Email Automations
Last updated: May 7, 2026
What are Email Automations?
Email Automations in RetailReady allow 3PLs and brands to automatically send order-related emails based on either a scheduled export or a specific order status change. This eliminates manual follow-up and keeps the right people notified at the right time, without any extra effort.
How to Set Up Email Automations
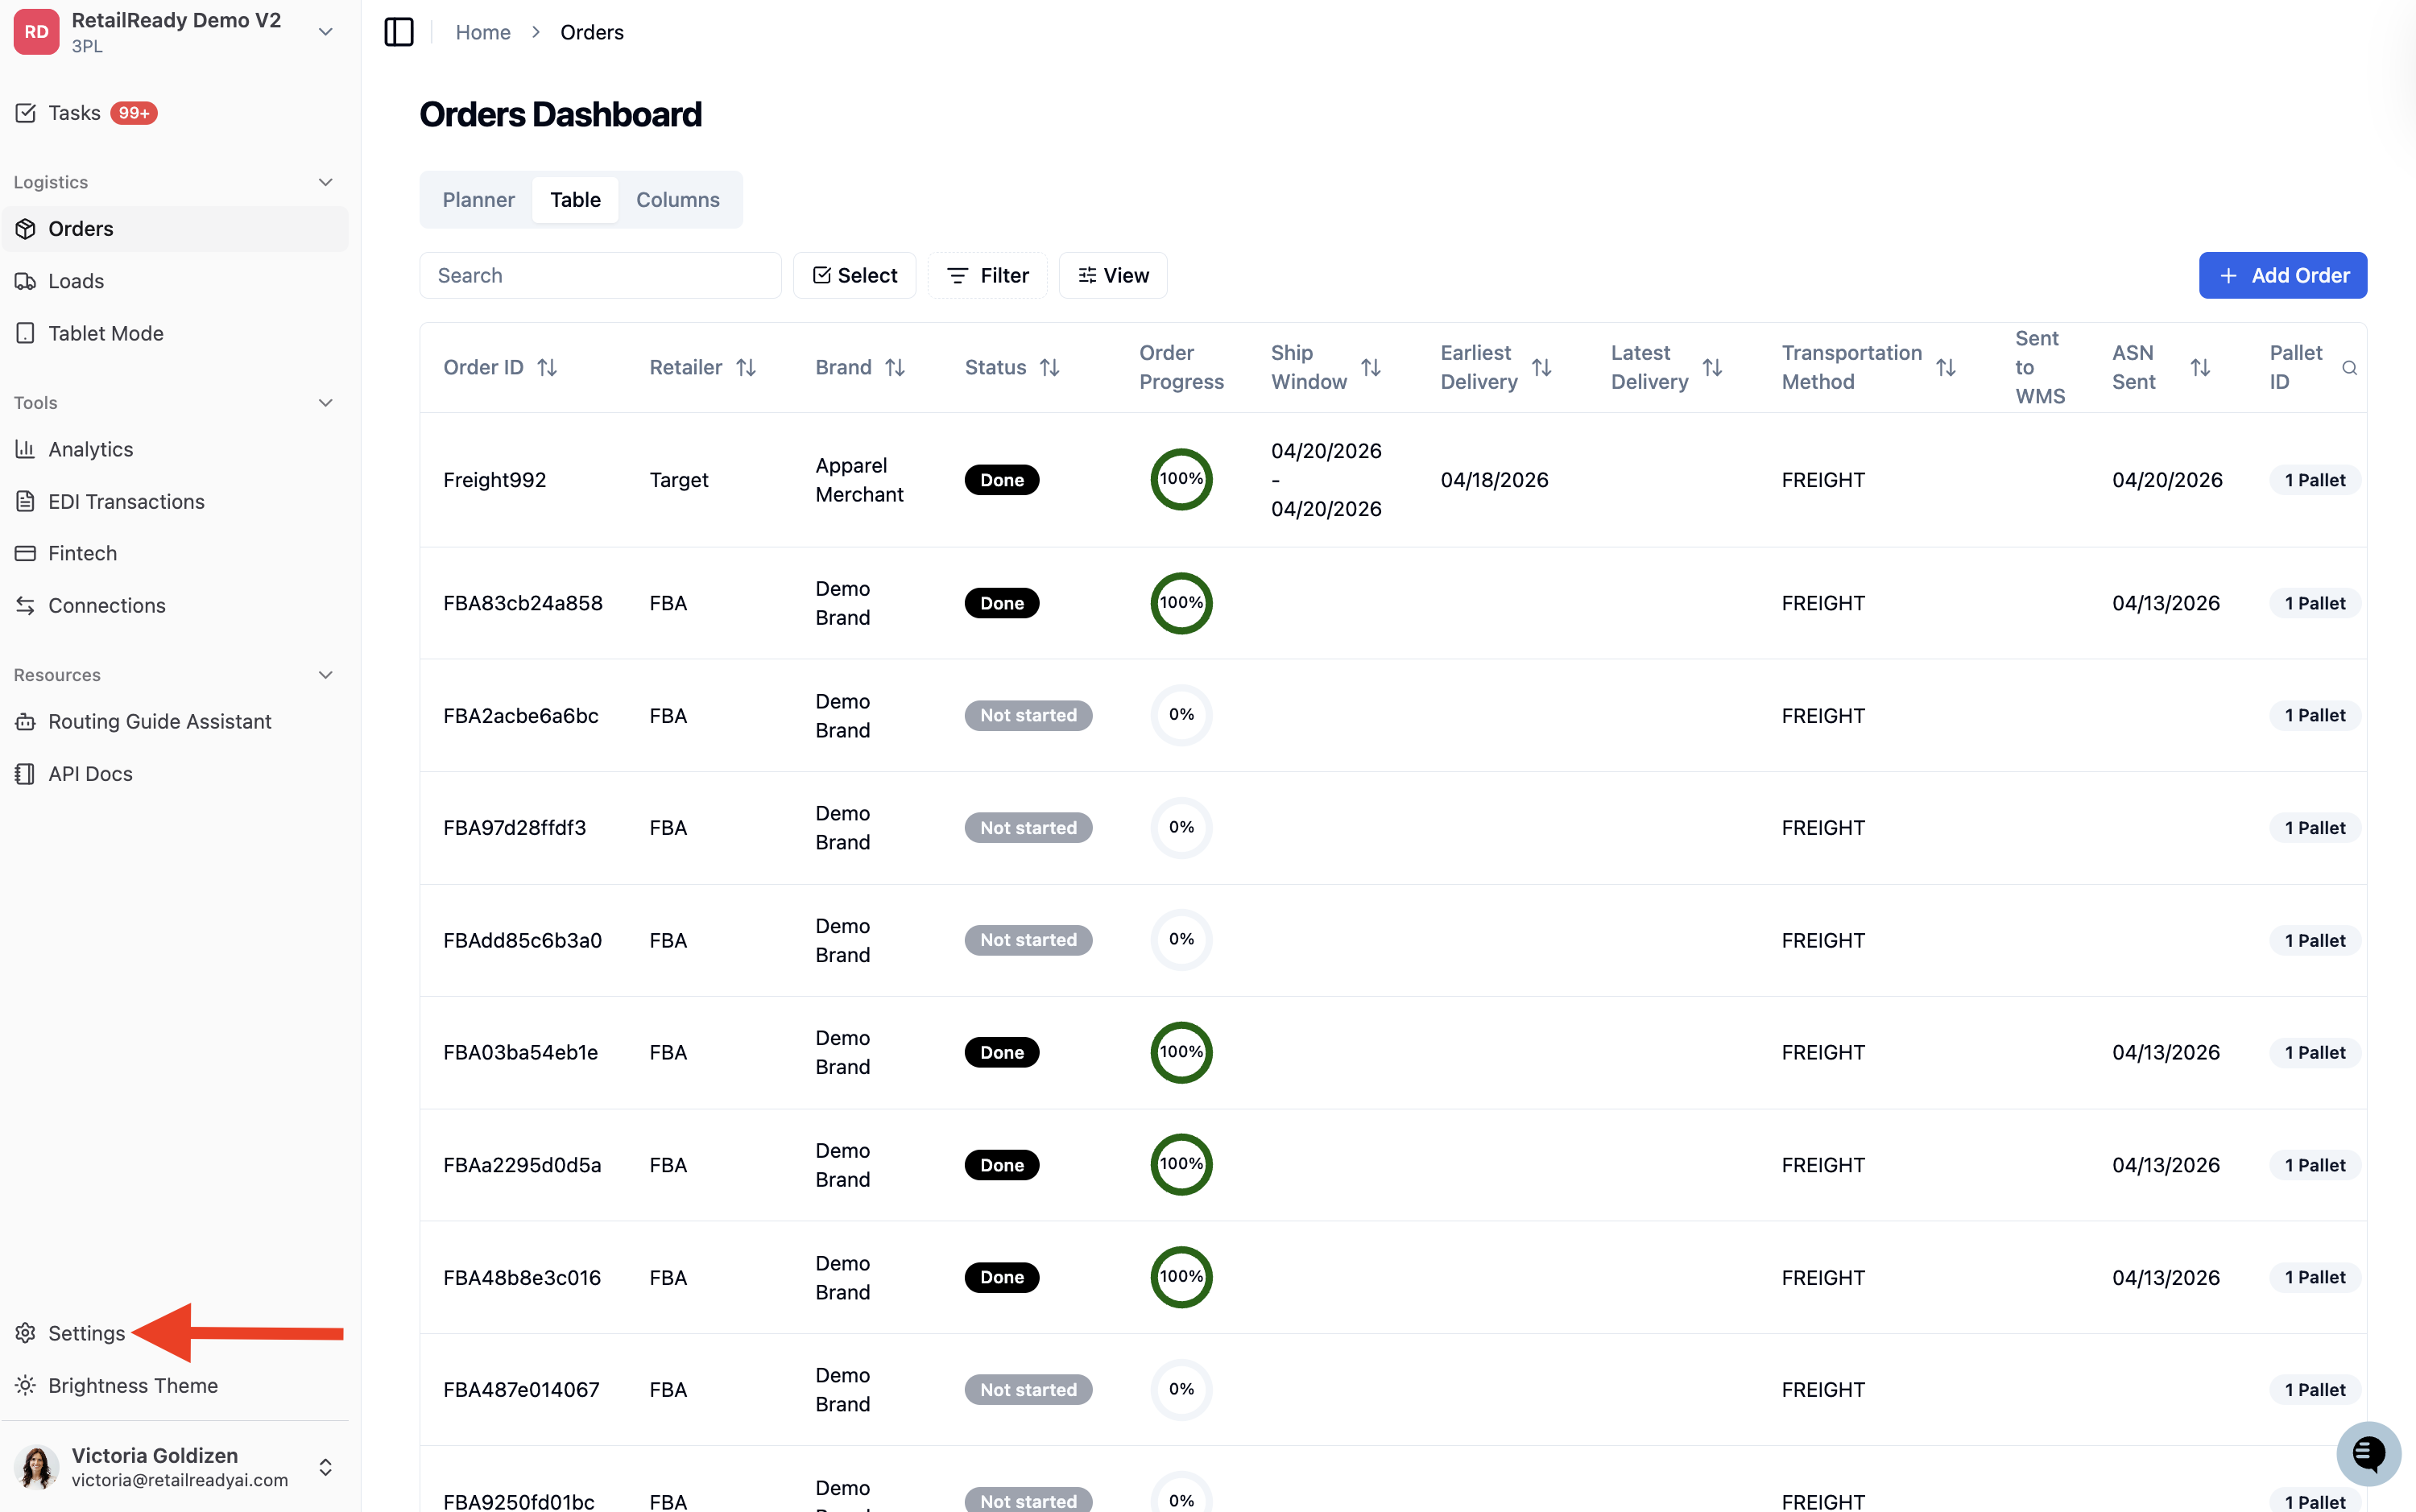
From the left-hand navigation, click 'Settings' at the bottom of the sidebar.
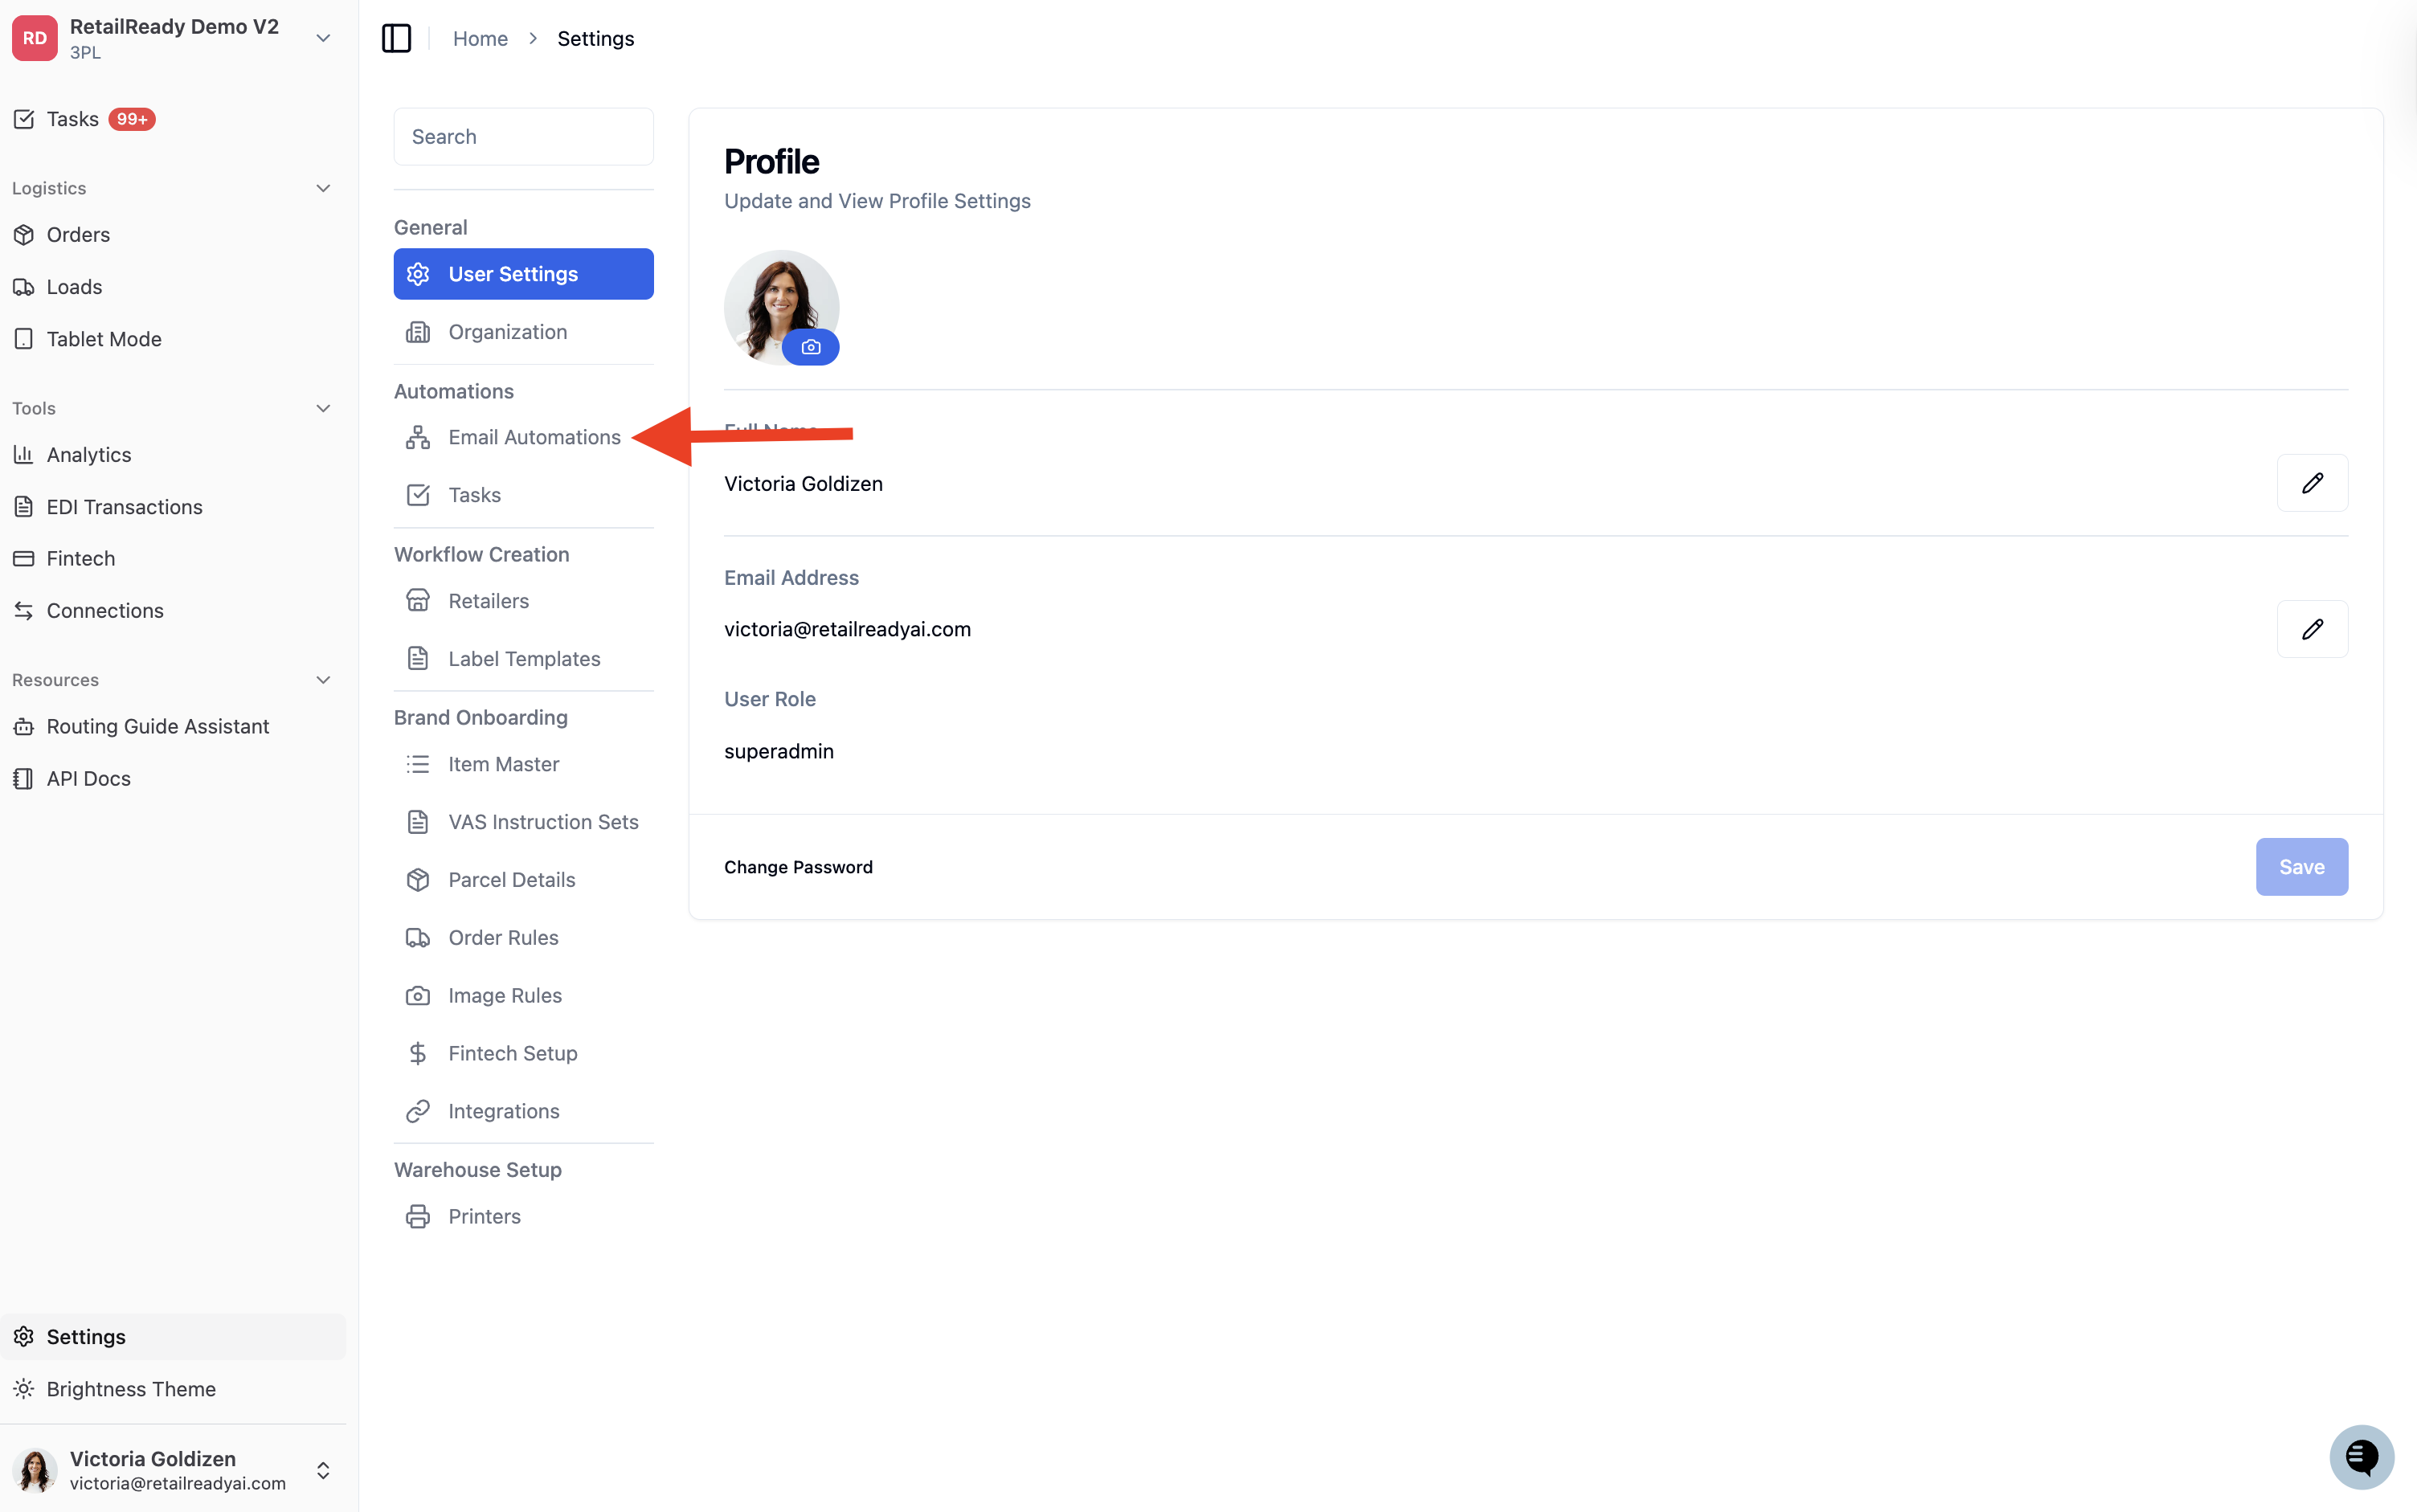
In the Settings menu, scroll down to the Automations section and click 'Email Automations'.
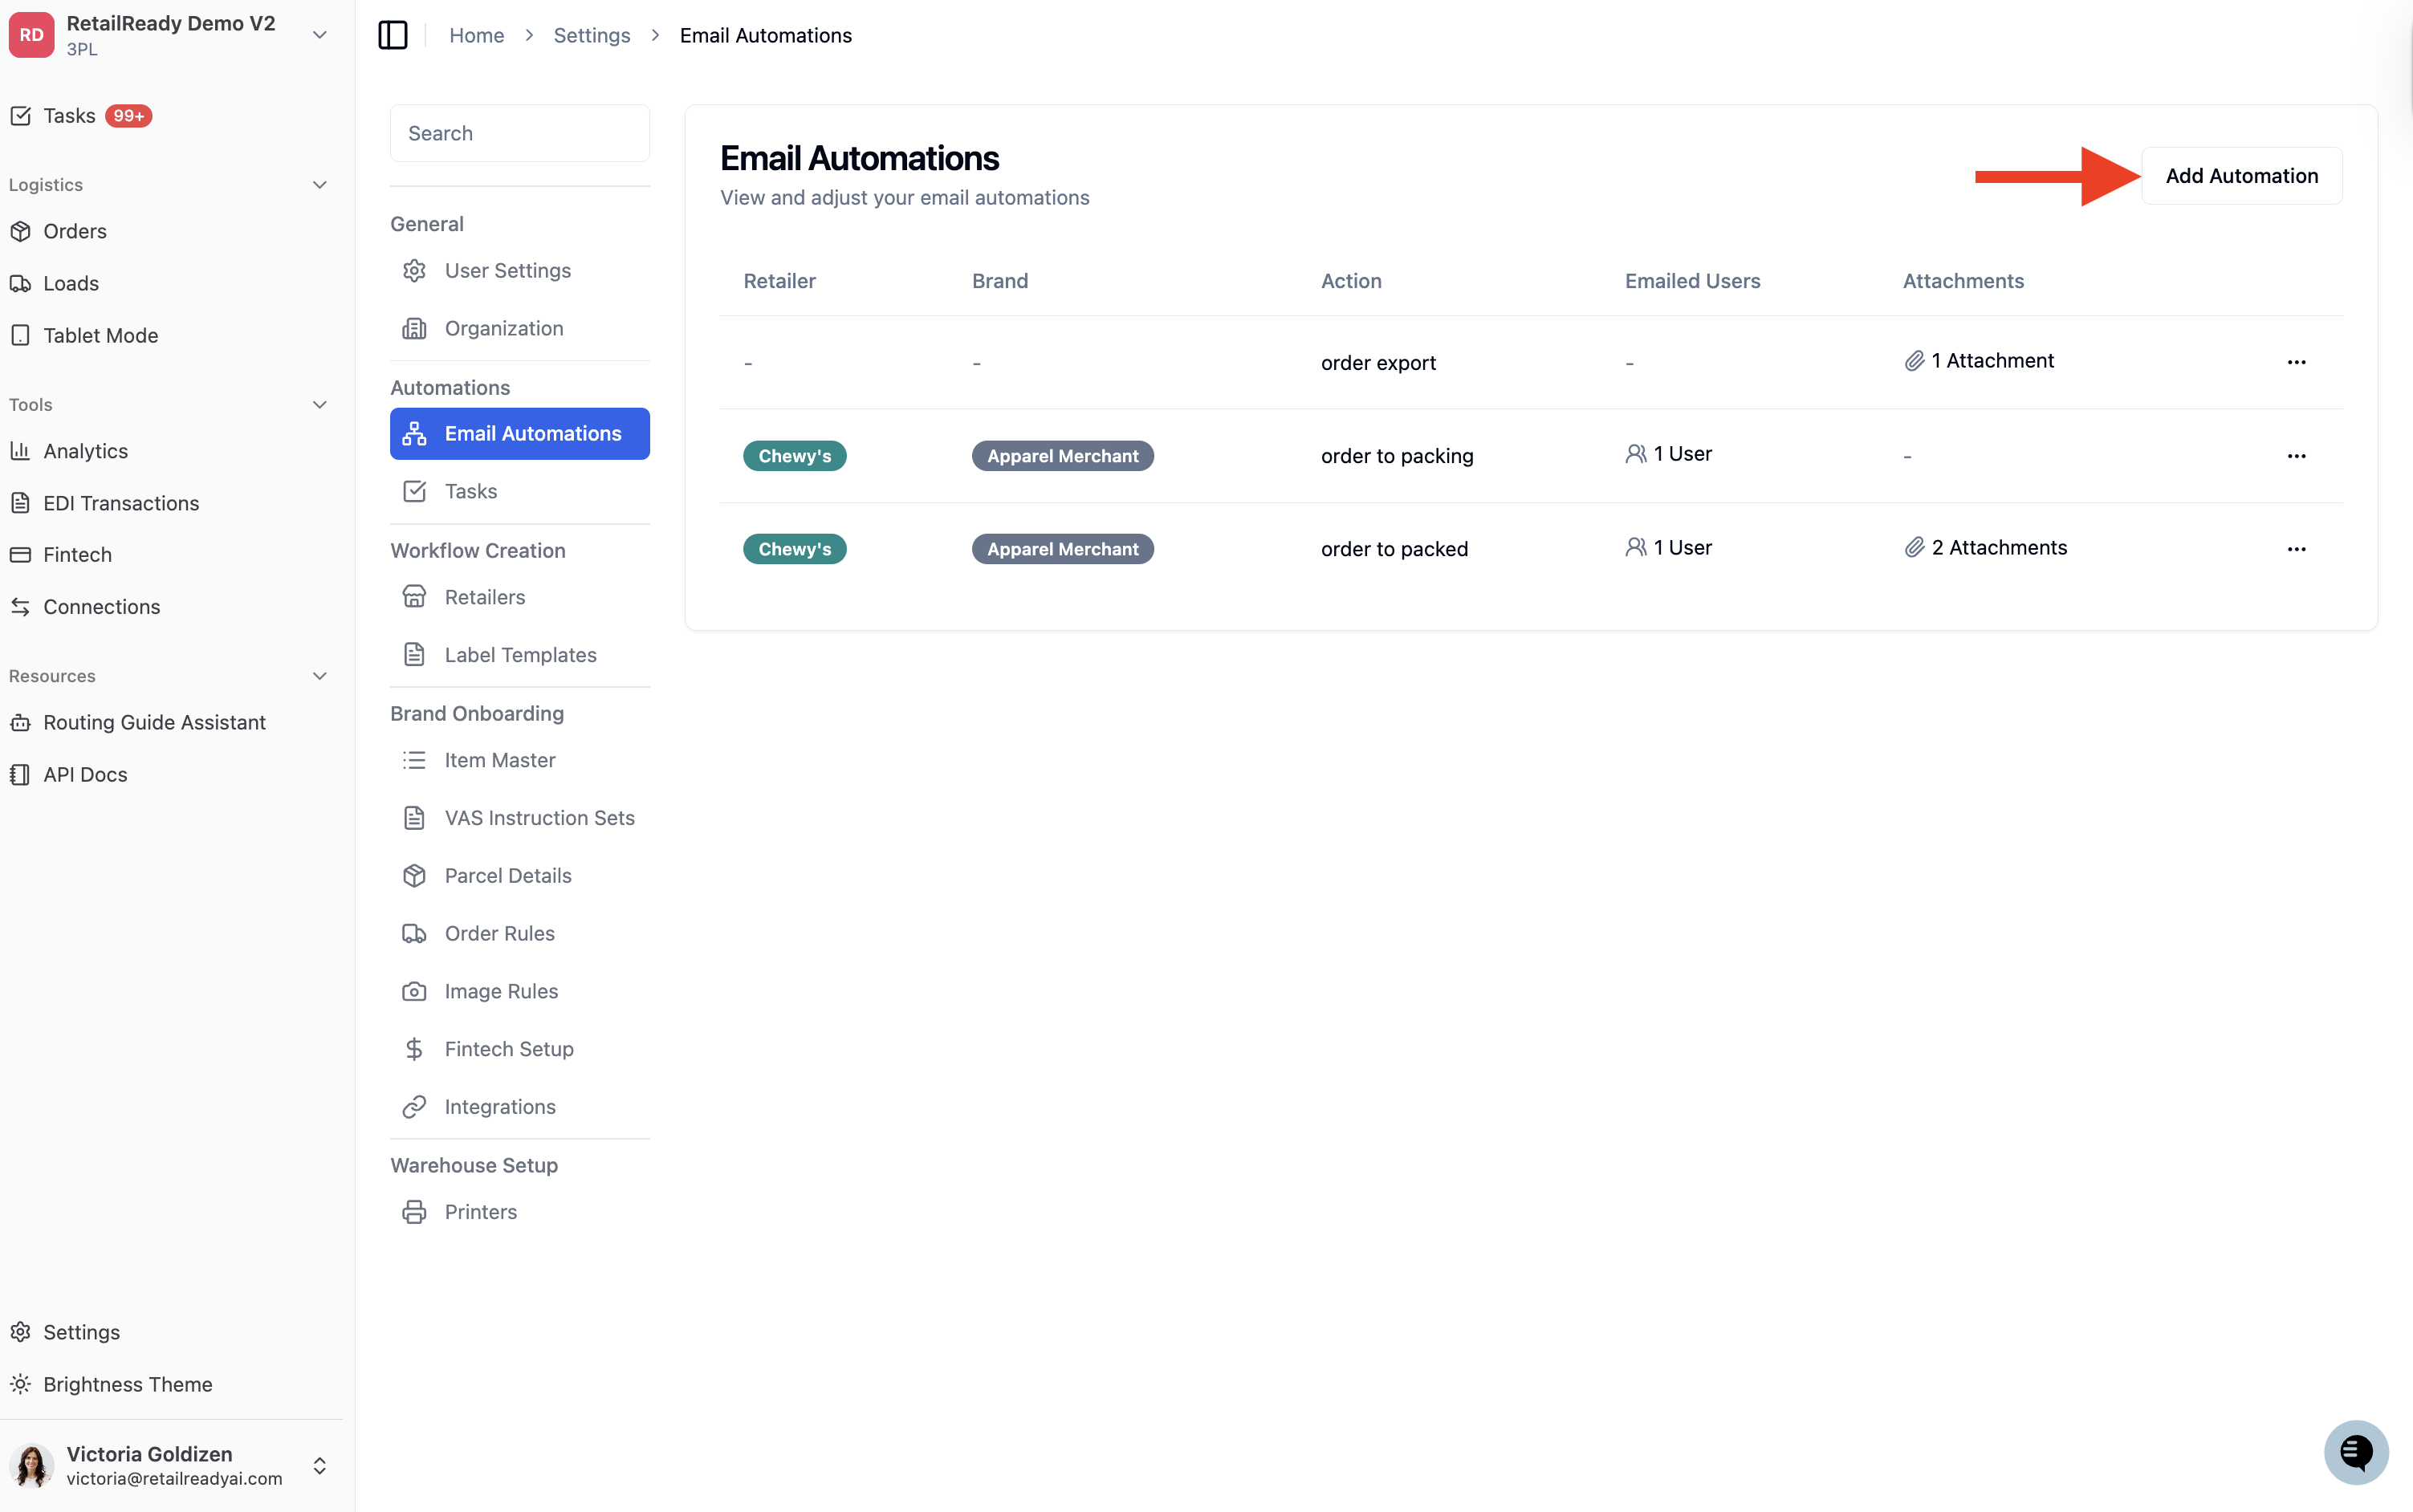
Click 'Add Automation' in the upper right corner.
Under Automation Type dropdown, there are two options:
Order Event Automation | Order Export Automation |
Triggers an email when an order reaches a specific status or is created for a given retailer/brand combination. This is ideal for notifying brands or internal teams the moment something happens to an order. | Sends a scheduled daily email with a .cvs file of orders matching a saved filter. This is ideal for brands or 3PLs who need a regular snapshot of order data at a set time each day. |
Order Event Automations:
Under Basic Information, select the Retailer and then associated Brand.
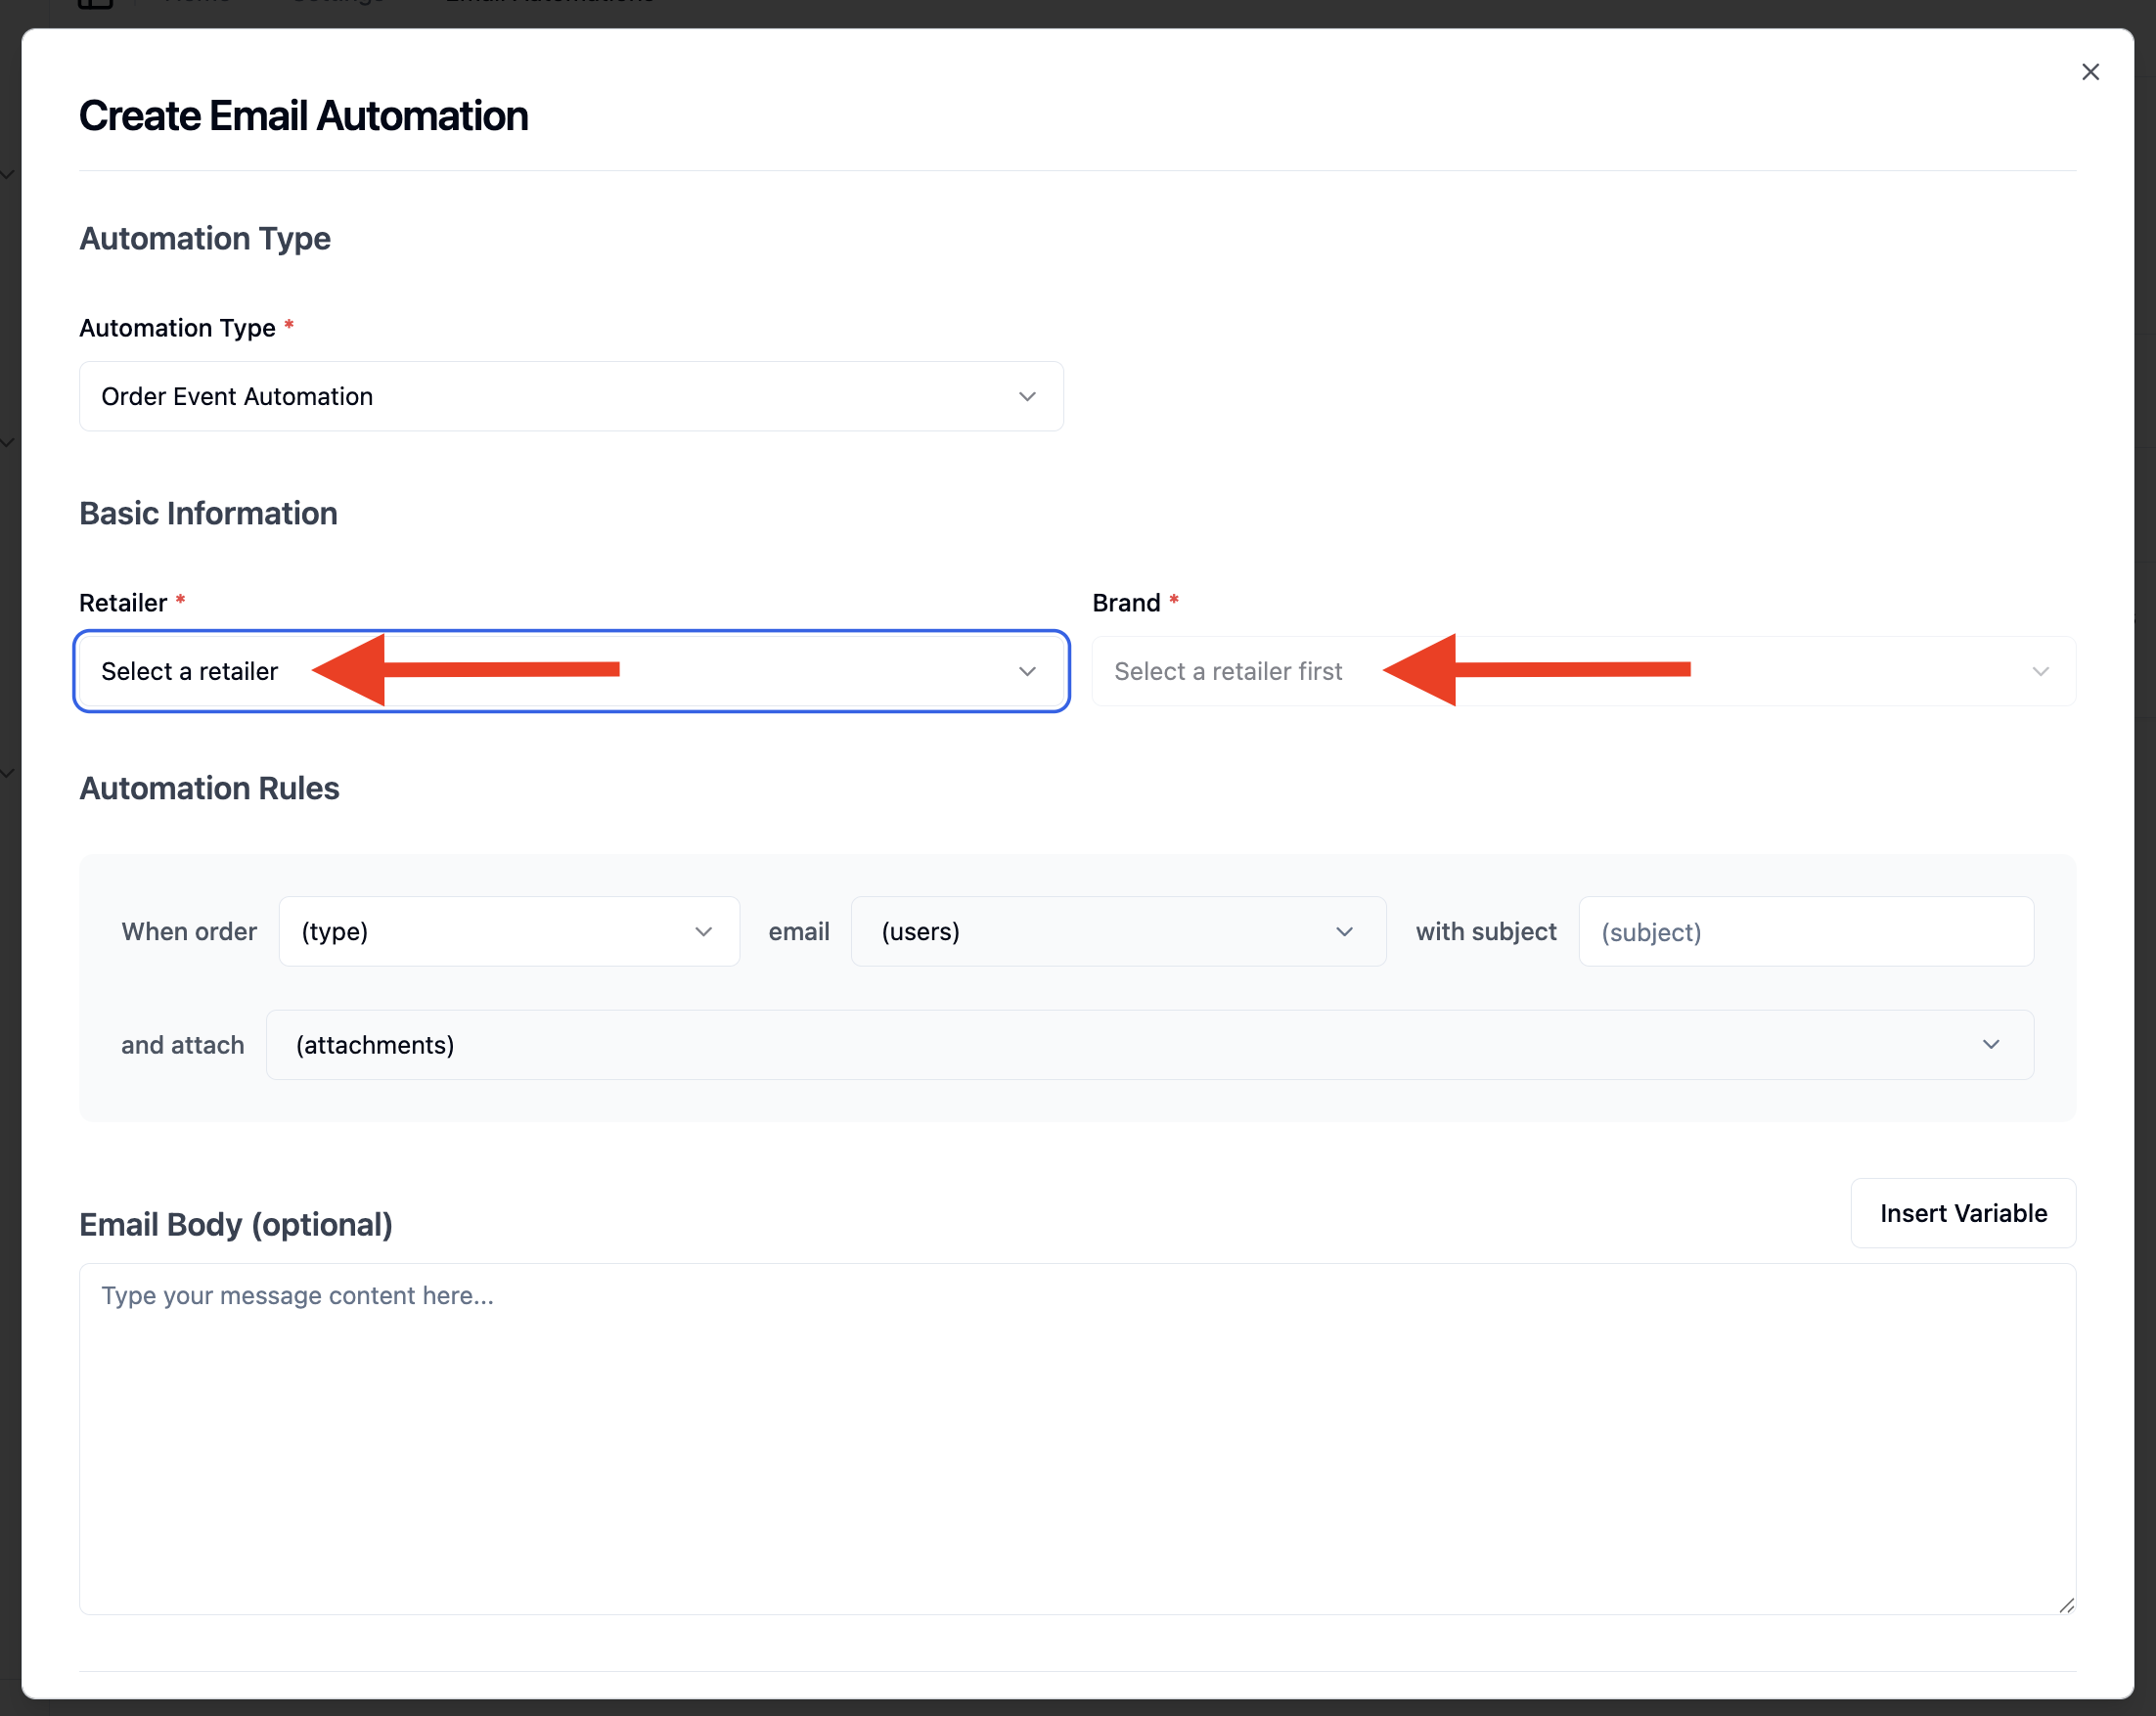
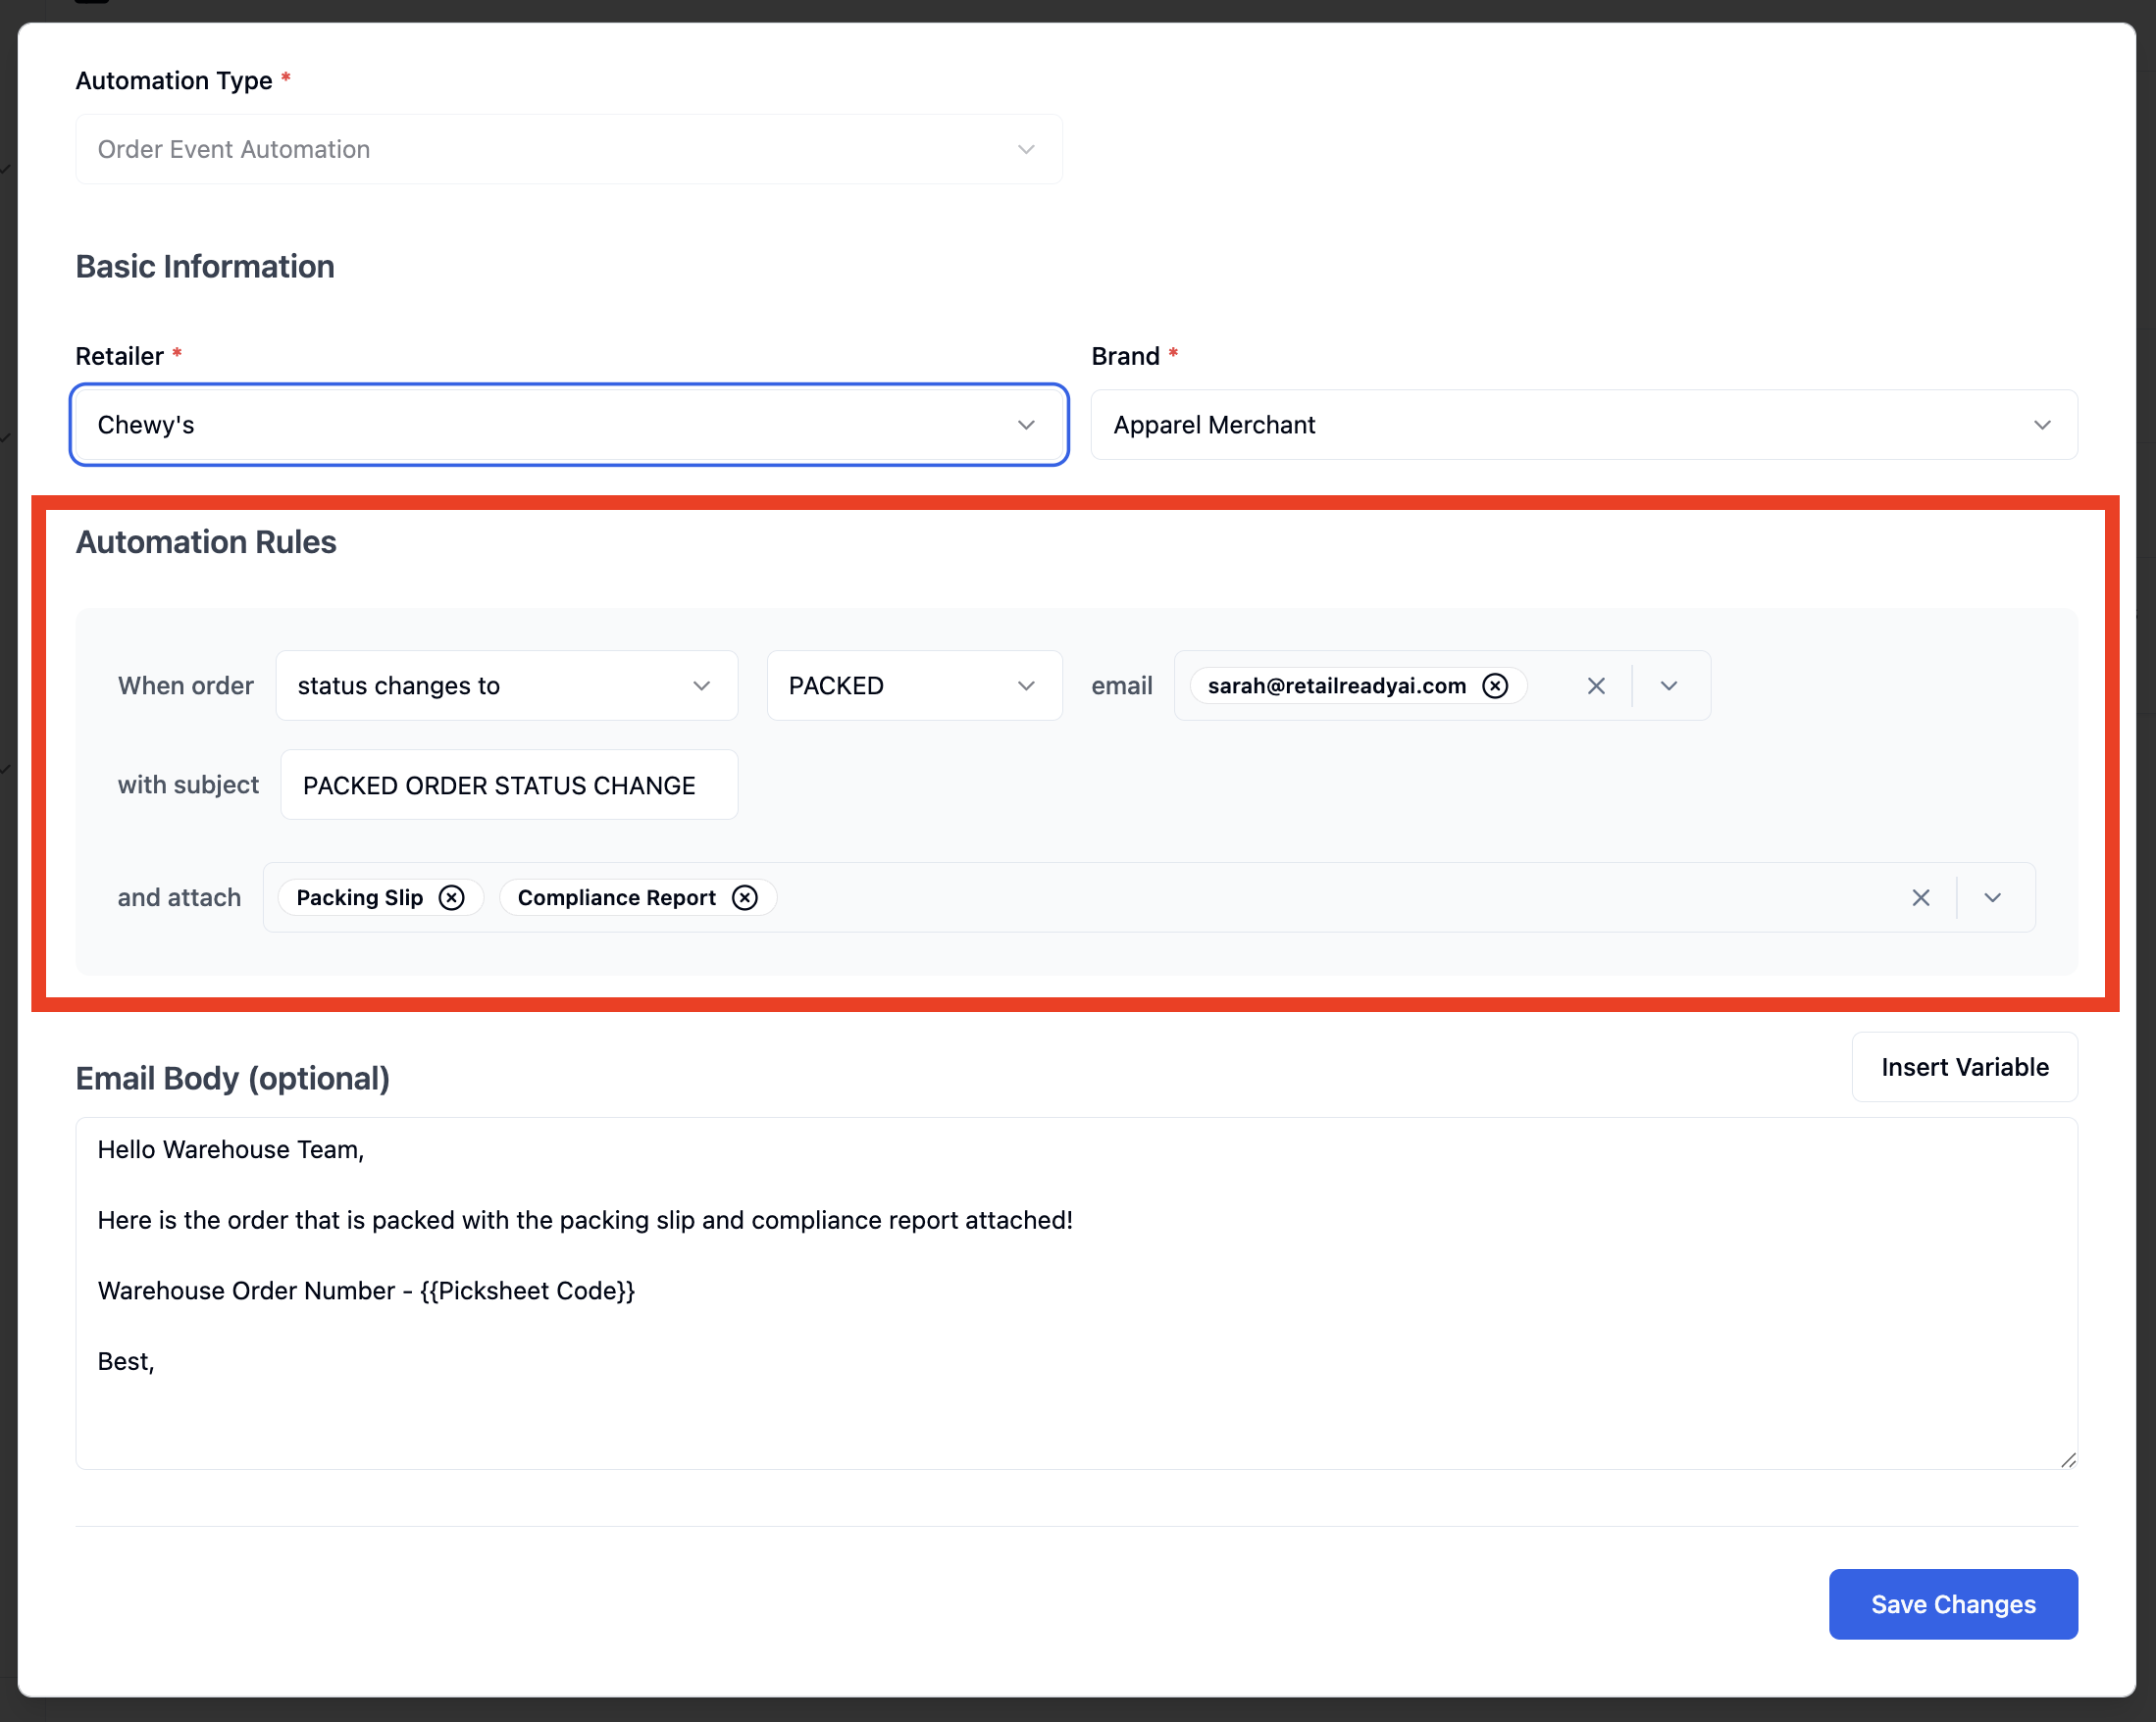
Under Automation Rules, configure the following:
When order: select the trigger type:
'status changes to' - ires when an order moves to a specific status
'is created' - fires when a new order is created
Email: select the user from the dropdown who should receive the notification
With subject: enter the email subject line
And attach: select one or more attachments from the dropdown:
Packing Slip
Compliance Report
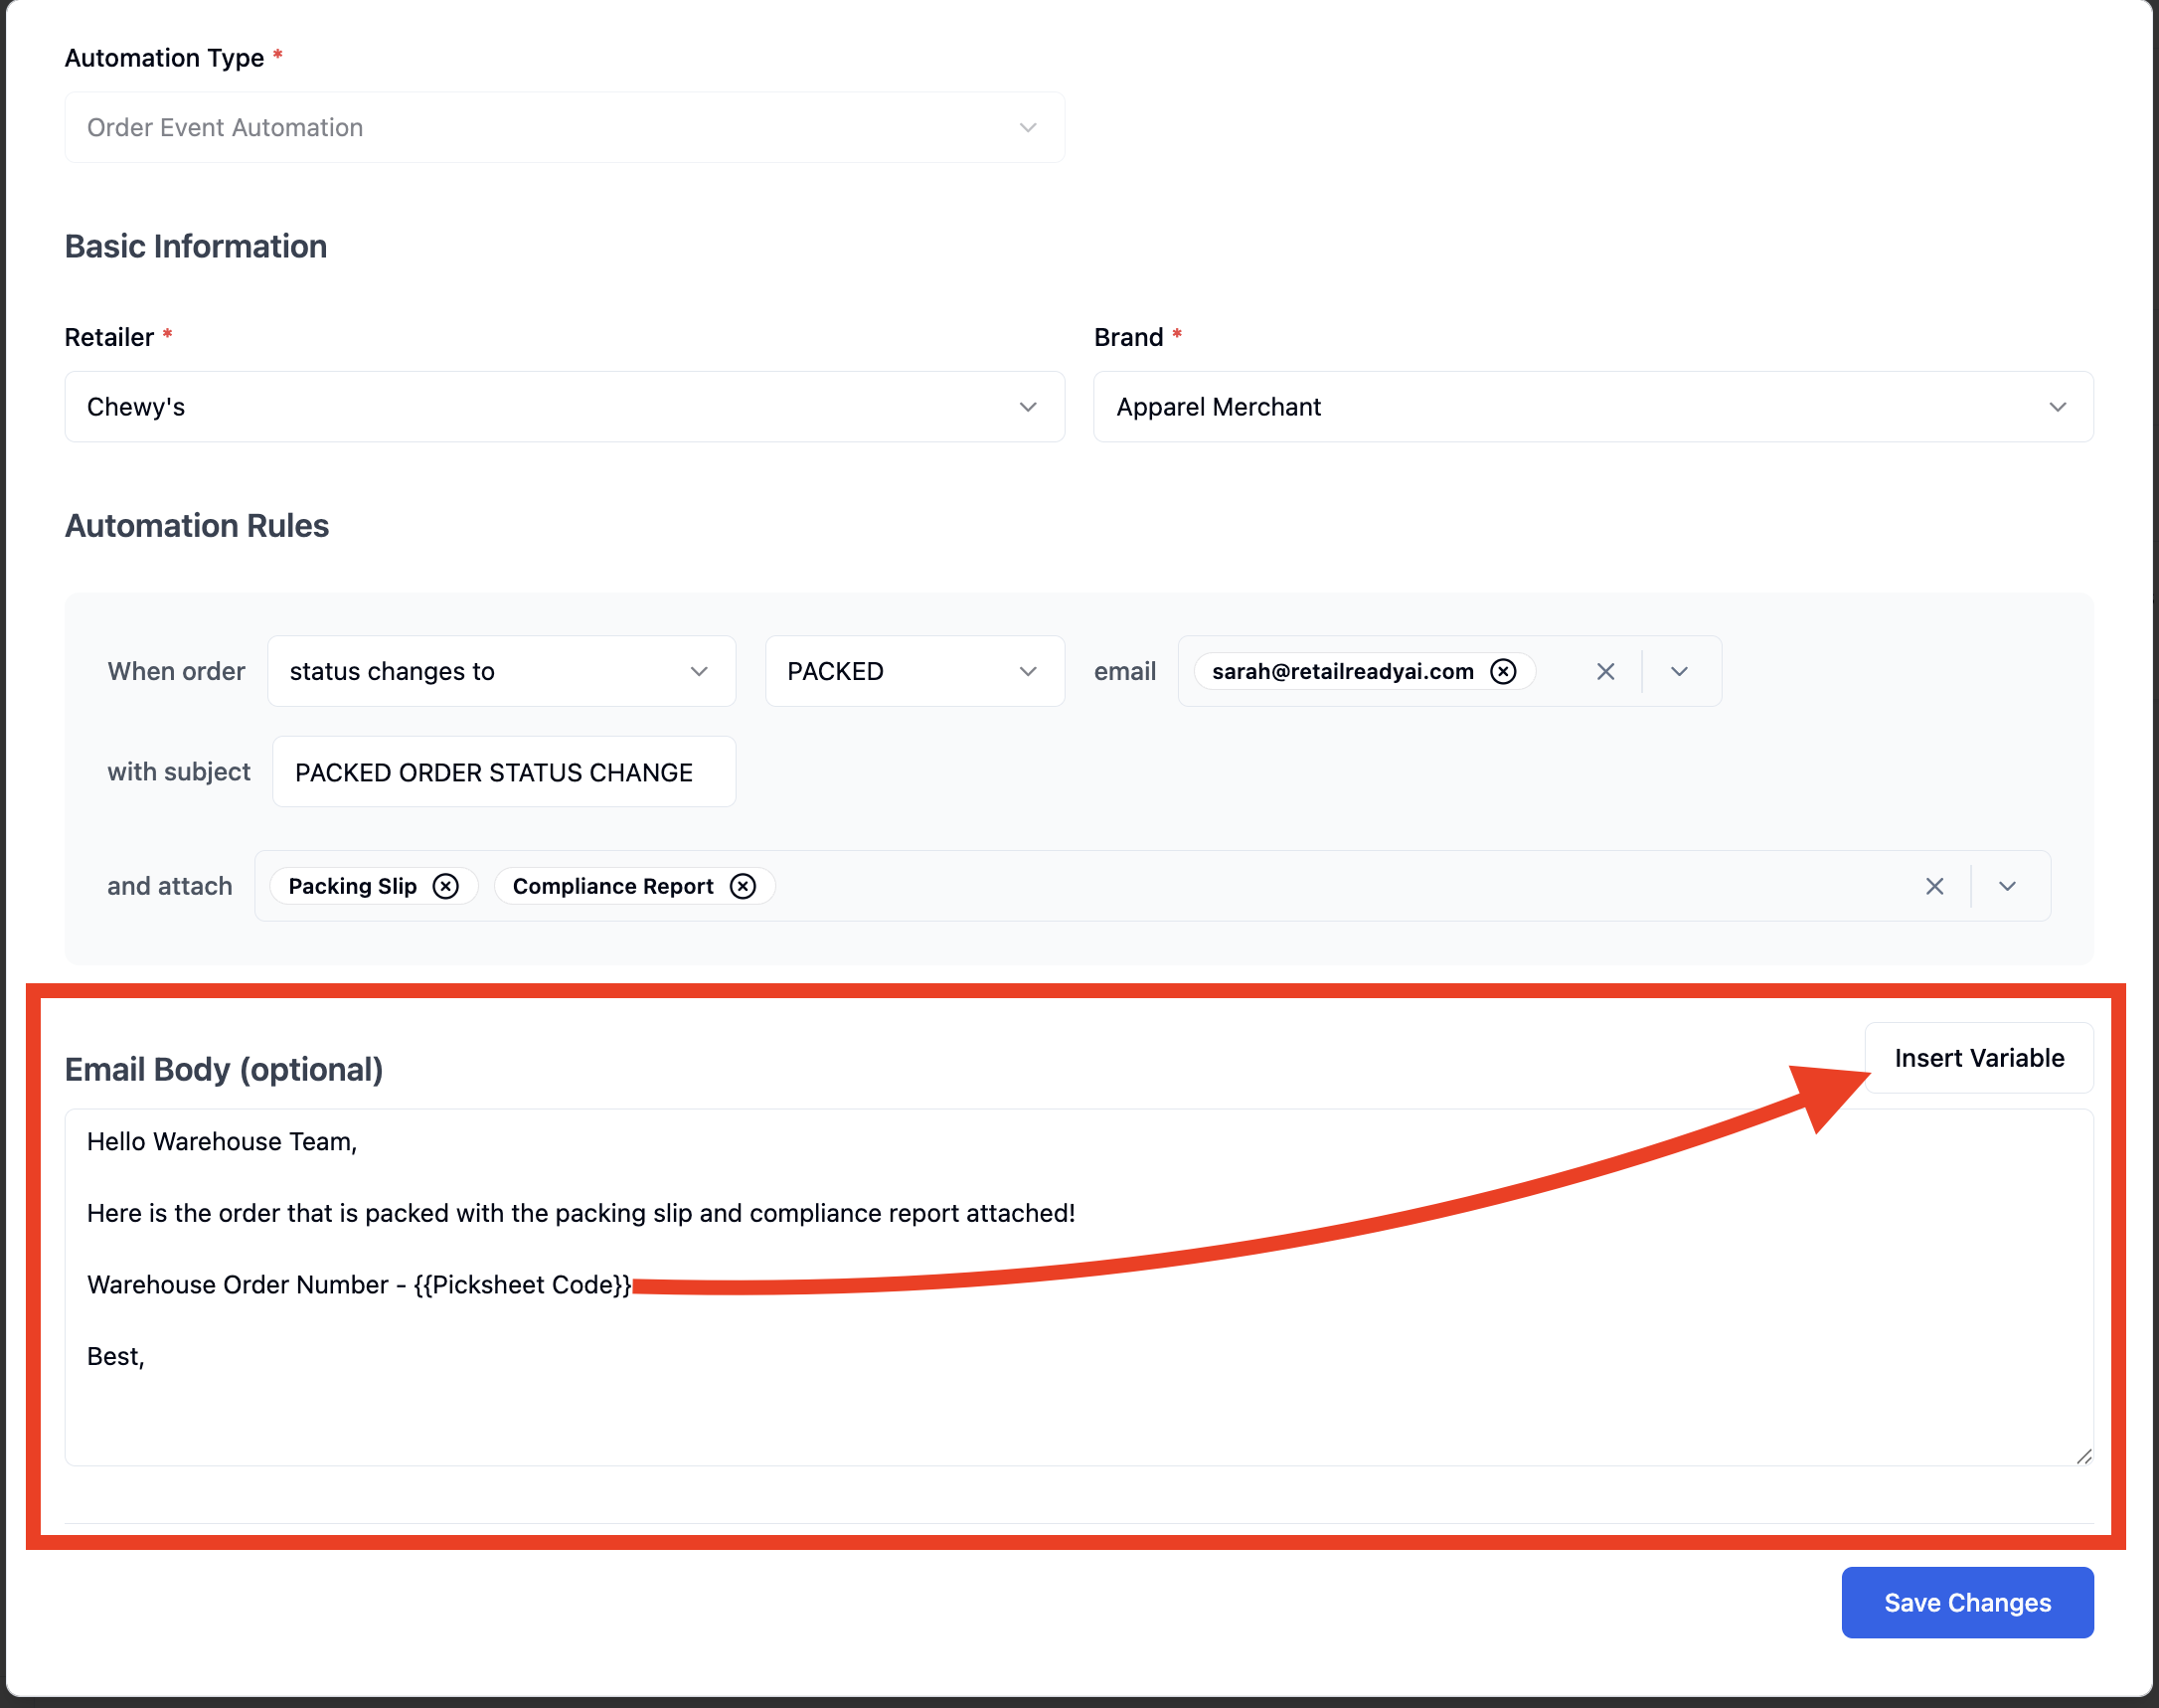
Optionally, fill in the Email Body by typing your message and/or use 'Insert Variable' to dynamically pull in order-specific details (e.g., PO Number, Tracking Numbers, Ship Dates).
Multiple variables can be added by clicking 'Insert Variable' again after each selection.
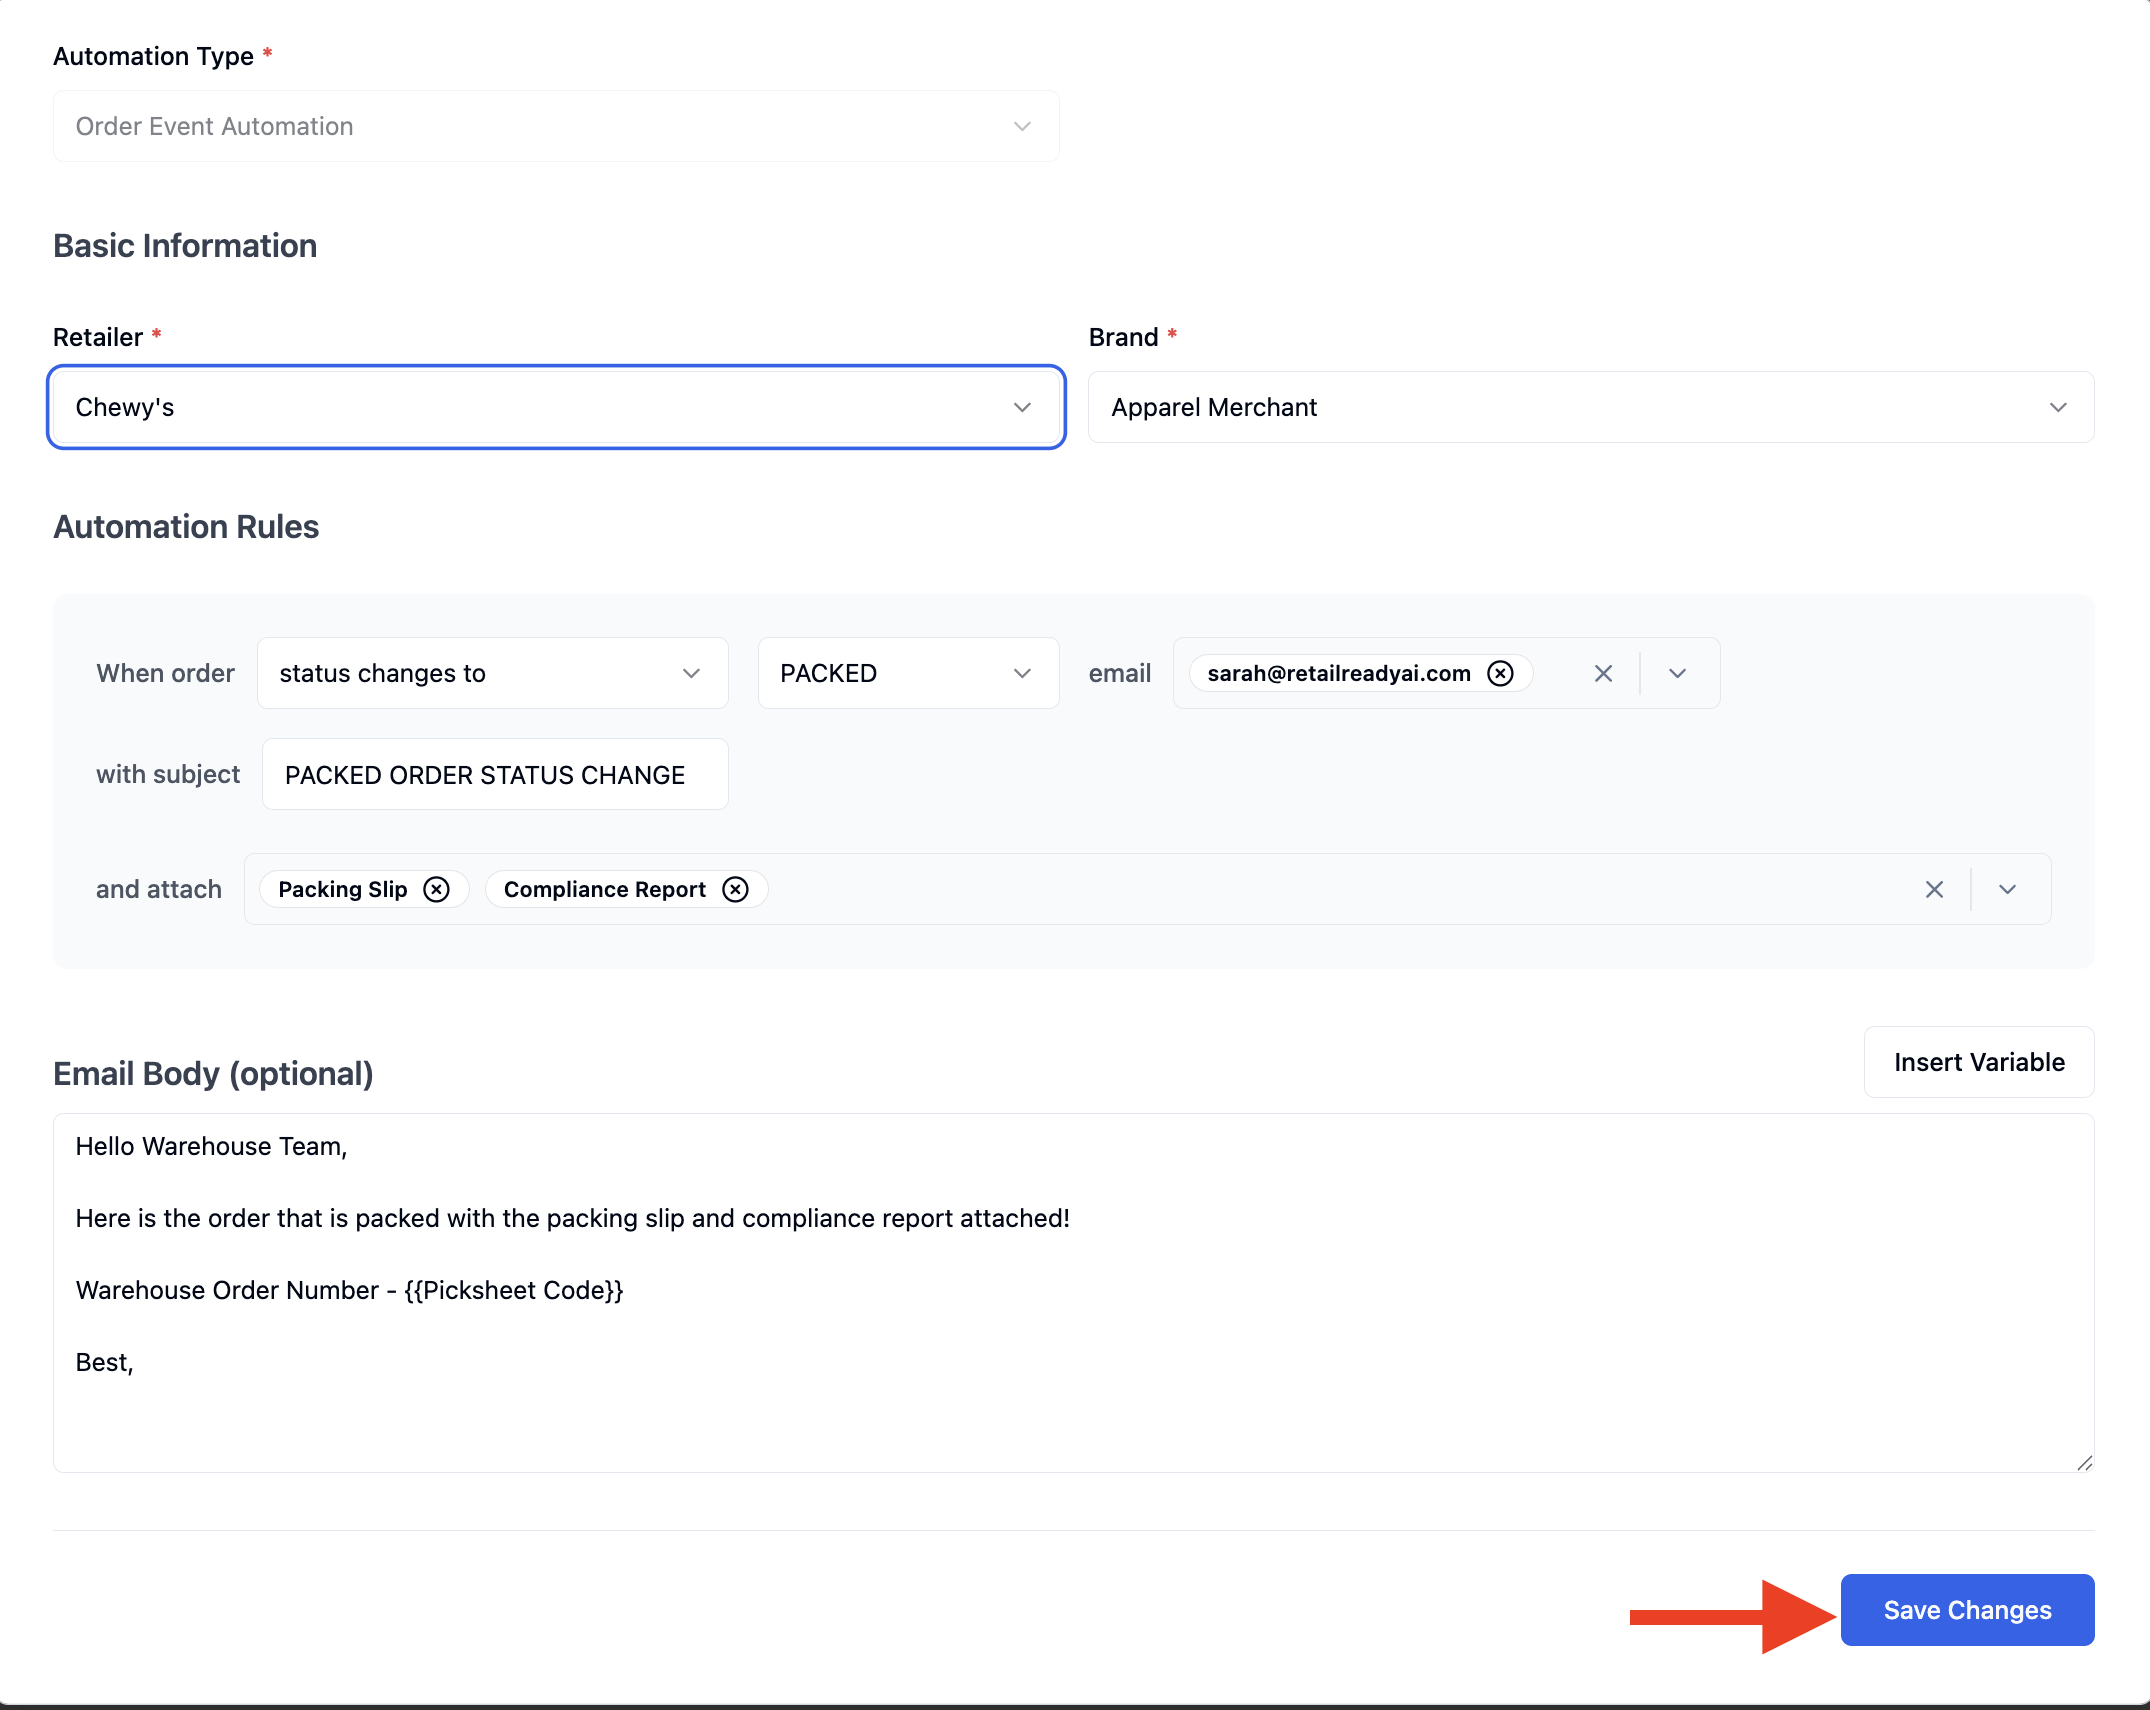
Click 'Save Changes'
Order Export Automation
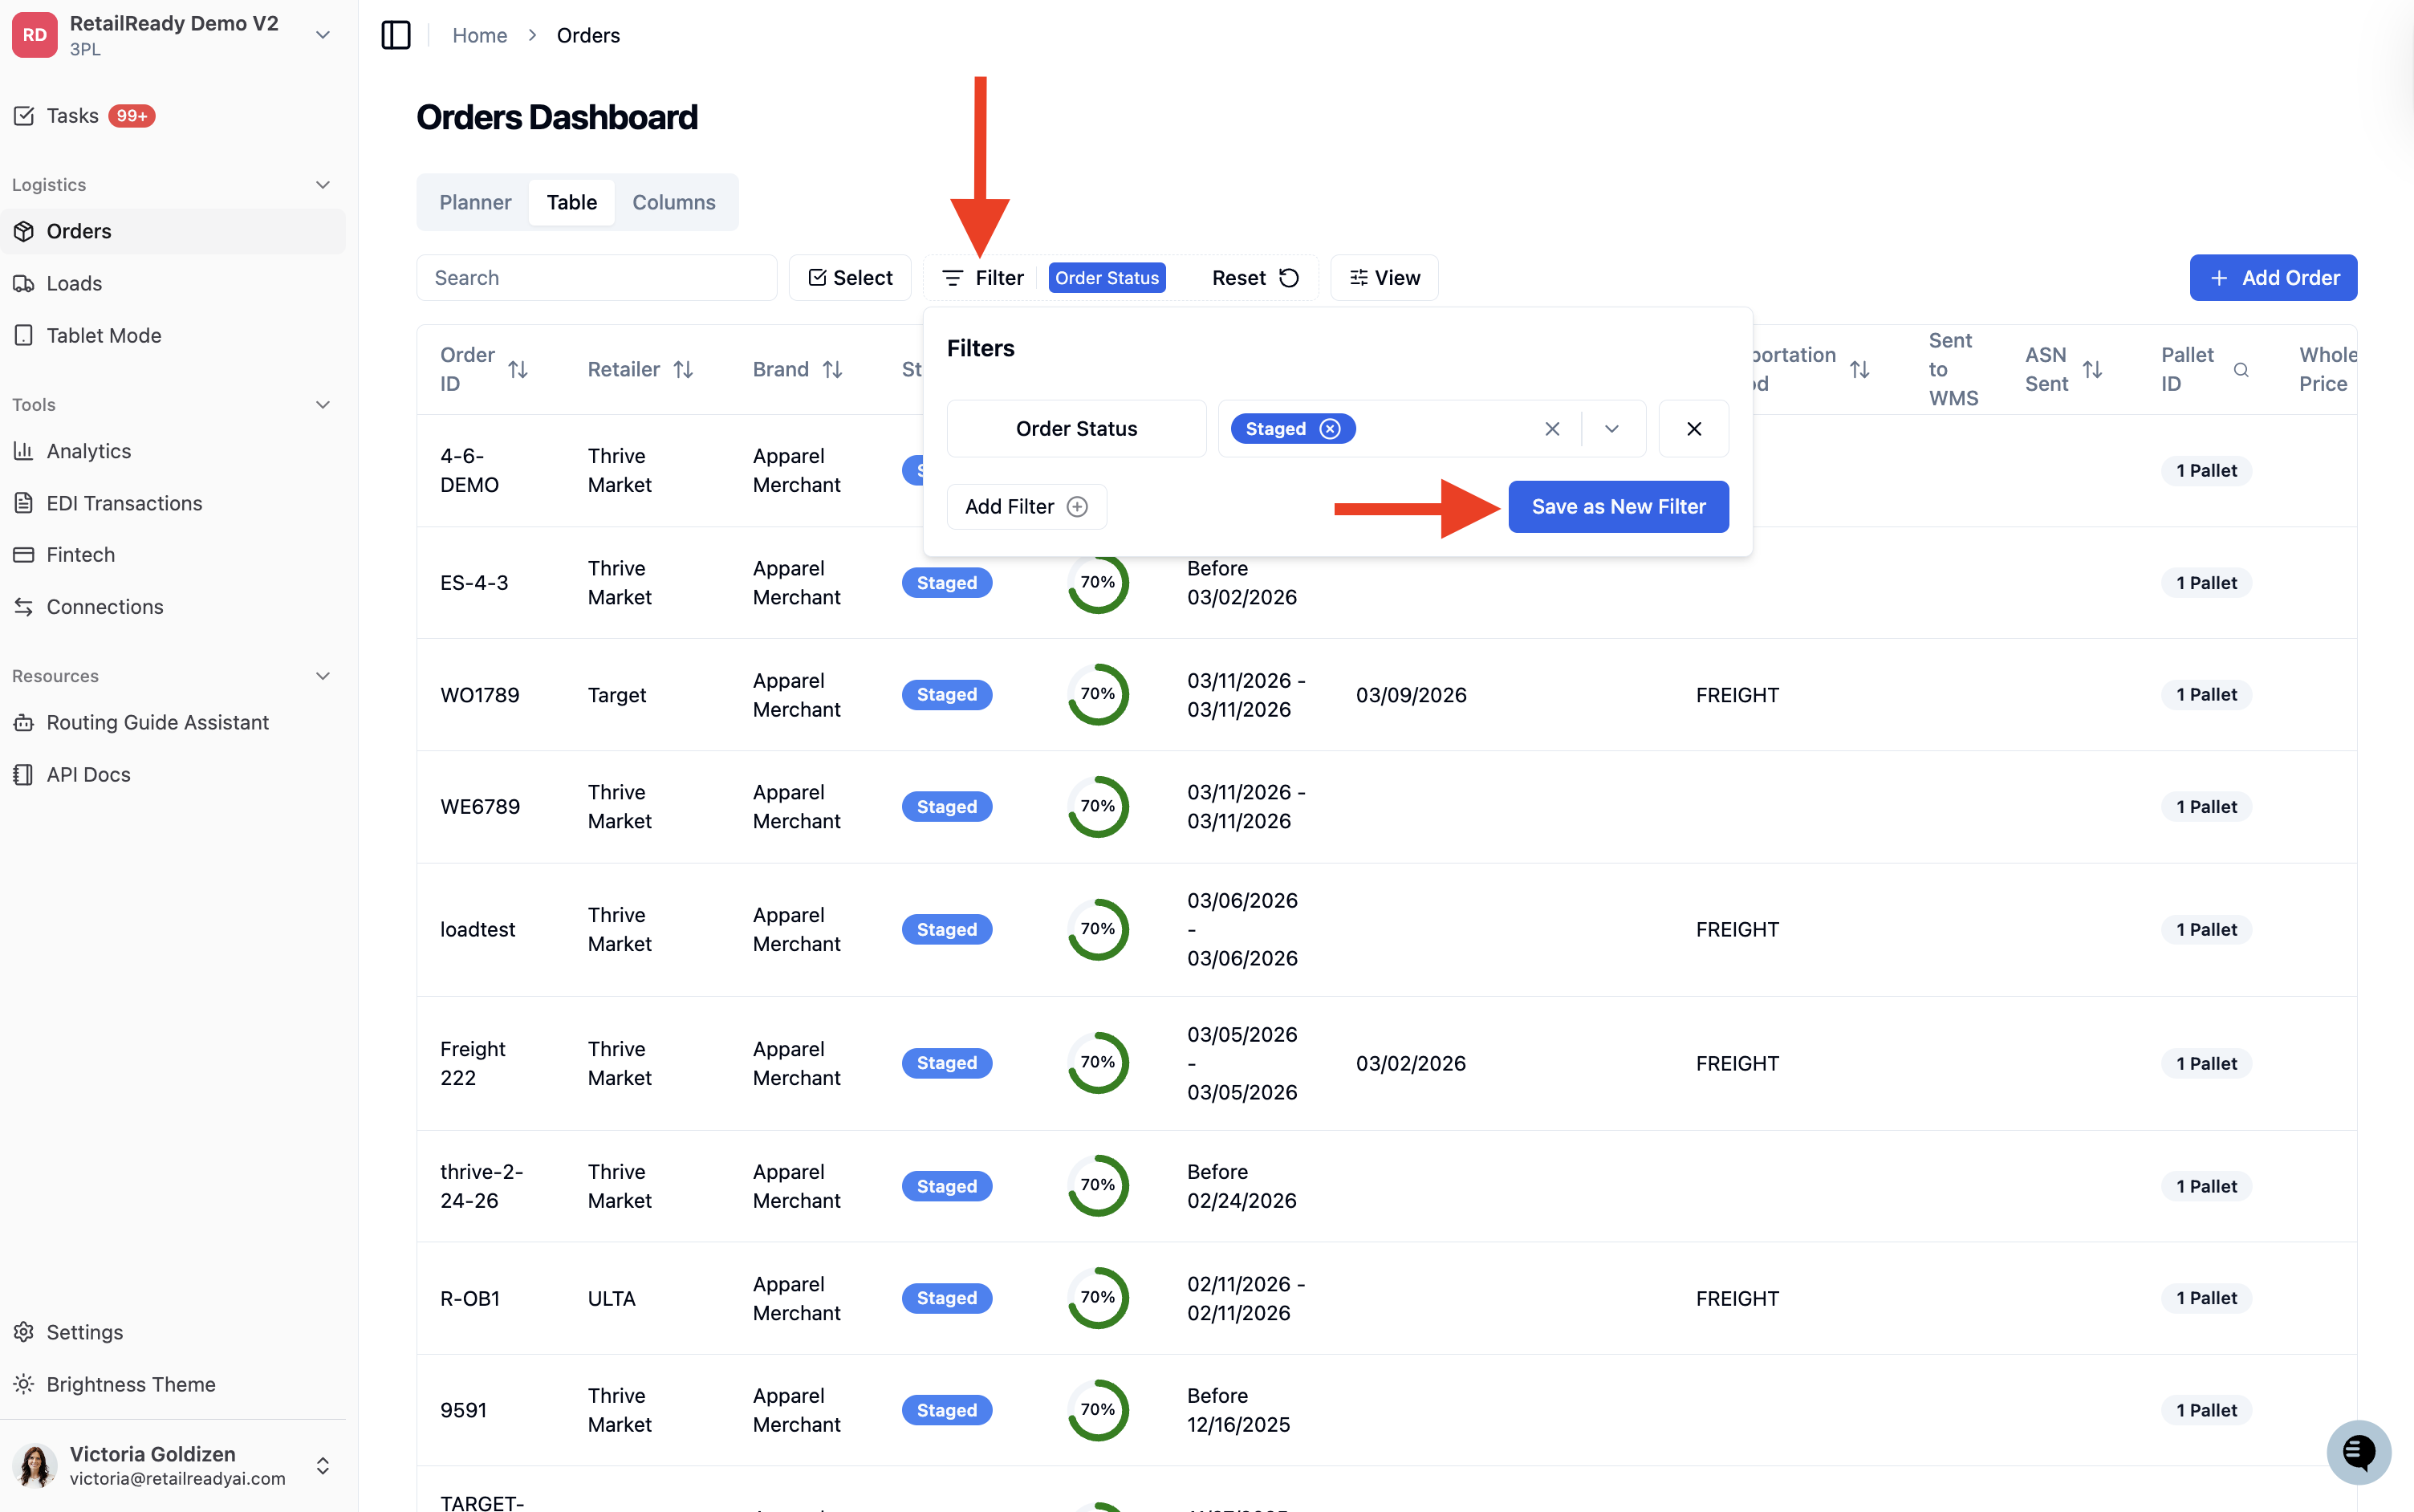
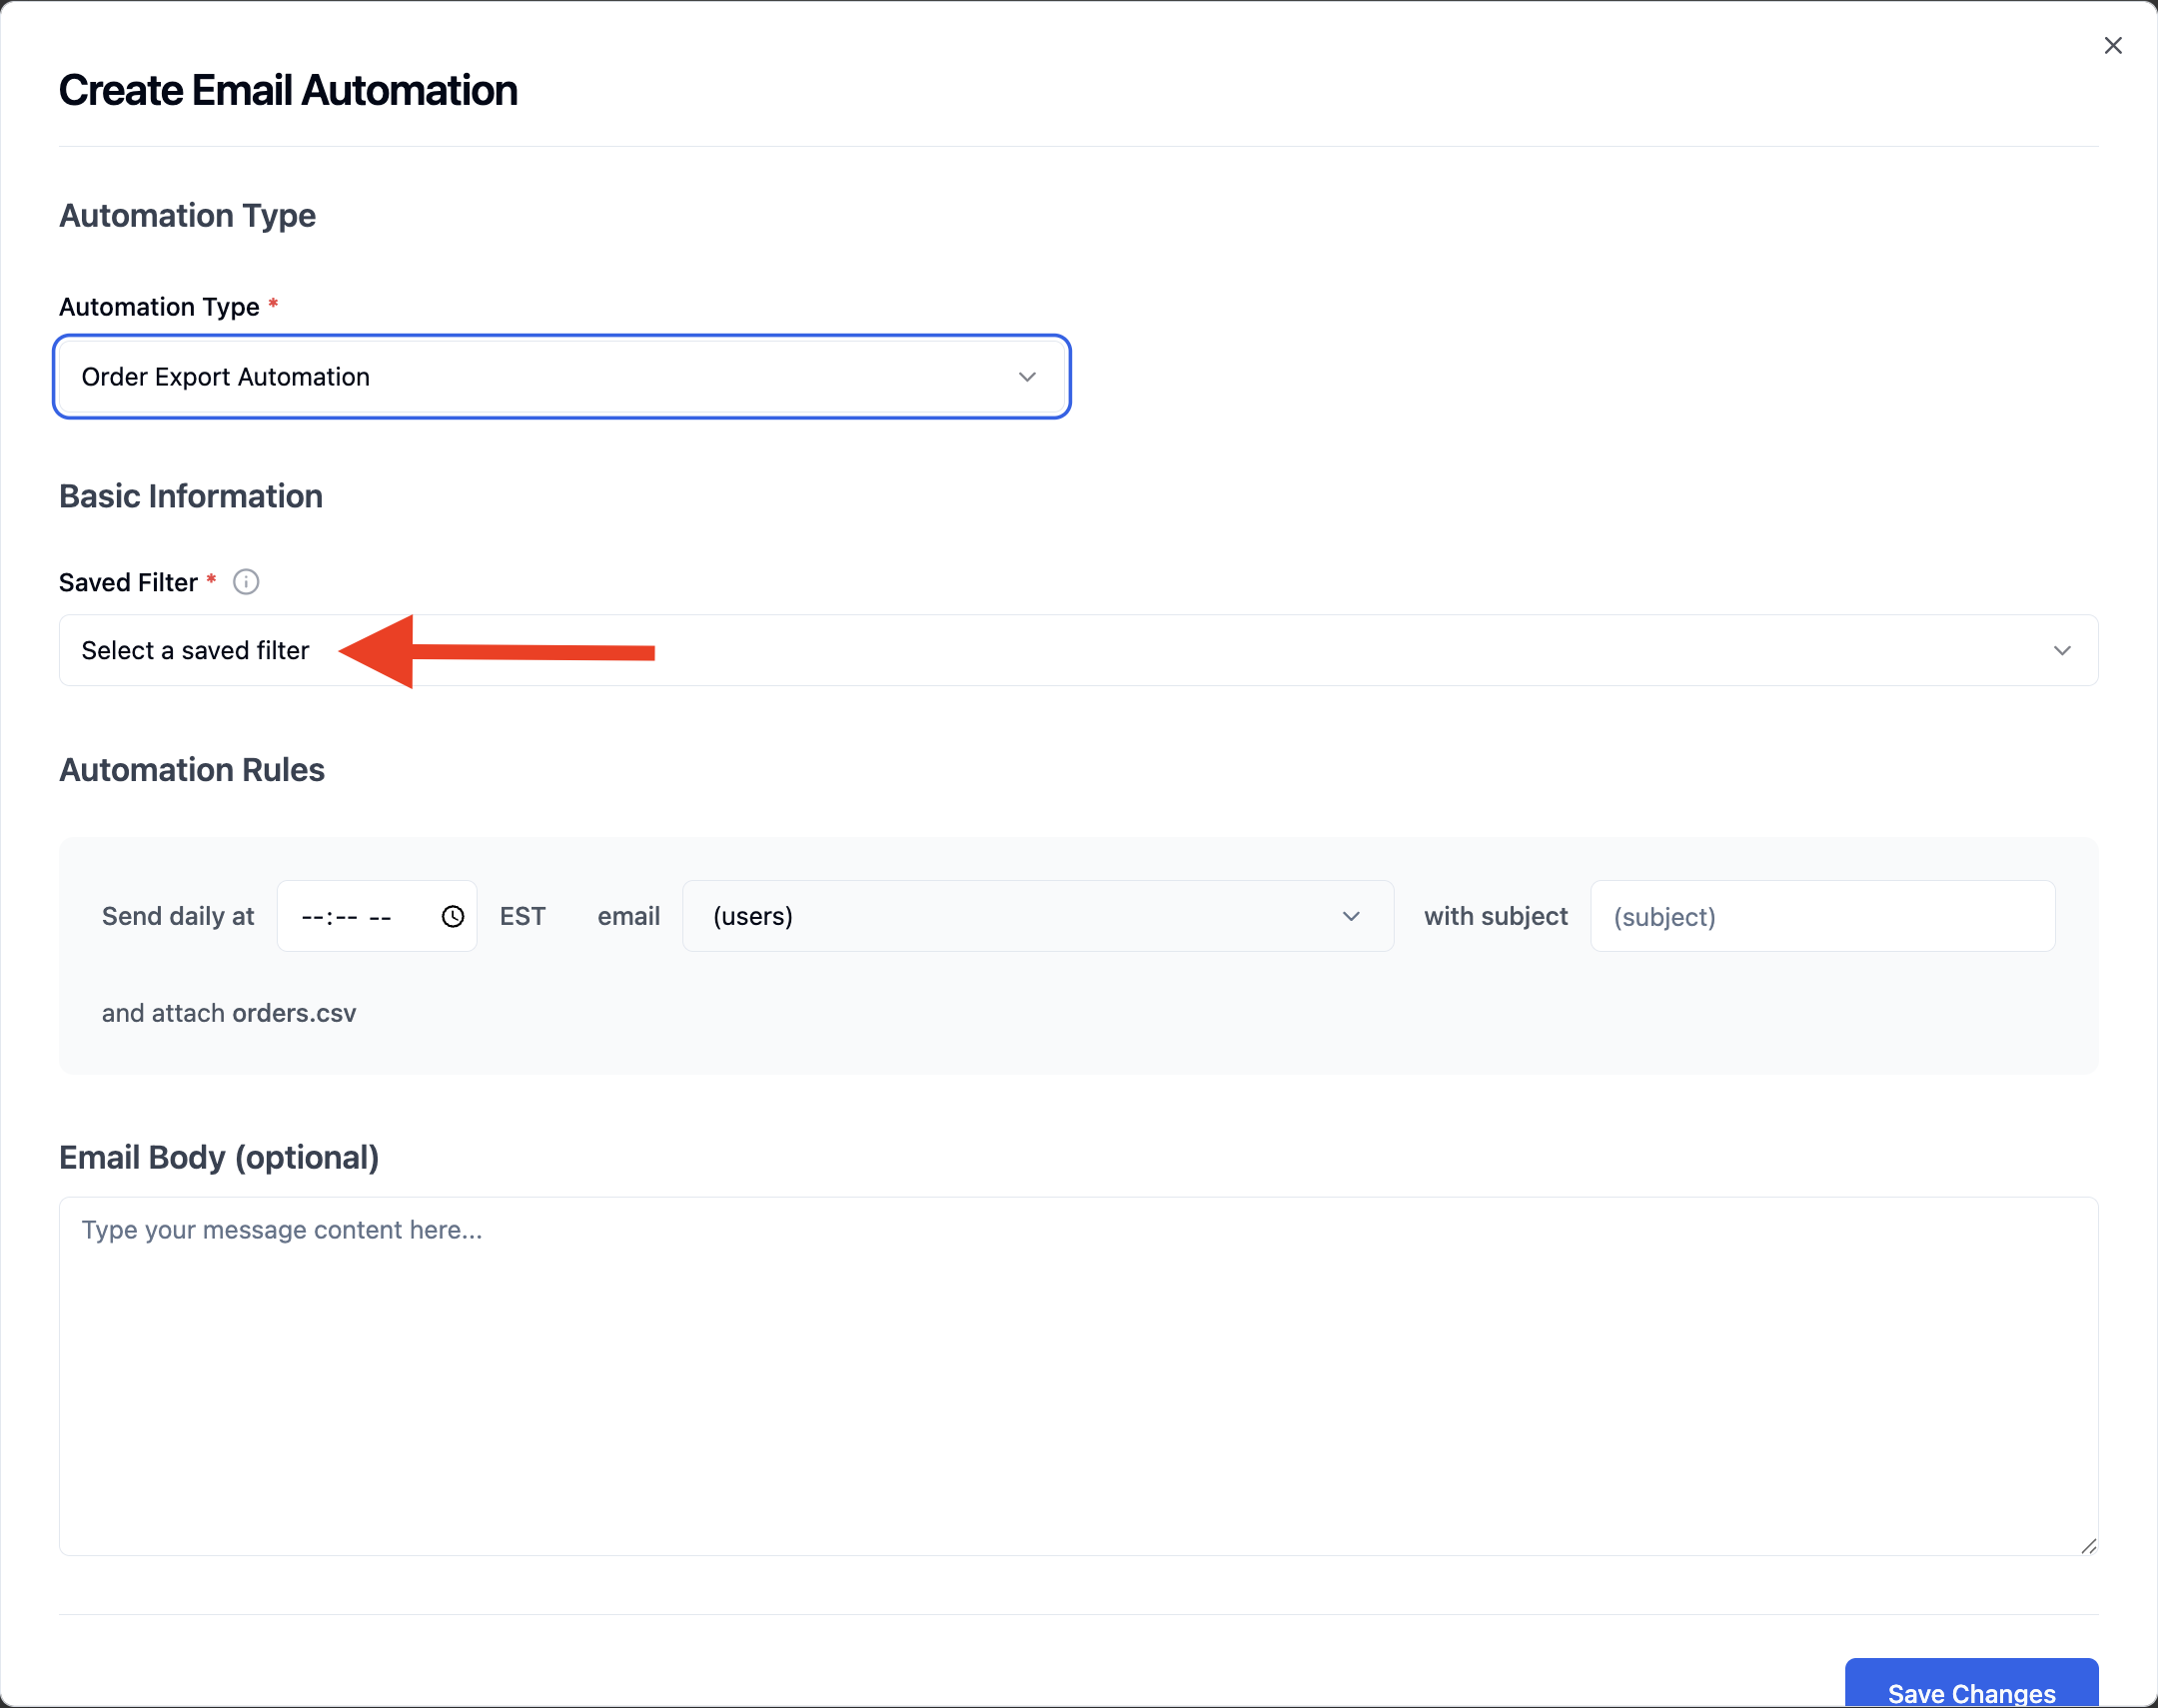
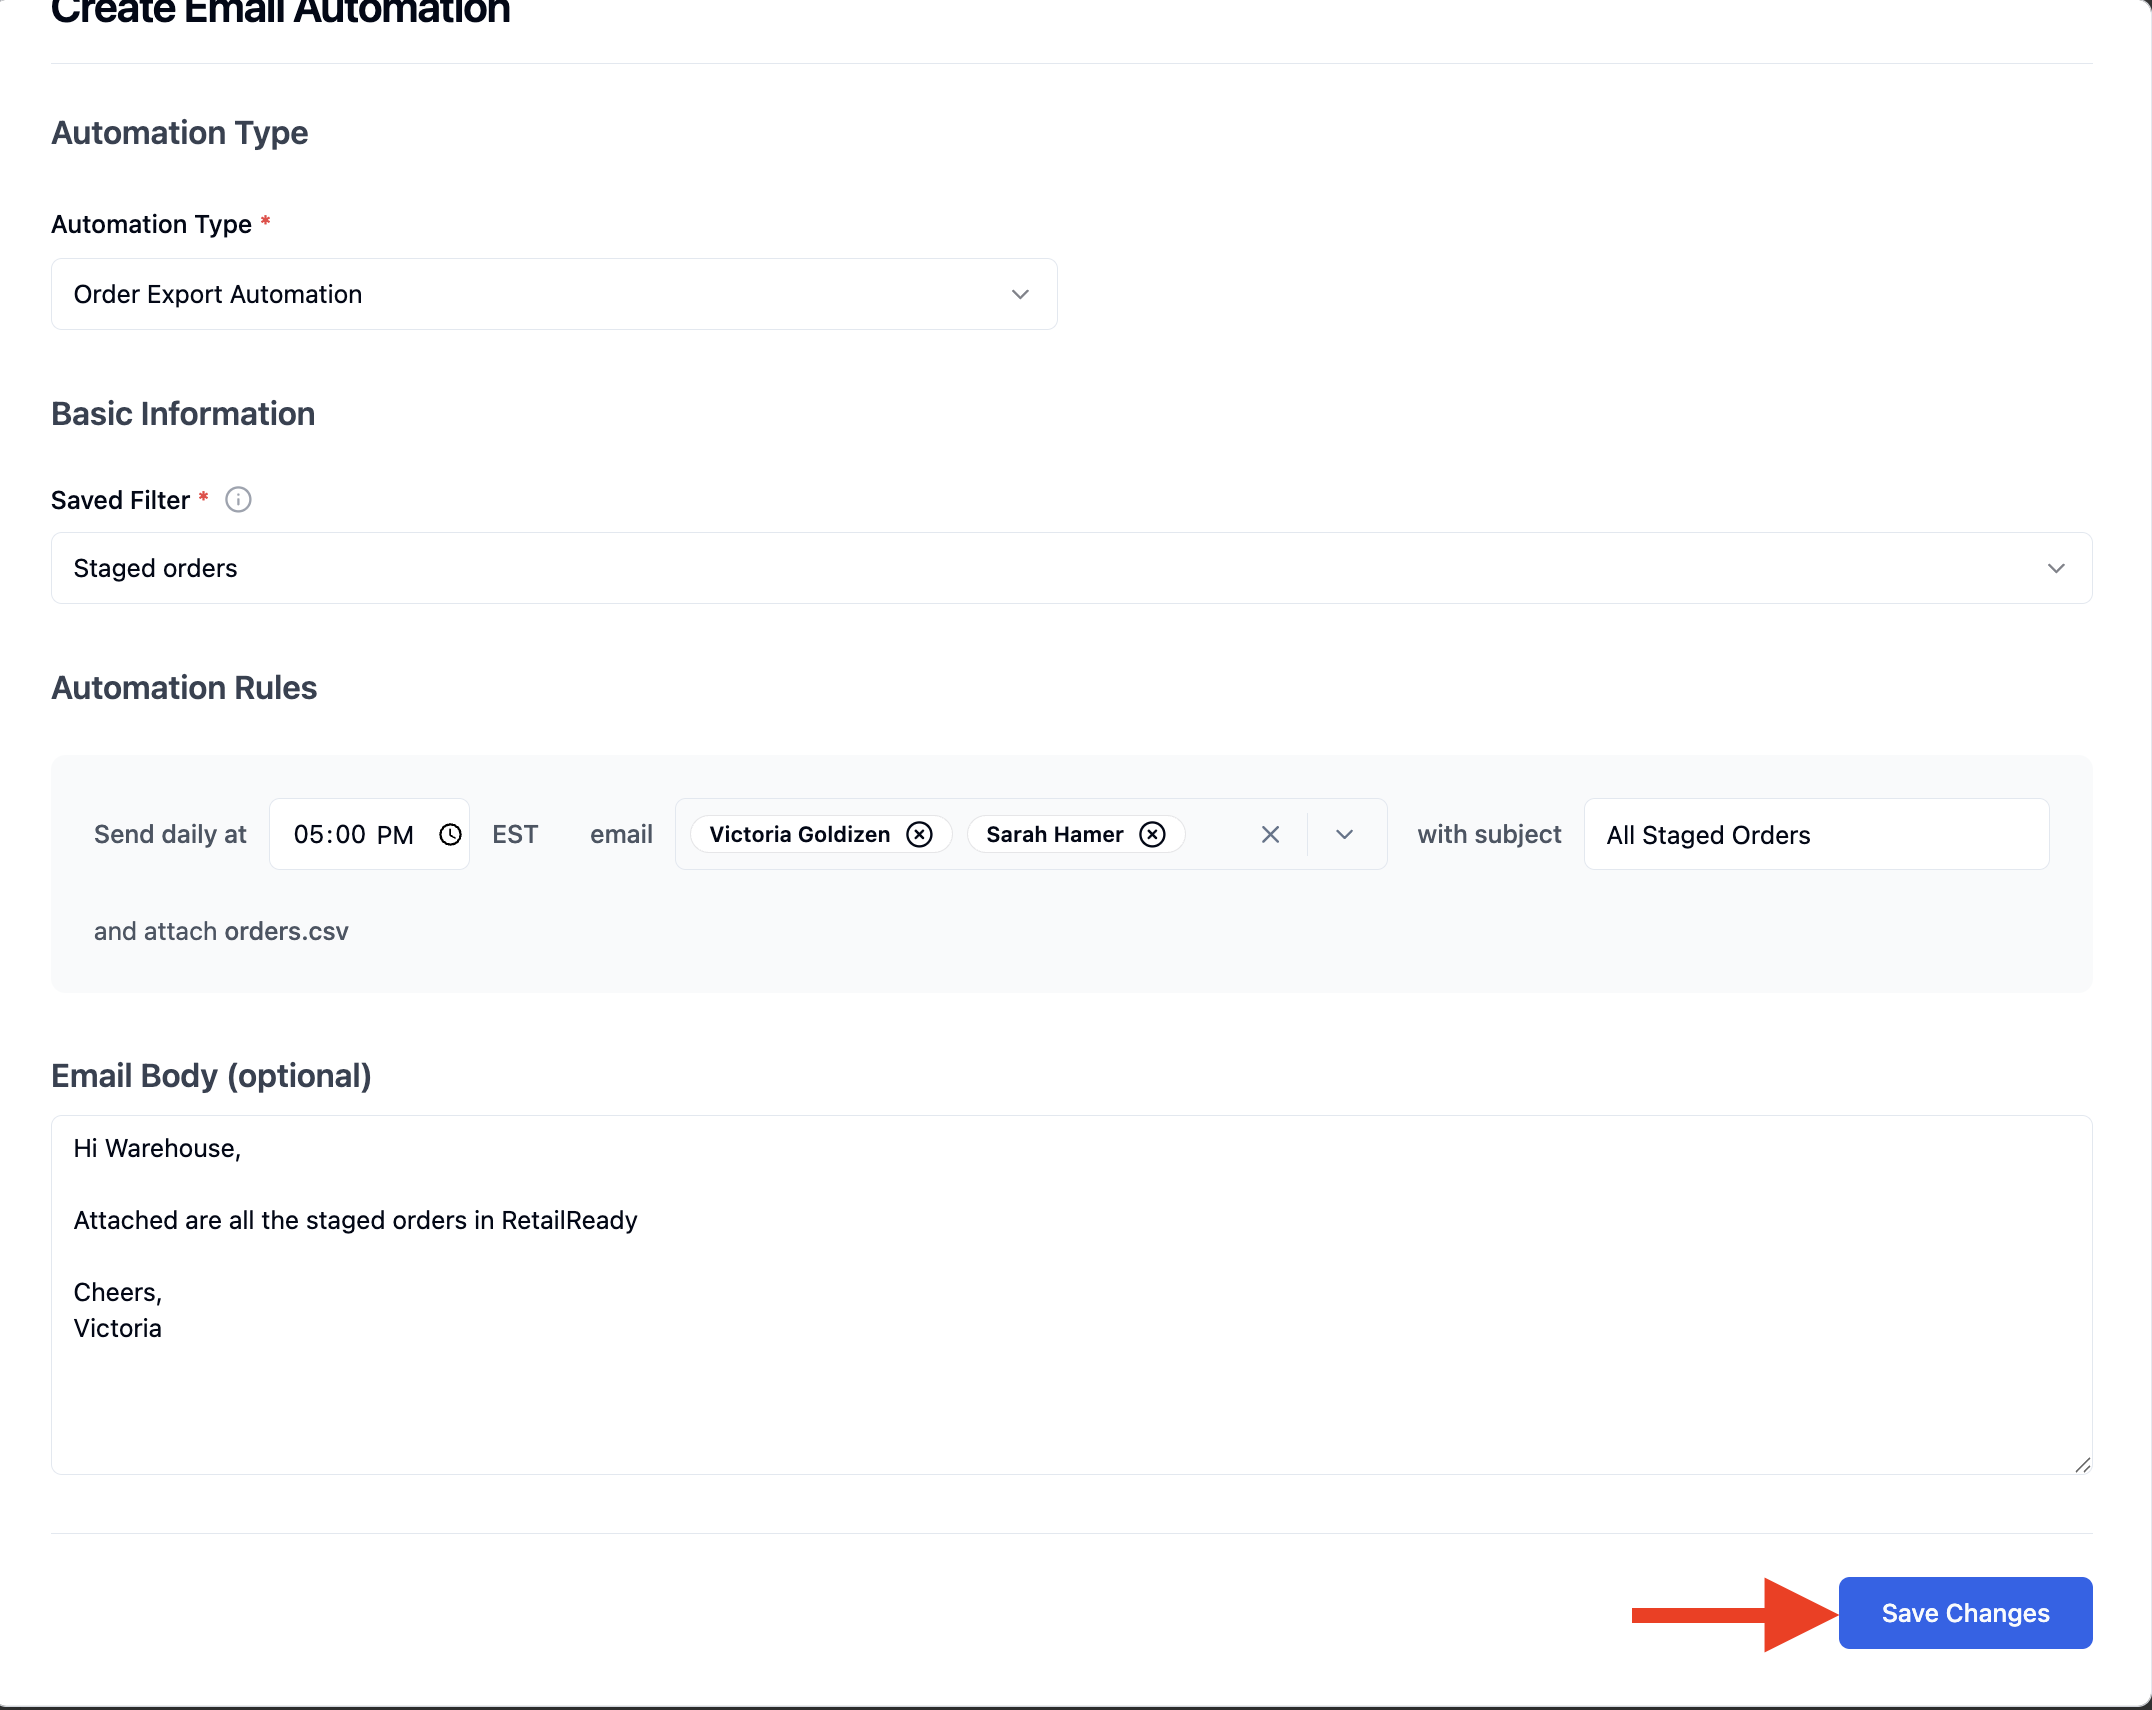
Under Basic Information, select a 'Saved Filter' from the dropdown, this determines which orders will be included in the export
Saved Filters are created from the Orders table. Set up your filter there first before creating the automation.
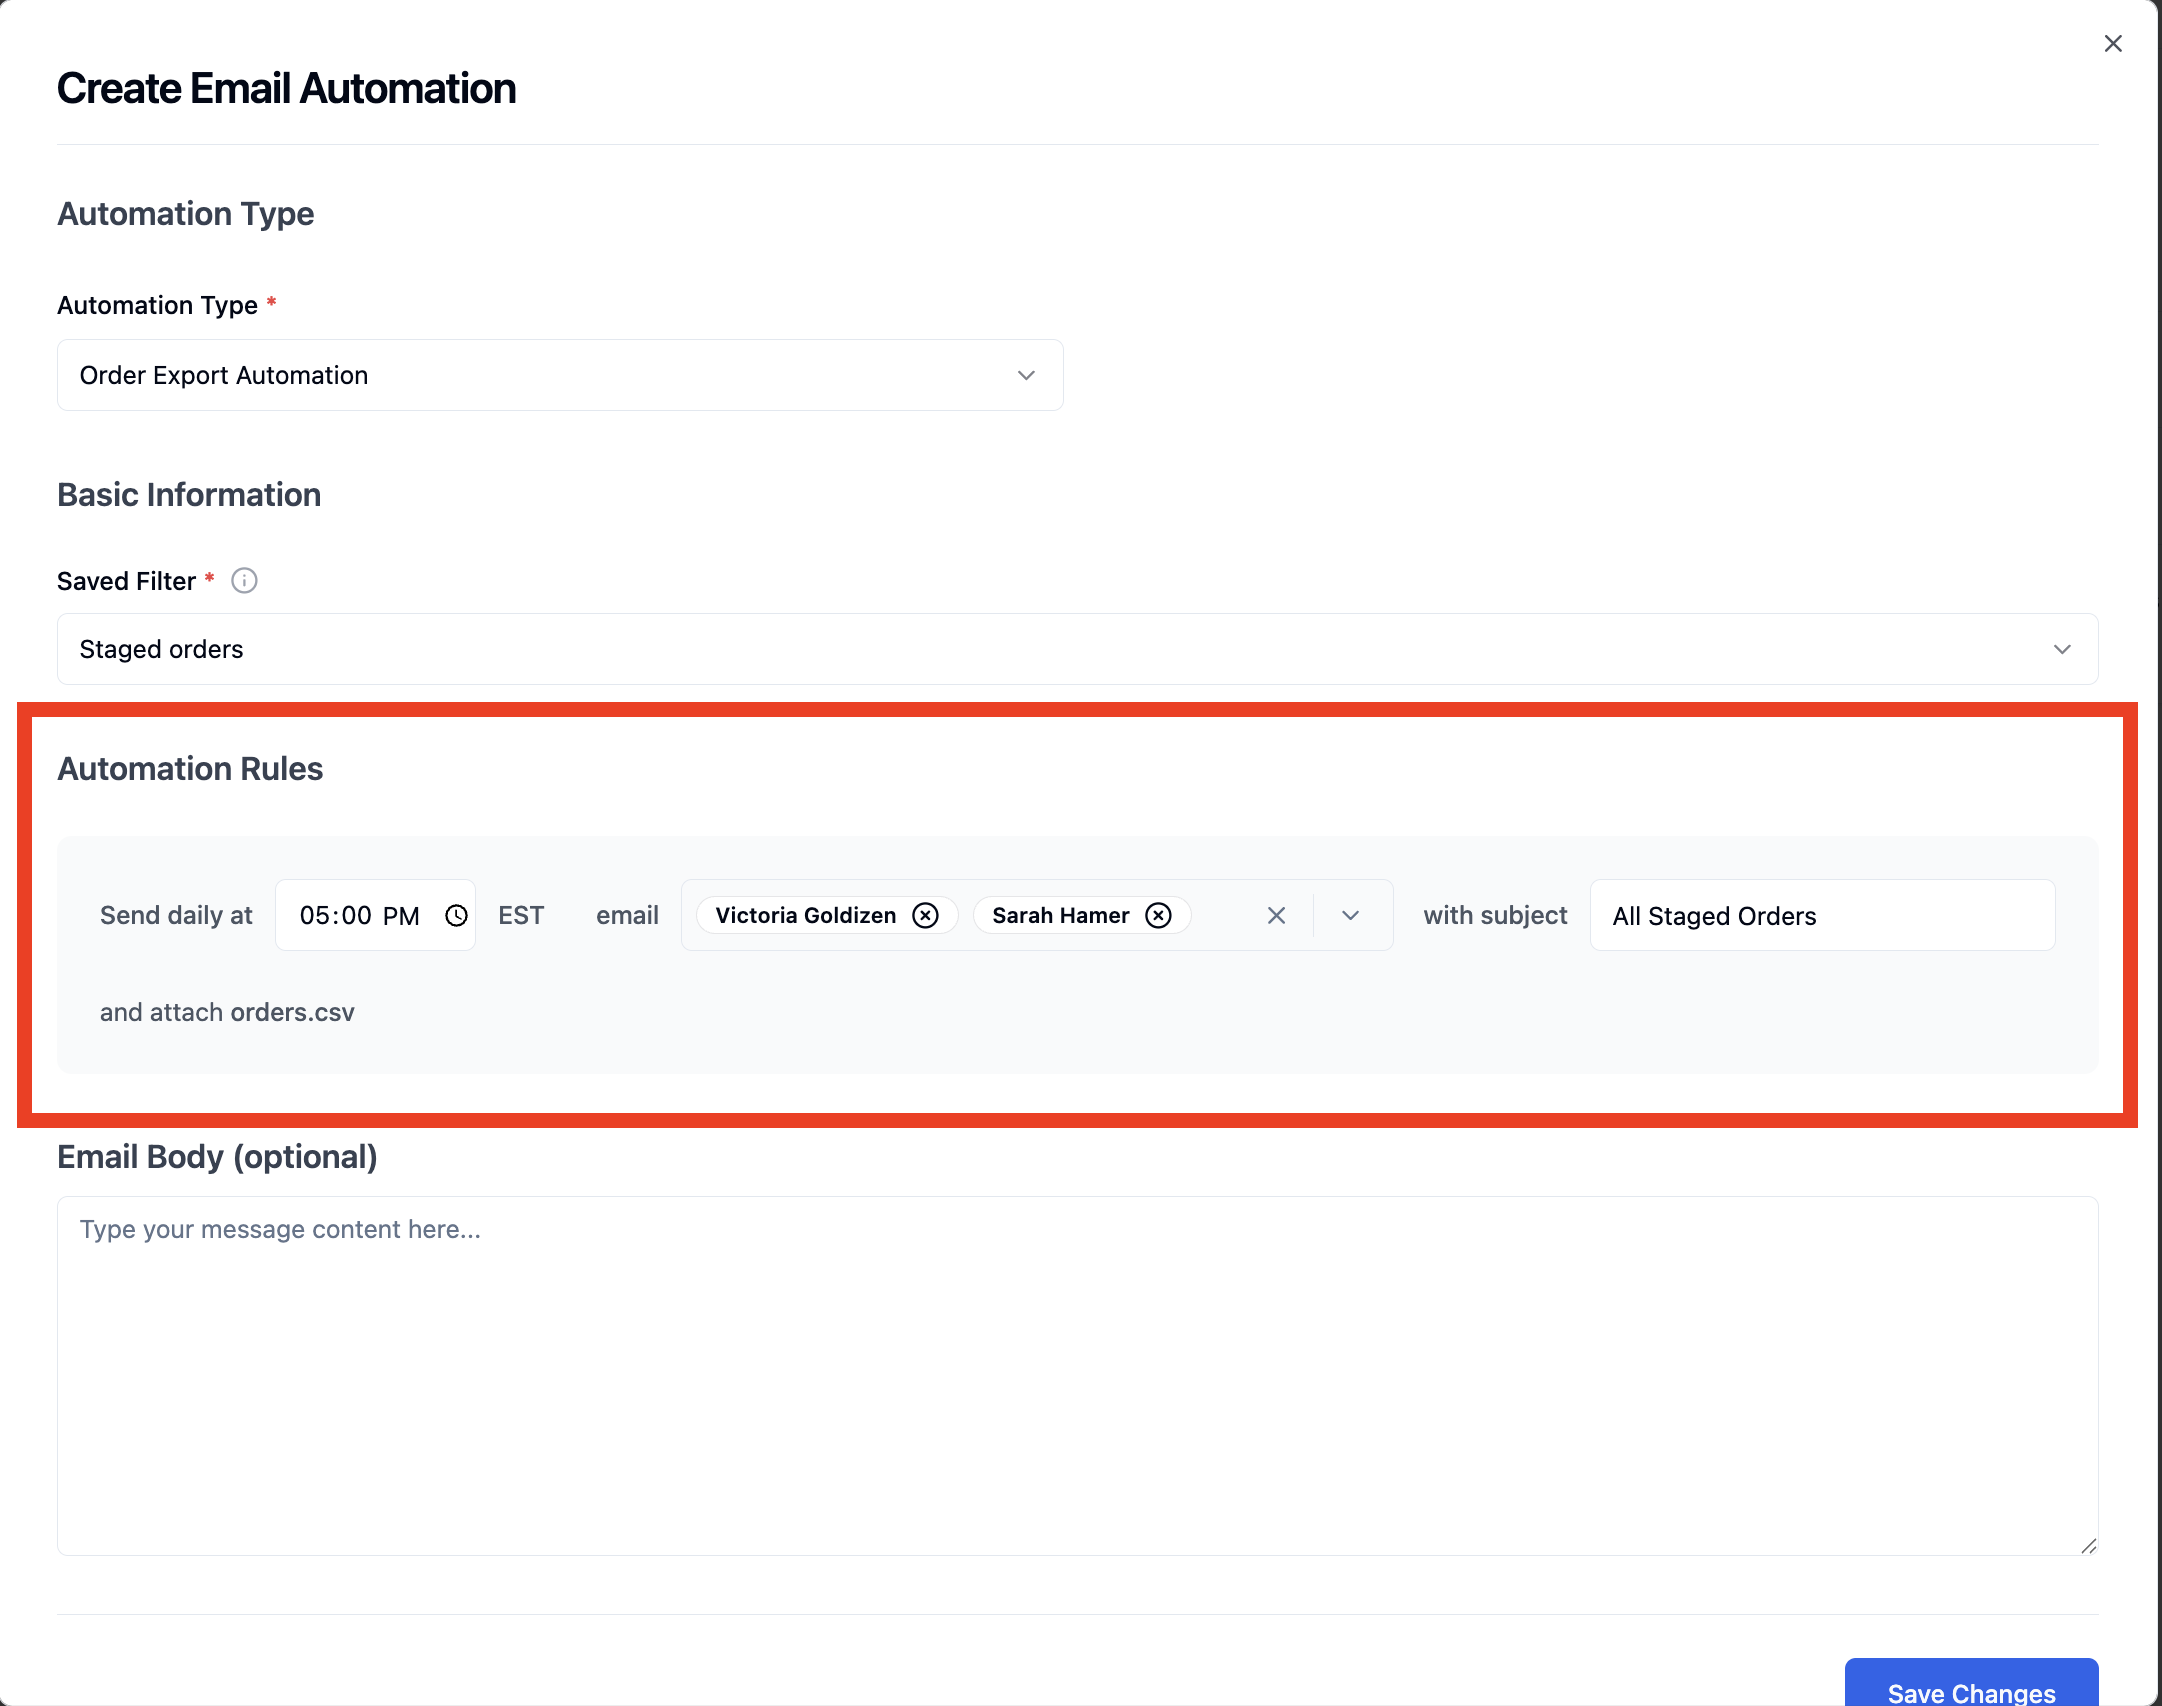
Under Automation Rules, configure the following:
Send daily at: use the time picker to select the hour, minute, and AM/PM (EST) for when the email should send
Email: select the user(s) from the dropdown; you can search by name or type an email address to add external recipients
With subject: enter the email subject line
(The attachment will automatically be orders.csv)
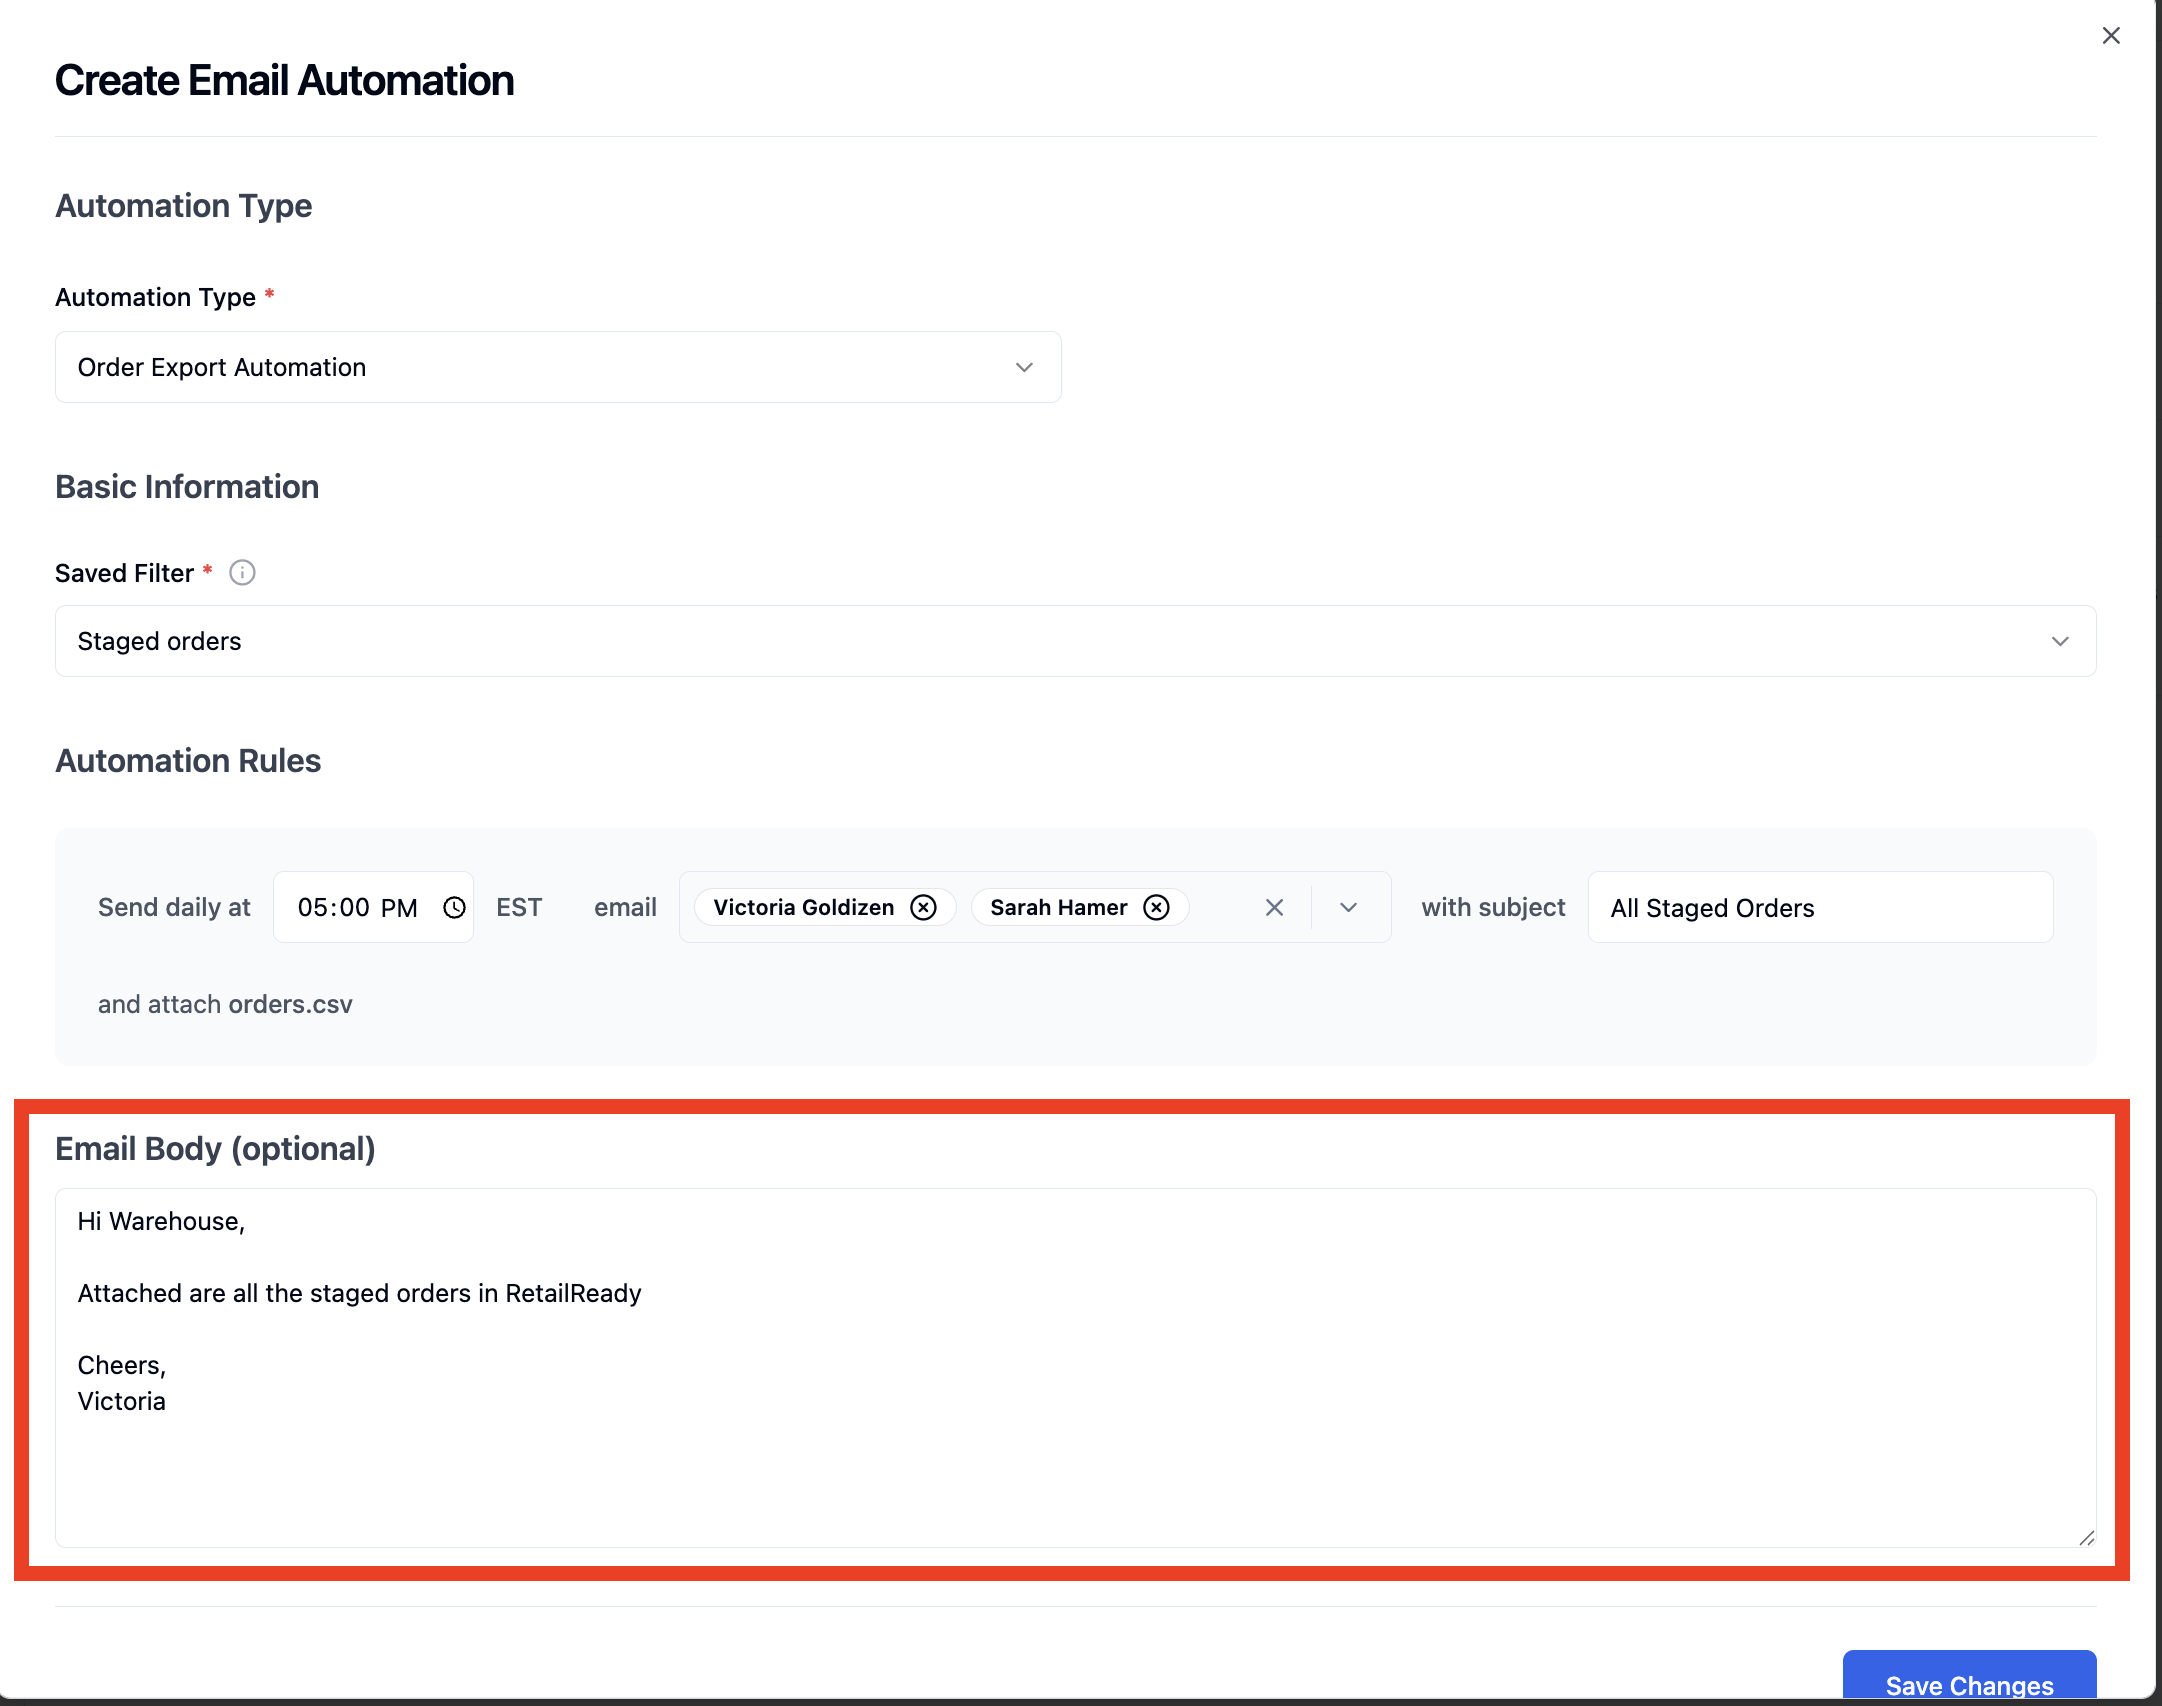
Optionally, fill in the Email Body by typing your message.
Click 'Save Changes'.
How to Edit/Delete Email Automations
From the left-hand navigation, click 'Settings' at the bottom of the sidebar.
In the Settings menu, scroll down to the Automations section and click 'Email Automations'.
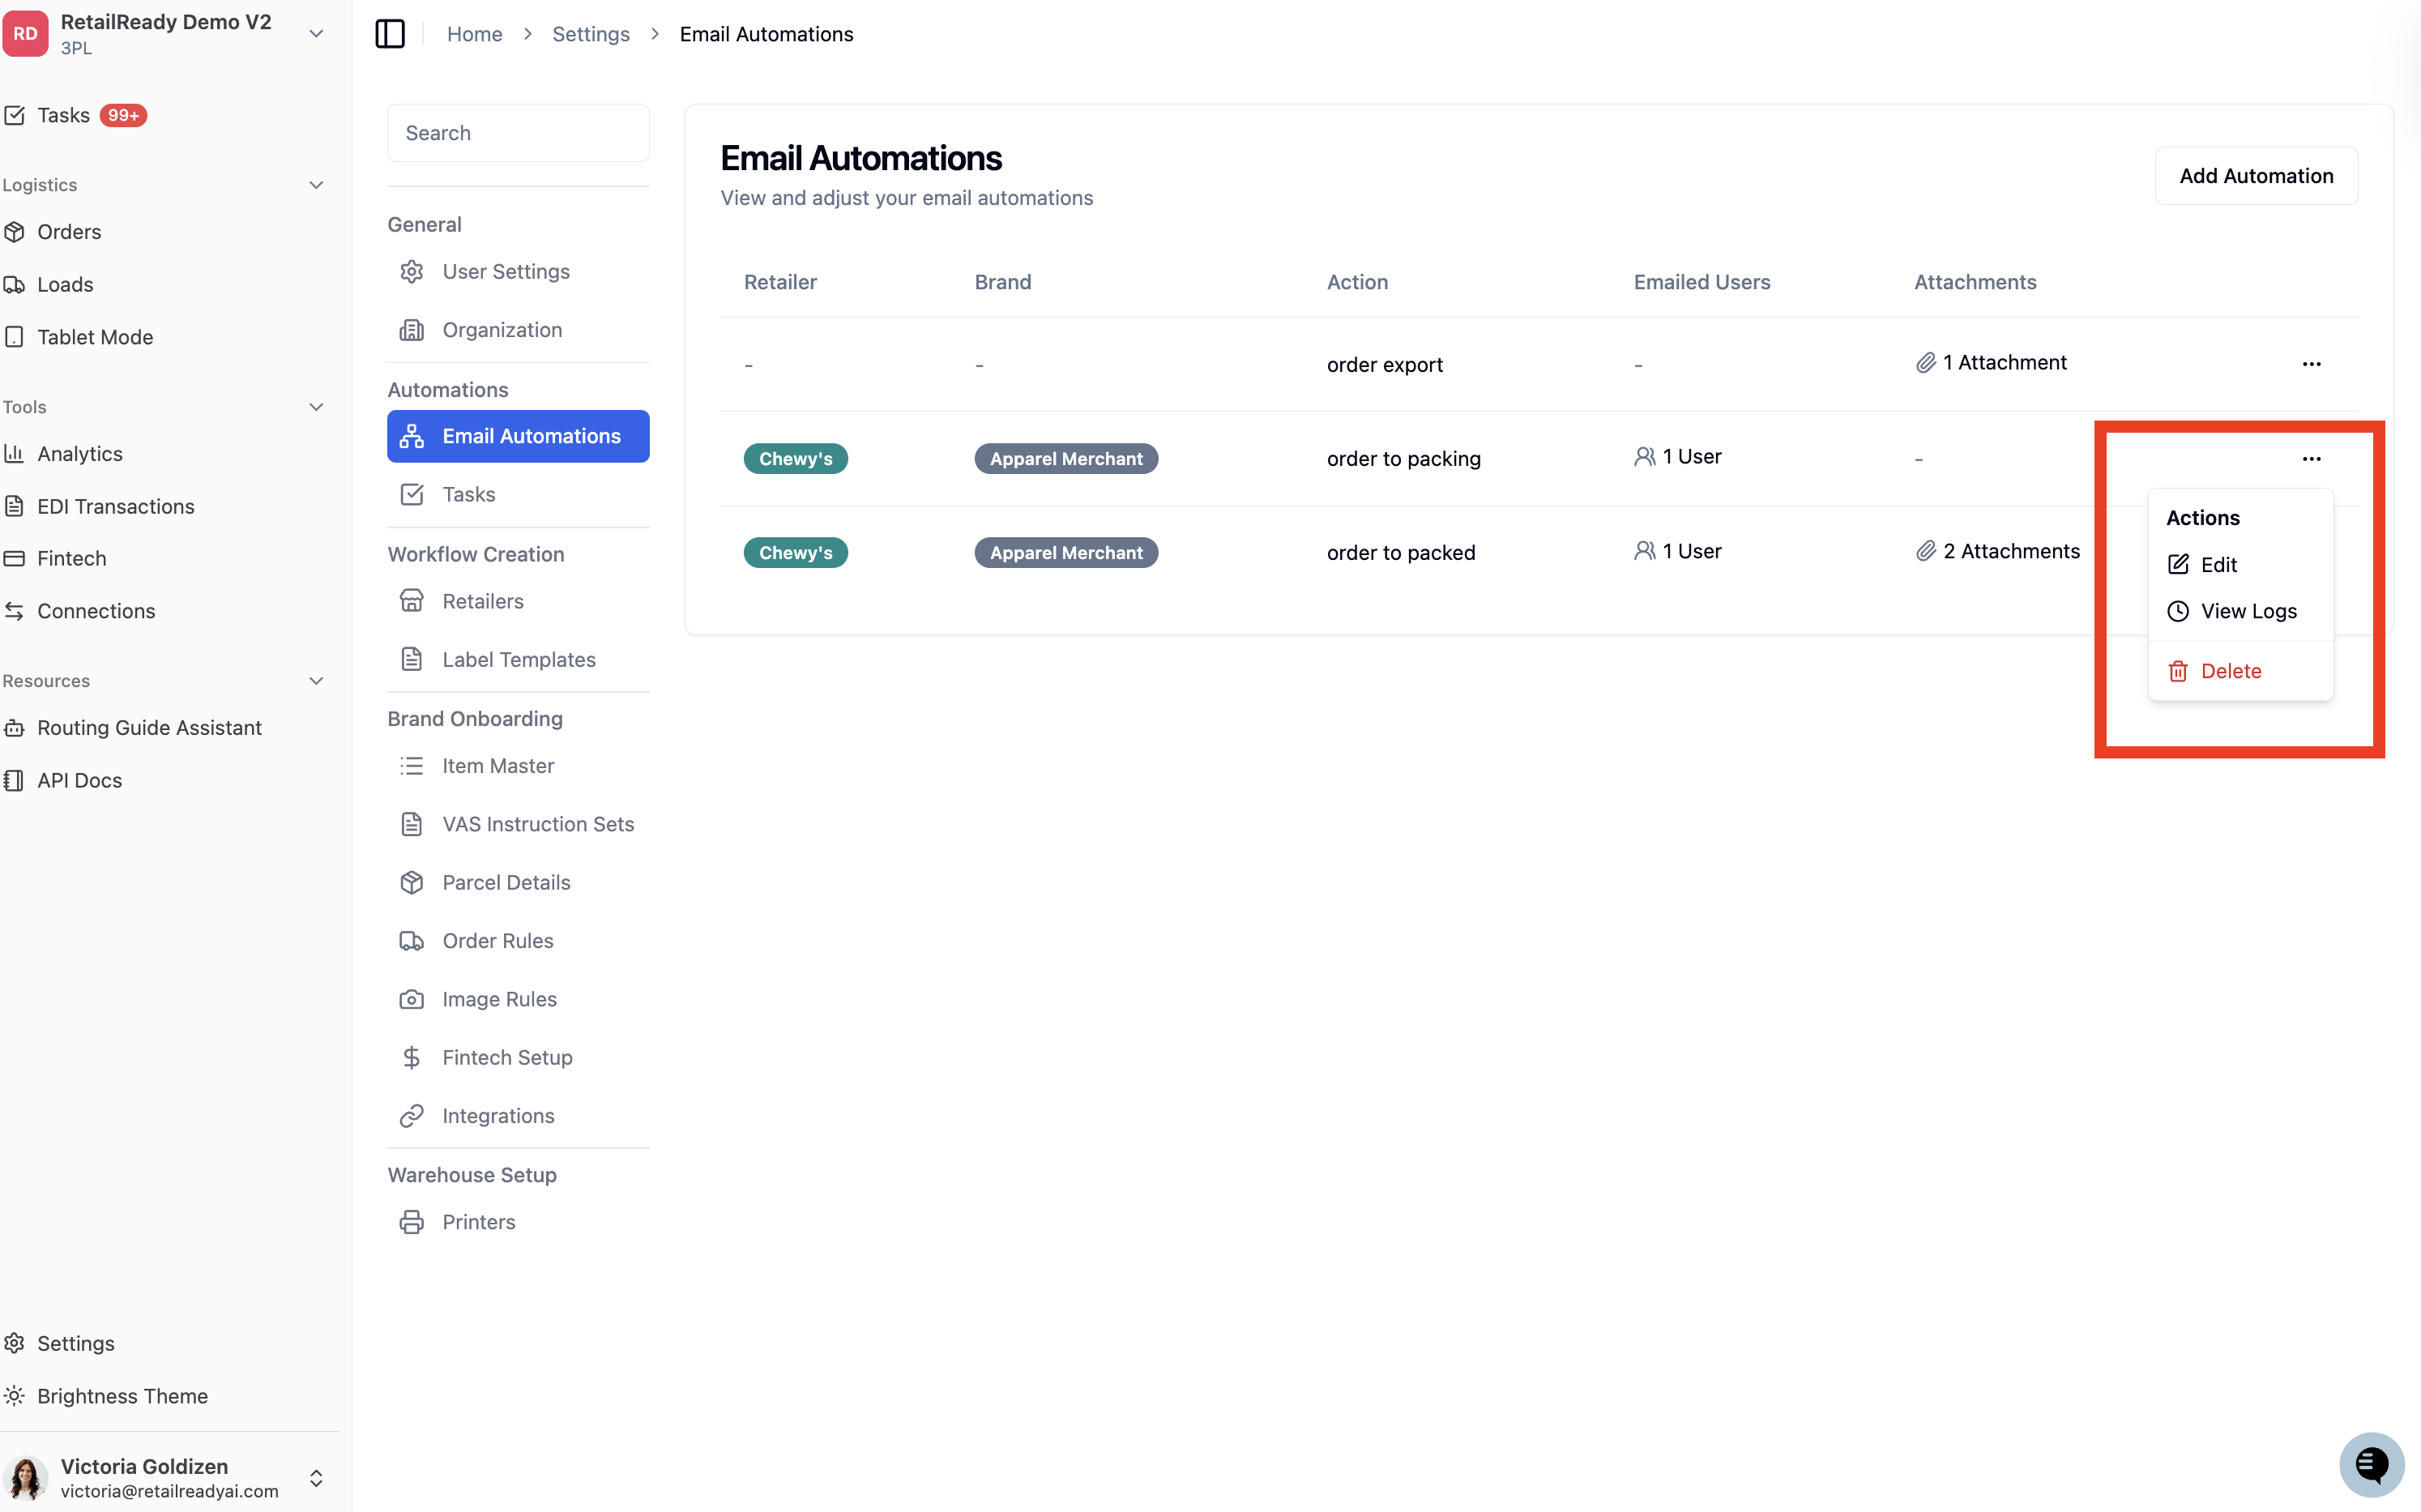
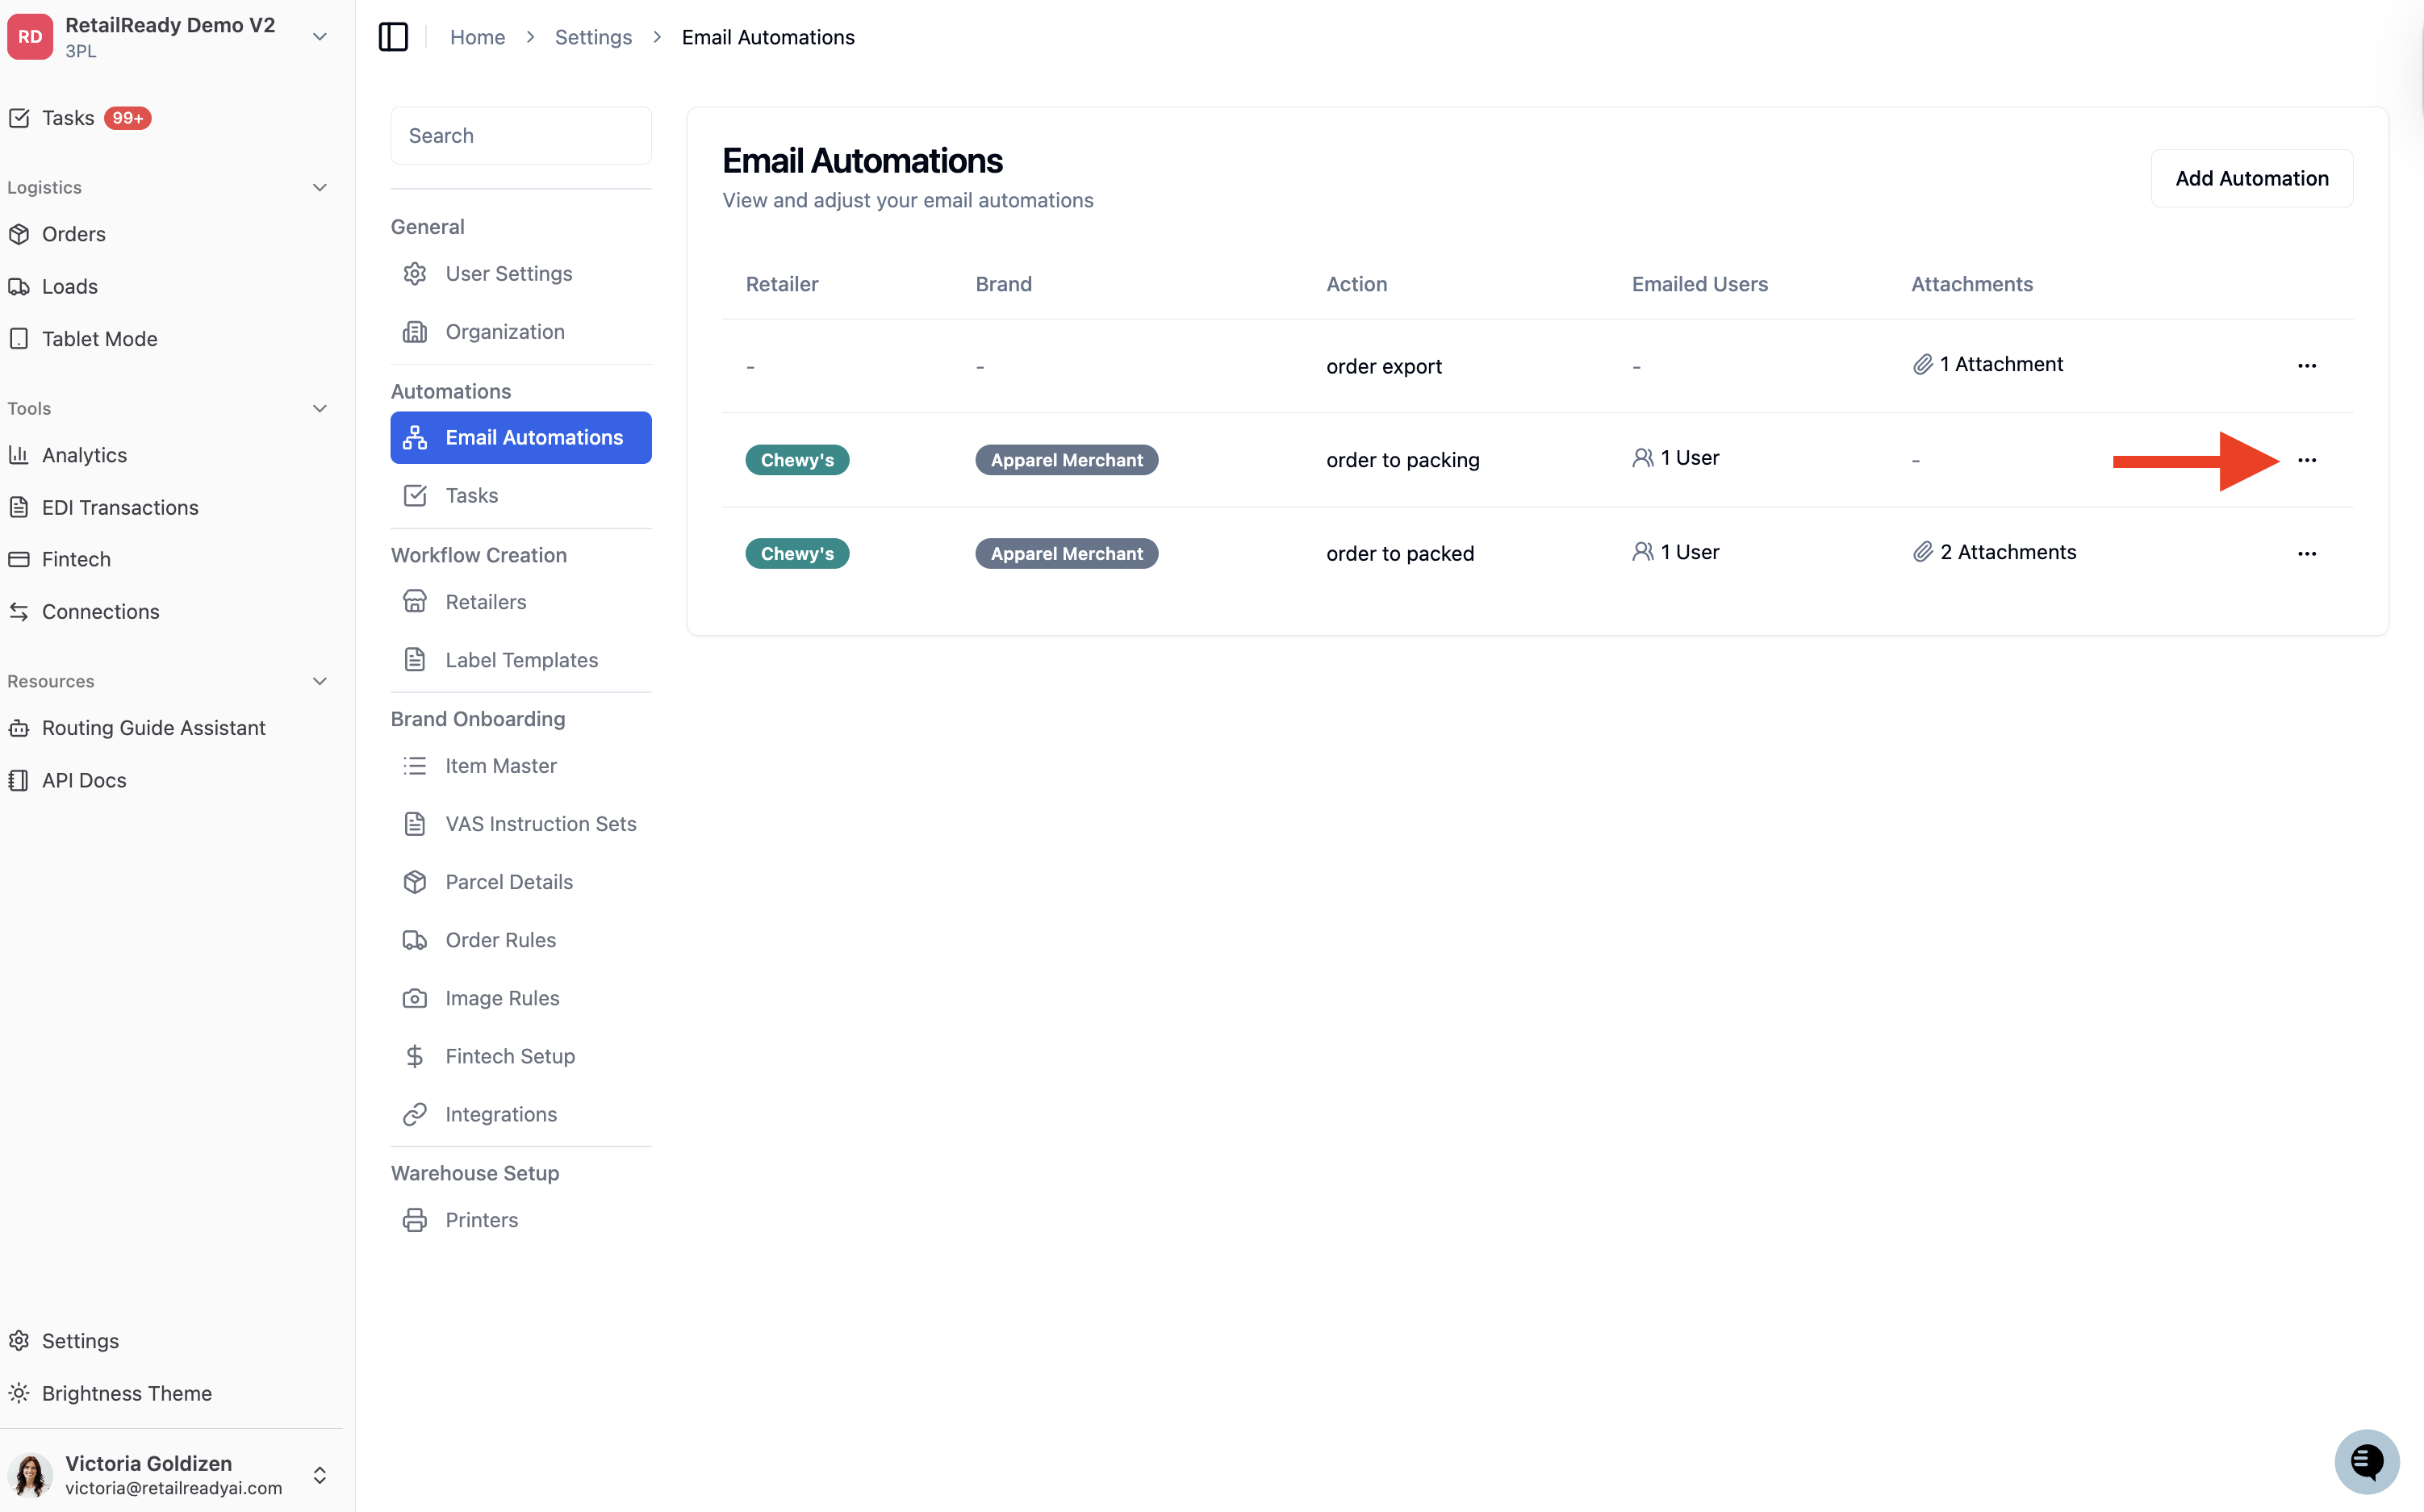
Locate the automation you want to update and click the 3 dots '...' menu on the right side of the row.
Select an action:
'Edit': opens the automation to make changes, then click 'Save Changes' when done.
'View Logs': review a history of the automation.
'Delete': permanently removes the automation. A confirmation prompt will appear asking "Are you sure you want to delete this email workflow?" click 'Delete' to confirm.