User Management in RetailReady
Last updated: April 20, 2026
This article covers how to create and manage both 3PL and Brand users in RetailReady, including assigning roles, configuring permissions, and ensuring proper access to facilities or brands.
RetailReady user management aligns system access with operational responsibilities. 3PL users are assigned roles such as Associate, Lead, or Admin to support warehouse workflows, while Brand users are granted visibility into their brand for order tracking.
How To Add A 3PL User in RetailReady?
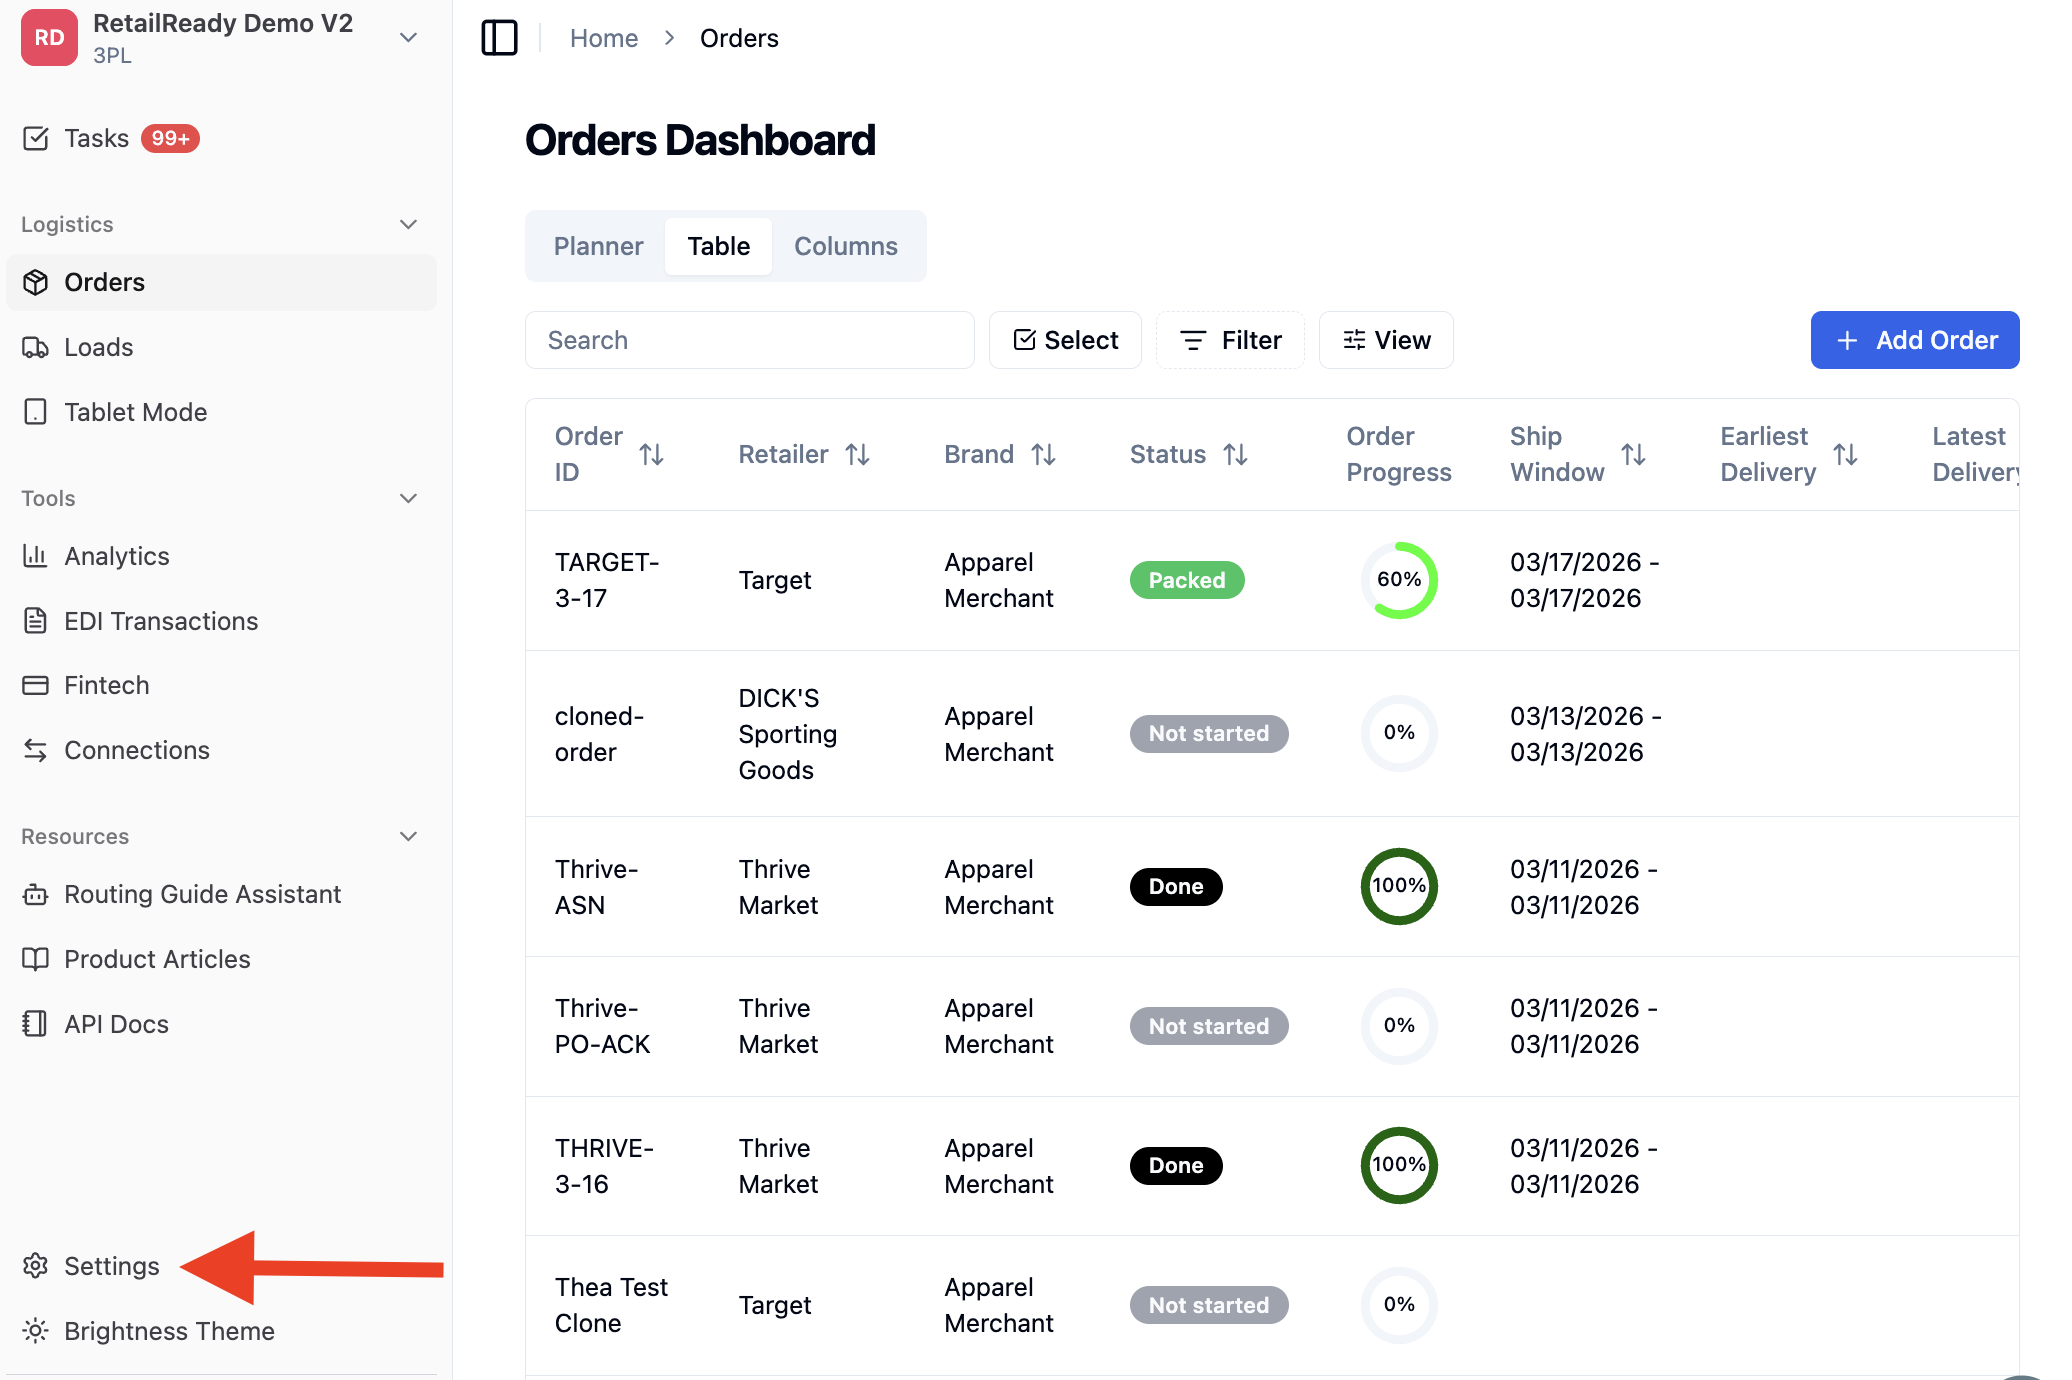
Navigate to the 'Settings' Tab on the left-hand navigation panel of RetailReady.
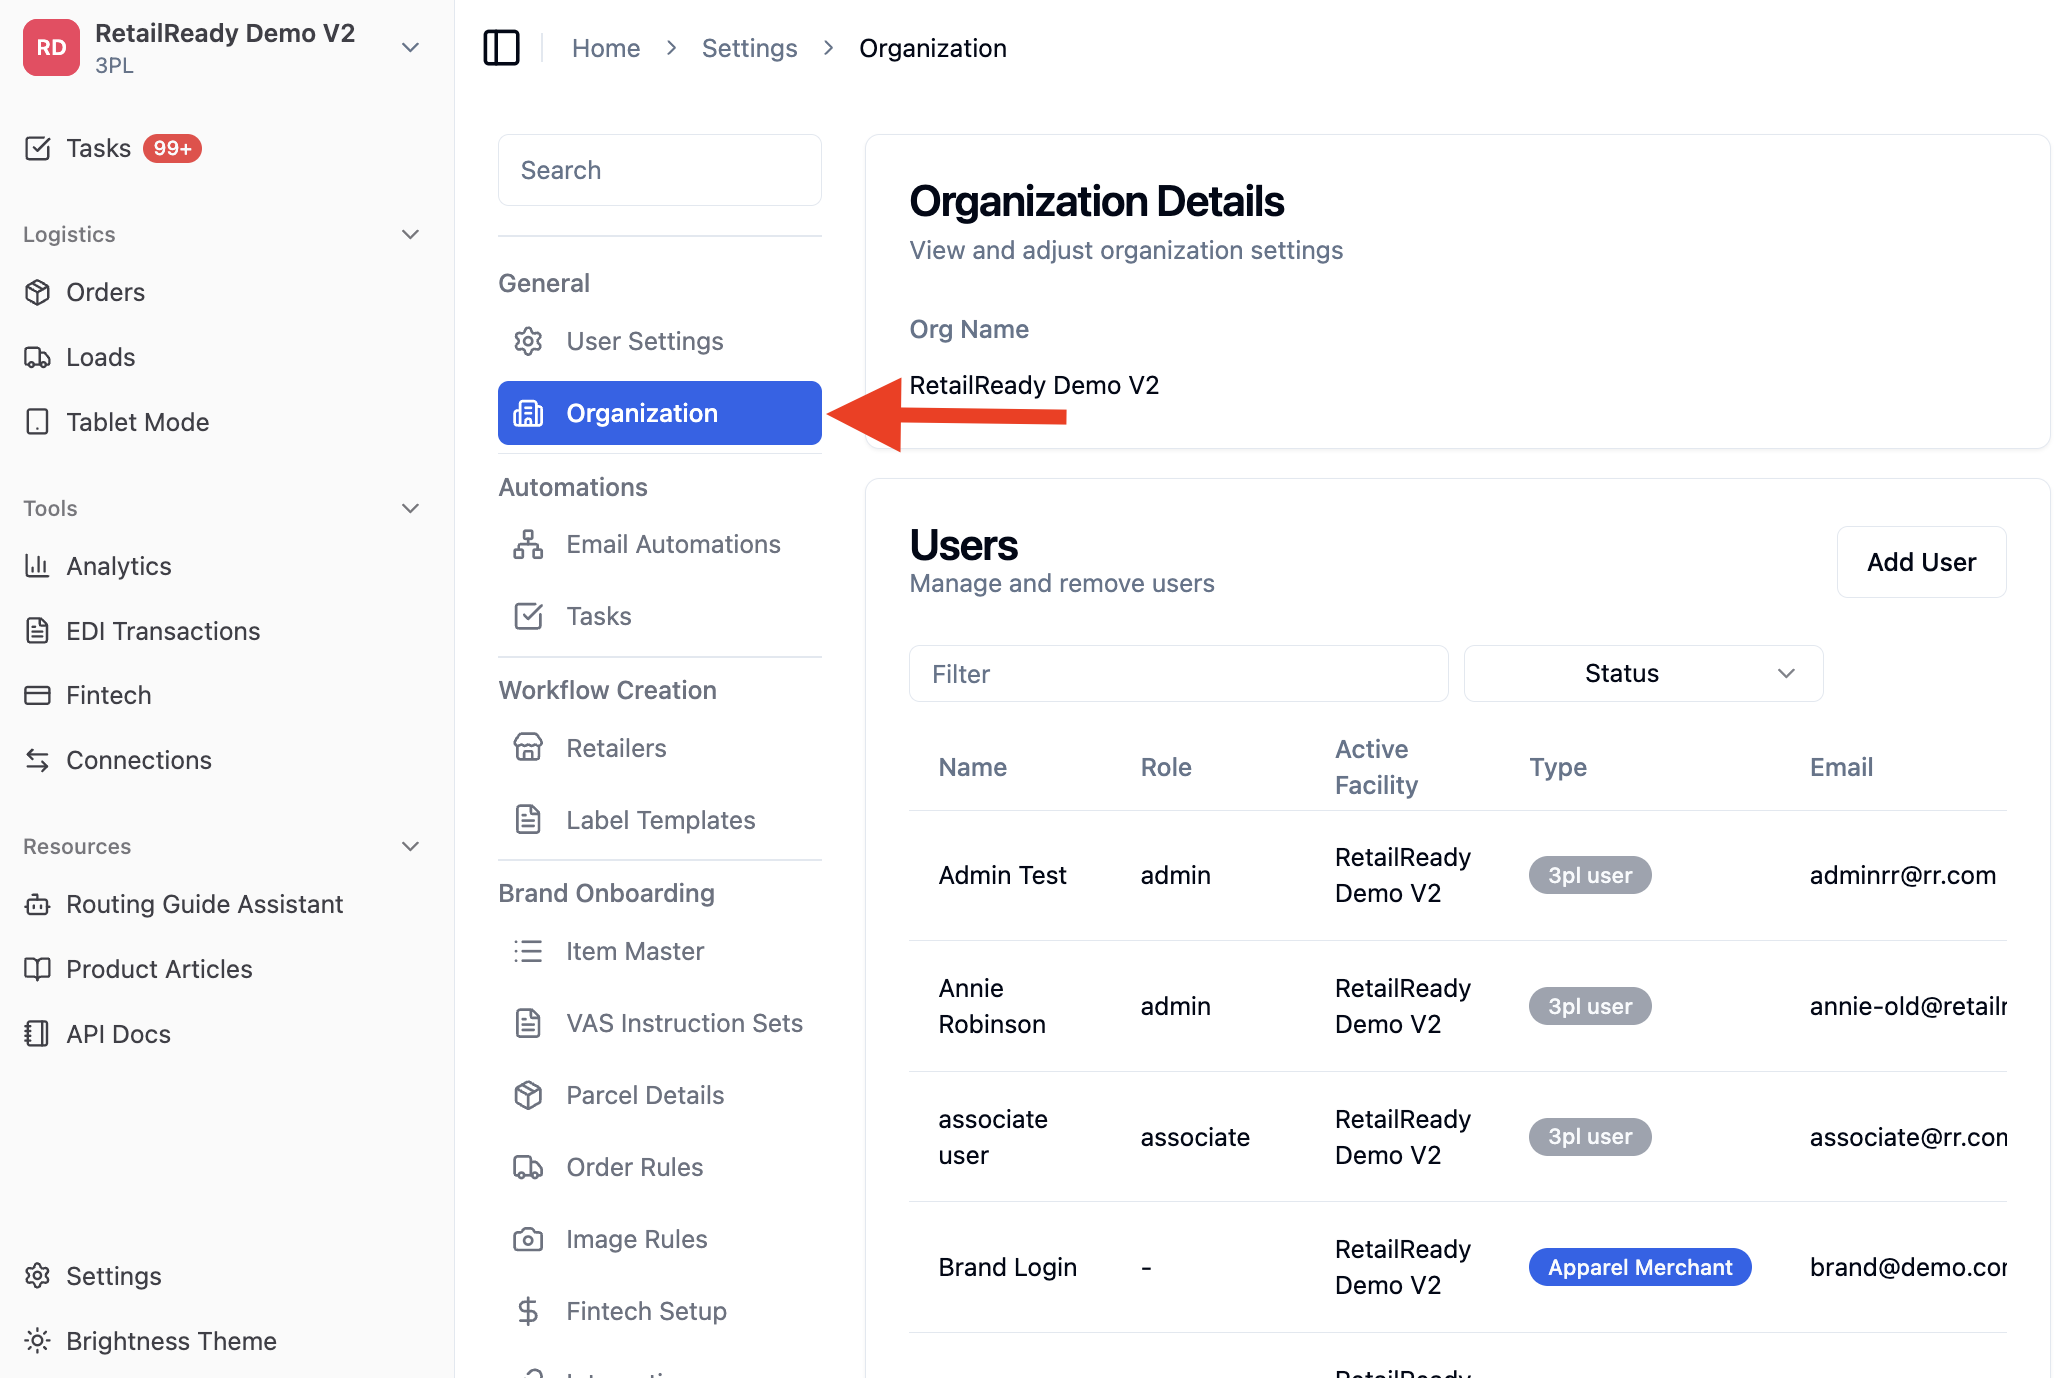
Under the General section, select 'Organization'.
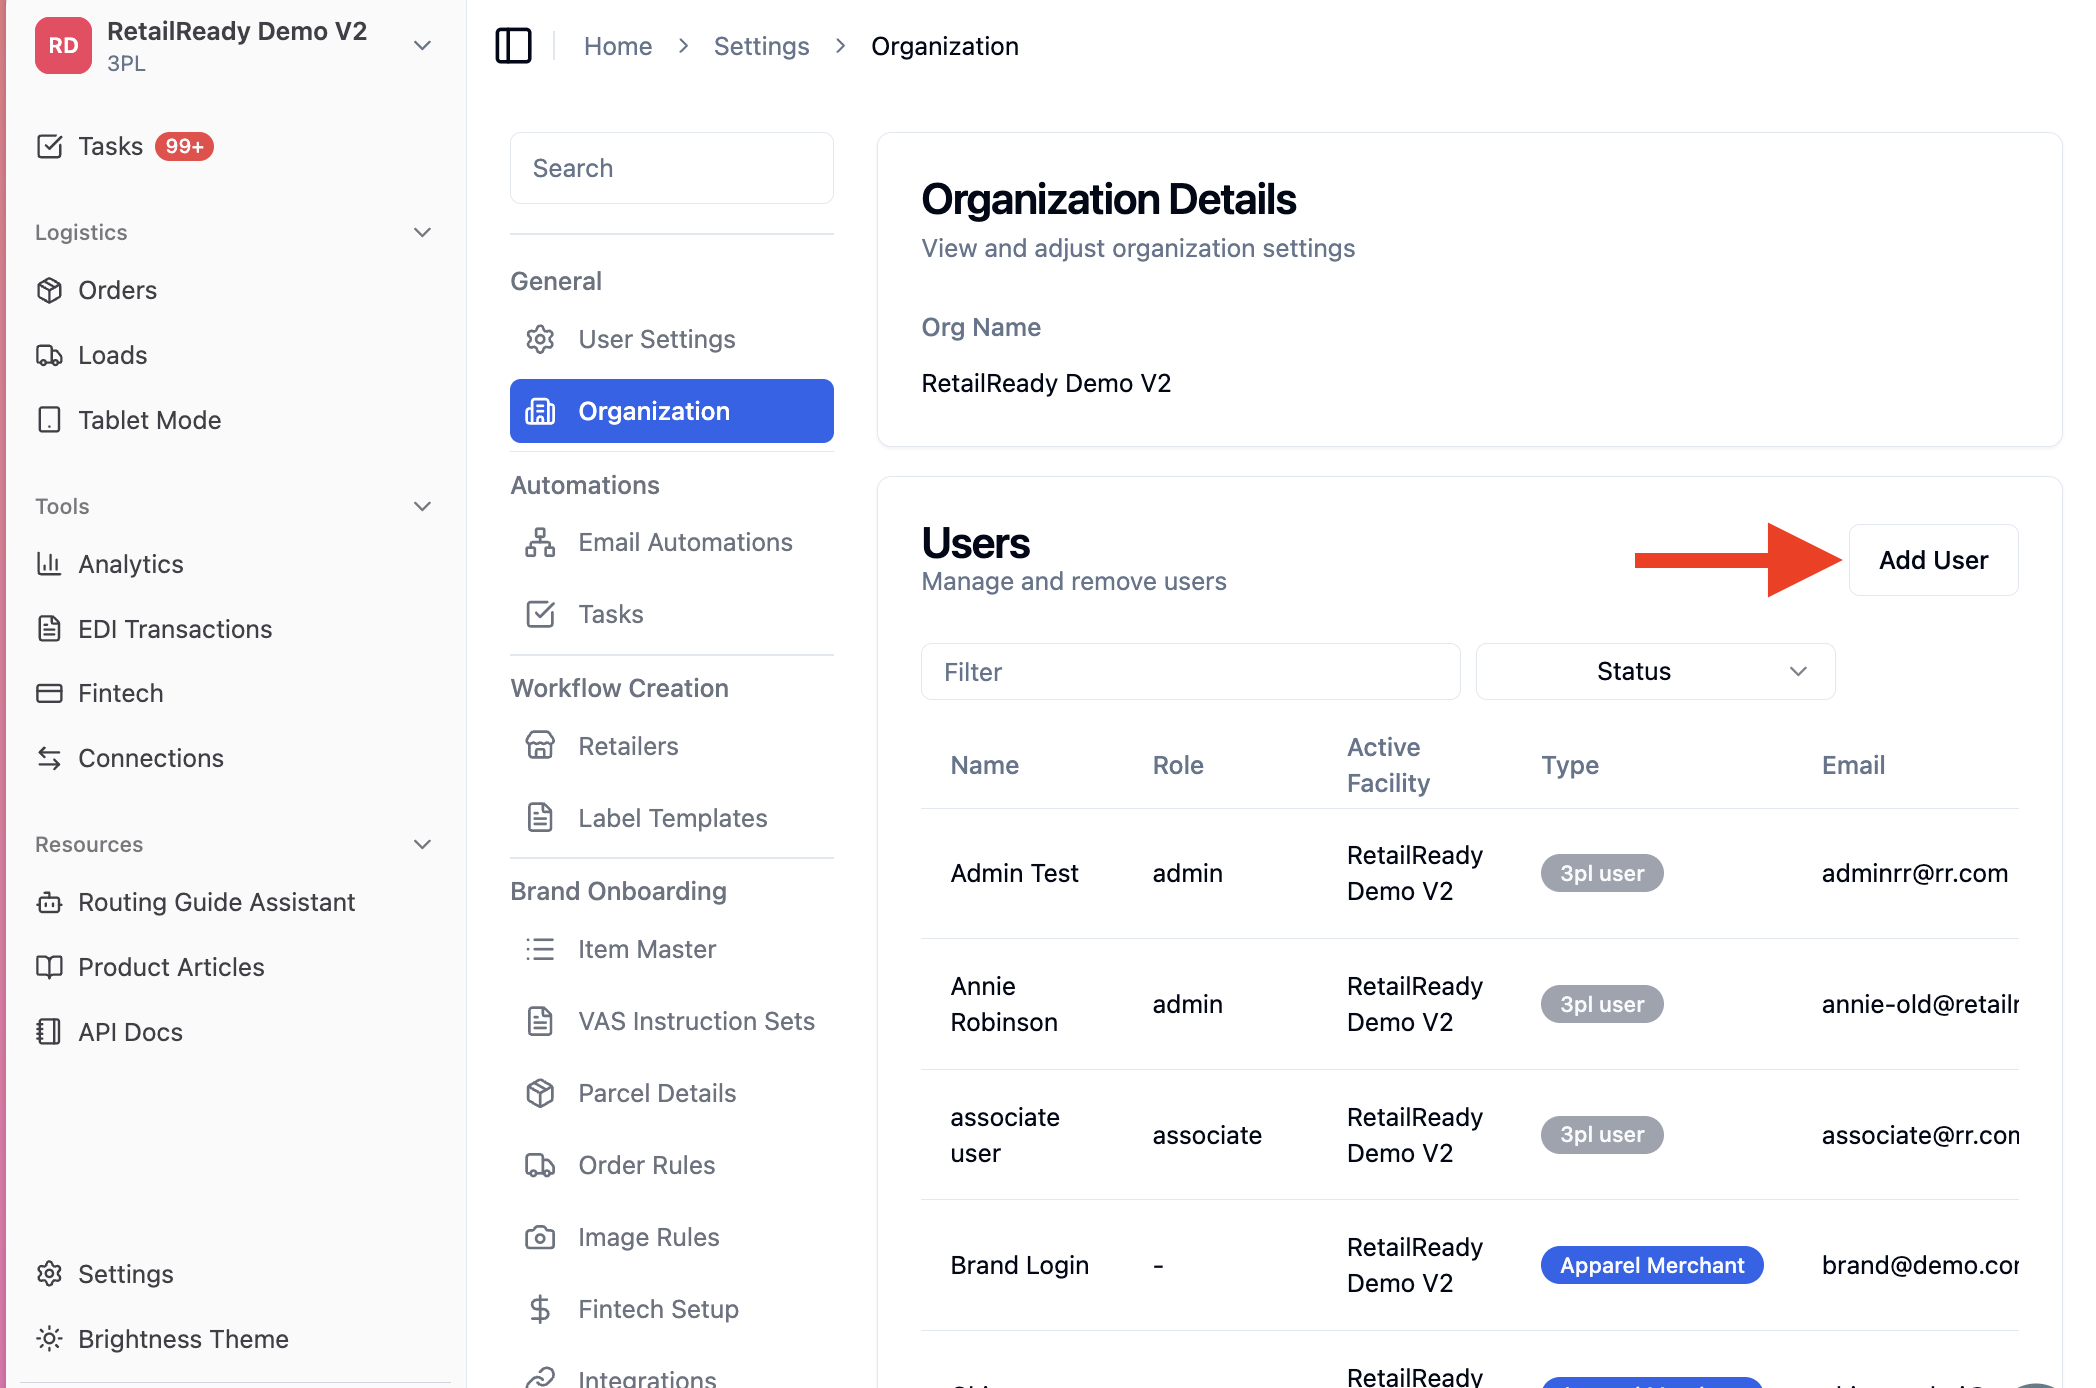
Select 'Add User' to begin creating a new user.
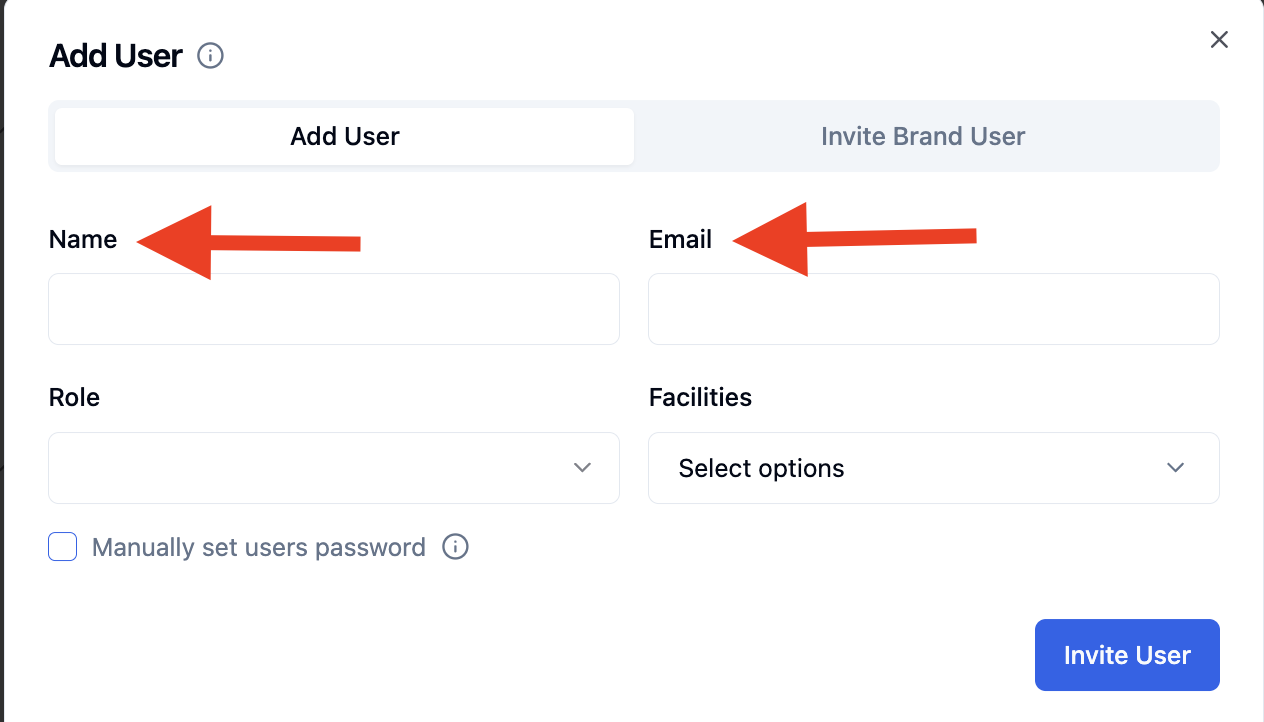
Enter the user’s name and email address in the appropriate fields.
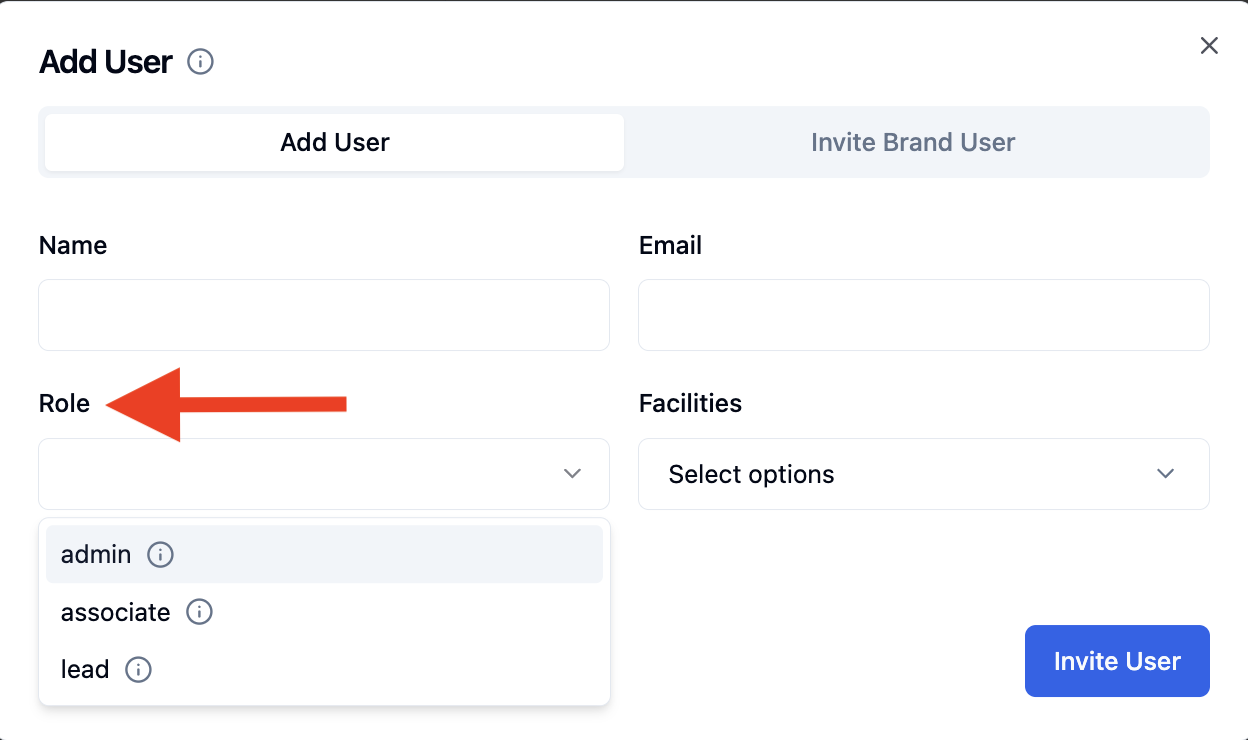
Select a role from the Role dropdown menu. Refer to the role selection chart to determine the appropriate access level based on the user’s responsibilities.
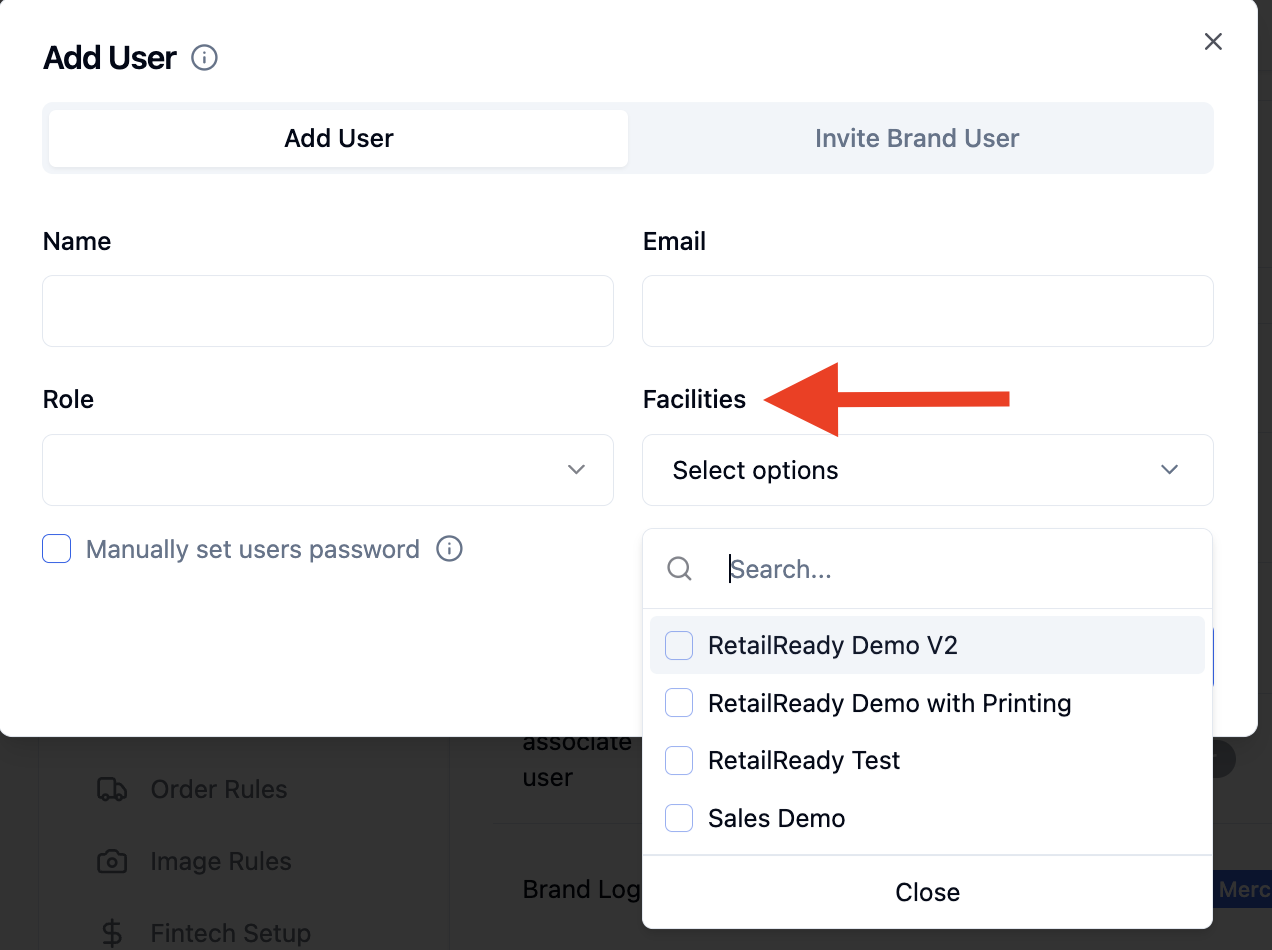
Select one or more facilities under the Facilities dropdown menu.
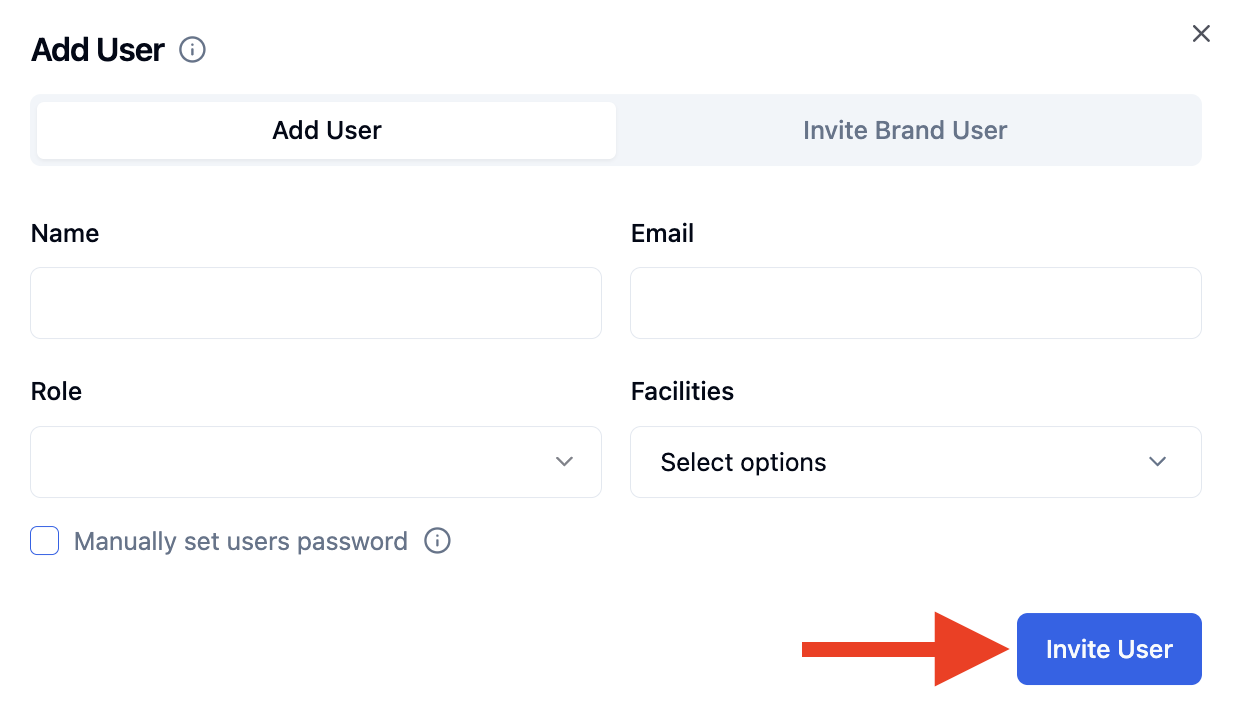
If 'Manually set user password' is left unchecked, the user will receive an email containing a one-time password and will be prompted to update it upon first login. If this option is selected, a password can be set manually during user creation.
Click 'Invite User' or 'Save' if manually set user password was checked.
3PL Users Roles & Permissions
RetailReady roles are designed to align system access with a user’s responsibilities within warehouse operations.
The Associate role is intended for execution-based users working within the tablet application to complete operational tasks.
The Lead role is designed for supervisors who require both operational visibility and the ability to manage day-to-day workflows.
The Admin role provides full system access and is intended for users responsible for configuration, oversight, and end-to-end operational control.
Access | Associate | Lead | Admin |
Tablet Application | ✅ | ✅ | ✅ |
View Dashboard | No | ✅ | ✅ |
Orders Dashboard | No | ✅ | ✅ |
Loads Dashboard | No | ✅ | ✅ |
Tablet Mode | No | ✅ | ✅ |
Analytics | No | ✅ | ✅ |
Fintech | No | No | ✅ |
Add/Edit Users | No | No | ✅ |
Tasks Assignments | No | ✅ | ✅ |
Email Automations | No | No | ✅ |
Workflow Creation | No | No | ✅ |
Add/Edit Item Master | No | No | ✅ |
Add/Standard Box Size | No | ✅ | ✅ |
Acknowledge Purchase Orders | No | ✅ | ✅ |
Enter Transportation Information | No | ✅ | ✅ |
Create Loads | No | ✅ | ✅ |
Delete Cartons | No | ✅ | ✅ |
Edit Carton / Pallet Details | No | No | ✅ |
Send ASN / Packed Signal to WMS | No | No | ✅ |
Create Custom Packout Instructions | No | No | ✅ |
How To Add A Brand User in RetailReady?
Navigate to the 'Settings' Tab on the left-hand navigation panel of RetailReady.
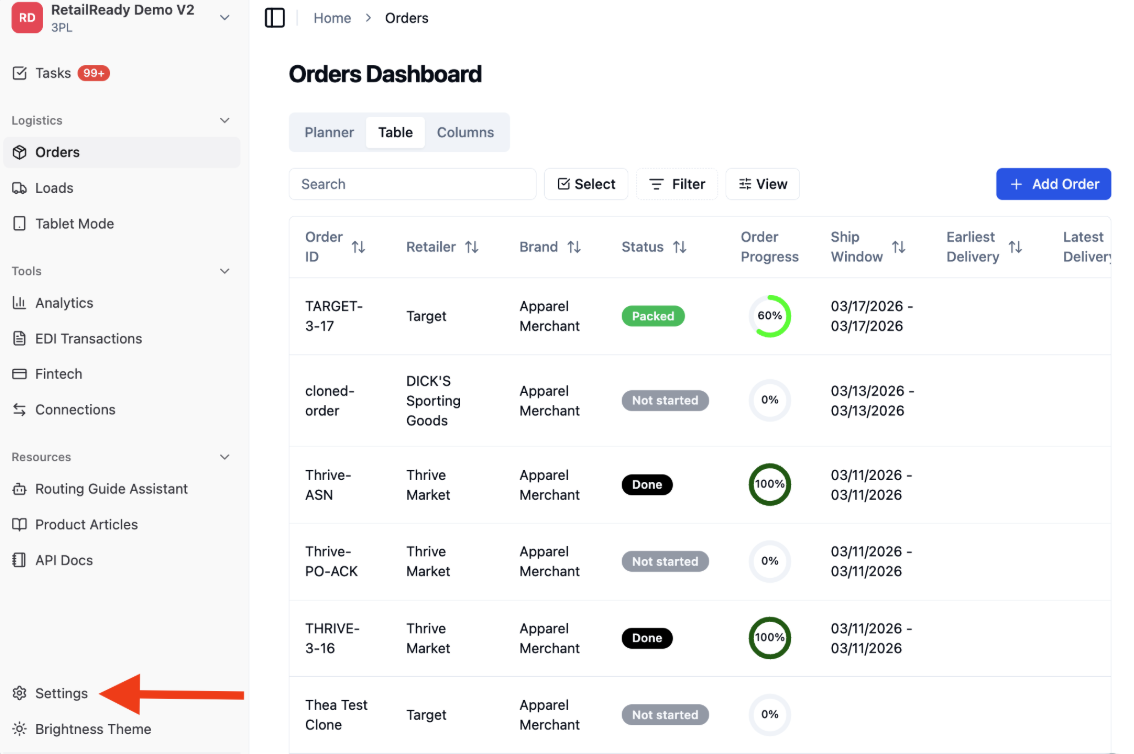
Under the General section, select 'Organization'.
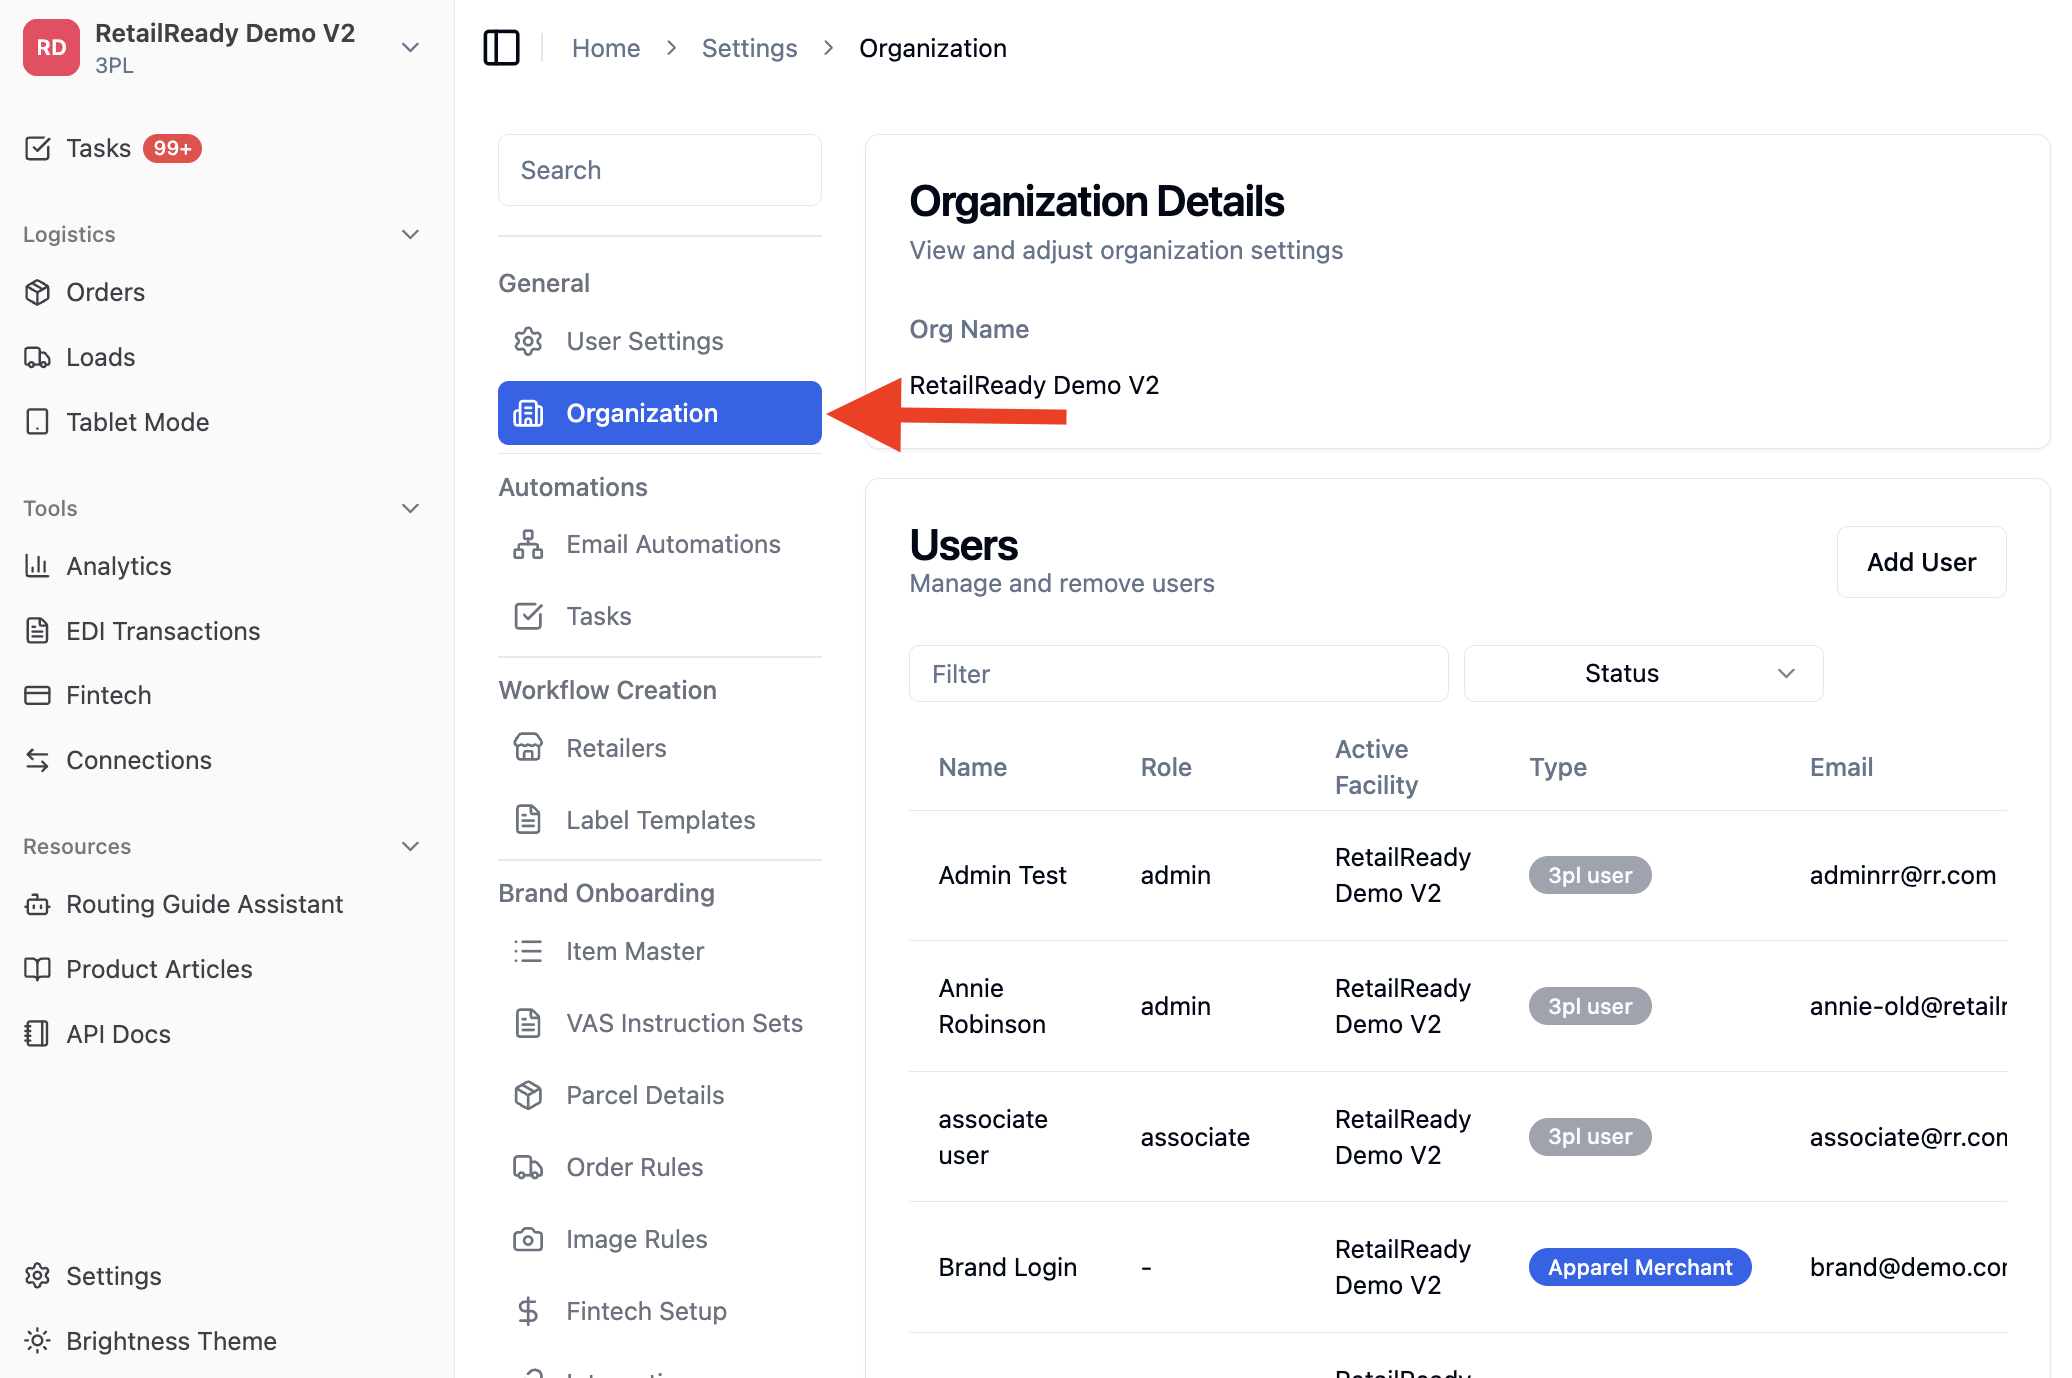
Select 'Add User' to begin creating a new user.
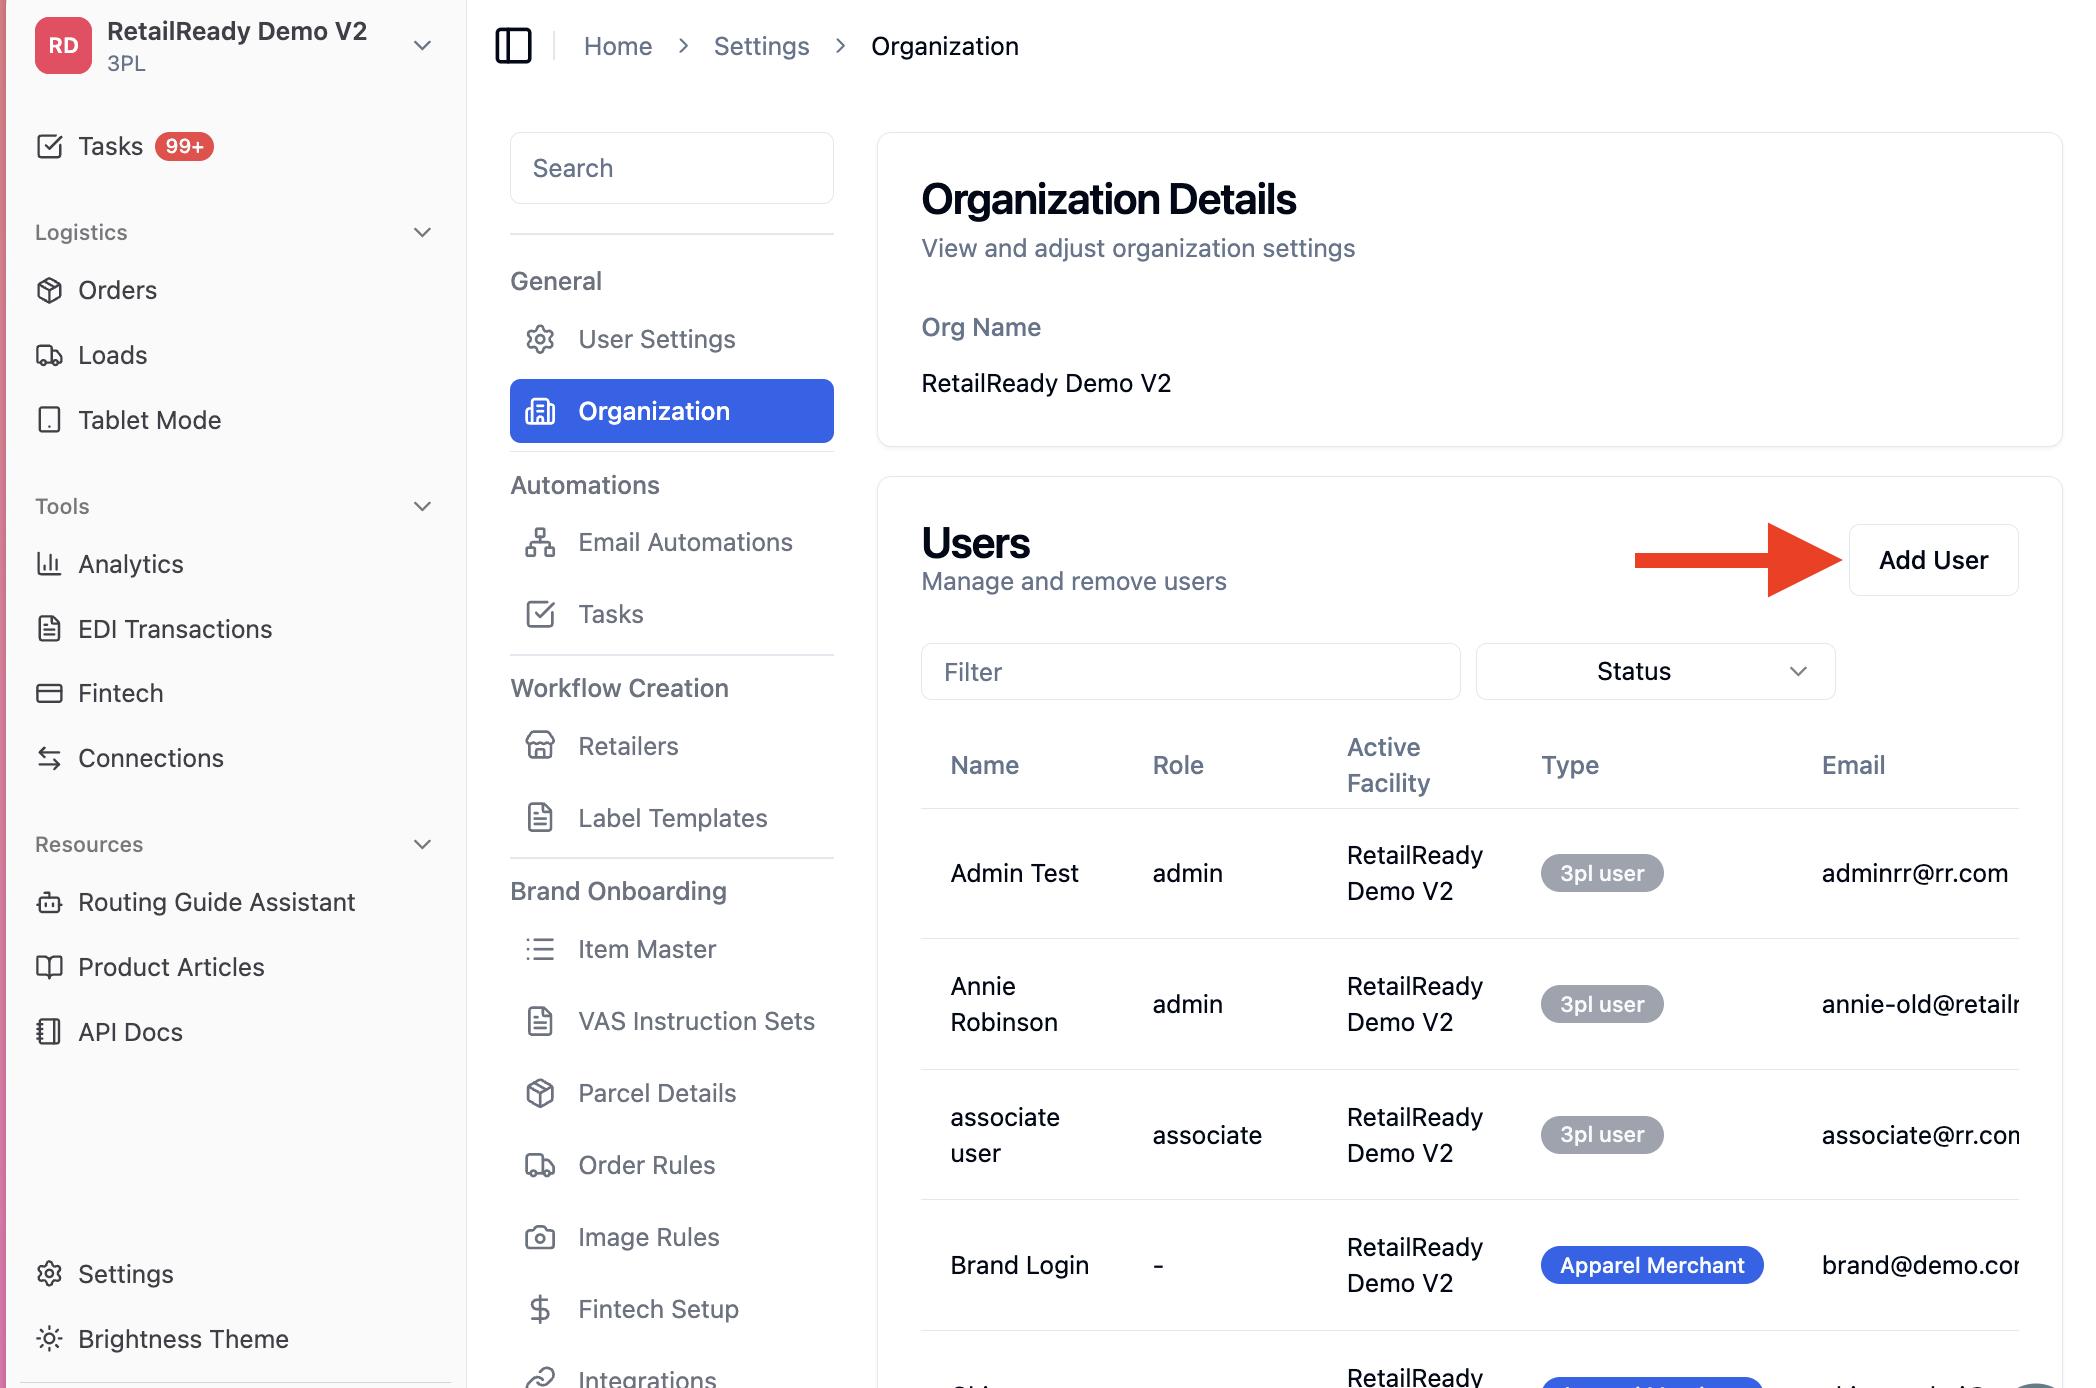
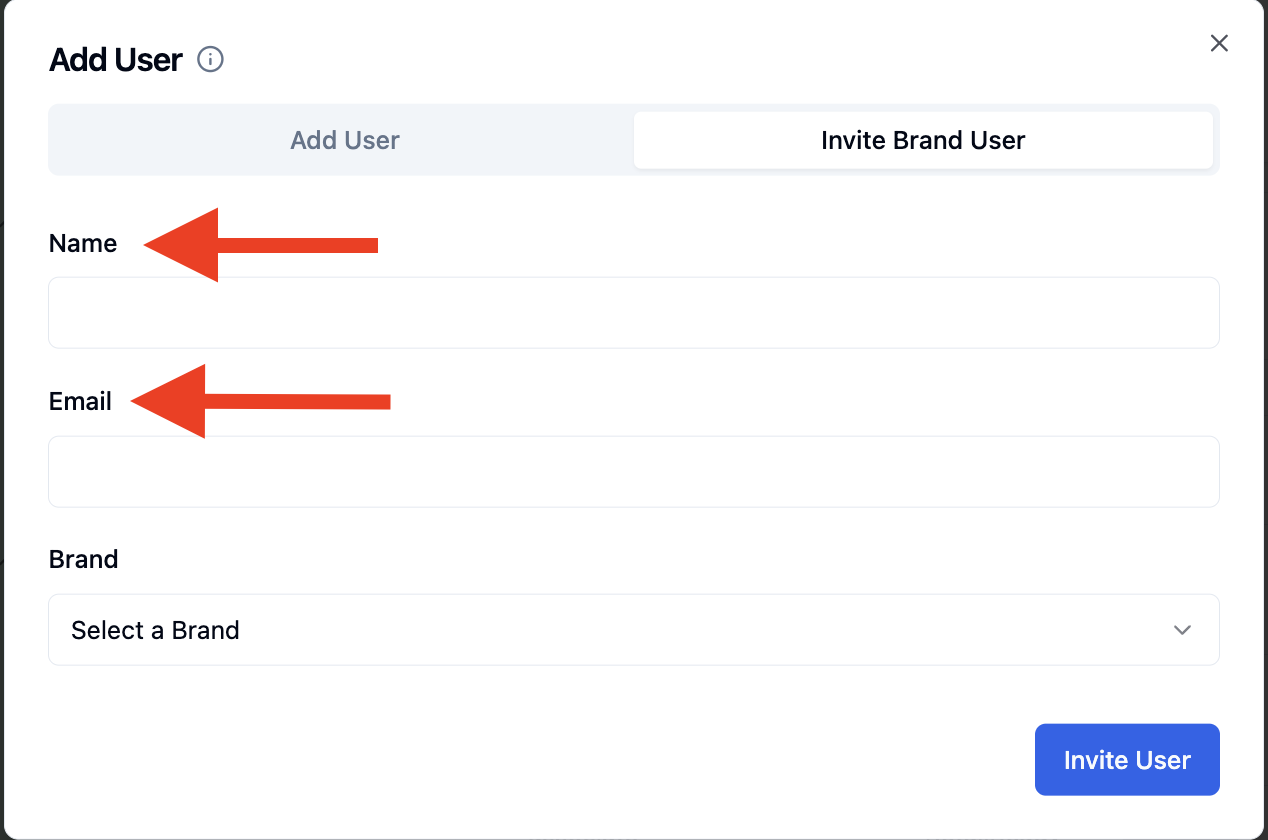
Select 'Invite Brand User' tab to create a brand user.
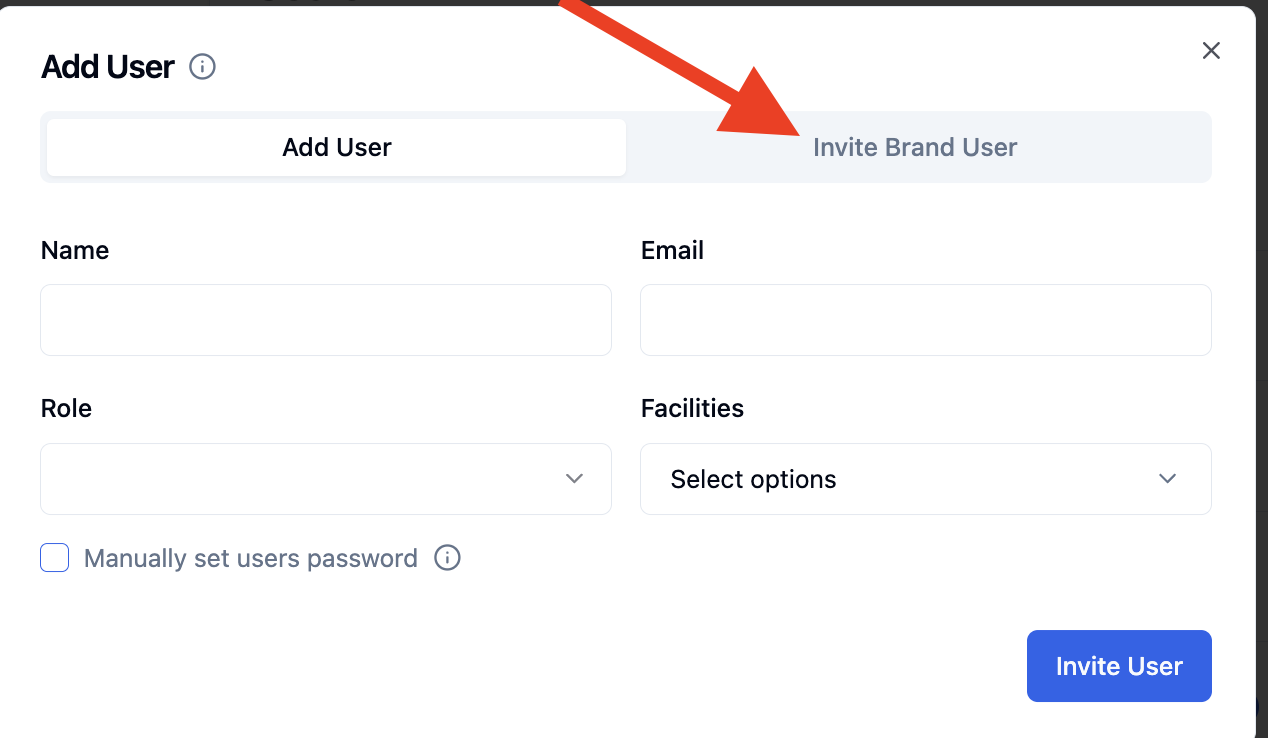
Enter the user’s name and email address in the appropriate fields.
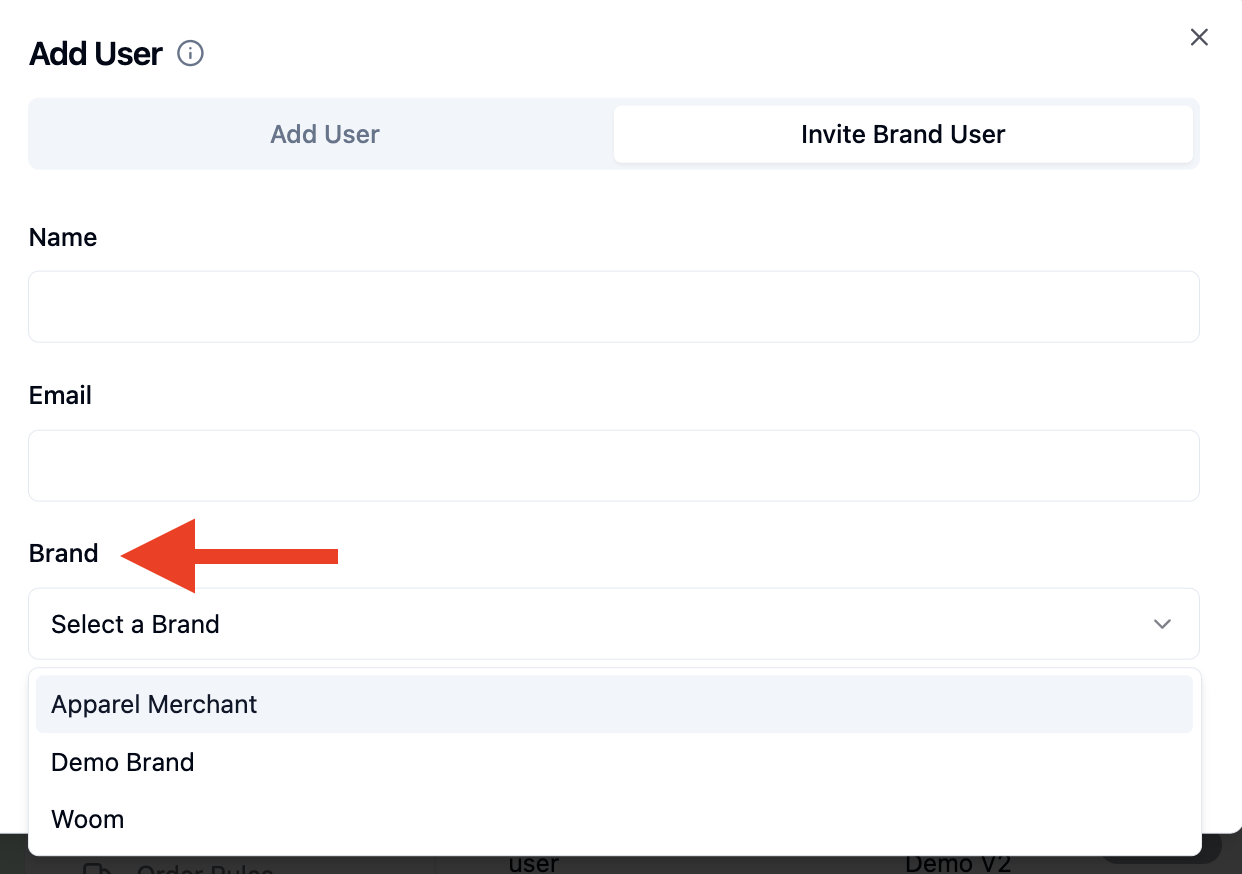
Select the brand from the Brand dropdown menu.
Click 'Invite User'.
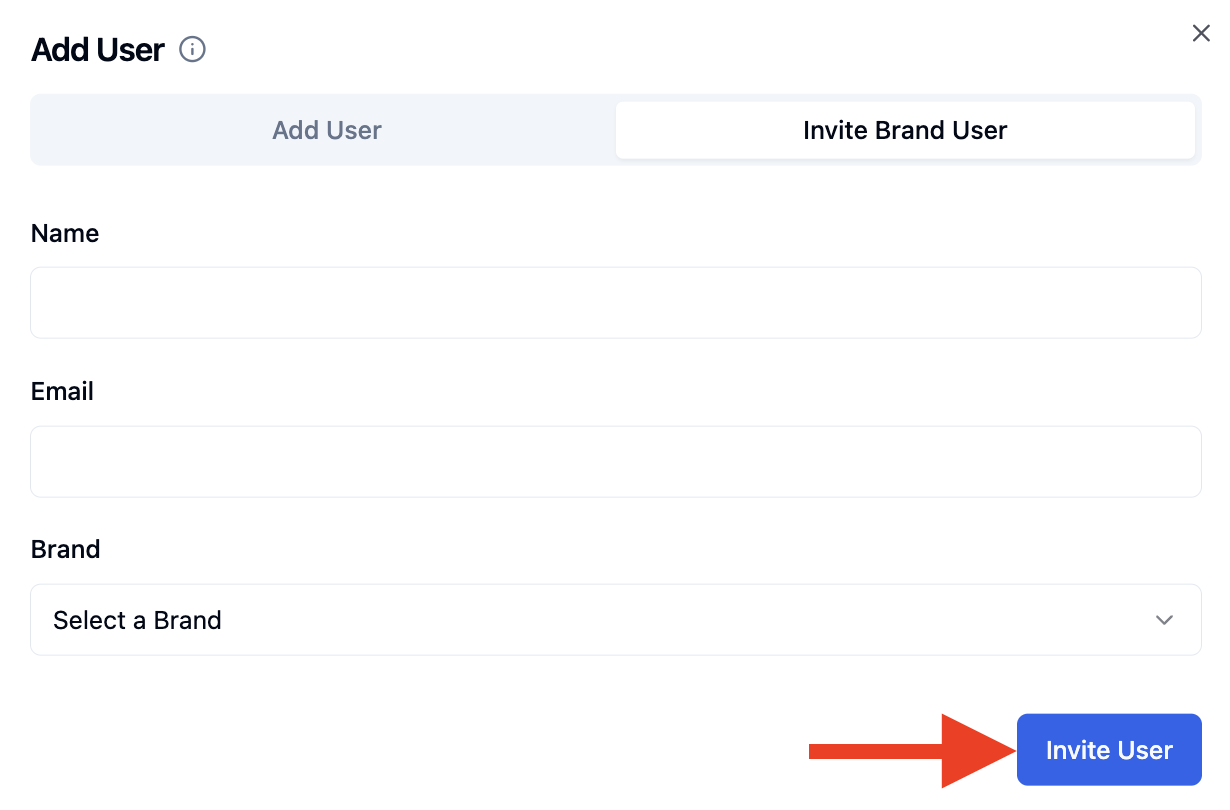
The user will receive an email containing a one-time password and will be prompted to update it upon first login.
Associate Login QR Code Labels
The Associate Login QR Code allows user who are associate role to quickly log into RetailReady by scanning a QR code instead of manually entering credentials.
How Do I Print an Associate Login QR Code?
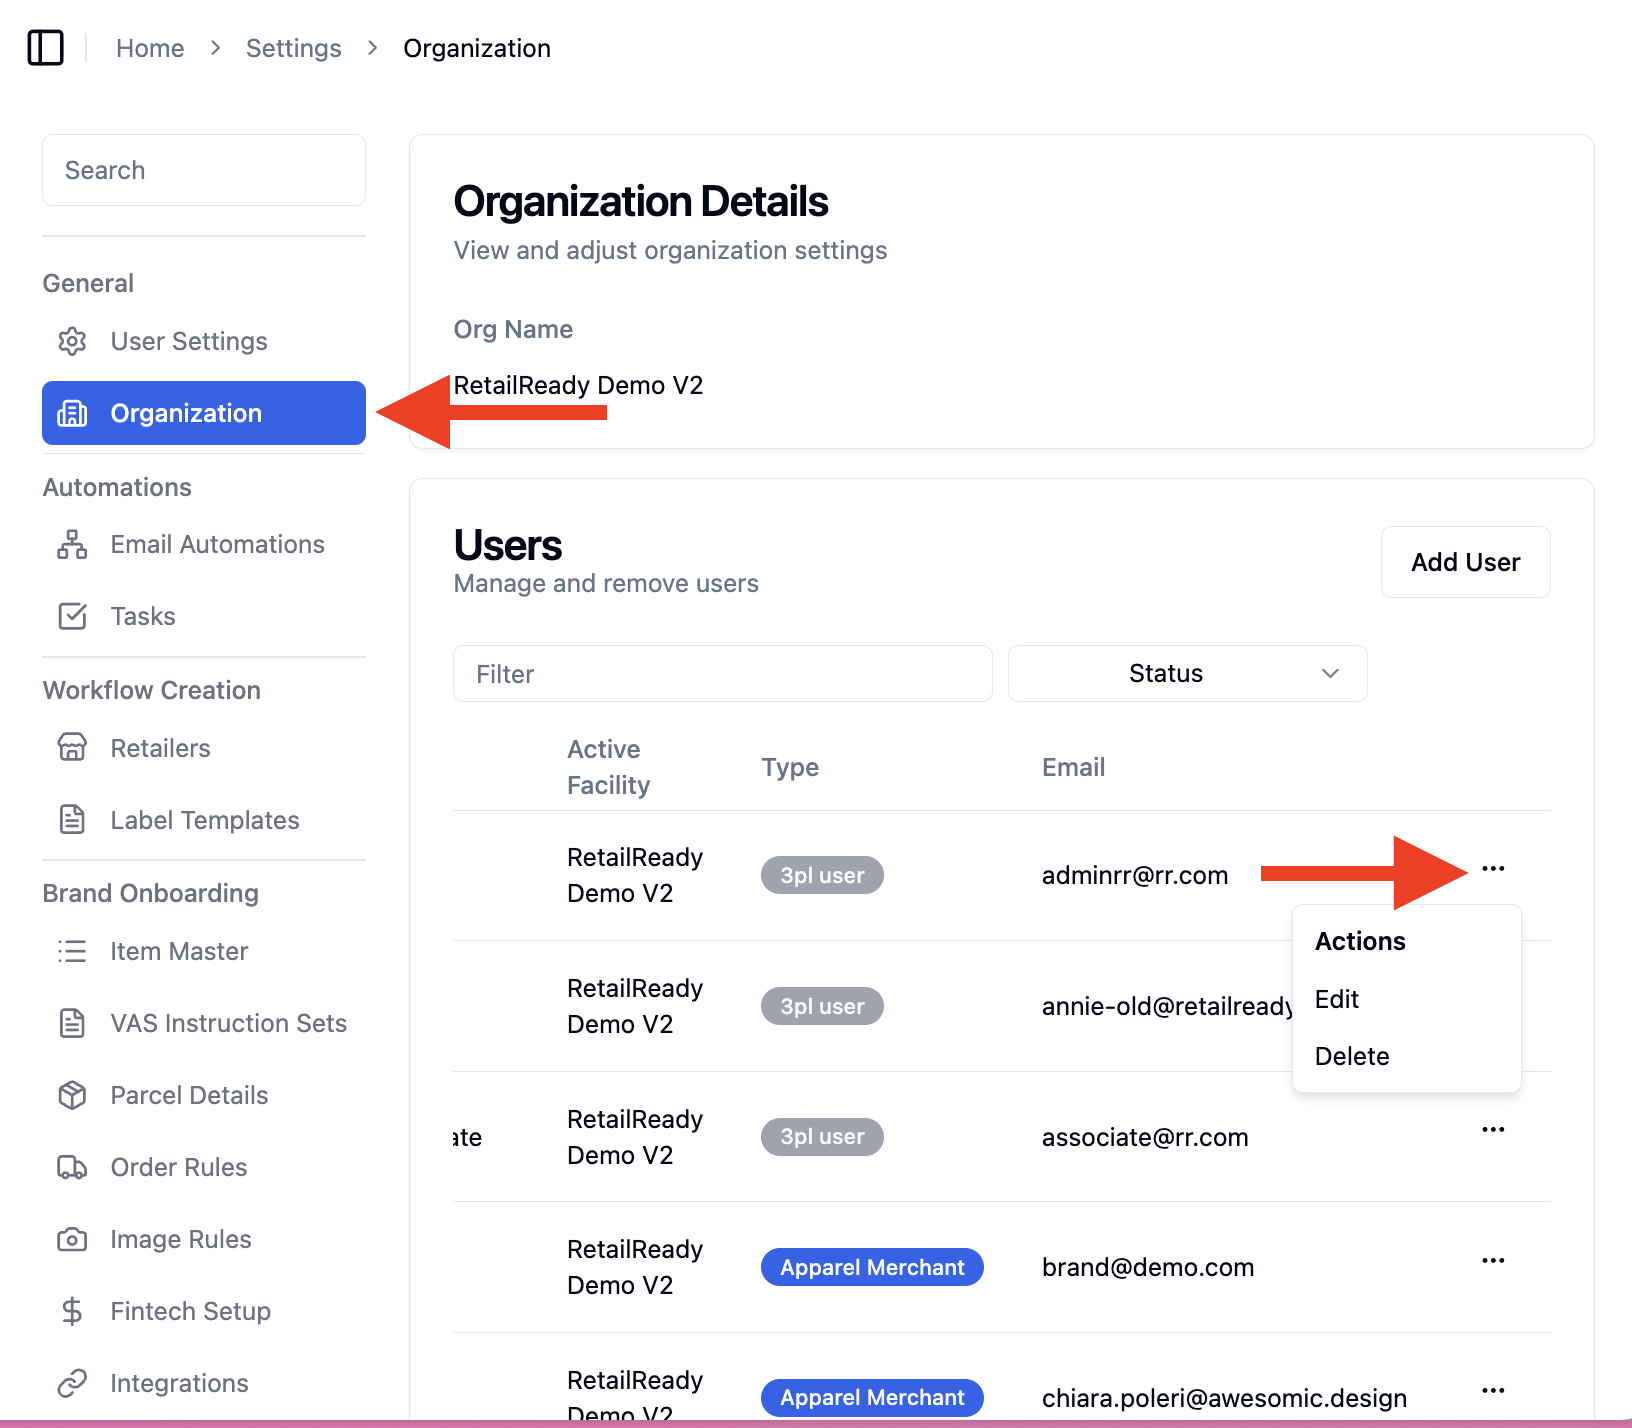
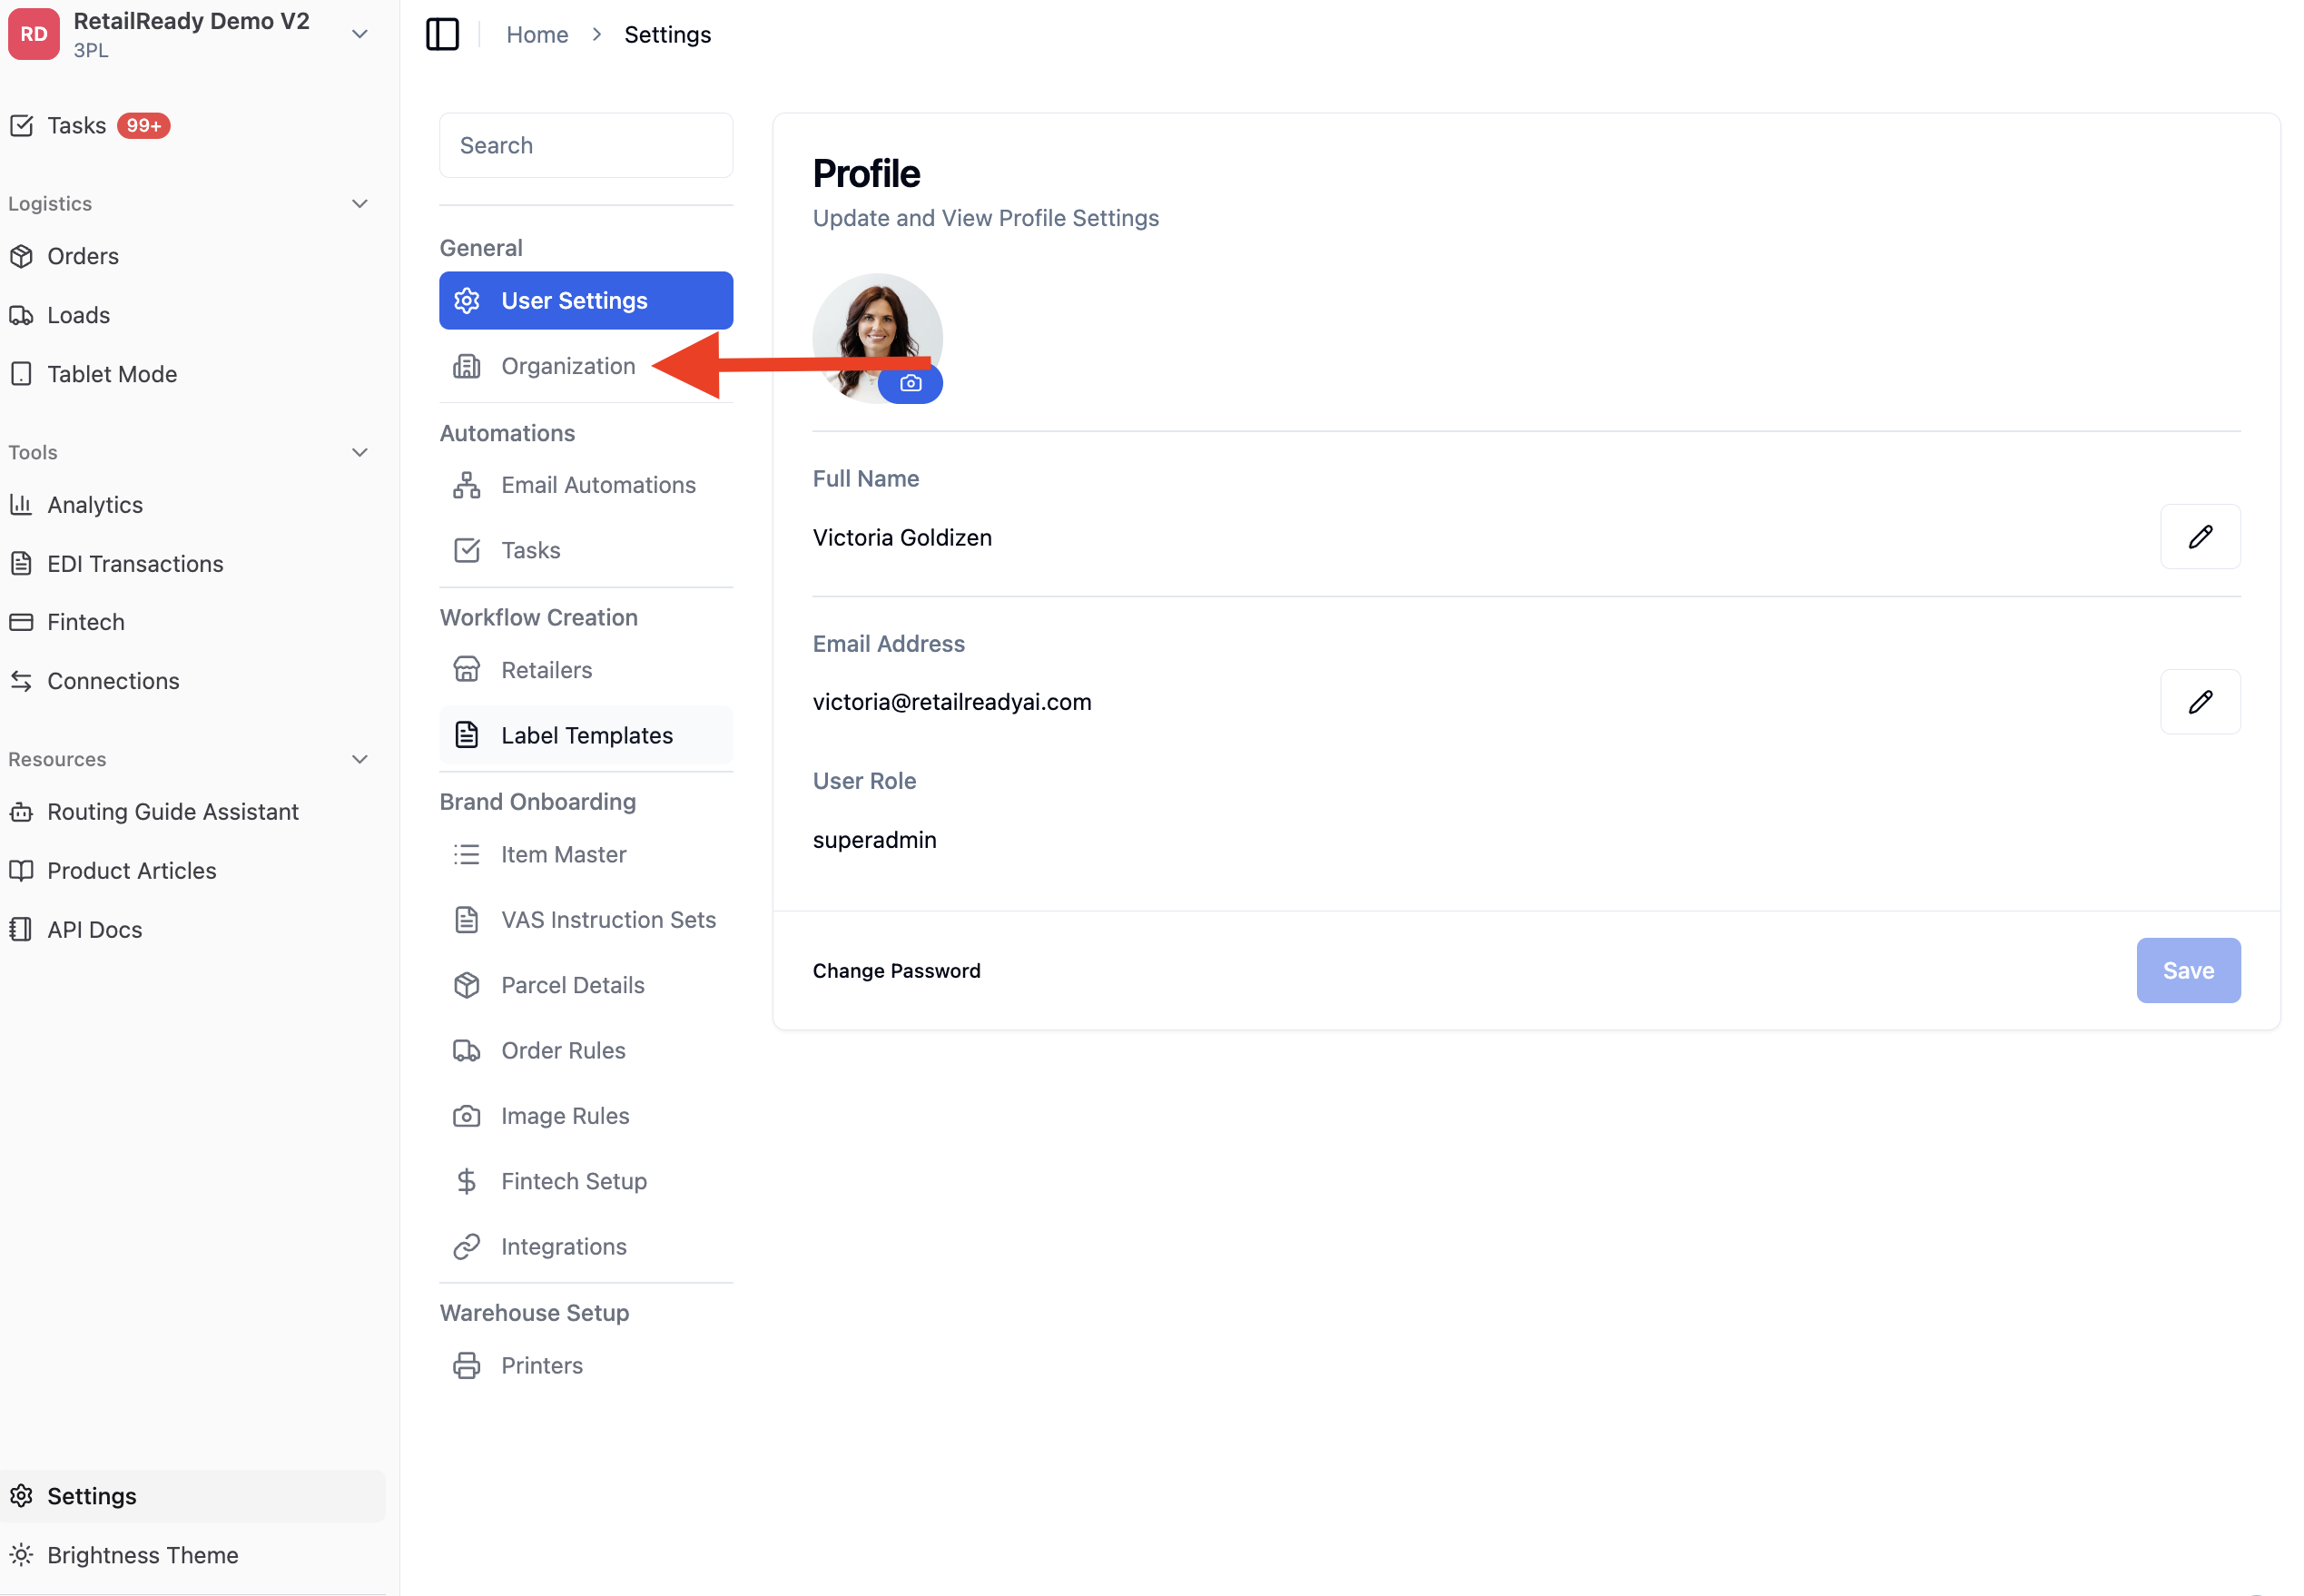
Navigate to the 'Settings' tab on the left-side navigation panel.
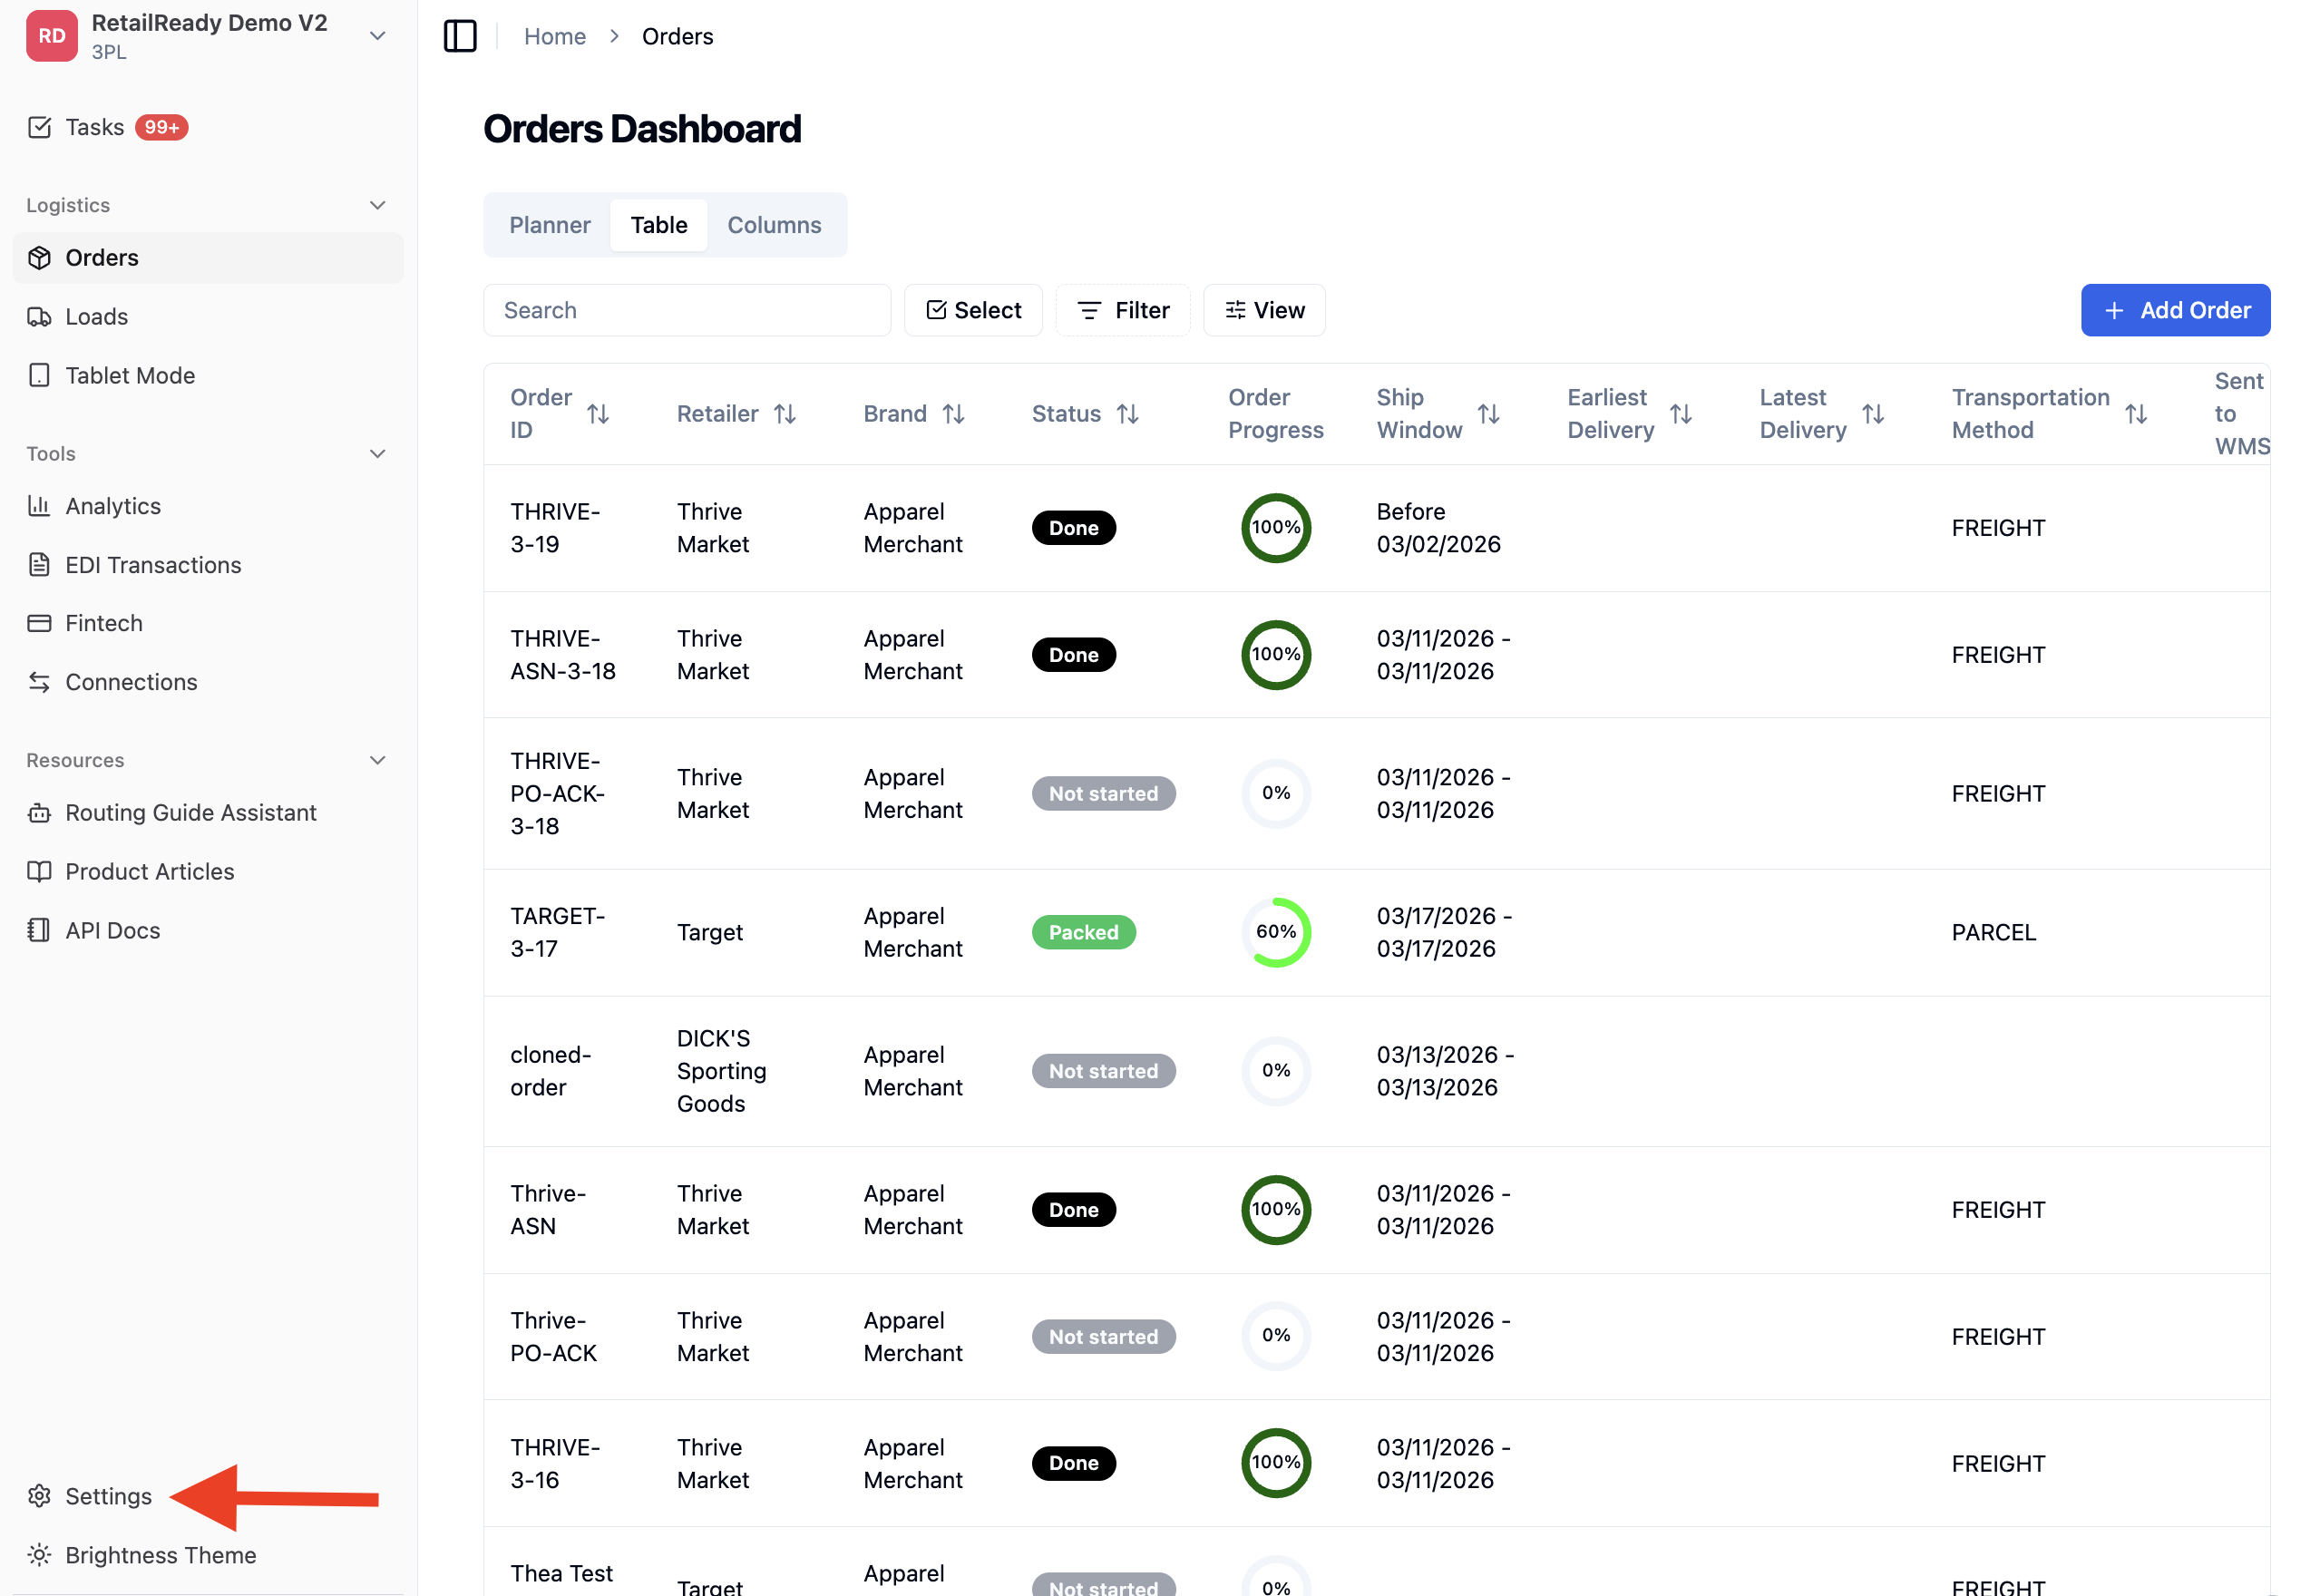
Click into 'Organization'.
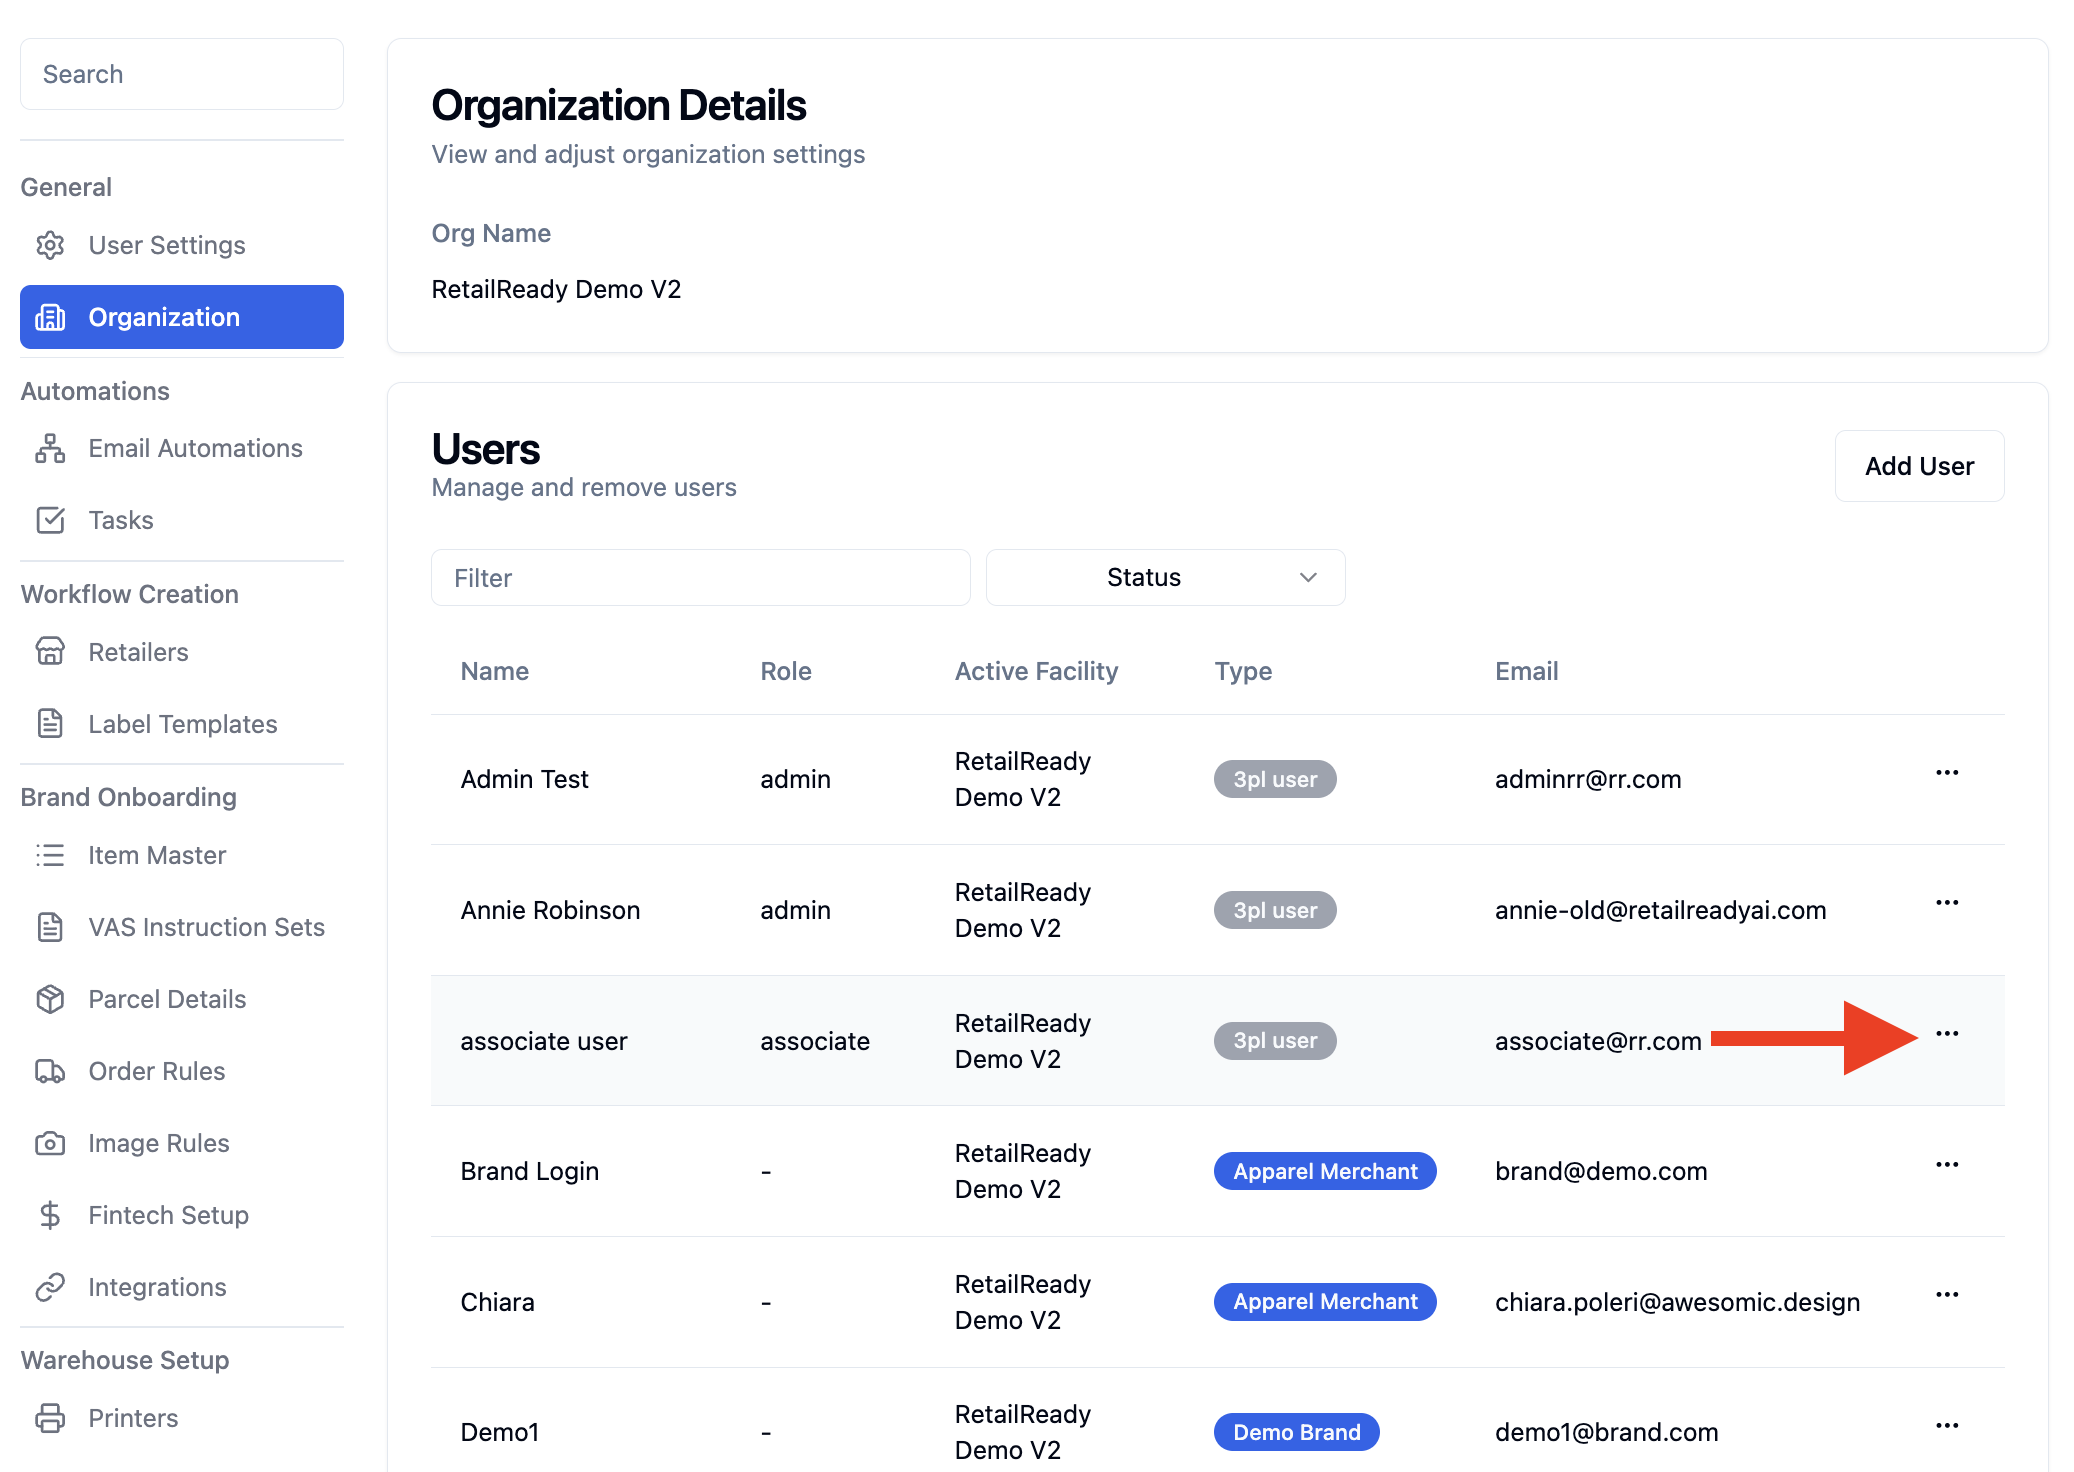
Locate the associate in the user list.
Click the three dots on the right side of the user.
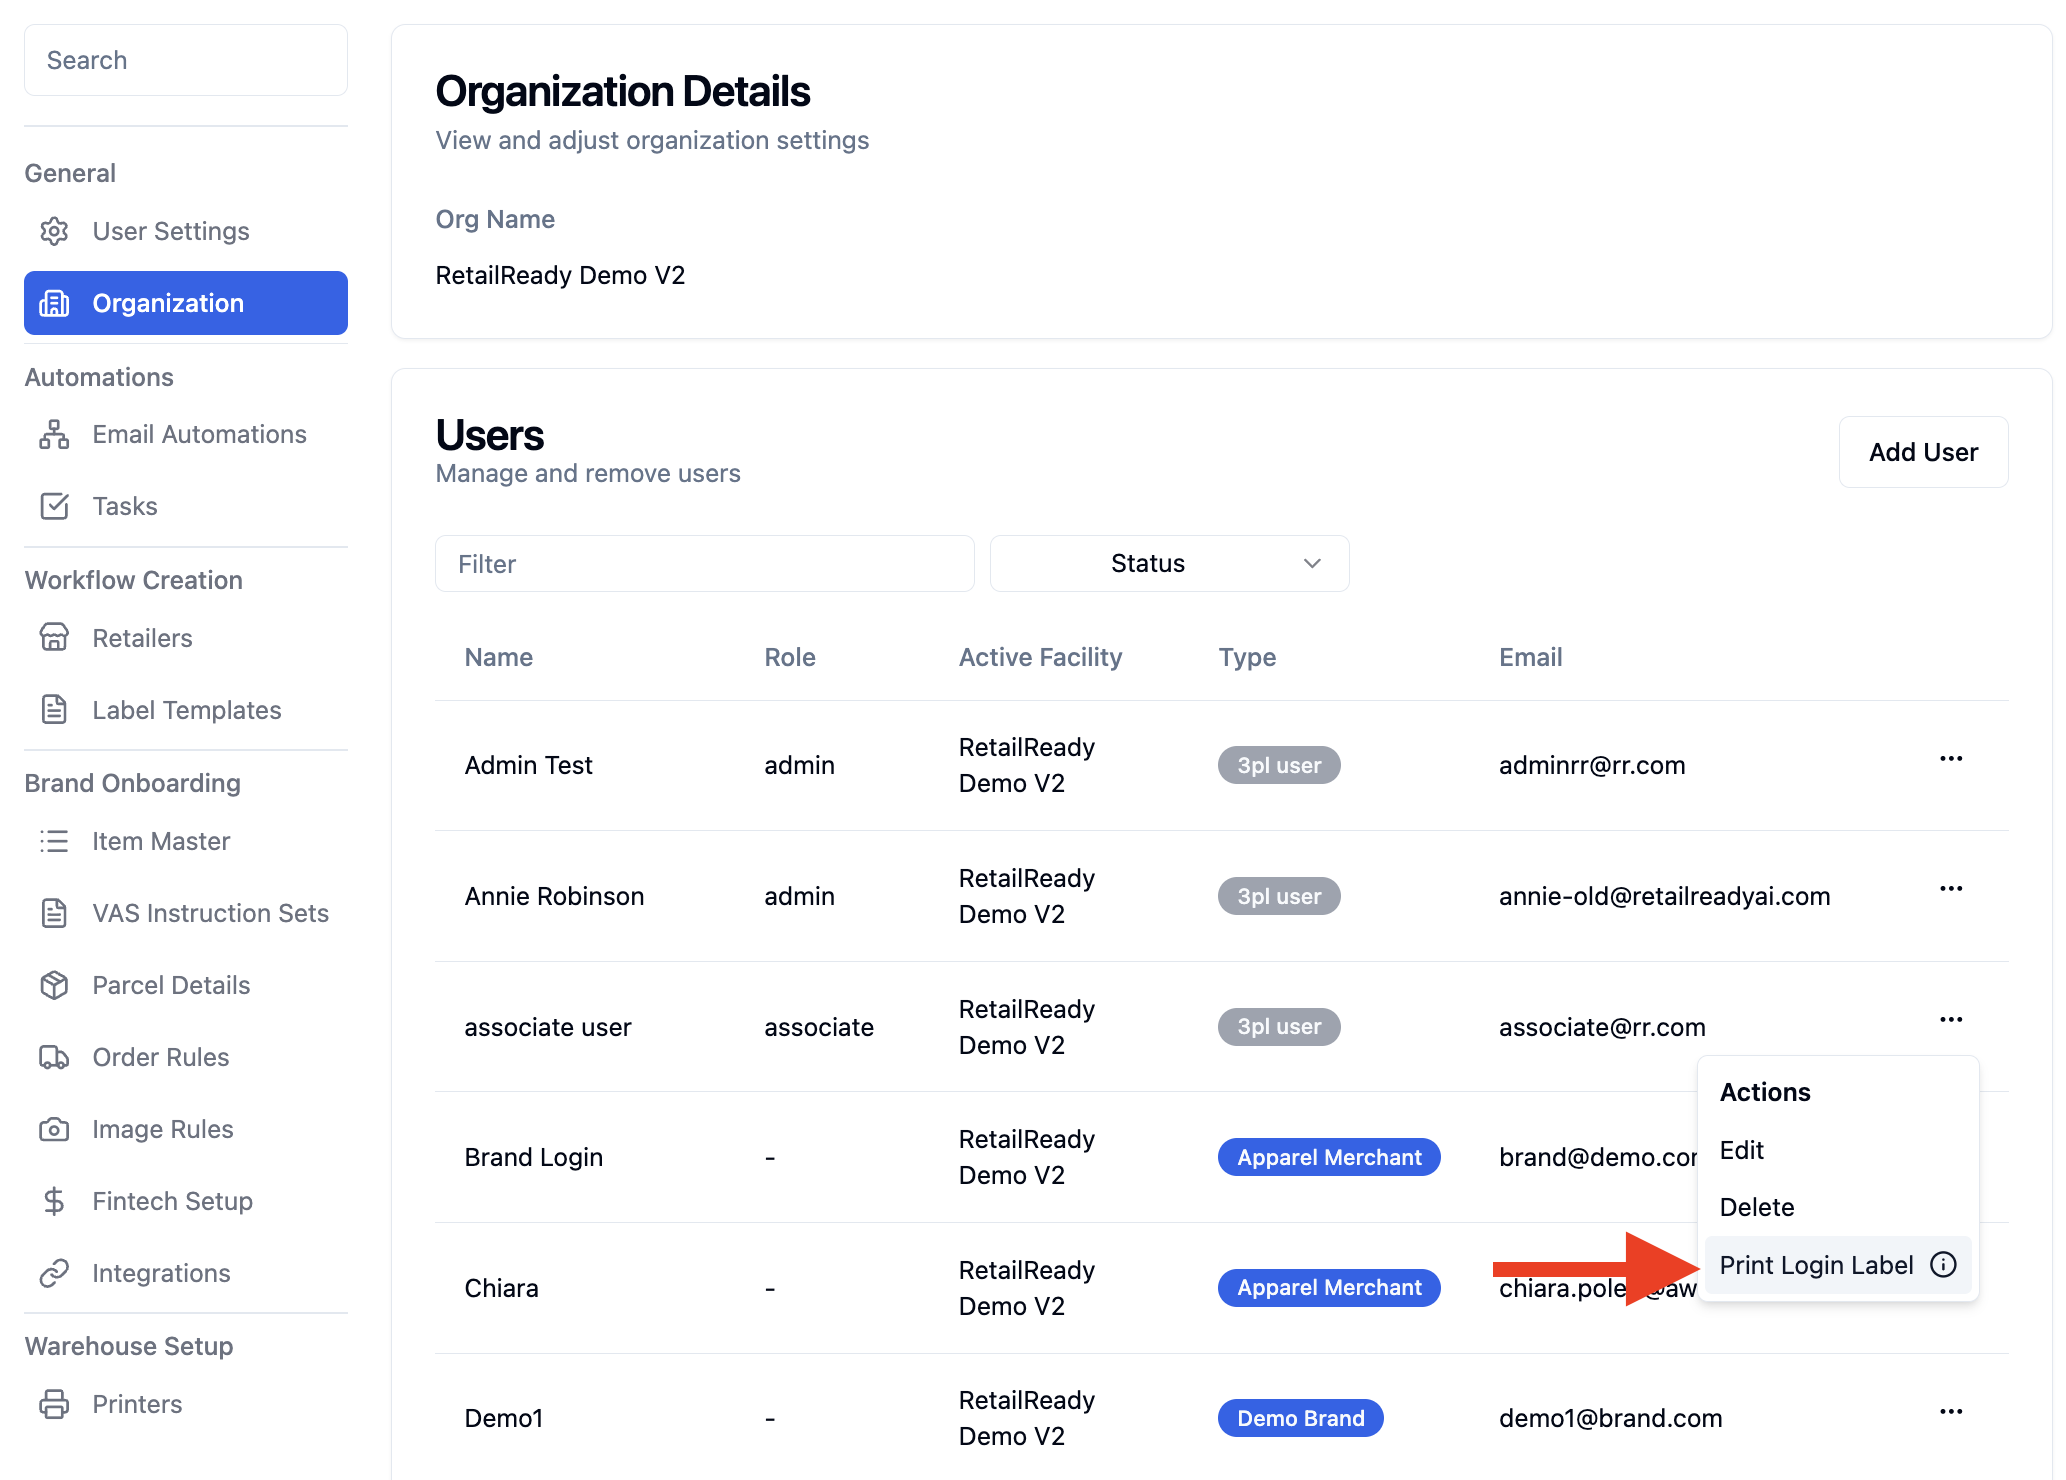
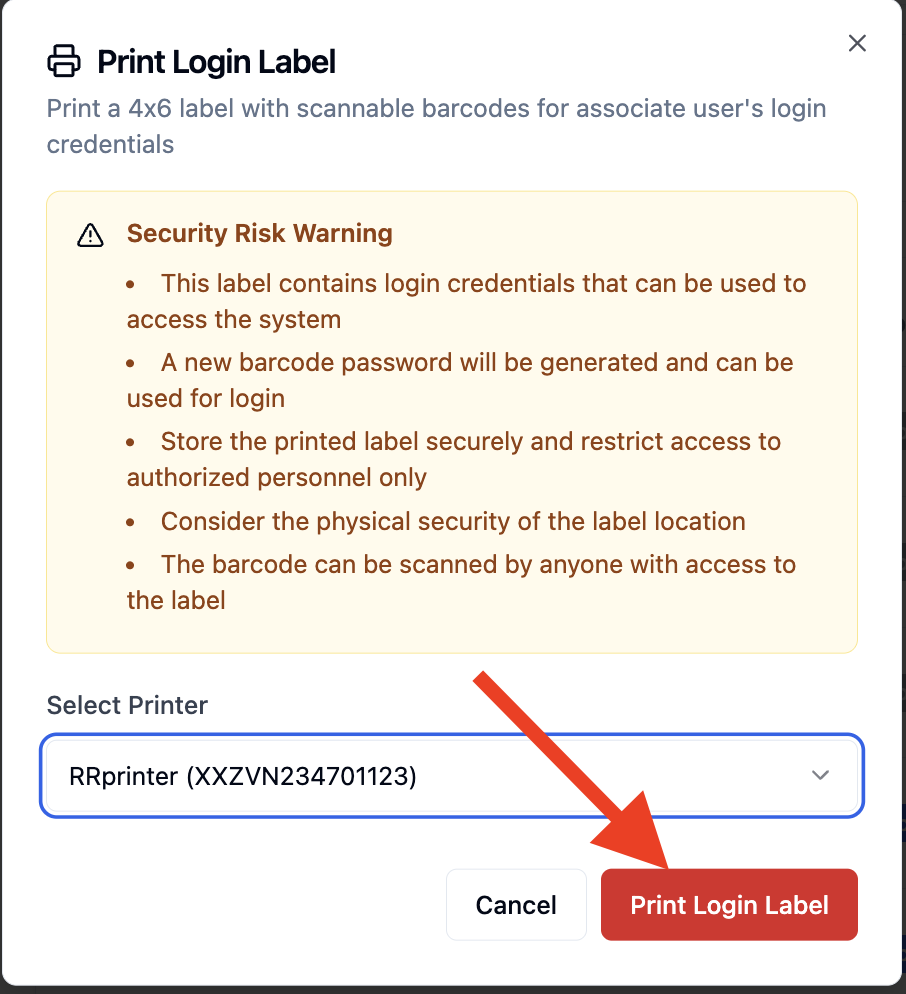
Select 'Print Login Label'.
Select printer using the dropdown menu.
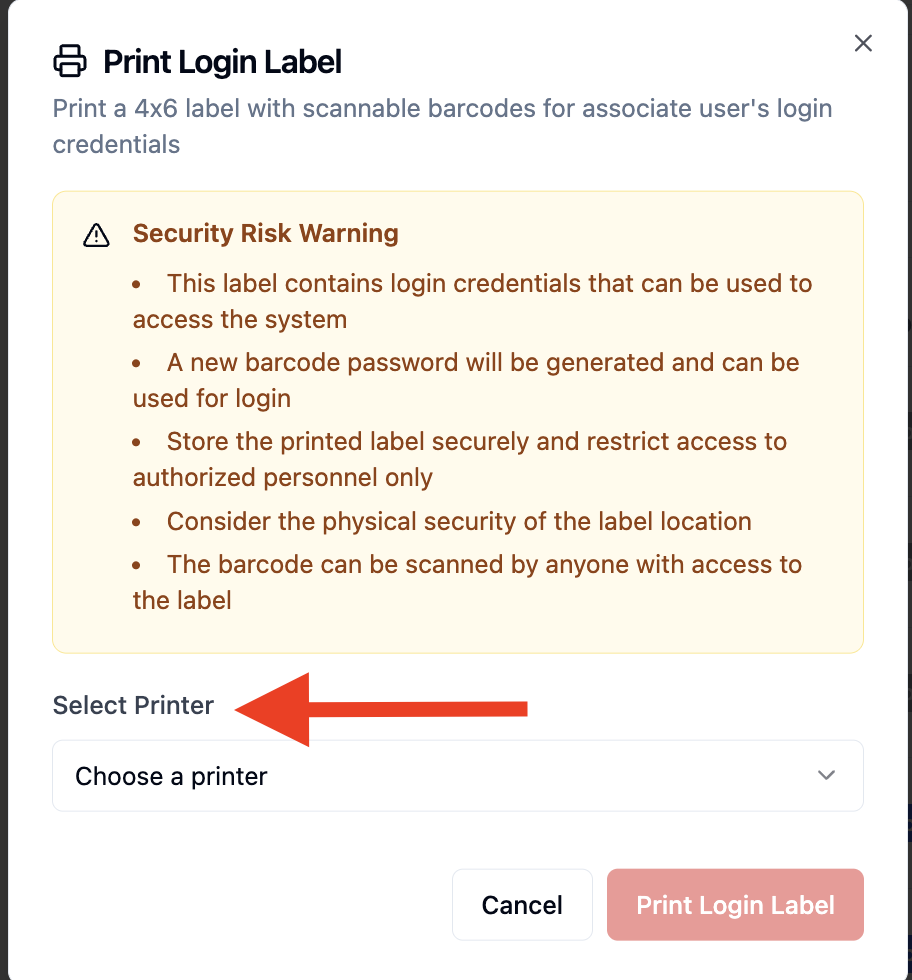
Click 'Print Login Label' to generate a printable QR code label for that associate
Brand vs 3PL User Capabilities
Order Dashboard
Capability | Brand | 3PL Admin User |
View all orders & details | ✅ | ✅ |
Planner view | ✅ | ✅ |
View carton / pallet/ documents images | ✅ | ✅ |
Generate Compliance Report | ✅ | ✅ |
Enter Transportation Info | ✅ | ✅ |
View Order Logs | ✅ | ✅ |
Place Order On Hold (pre-start) | ✅ | ✅ |
Edit Order (pre-start) | ✅ | ✅ |
Add Tags / Comments / Attachments | ✅ | ✅ |
Set Staged By and Pickup Date | ✅ | ✅ |
Cancel Order (pre-start) | ✅ | ✅ |
Send ASN | No | ✅ |
Send Shipment Confirmation | No | ✅ |
View / Download Packing Slip | No | ✅ |
Edit Order (post-start → before load) | No | ✅ |
Cancel Order (before ASN) | No | ✅ |
Cartons:
| No | ✅ |
Pallets:
| No | ✅ |
Loads Dashboard
Capability | Brand User | 3PL User |
View BOL & Pallet Images | ✅ | ✅ |
View Orders / Pallets on Load | ✅ | ✅ |
View Created By / Loaded By / Timestamp | ✅ | ✅ |
Create Load | No | ✅ |
Add / Remove Orders from Load | No | ✅ |
Edit Trailer / Auditor | No | ✅ |
FAQs:
Can a user access multiple facilities?
Yes, 3PL users can be assigned to multiple facilities during setup, allowing access across multiple warehouse locations.
How does a new user receive login credentials?
If a password is not manually set, the user will receive an email with a one-time password and will be prompted to update it upon first login.
Can I update a user’s role or access after creation?
Yes, user roles and access can be updated at any time by navigating to Organization under settings, locating the user, selecting the three dots, and choosing Edit or Delete.