How to Connect QuickBooks to RetailReady
Last updated: April 22, 2026
RetailReady's QuickBooks integration allows Brands to sync their order directly with their QuickBooks account. By connecting the two platforms and mapping your SKUs to QuickBooks items, you can keep your financial and fulfillment records in sync, reducing manual data entry and the risk of errors.
How to connect QuickBooks
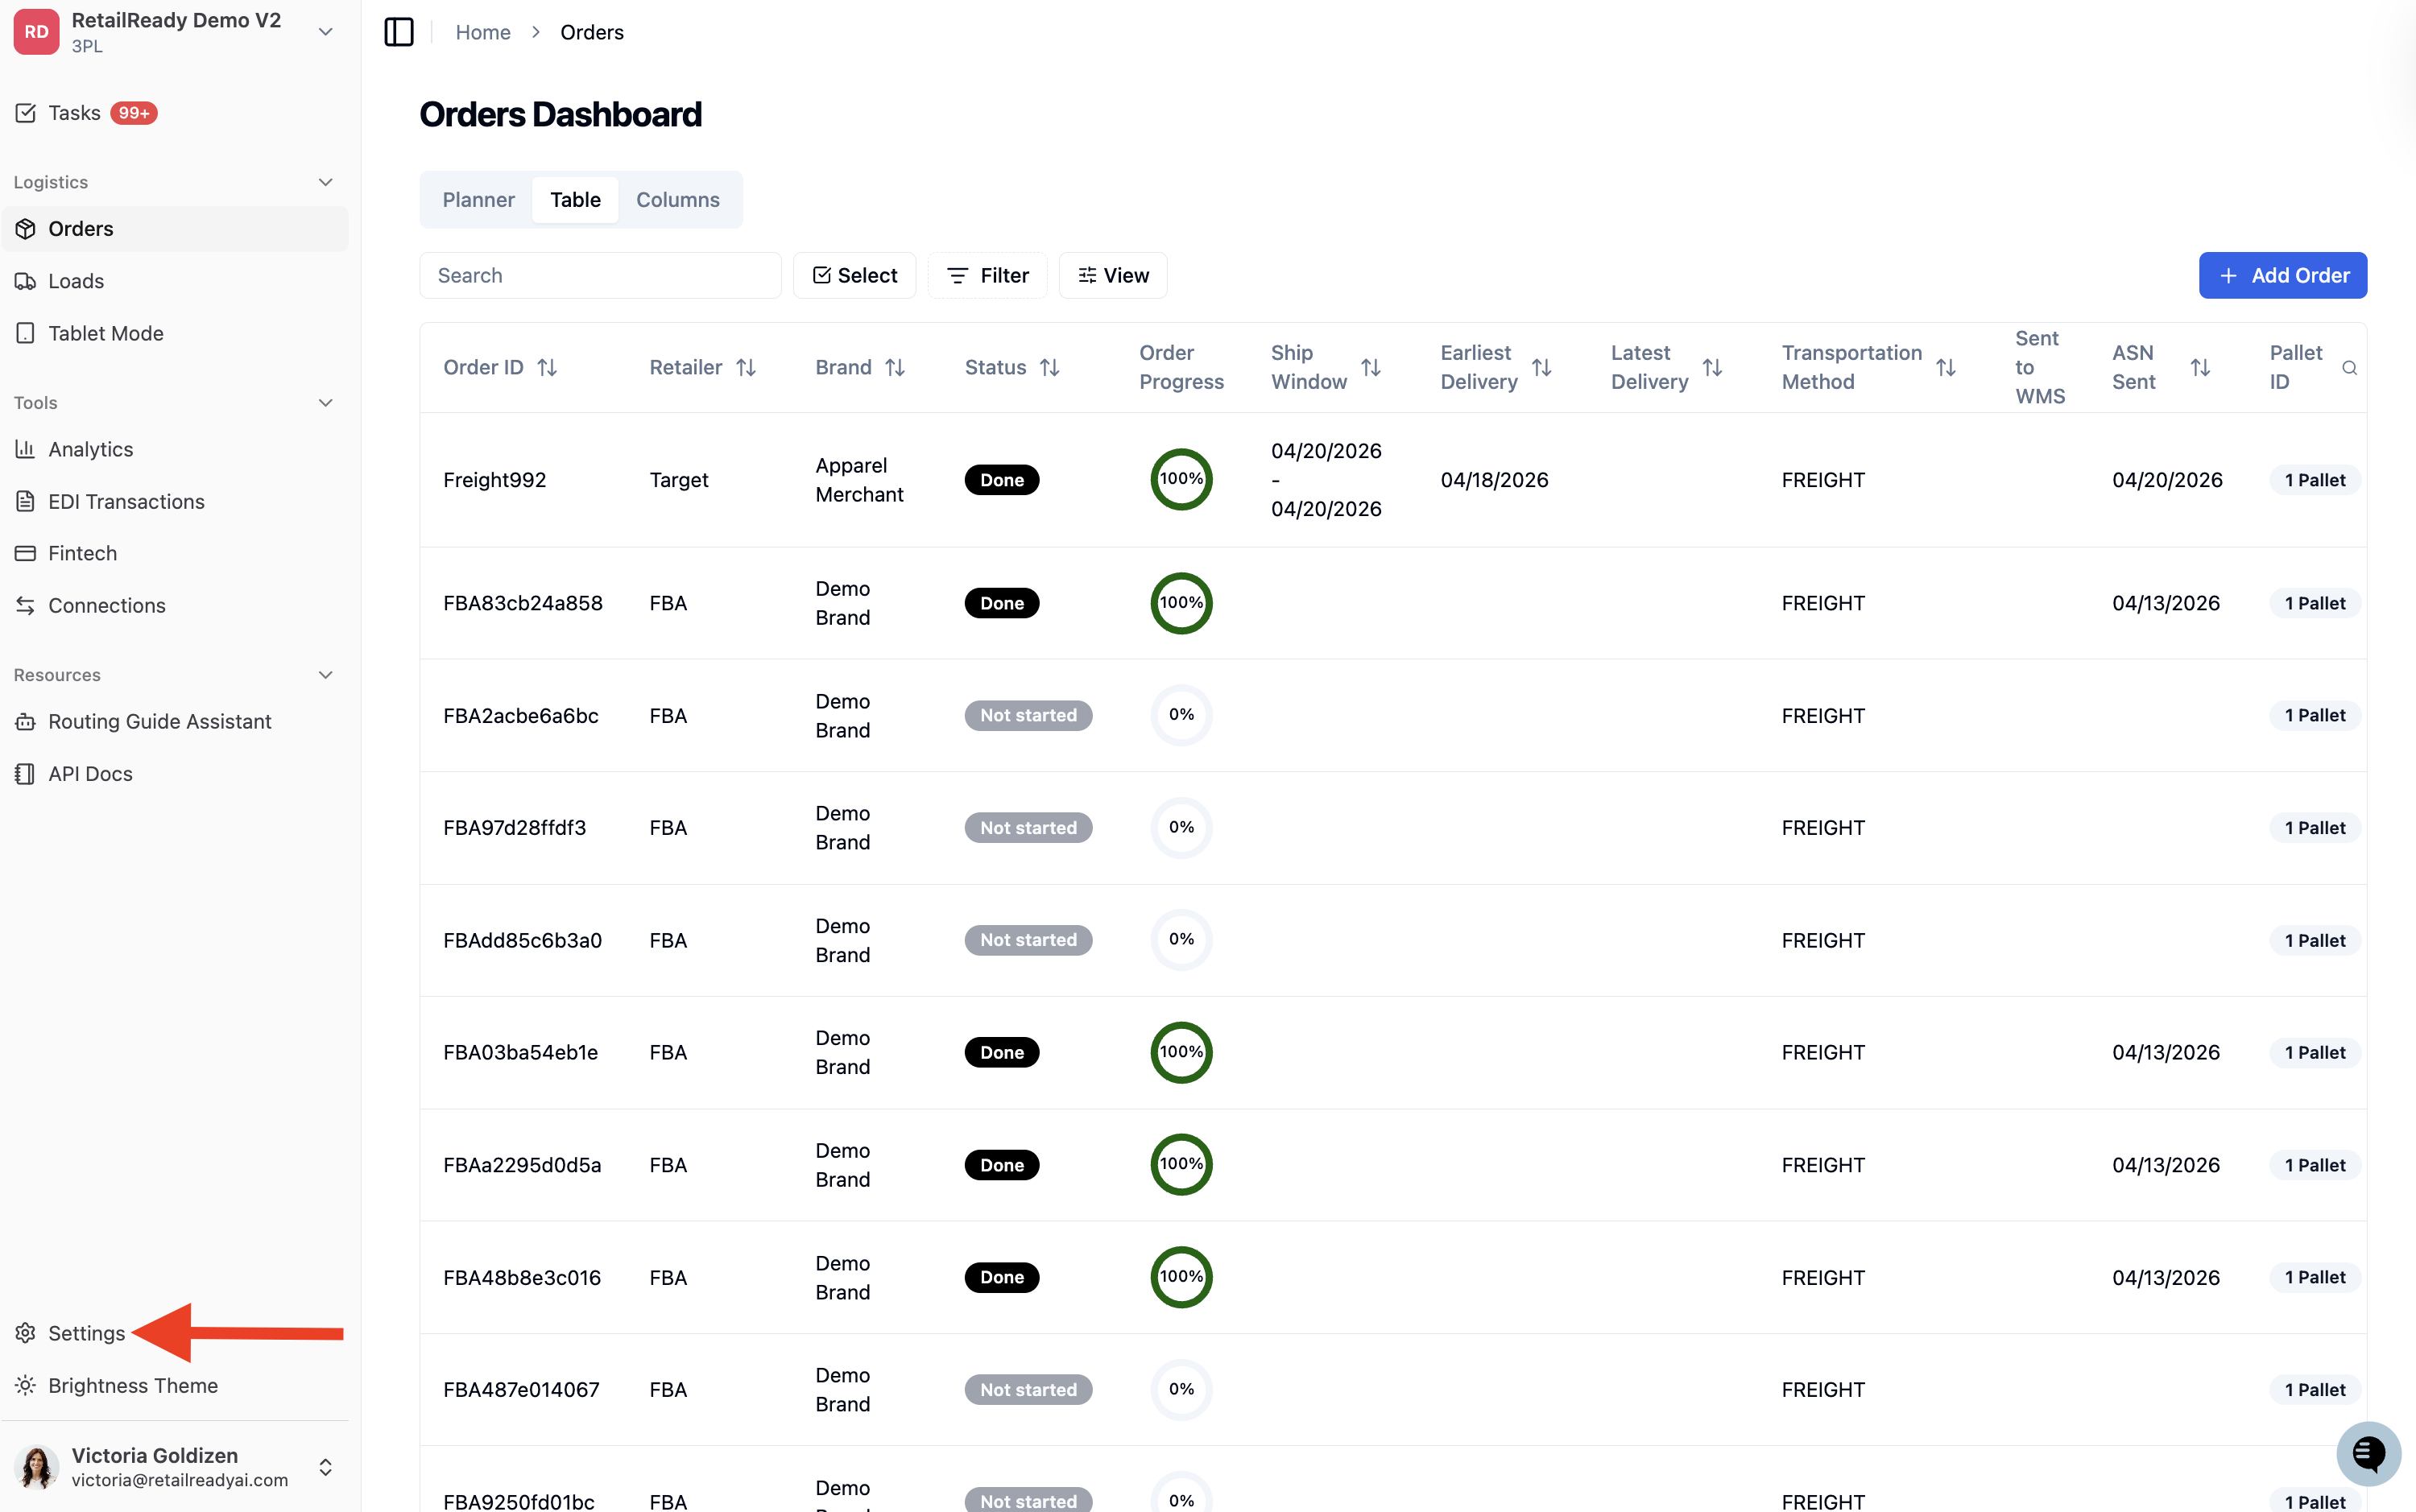
From the left-hand navigation, click 'Settings' at the bottom of the sidebar.
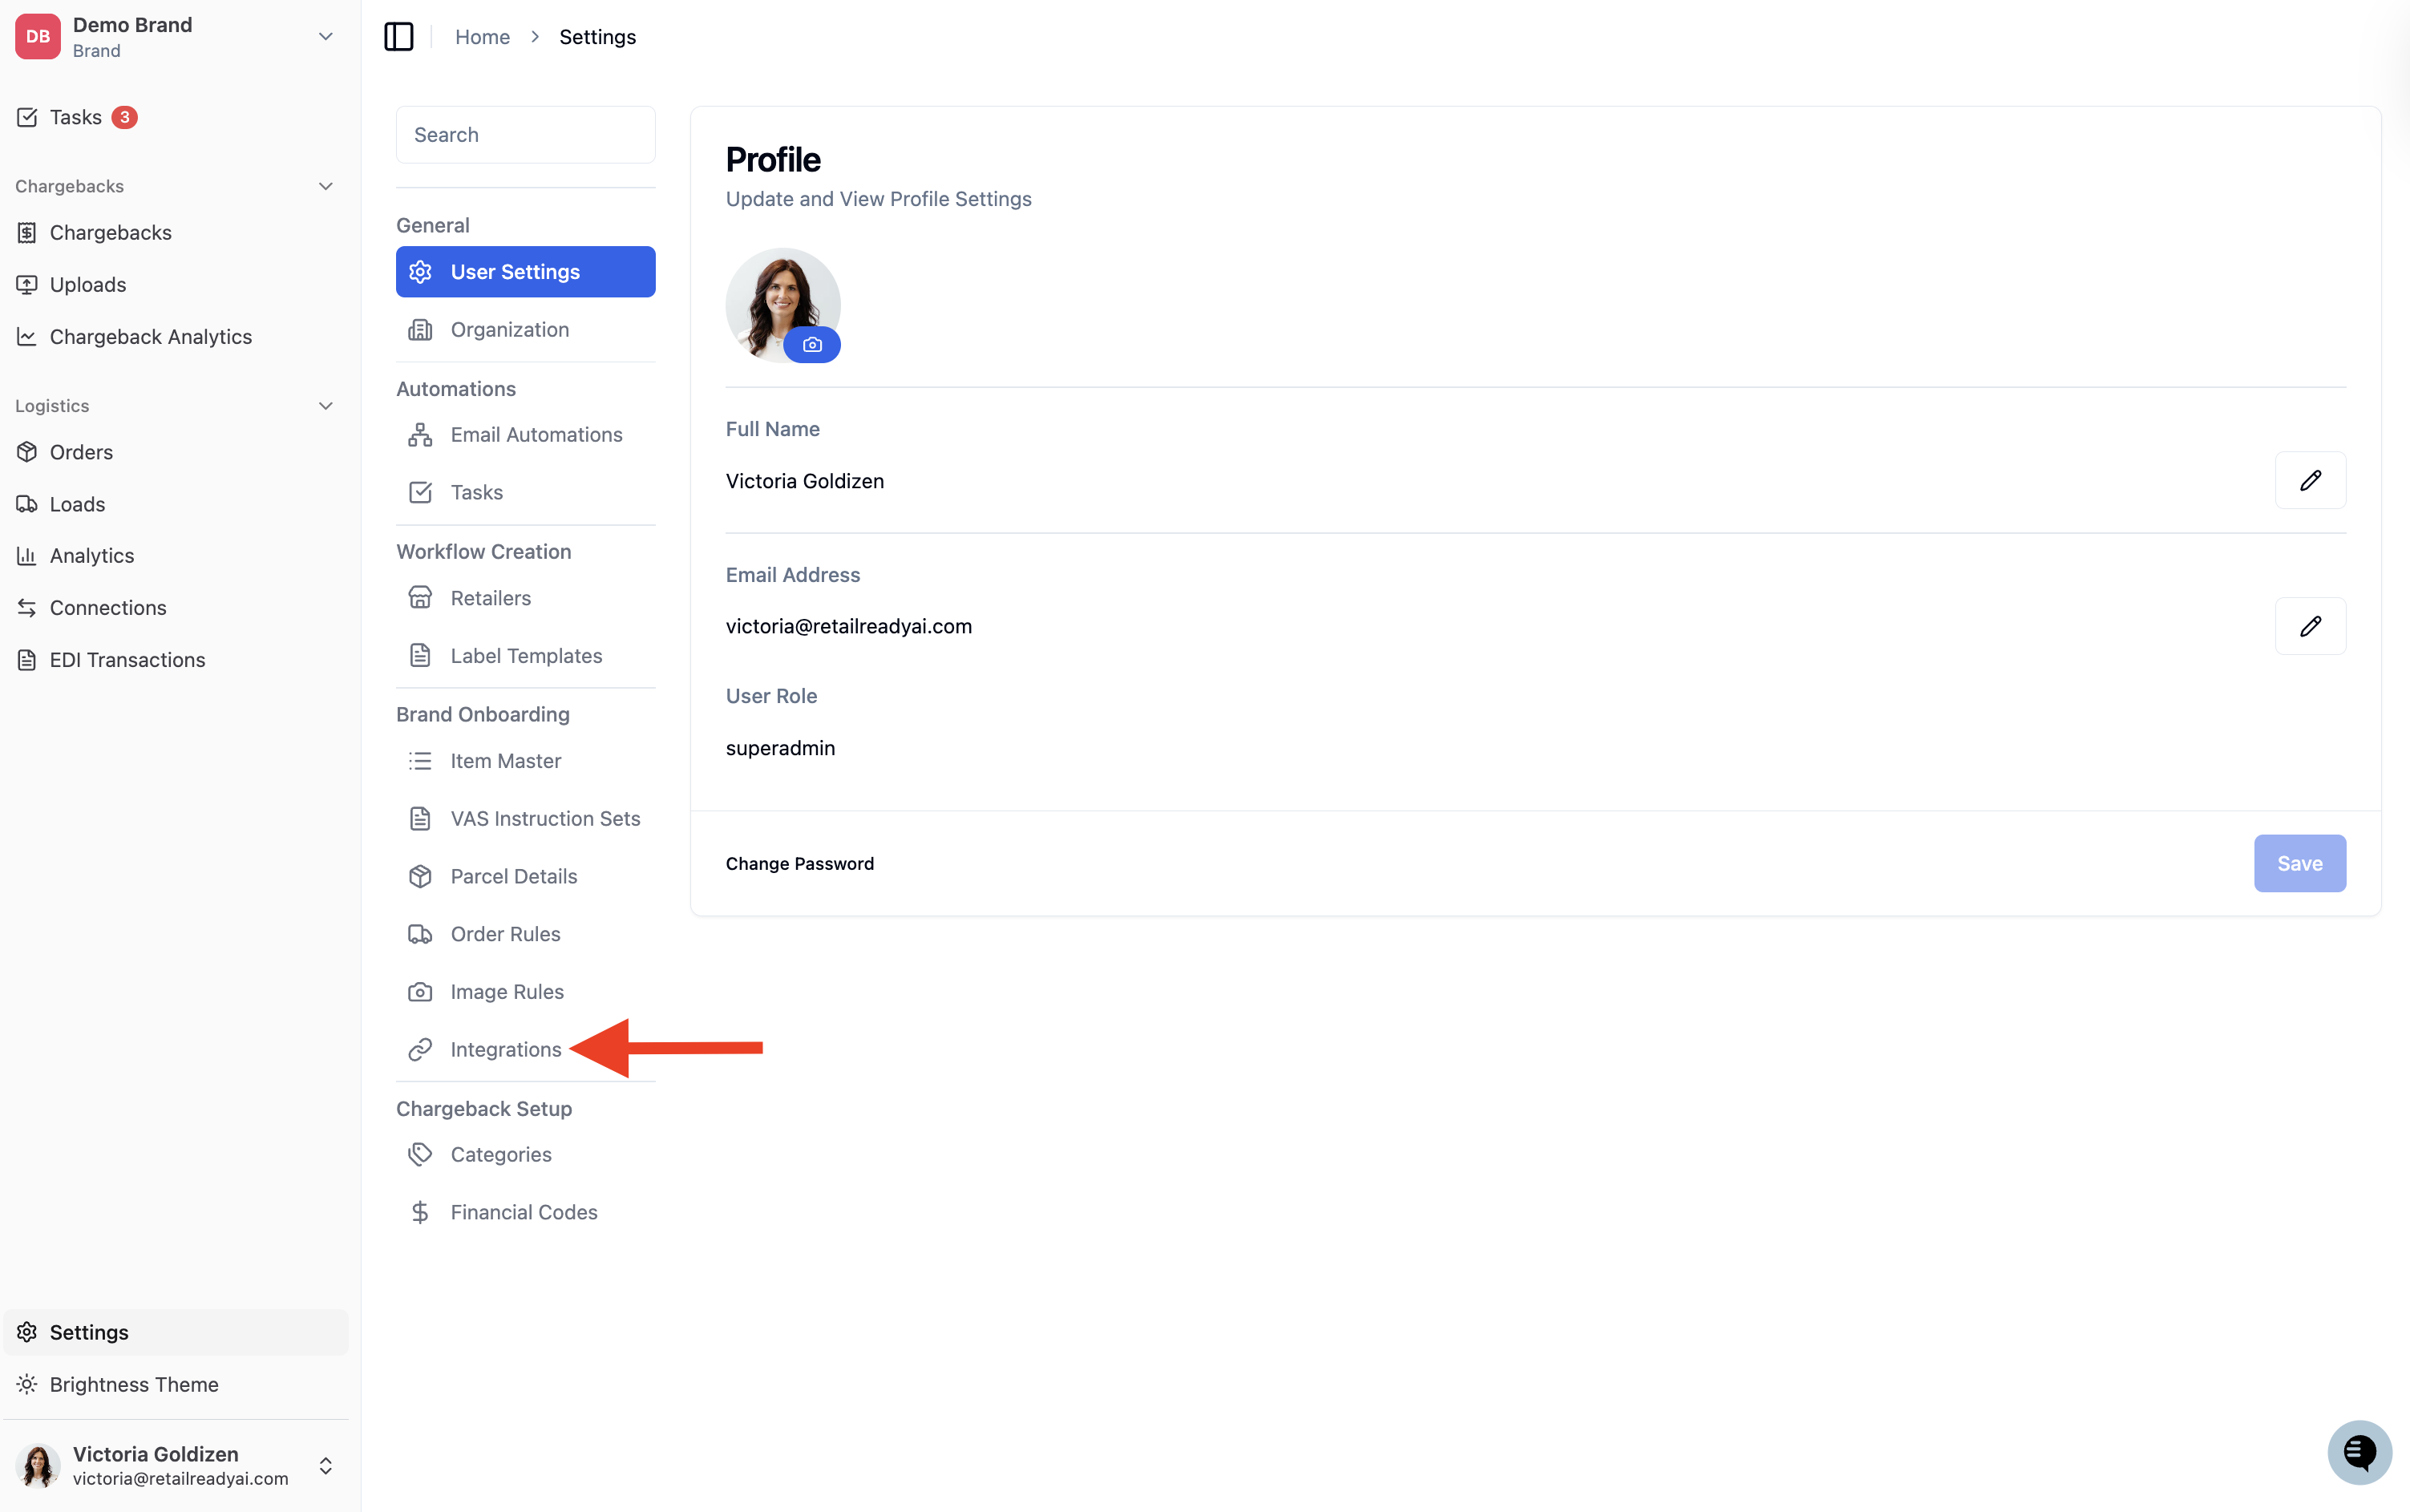
In the Settings menu, scroll down to the Brand Onboarding section and click 'Integrations'.
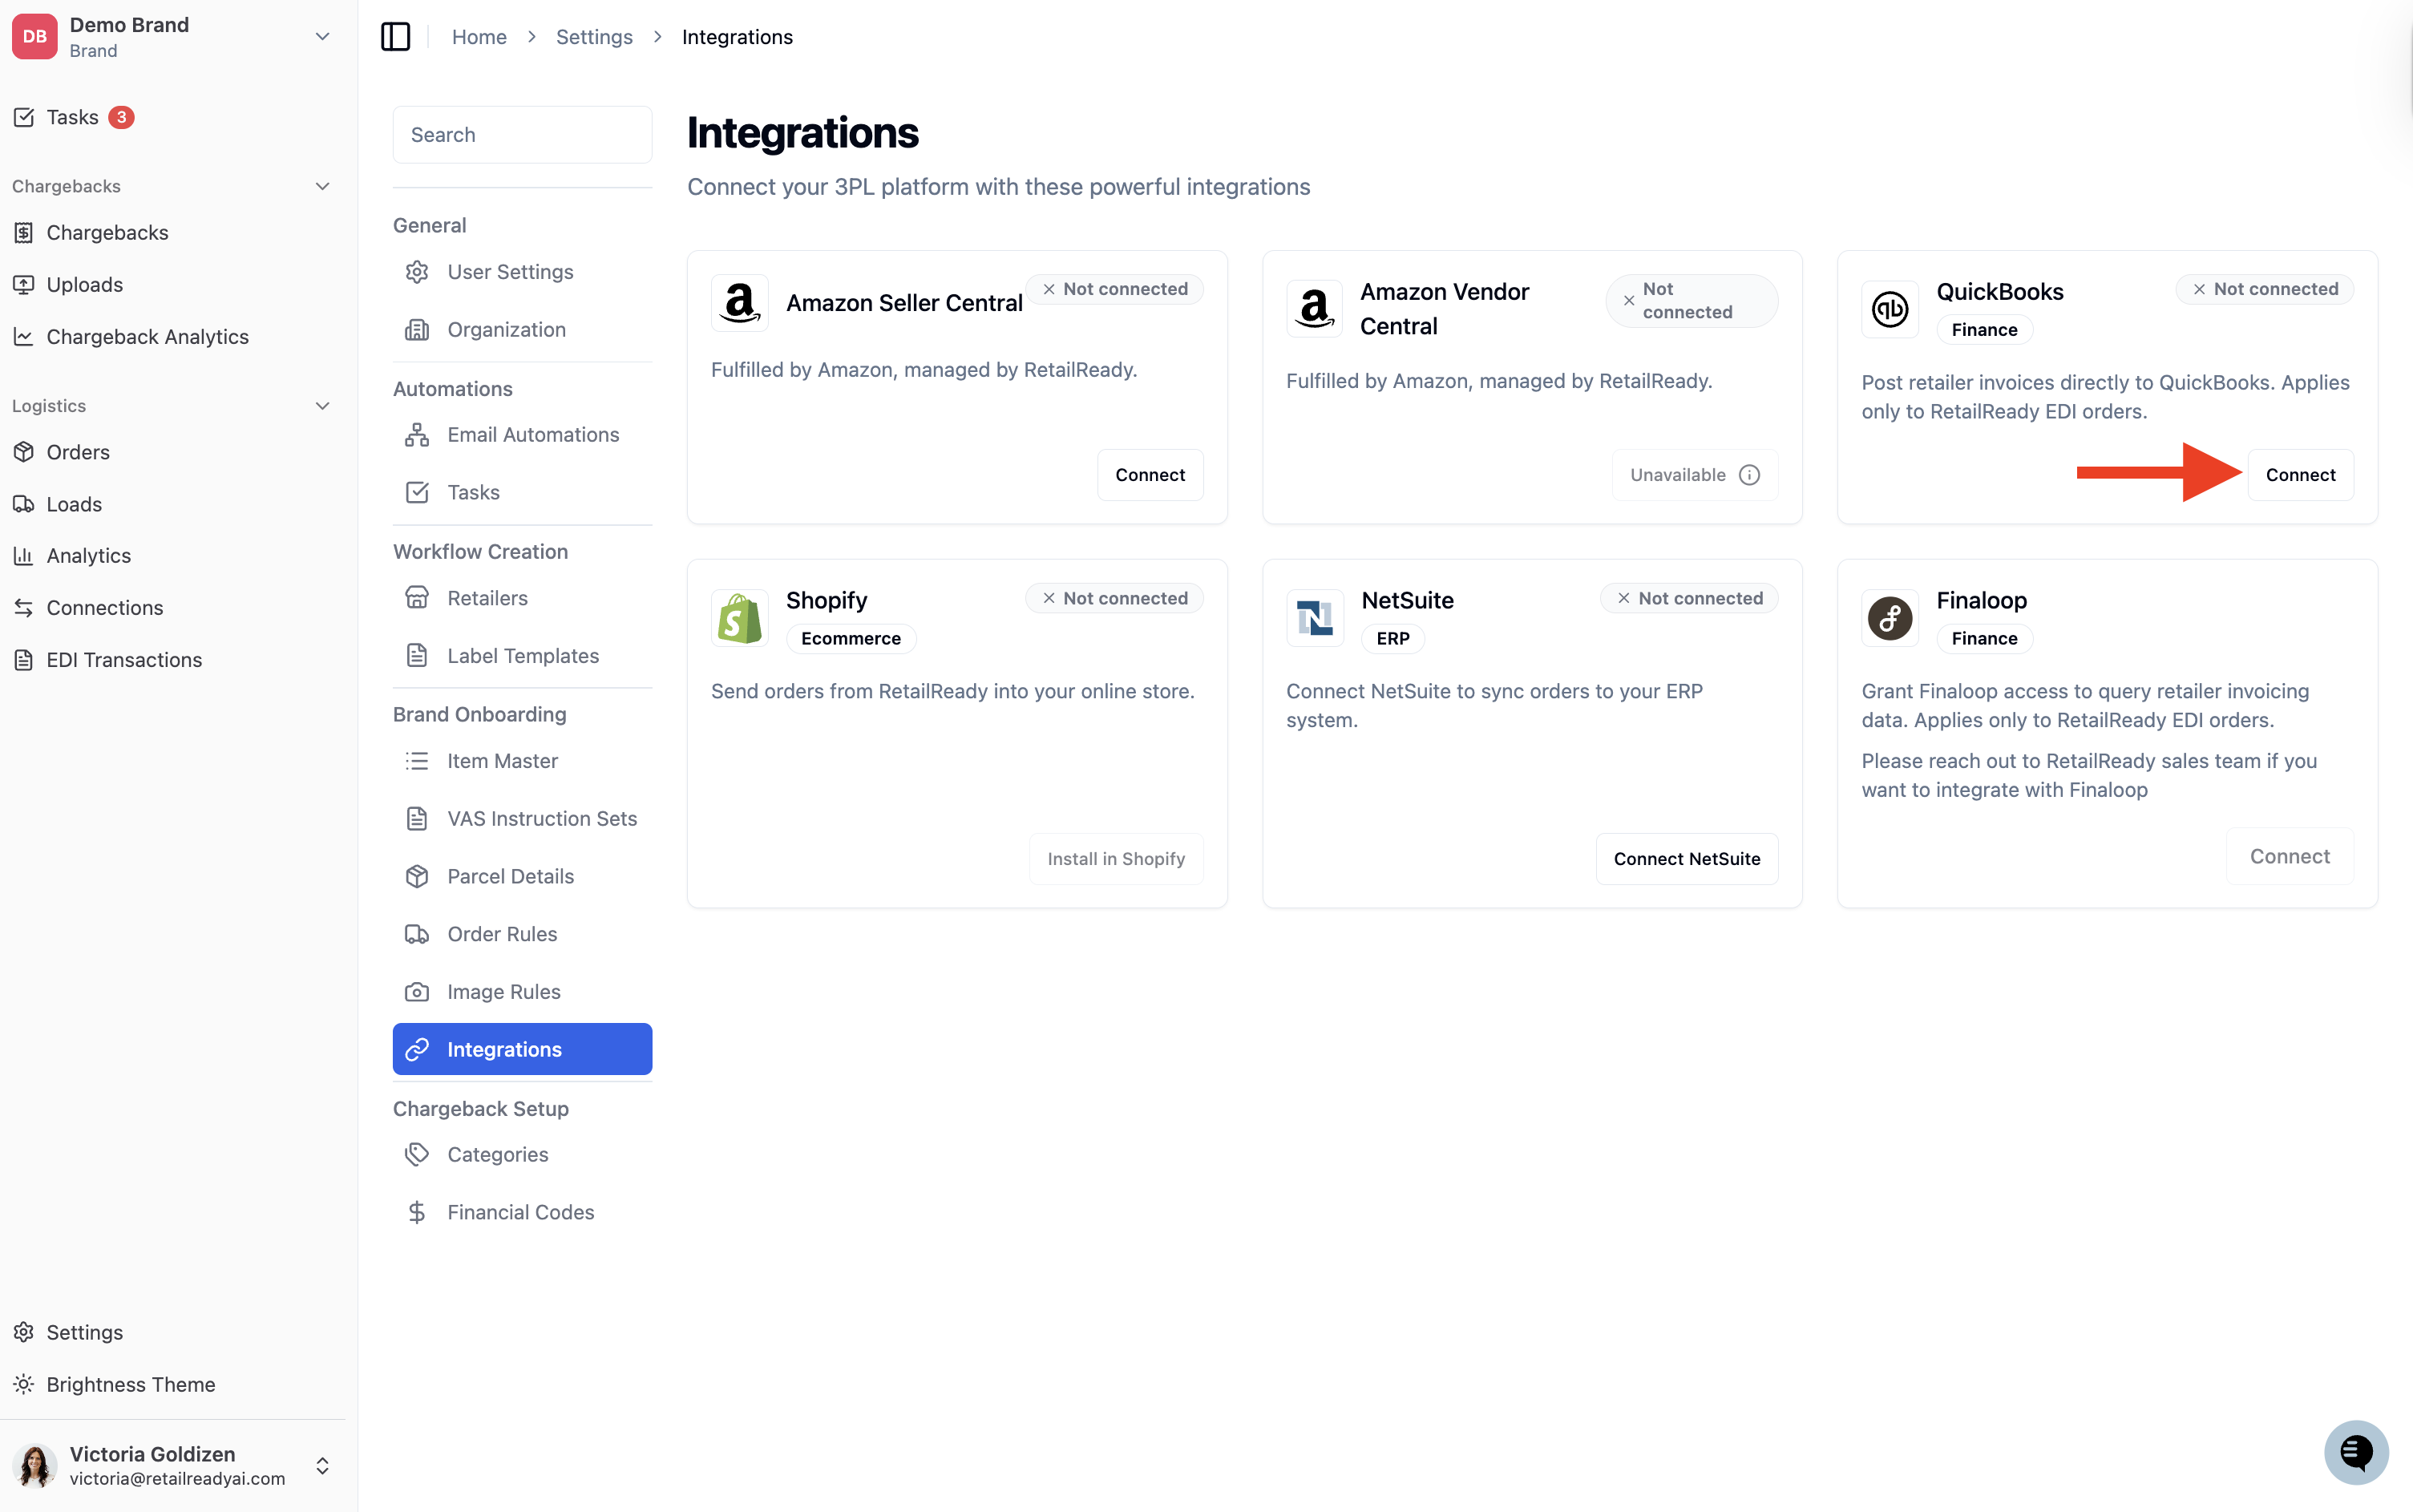
Locate the QuickBooks integration and click 'Connect'.
Clicking 'Connect' will launch the QuickBooks authorization flow, which grants RetailReady permission to integrate with your QuickBooks account. You will be redirected to QuickBooks to sign in and approve the connection.
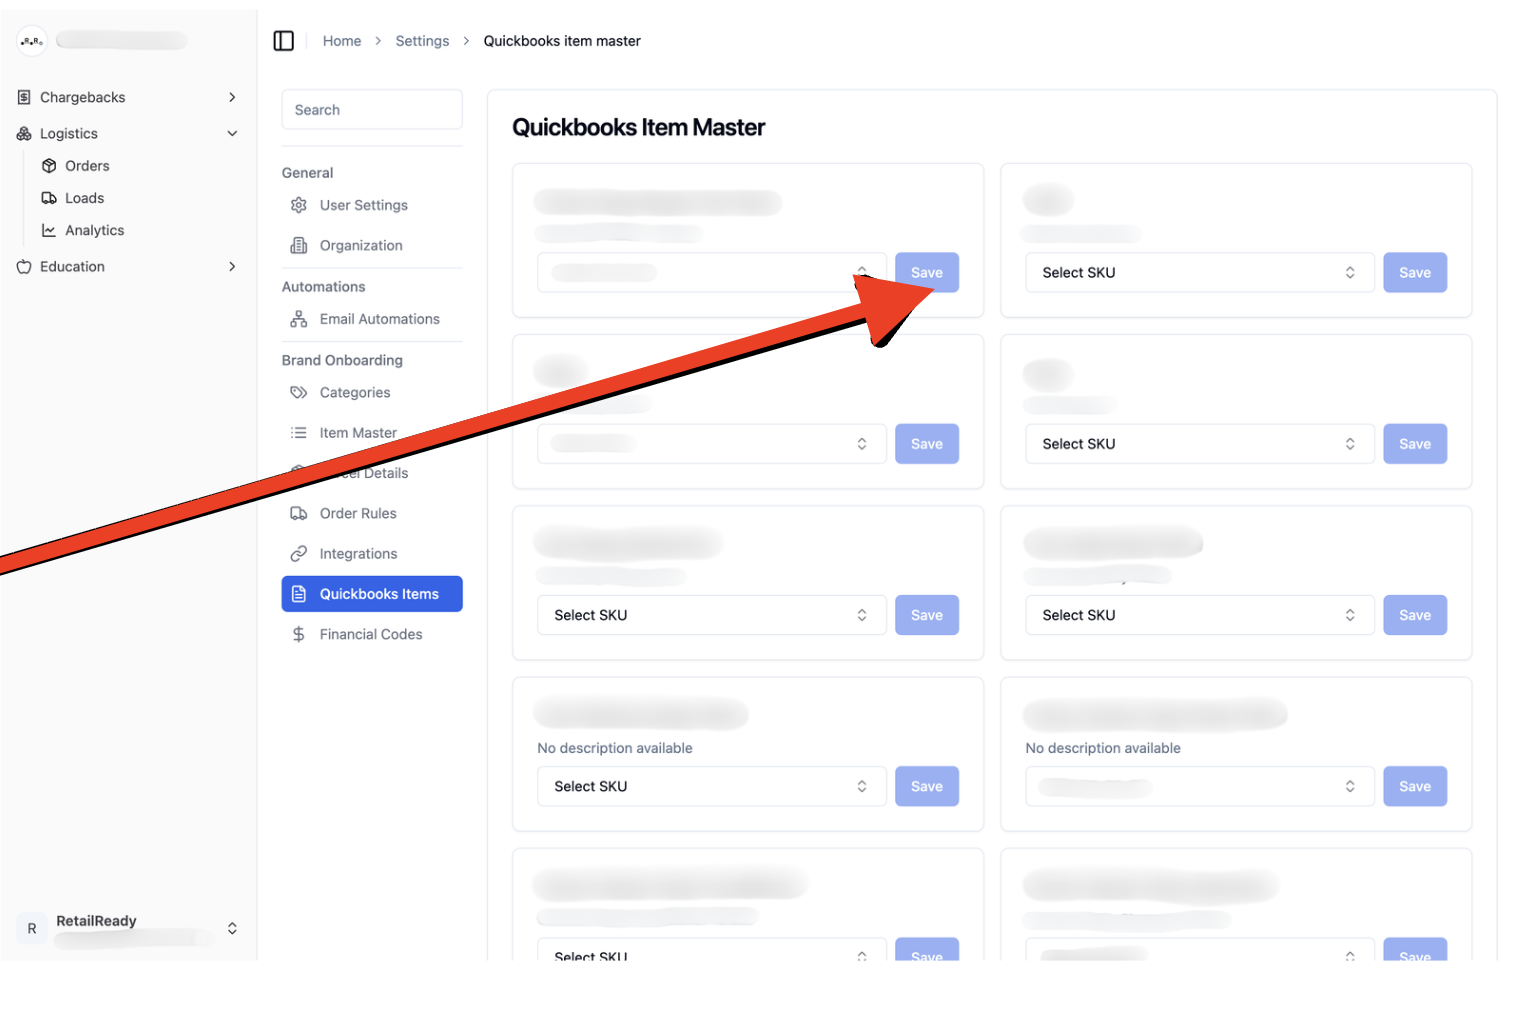
Once connected, you will be returned to RetailReady to map your SKUs to QuickBooks items. For each SKU, select the corresponding QuickBooks item from the dropdown.
Only SKUs that have been entered in your RetailReady item master will appear here. If a SKU is missing, add it to your item master first and then return to this step.
Once your SKUs are mapped, click Save to confirm your selections.
Your QuickBooks integration is now active. RetailReady will begin syncing order and item data with your QuickBooks account based on your mapped SKUs.