How To Use Item Master
Last updated: April 3, 2026
What is the Item Master for?
Brands can use the Item Master to create and manage their different products. The Item Master stores key details such as SKU, UPC, case pack, carton and pallet information as well as tracking requirements.
How RetailReady will use your Item Master
The data entered into the Item Master will automatically load into the pack out workflow as default values. These defaults are validated against retailer guidelines to ensure compliance every time you ship.
How do I use the Item Master?
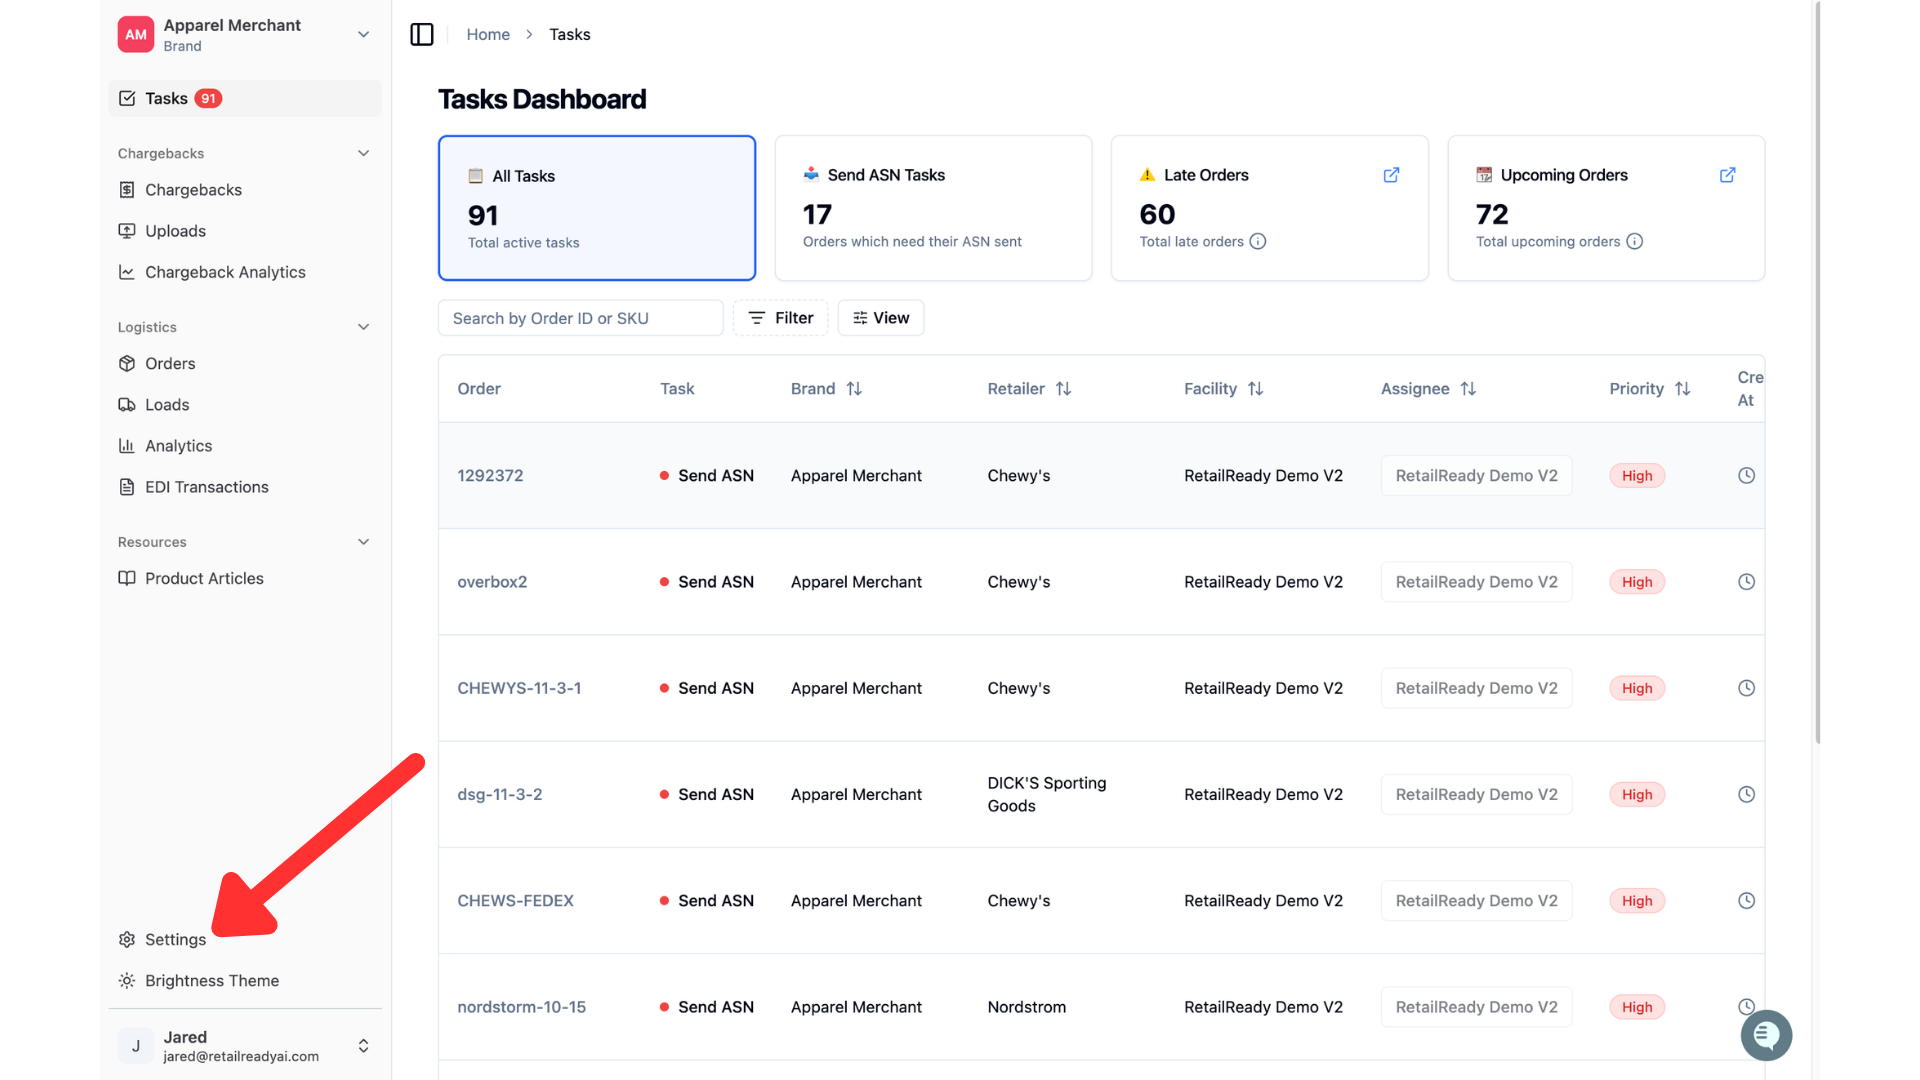
Click on settings in the bottom left corner.
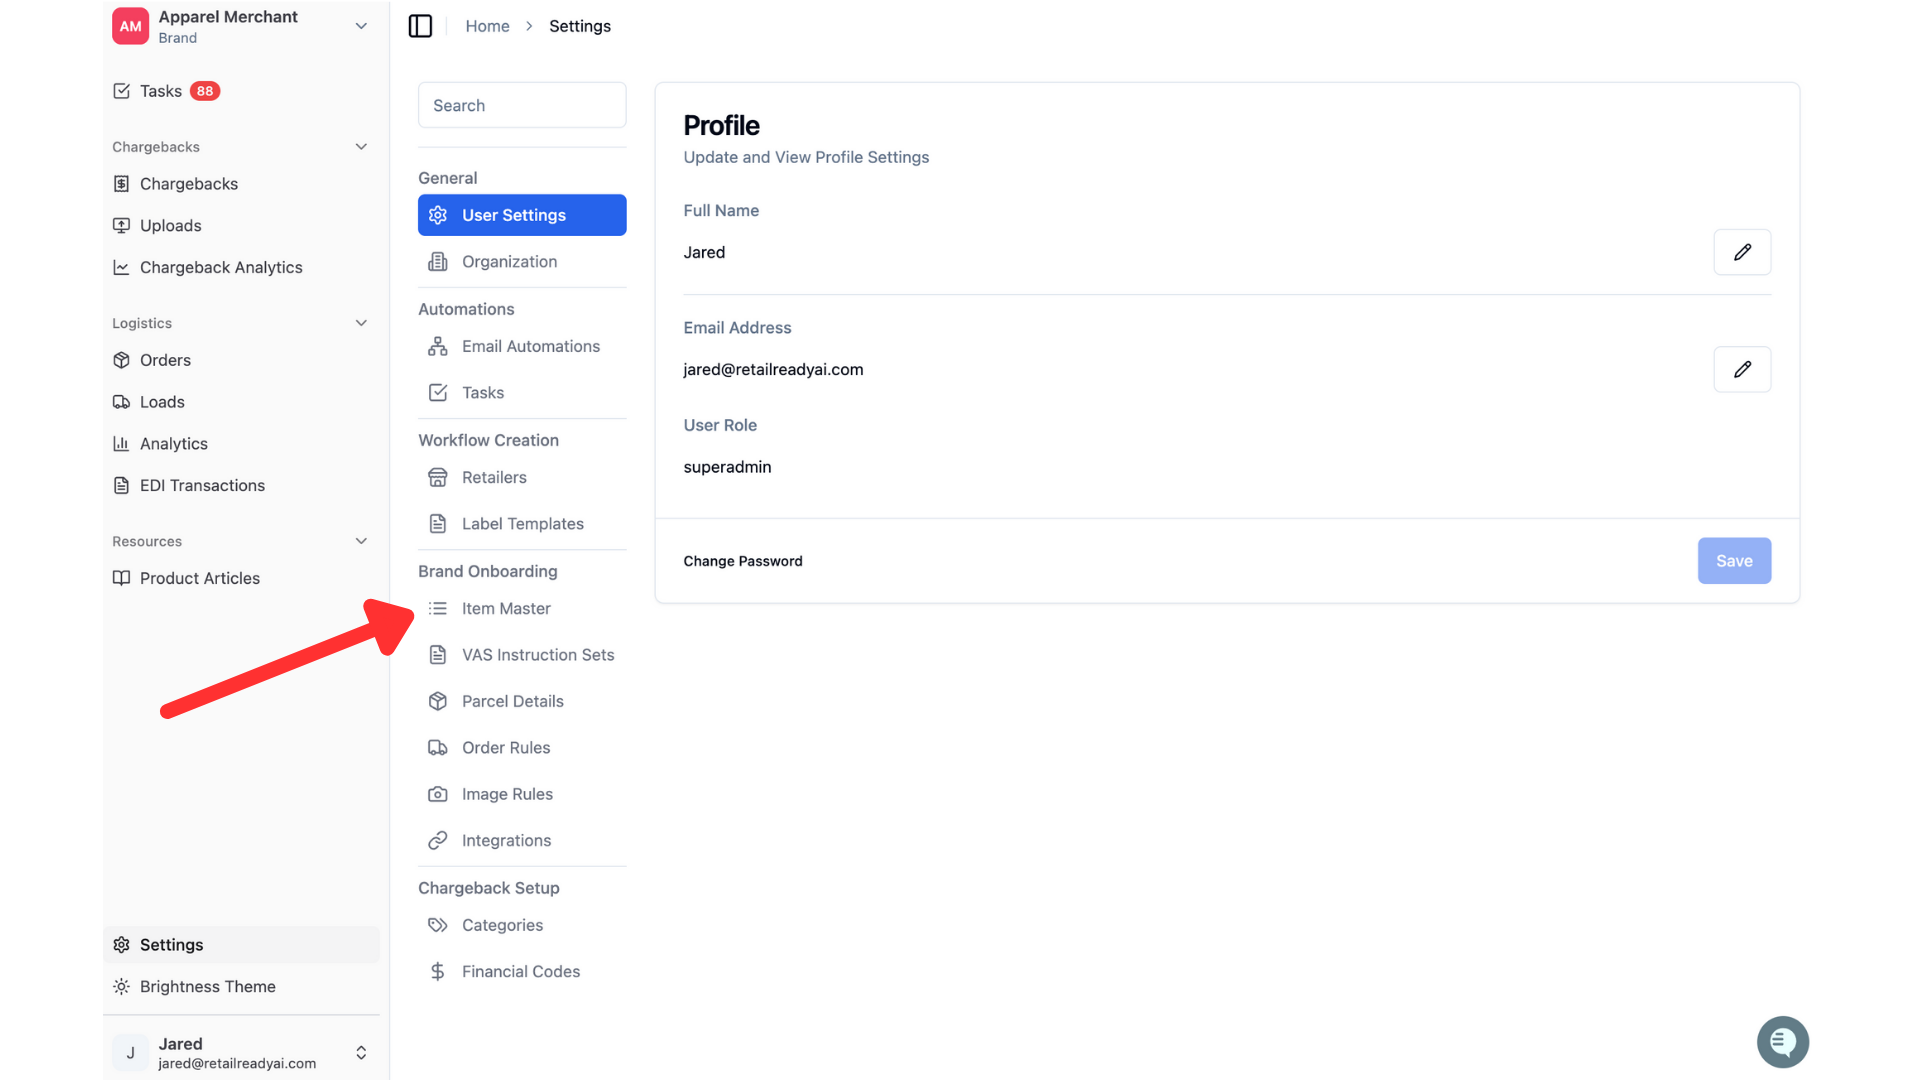
Navigate directly to your Item Master page by clicking item master in the column that opens
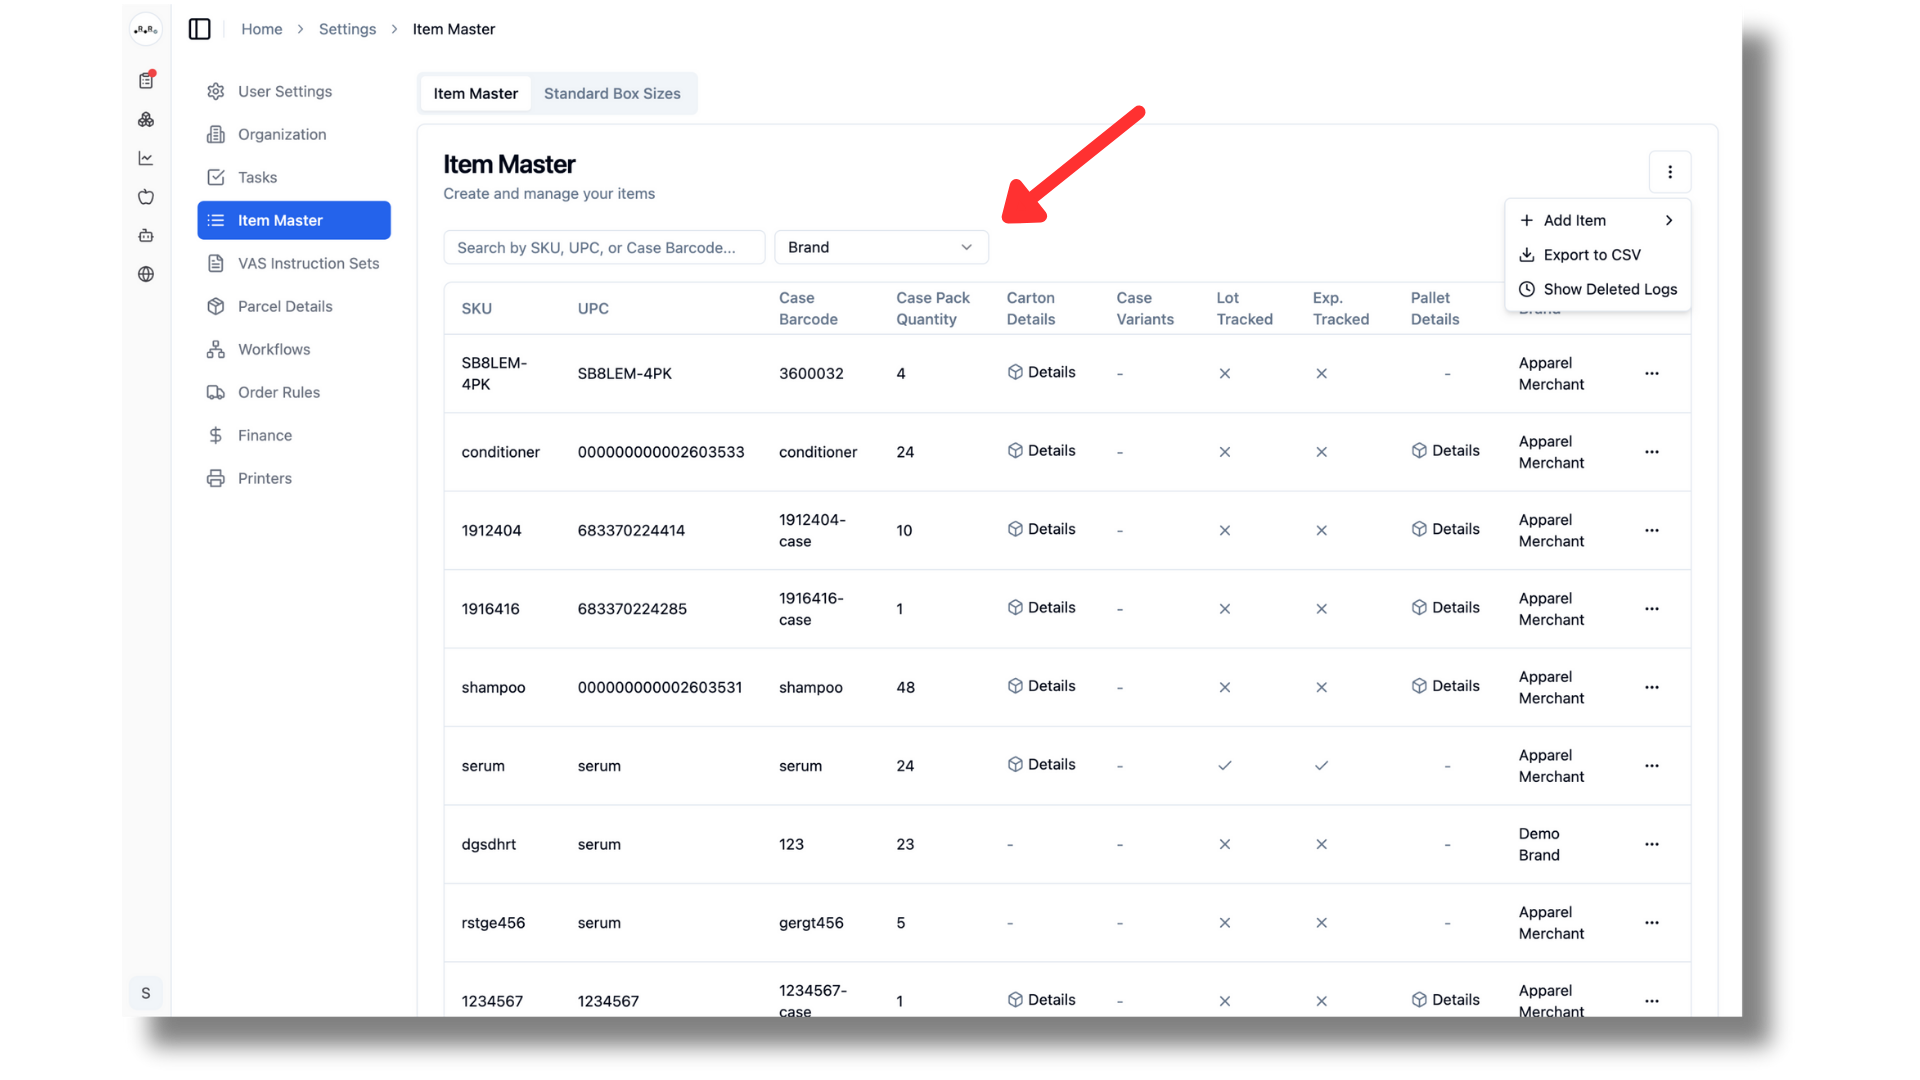
Begin uploading your items. To do this select your brand from the drop down menu.
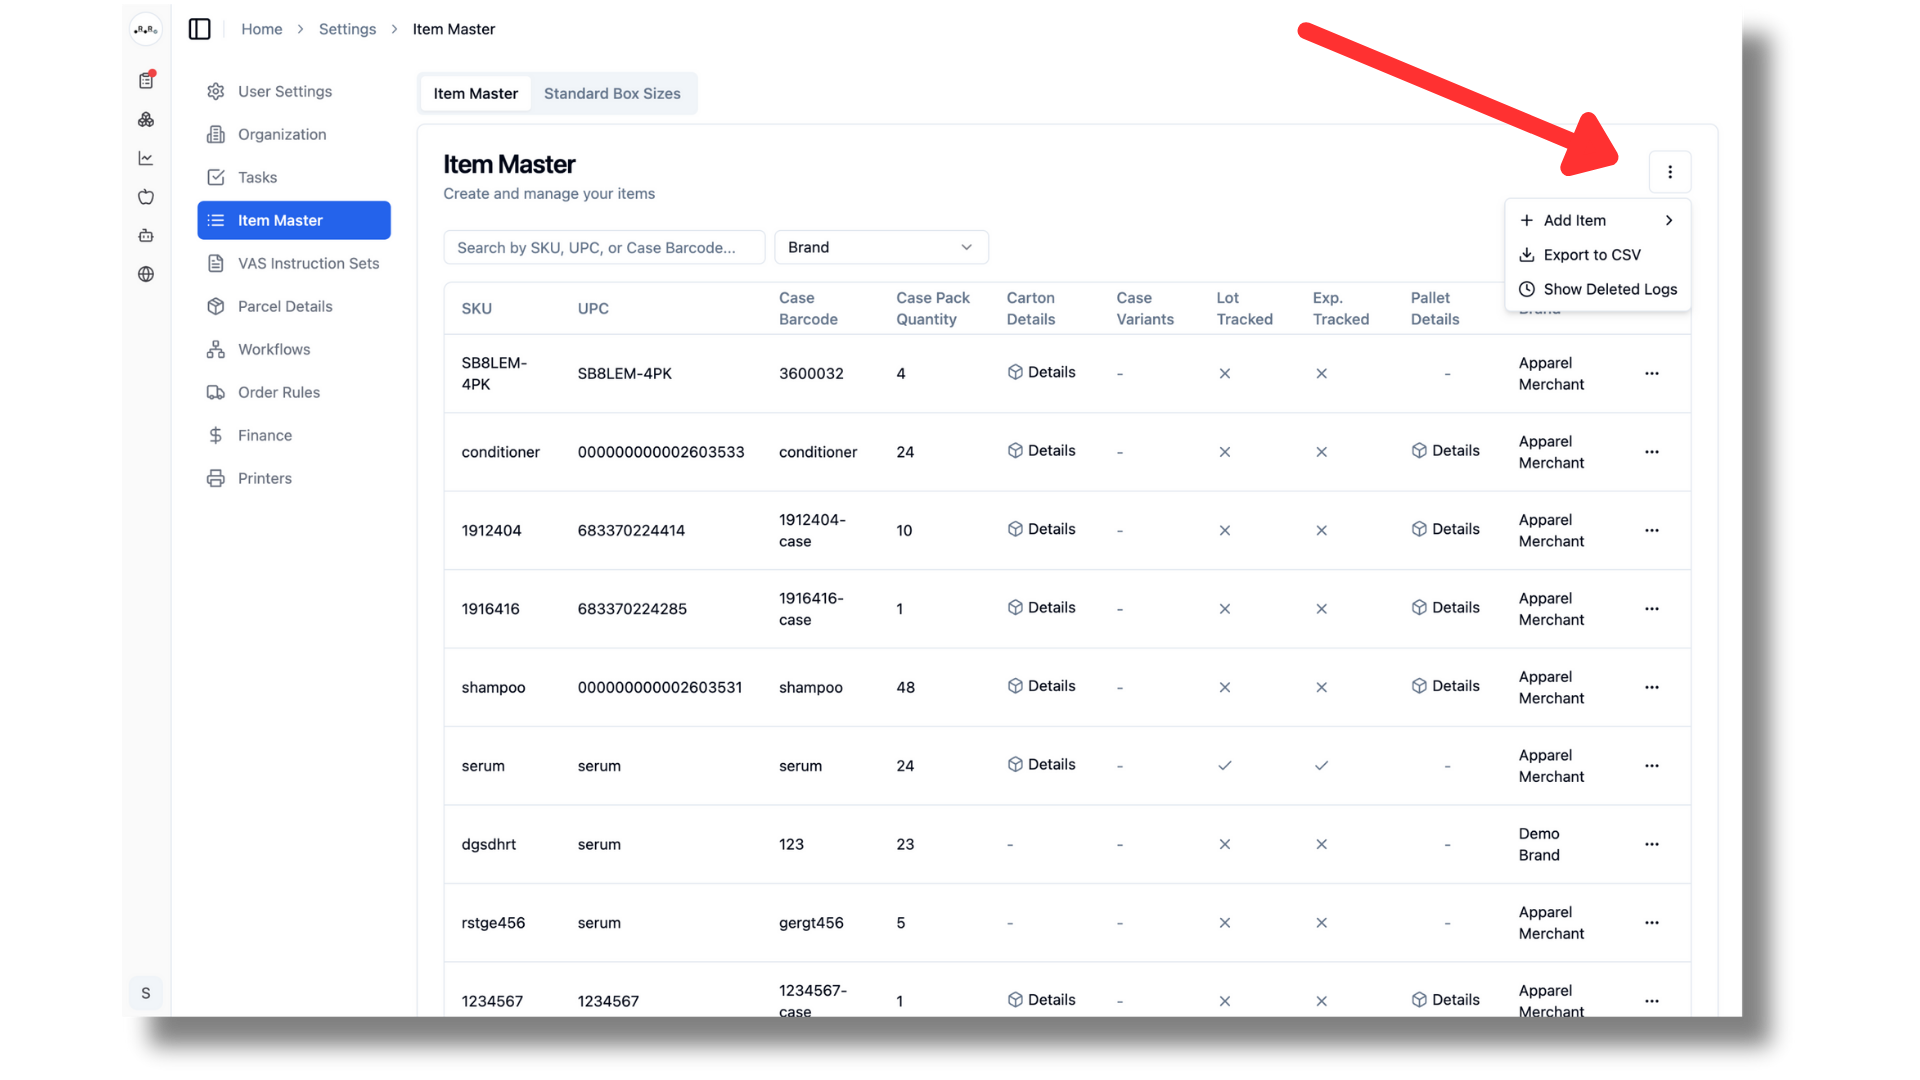
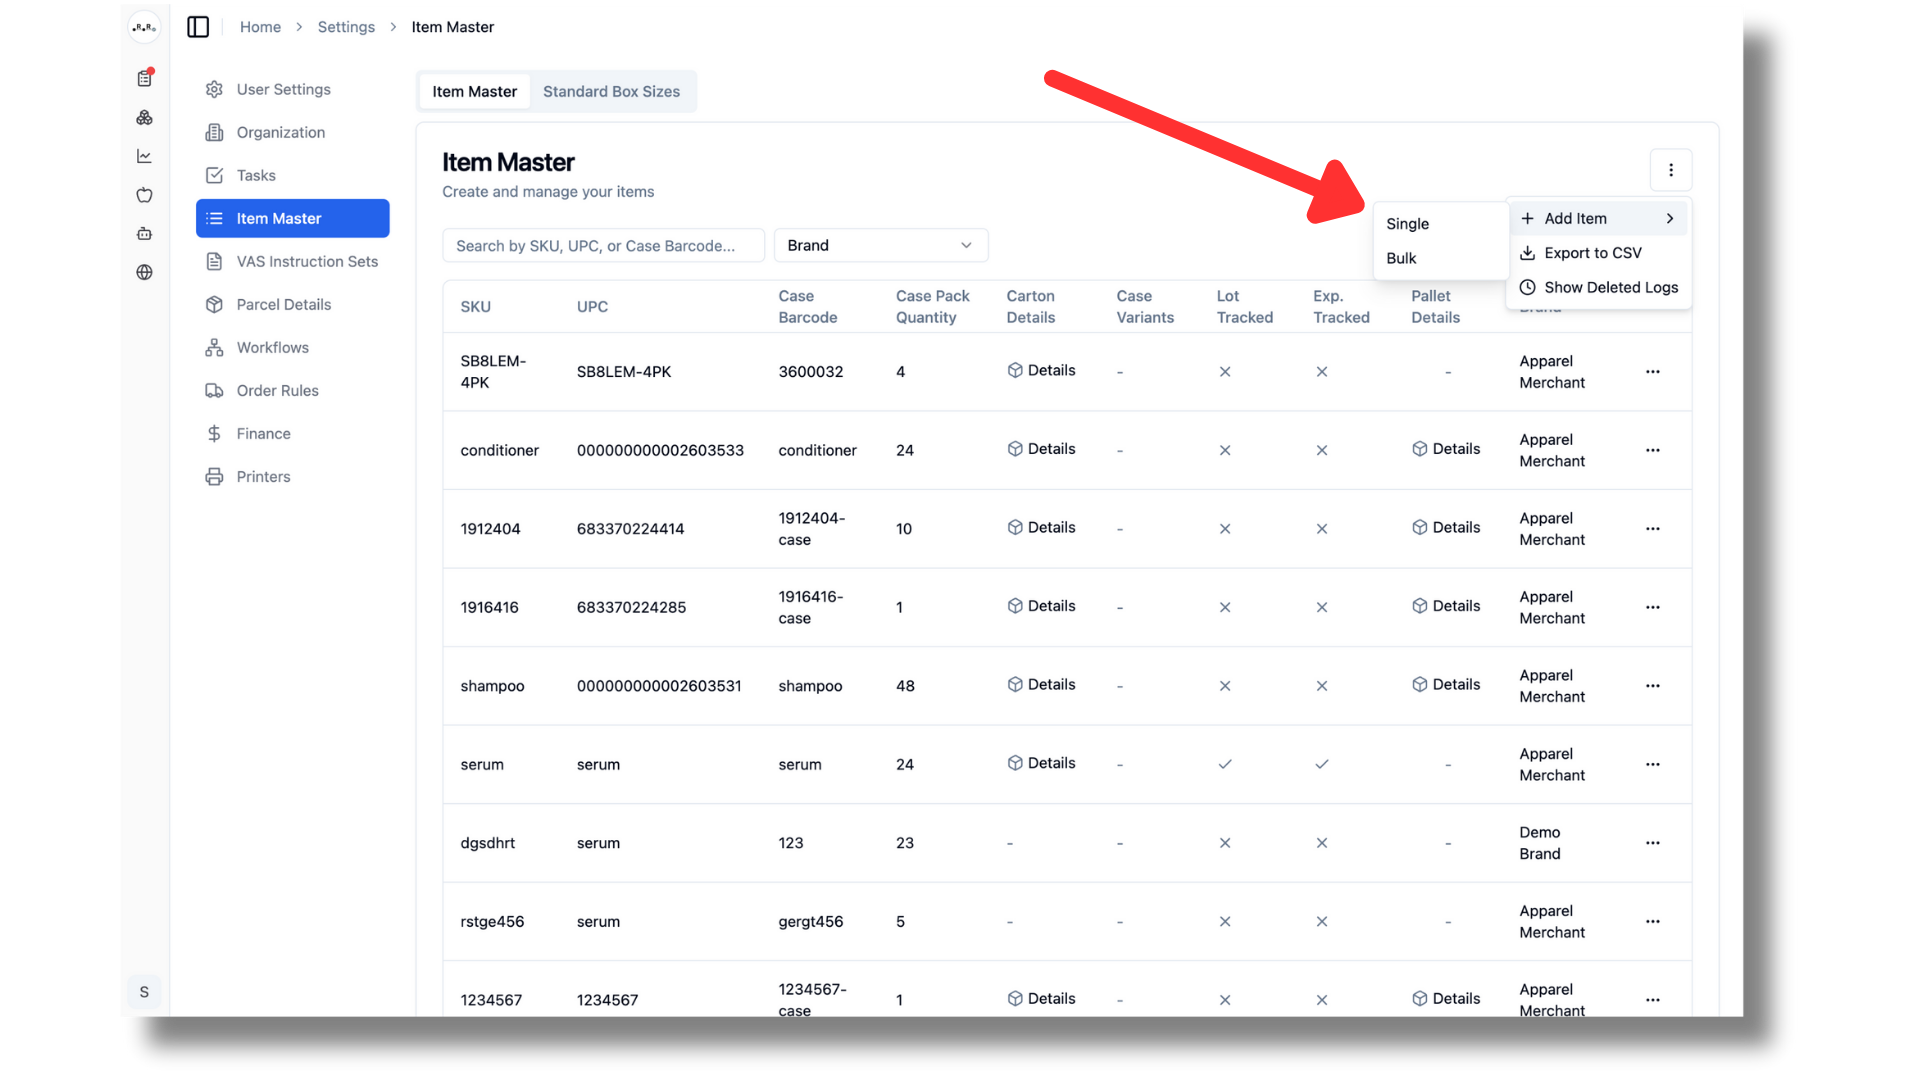
Click on the 3 dots located in the top right corner, followed by add item.
Single VS Bulk upload
Single upload will allow you to upload one item at a time. Bulk upload will provide you with a .csv template to fill out and then upload all of your items at once. We will start by going through the single item upload.
Select single upload.
Now it is time to input the details for a specific item. You will see the brand name is already filled in. Select a facility, then input the items SKU and UPC. If the item has a lot number, expiration date or serial number you can toggle those on. This tells RetailReady to track those values as well!
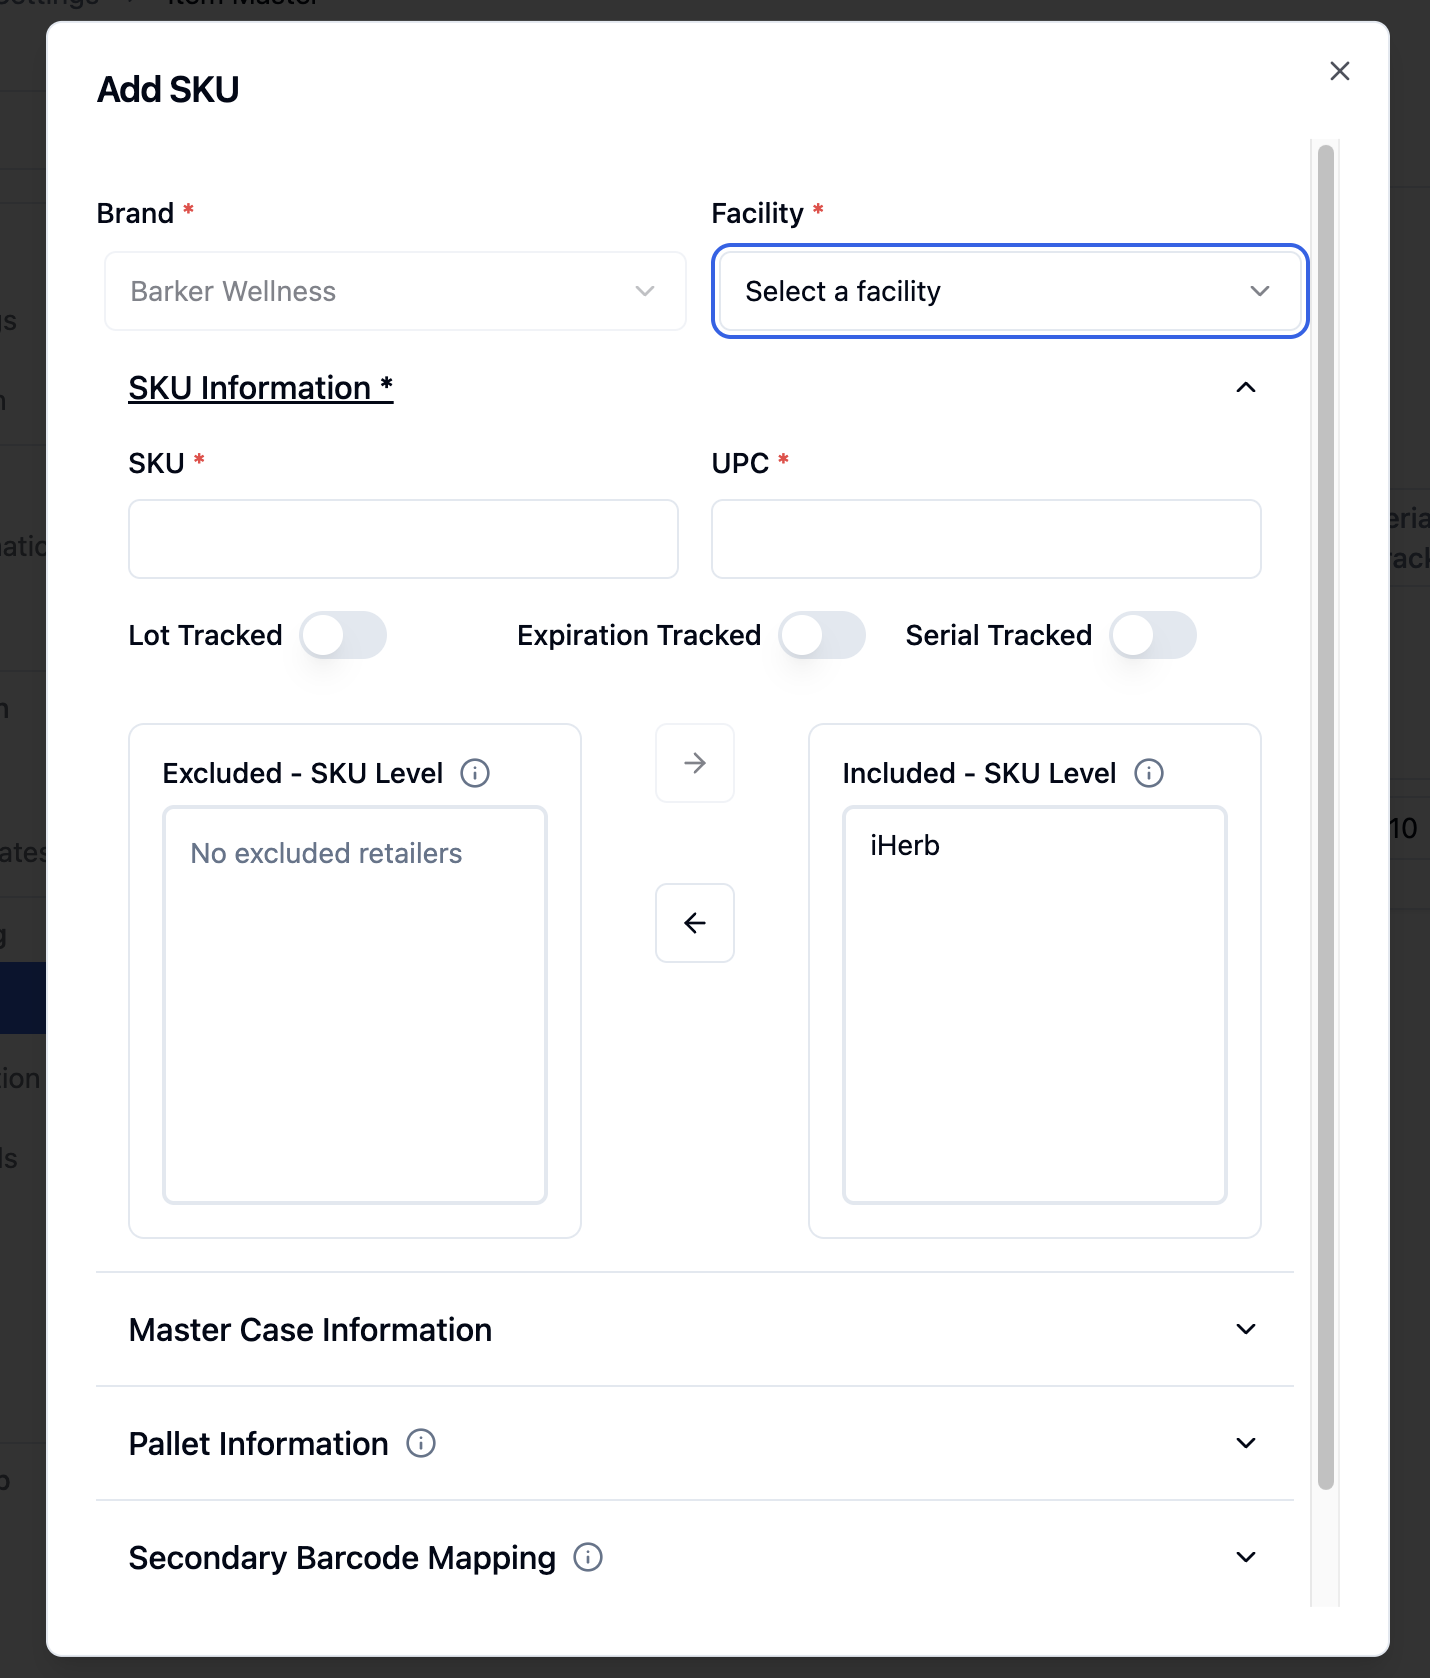
The Included and Excluded sections determine which retailers can receive this SKU. All retailers default to Included. Move any retailer that should not receive this SKU to Excluded. Clicking a retailer moves it between sections.

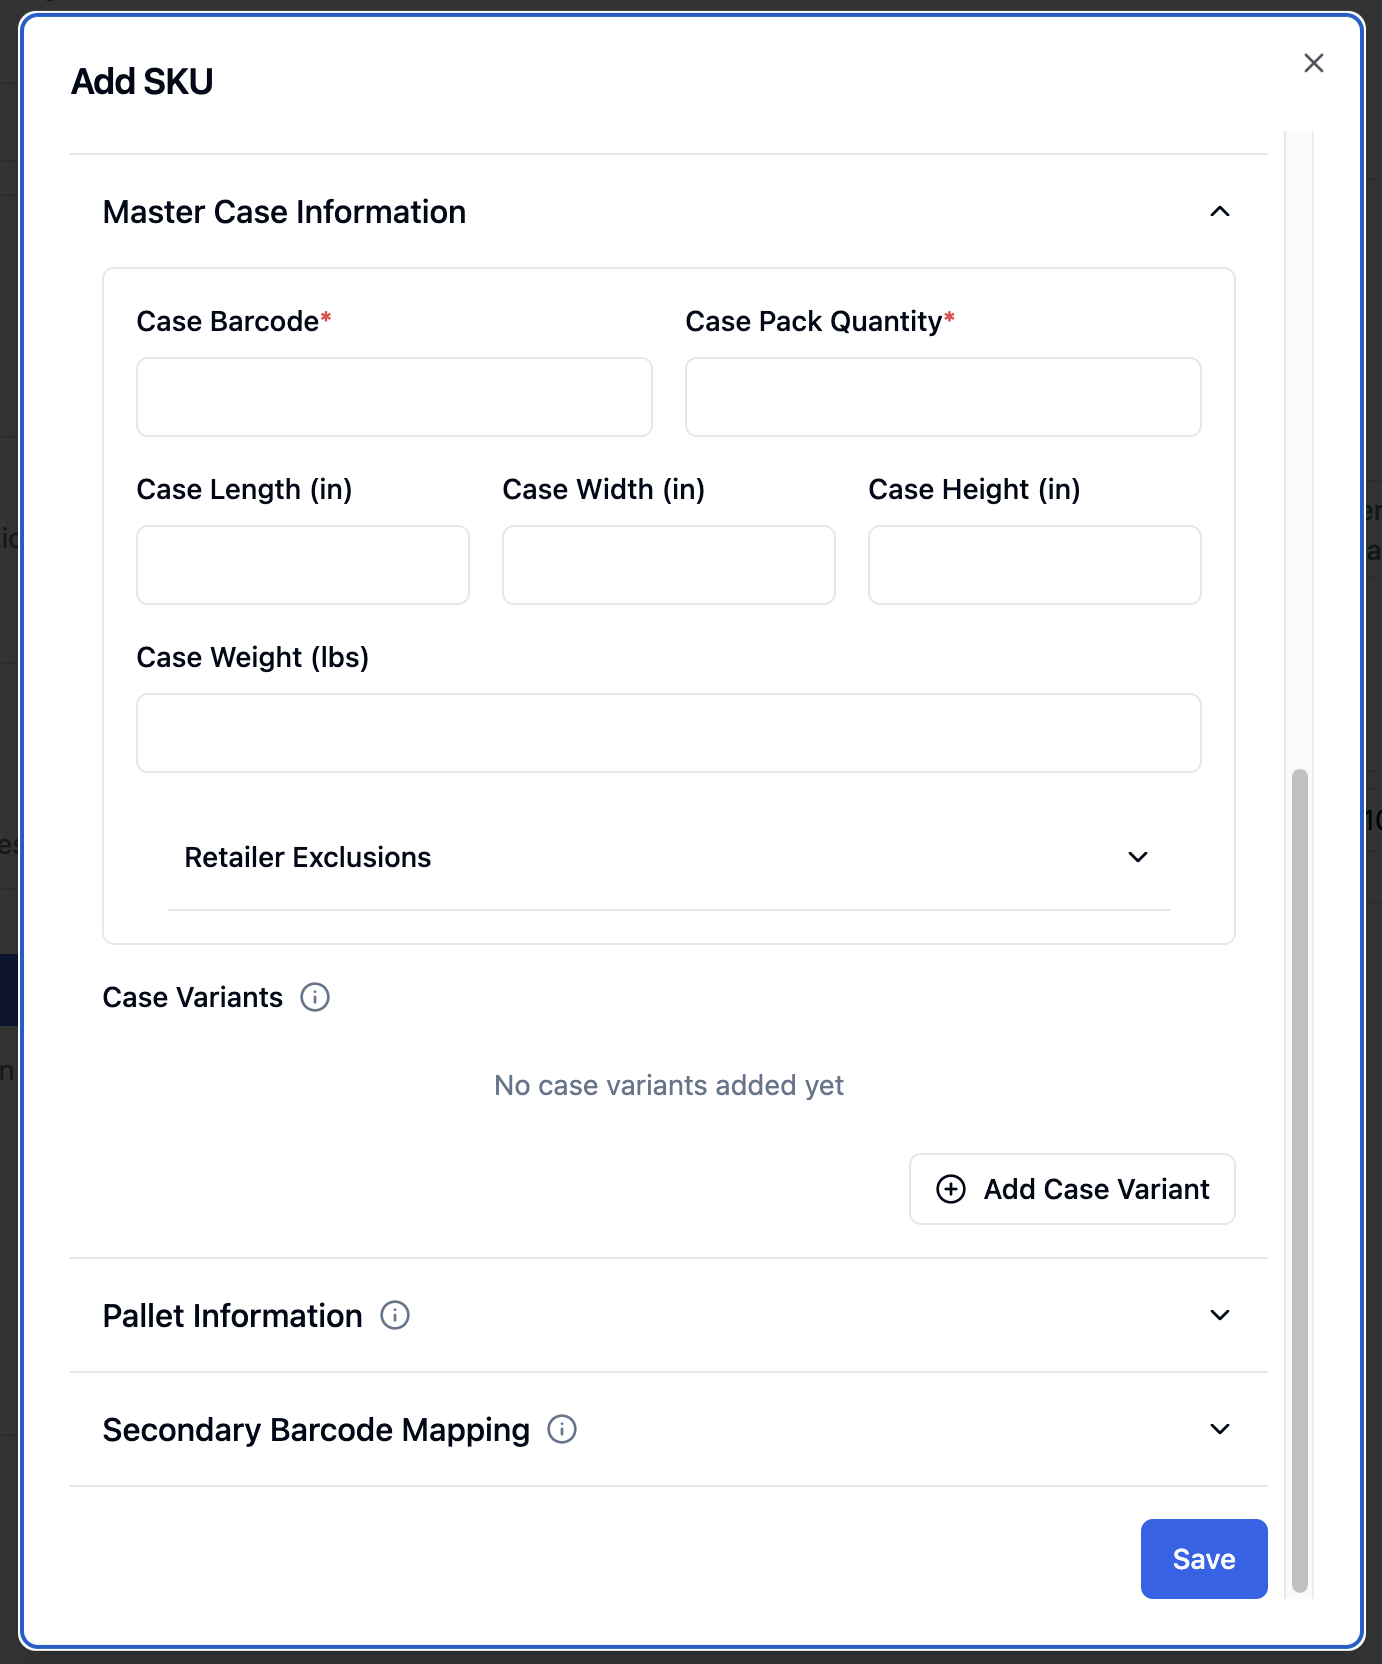
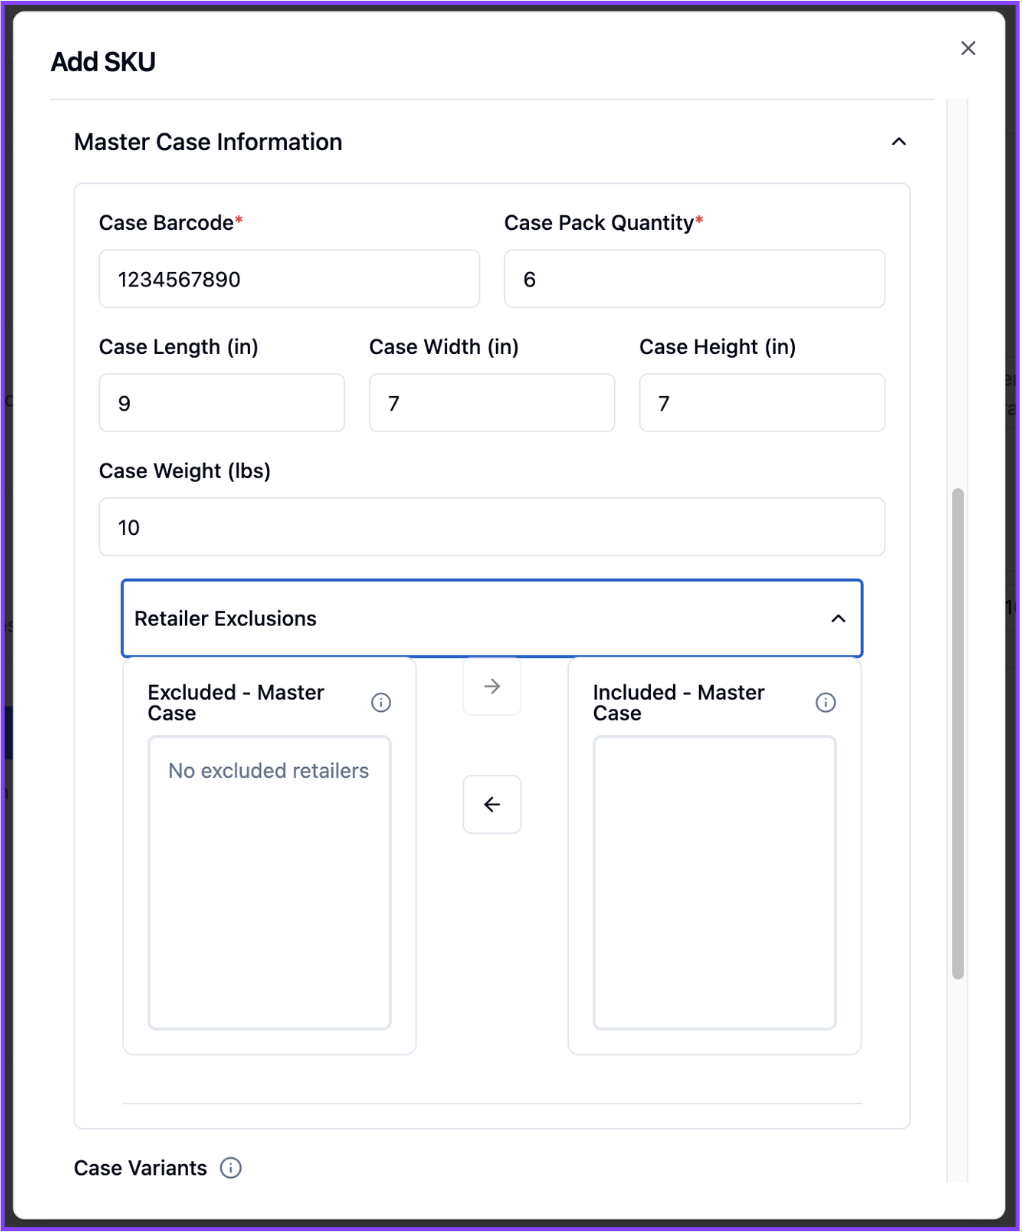
Lets input the Master Case Information! This is where you can specify the quantity of items in your standard case, the case dimensions, and the weight of the case. This allows RetailReady track the size and weight of cartons during the pack out process. One of the ways we make sure you stay compliant!
Select the retailers that do not use this master case size. Do this by moving them to the Excluded section.
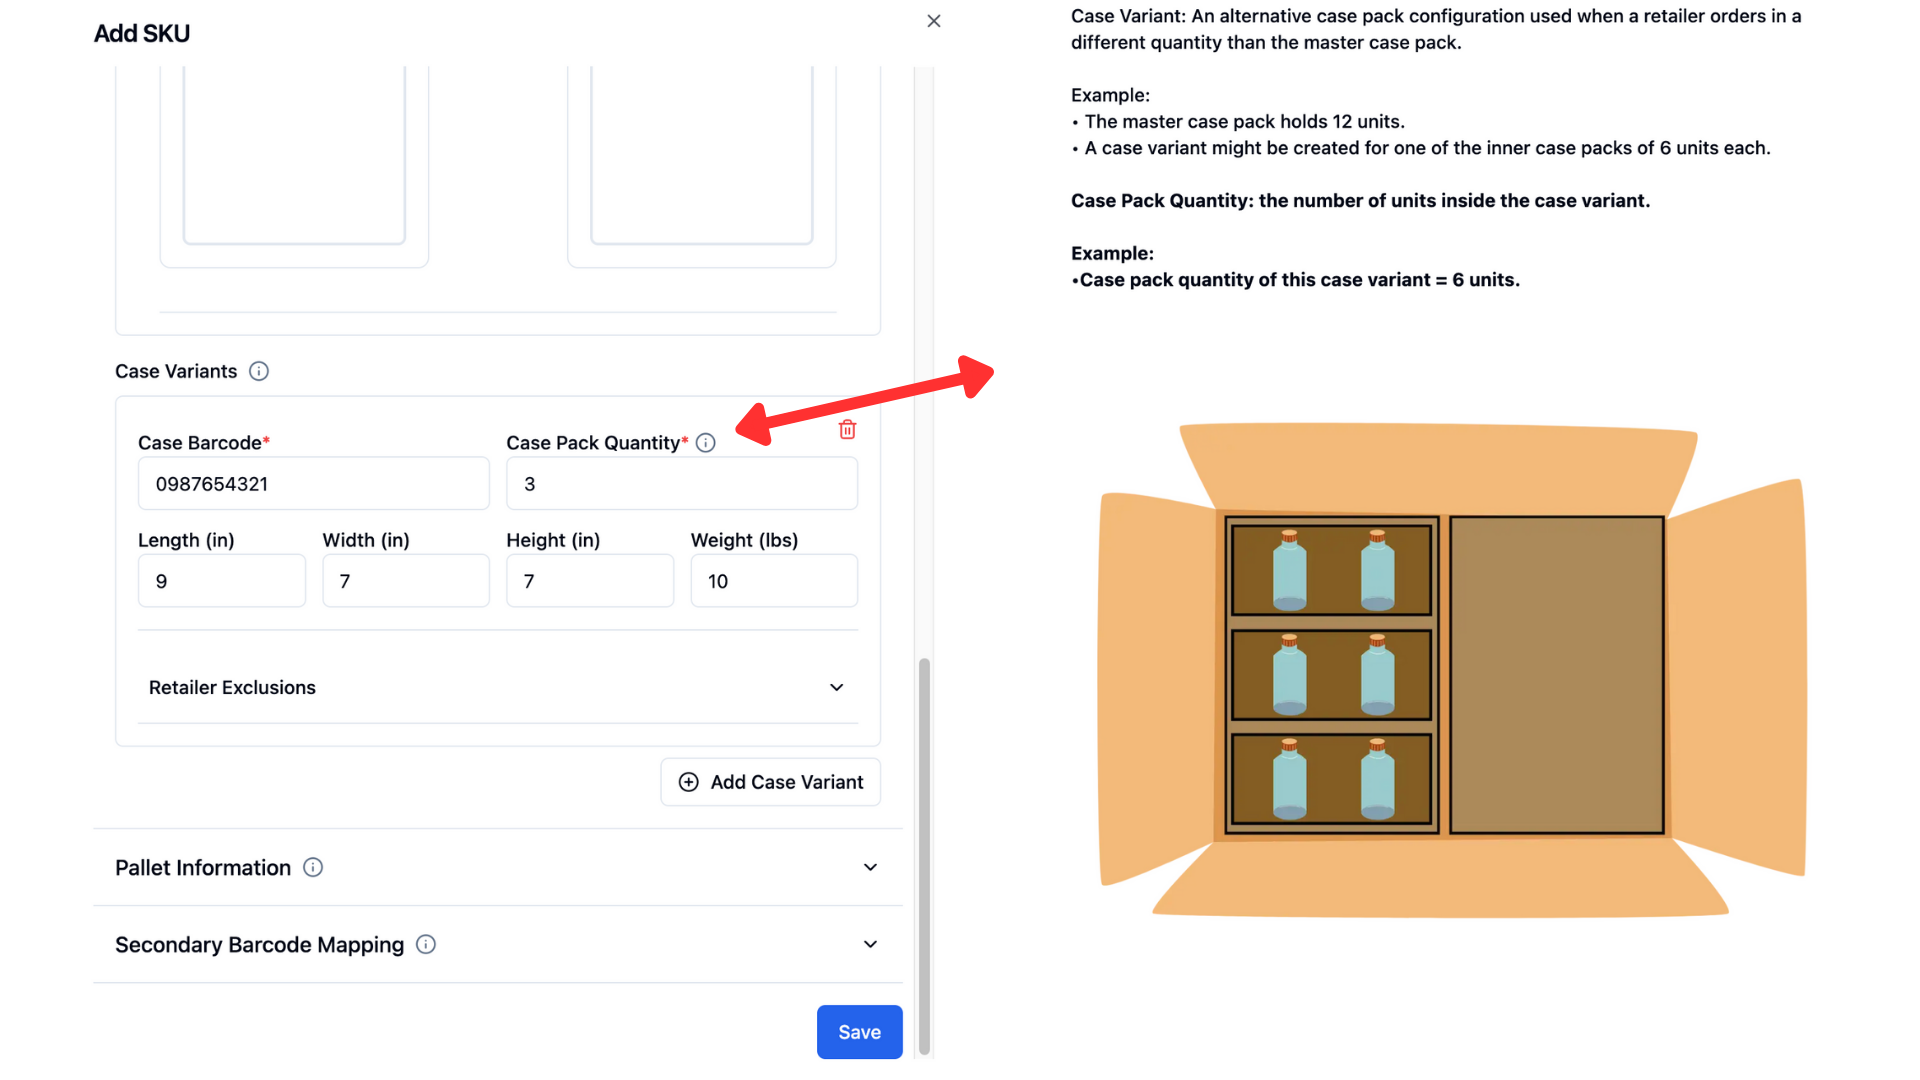
Create a case variant for any alternative cases you may use. This section is for any situations when a retailer might order a different quantity than your standard master case. Hovering over the i icon will provide more detail about case variants and their purpose. In this section you can add any case pack quantity needed.
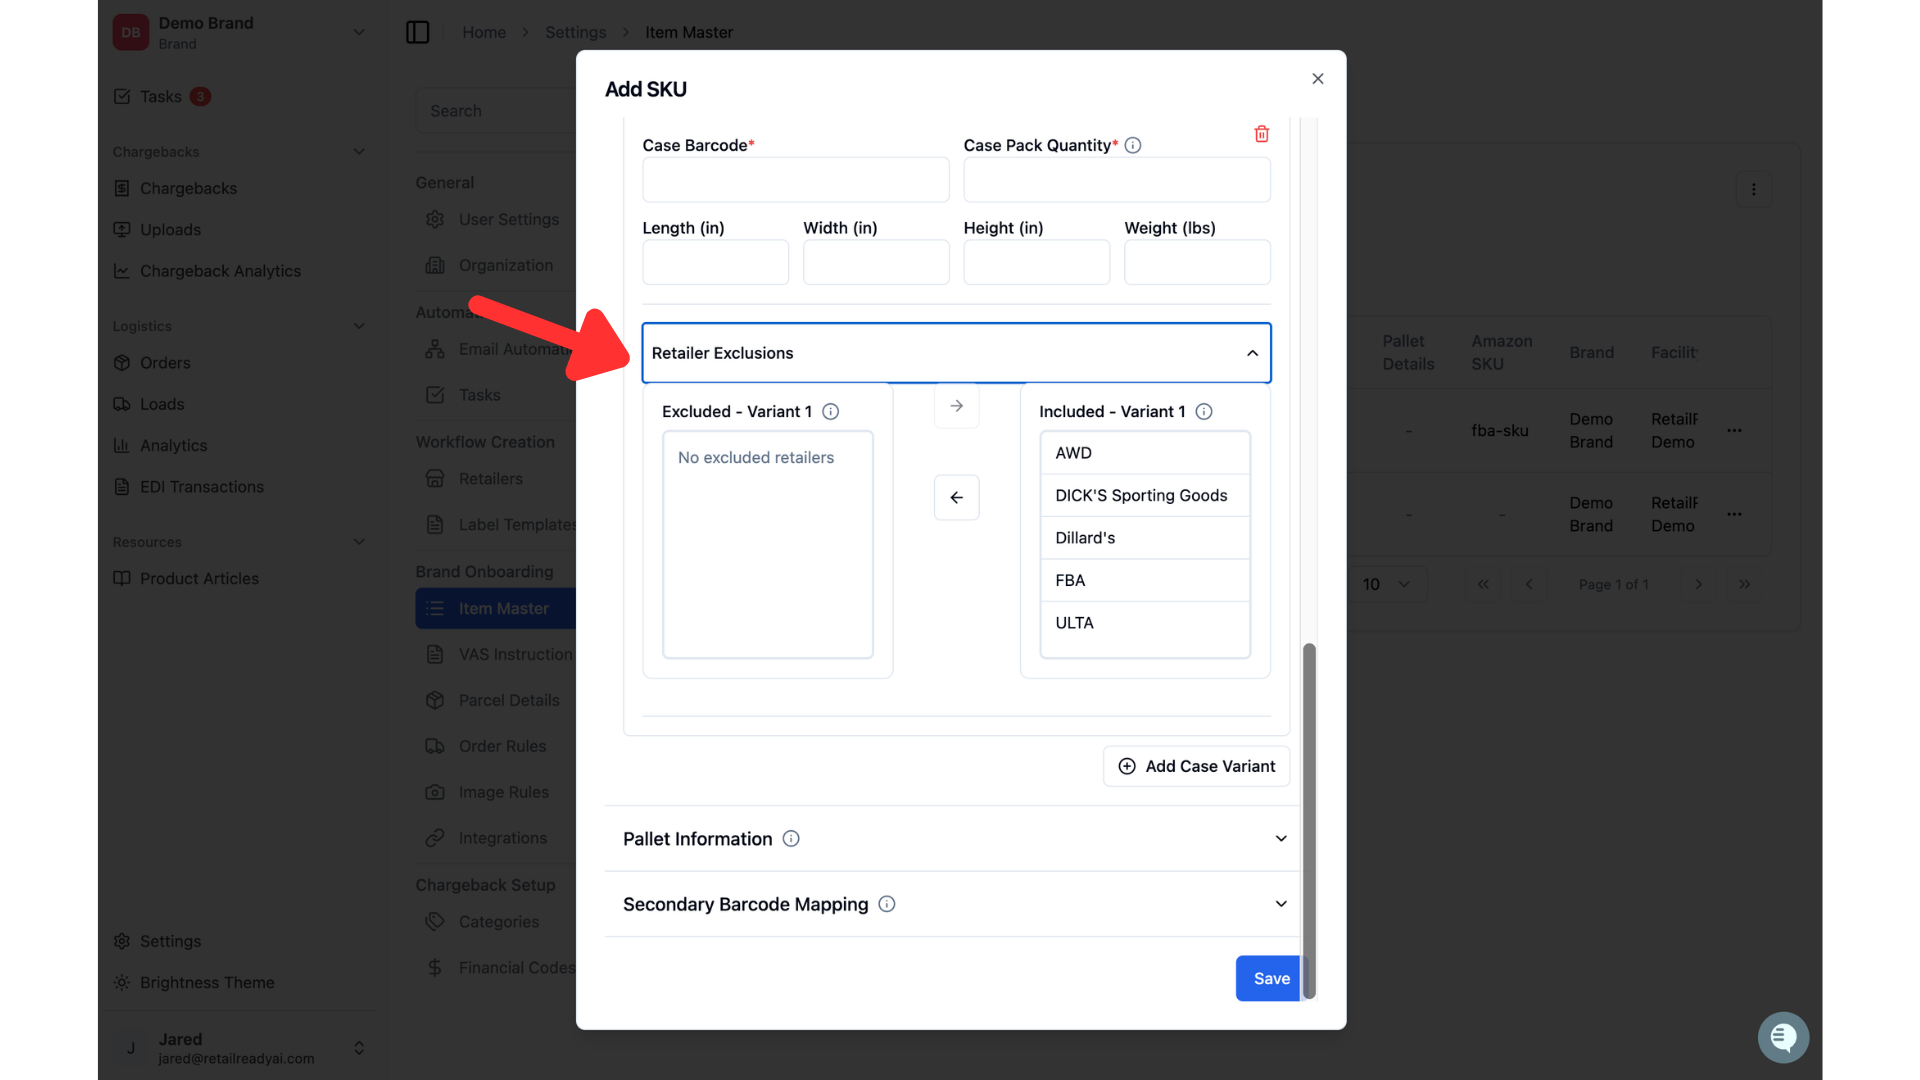
Add the retailer exclusions for this case pack. In the case variant section, retailers will populate the excluded section unless moved. If this case variant is used for a specific retailer, it should be put in the included section. If it will not apply to a retailer, it should be left in the excluded section.
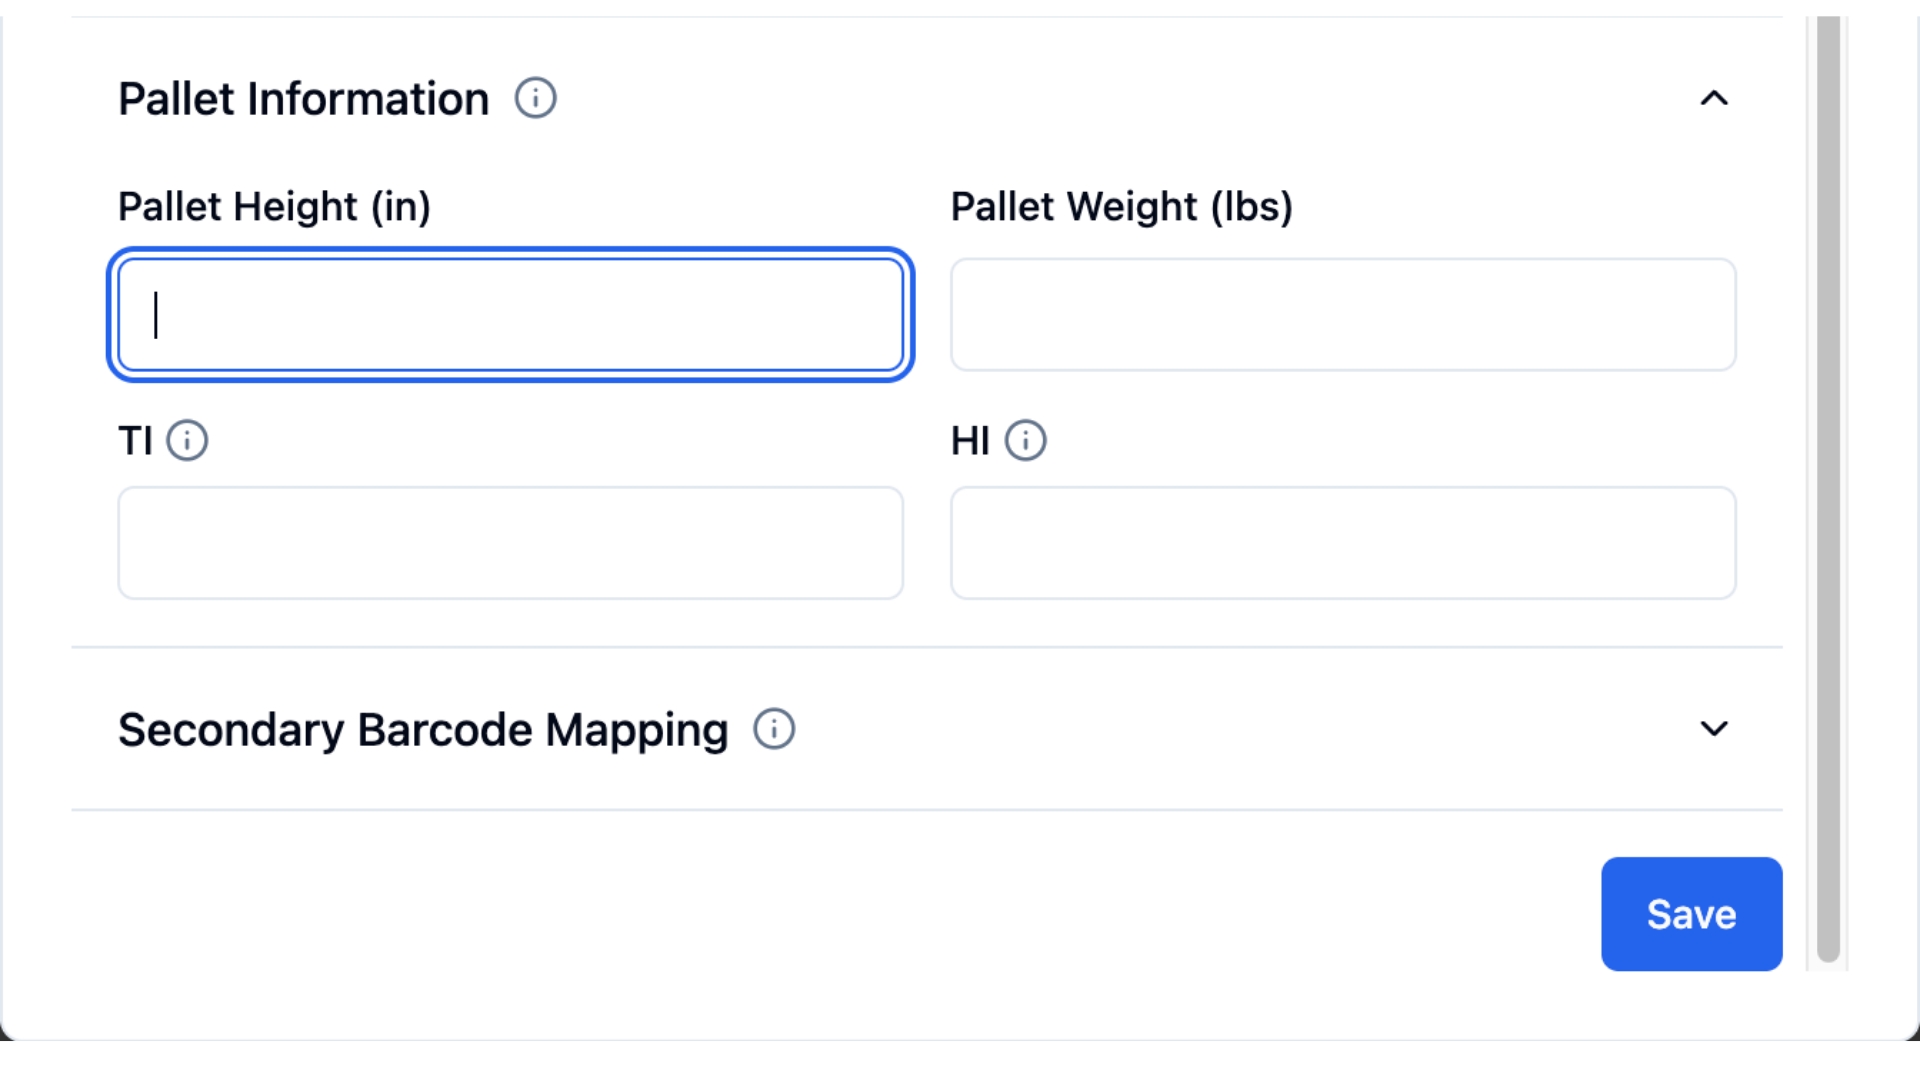
The pallet information section is optional and it's purpose is for guidance during directed workflow. These fields are for describing how a single SKU pallet it stored. Input the Height and Weight of that pallet. For TI, input the number cases per pallet layer, For HI, input the number of layers on the pallet.
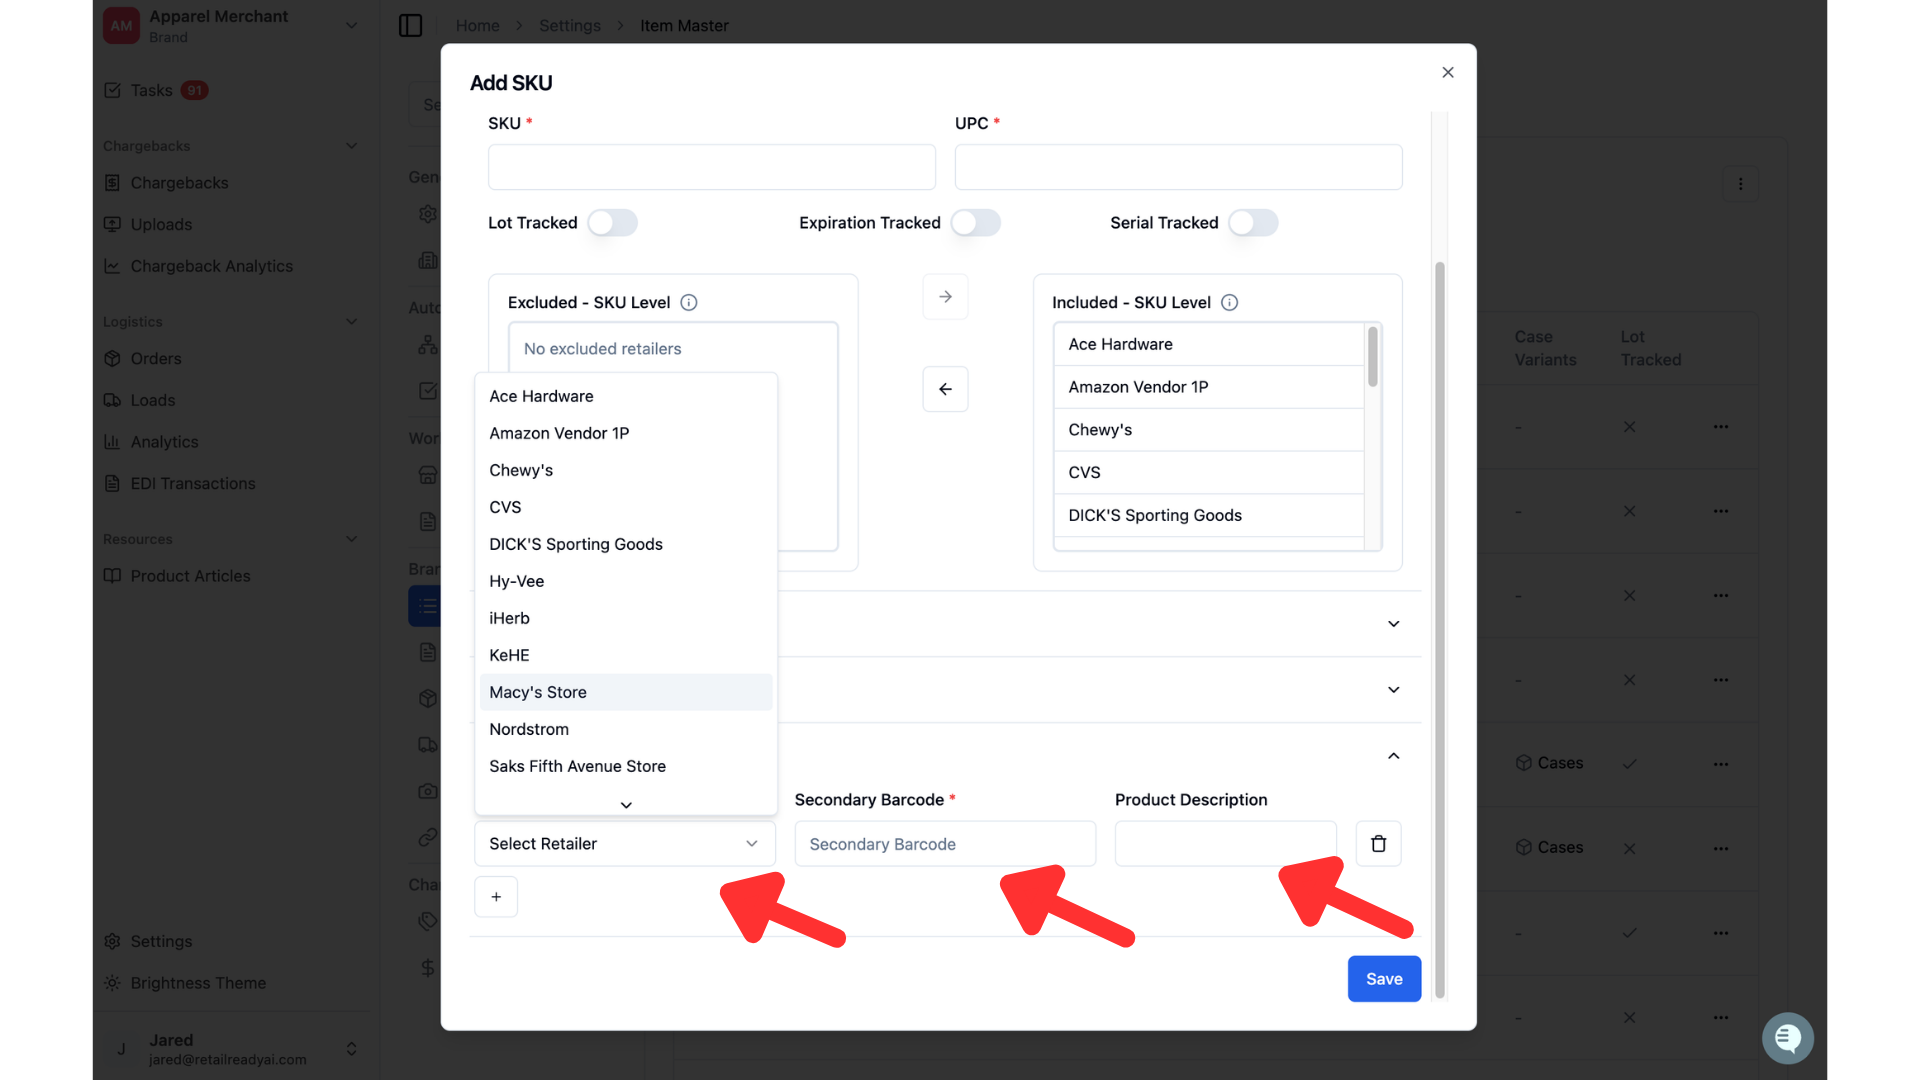
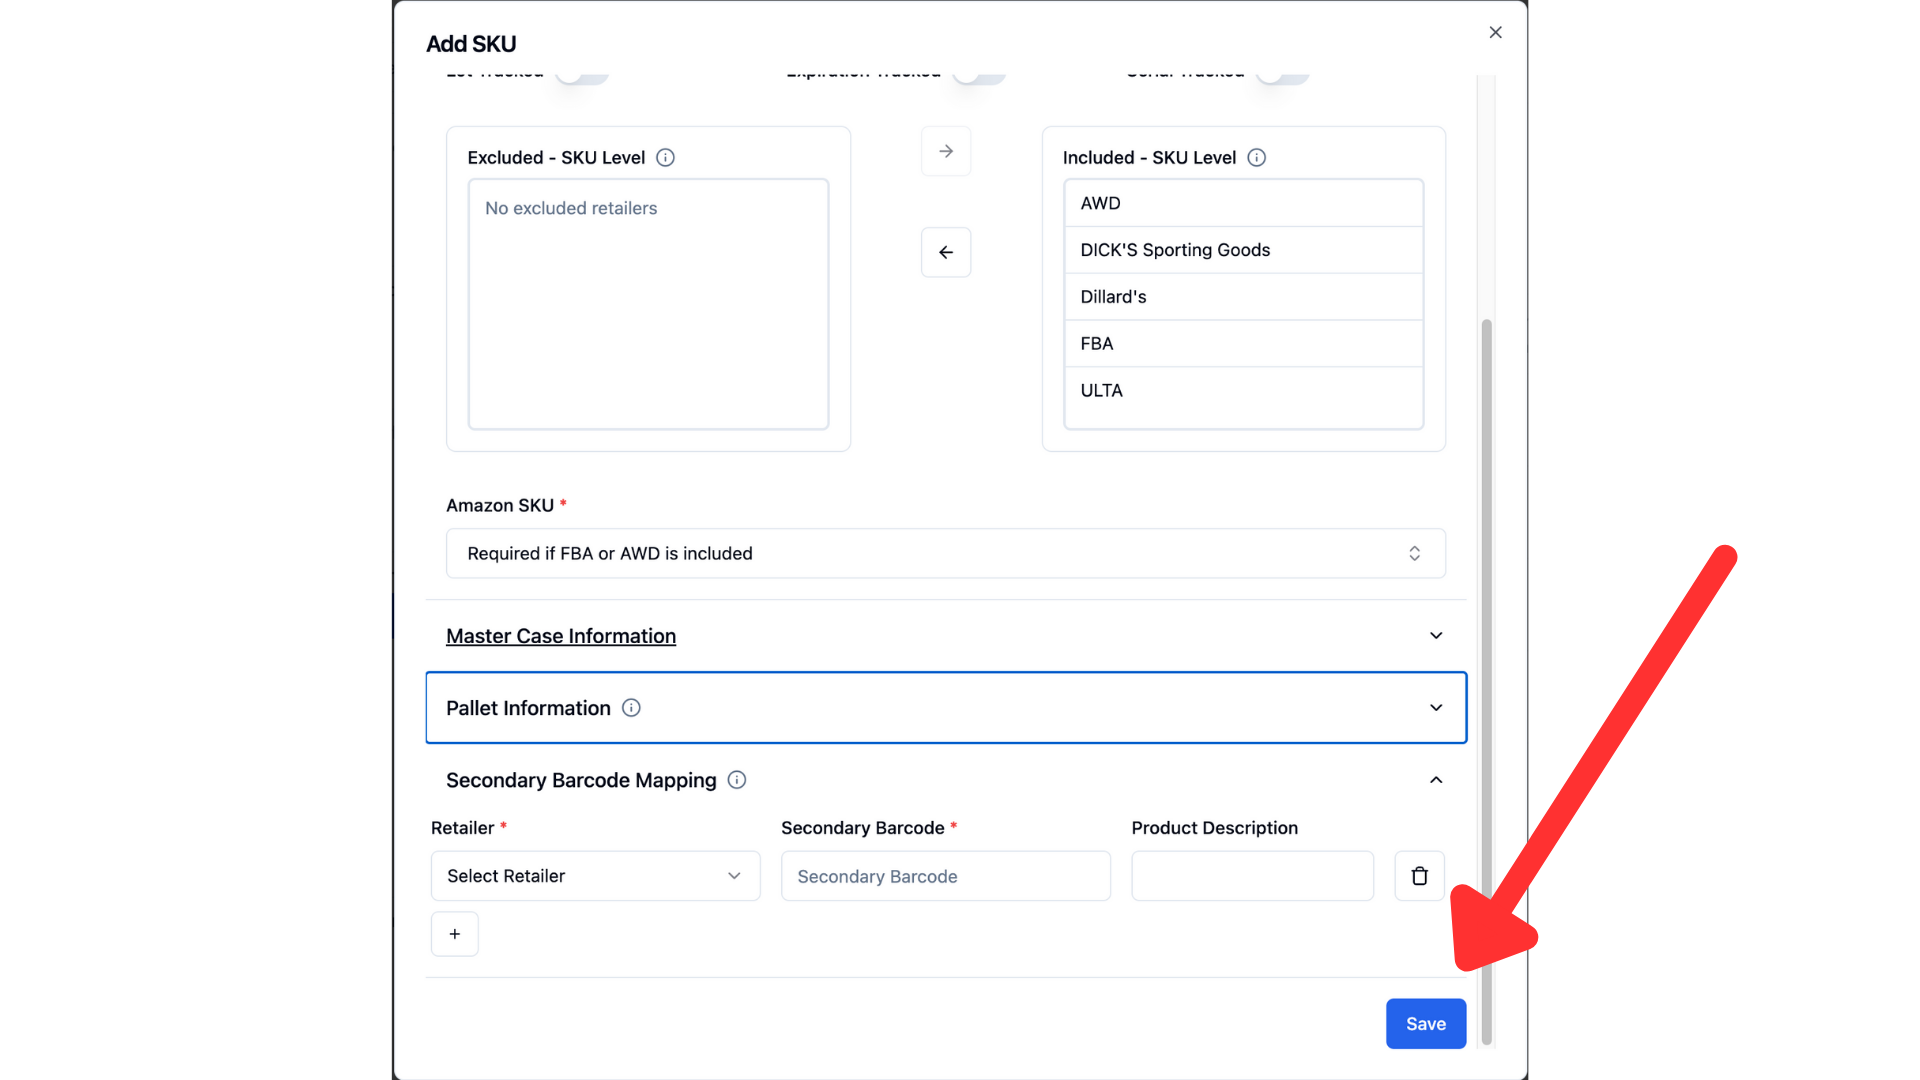
Secondary Barcode Mapping lets you add additional product identifiers to a SKU. You can assign retailer specific UPCs or alternative barcodes to the same SKU, without creating a duplicate.
Hit save and your item is uploaded to the Item Master!
Bulk Item Upload
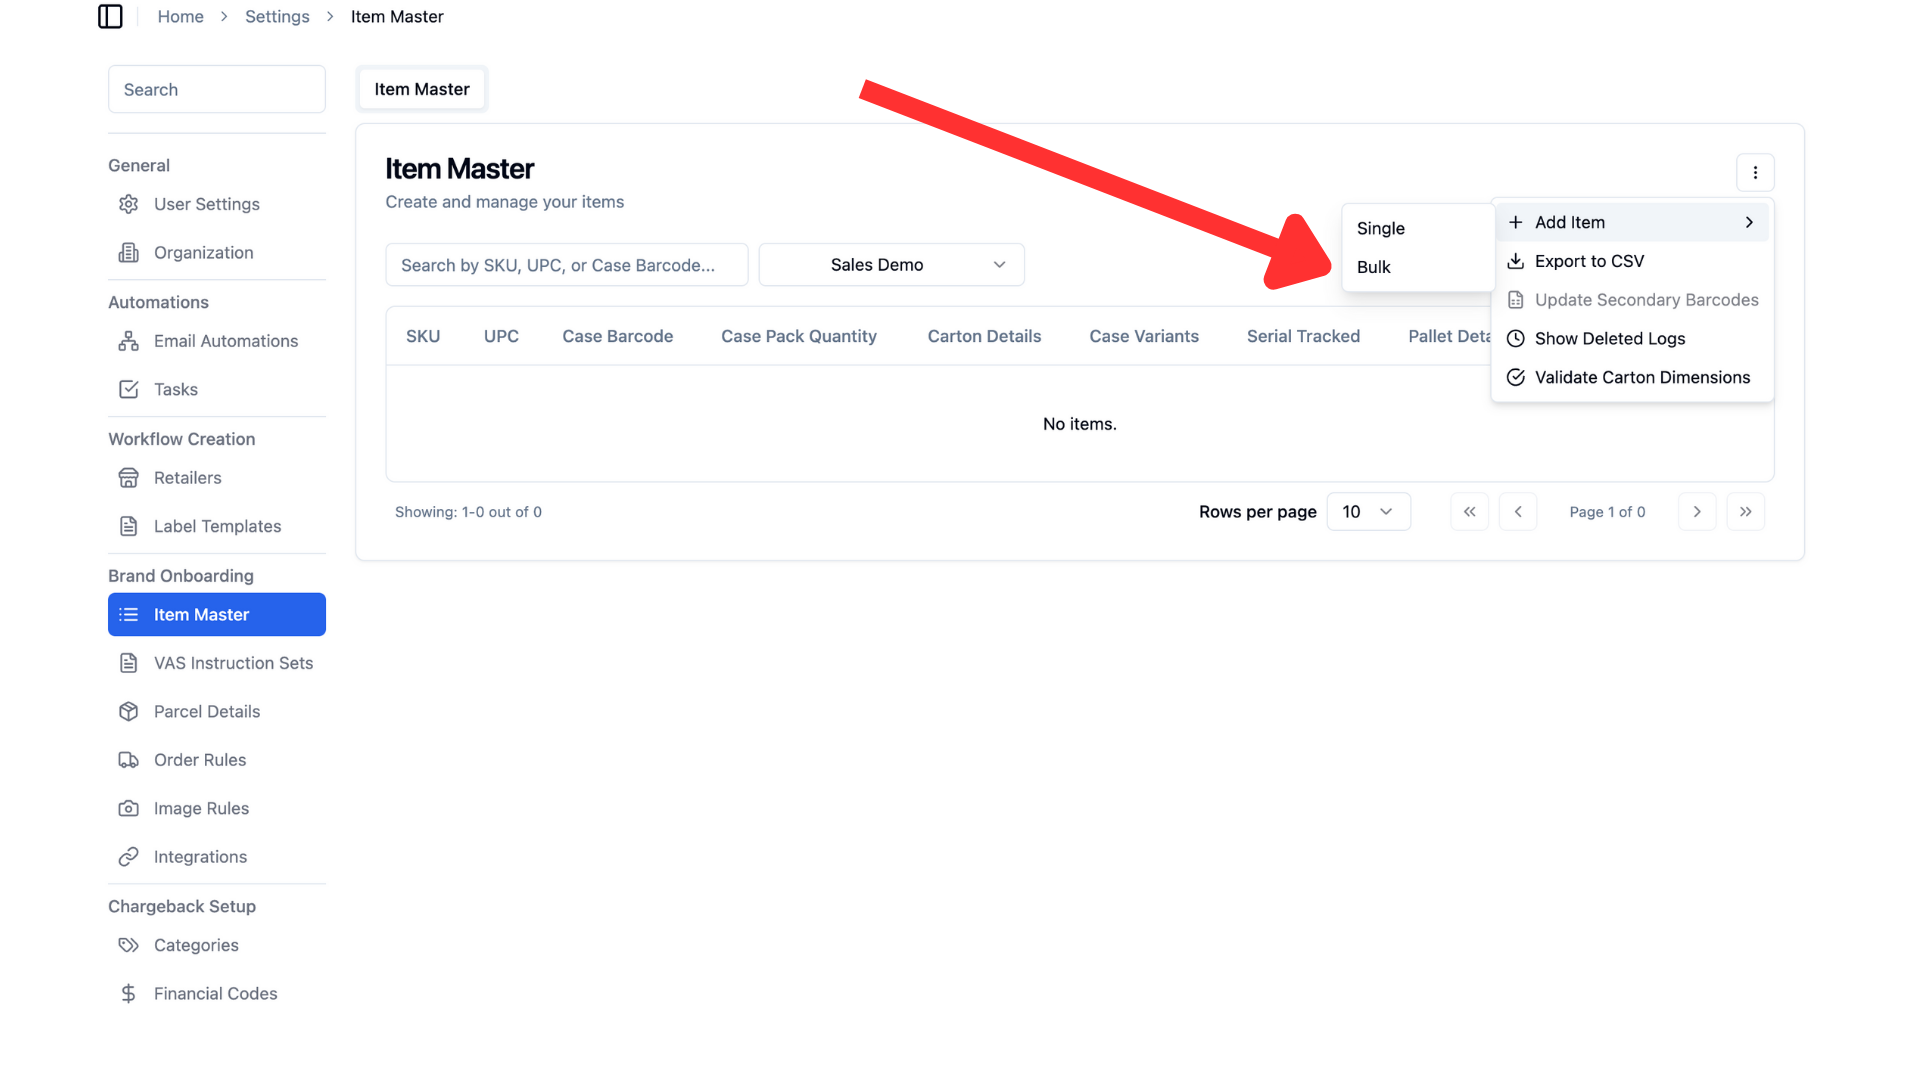
Hit the 3 dots in the top right corner, then add item, then select bulk.
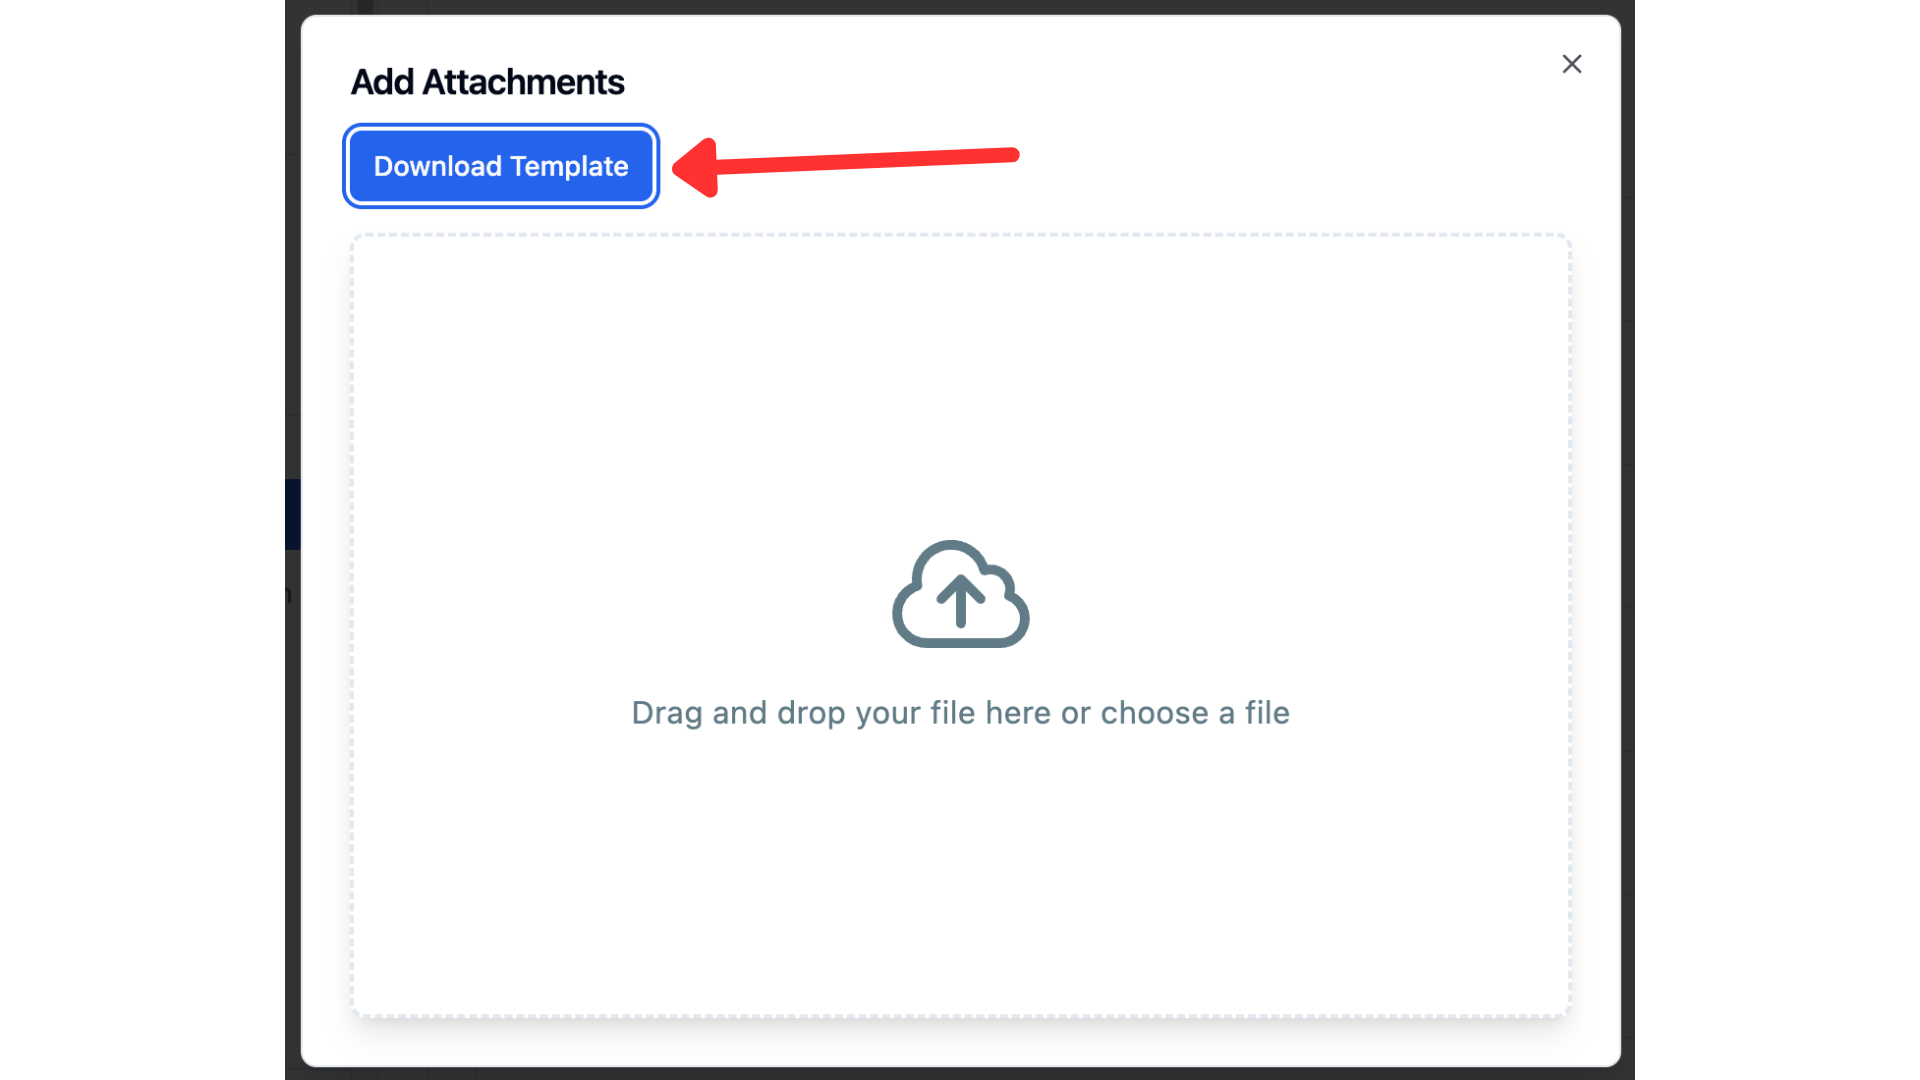
Select download template.
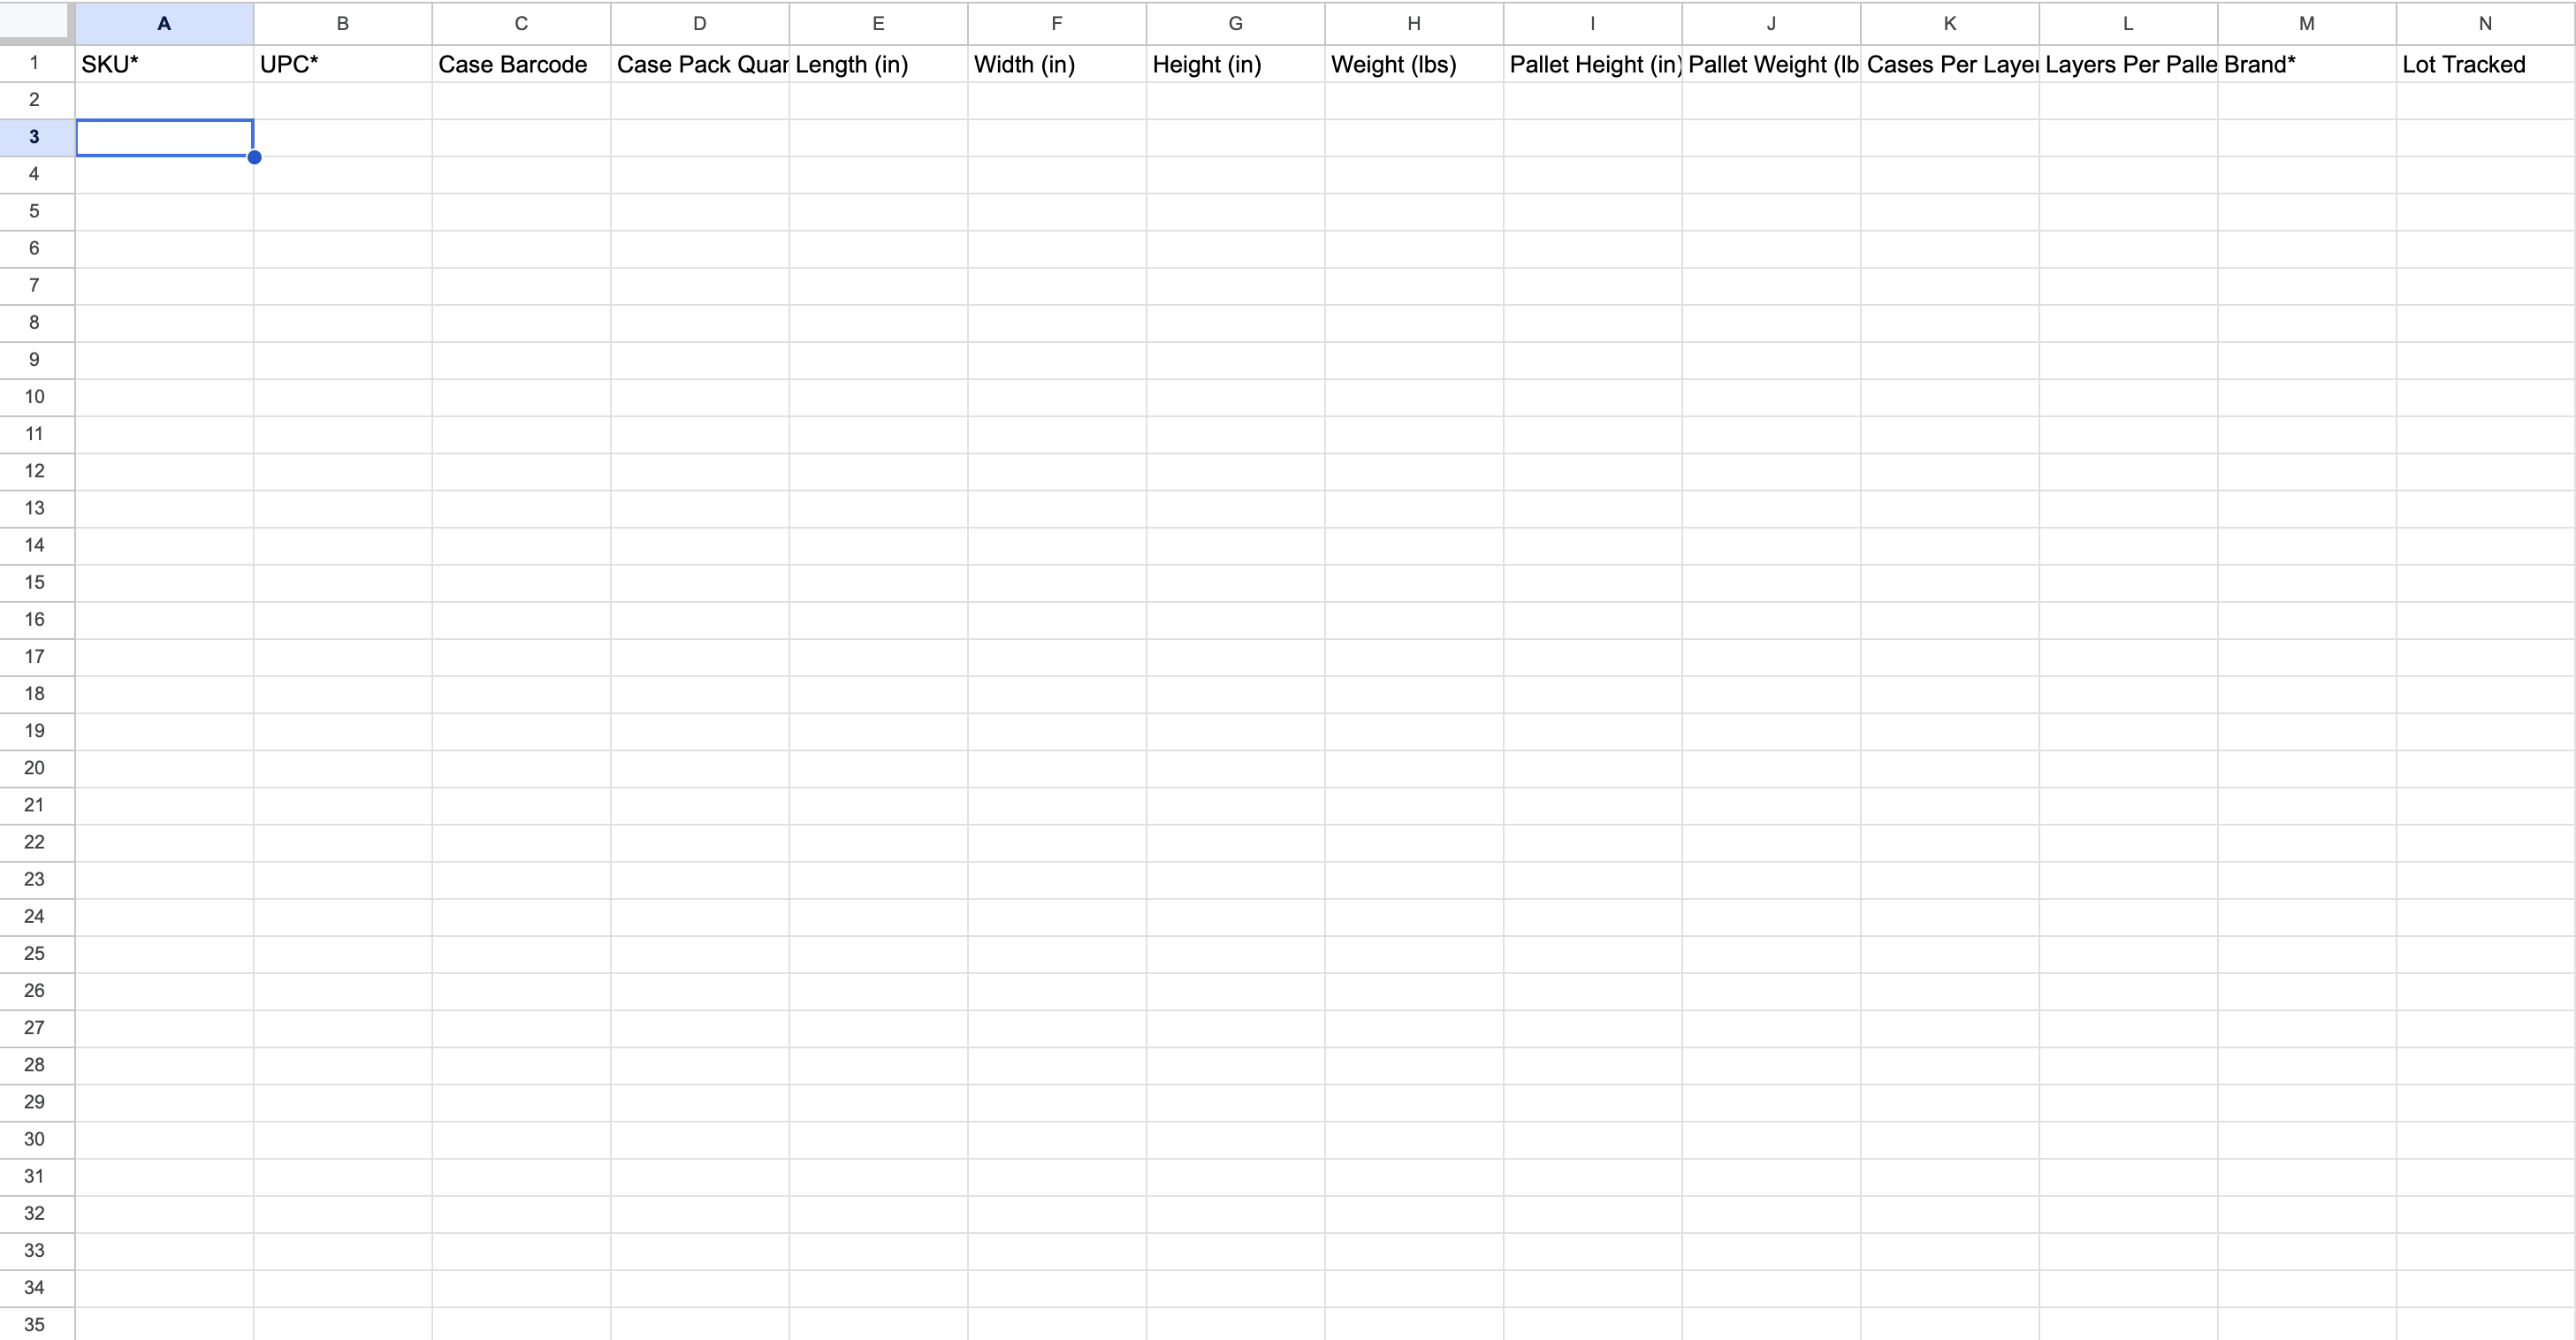
Once your bulk template is opened, fill out each column with the information marked by the column headers.
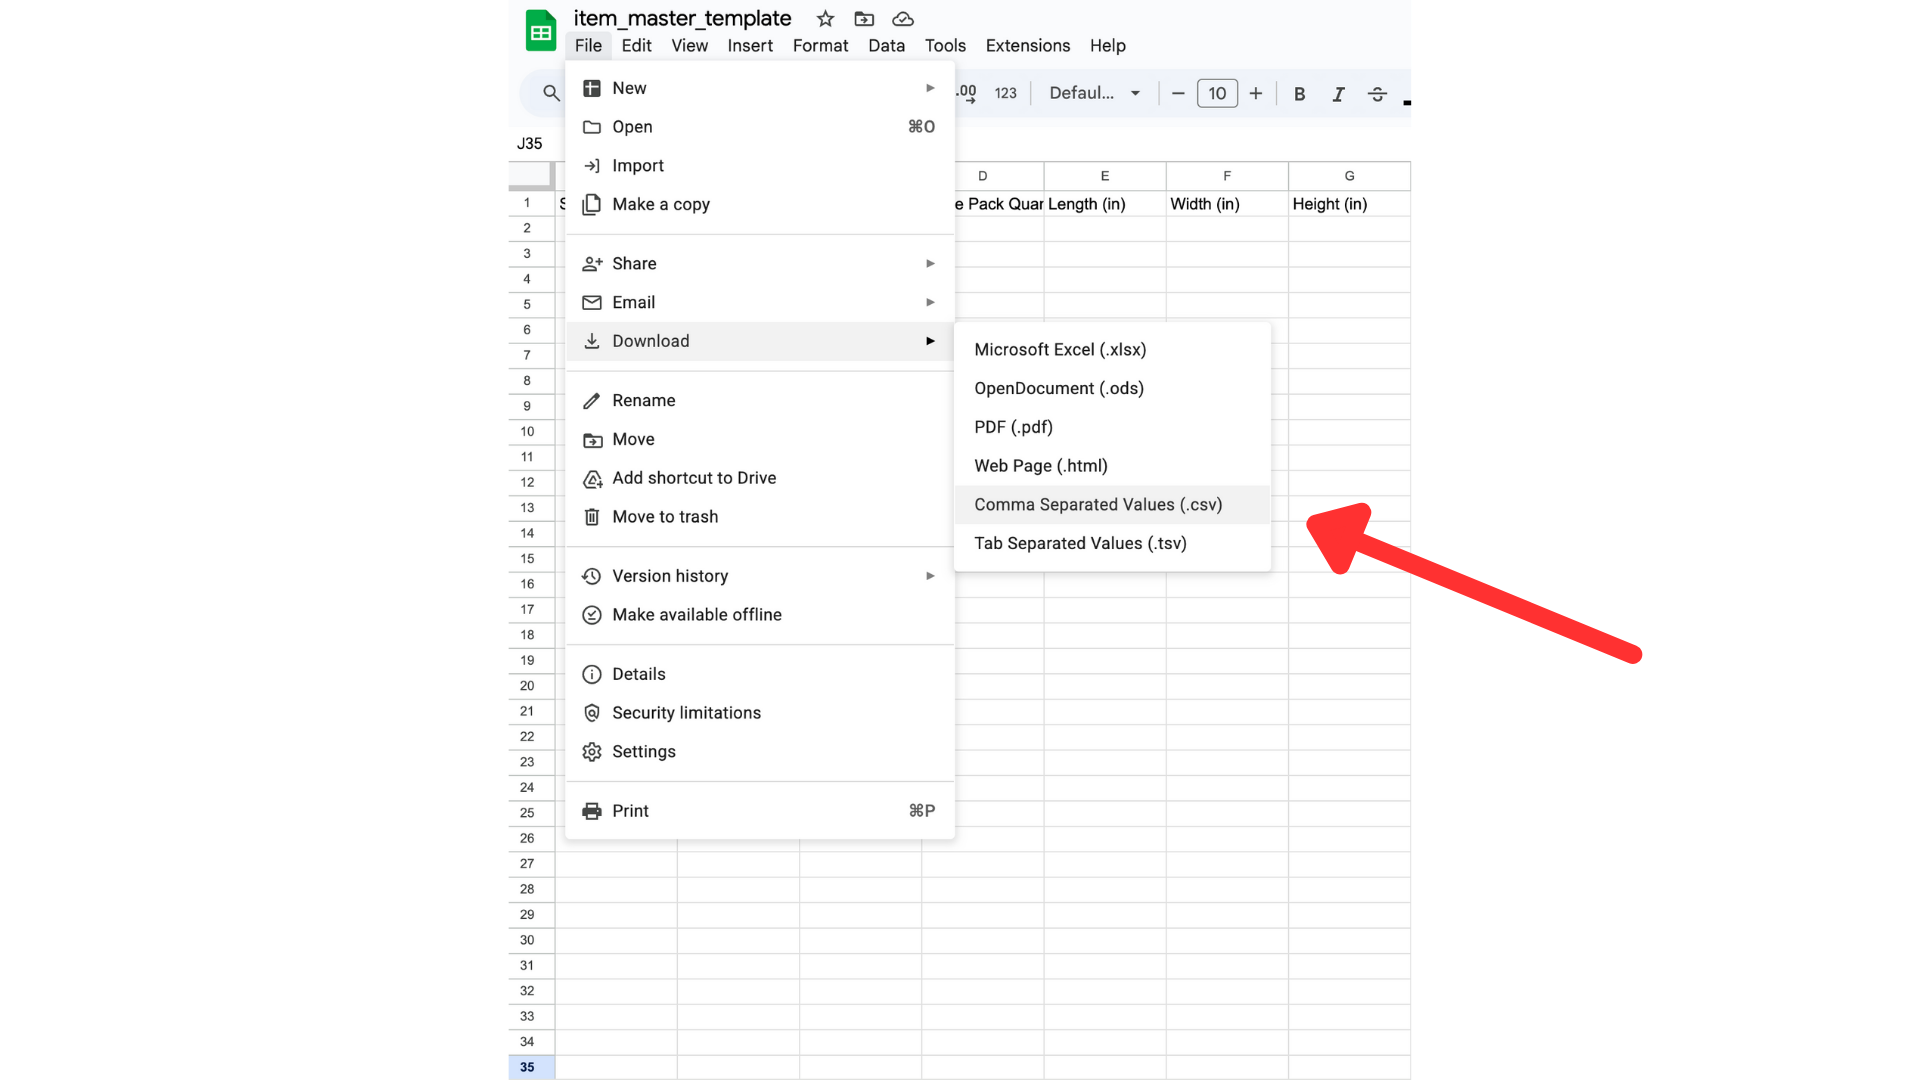
Download your template as a .csv file
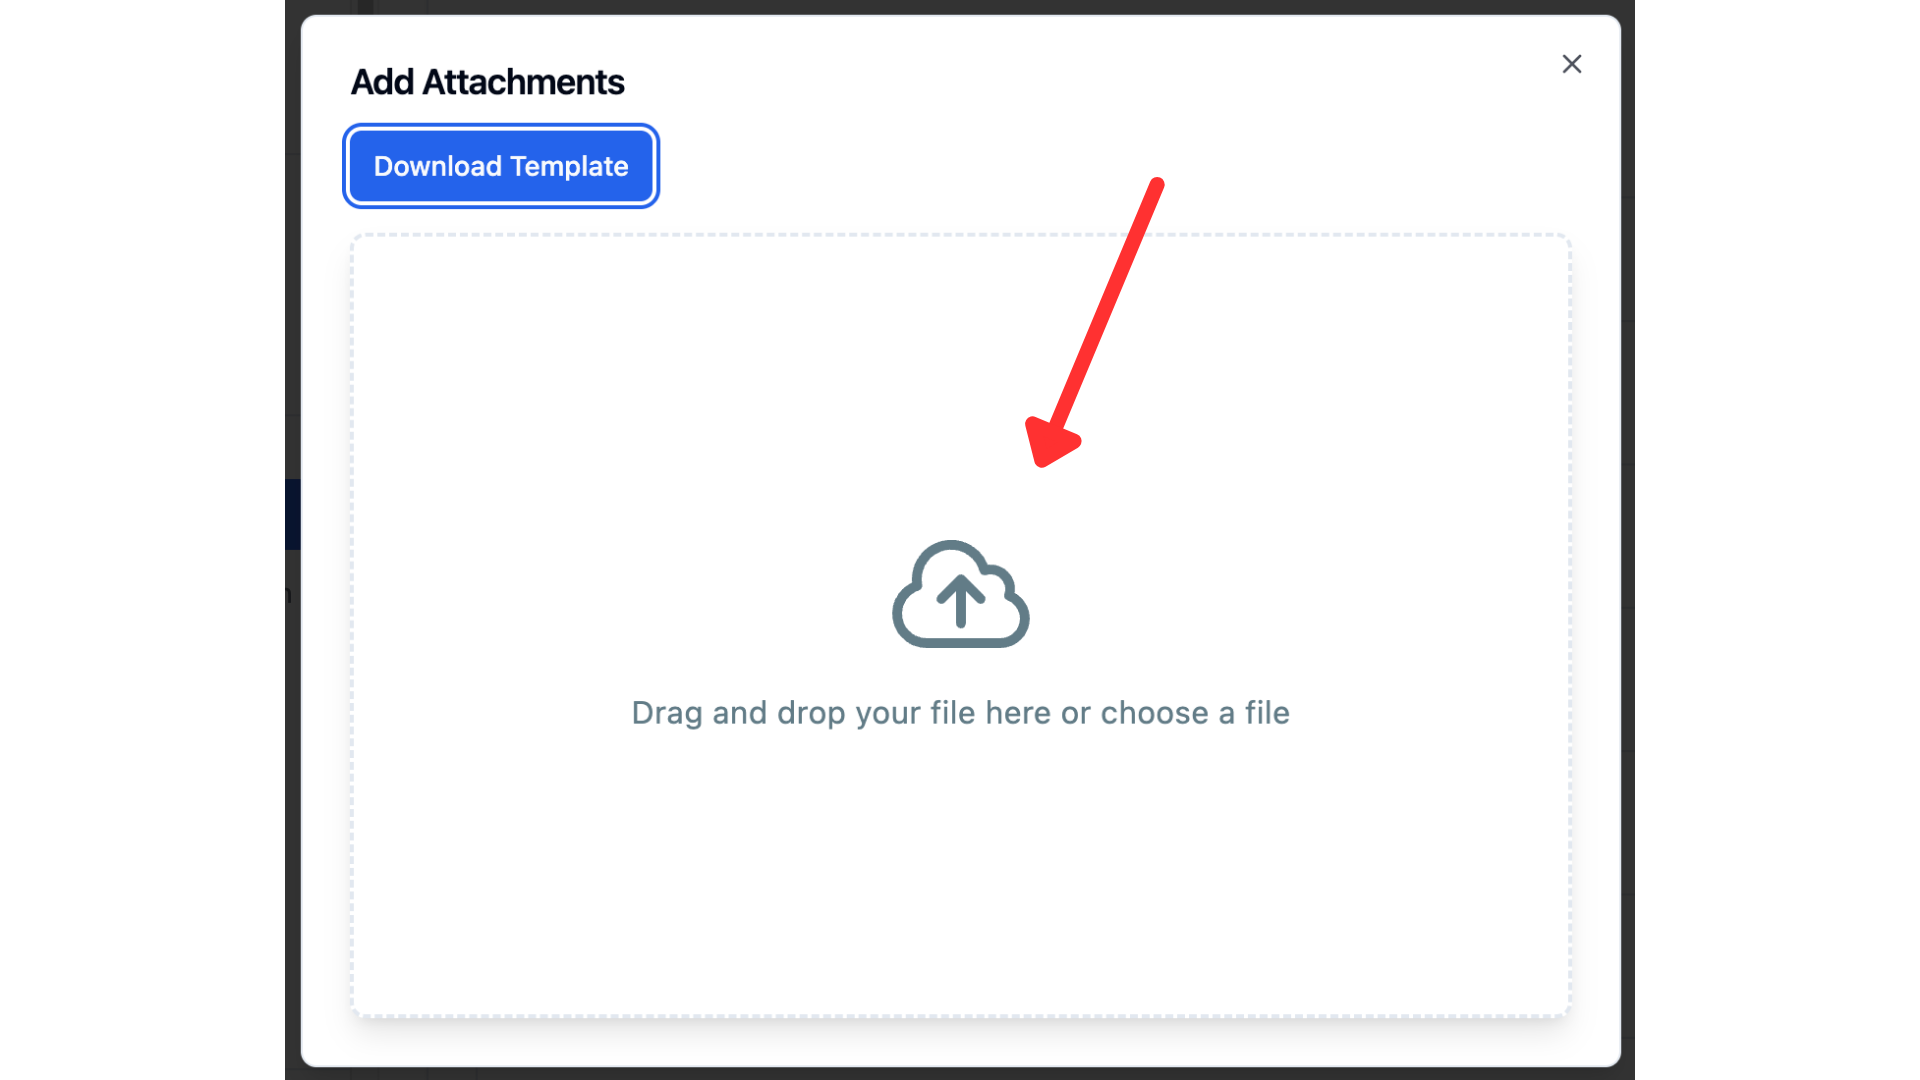
Return to RetailReady and upload your .csv file in the drag and drop window.
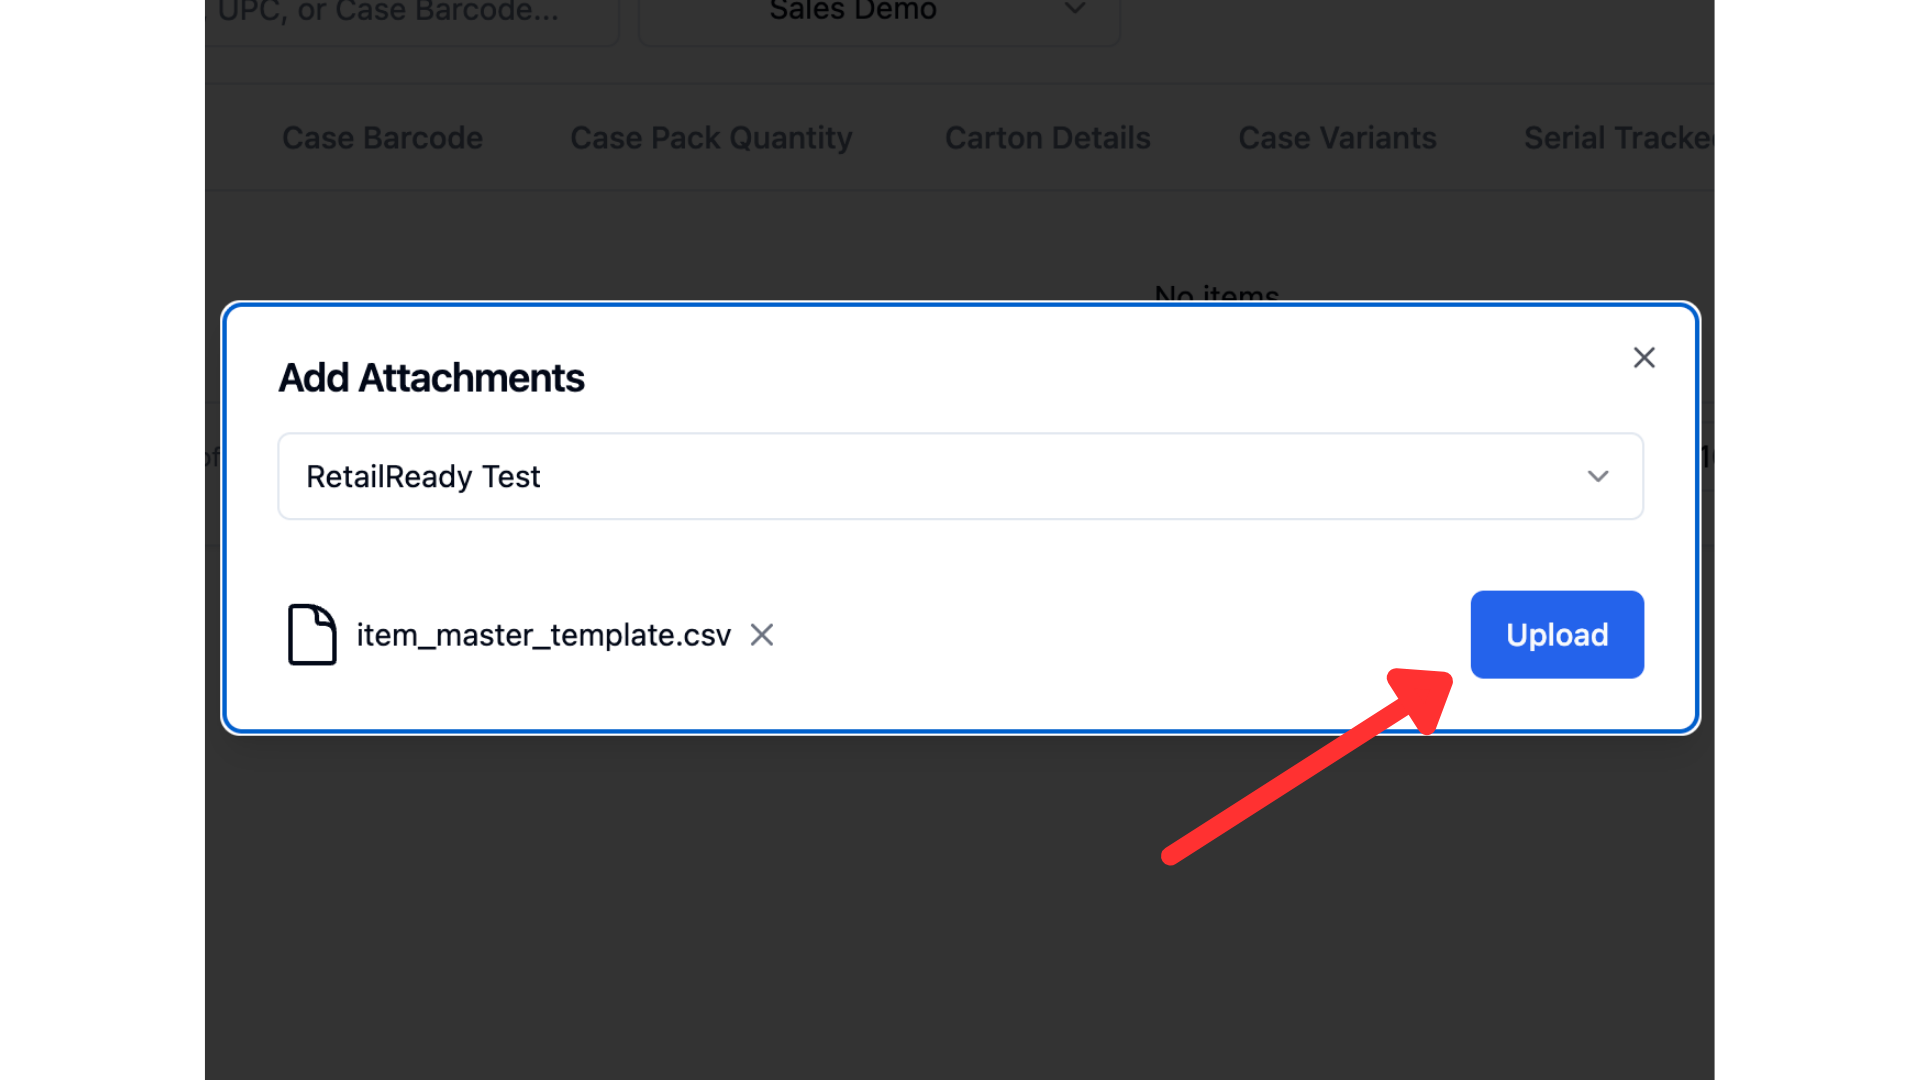
Select upload!
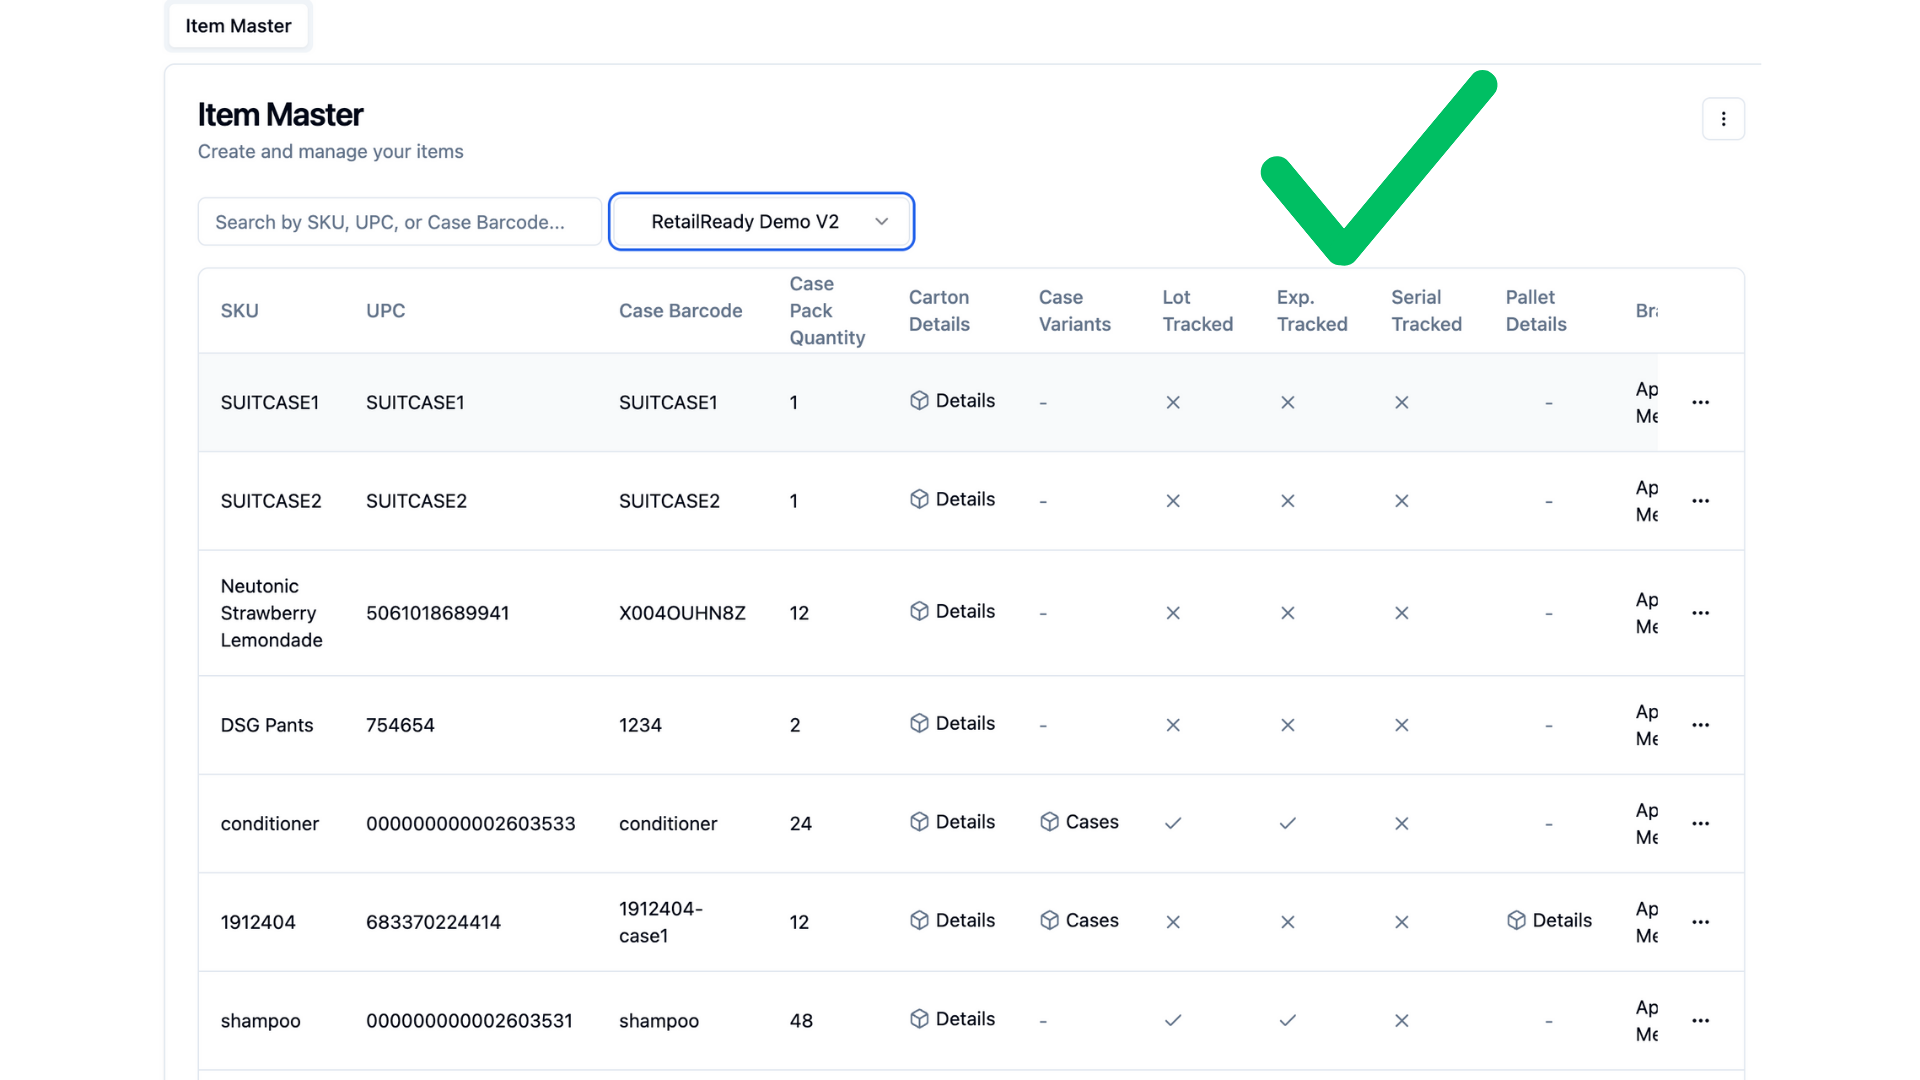
You should now see your populated Item Master!
Validate Carton Dimensions
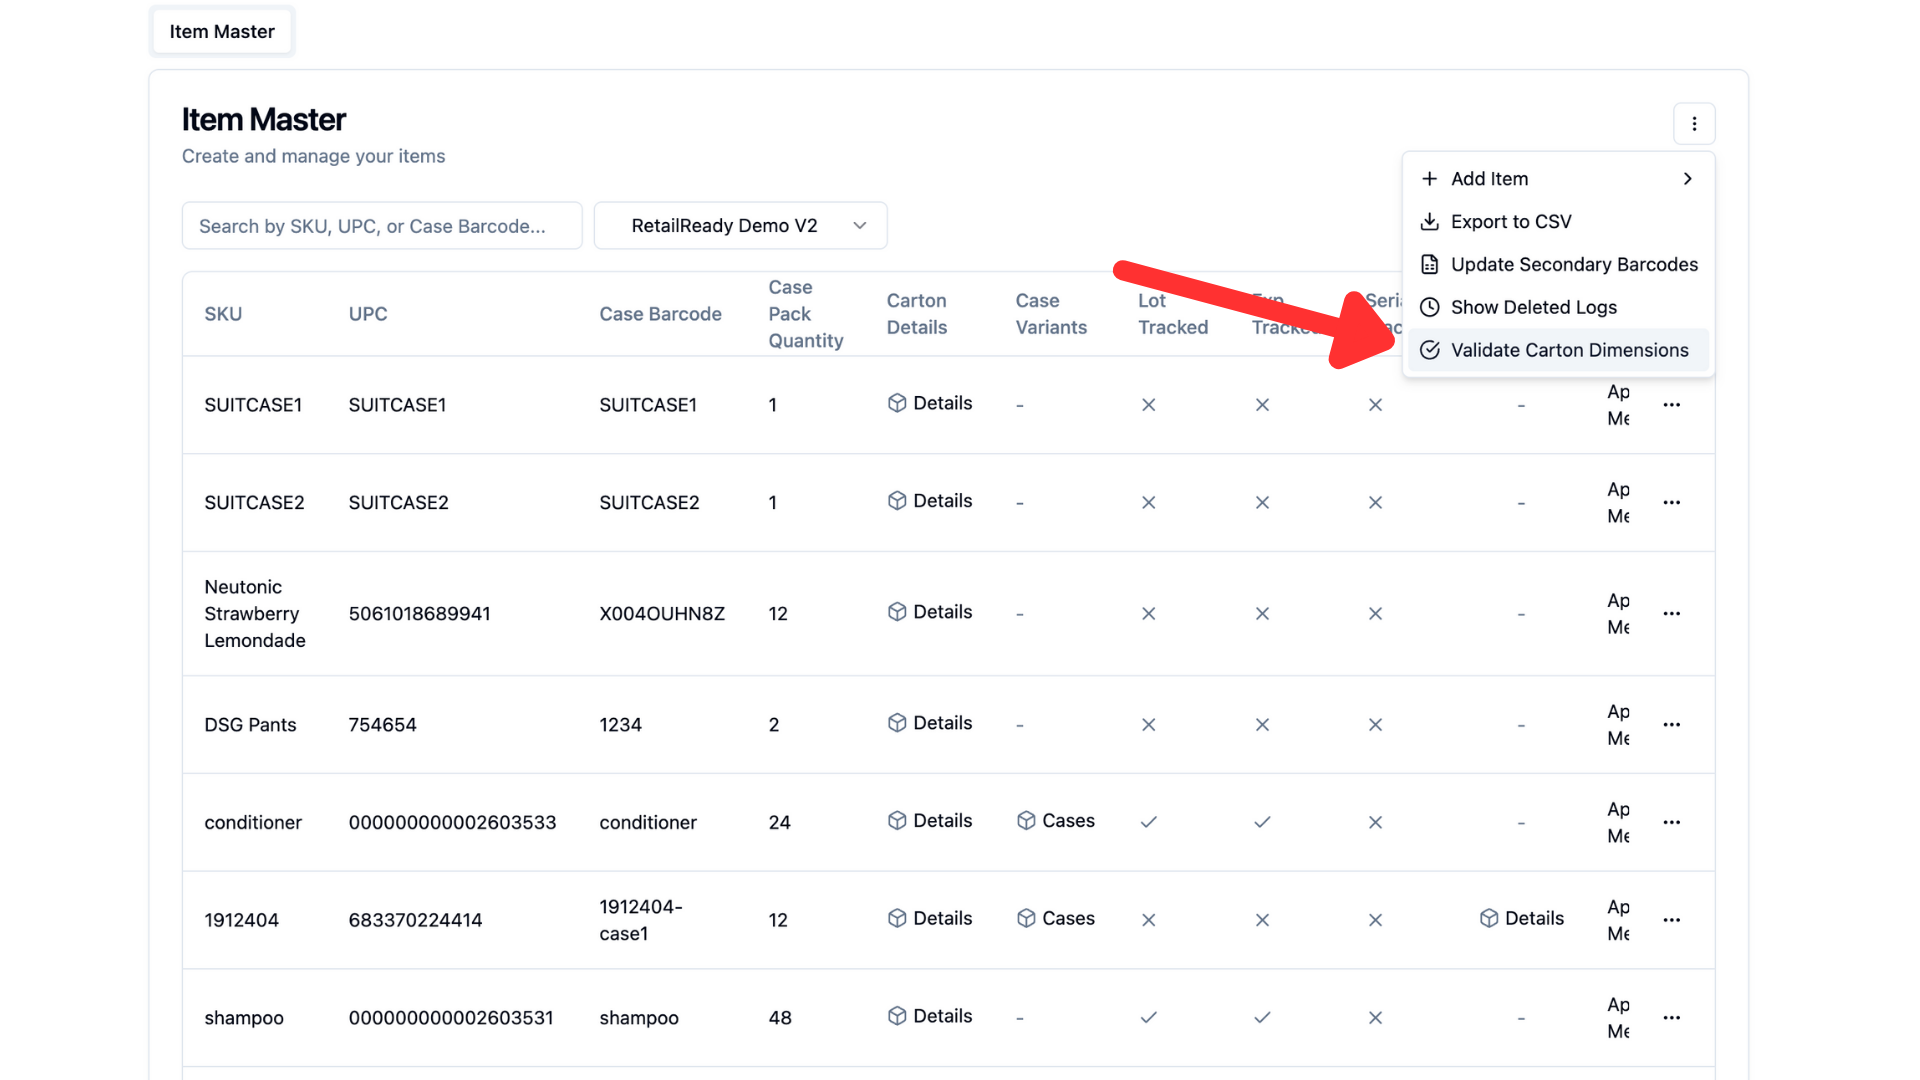
Another important feature of the Item Master is the Validate Carton Dimensions page. This feature compares the carton dimensions that you input for each item with the guidelines of your retailers. By doing this, RetailReady will highlight which items are at risk for compliance issues and alert you before you pack out.
Click the 3 dots in the top right corner of your item master view. Then click Validate Carton Dimensions
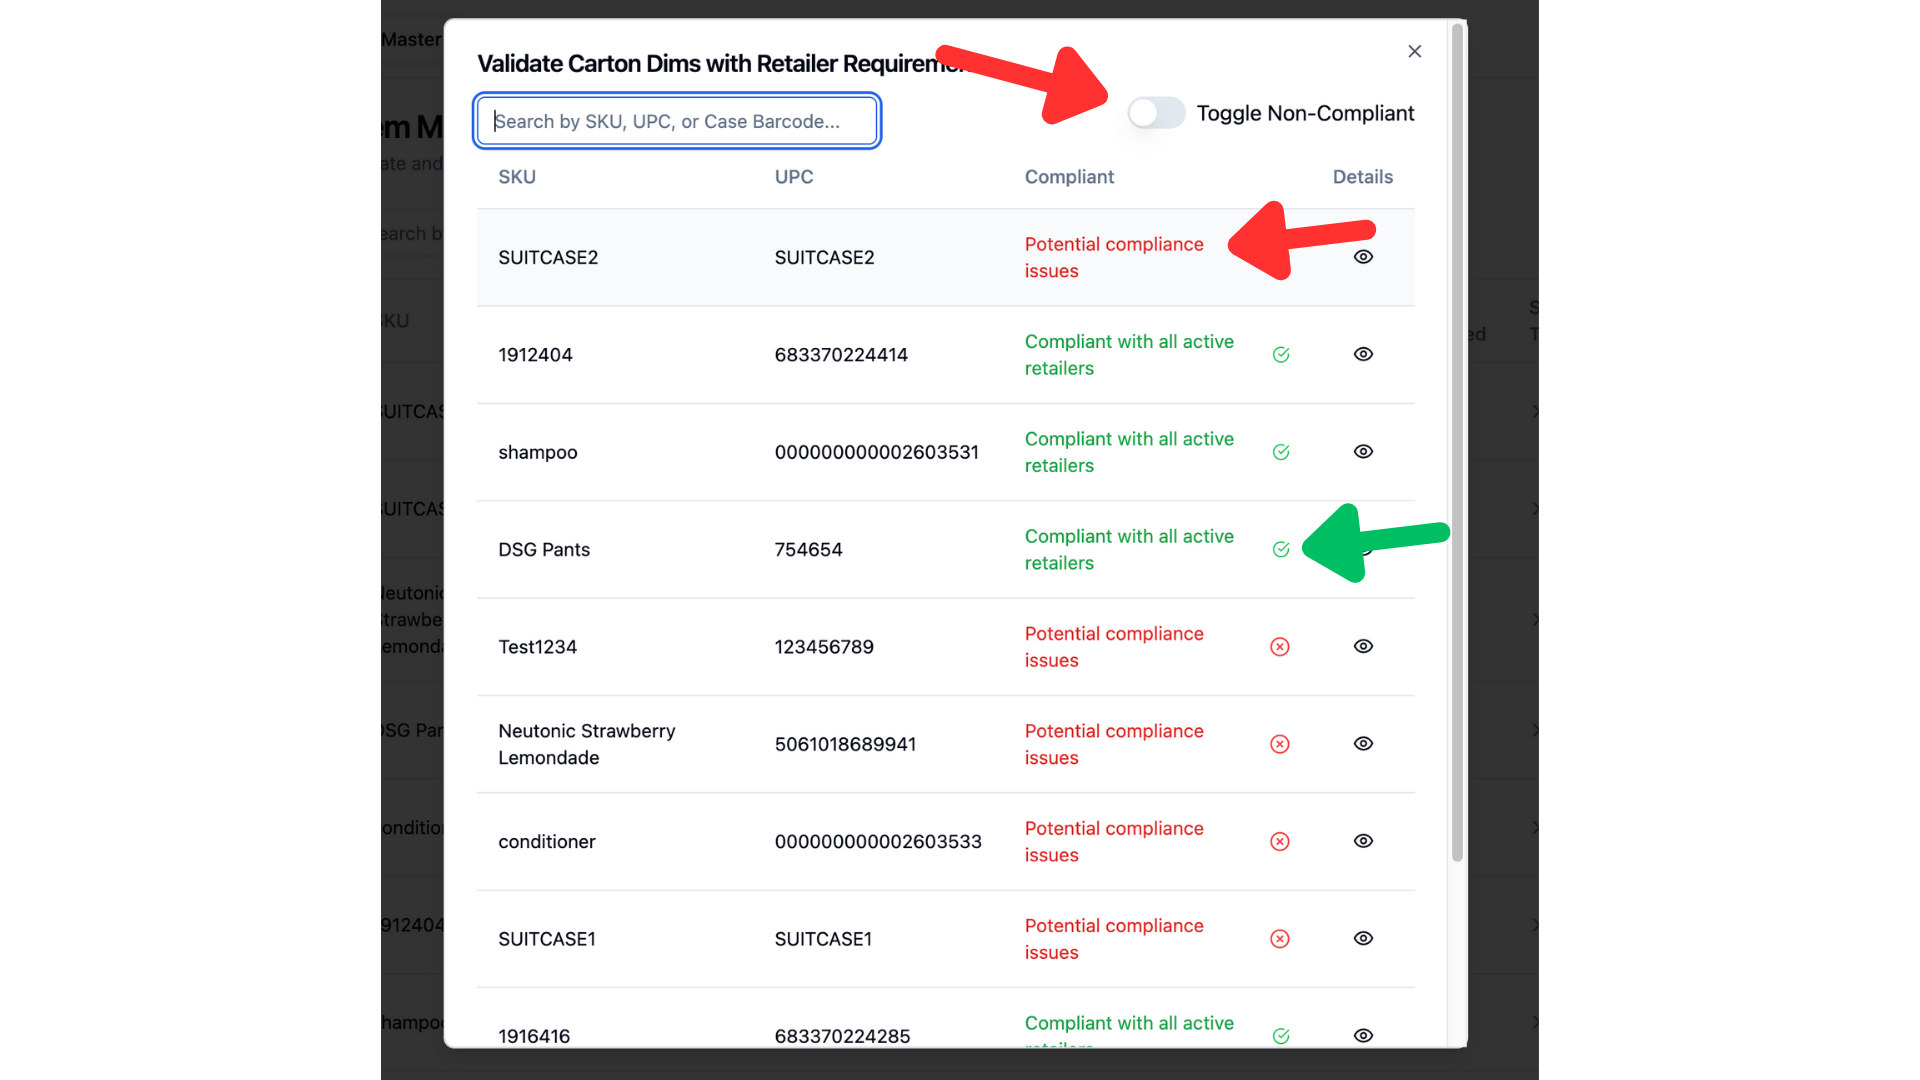
This will show you which SKUs are complaint with your retailers and which ones have been flagged. You can also toggle to see only the non-compliant SKUs!
Select the Eye icon next to one of your SKUs, you can see a more detailed breakdown of the SKU dimensions and which retailers are at risk of non-compliance.
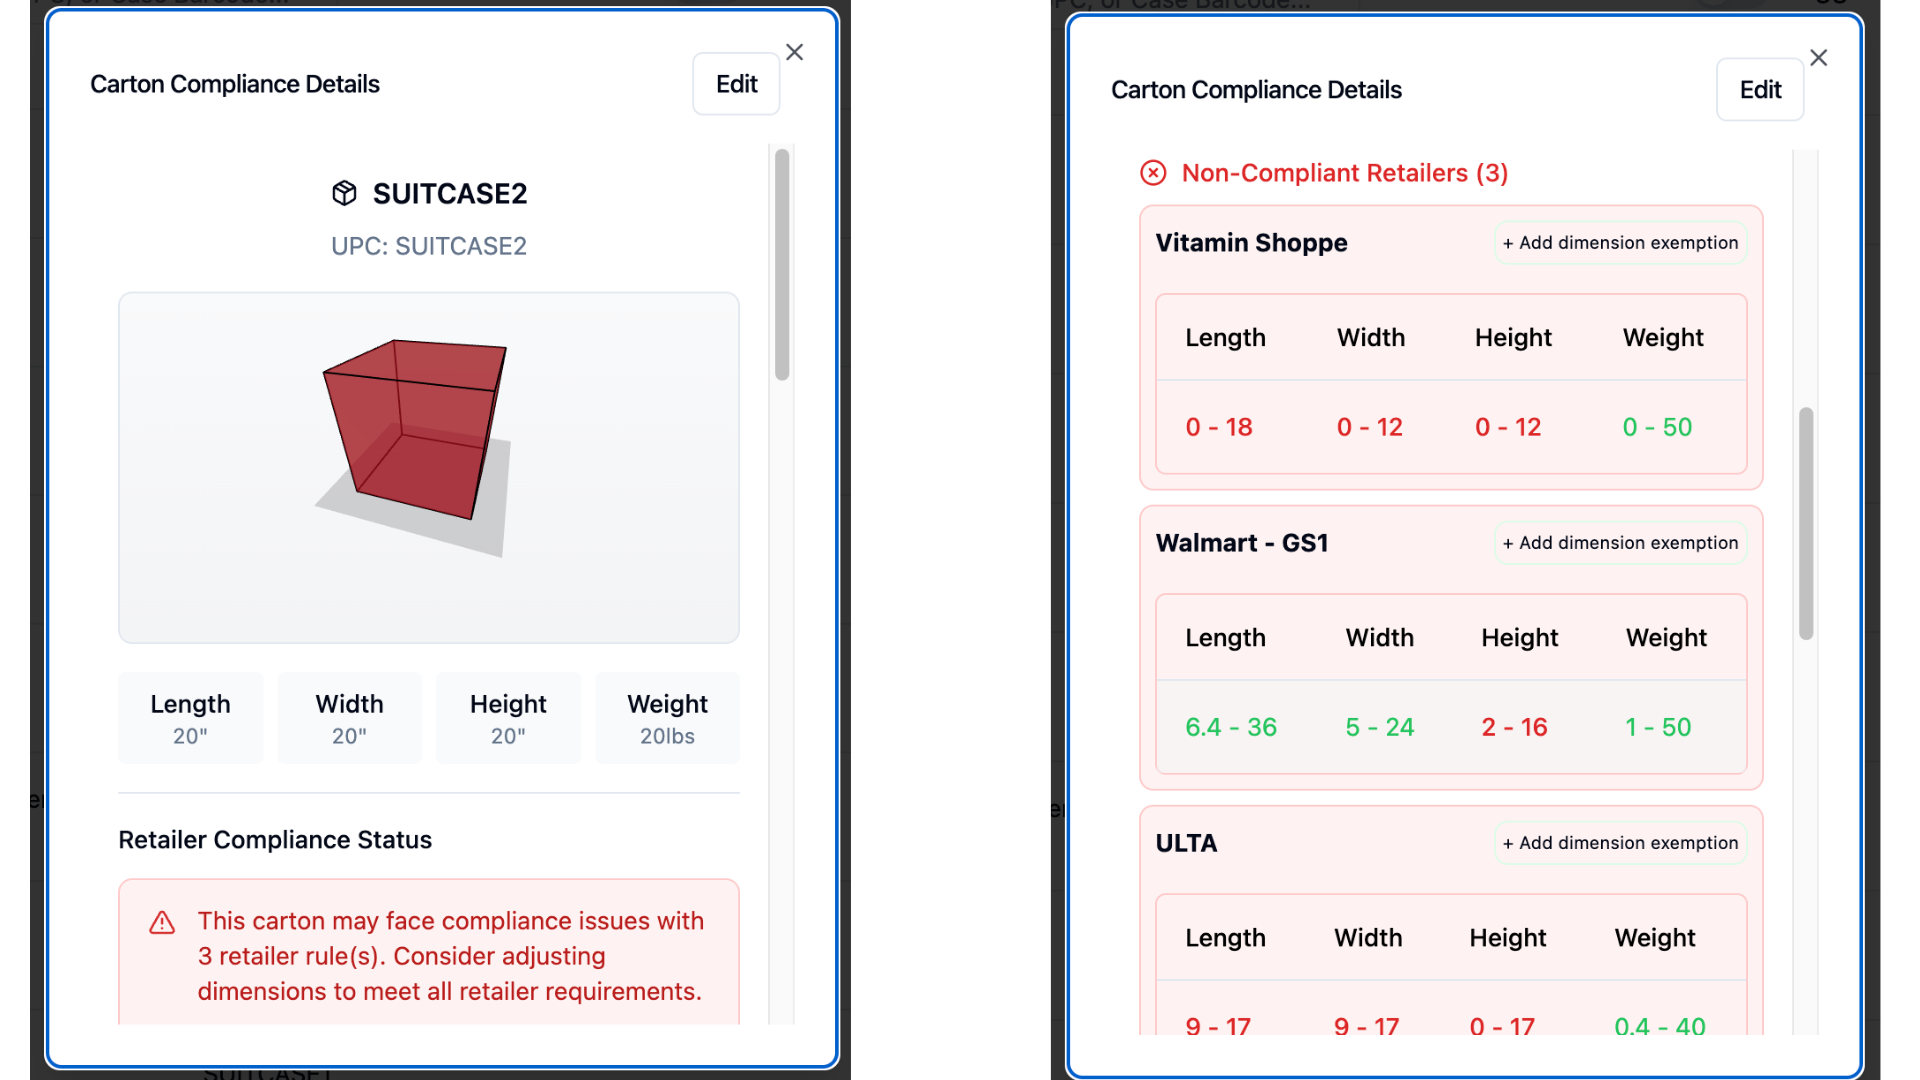
This feature will allow you to make the necessary adjustments to your carton size, before you get charged back!
FAQS
How do I edit or delete items in my item master?
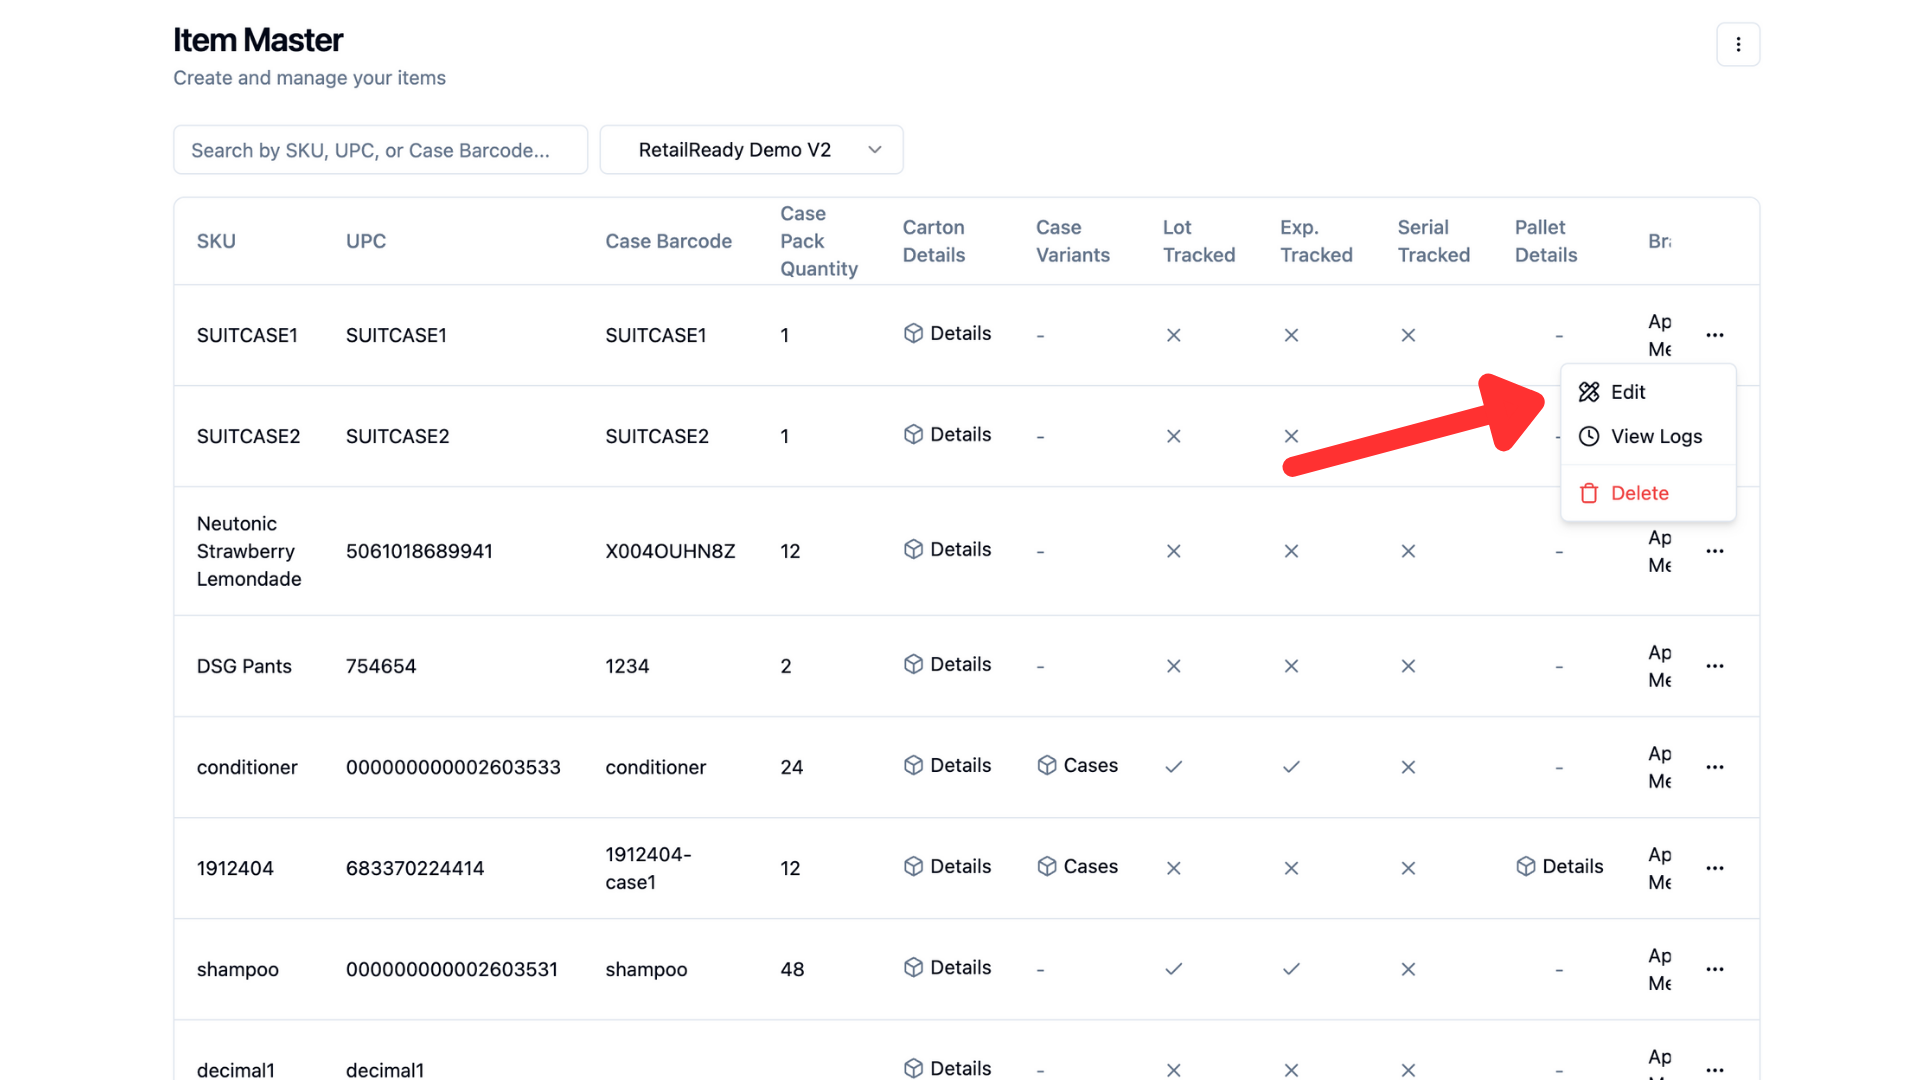
Select the 3 dots on the right side of the item you want to update, then choose Edit or Delete. If Edit is selected, a window will open displaying the item details, where changes can be made.
Can I edit the SKU/UPC?
No you cannot. You will need to delete the item in RetailReady item master and create a new item master entry. To do this, navigate to the item master and click the 3 dots --> delete.
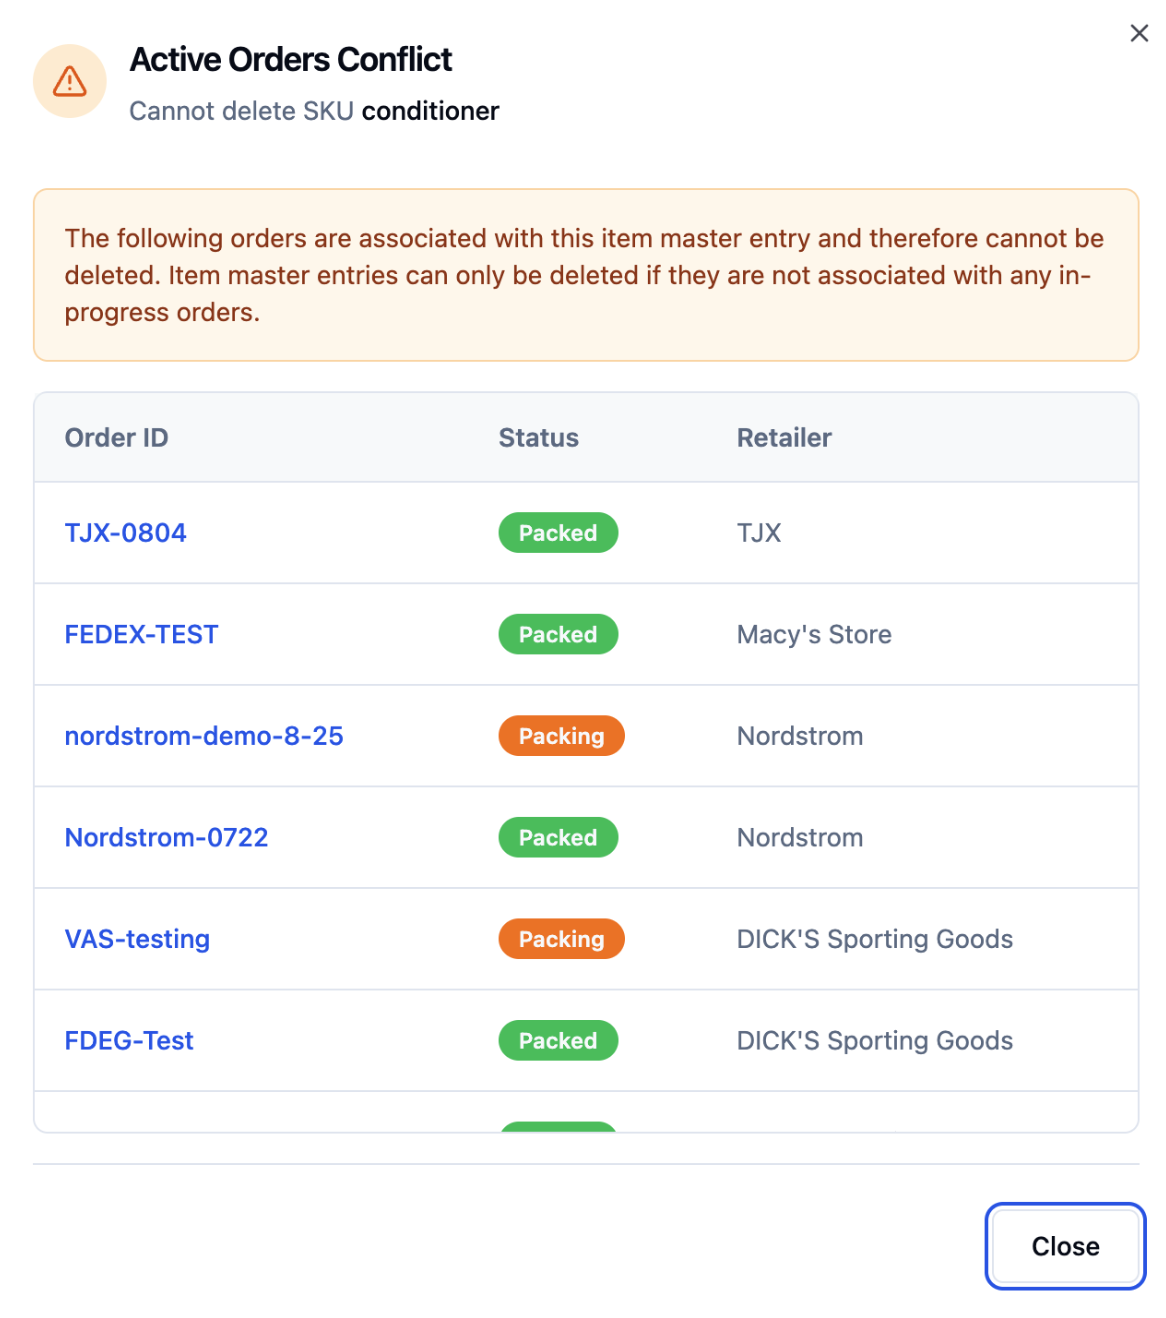
Item(s) cannot be deleted if they are associated with an in-progress order. A pop-up will appear indicating that the item is associated with active orders.
What do I do if I ship case packs but my cases do not have barcodes?
If you are shipping full case packs and do not have a case barcode, you may enter the UPC as the case barcode. Since the UPC will always be sent as a case, assigning the UPC to the case barcode allows RetailReady to recognize this during scanning.