Set up Client M2M authentication for Netsuite
Last updated: June 10, 2026
RetailReady now supports Machine-to-Machine (M2M) authentication for NetSuite integrations, providing a more reliable connection that lasts up to 2 years instead of the previous 7-30 day limit. This article explains how to set up M2M authentication for your NetSuite integration.
Setting Up NetSuite M2M Authentication
In your NetSuite account, go to Setup > Integration > Manage Integrations and find your existing RetailReady integration or create a new one.
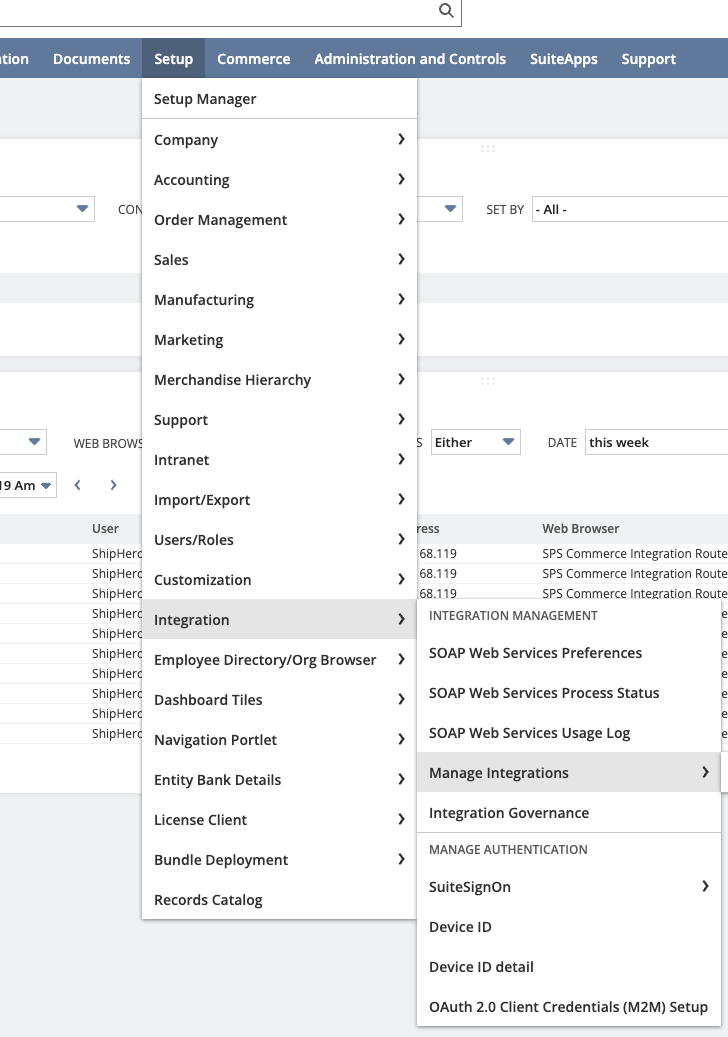
Edit the integration and check the 'CLIENT CREDENTIALS (MACHINE TO MACHINE) GRANT' option.

Reset the Credentials of the integration and MAKE SURE you save the Client ID, this will only be shown once.
Ensure you have the correct settings for this integration. Go to Setup > Company > Enable Features
Click the SuiteCloud Subtab
Ensure REST WEB SERVICES is checked
Ensure Oauth 2.0 is checked
Ensure you have a role with the required permissions. Go to Setup > Users/Roles > Manage Roles and verify your integration role includes:
Log in using Access Tokens
REST Web Services
Log in Using OAuth 2.0 Tokens
The document below are the required permissions for a Retail Ready role
Generate a certificate key pair using the following command in your terminal or command prompt. If you would like Retail Ready can generate these files and send them to you:
openssl req -new -x509 -newkey ec -pkeyopt ec_paramgen_curve:prime256v1 -nodes -days 730 -out public.pem -keyout private.pem
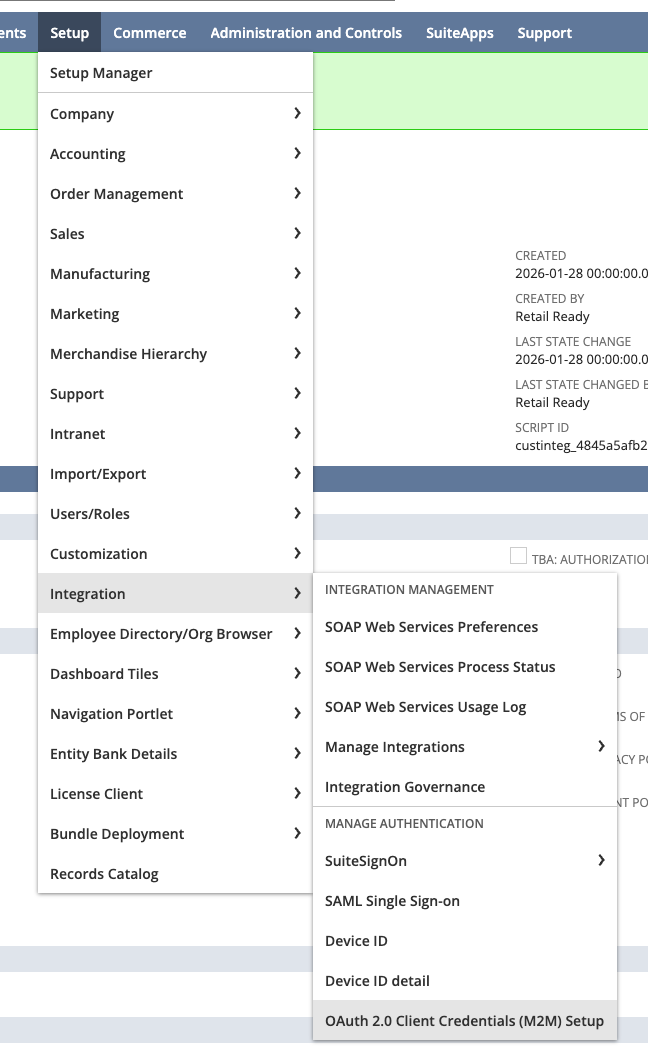
In NetSuite, go to Setup > Integration > Manage Authentication > OAuth 2.0 Client Credentials (M2M) Setup.
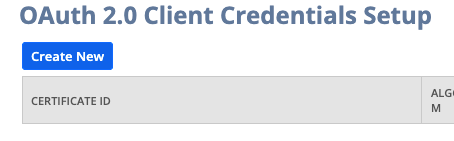
Click 'Create New' and select your Entity (user), Role, and Application (the RetailReady integration).
The role doesn't need to be Administrator like in the photo, it just needs the permissions listed in the NetSuite Integration Role Checklist
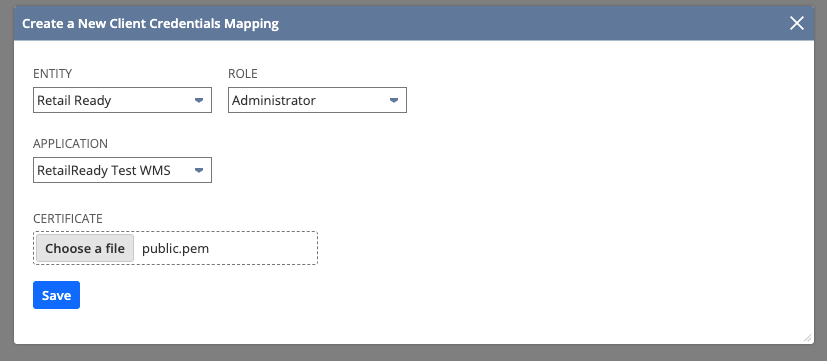
Upload the
public.pemfile you generated and save. NetSuite will generate a Certificate ID.
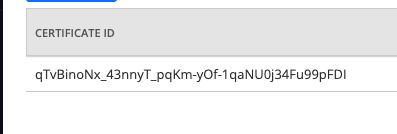
Connecting RetailReady with M2M Authentication
In RetailReady, go to your integrations page and locate your NetSuite integration card.
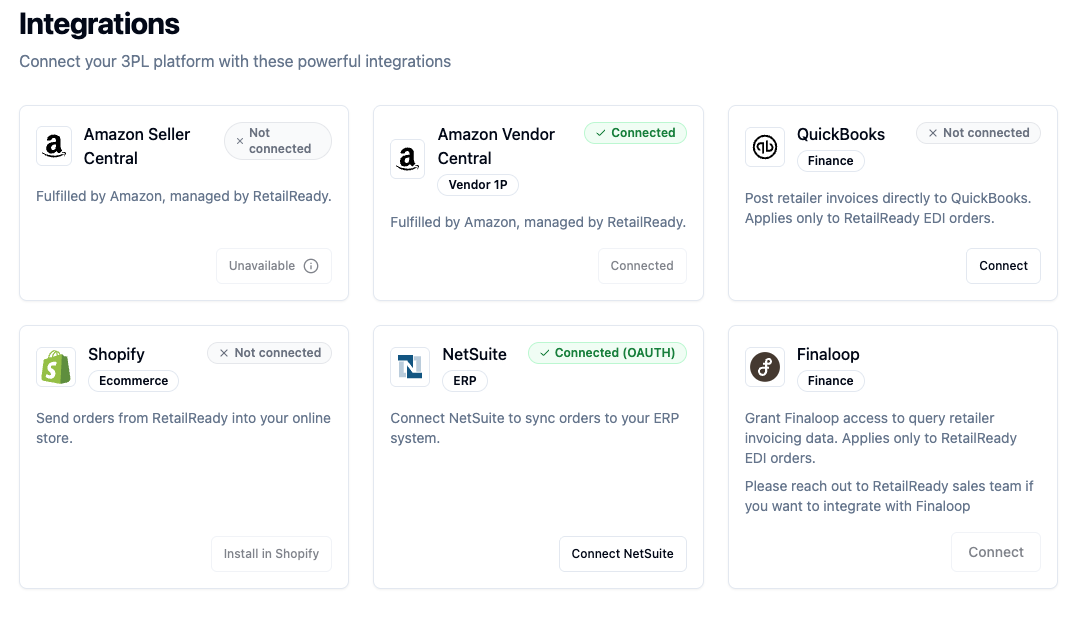
Click 'Configure Authentication' and select the 'M2M' tab.
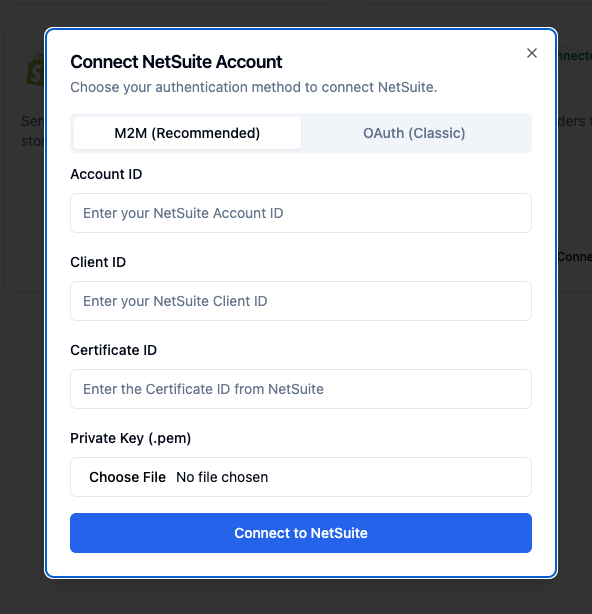
Enter your NetSuite Client ID in the designated field.
Enter the Certificate ID that NetSuite generated in step 7 above.
Copy the contents of your
private.pemfile and paste it into the Private Key field.
Click 'Save Configuration' to establish the connection.
FAQs
What's the difference between OAuth and M2M authentication?
OAuth authentication requires periodic re-authorization every 7-30 days, while M2M authentication uses certificates that last up to 2 years, providing a more stable connection for your warehouse operations.
Do I need to migrate my existing NetSuite integration?
No, existing OAuth integrations will continue to work. M2M is recommended for new integrations or when you want to reduce maintenance overhead.
What happens when my certificate expires?
Certificates can be valid for up to 2 years. Before expiry, you'll need to generate new certificate key pairs and update your NetSuite and RetailReady configurations.
Can I still use OAuth if I prefer?
Yes, both authentication methods are supported. You can choose the method that best fits your operational needs.
What should I do if the connection fails?
Verify that your Certificate ID matches what NetSuite generated, ensure your private key is copied correctly including all line breaks, and confirm that your NetSuite integration has M2M enabled.