How to Request a New Connection
Last updated: February 19, 2026
What is a Brand<>Retailer Connection?
Connections represent each unique Brand <> Retailer relationship that uses RetailReady to ship through your facilities. Once a connection is activated, RetailReady receives orders from the Retailer on behalf of the Brand through that connection.
How to See Your Connections
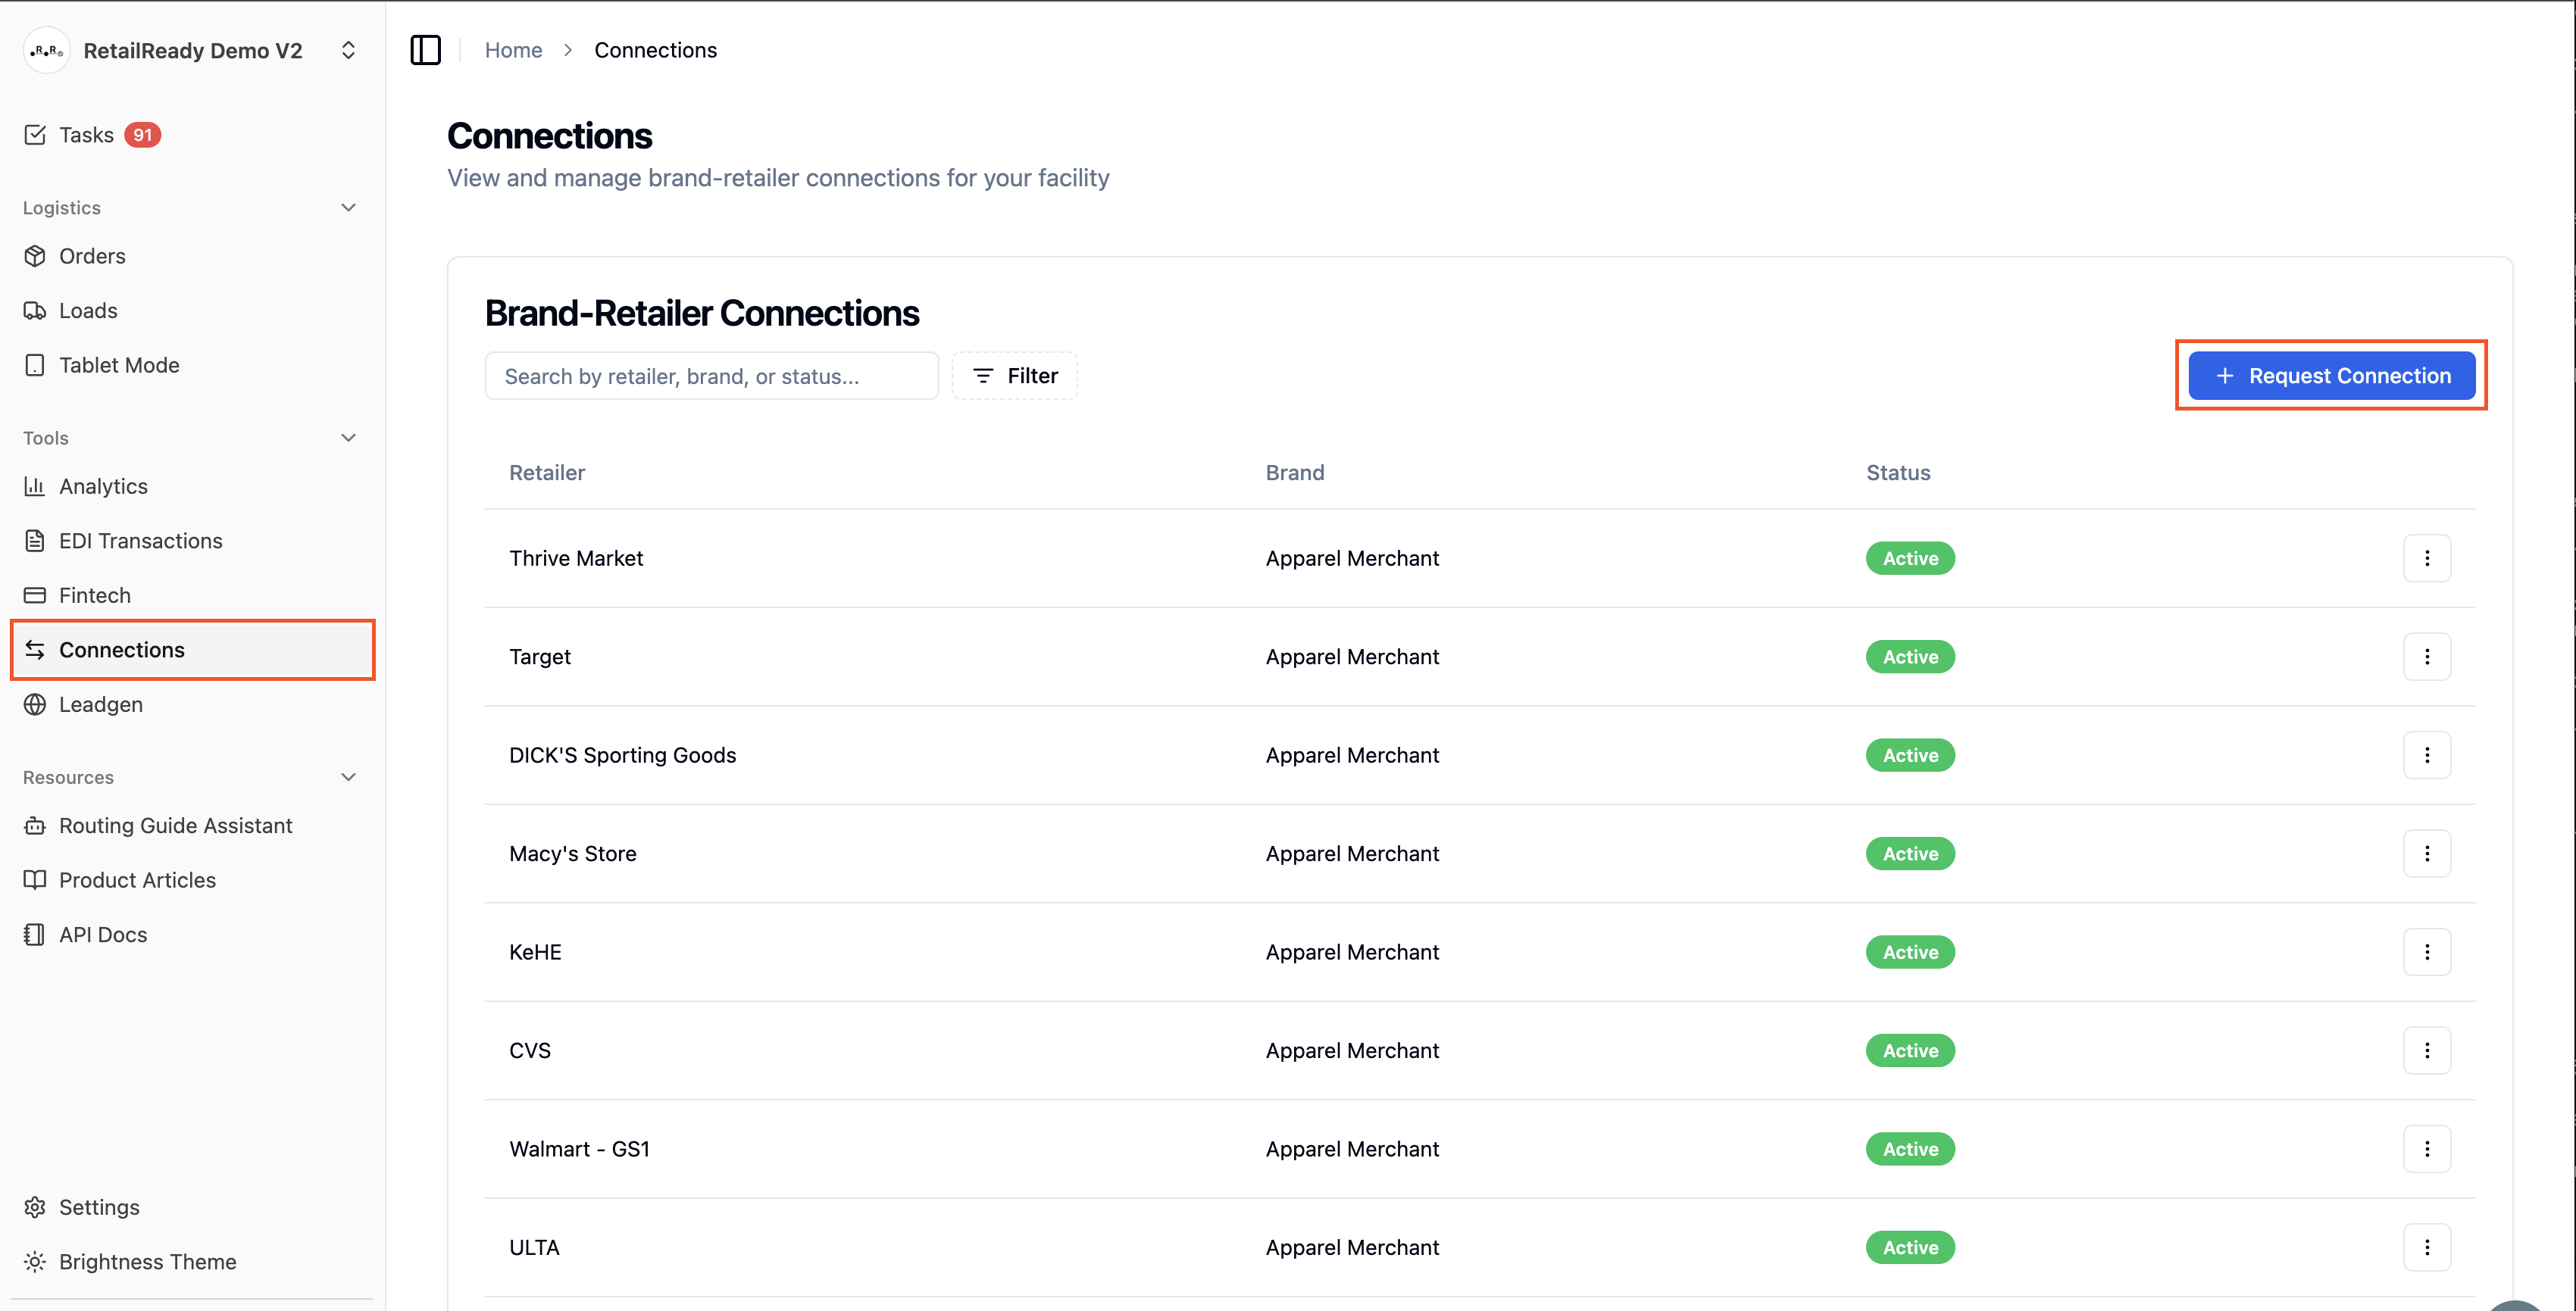
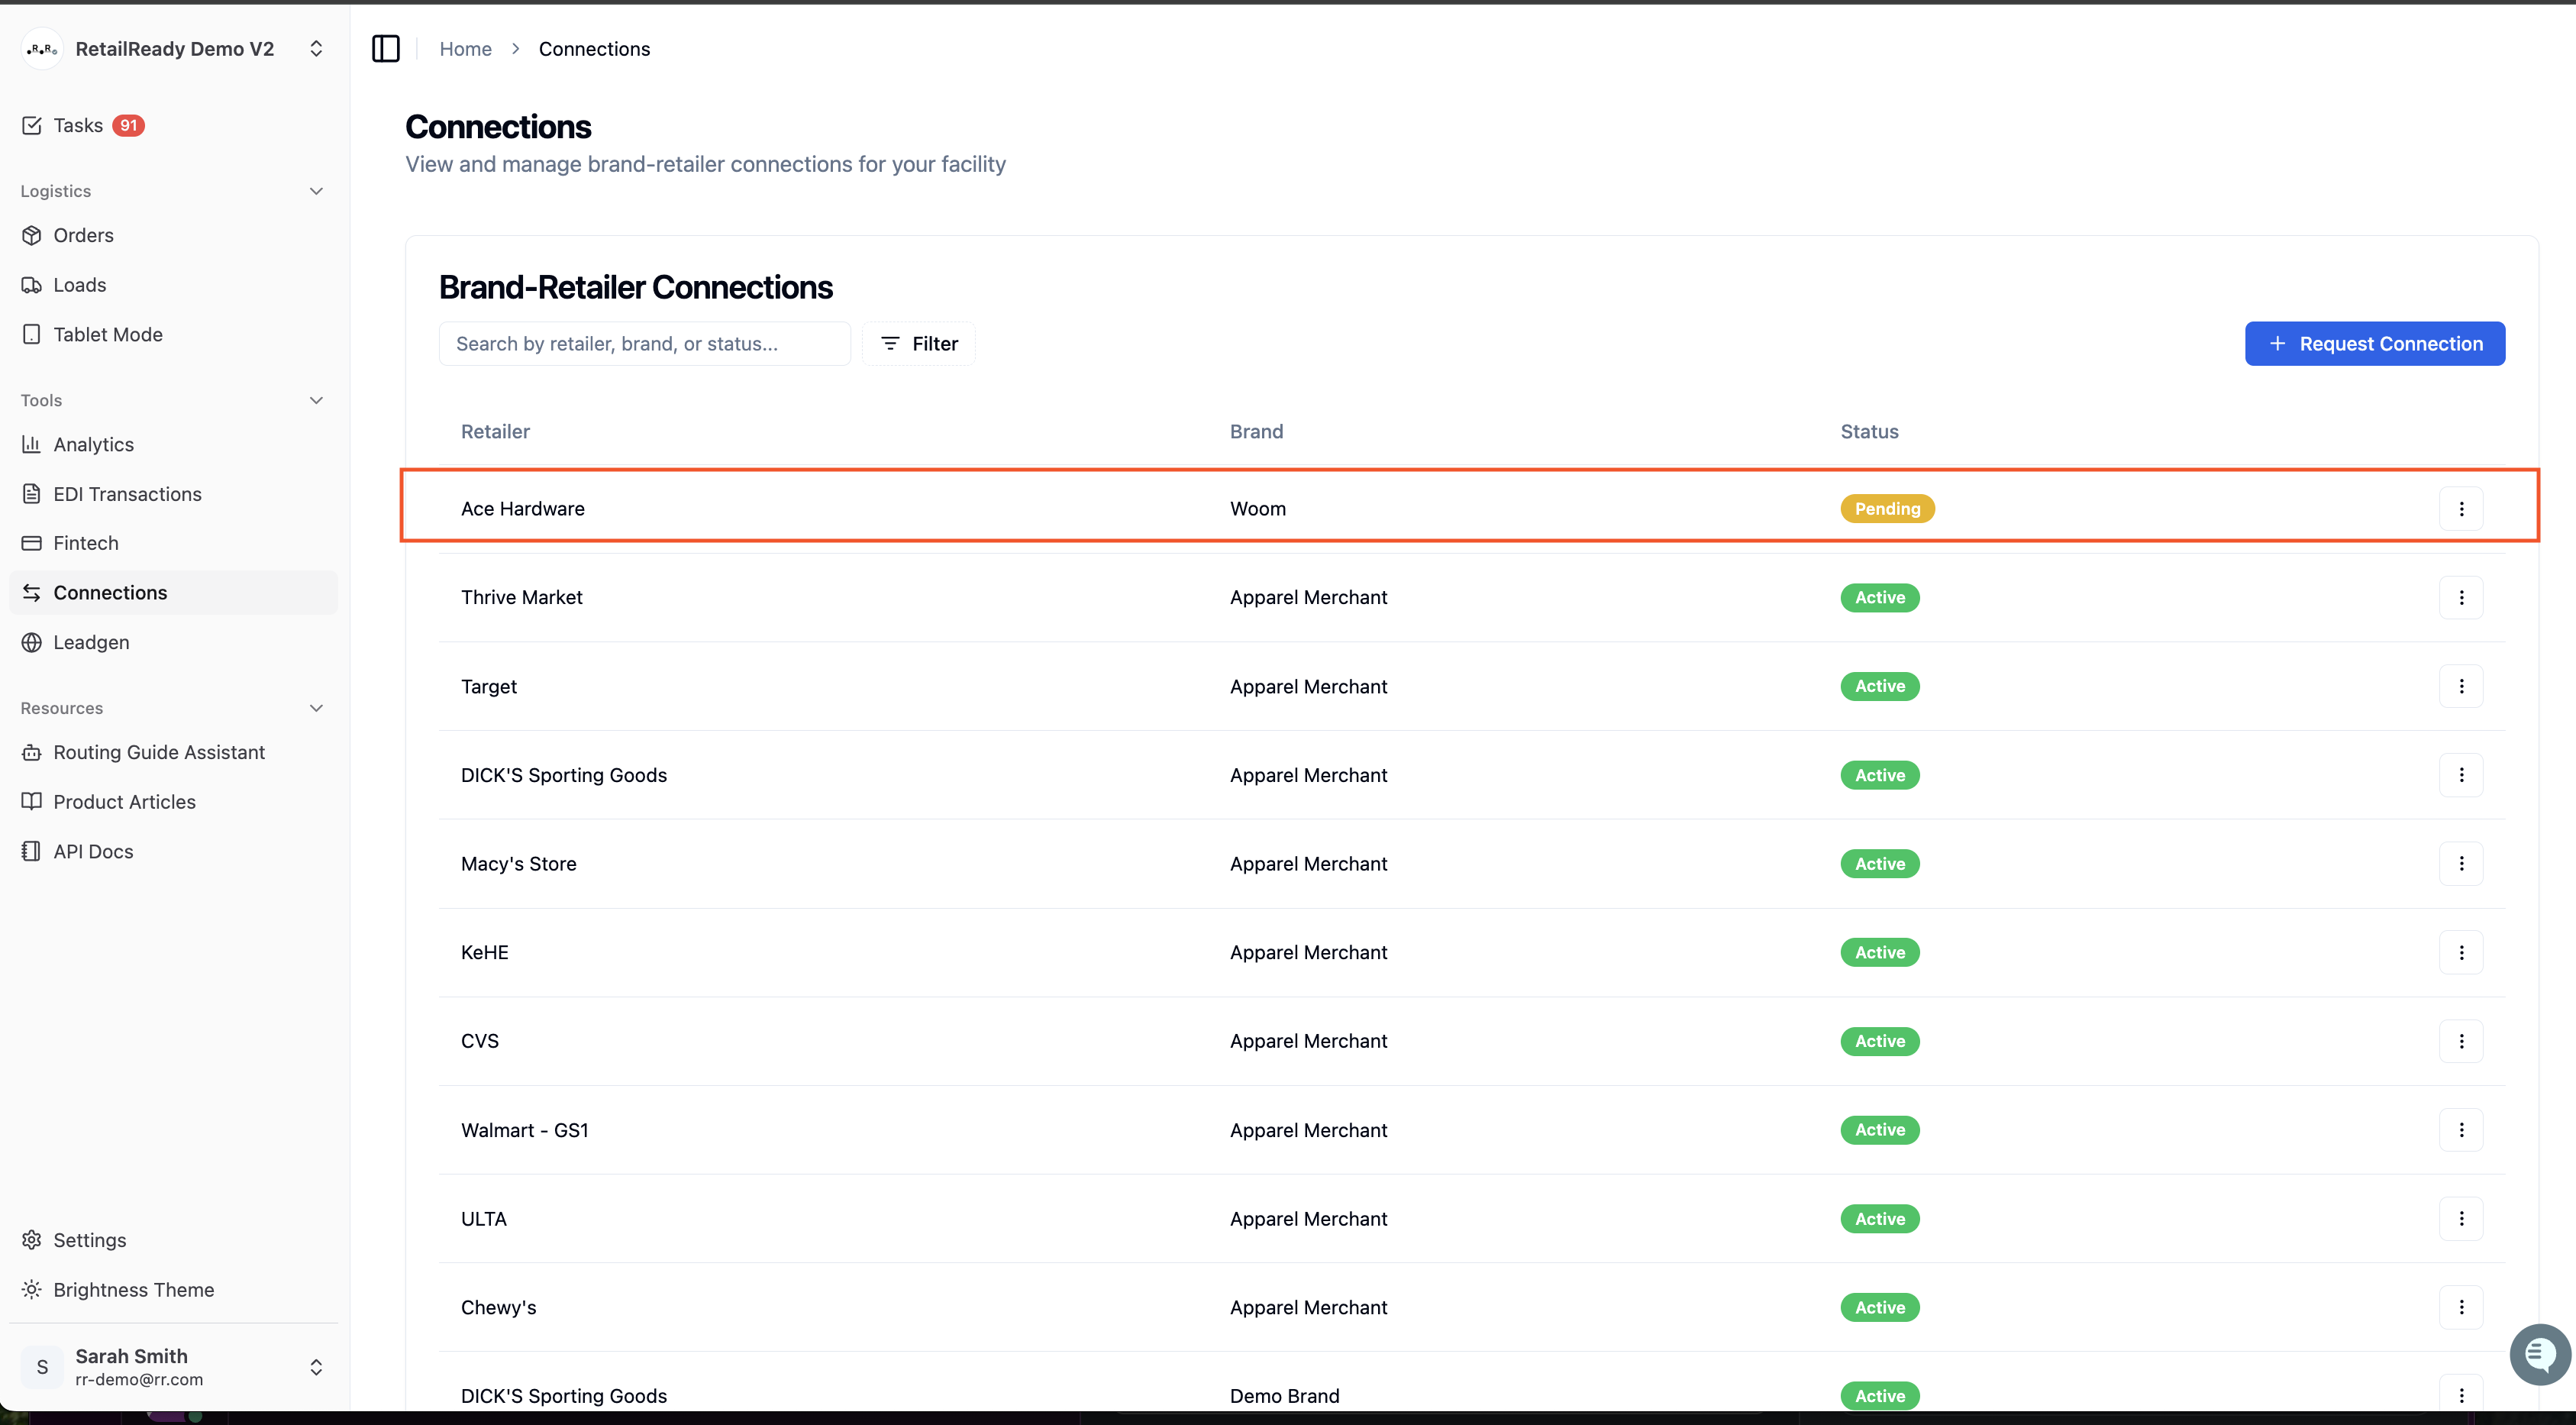
Navigate to the Connections Tab on the left sidebar under 'Tools' from the Home page. Here, you'll see the list of Brand-Retailer connections already enabled in RetailReady. To add a new connection, select '+ Request Connection'.
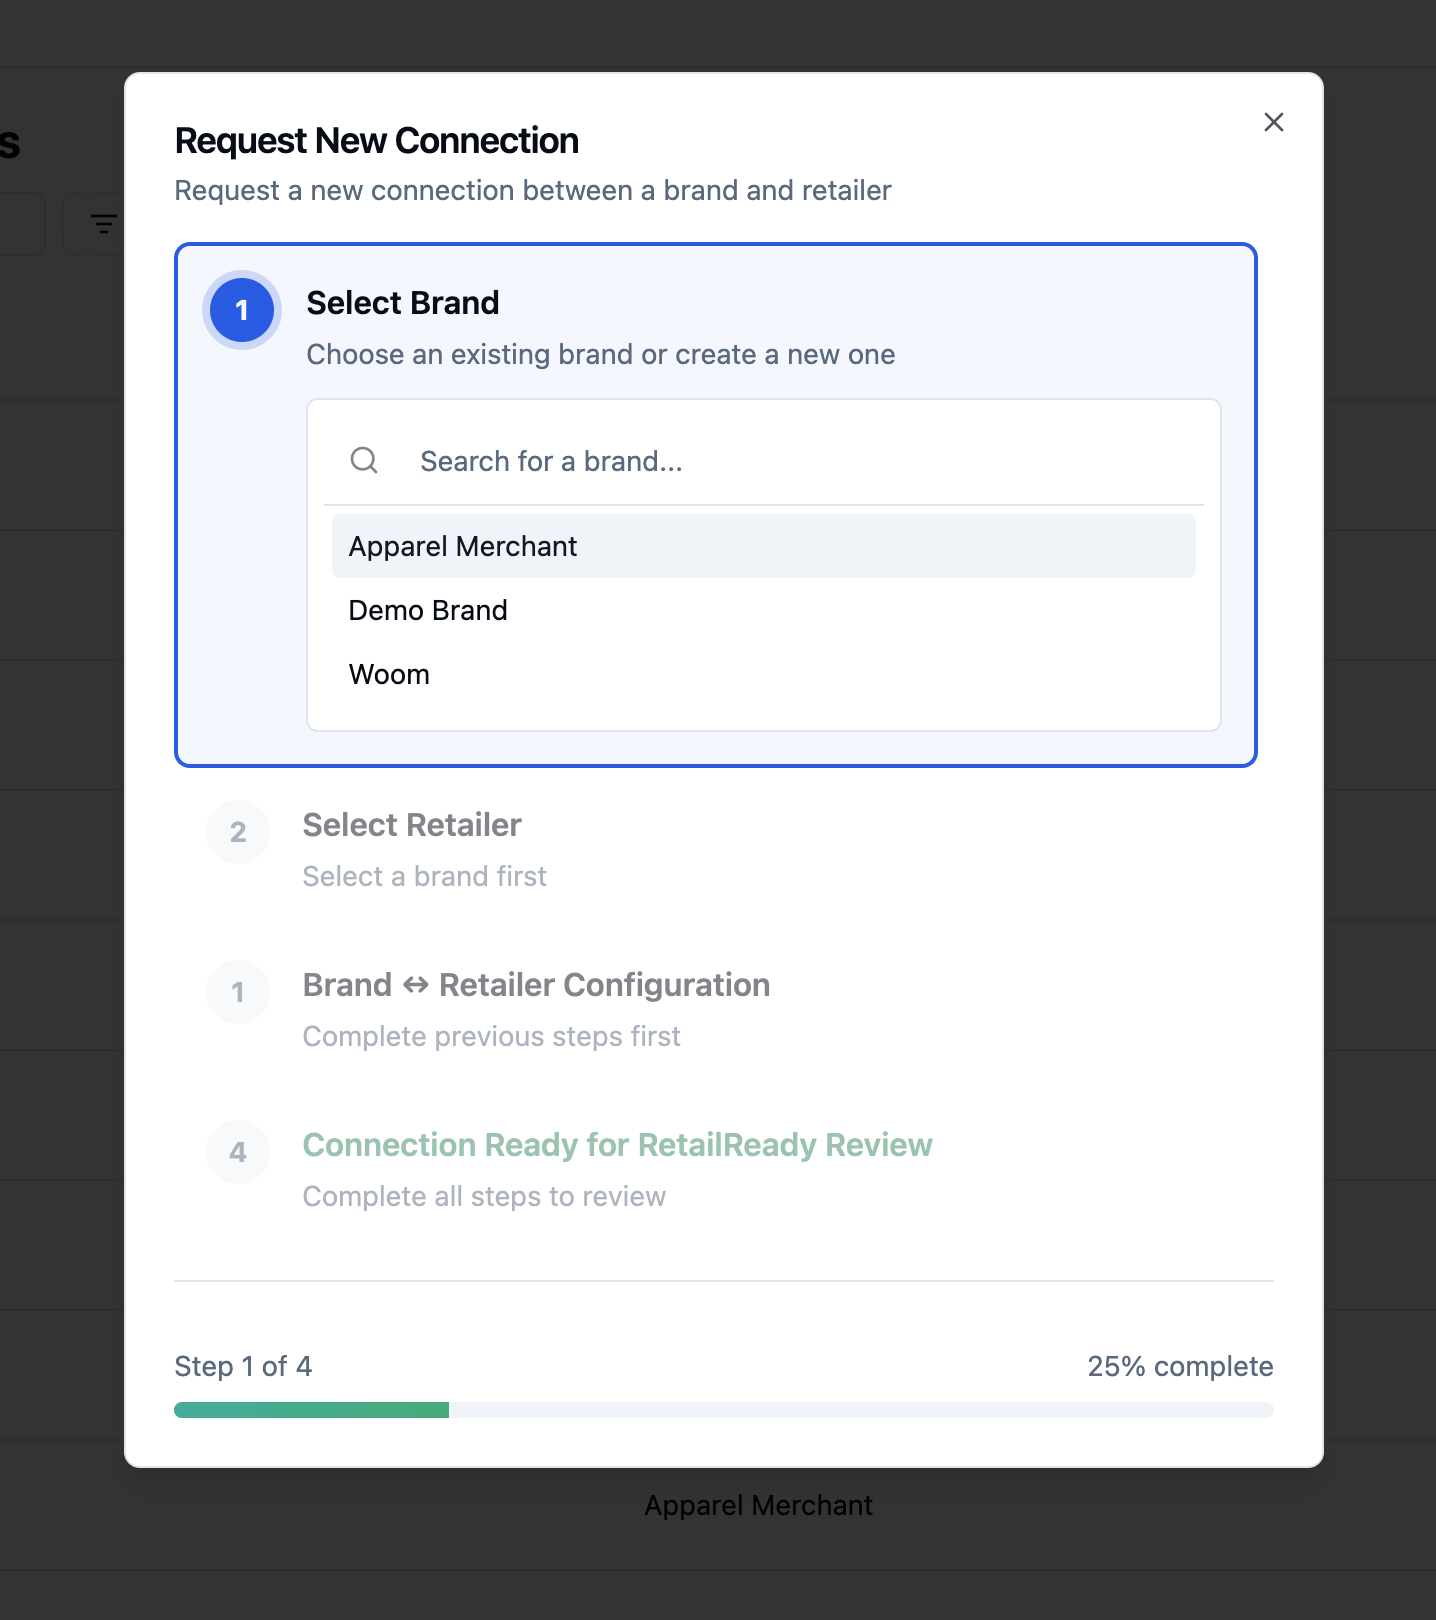
Choose an existing Brand from the list below. If you don't see the Brand you are looking for, please reach out to the RetailReady team for support adding a new Brand.
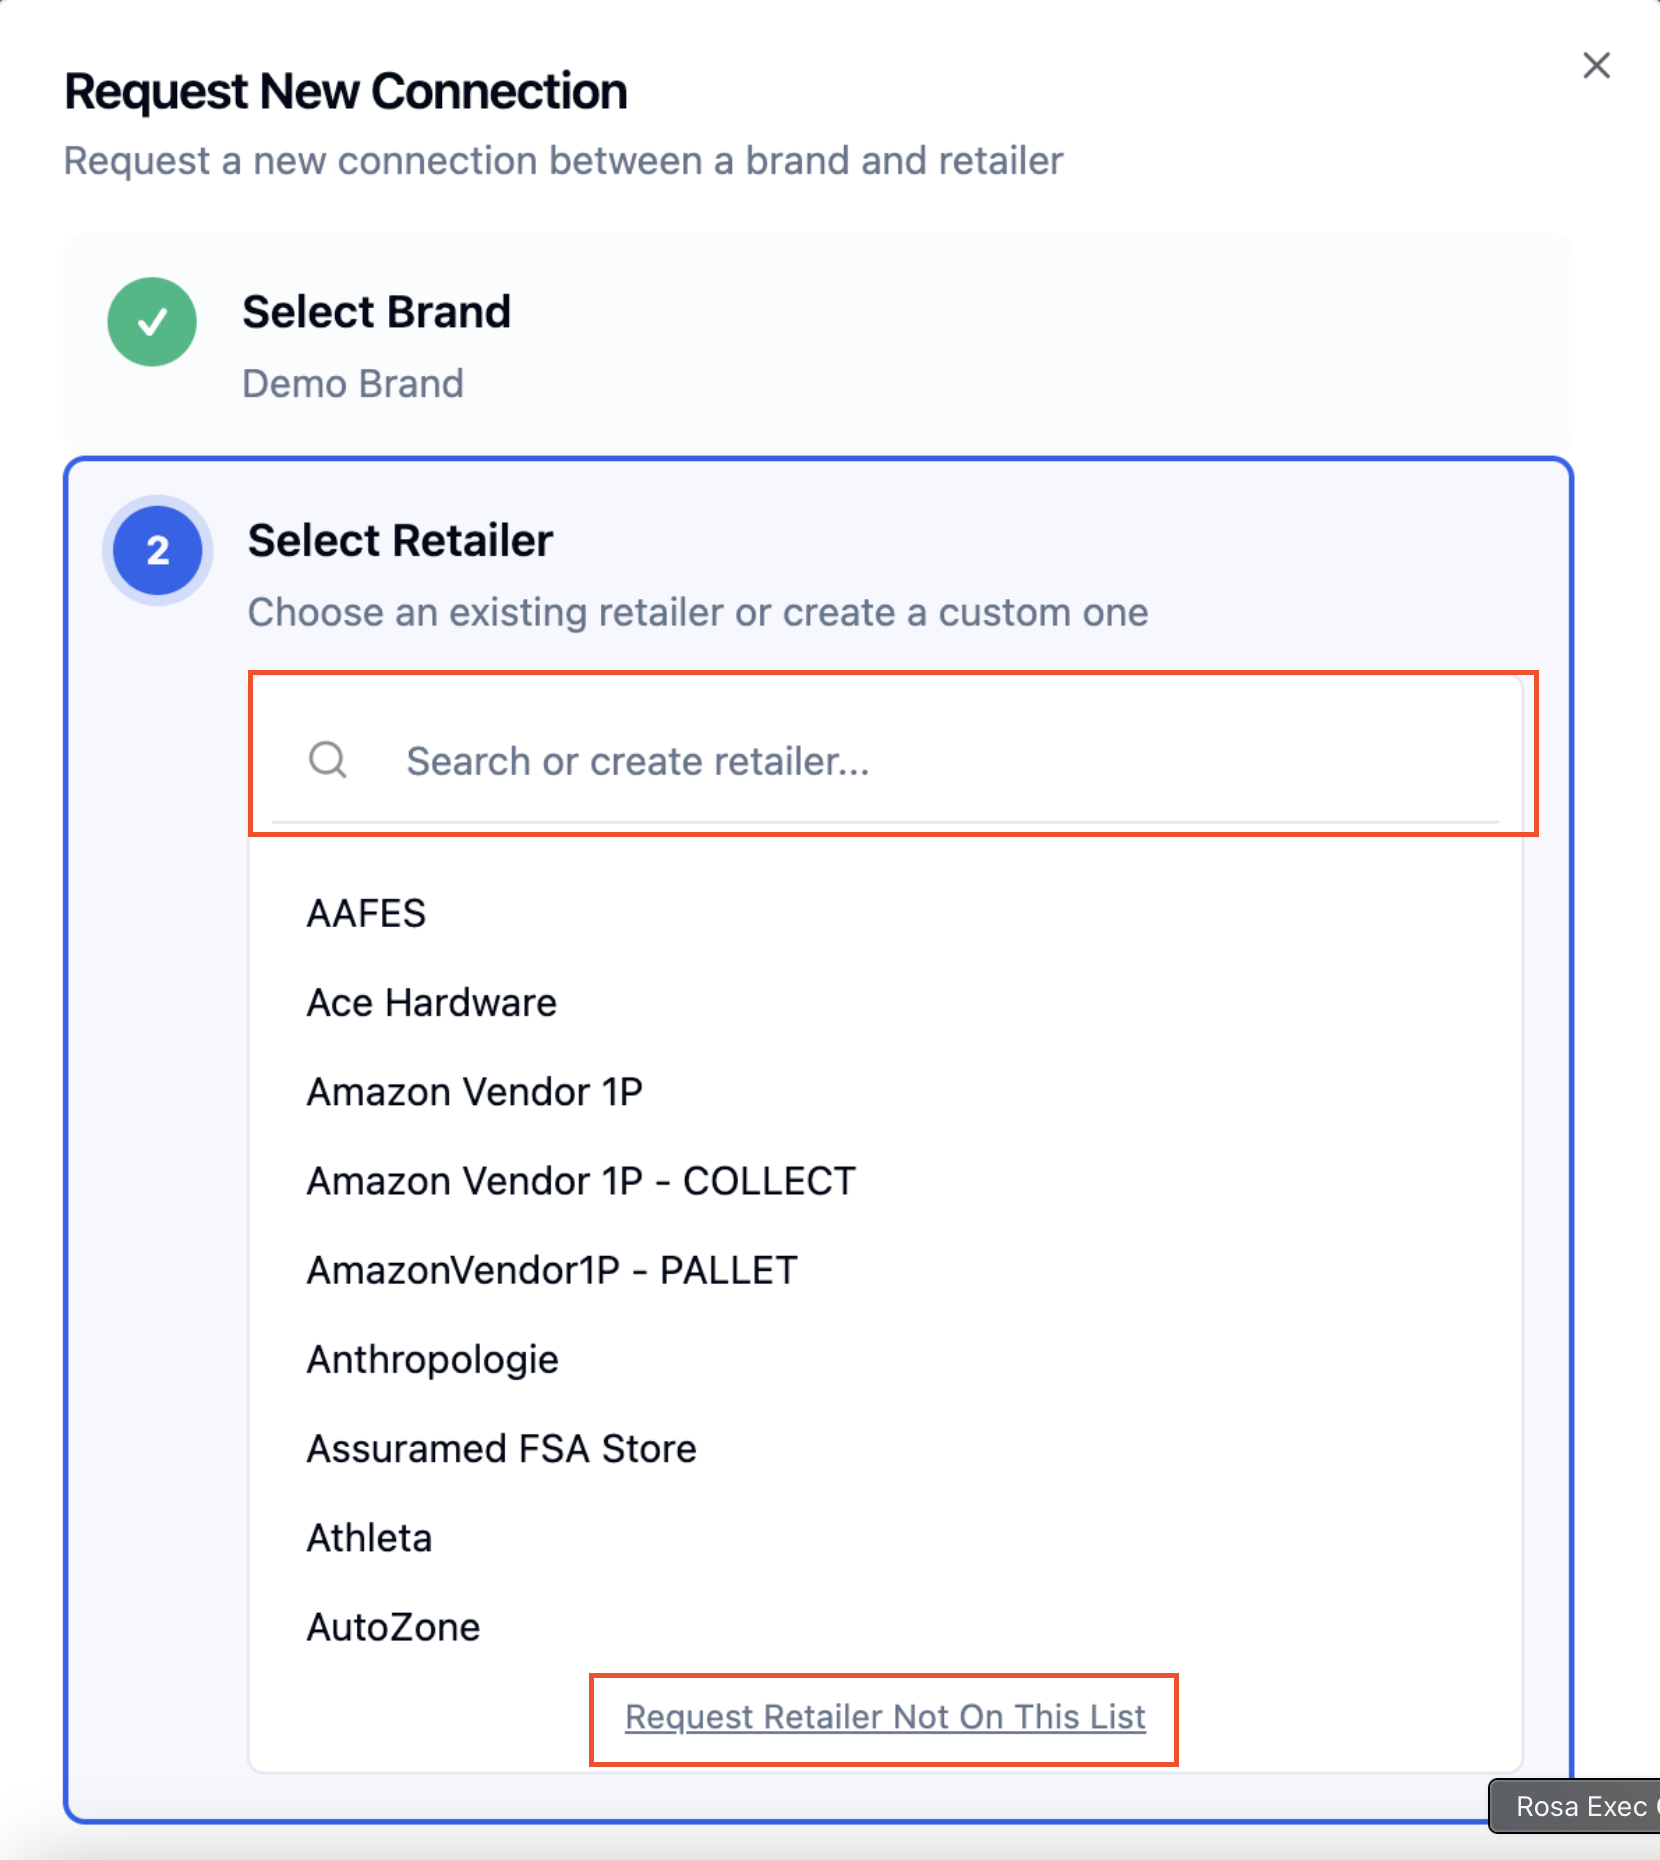
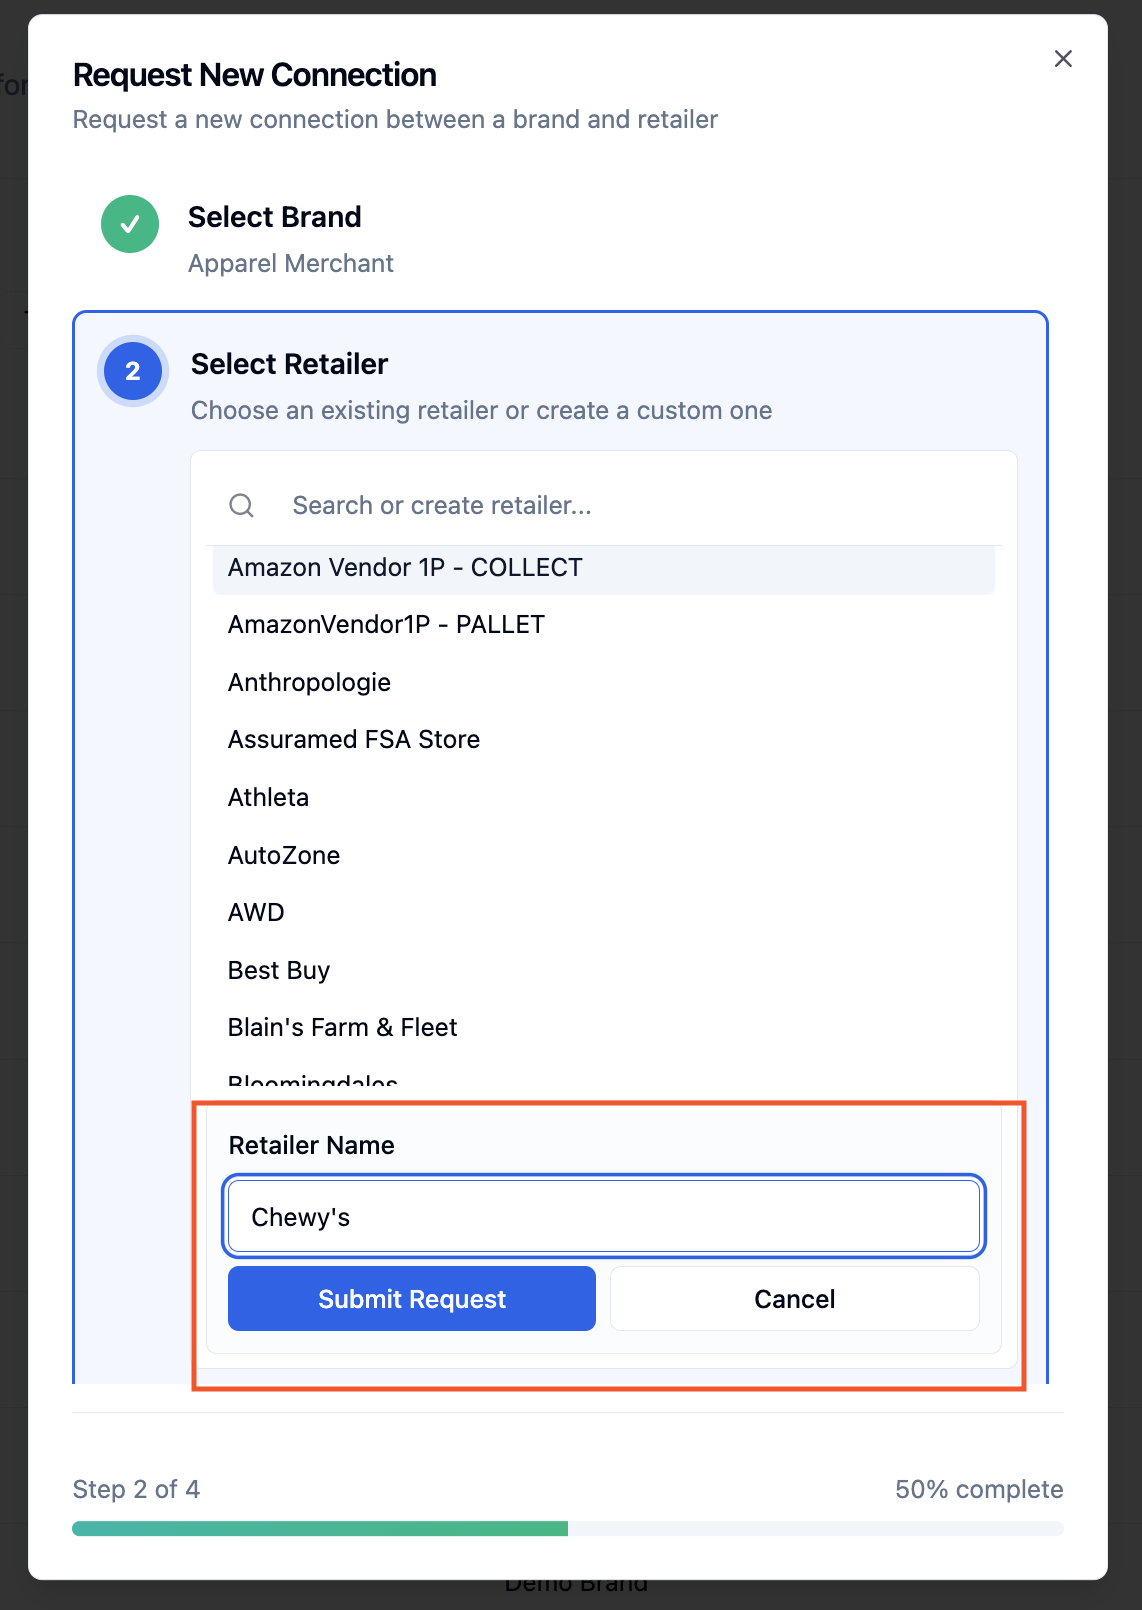
Choose the Retailer from the list of available retailers. If the Retailer doesn't exist in the list or you'd like to create a new one, select 'Request Retailer Not On This List'.
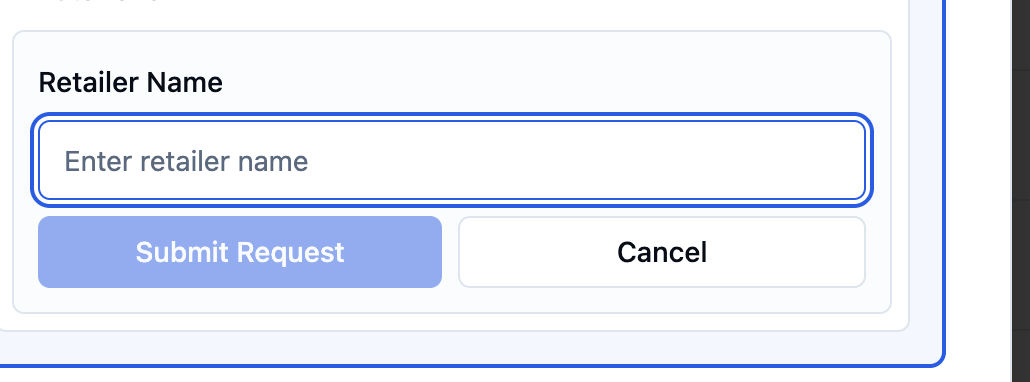
To Request a New Retailer: Enter the information for the Retailer Name and hit 'Submit Request'. A RetailReady team member will be in touch when the Retailer has been created.
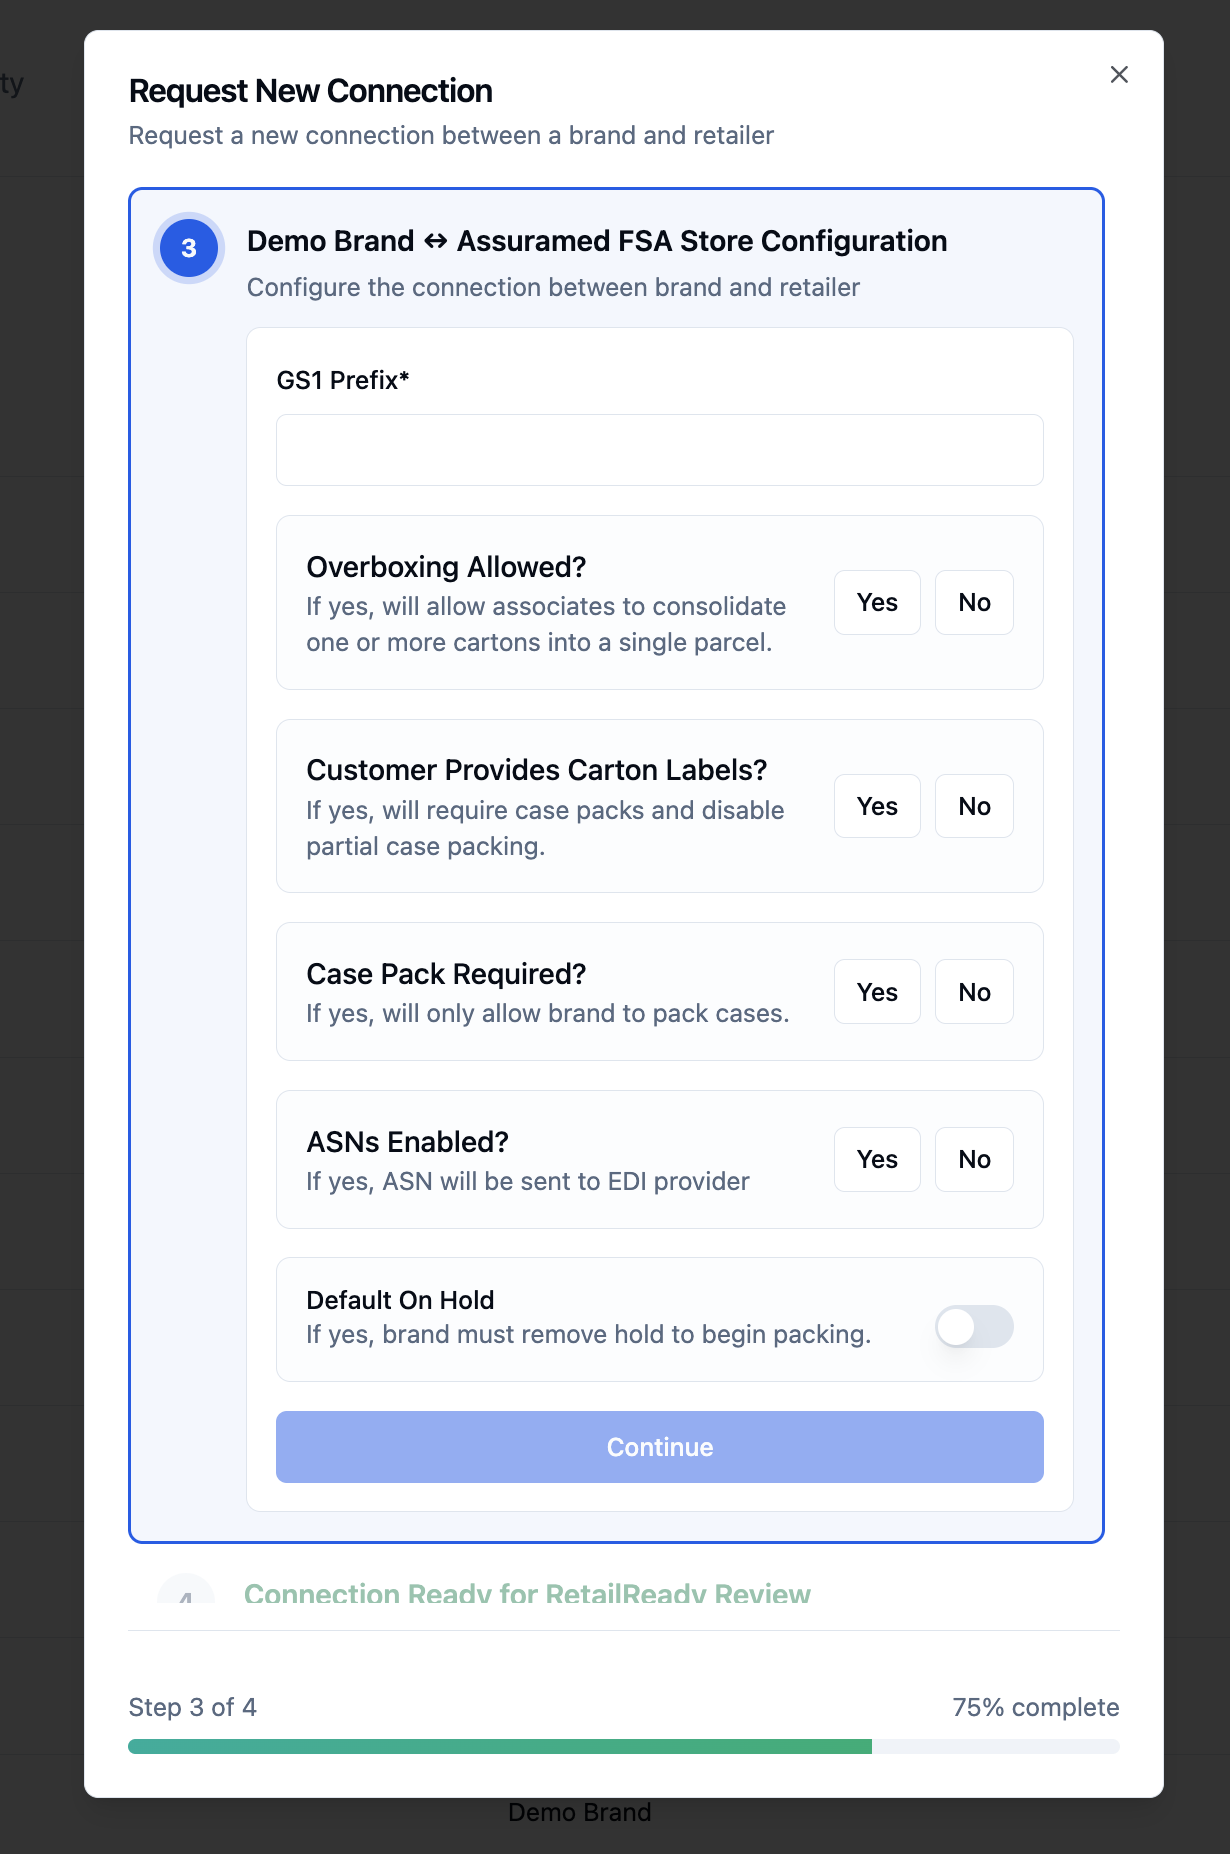
Configure the new connection, including adding the GS1 Prefix and setting configurations requirements for Overboxing, Carton Labels, Case Packing, ASNs and the Order On Hold properties.
GS1 Prefix: Enter the Brand's unique GS1 prefix.
Overboxing Allowed: Indicate Yes / No for if Overboxing will be allowed for parcels. Overboxing can be useful in making parcel shipping more efficient, by combining Cartons into the same larger parcel carton.
Customer Provides Carton Labels: In certain cases, brands may provide their own carton labels. For these non-EDI orders, RetailReady will generate cartons in the system based on the information printed on those labels.
If you would like this feature enabled, please reach out to your onboarding specialist.
Case Pack Required: Indicate Yes / No, if a Retailer requires that all Cartons be Case Pack only; if Yes, an option will appear for allowing partial case packing.
ASNs Enabled: Indicate Yes if you'd like an ASN to be sent automatically to the Retailer when an Order reaches 'Done' status.
Default On Hold: Toggle this 'on' if you'd like Orders to drop first into an 'On Hold' status for review by the Brand, before they are released by to your team to begin packing.
Once you complete your configurations, click 'Continue'.
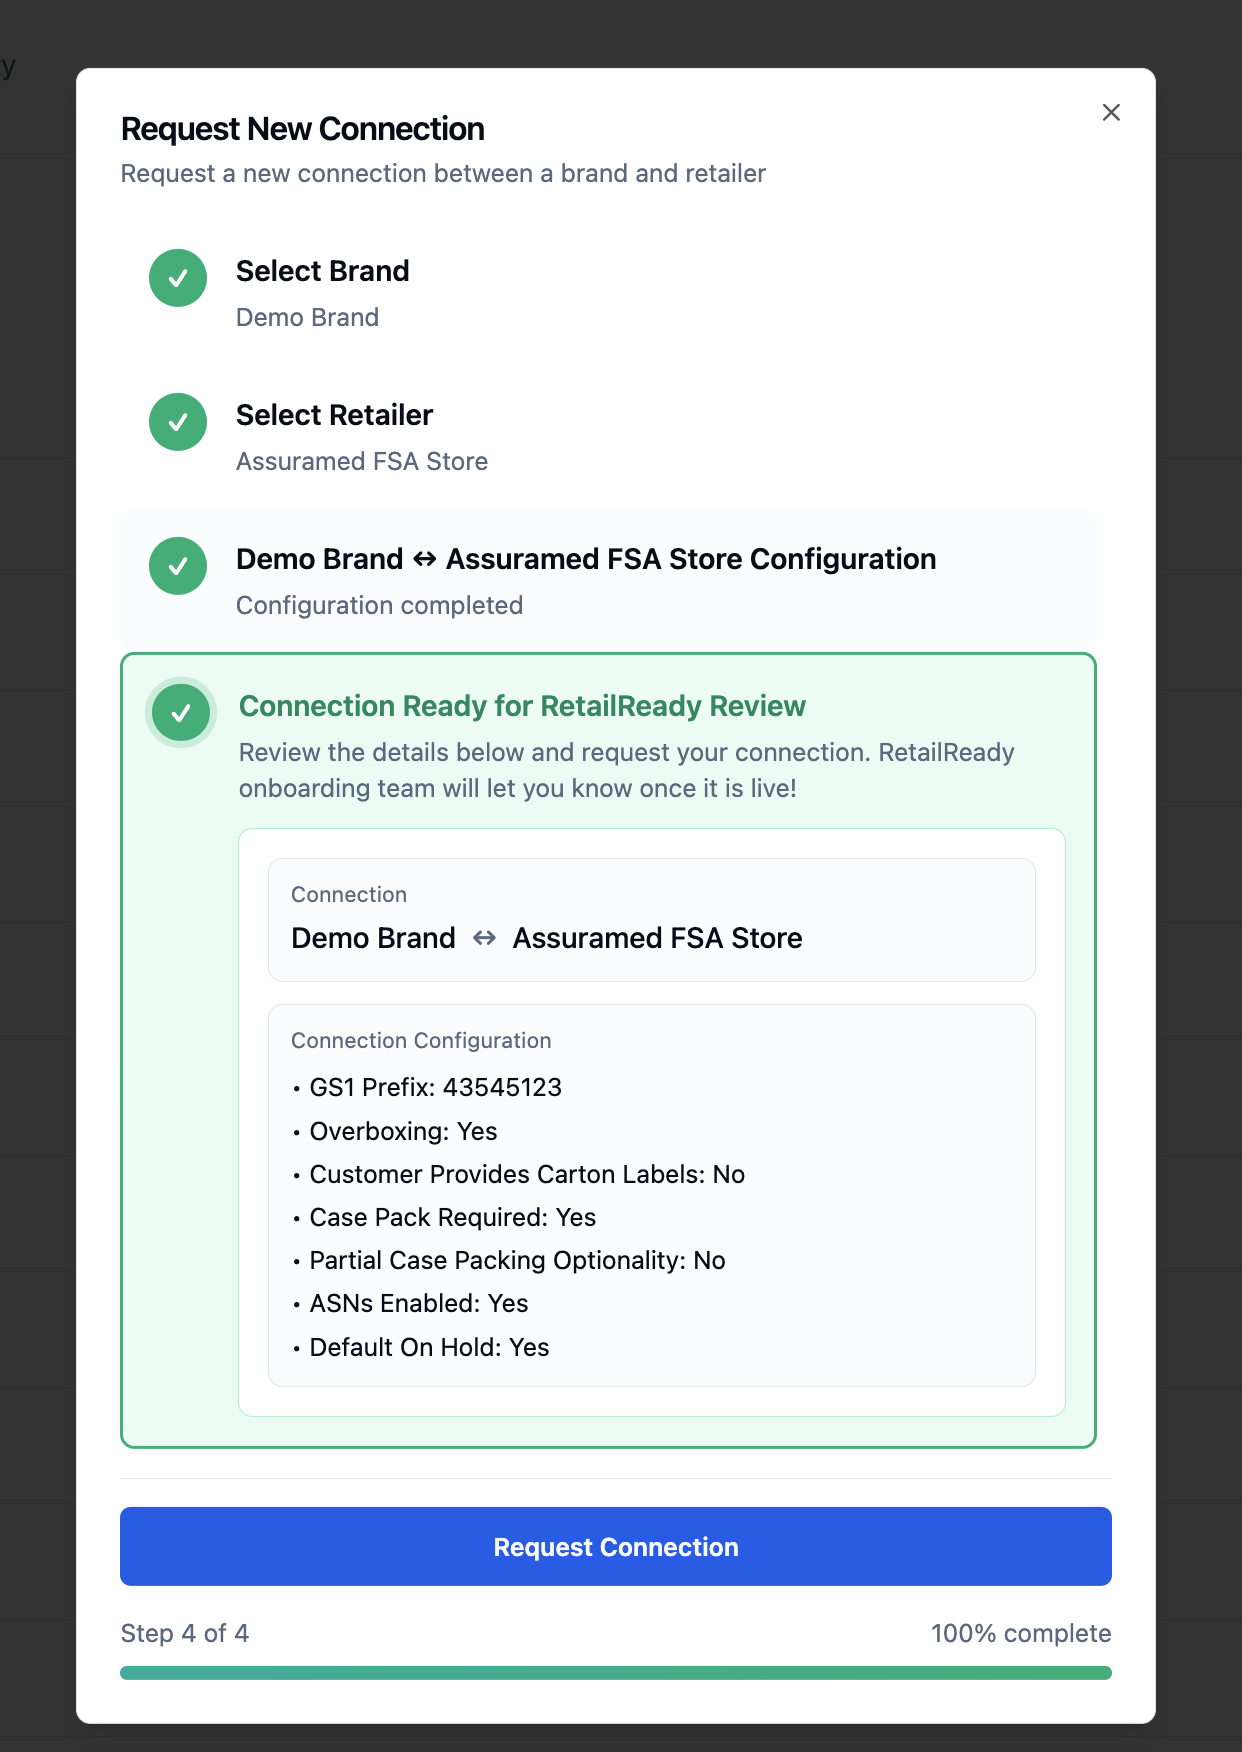
Review the information and select 'Request Connection'. To edit, click on a previous step to re-enter the correct information.
Your new connection will now appear on the Connections screen with a yellow 'Pending' status. Once RetailReady provisions the connection, the status will be turned to 'Active' and a RetailReady representative will reach out to let you know the connection is ready to use!
Additional Features on the 'Connections' Page
Search
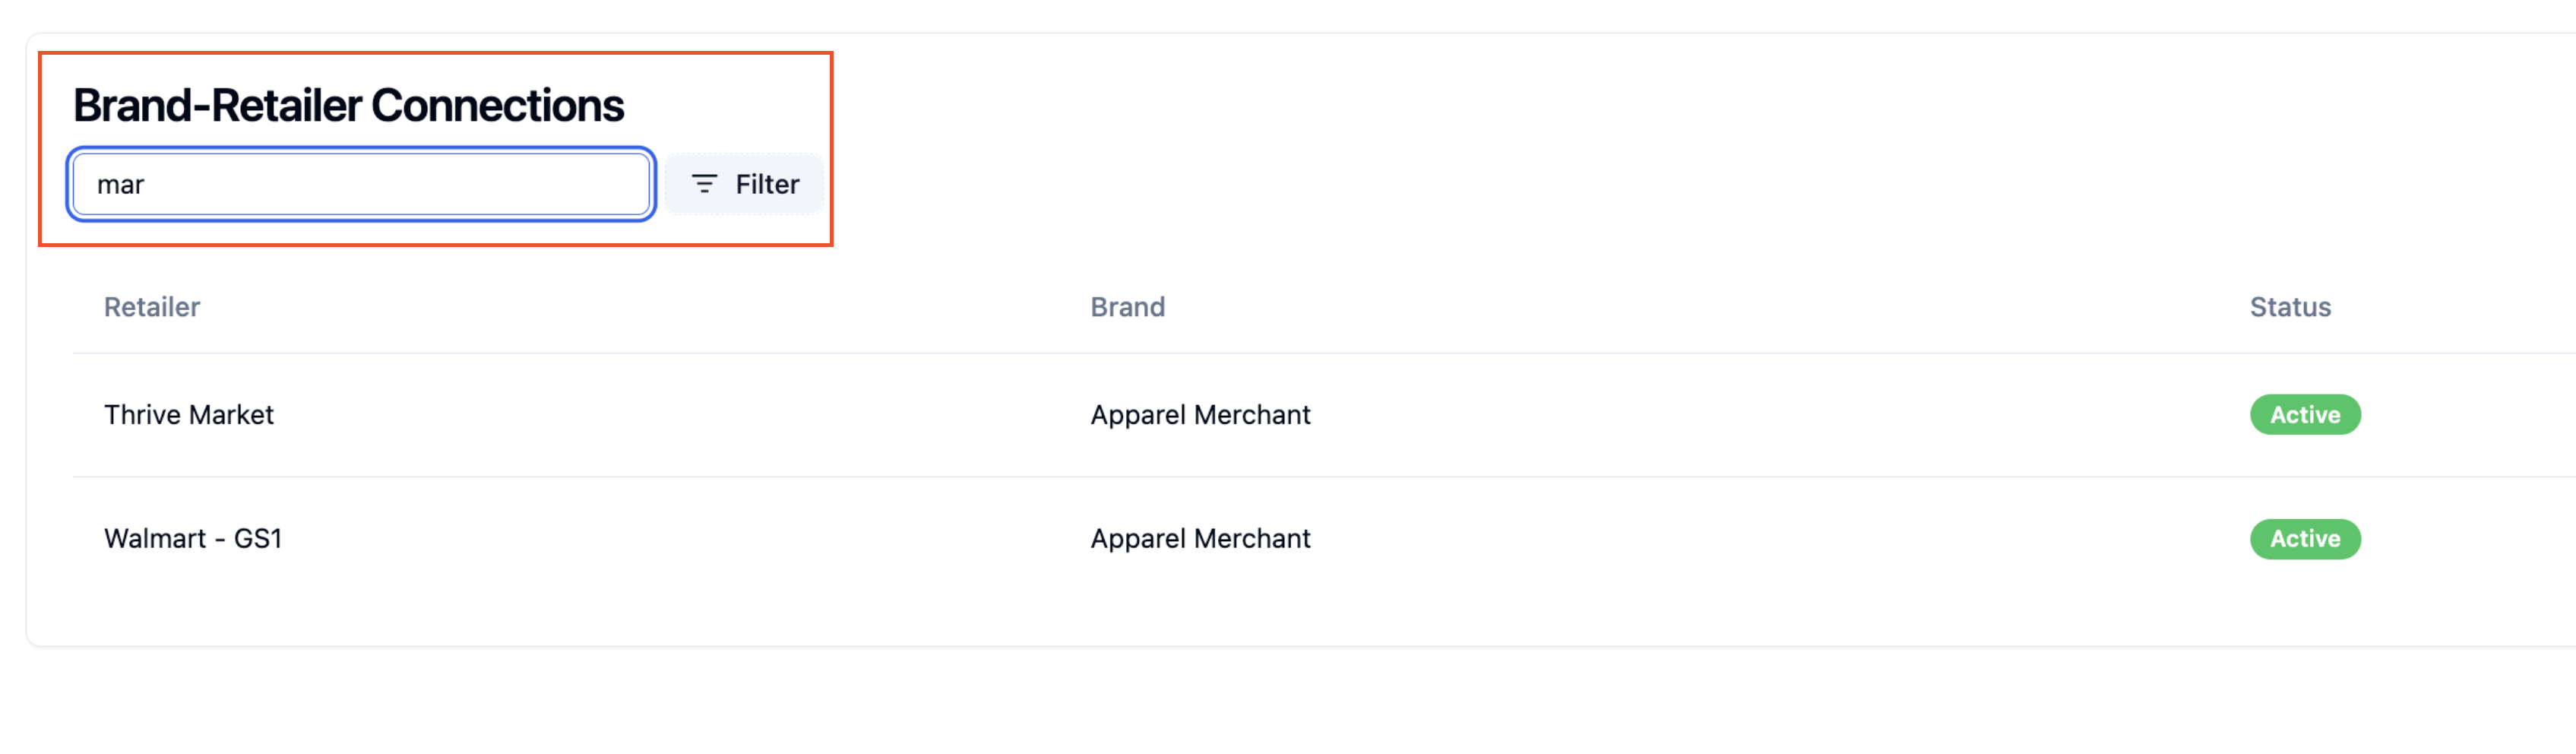
Use the search bar to quickly find the individual connection you're looking for. Type in the name of the Retailer and options that match will appear.
Filters
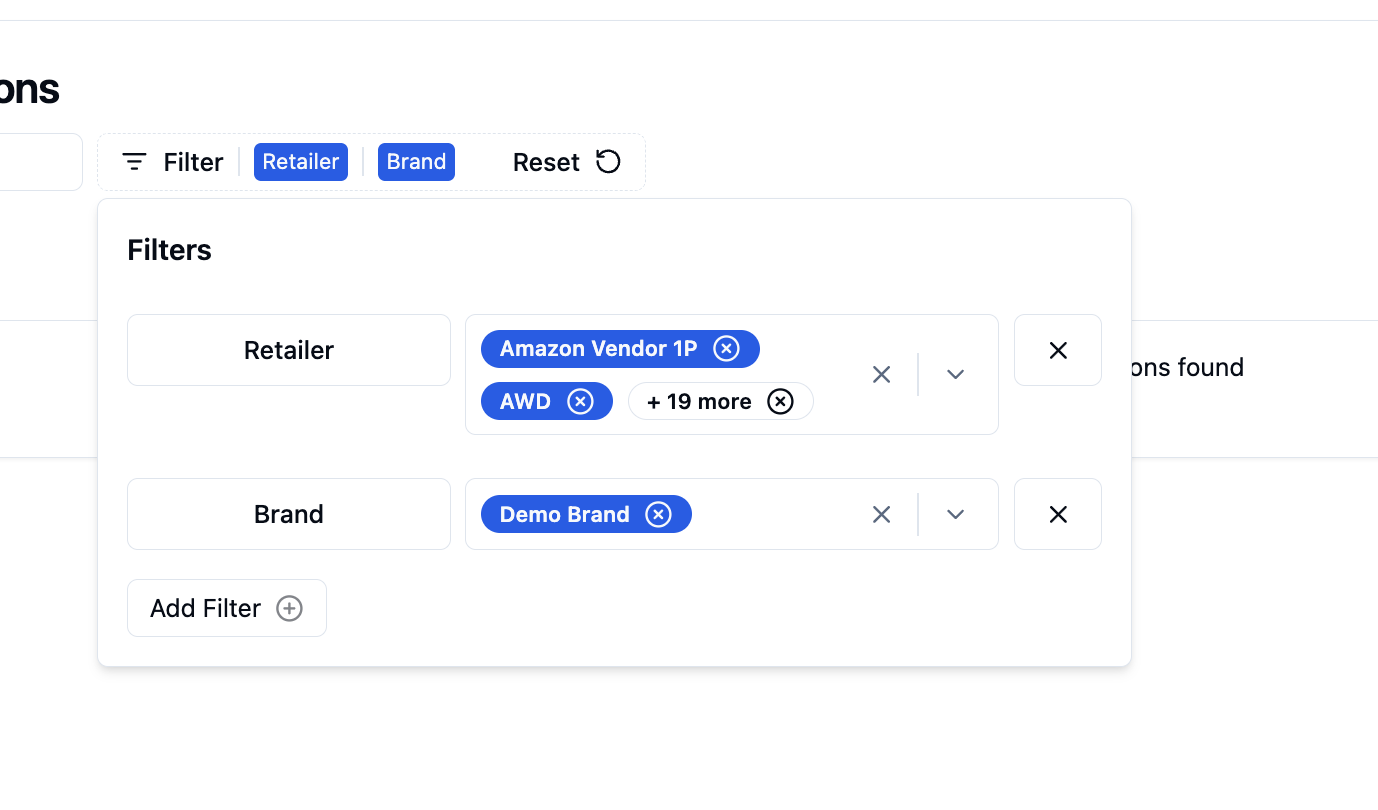
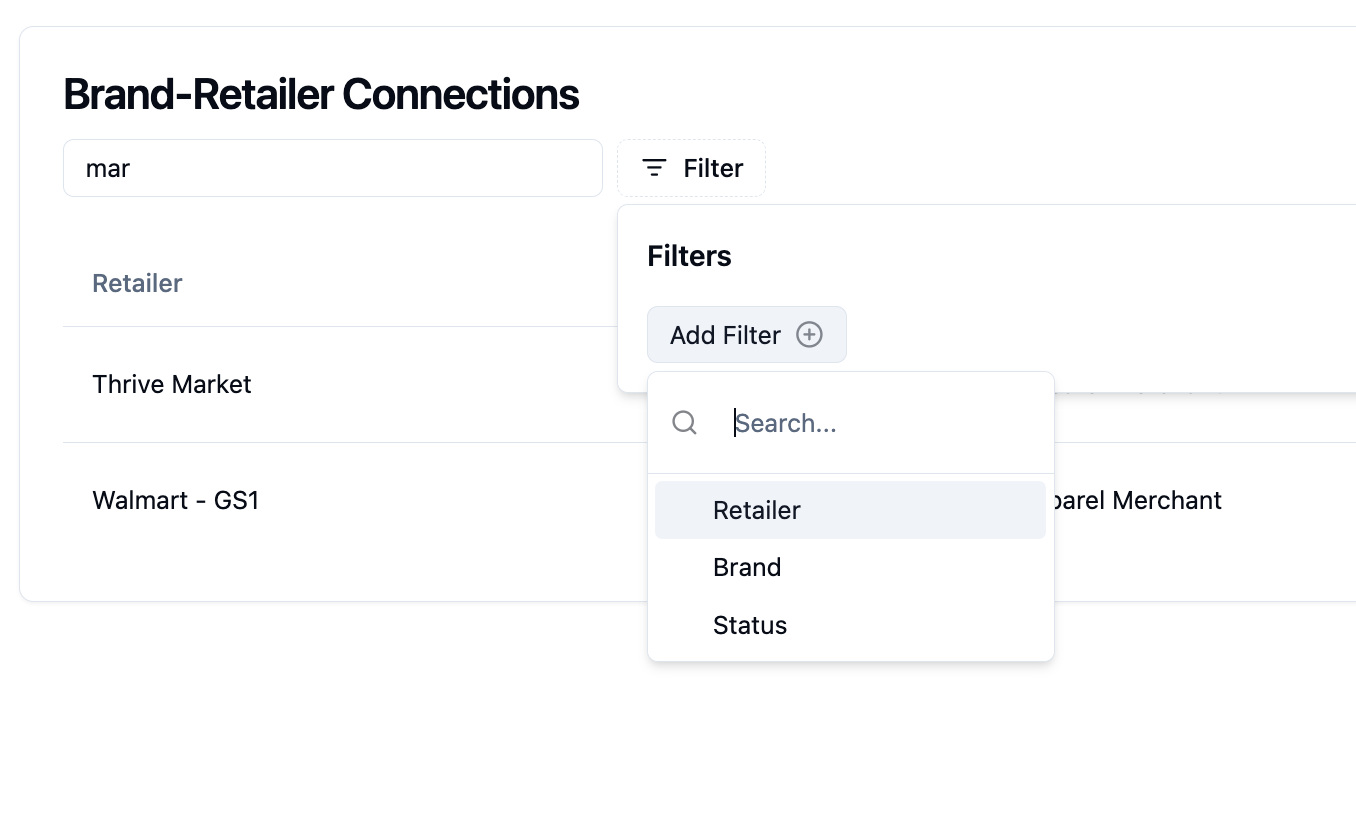
You can use the filter button next to the search bar. Filters include Retailer, Brand and Status. You can create multi-option filters by combining these options.
FAQs
What if I don't see the Retailer I want to add?
If when trying to add a new connection you don't see the Retailer you want to connect to, please 'Request Retailer', fill in the name and click 'Submit Request'.
How can I edit the Settings for existing Connections?
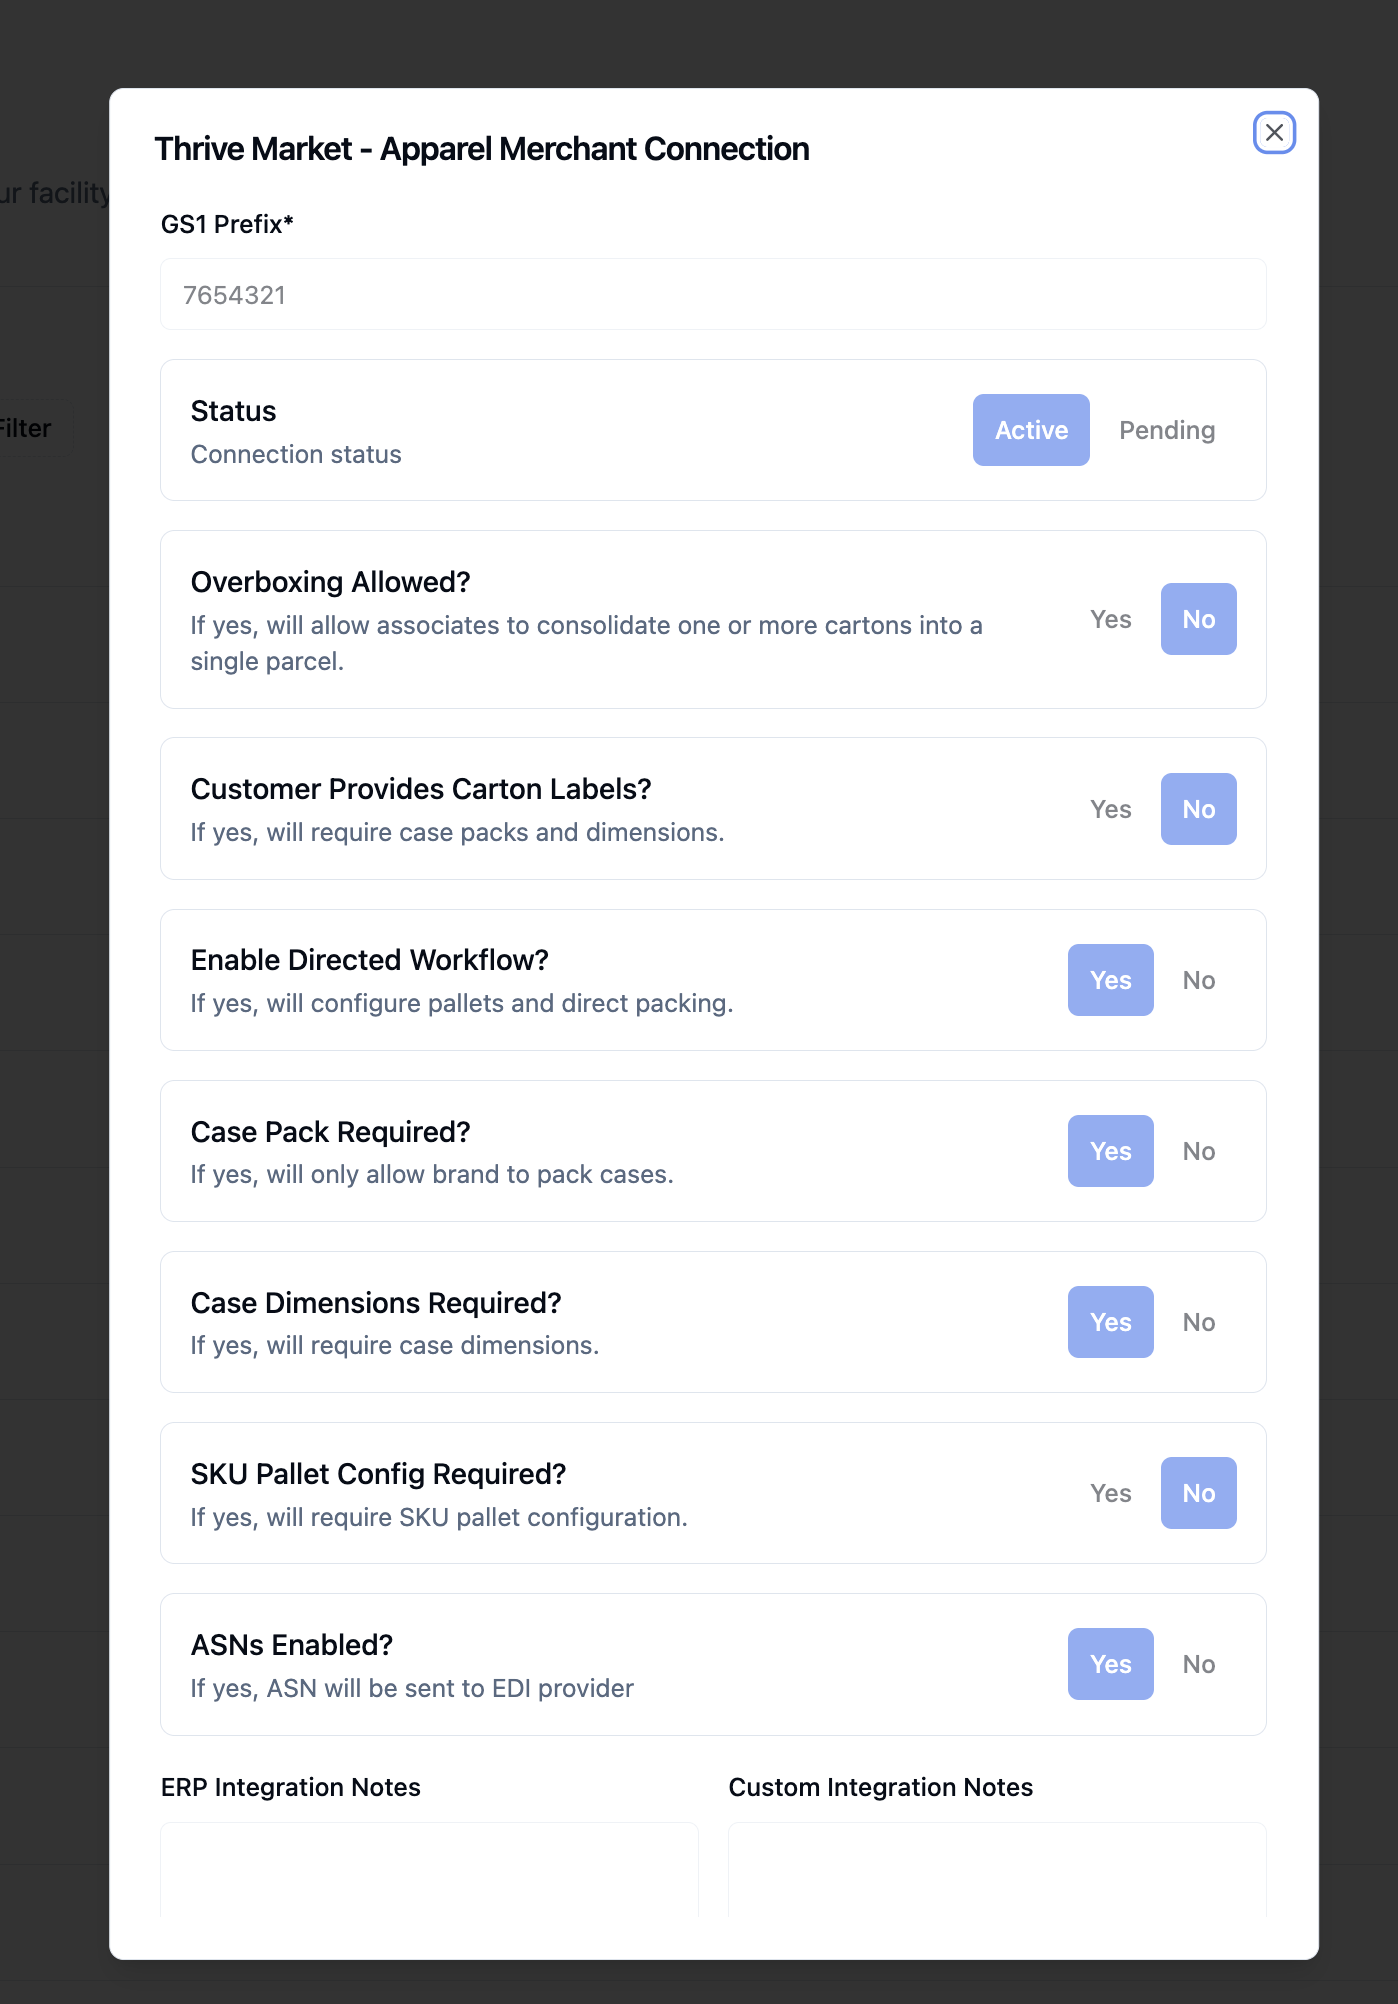
You can see the current settings by selecting the three dot button the right hand side. A form will pop up and you can see the settings. They can't be edited here but reach out Retail Ready and we'll be sure to help you make the changes.
What if I want to filter on multiple options?
Add initial Filter: Retailer, Brand or Status. Once selected you can add more filtering options like Individual Retailers, Brand or Status.
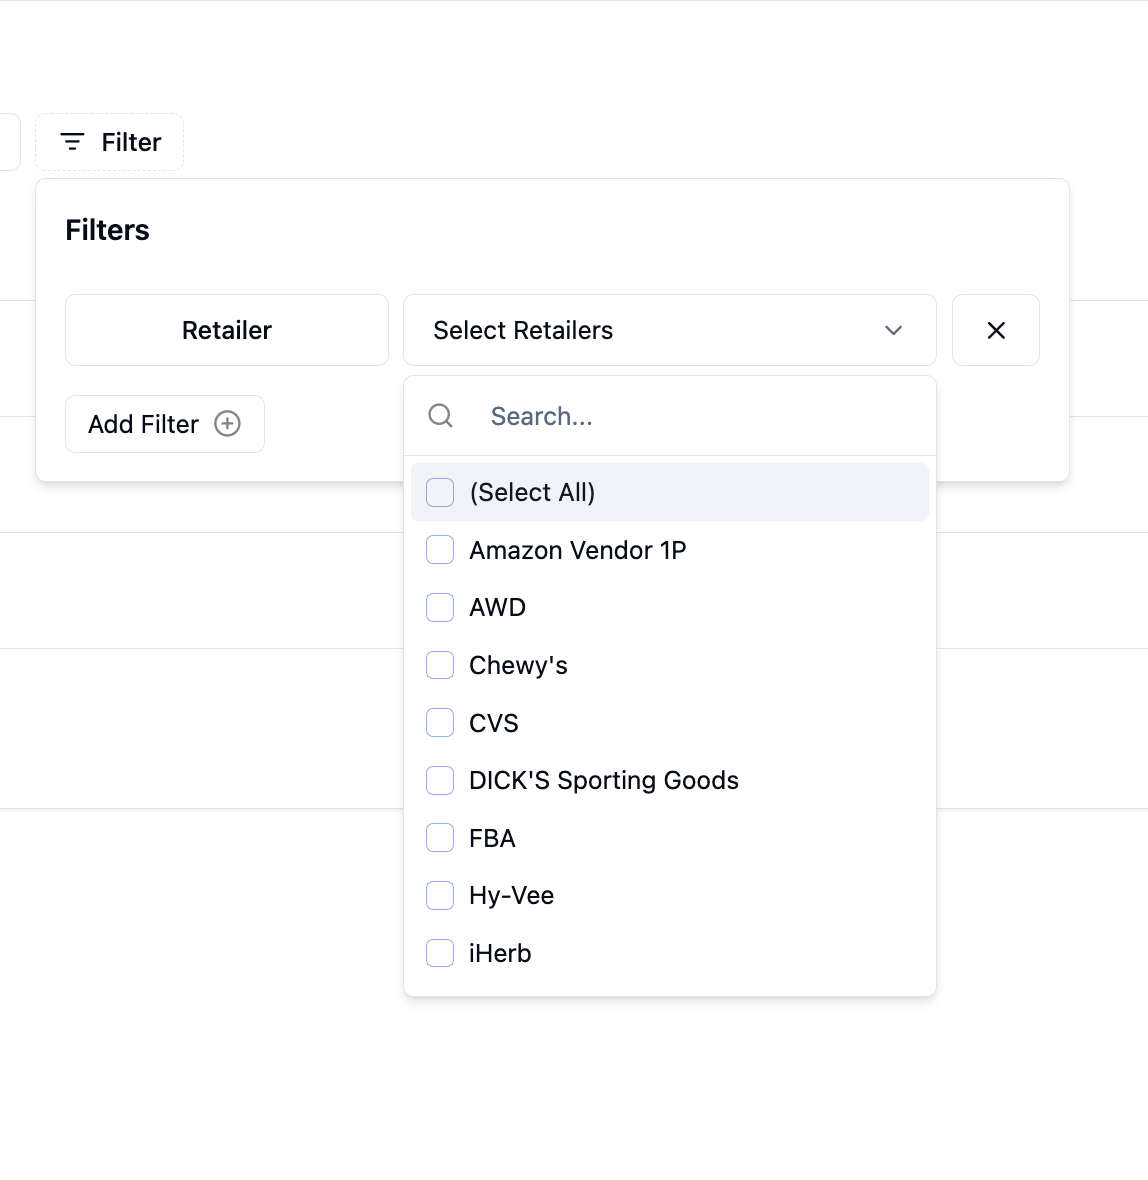
To combine filtering options, select 'Add Filter' below and chose from the remaining filter options.
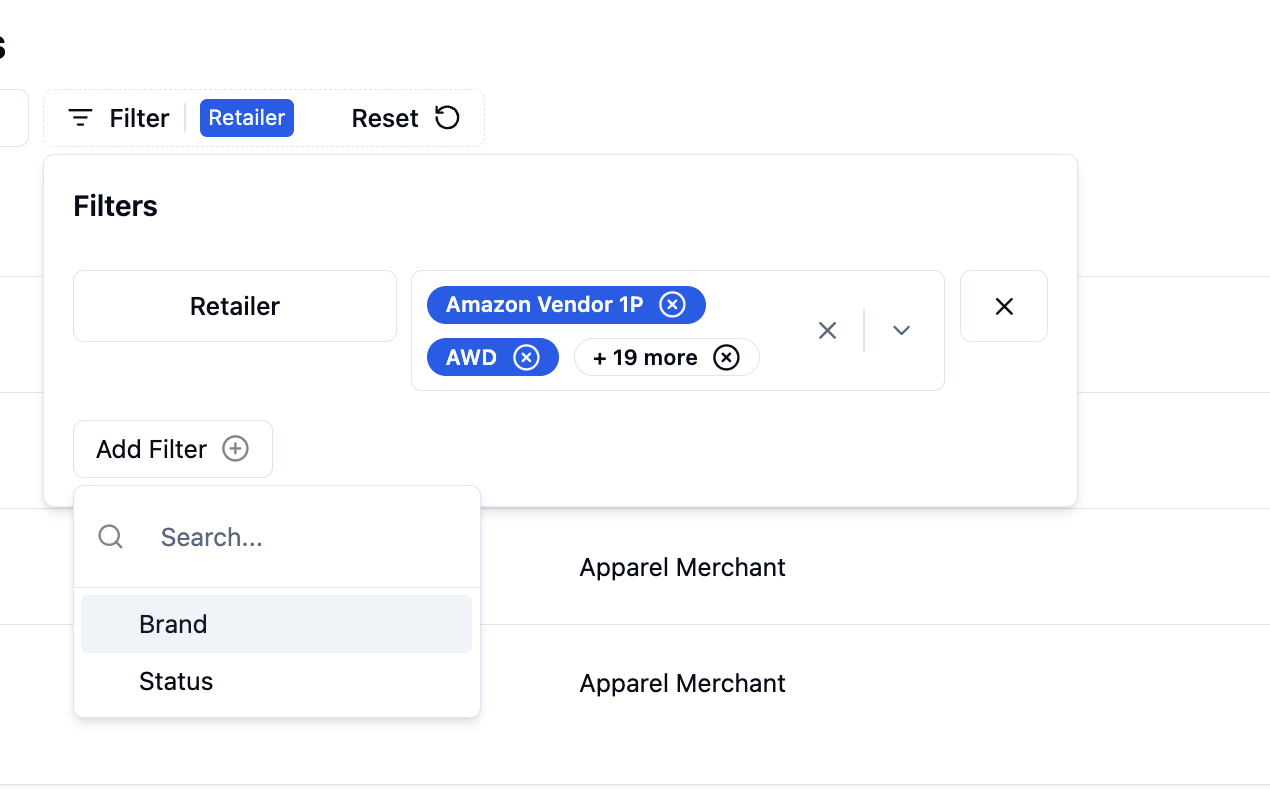
Configure the different options to create the filter. Entries will appear below on the table. Reset the filter by clicking the 'Reset' button to the right.