Amazon FBA Onboarding
Last updated: May 13, 2026
What is FBA?
Fulfillment by Amazon (FBA) is a fulfillment option for selling on Amazon that requires the vendor to monitor their own inventory levels in Amazons facility. When inventory runs low, the vendor must create a shipment to send to Amazon.
How do I set up FBA on RetailReady?
The first step for shipping to Amazon through their FBA program is to connect your Seller Central account in RetailReady.
Navigate to 'Settings' in the bottom left corner of the page.
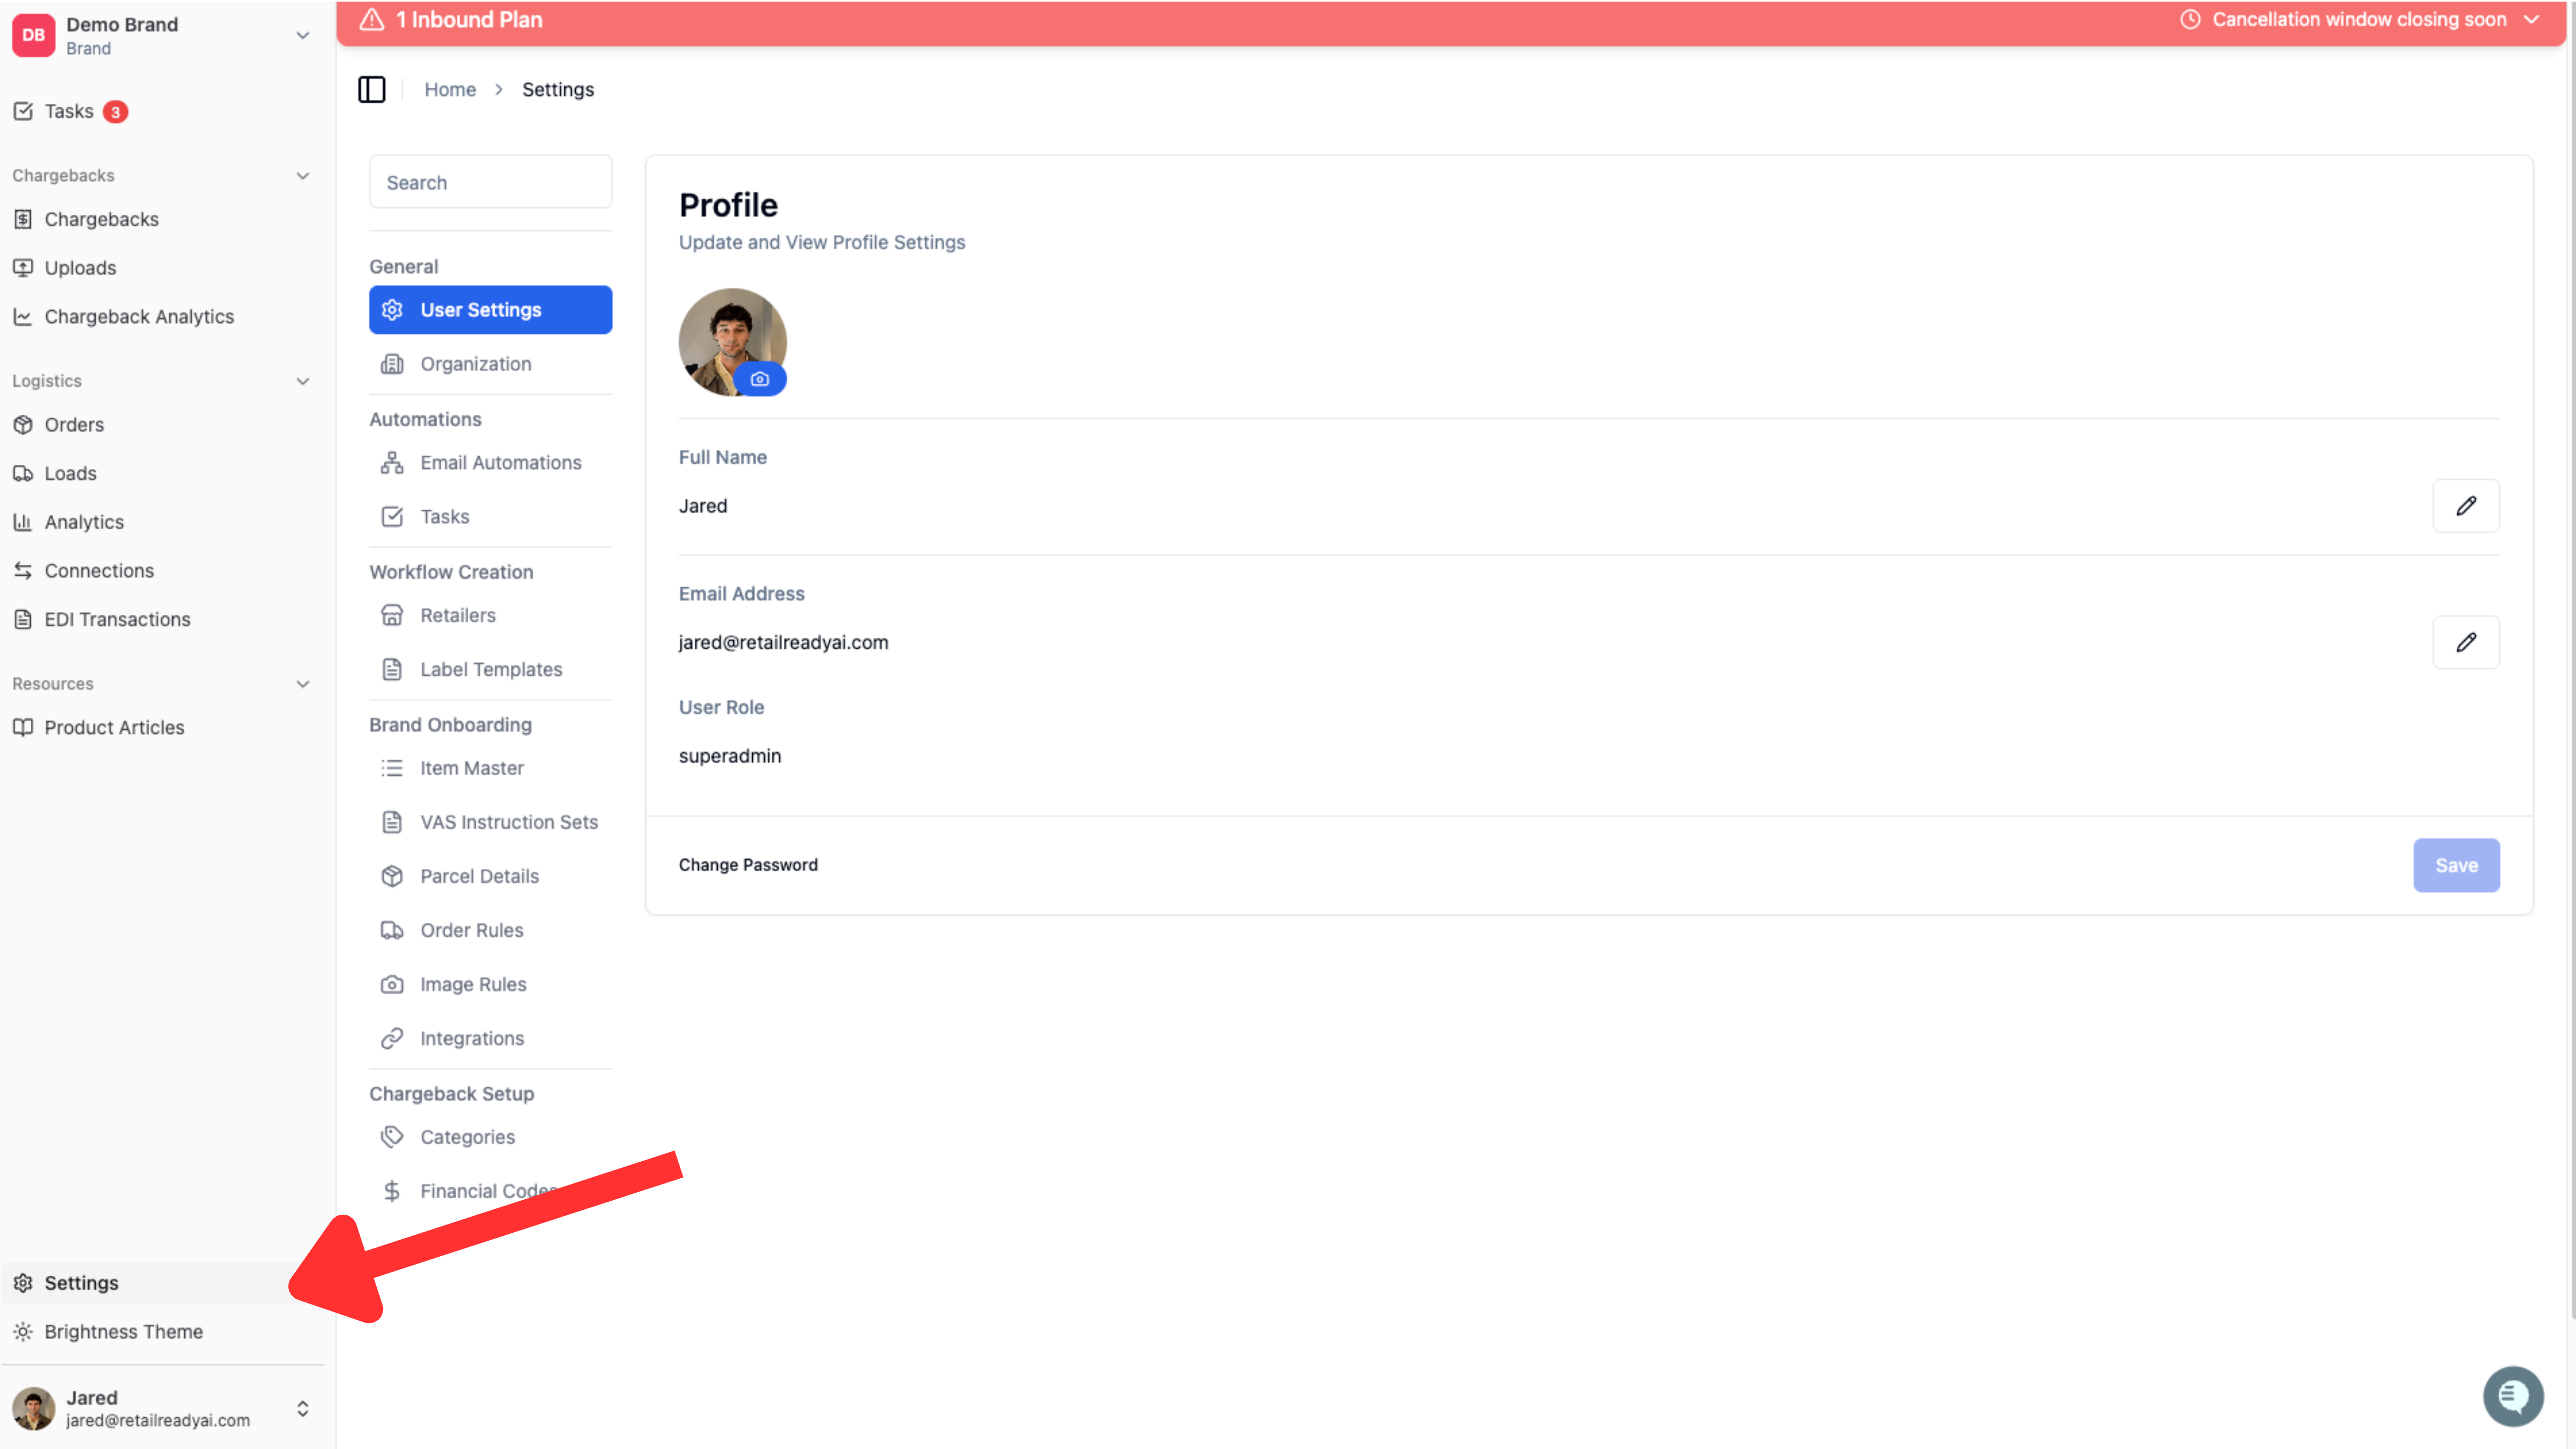
Click on 'Integrations' in the column that opens.
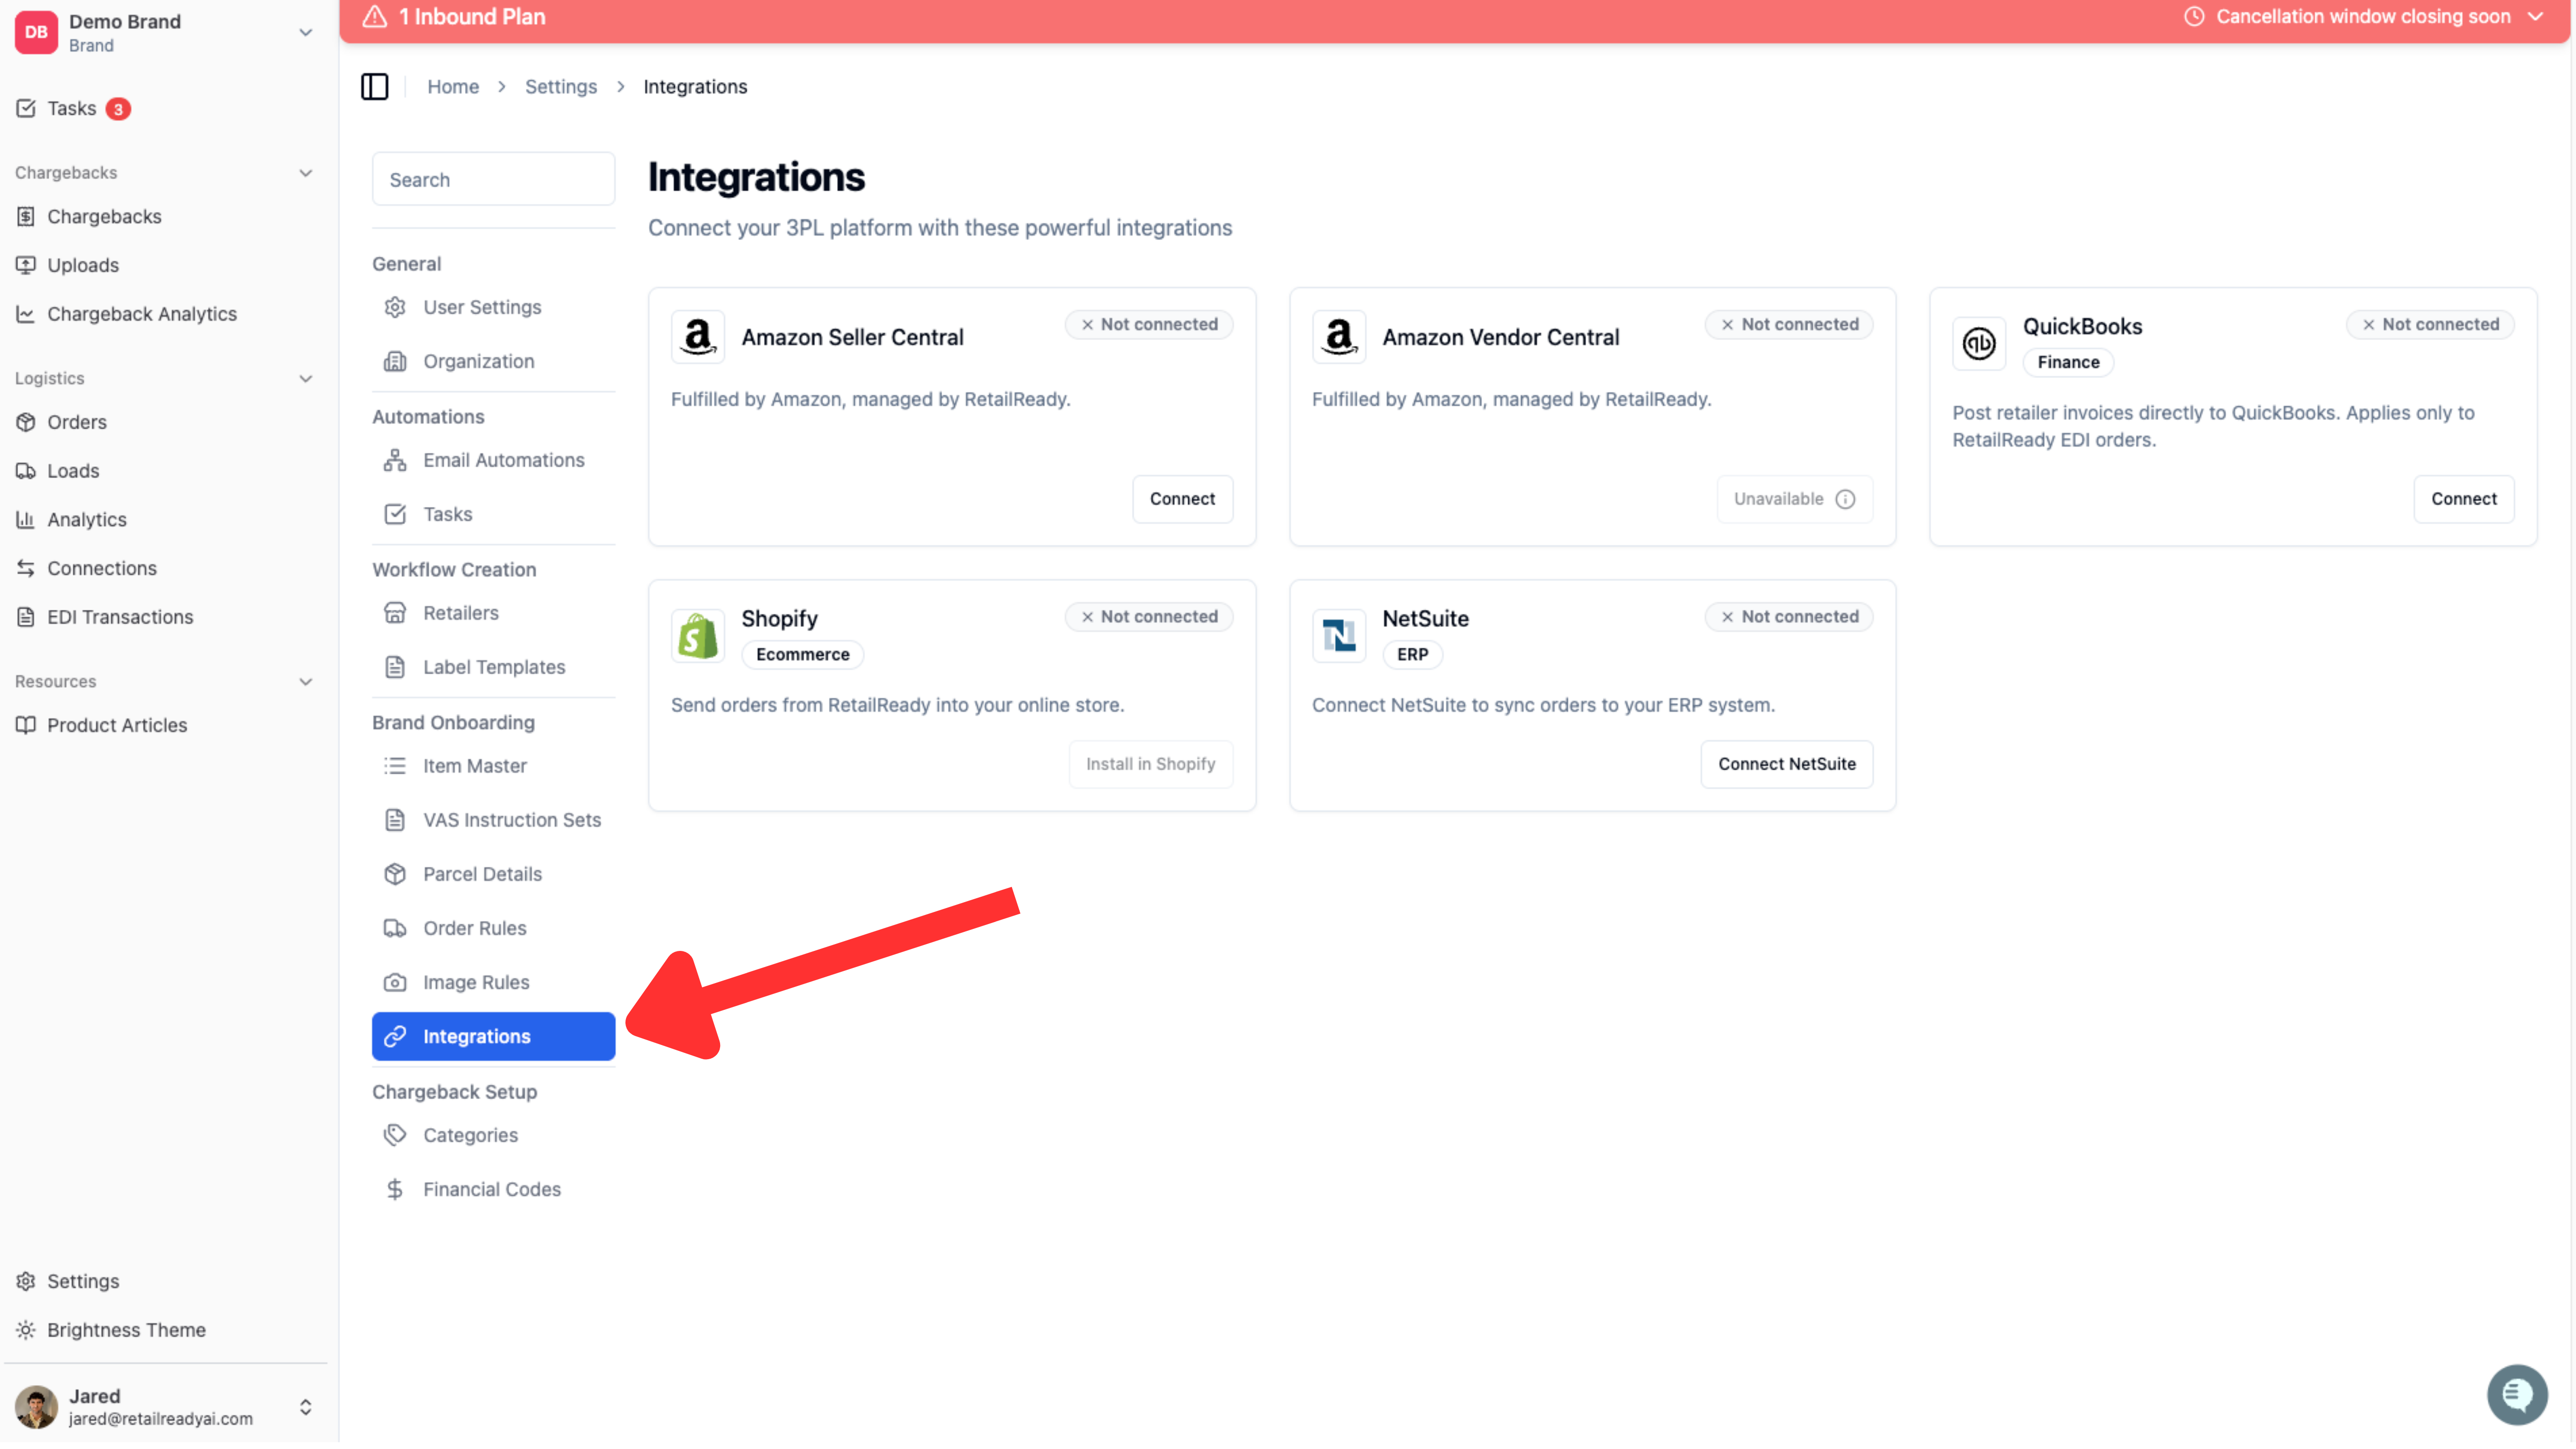
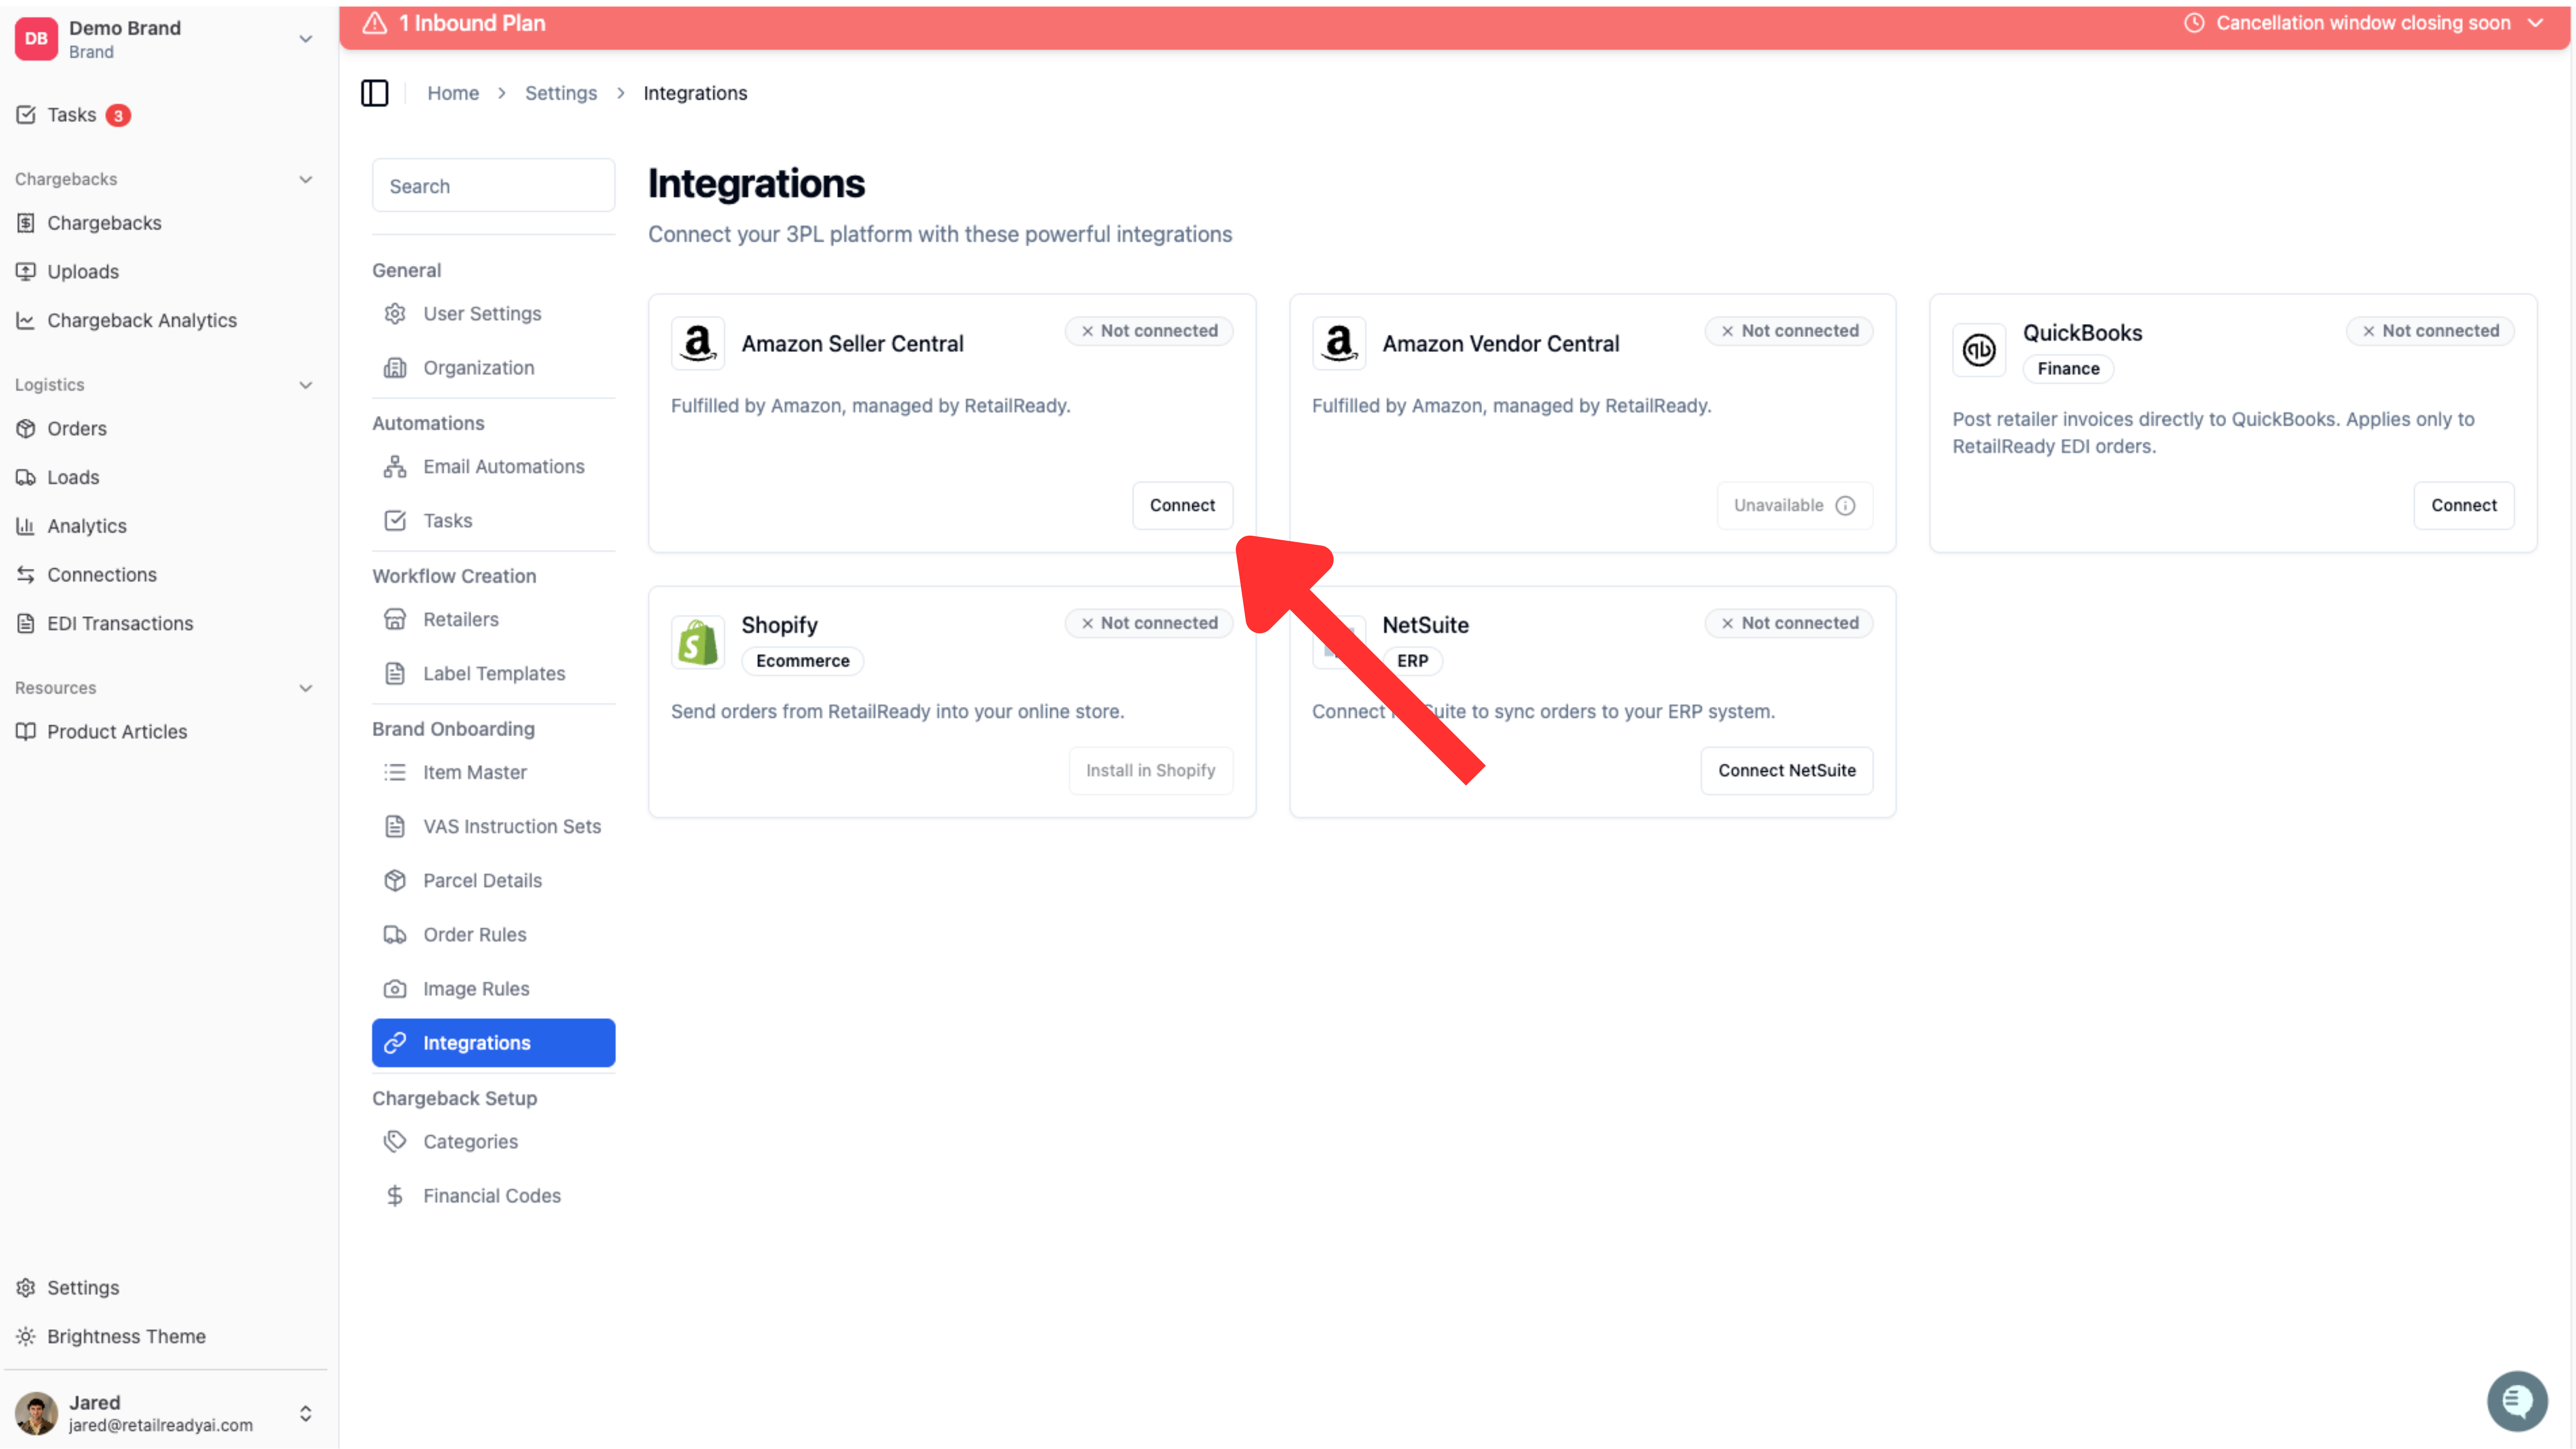
Click 'Connect' on the Amazon Seller Central tile and log in to the window that opens.
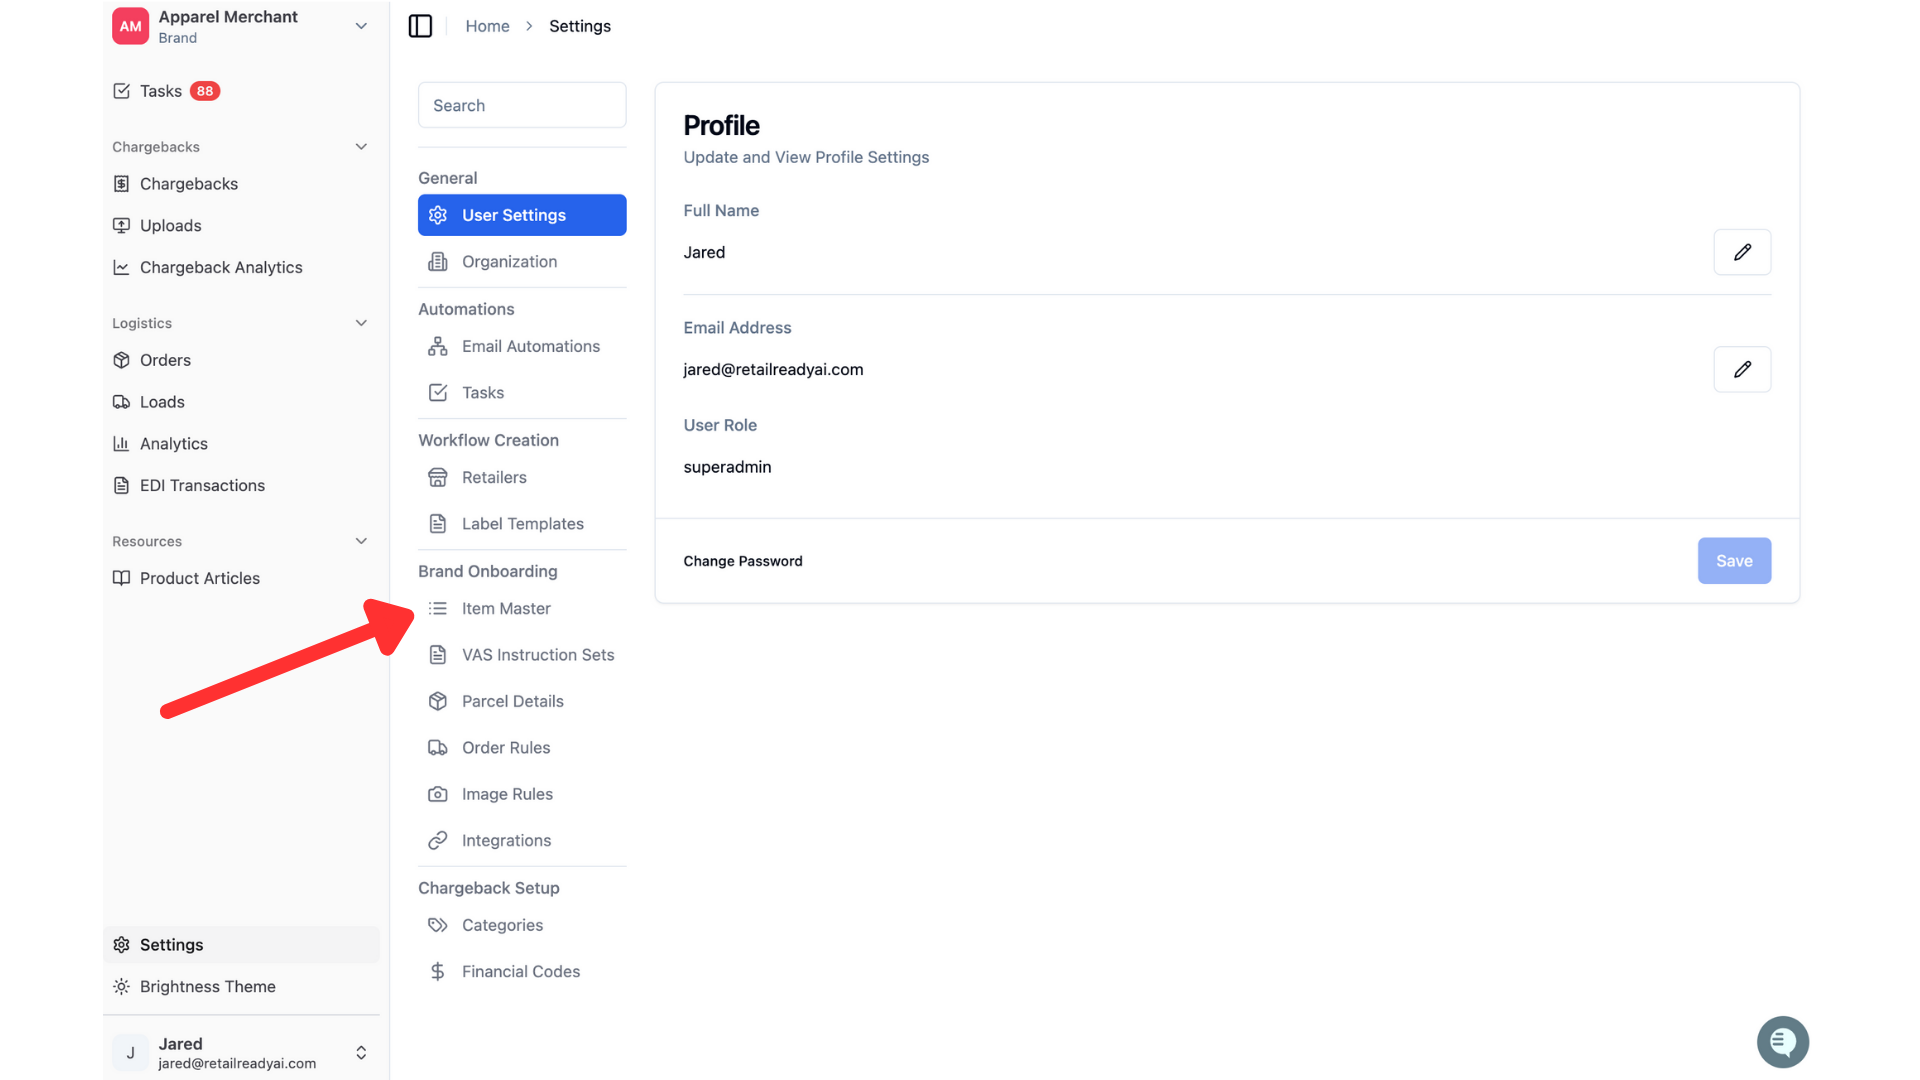
Once you have connected you Amazon Seller Central account, navigate directly to your Item Master page by clicking item master in the column that opens
Begin uploading your items. To do this select your brand from the drop down menu.
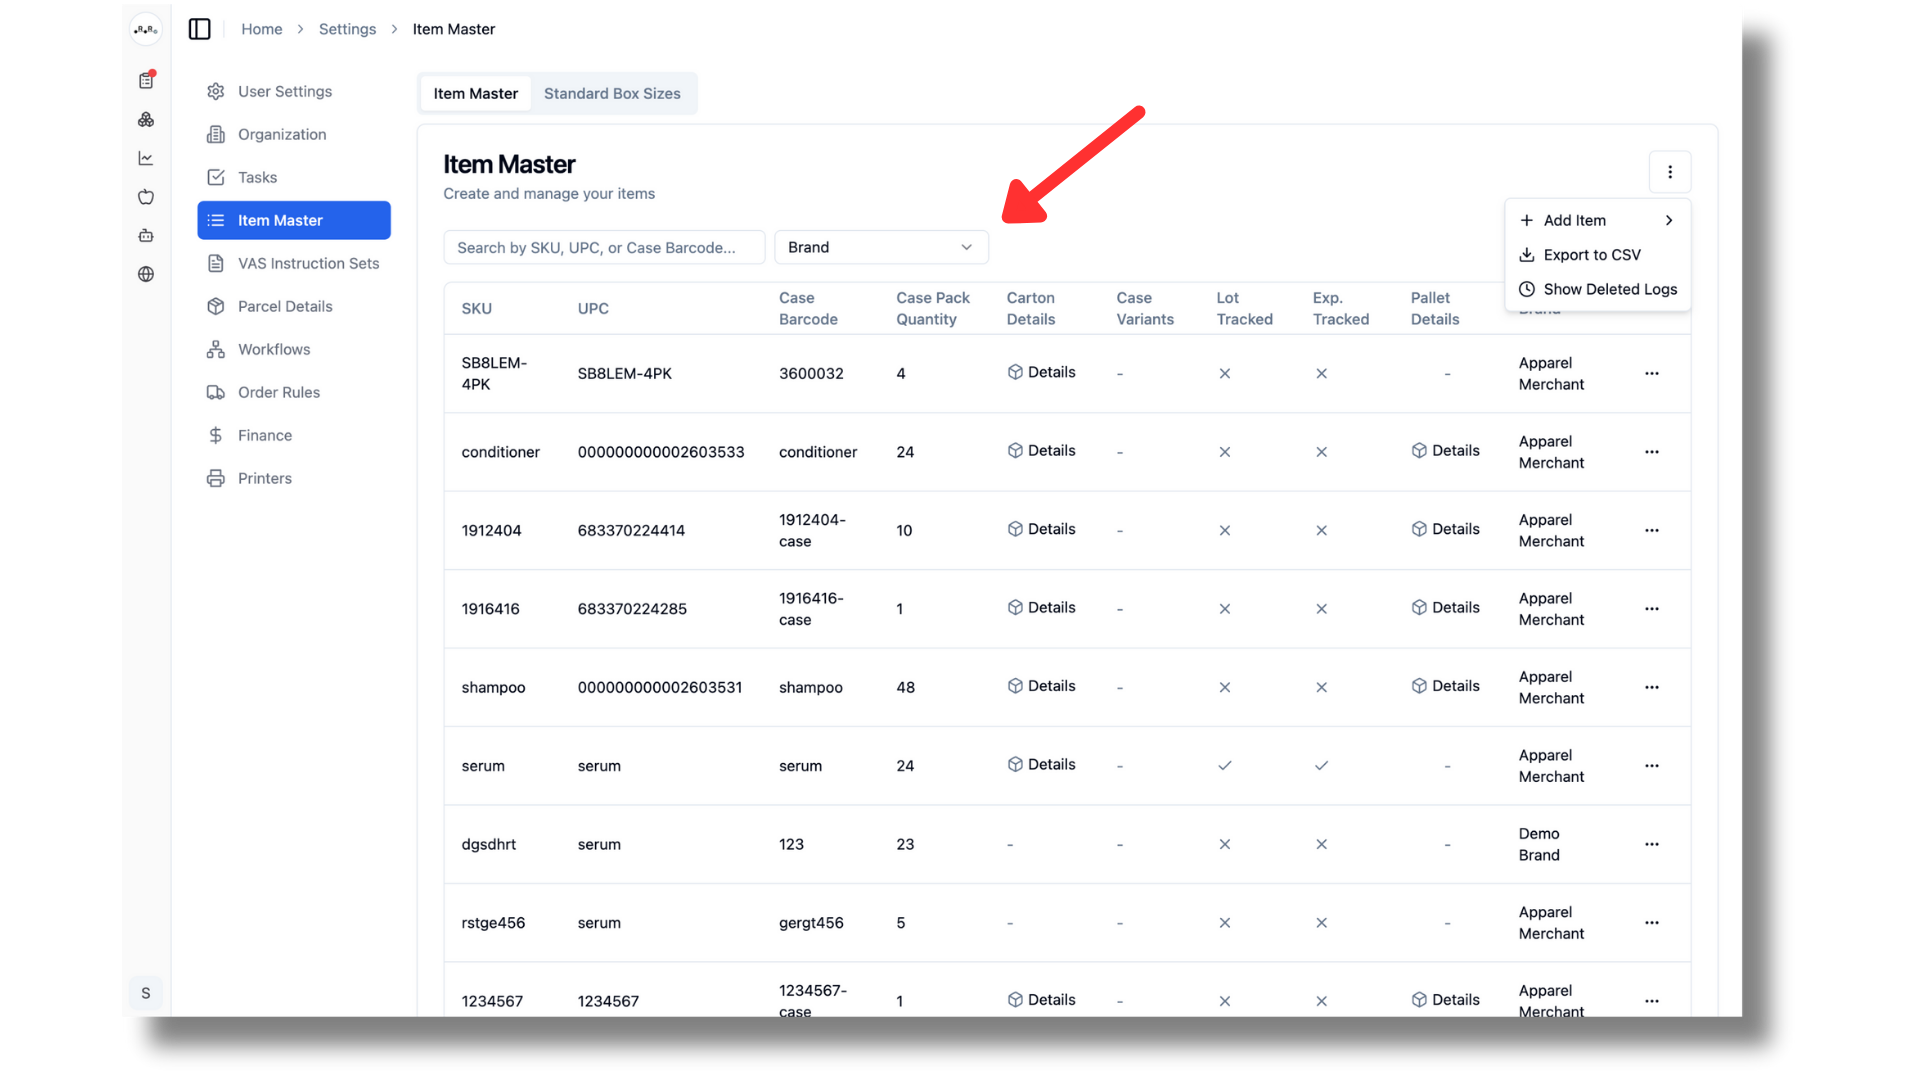
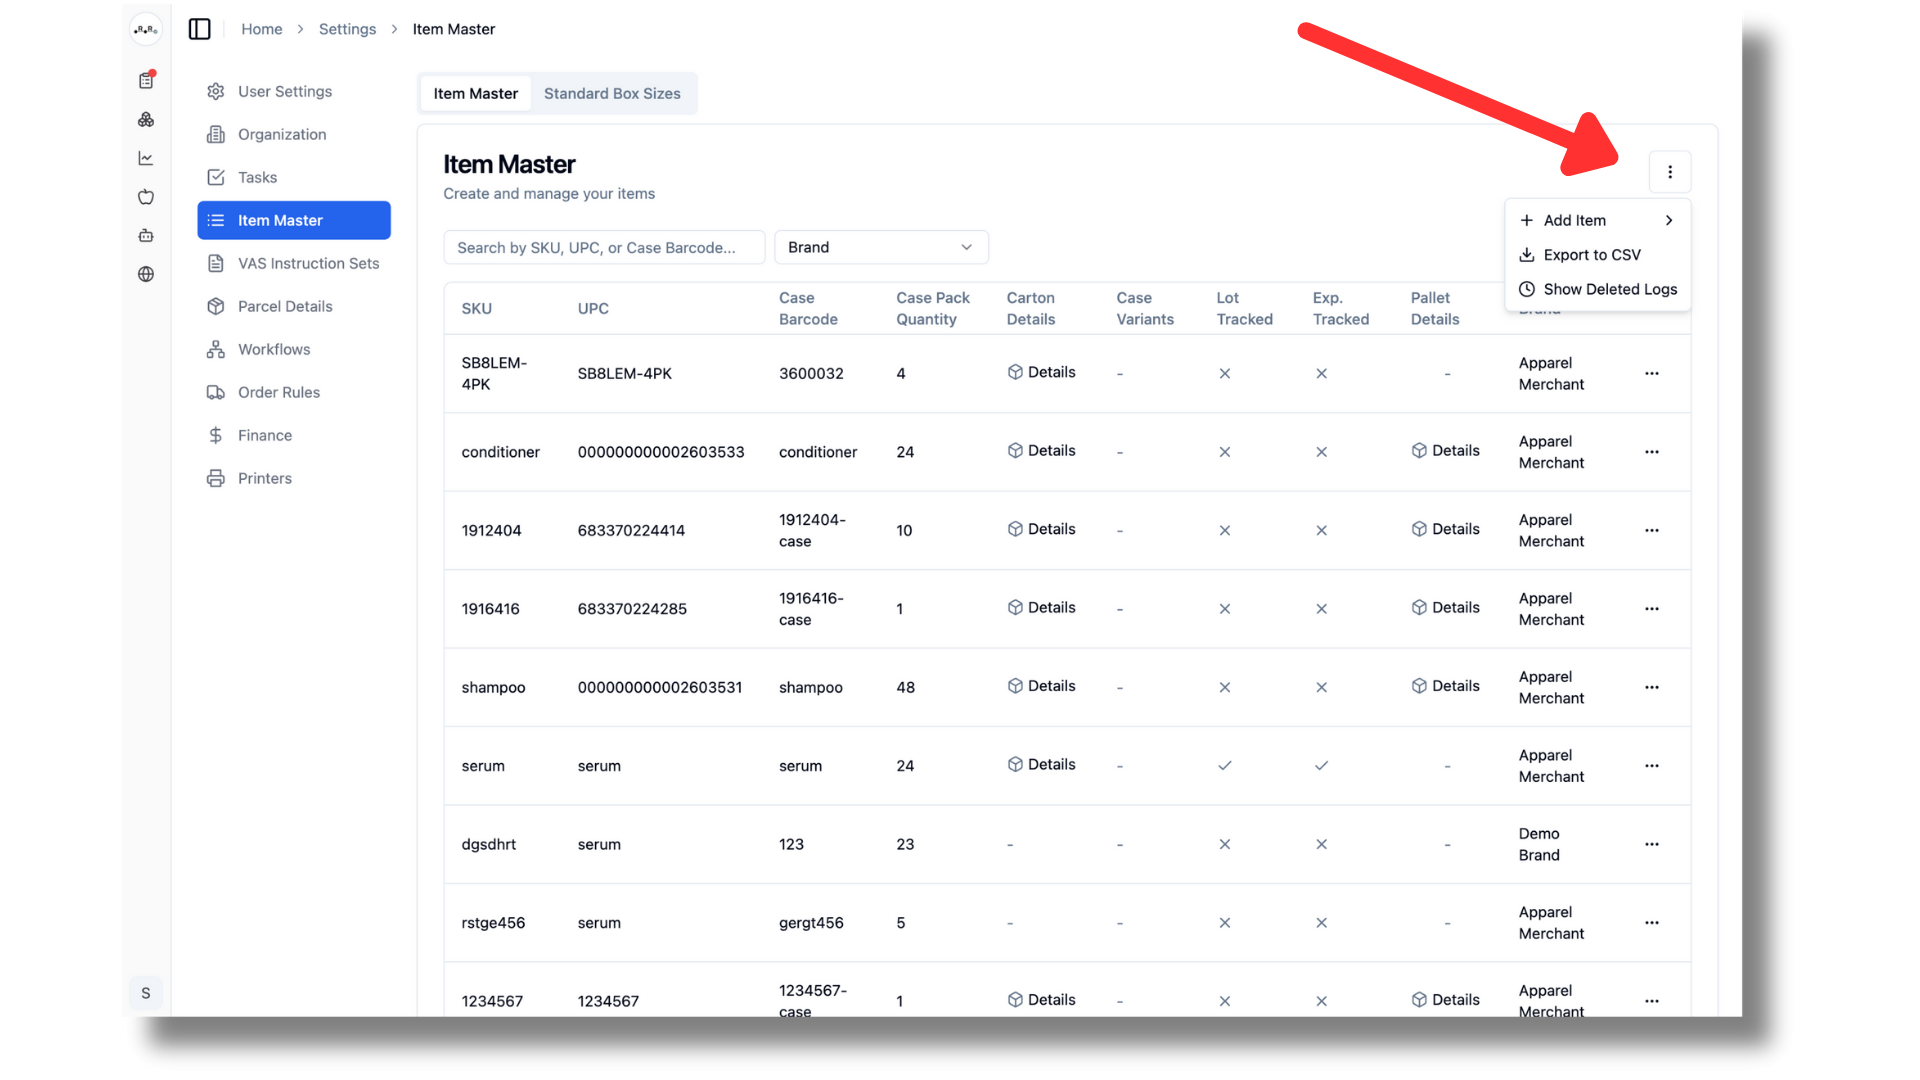
Click on the 3 dots located in the top right corner, followed by add item.
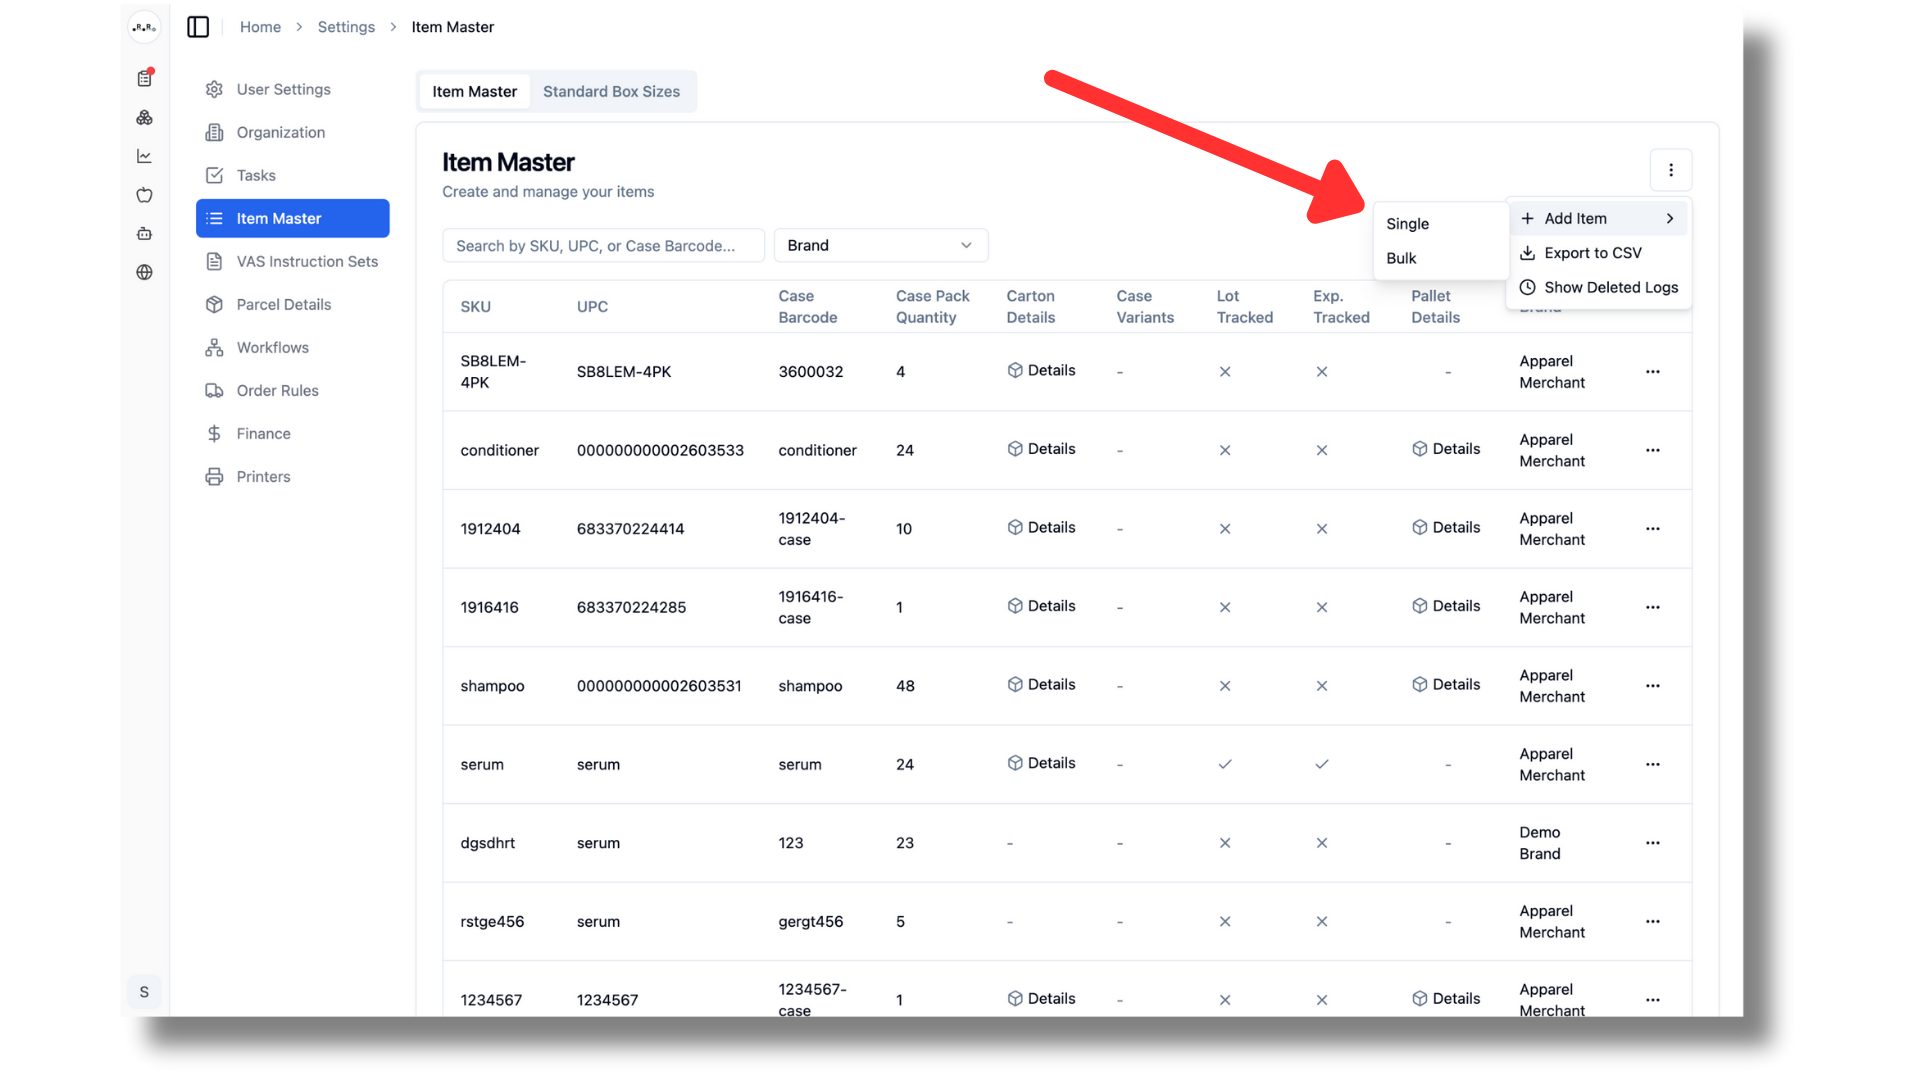
Select single upload.
Want to bulk upload or bulk update Amazon FBA SKUs? Hit the three dots in the item master and then 'update Amazon SKU'.
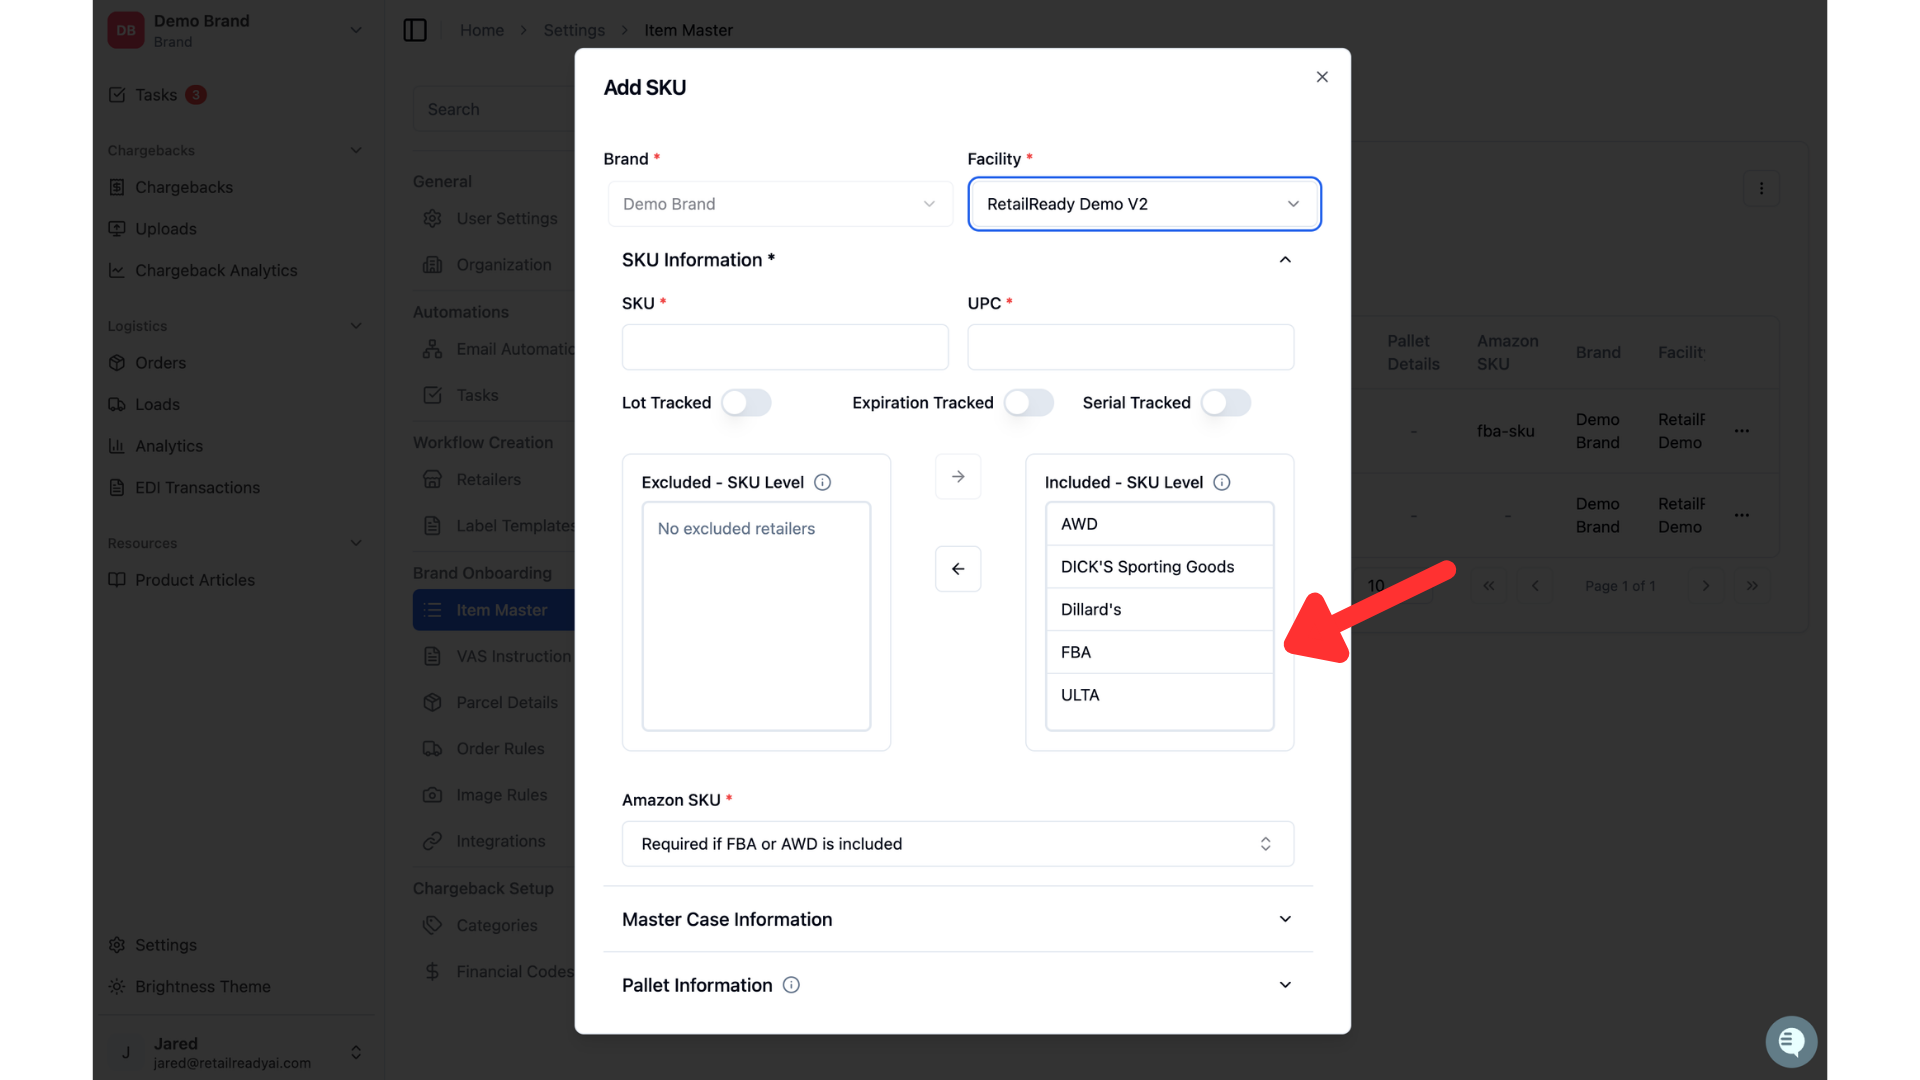
Now it is time to input the details for a specific item. You will see the brand name is already filled in. Select a facility, then input the items SKU and UPC. If the item has a lot number, expiration date or serial number you can toggle those on. This tells RetailReady to track those values as well!
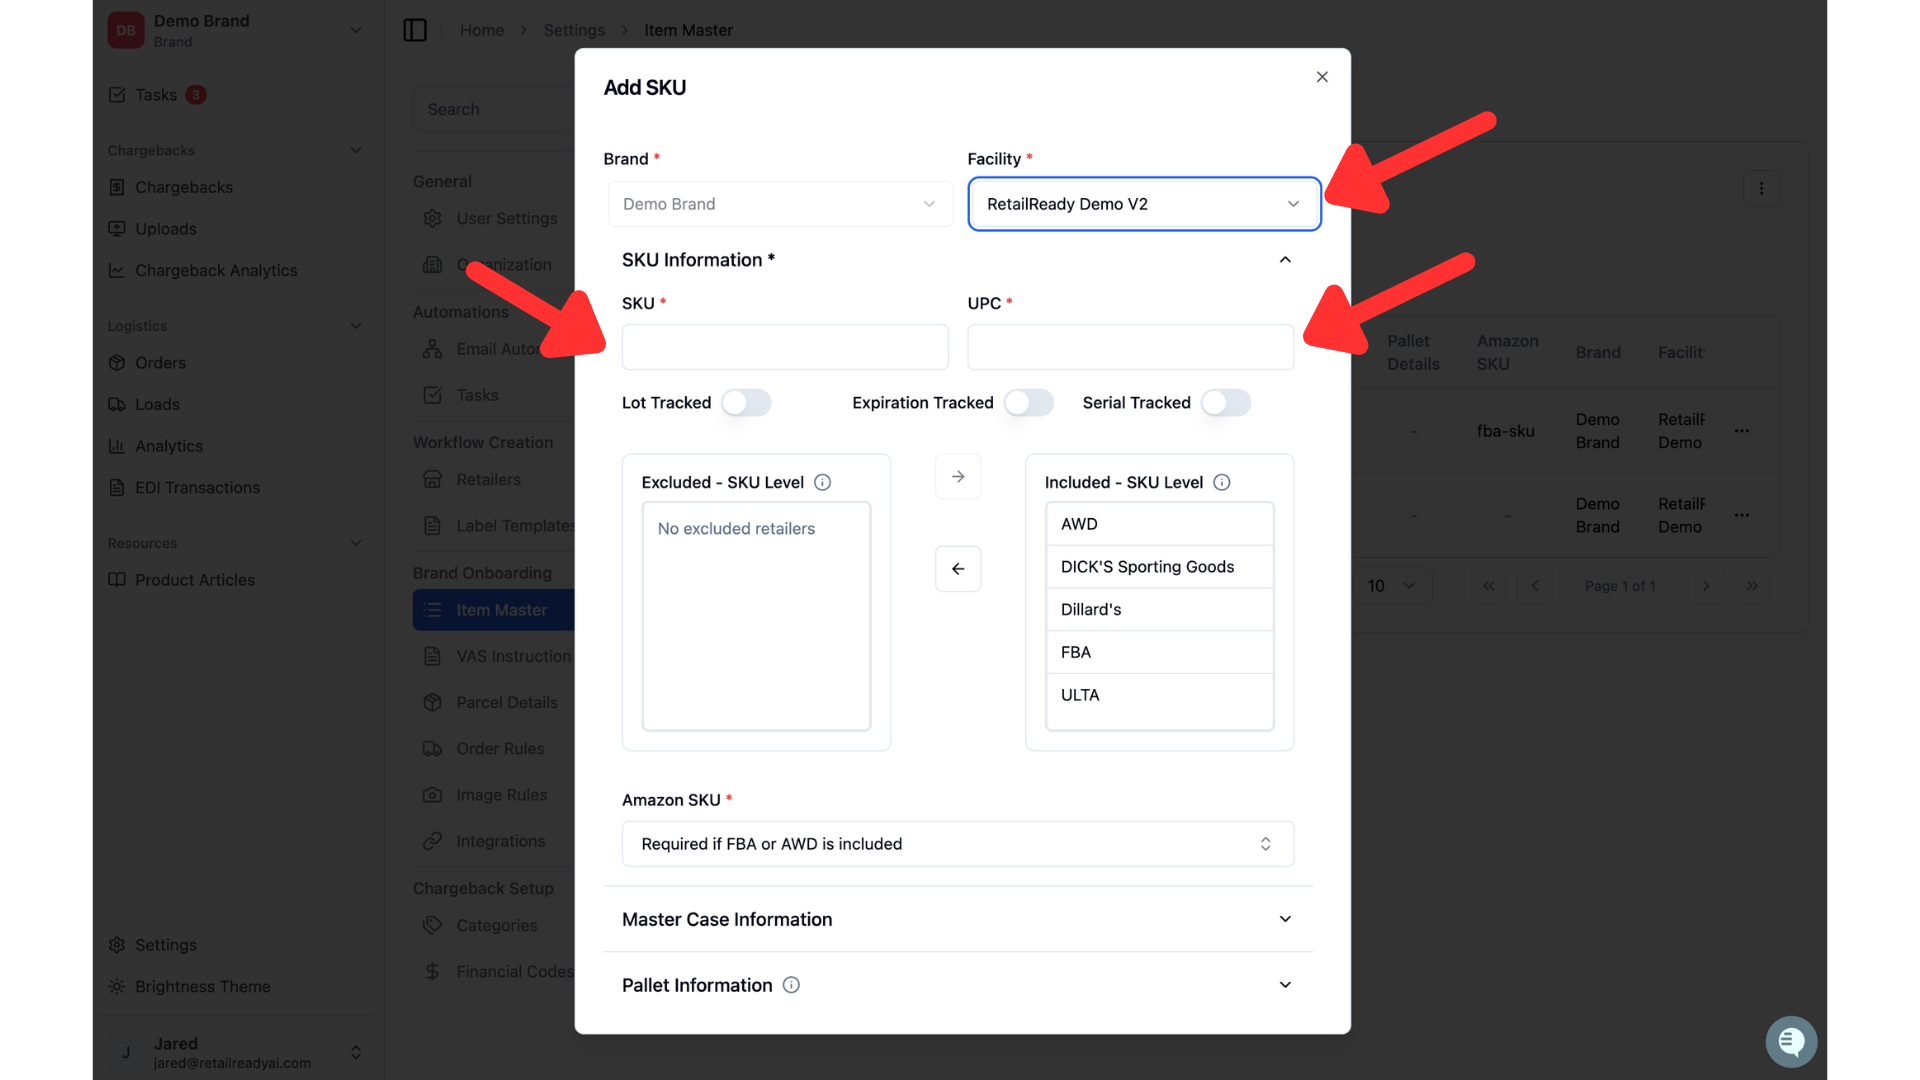
The Included and Excluded sections determine which retailers can receive this SKU. All retailers default to Included. Move any retailer that should not receive this SKU to Excluded. Clicking a retailer moves it between sections.
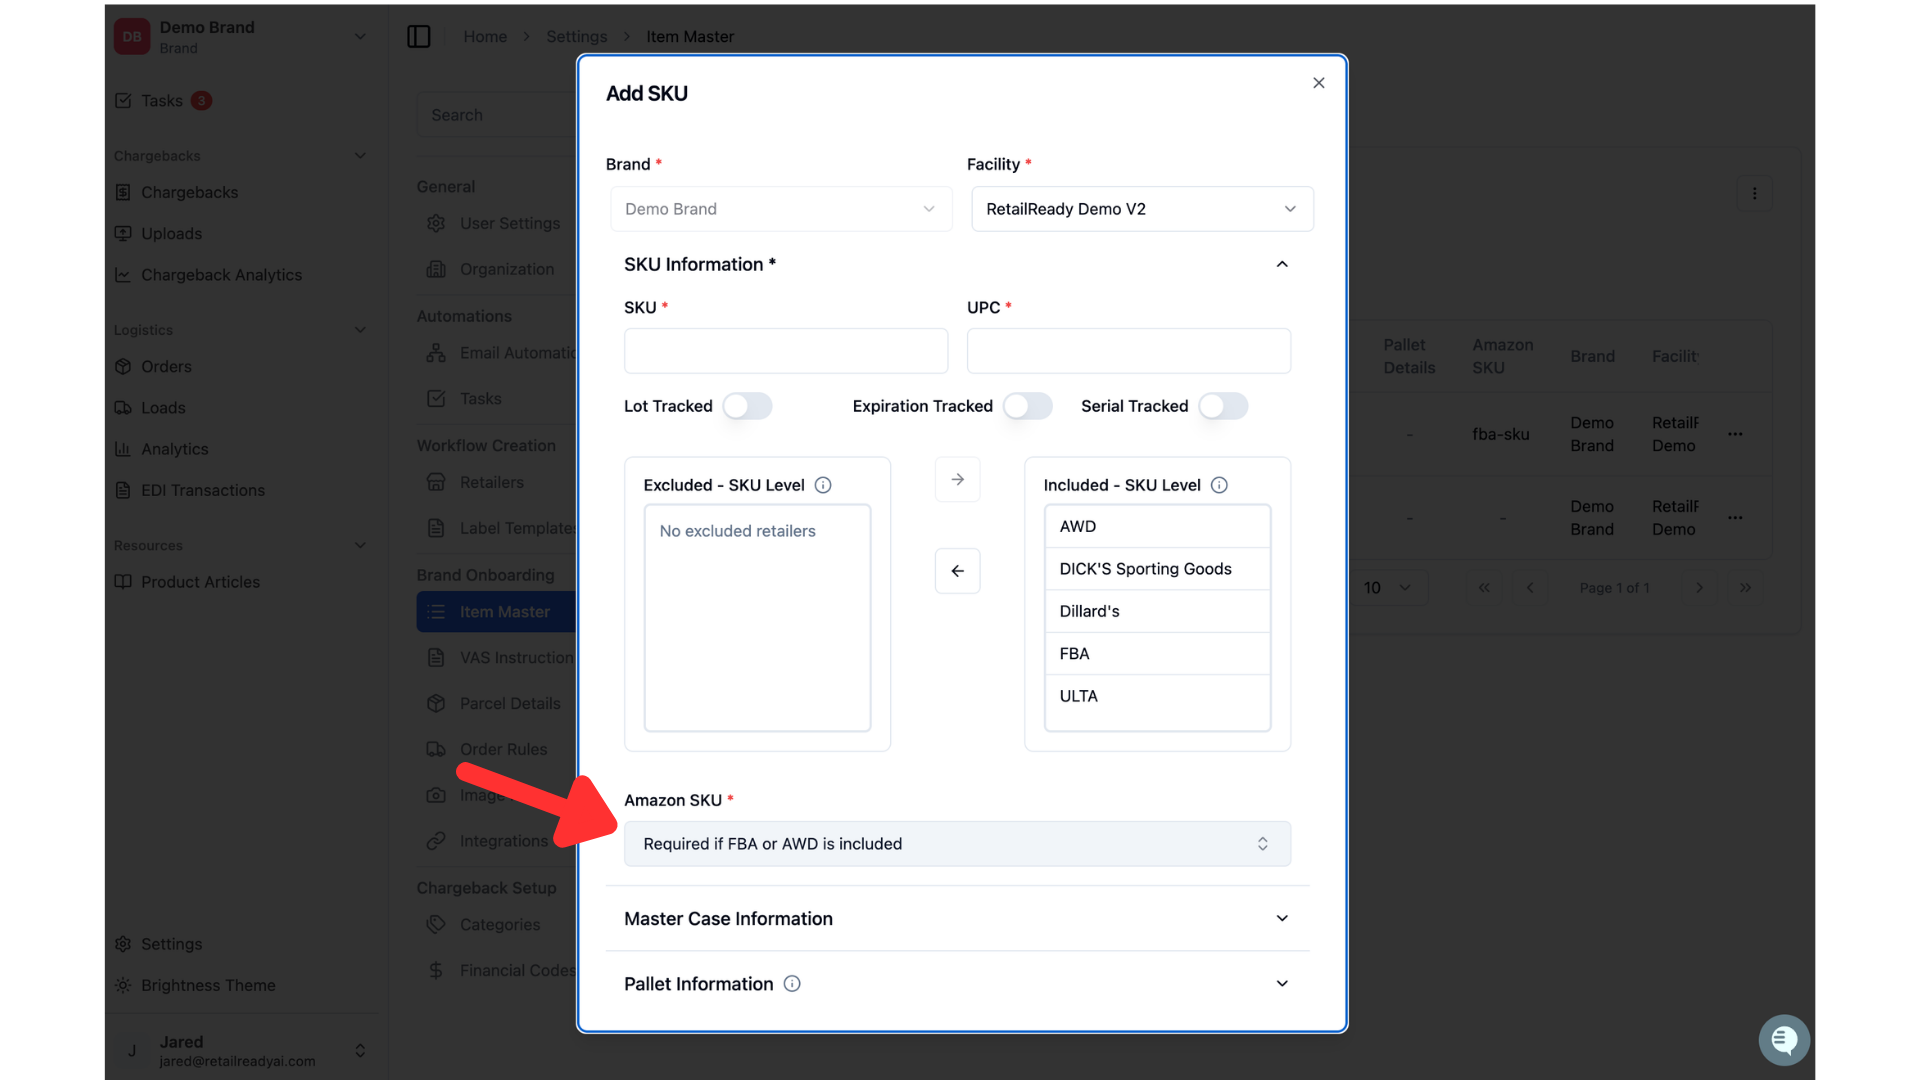
Select the Amazon SKU that this item is associated with. This is how RetailReady will make sure the items are connected properly and the products are what Amazon expects.
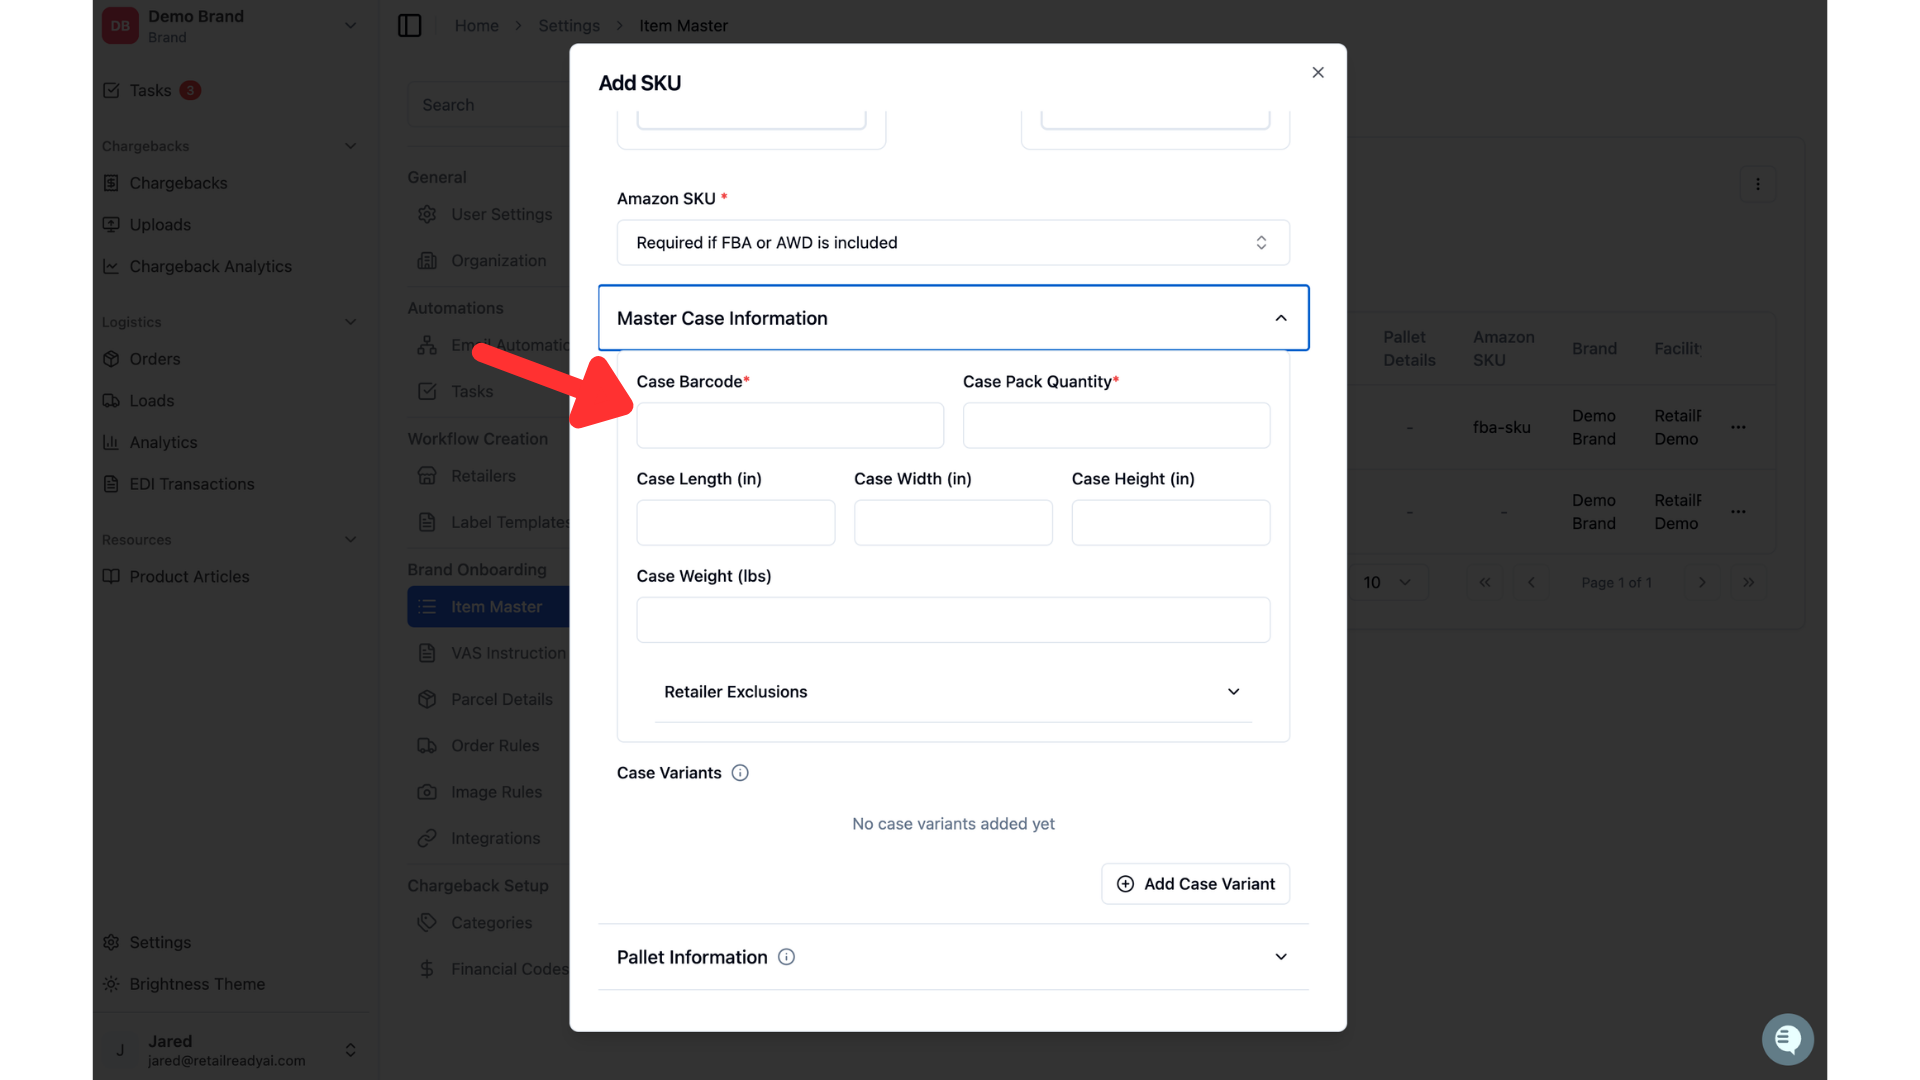
Lets input the Master Case Information! This is where you can specify the quantity of items in your standard case, the case dimensions, and the weight of the case. This allows RetailReady to track the size and weight of cartons during the pack out process. One of the ways we make sure you stay compliant!
Hit save and your item is uploaded to the Item Master!
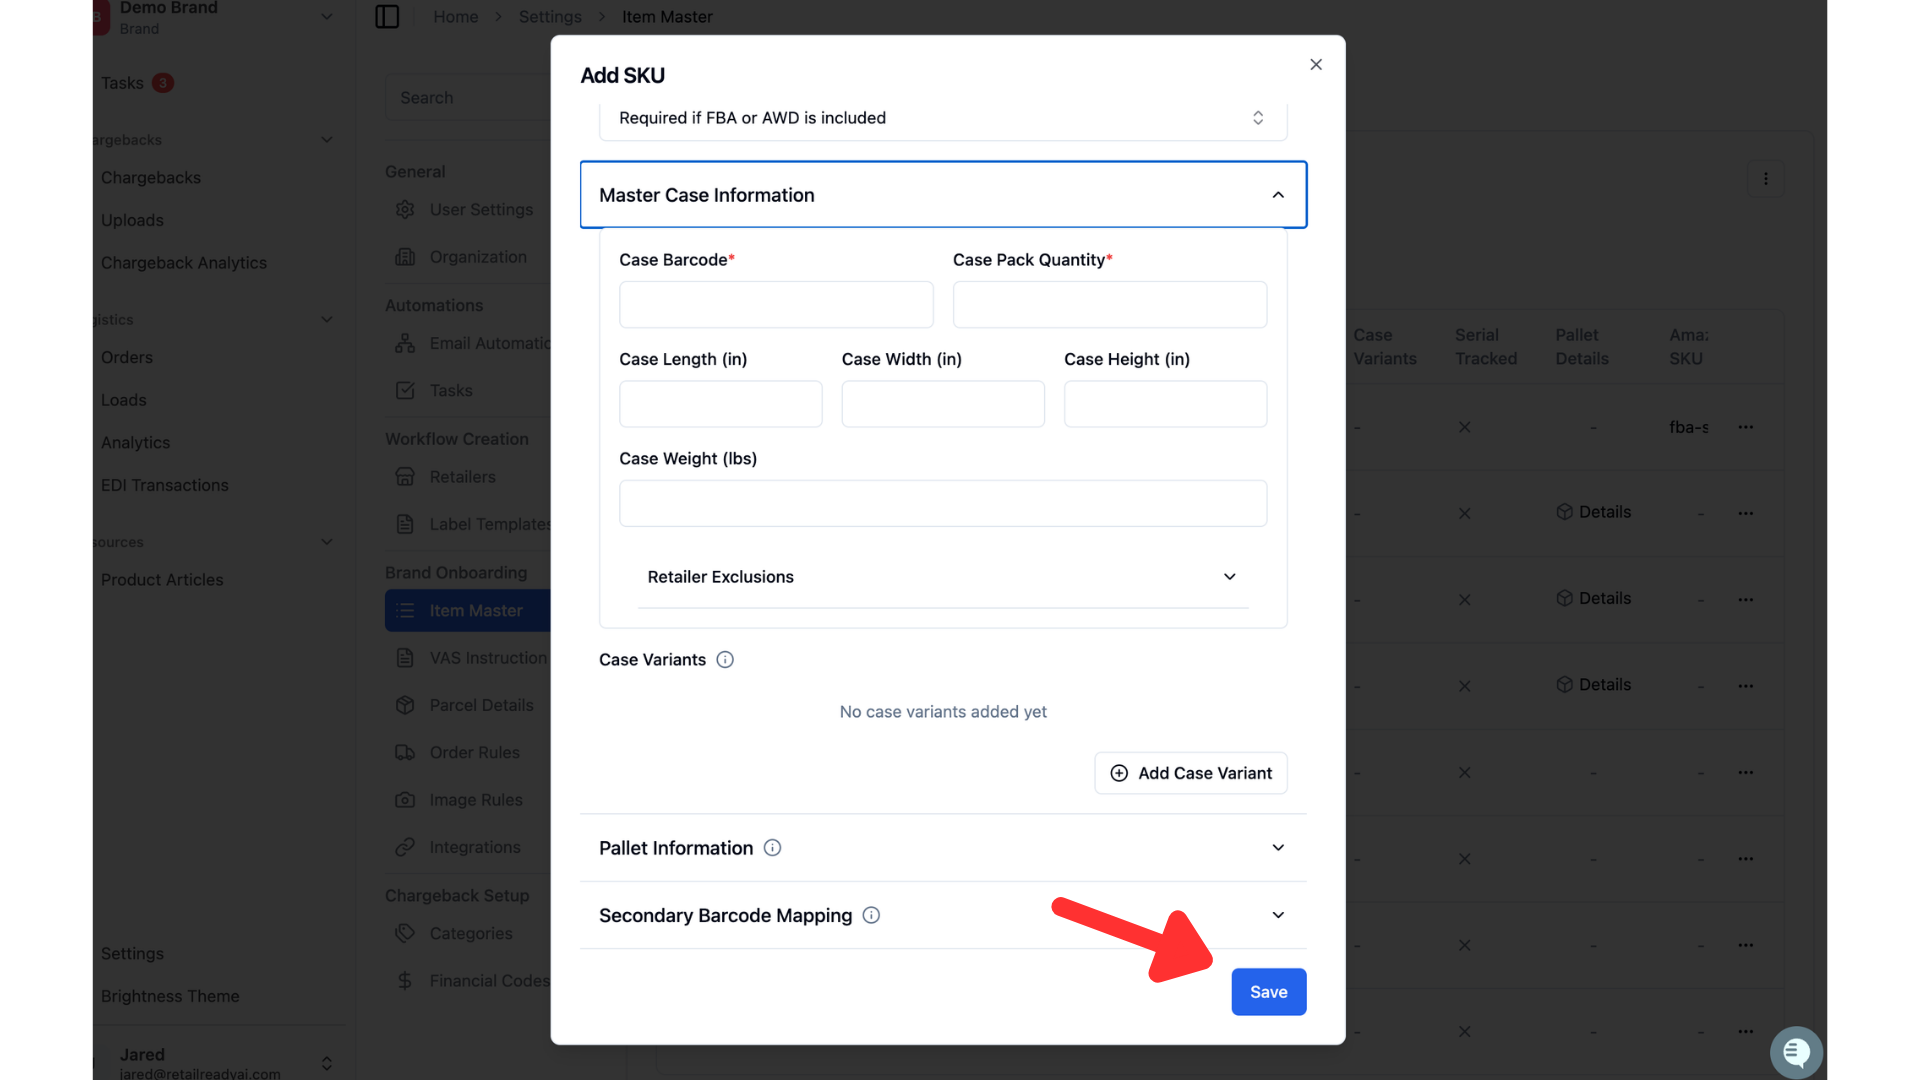
For more information about the optional sections of the single item upload, refer to the How to use Item Master!
Now it's time to create the FBA order!
Only brands are able to create an FBA order in Retail Ready. If you are a 3PL trying to create an FBA order you must reach out to the brand.
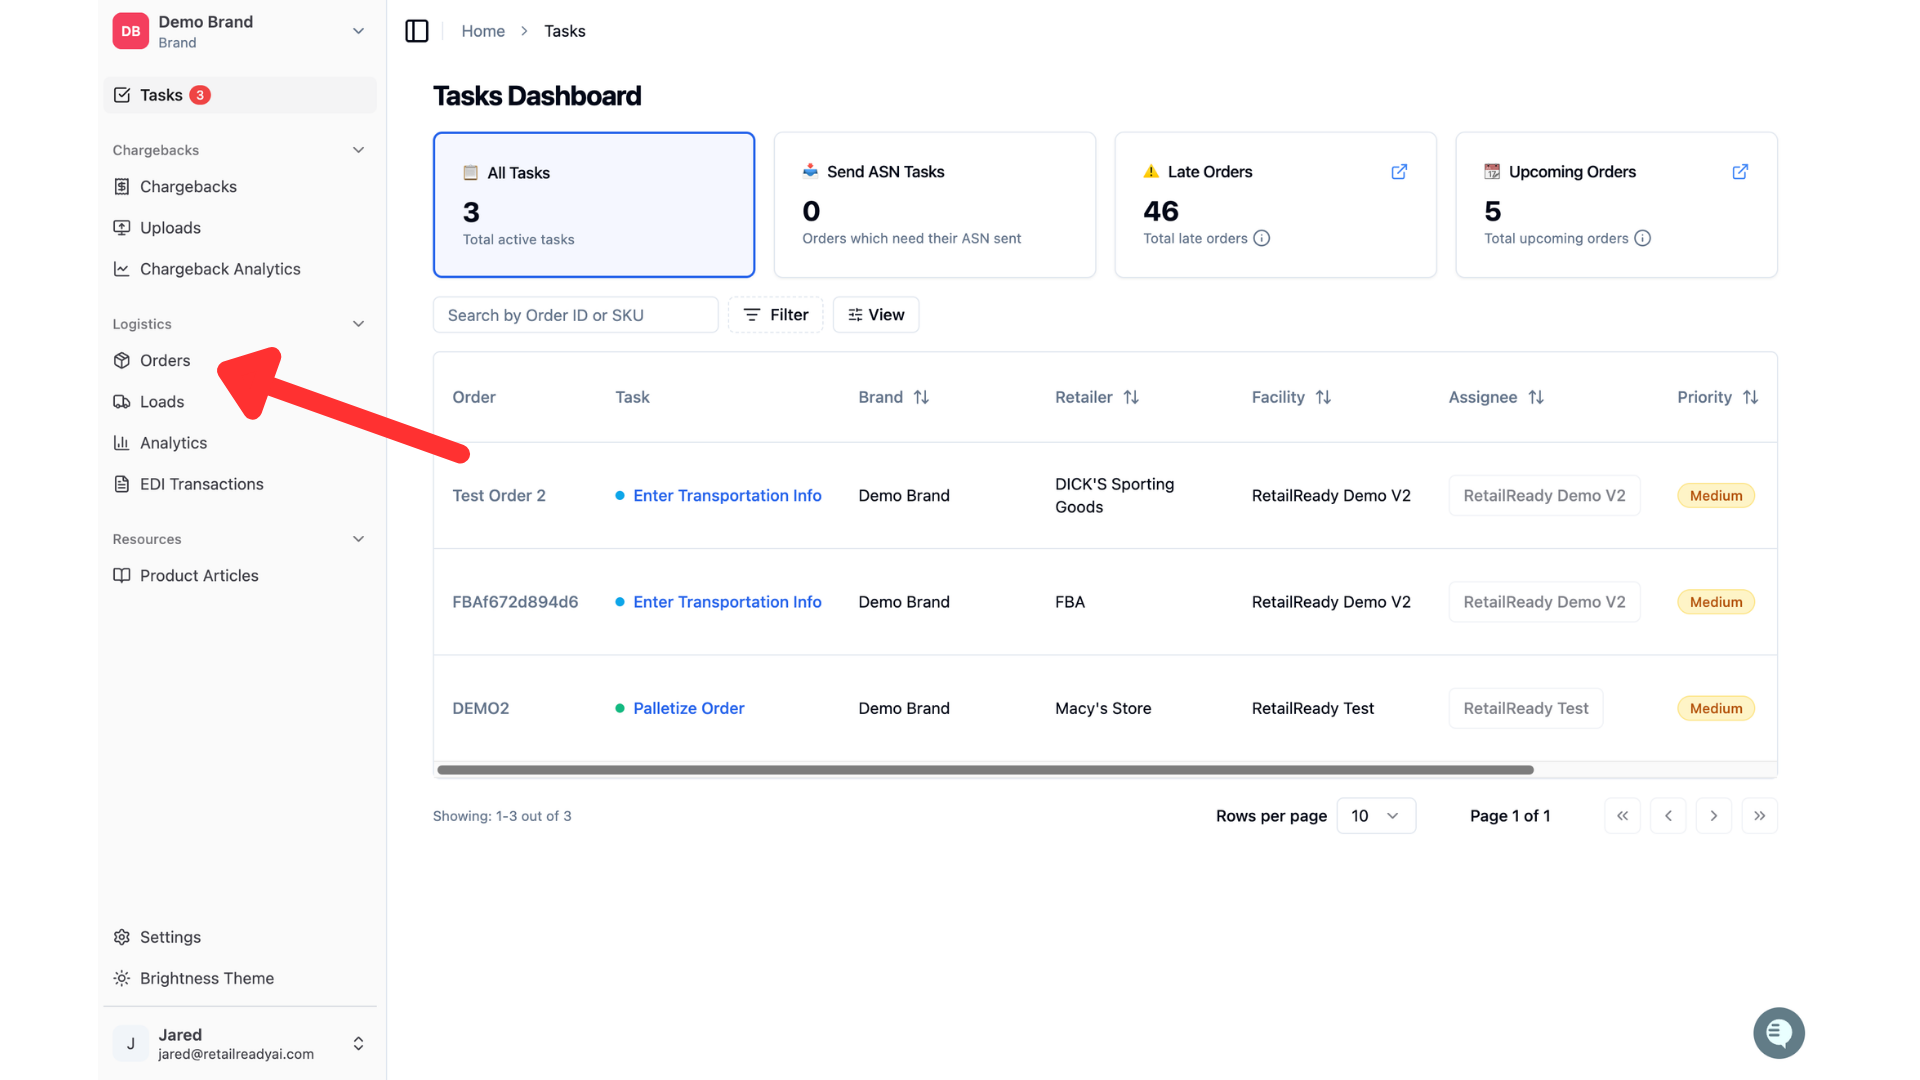
Once the item master is set up, navigate to the orders tab by clicking orders in the left most column.
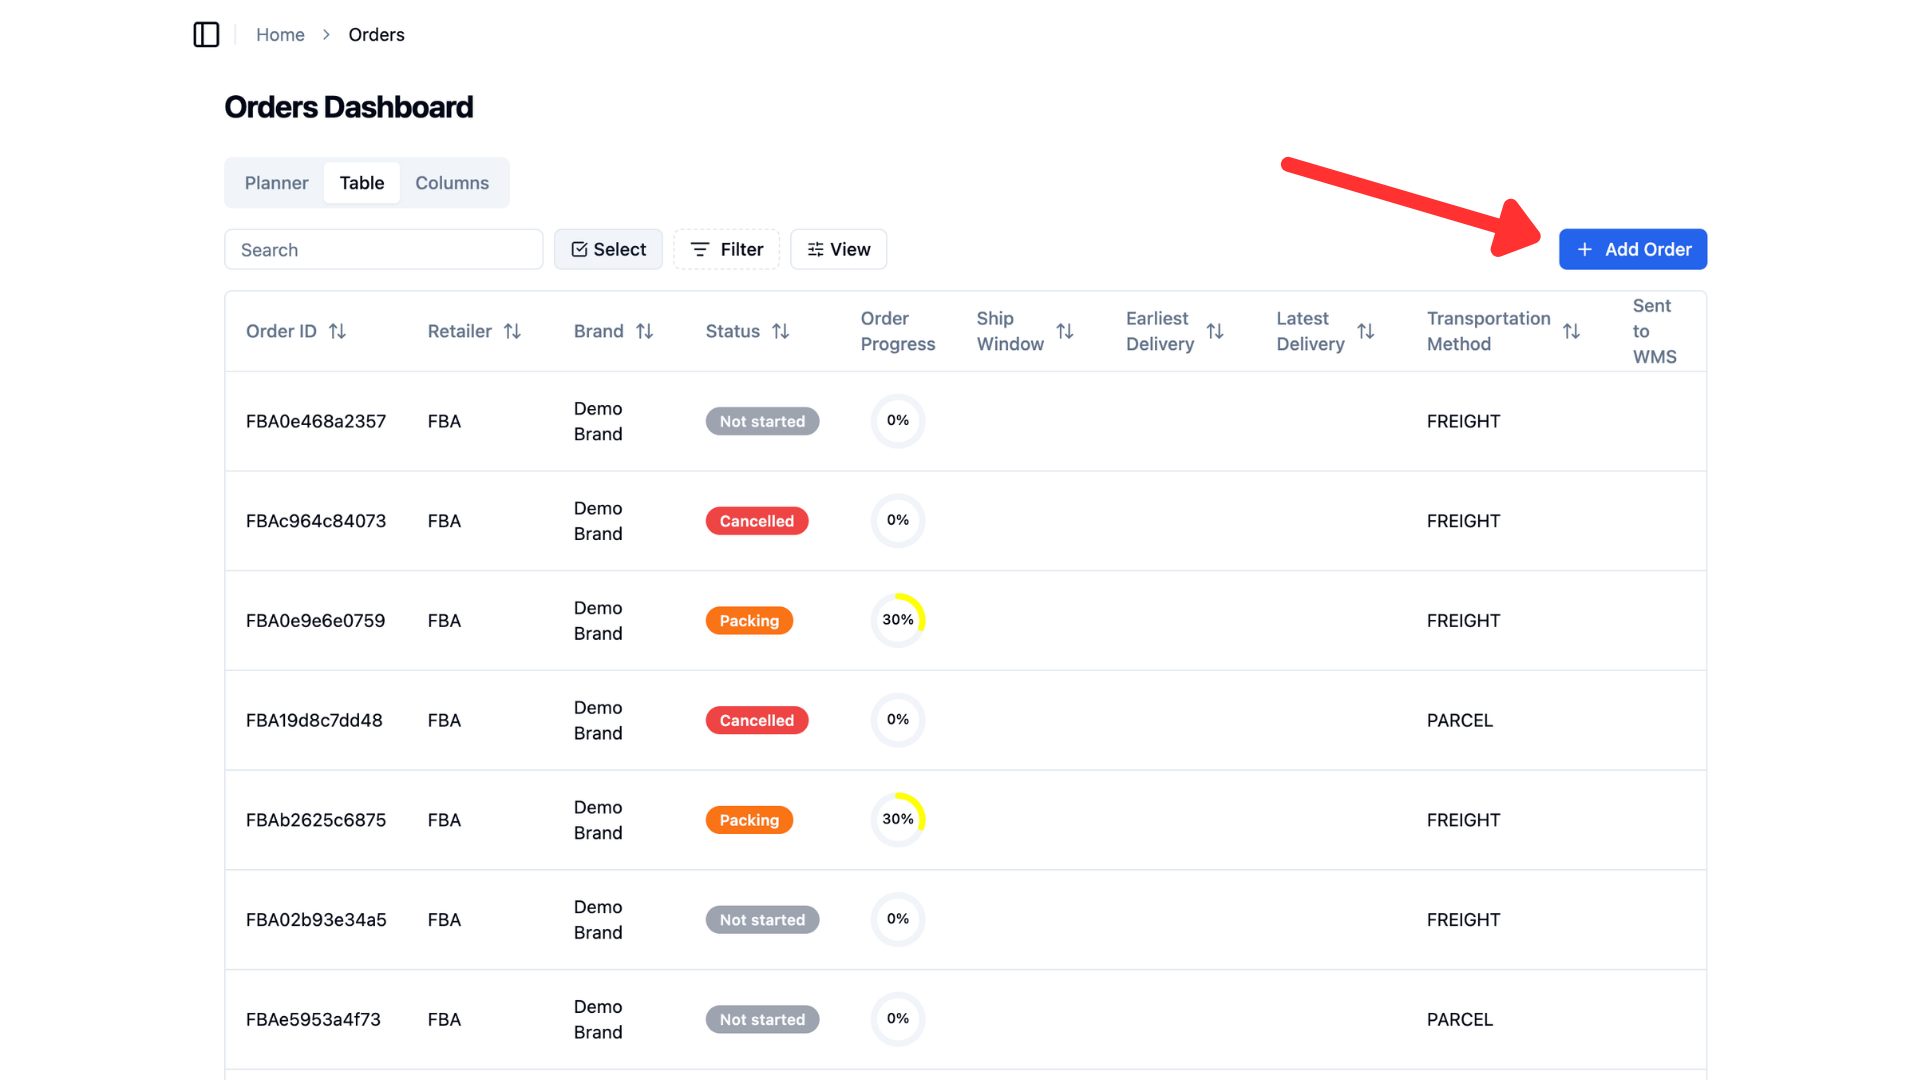
Click the add order button
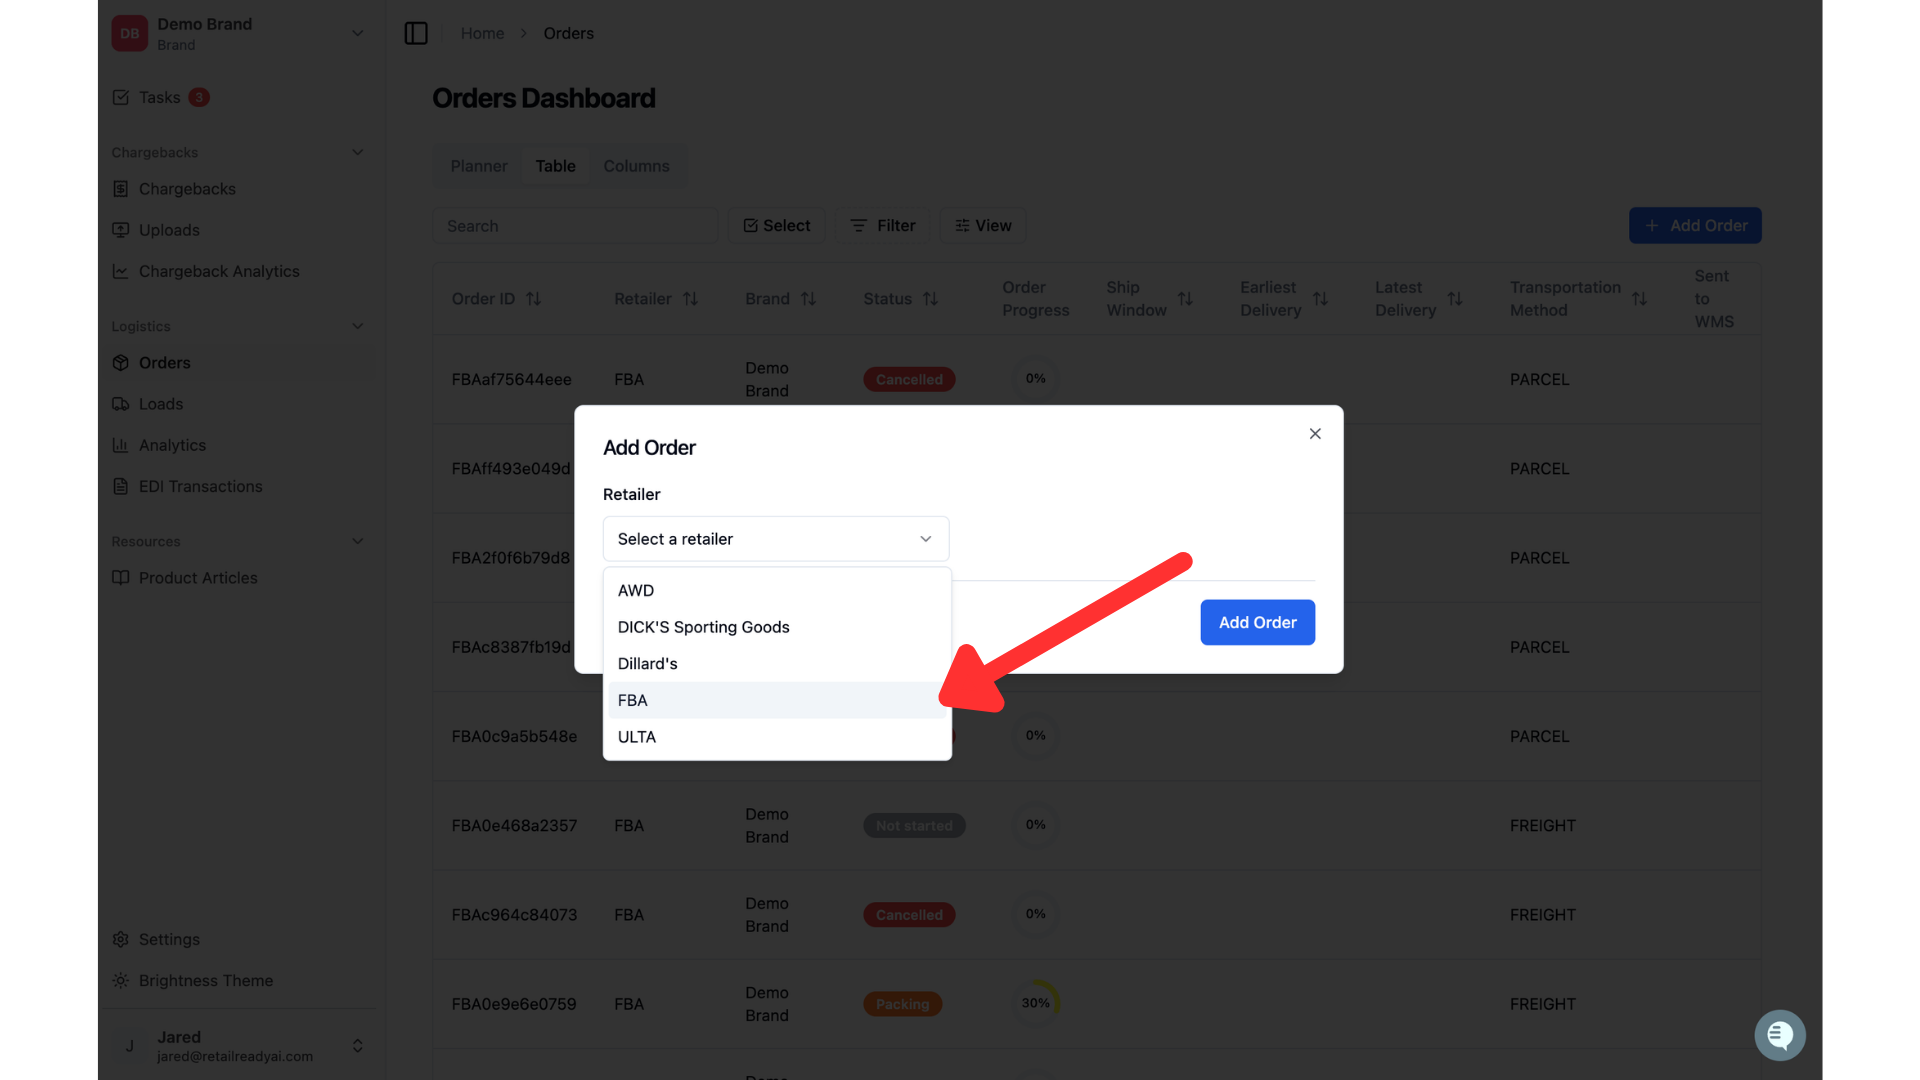
Click select a retailer to select which retailer this order is going to. Since this is an FBA order, you should be selecting FBA.
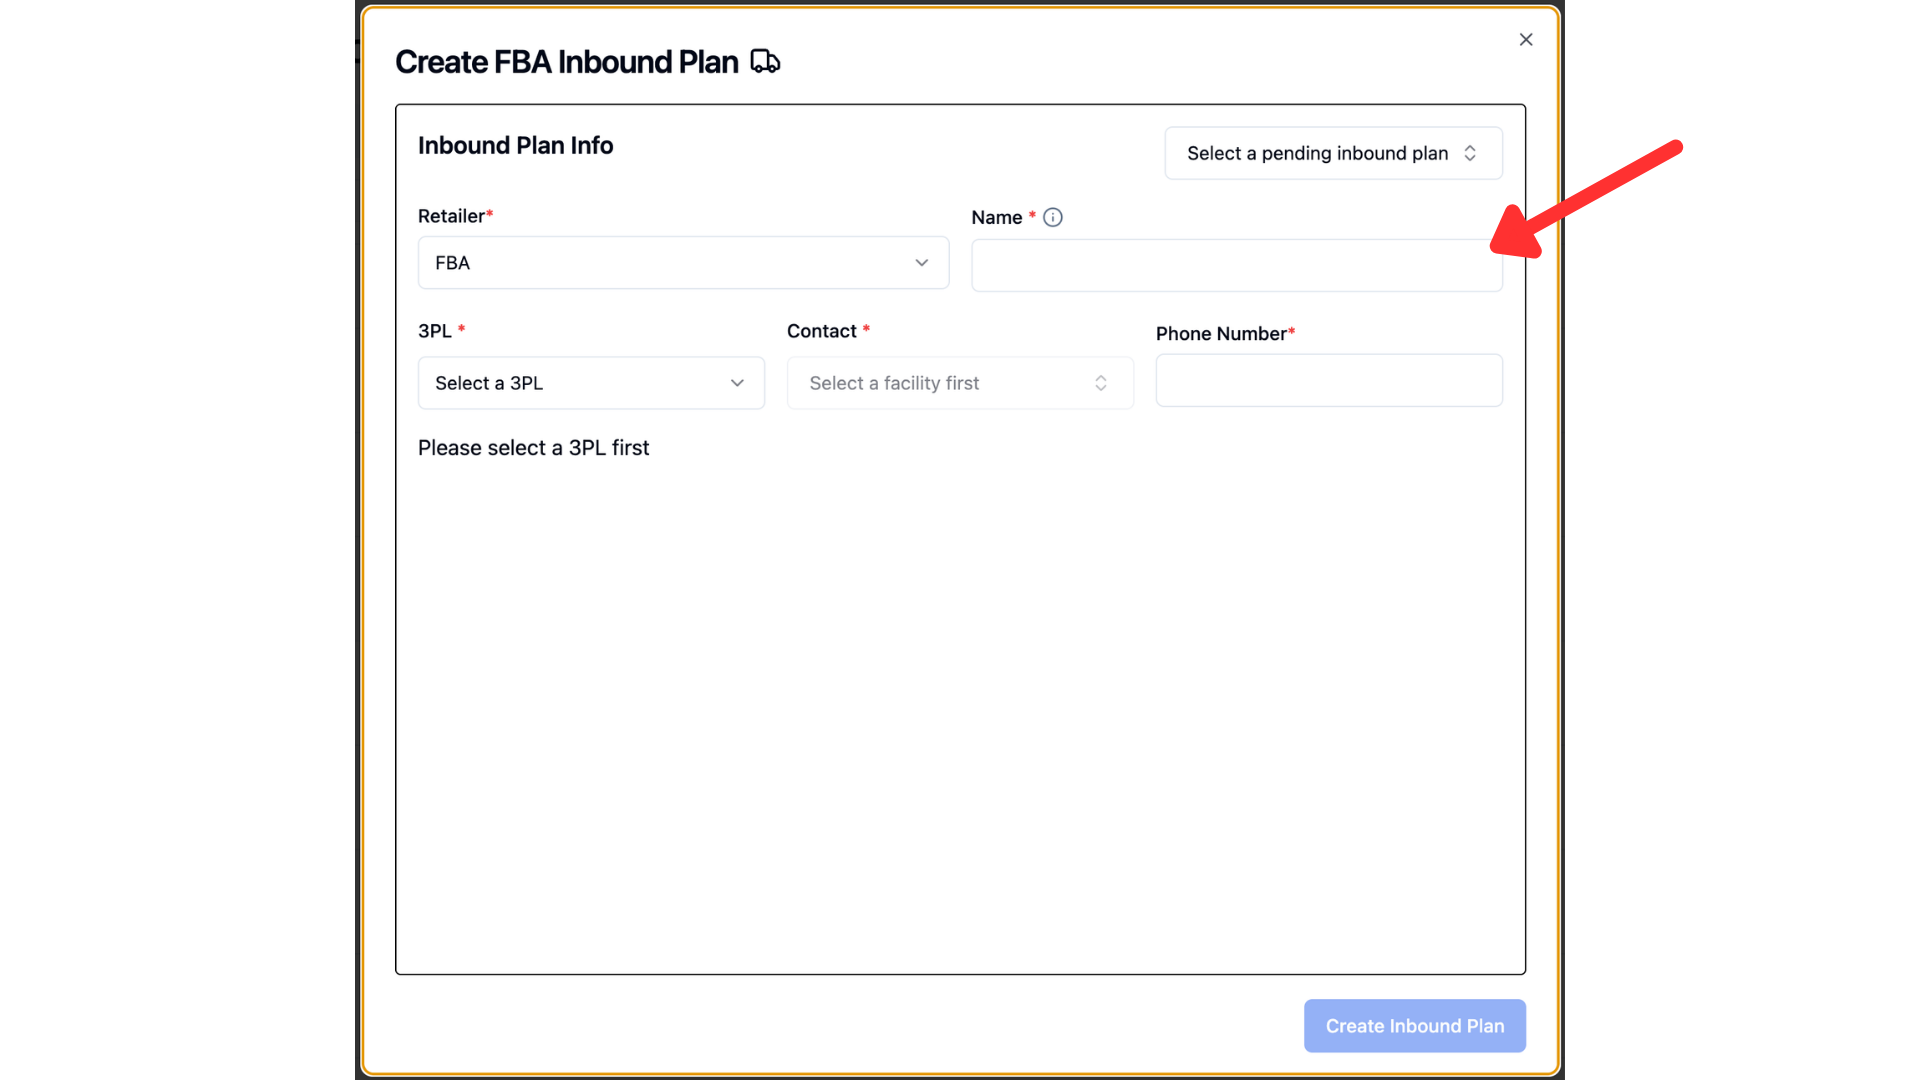
Start by naming your inbound plan. This is a required field for Amazon to identify the inbound plan and will be viewable in Amazon Seller Central. Each FBA shipment will be tied to this inbound plan name.
Select your 3PL from the dropdown menu.
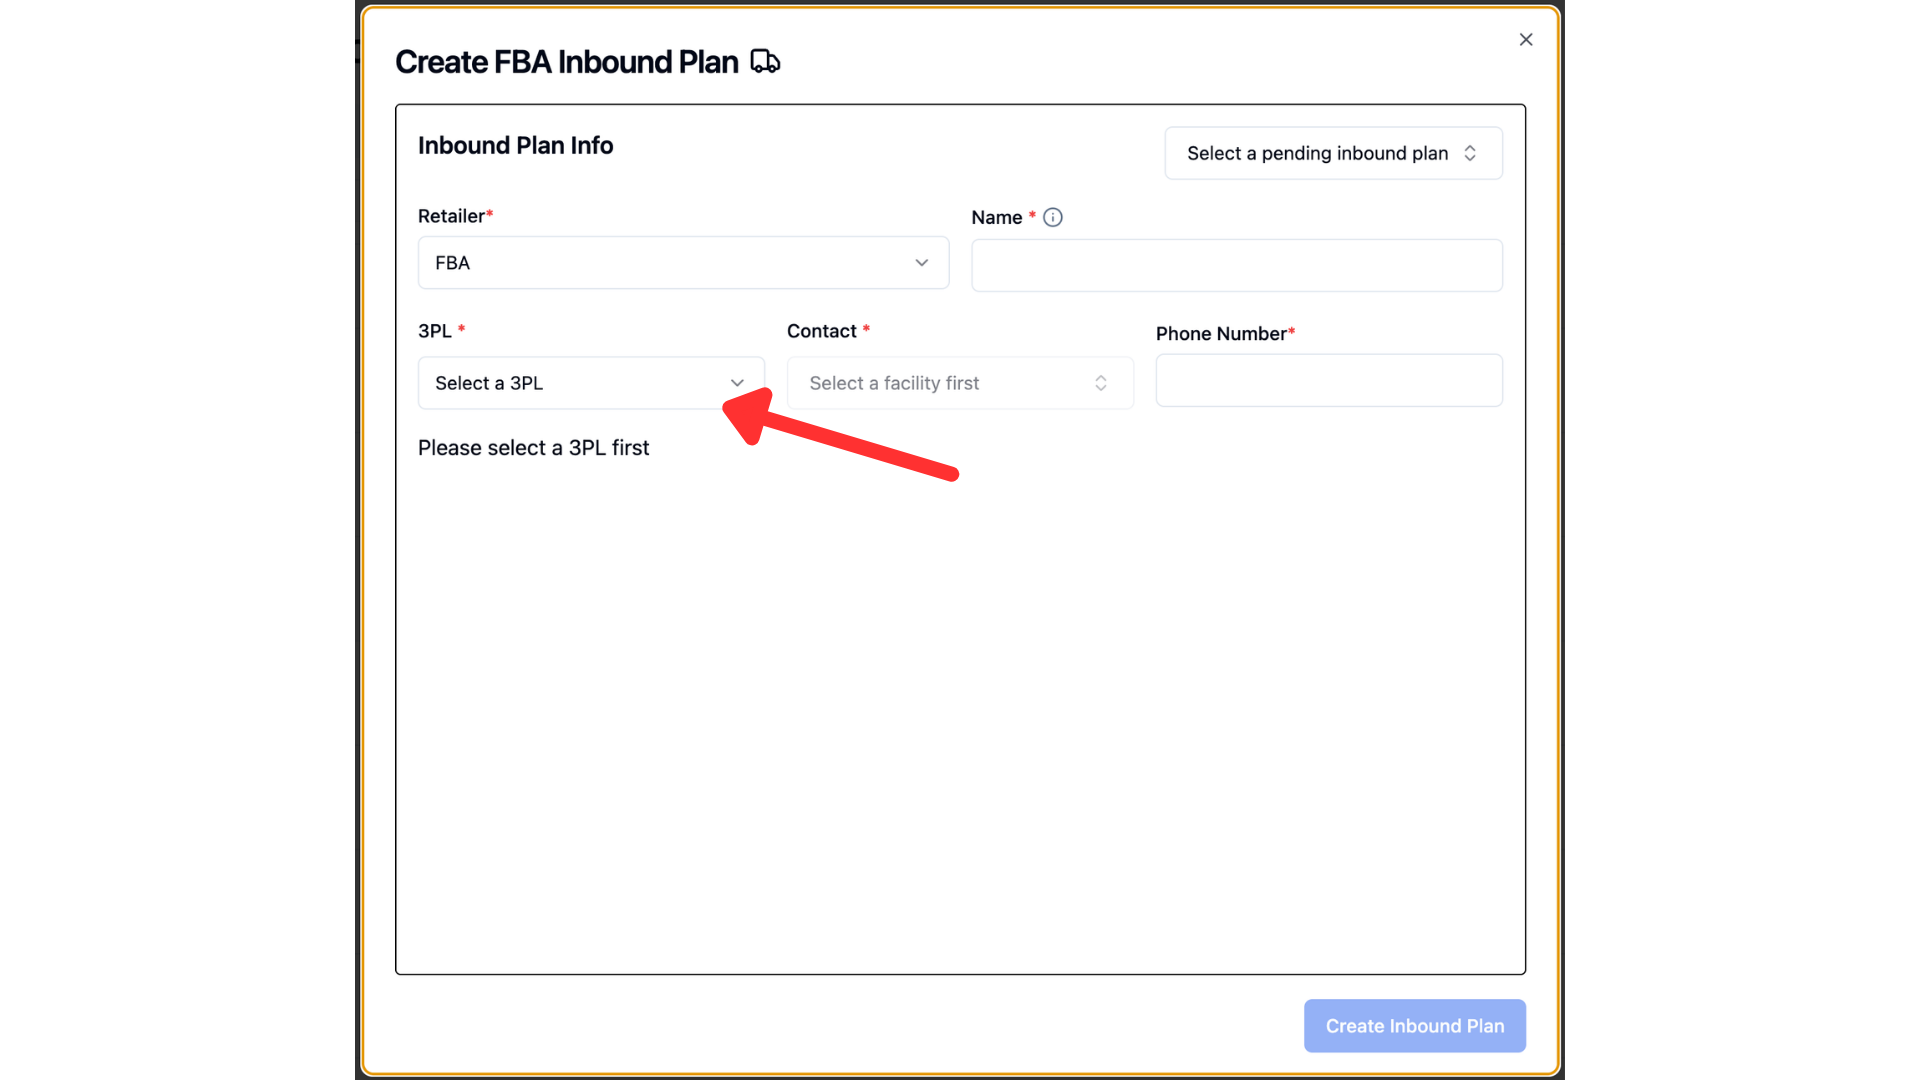
Select a contact from the chosen facility
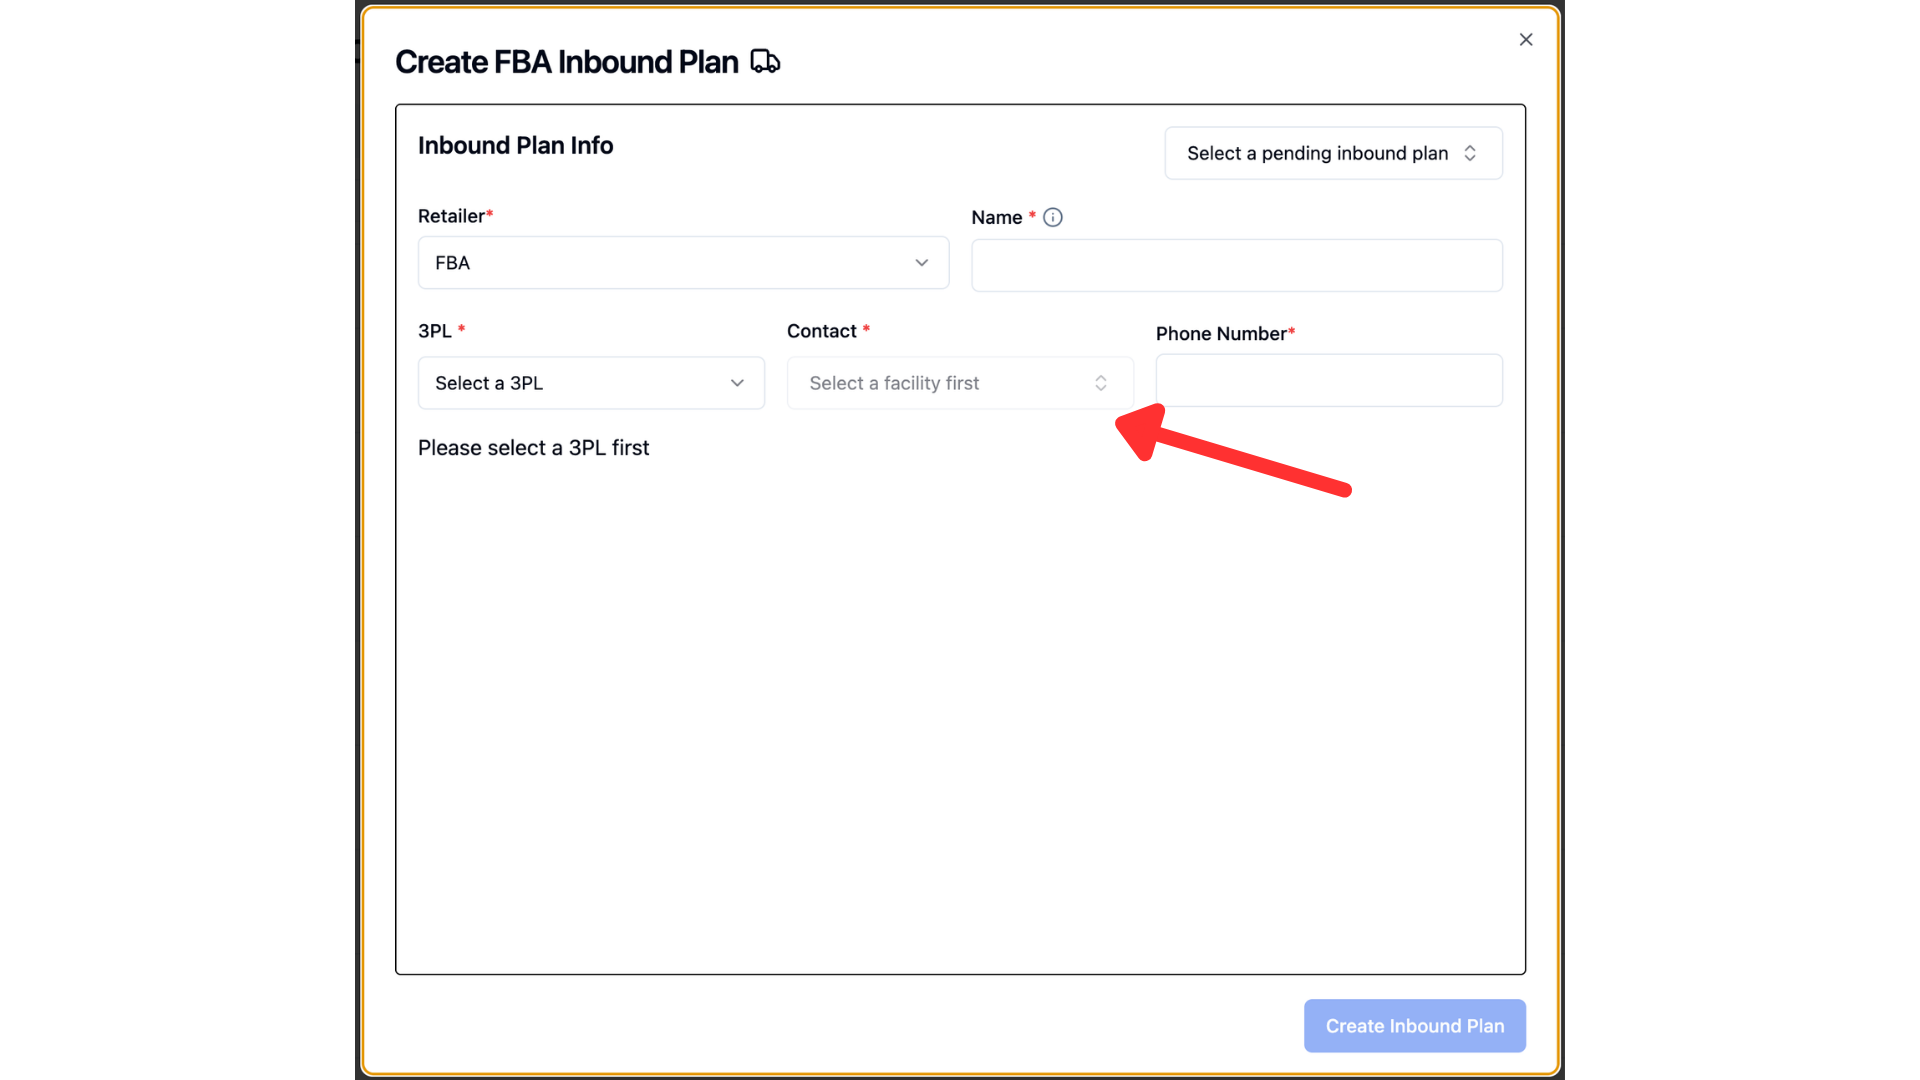
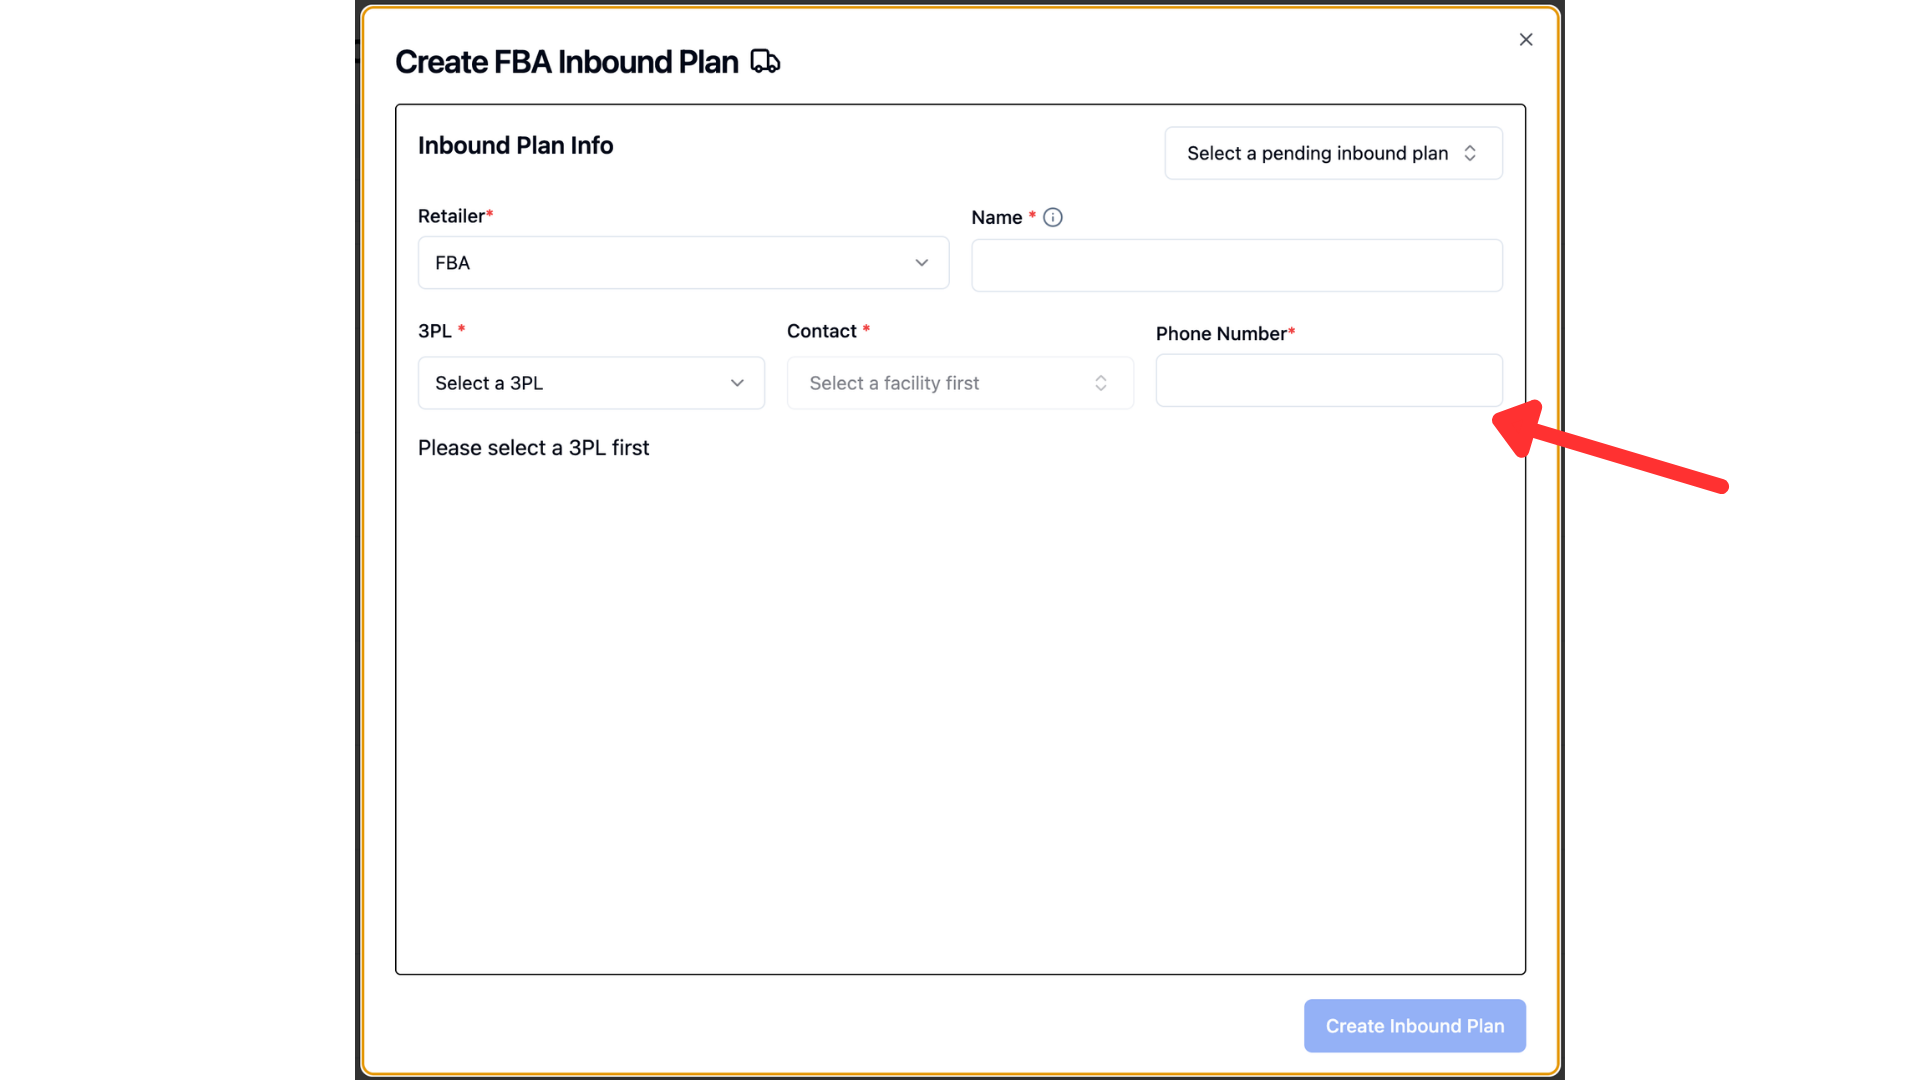
Input a phone number for your chosen contact/facility
Select the first item you are choosing for this inbound plan from the SKU drop down menu.
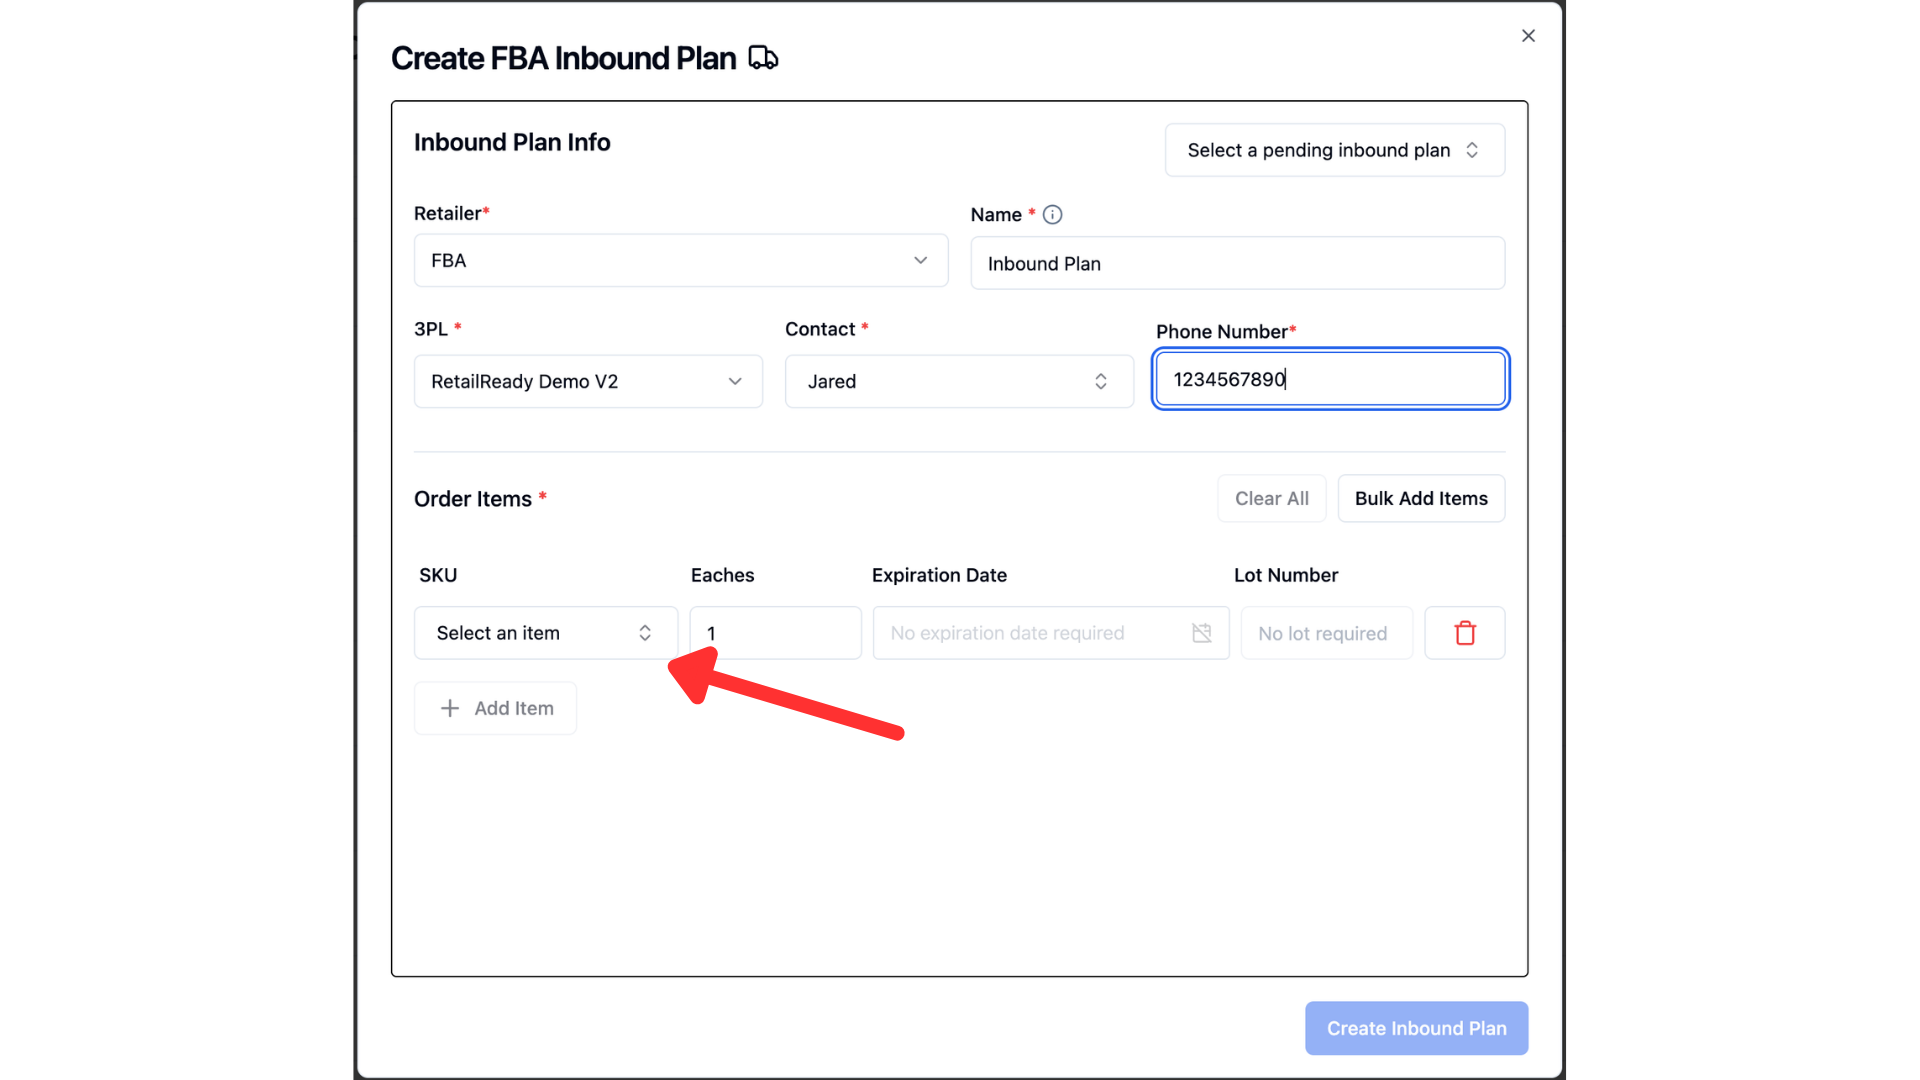
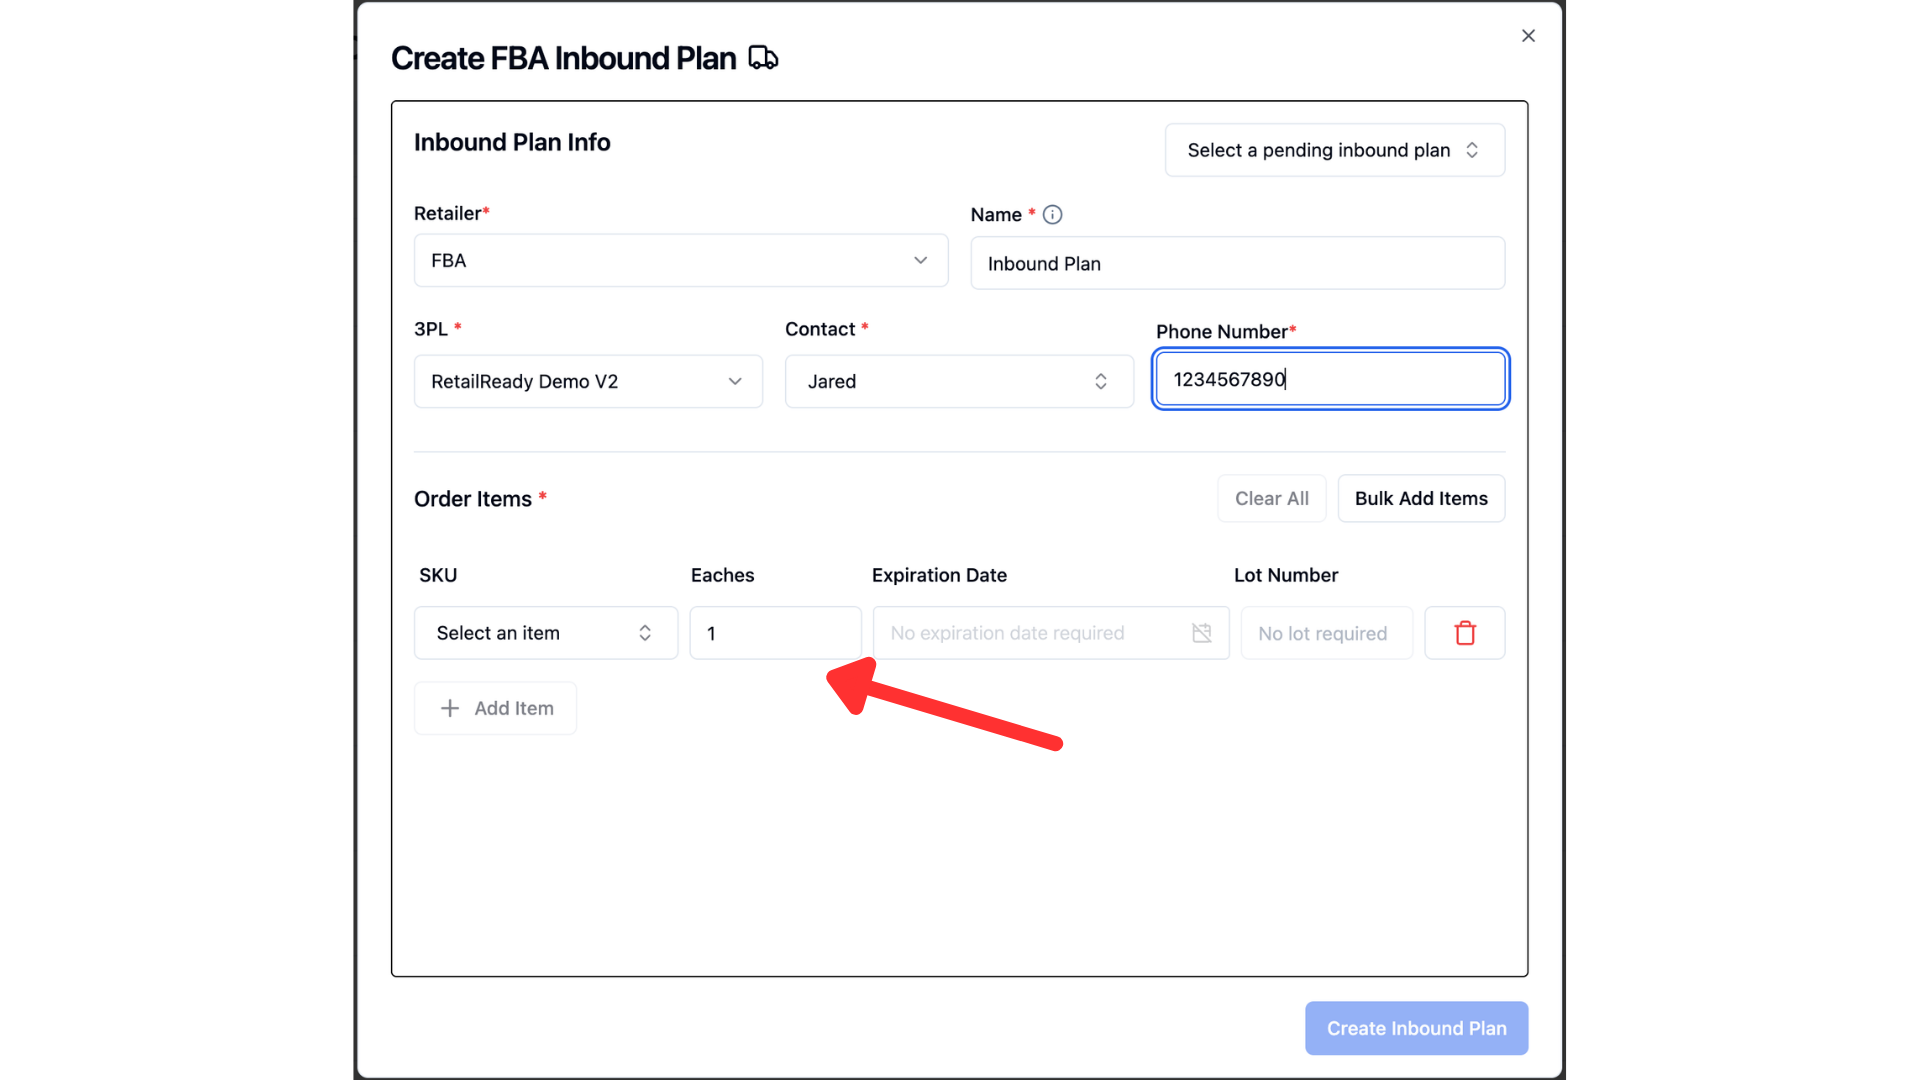
Select how many of these items are going to be on the order.
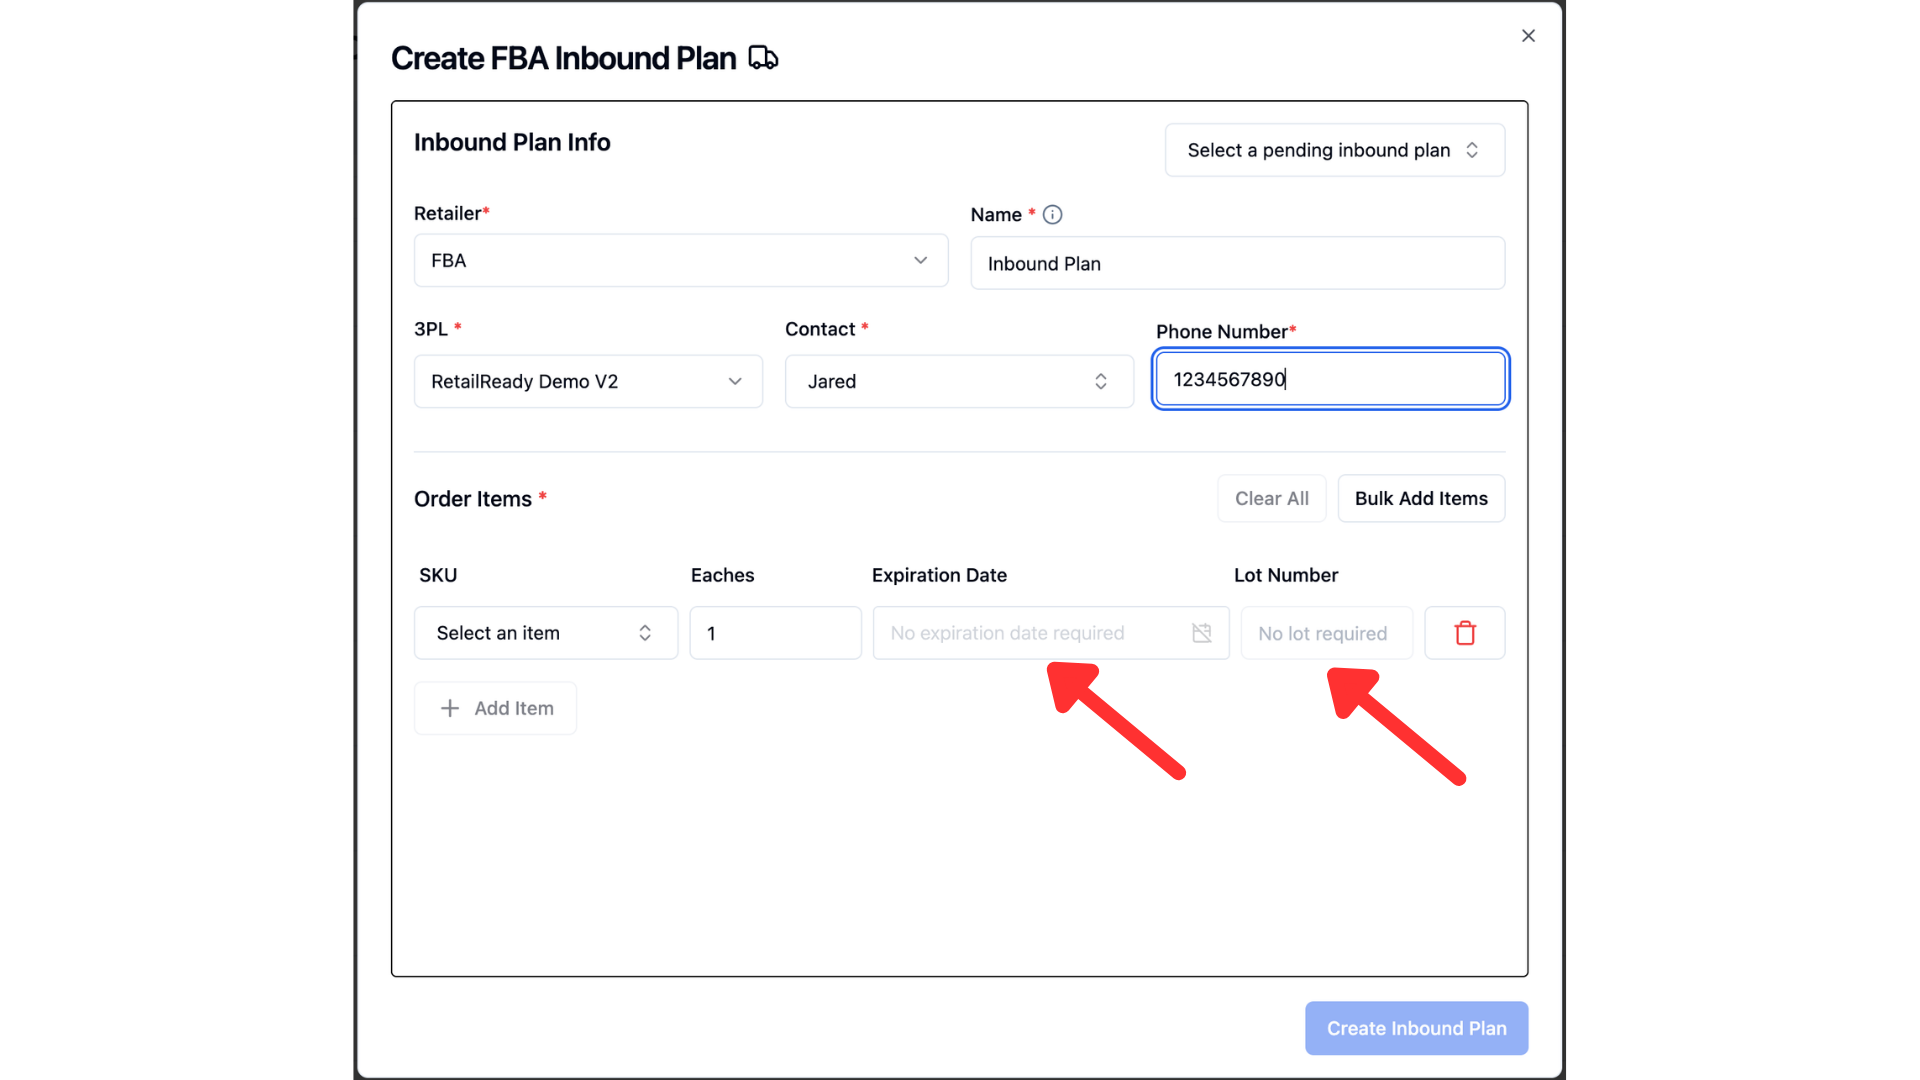
If this item has an expiration date or lot number, add them in these fields. If the SKU does not have tracking toggled on for expiration date or lot number, these fields will be blocked and should be skipped.
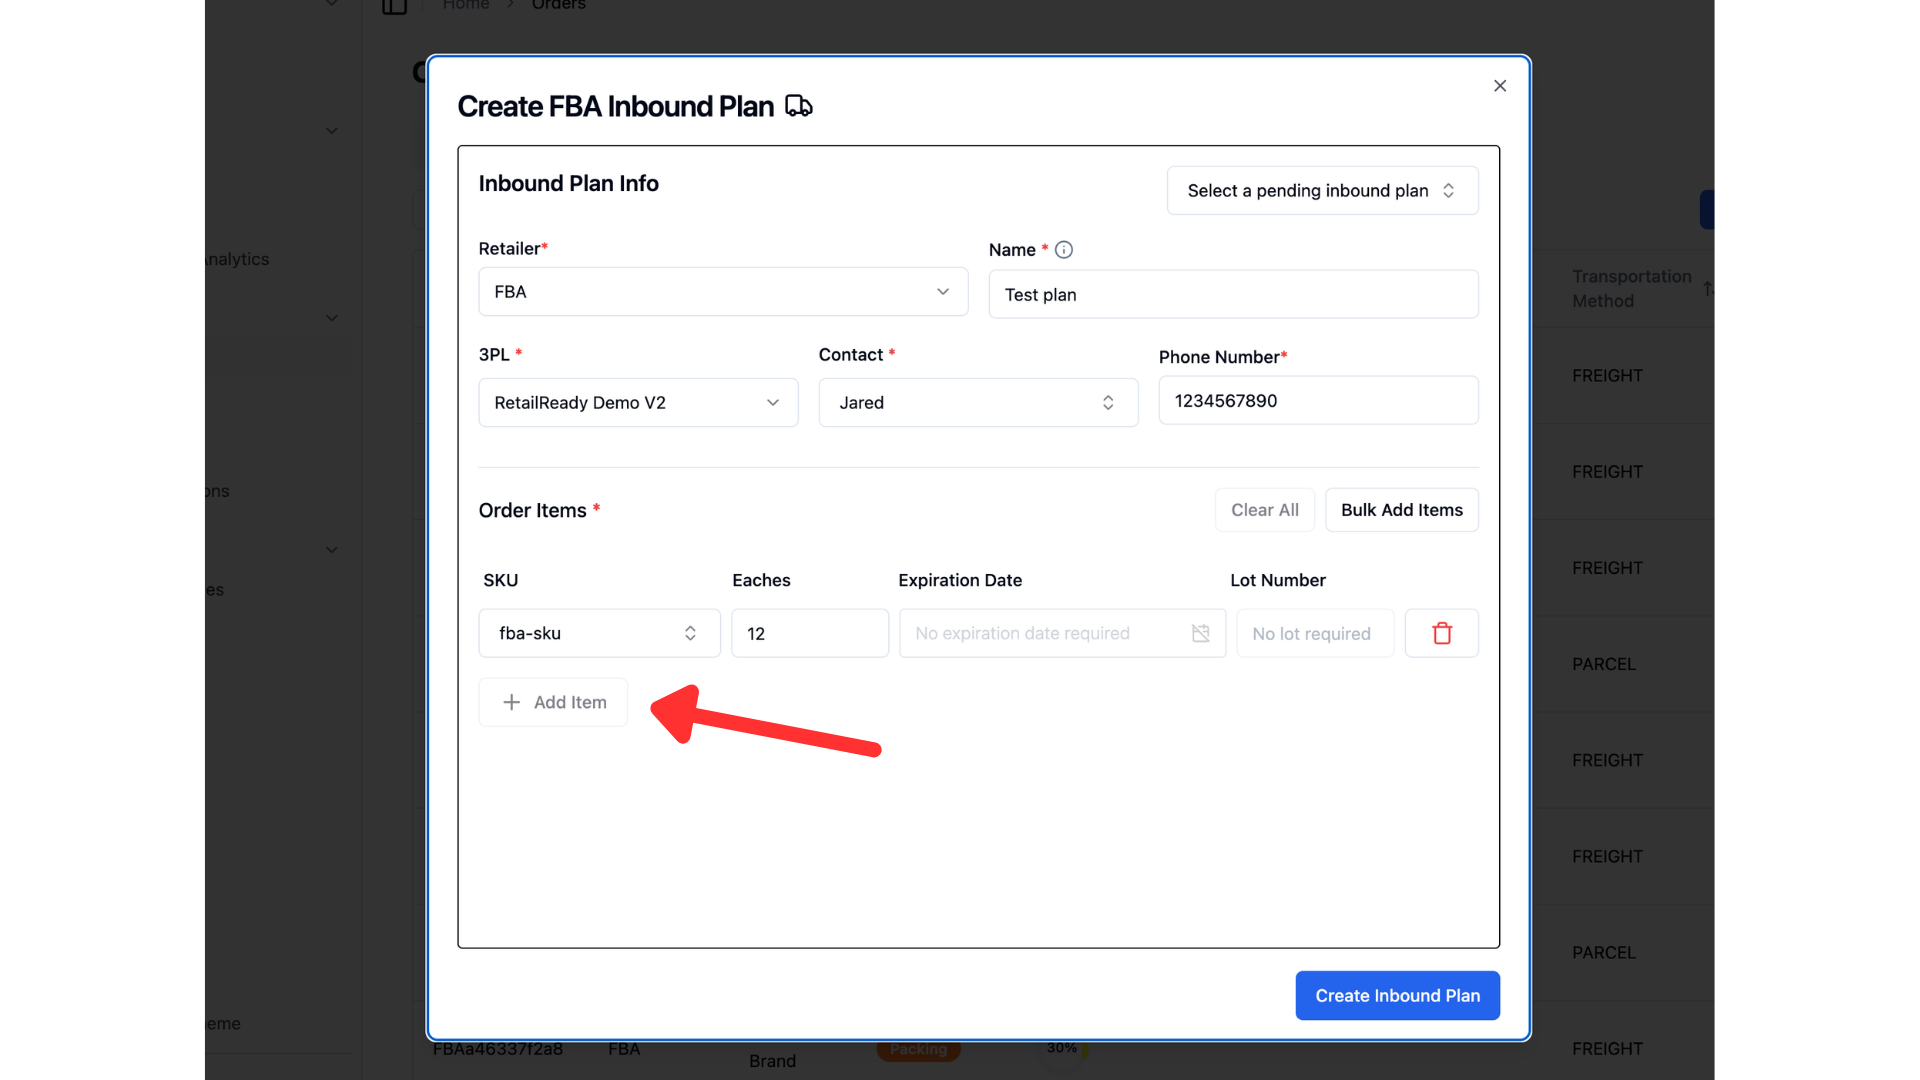
If there will be more than one SKU on this order, click add item and repeat steps 8 through 10 for each additional SKU.
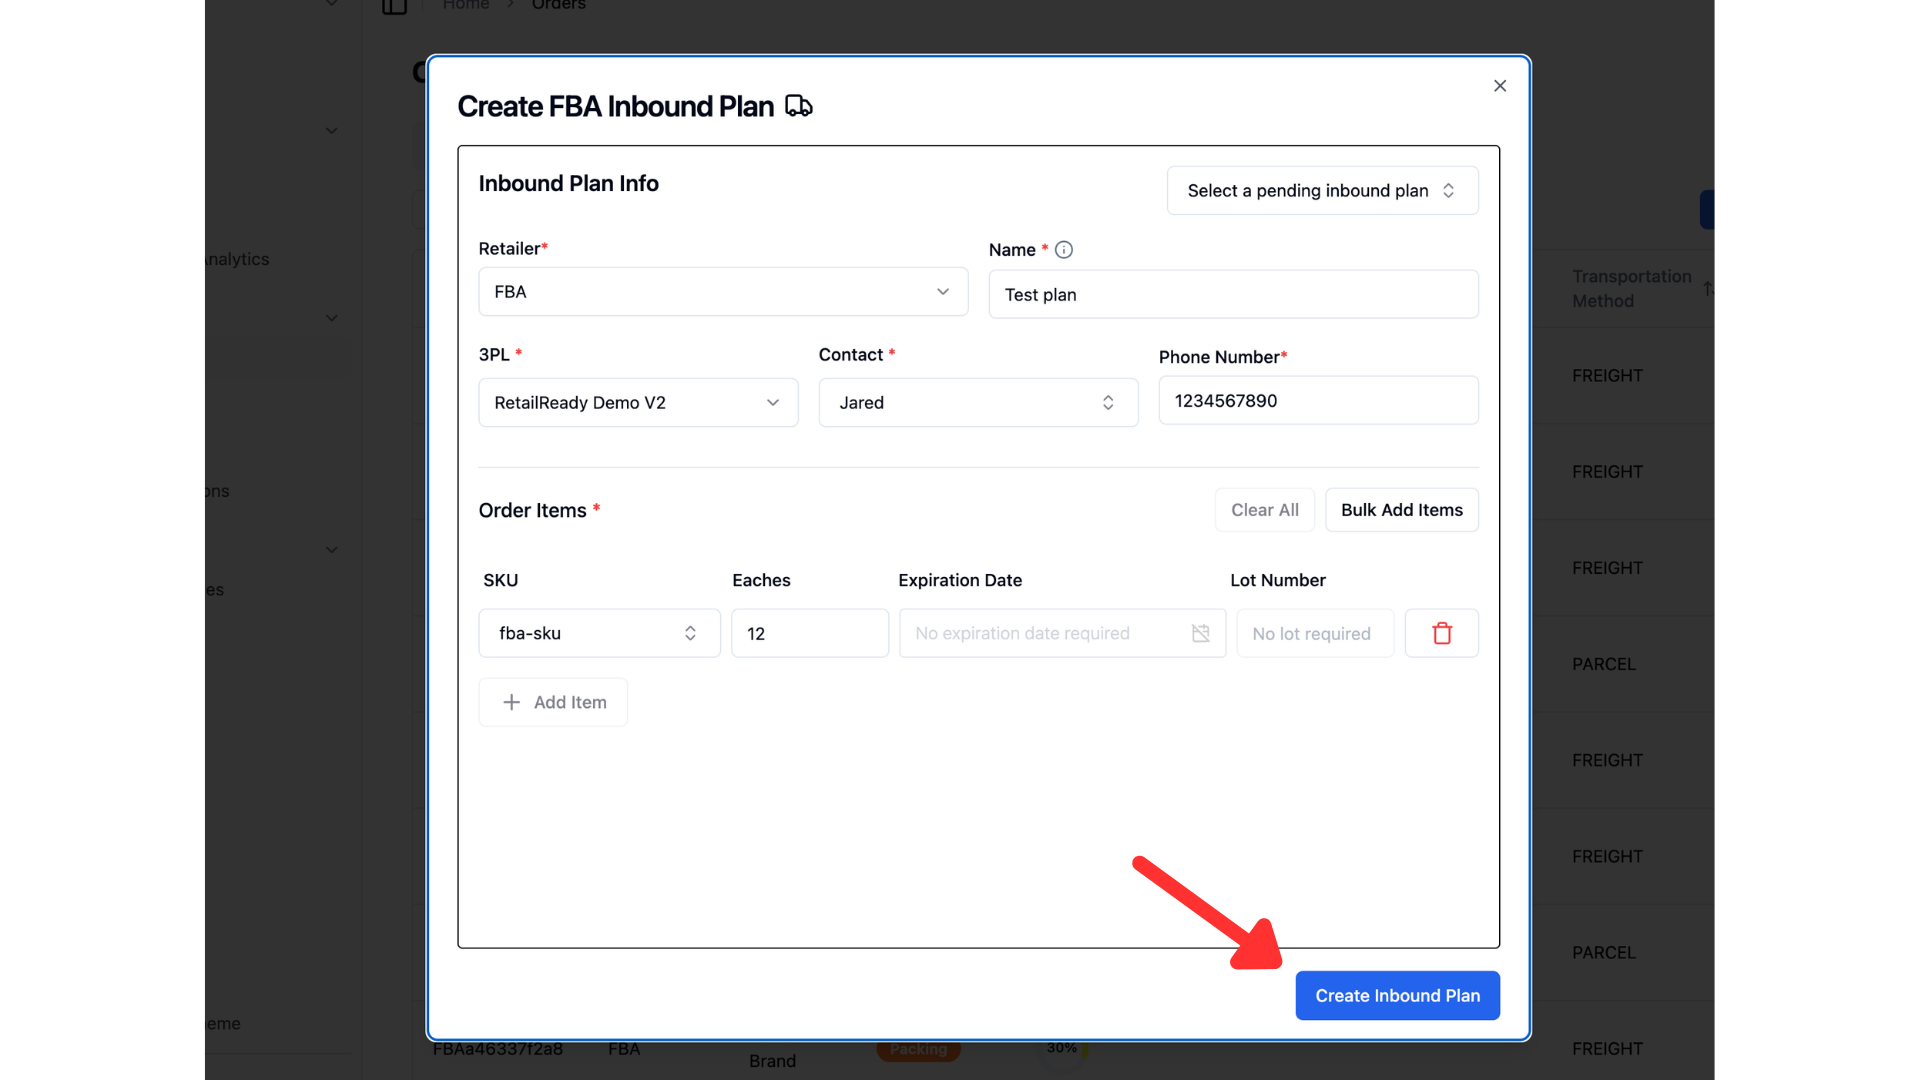
Click create inbound plan
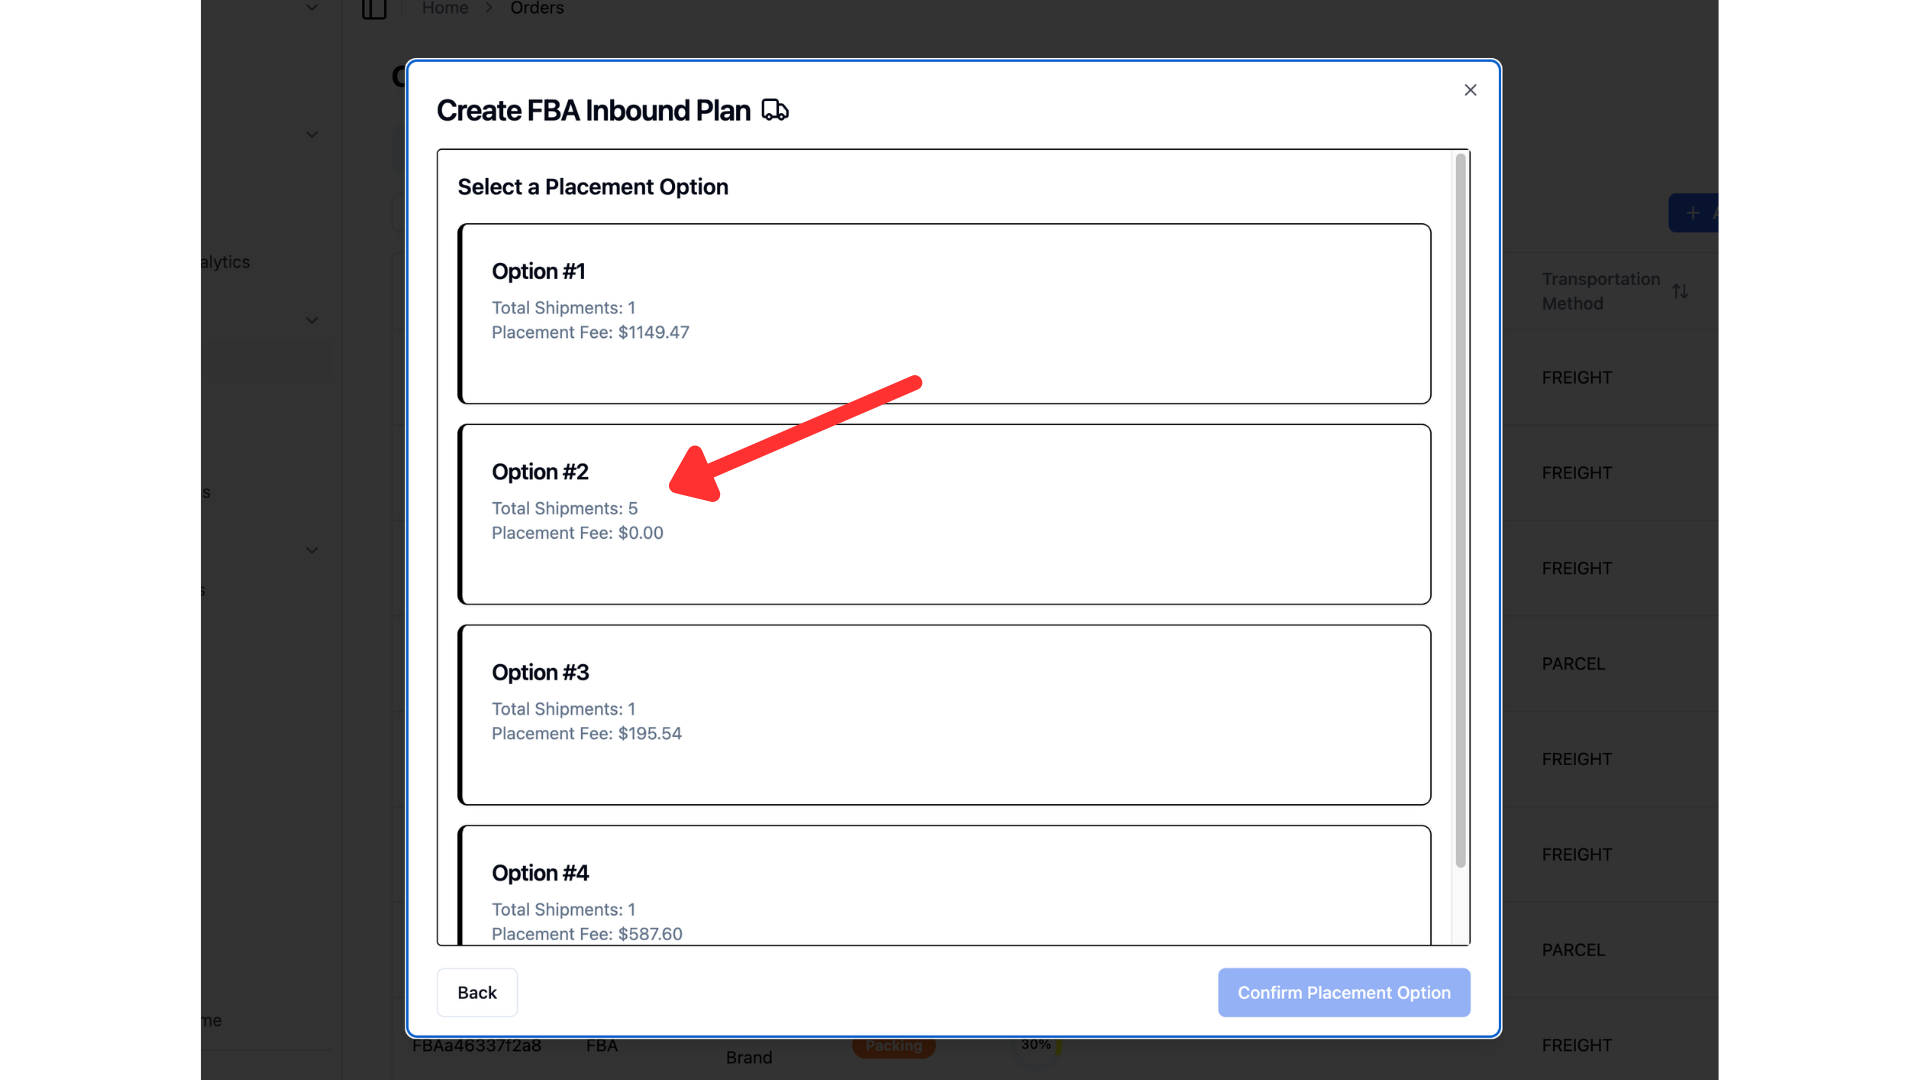
There will be shipment options to choose from with total shipments and placement fees listed. These are provided directly by Amazon. Clicking any option will open up more information.
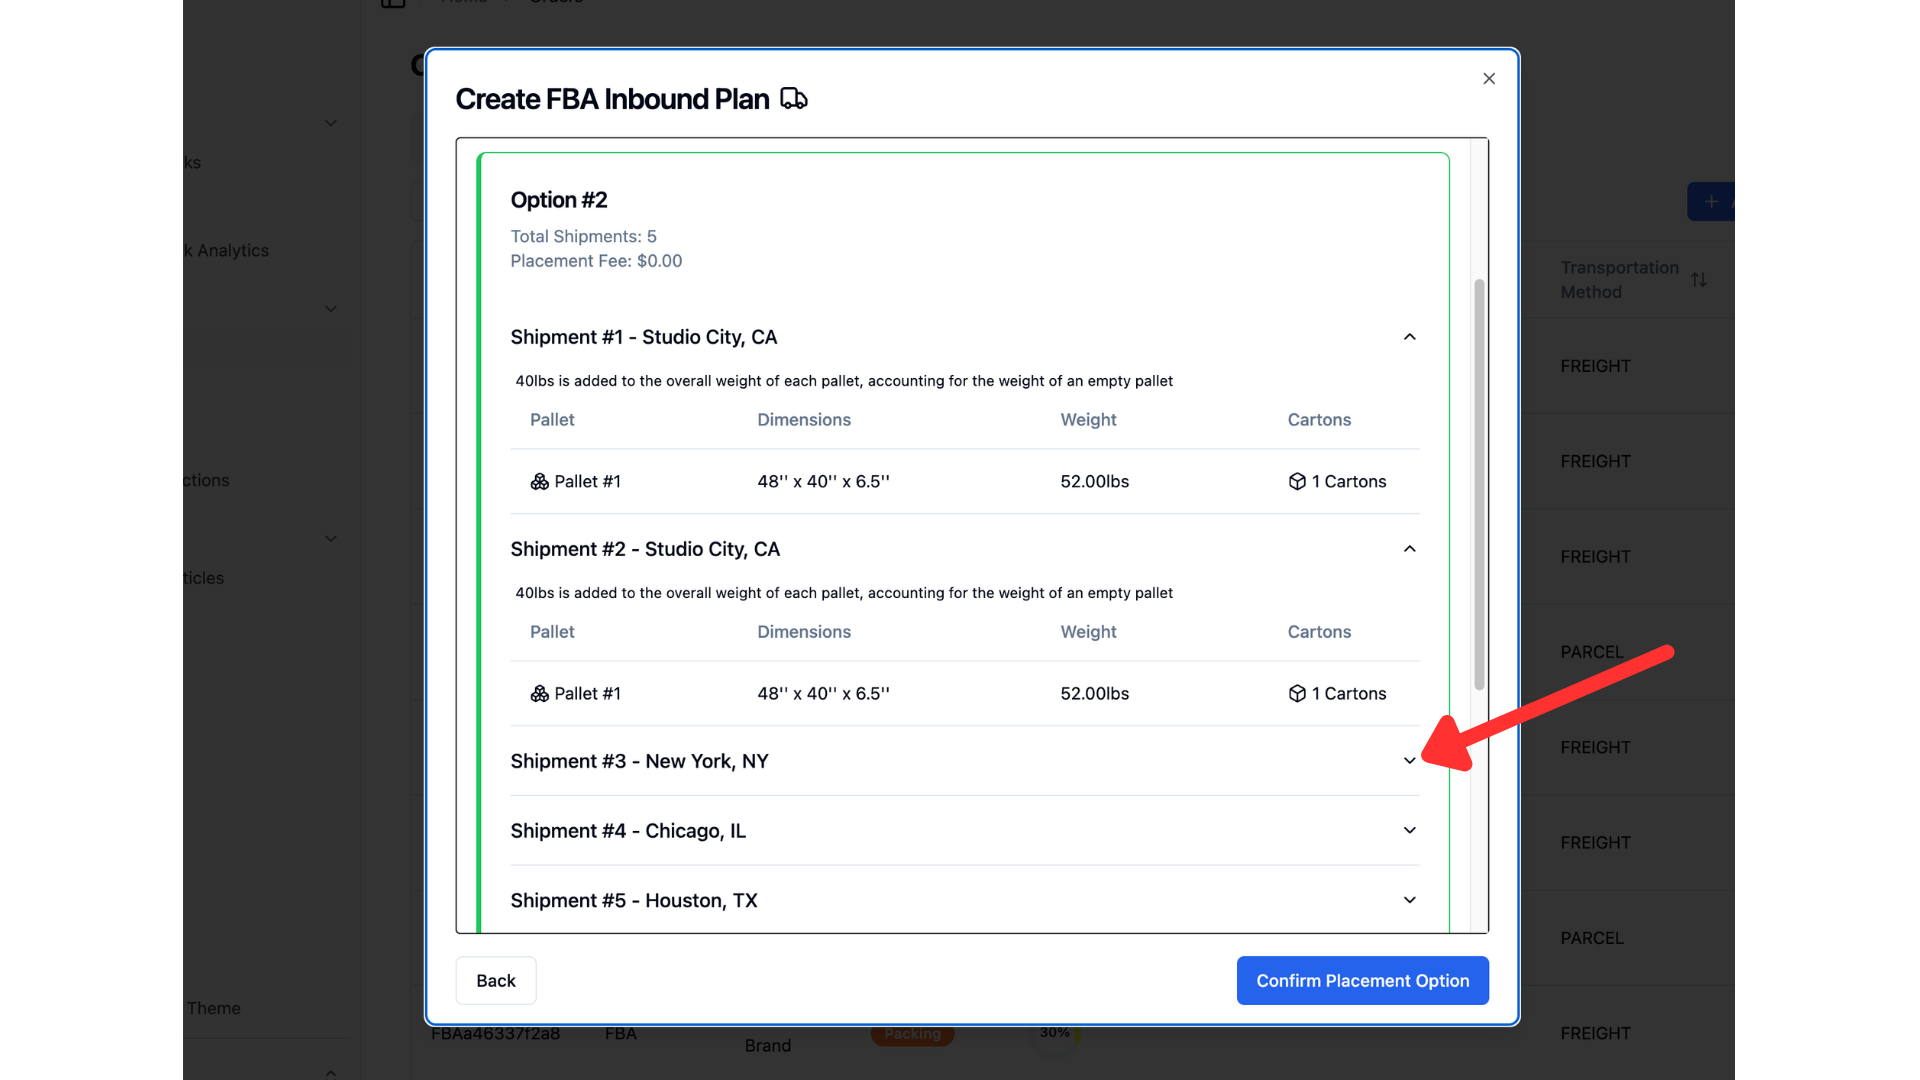
You will see a list of the distribution centers each option would route to. Clicking the drop down on each distribution center will show you pallet/carton information and dimensions.
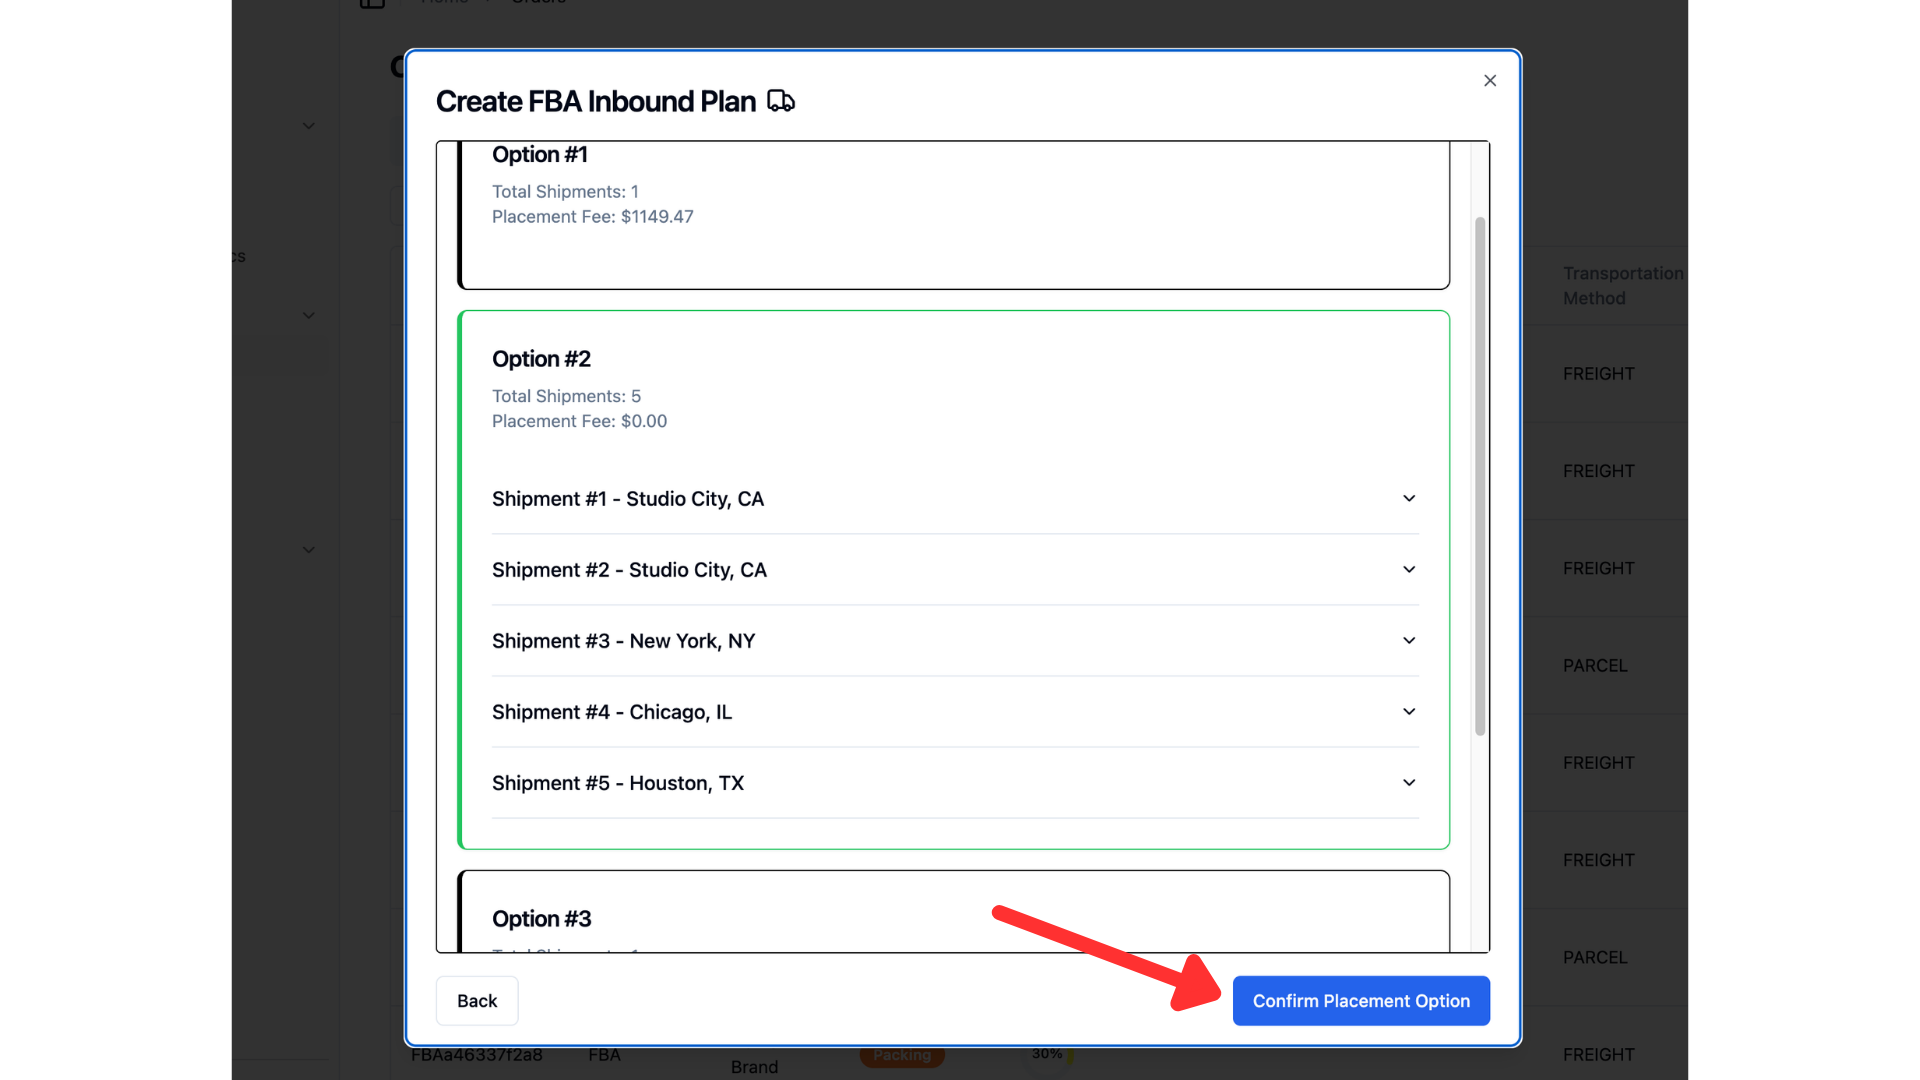
Select the placement option that you would like and click confirm.
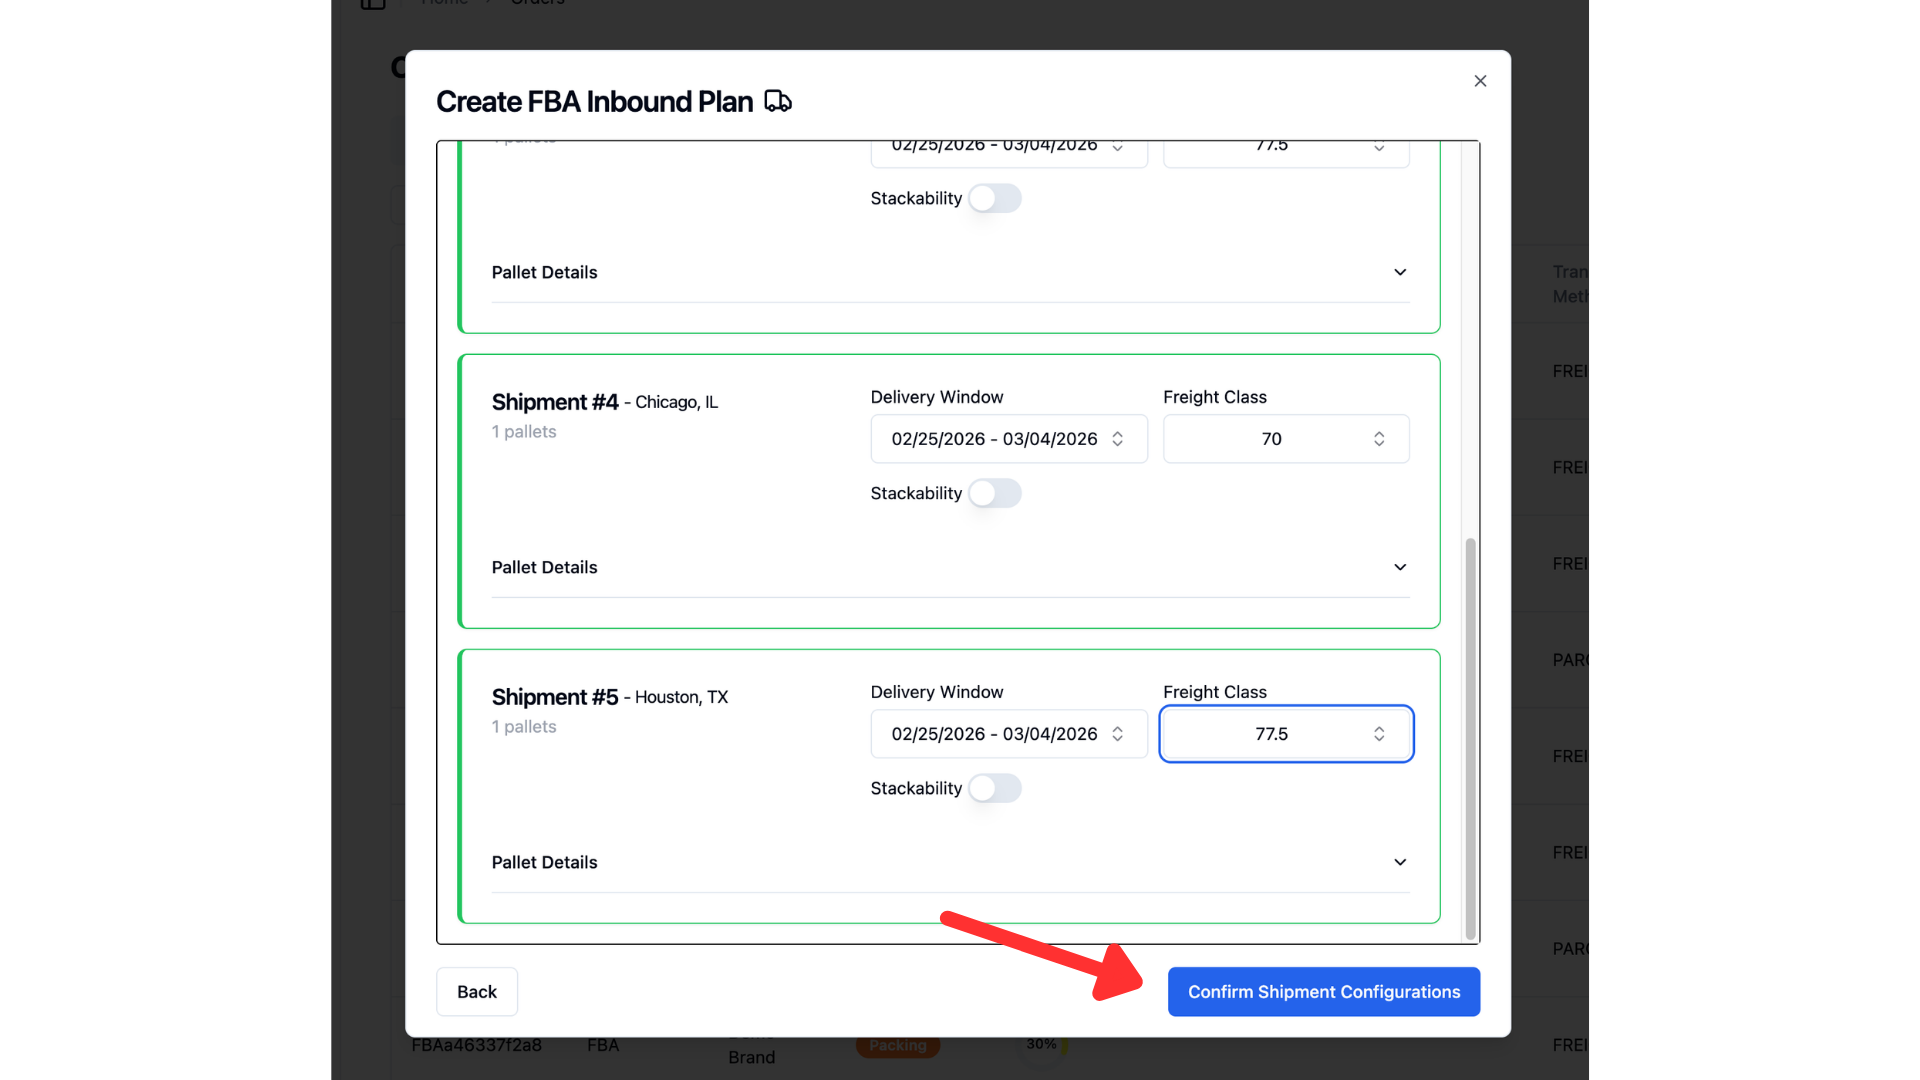
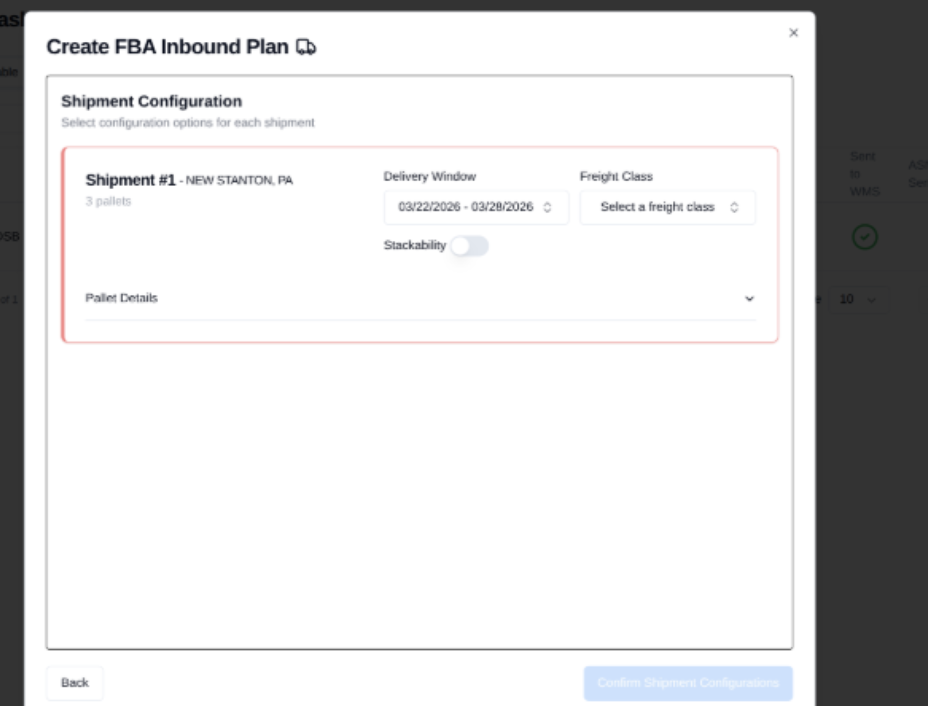
You should now assign a delivery window and freight class to each shipment in the chosen plan.
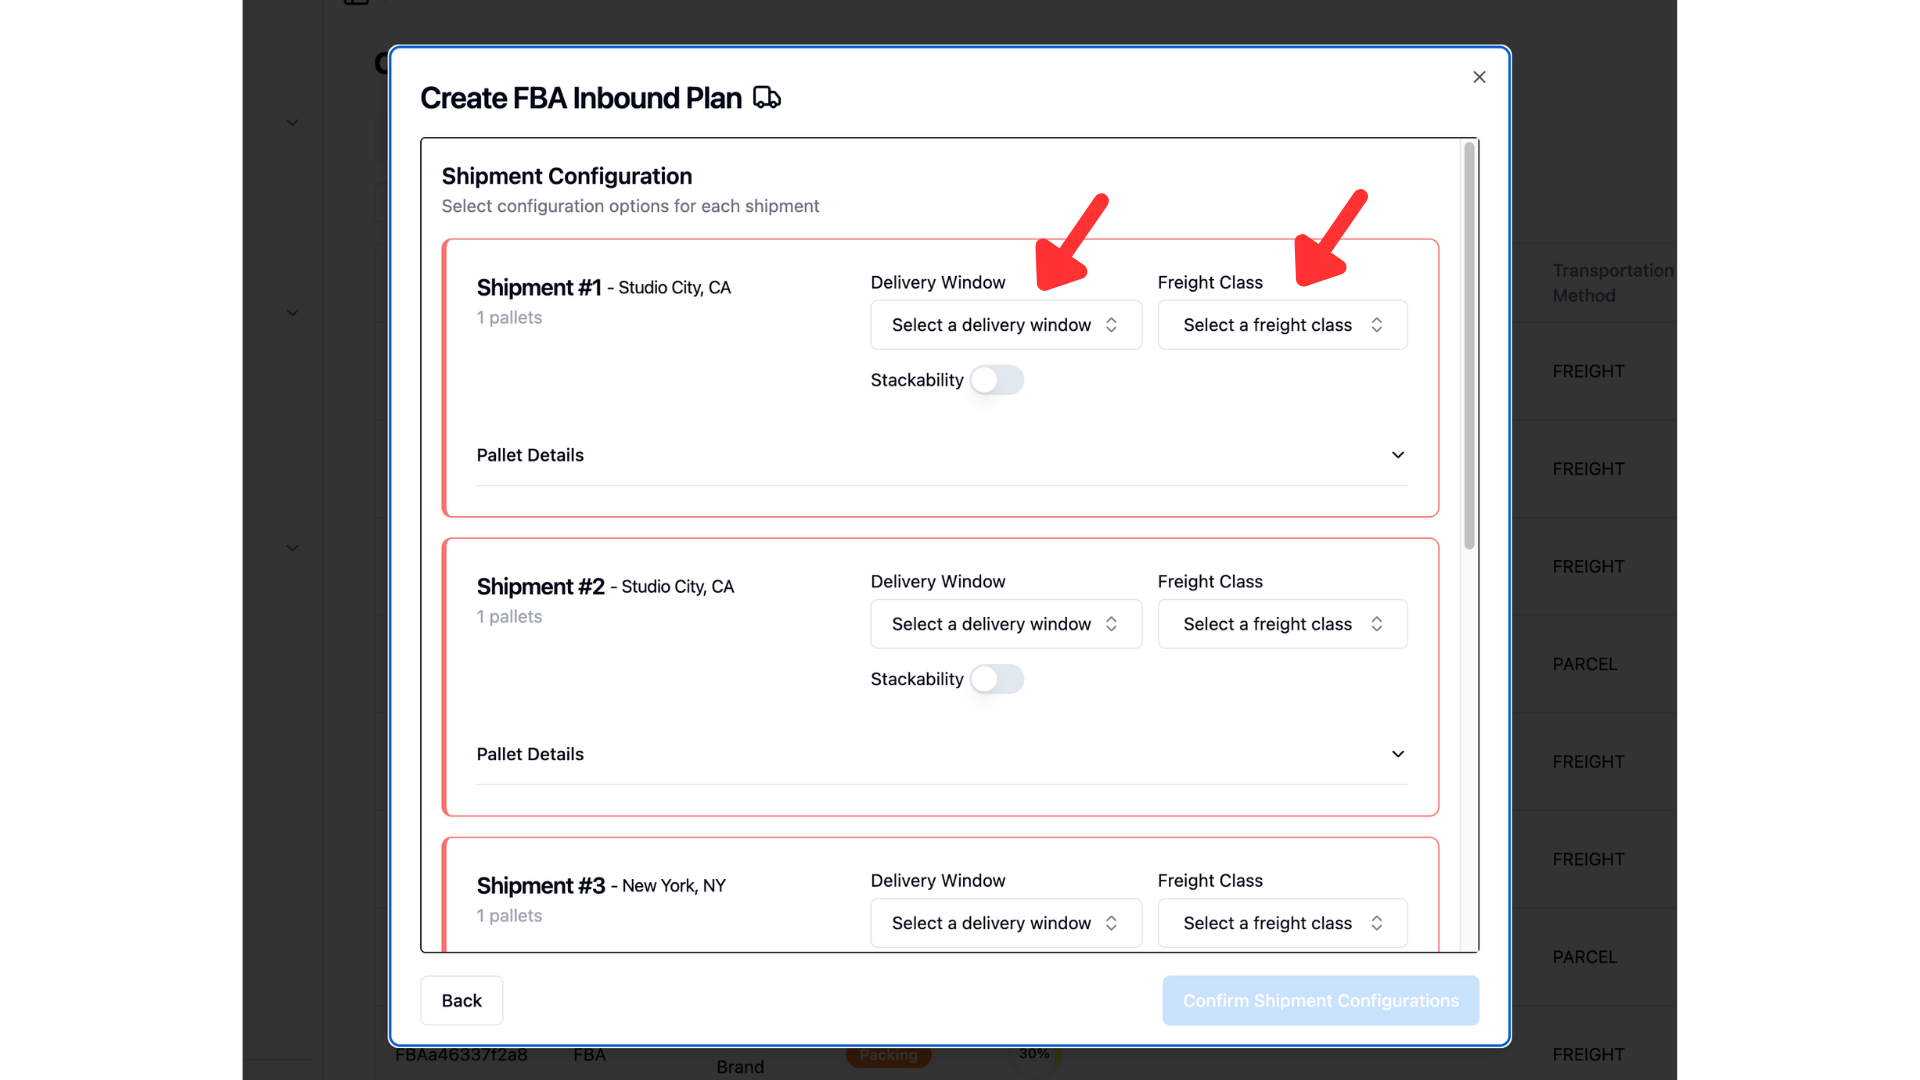
Click confirm shipment configuration.
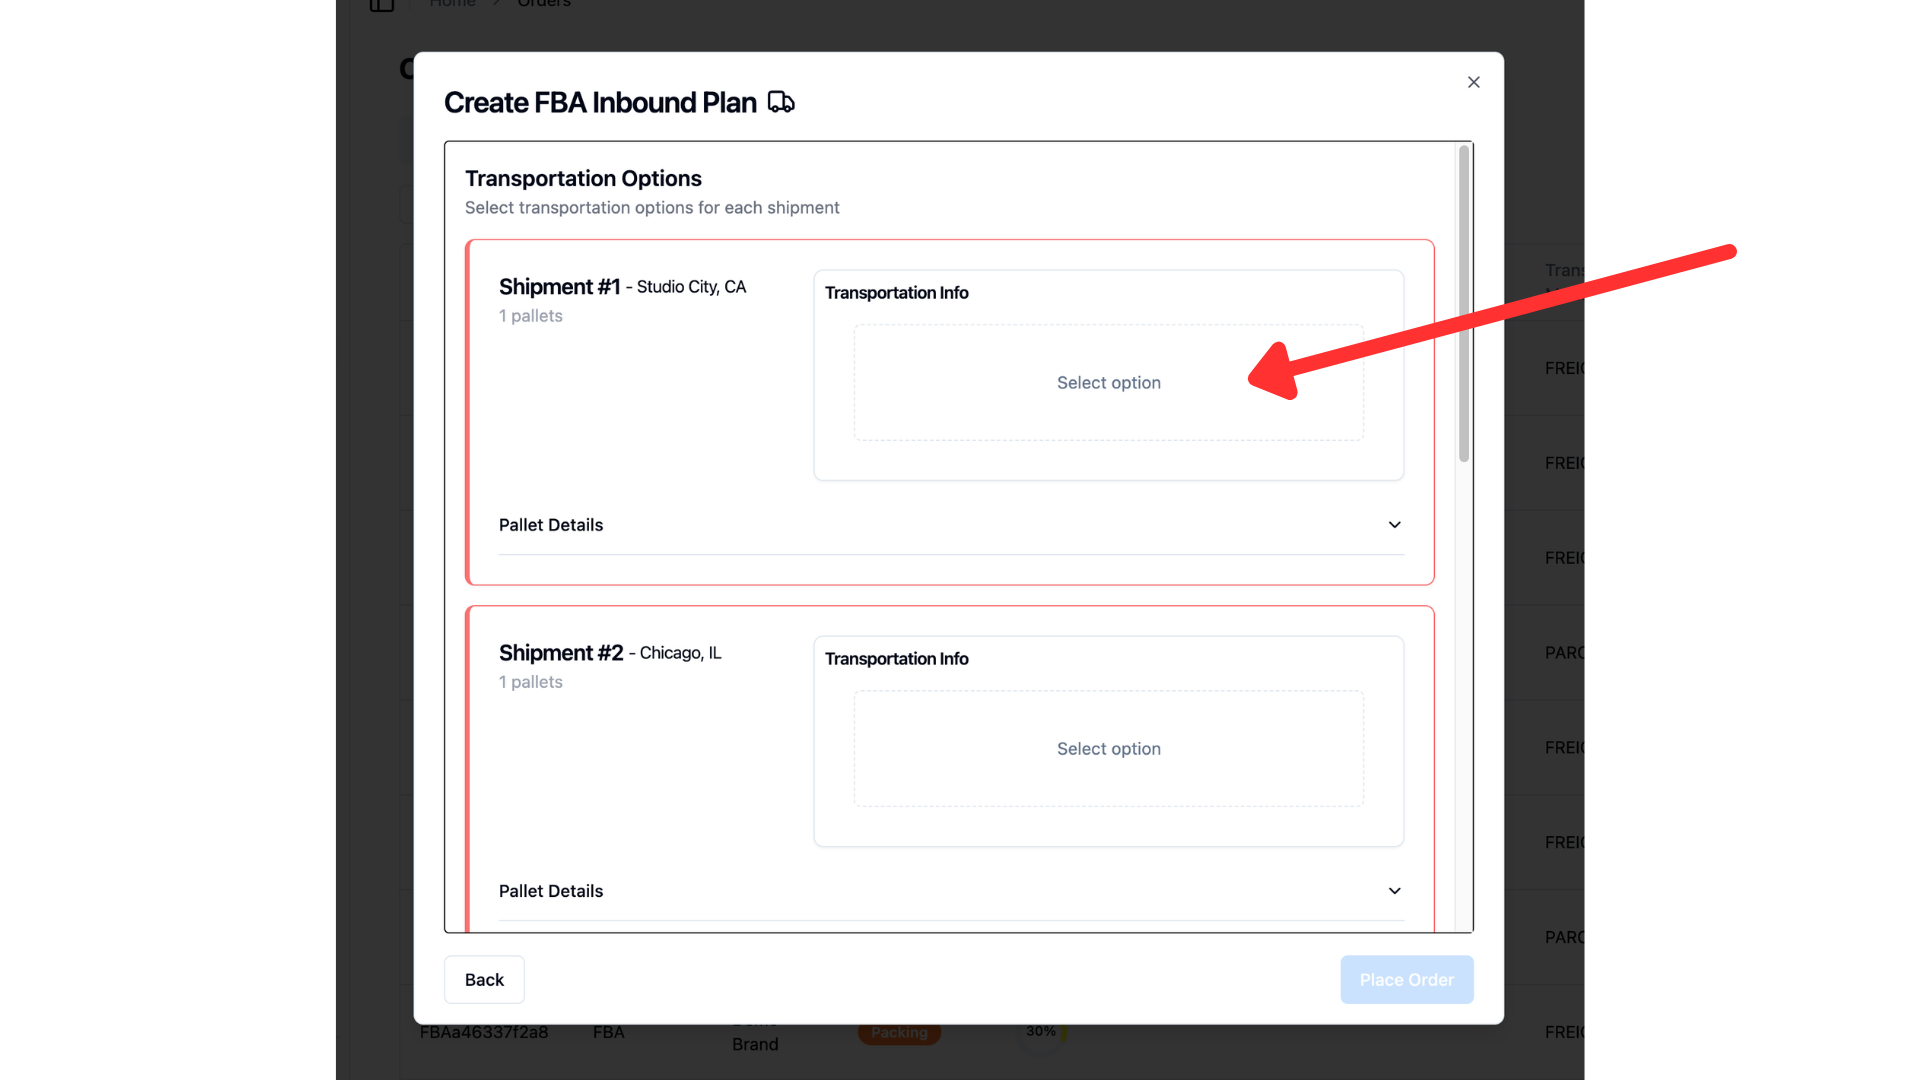
For each shipment you need to select a shipment option. To do this click select option in transportation info.
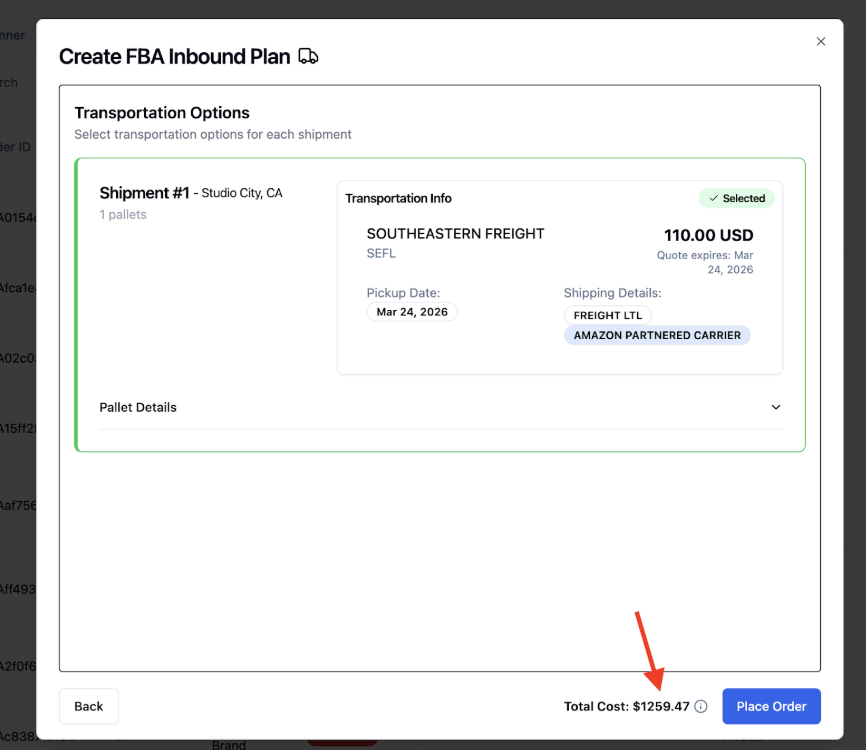
Freight class is calculated automatically so brands don't have to sweat the details, and a live ‘Total Cost’ display means no more guessing on pricing. We've also added time-savers like ‘Apply to All’ for delivery windows and autoselect for transportation options.
This view will show you all of the options available to ship within the chosen shipping window.
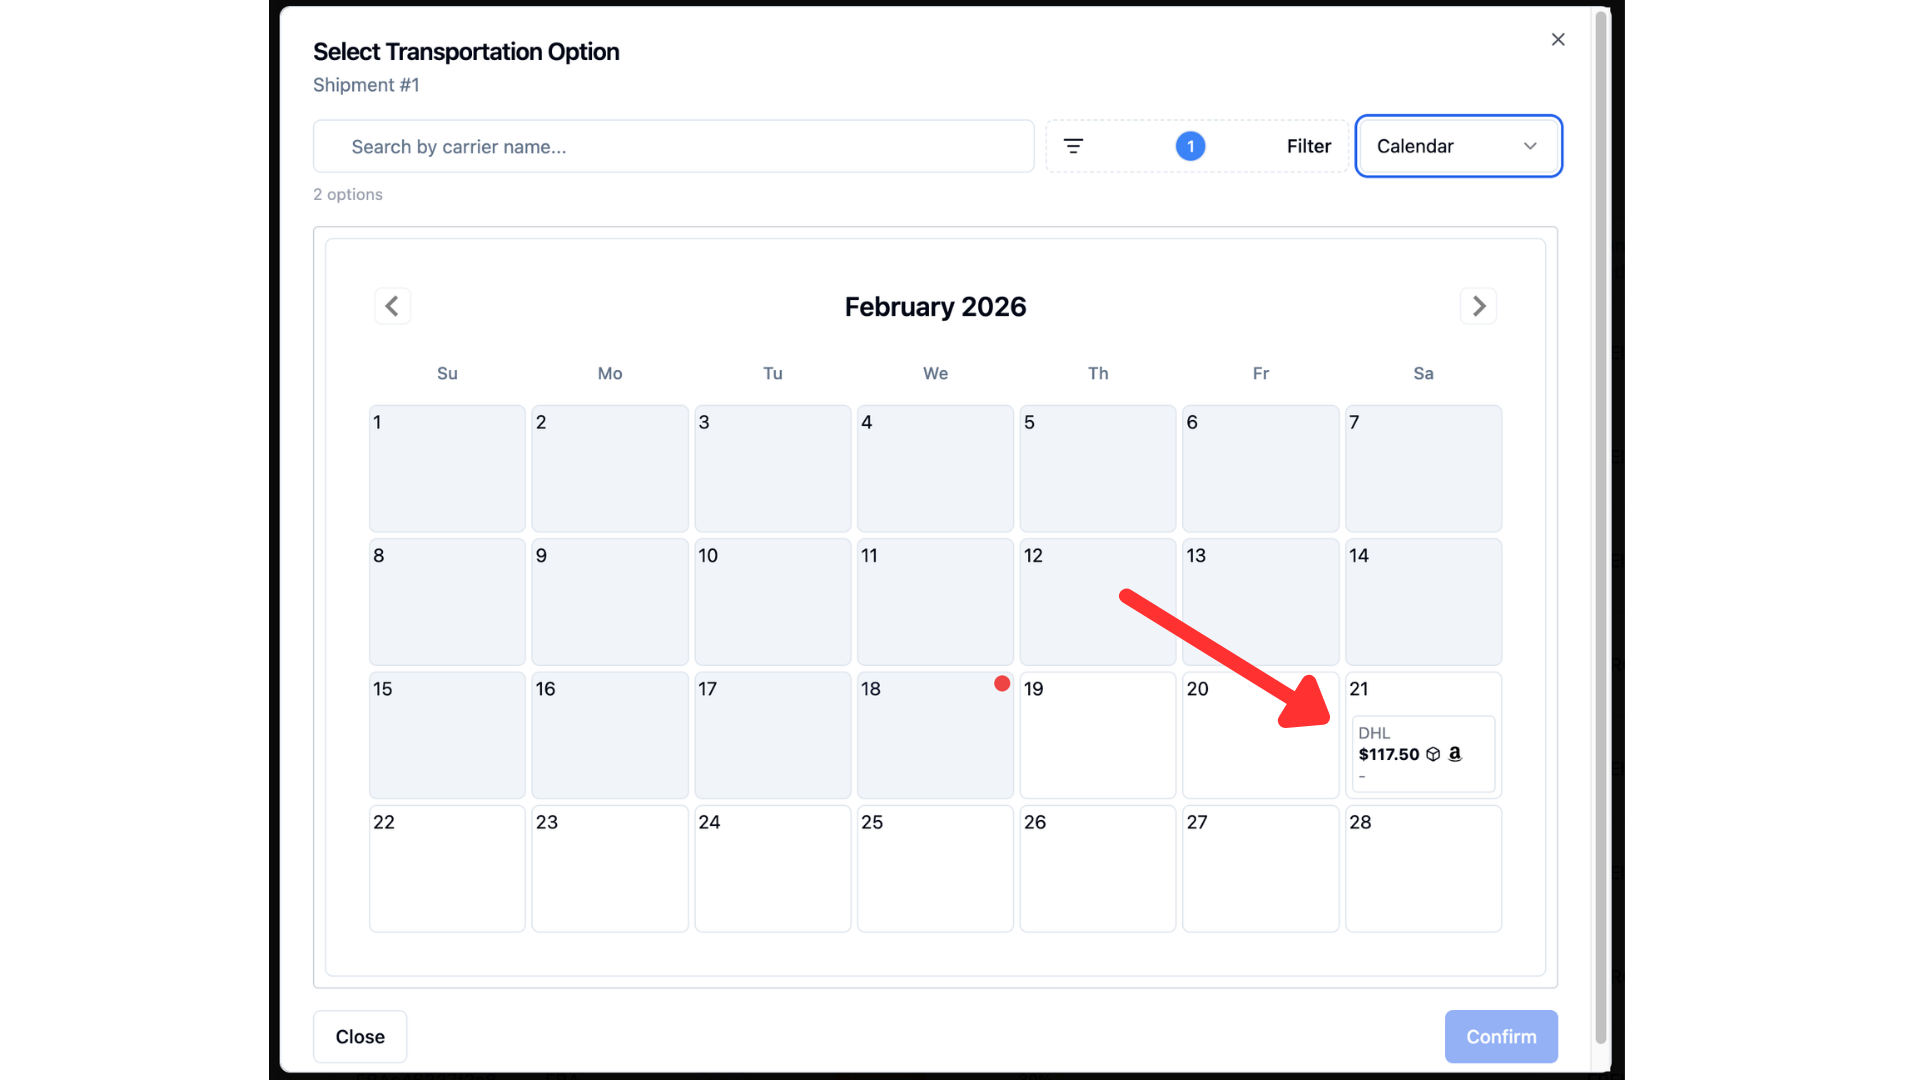
If you would like to apply filters, such as Amazon Partnered Carrier only, you can view the filter options here.
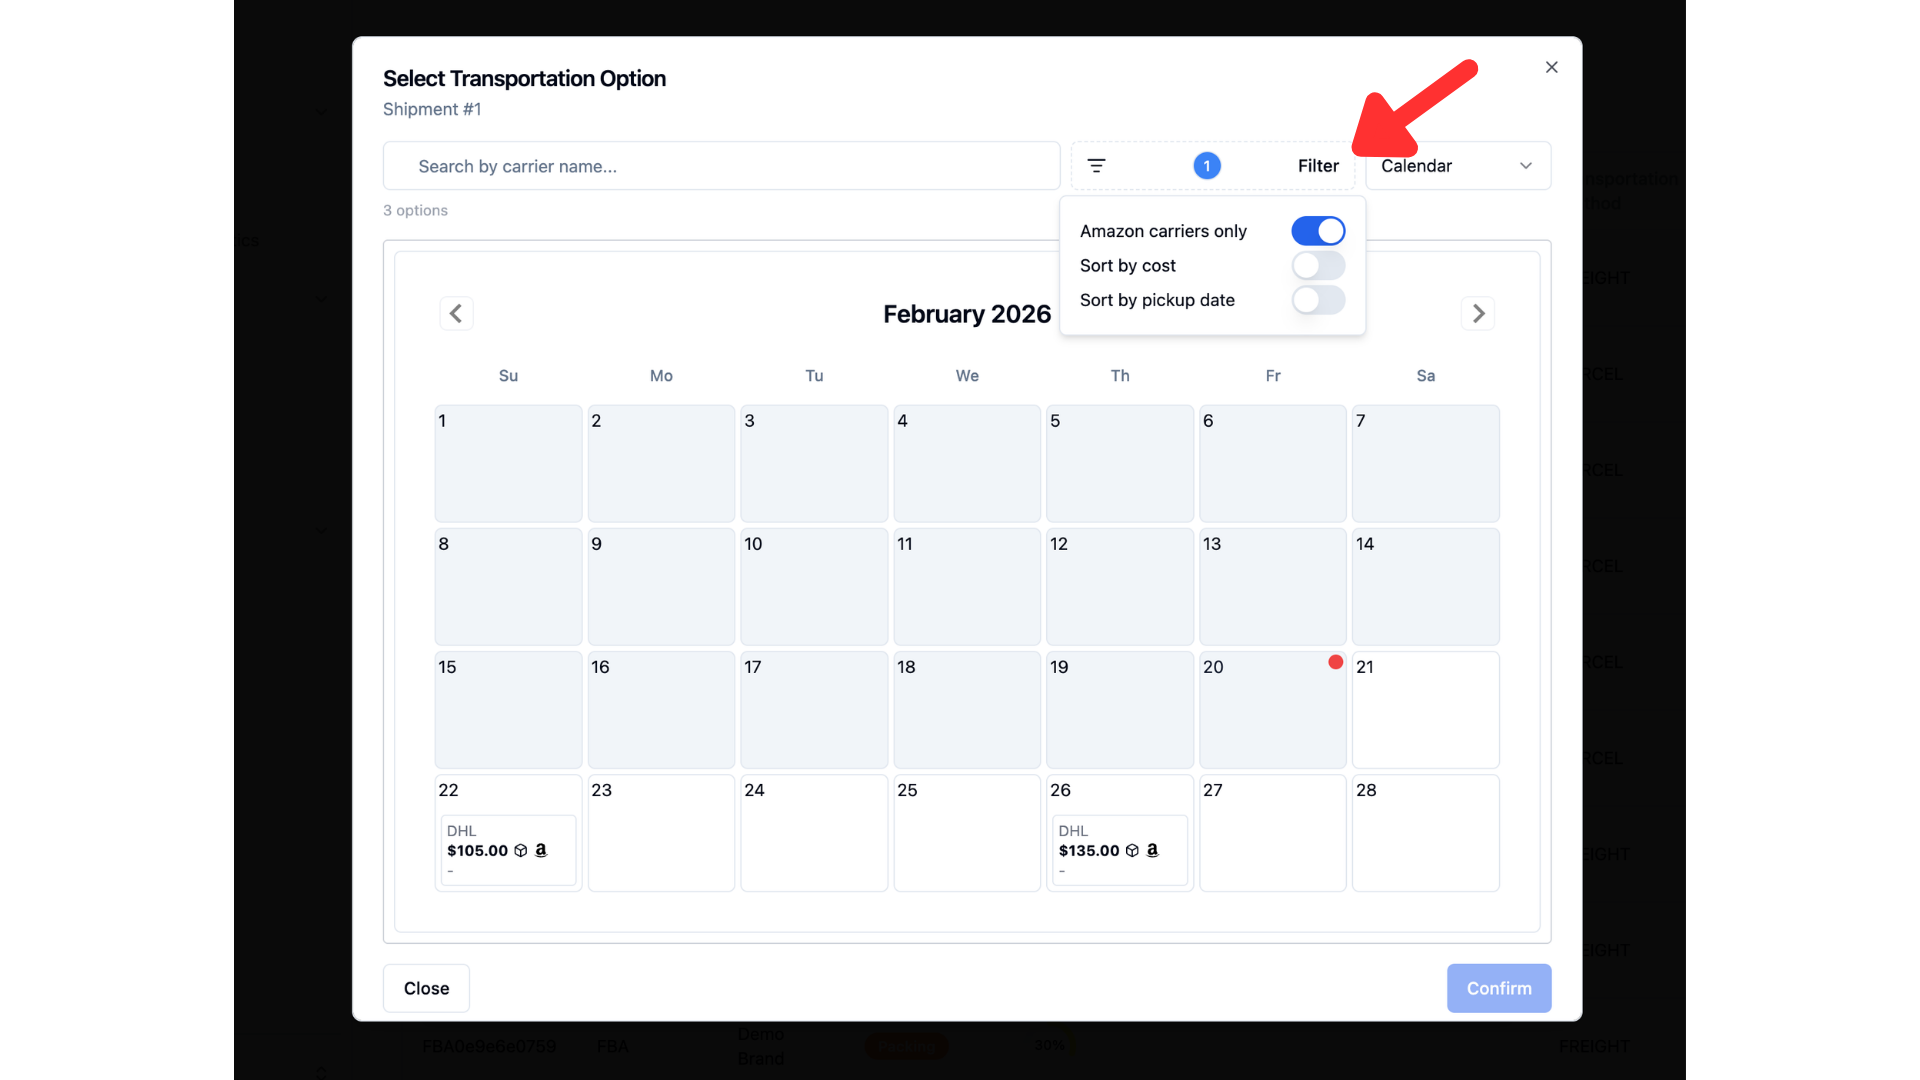
You can also switch to a list view by clicking calendar and selecting list. This will display a scrollable list of your transportation options.
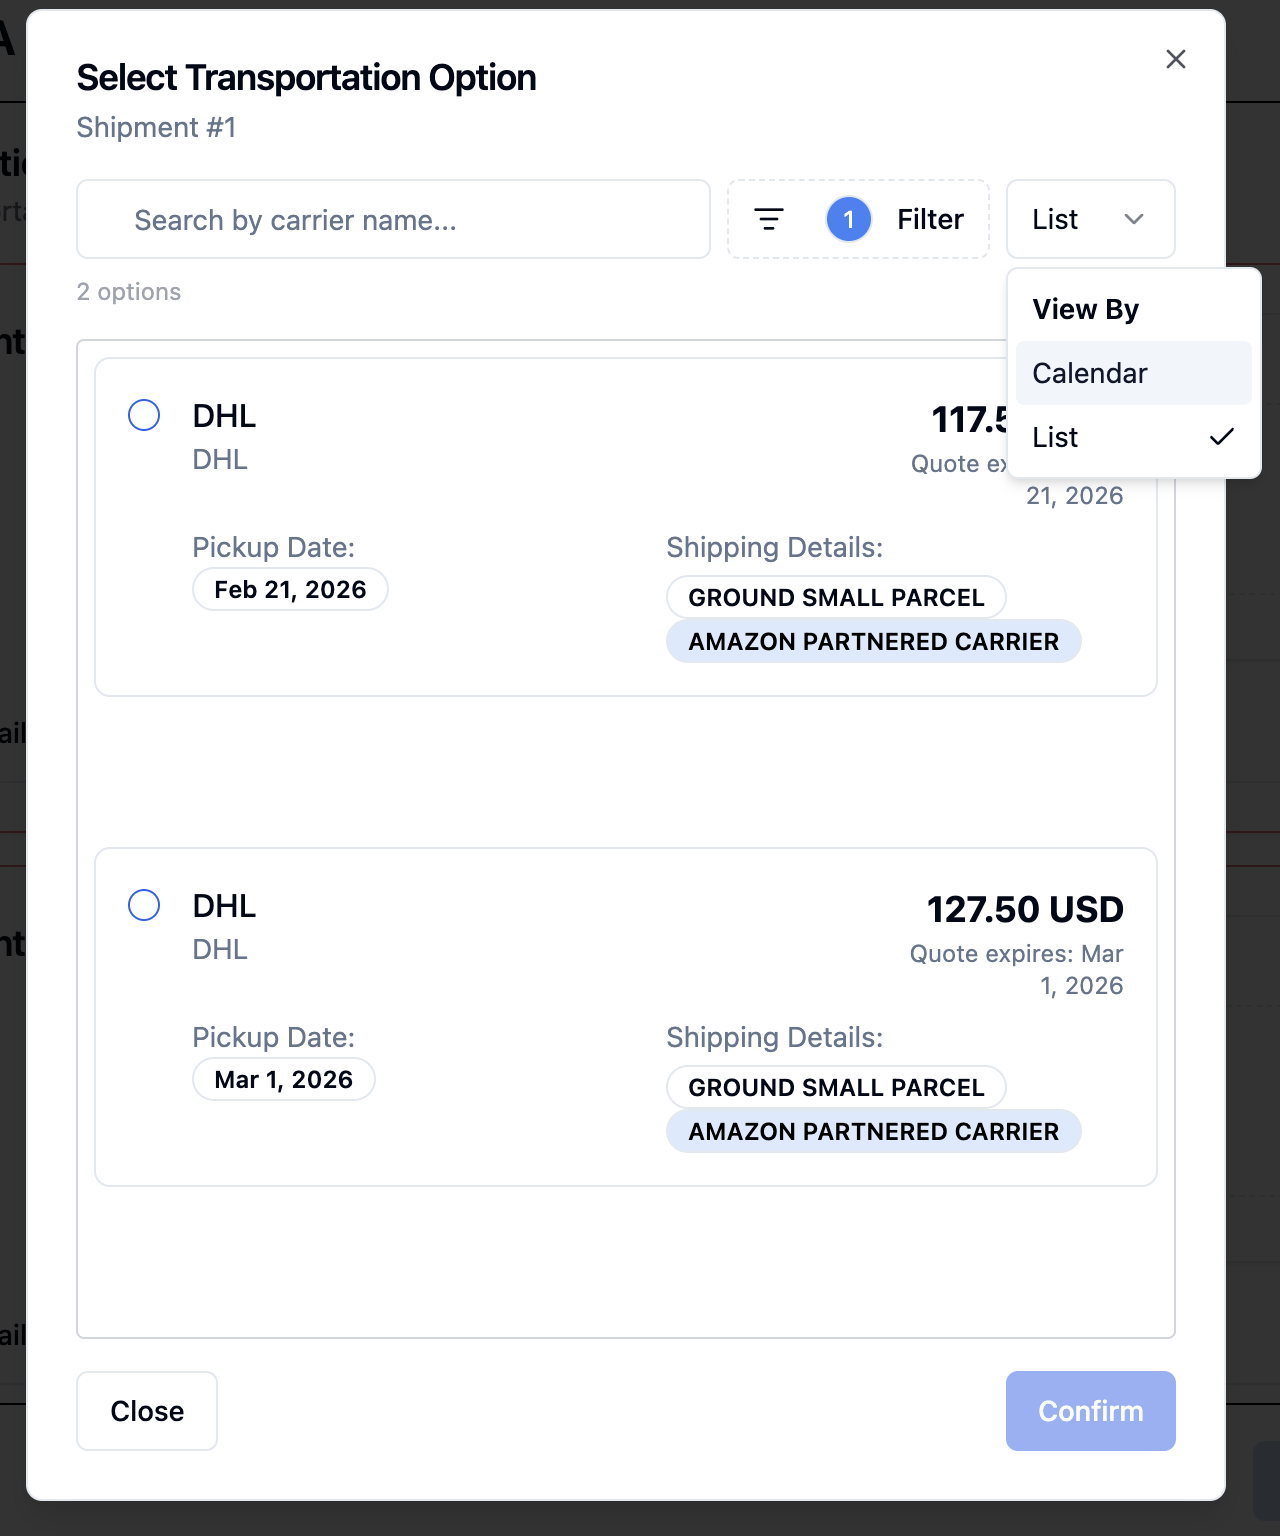
From the calendar view or list view, select a transportation option and click confirm.
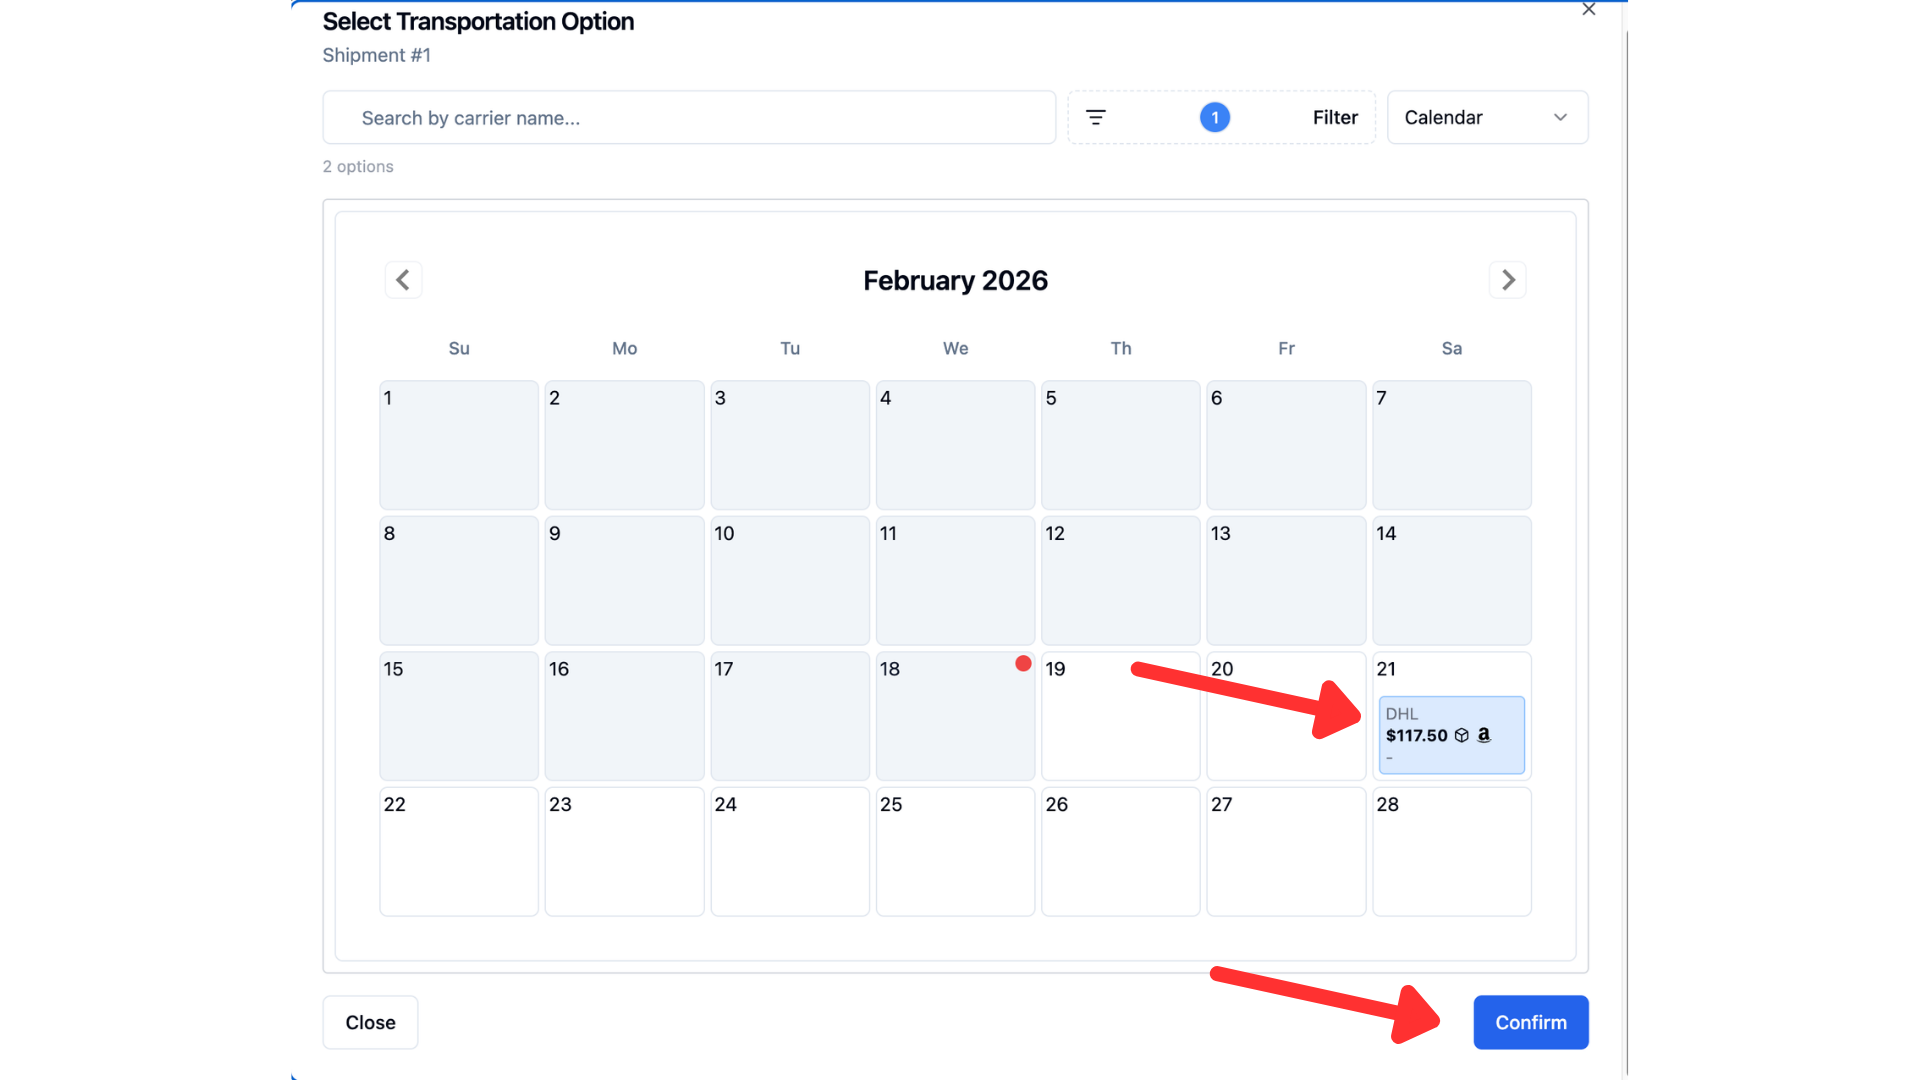
Repeat for each separate shipment.
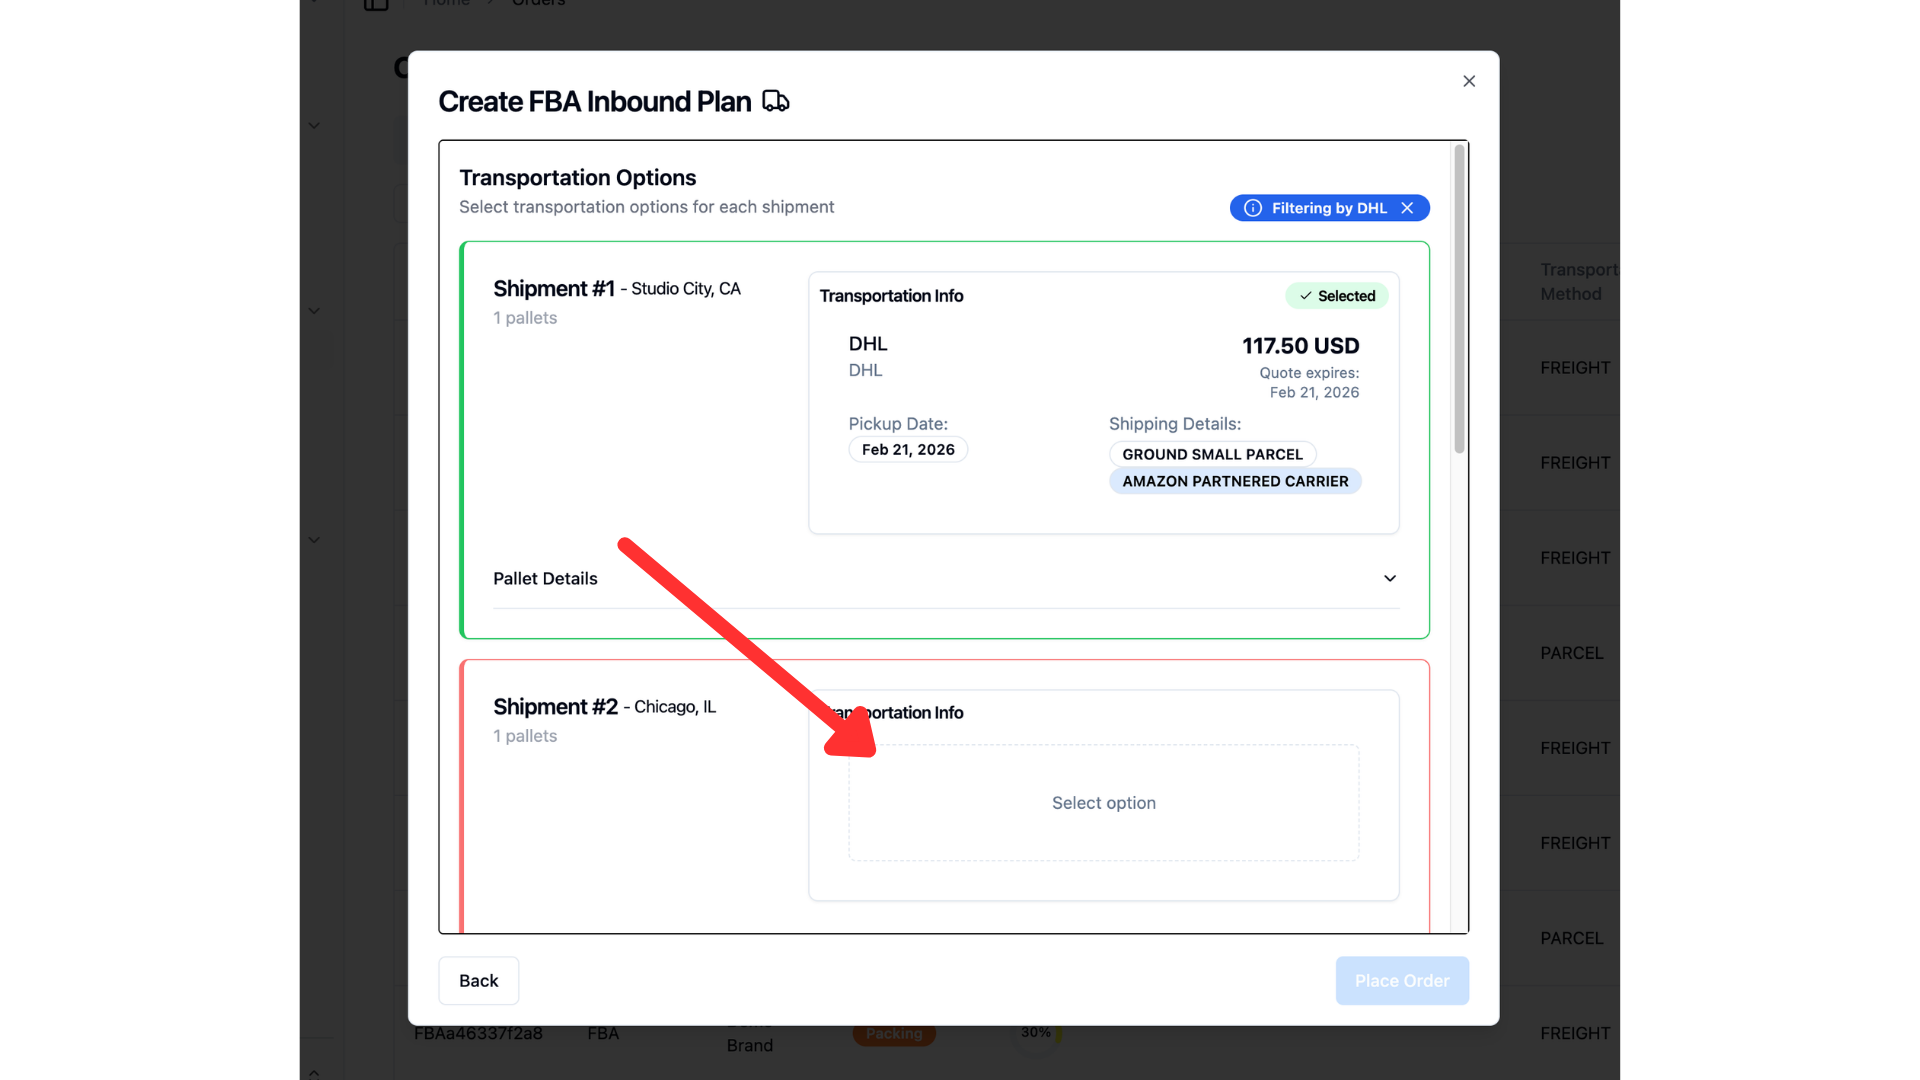
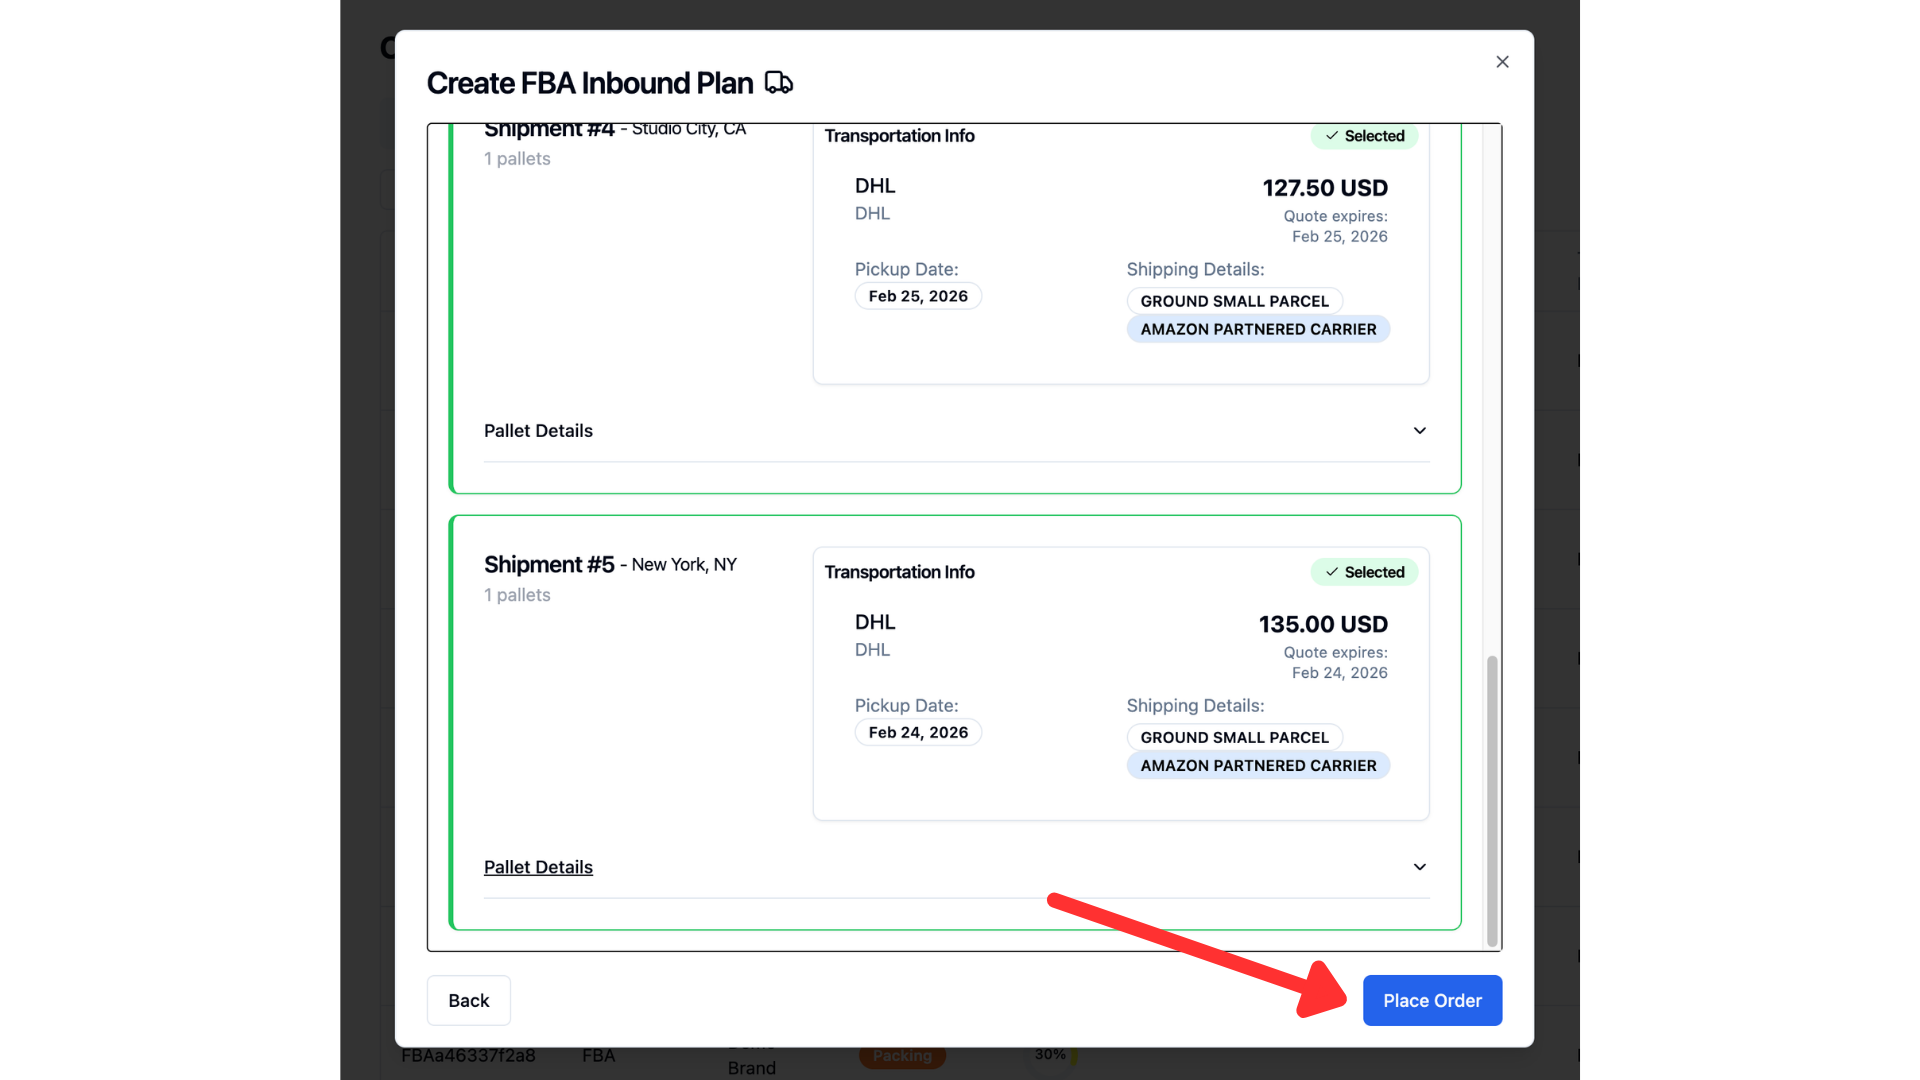
Click place order to submit your order with Amazon FBA
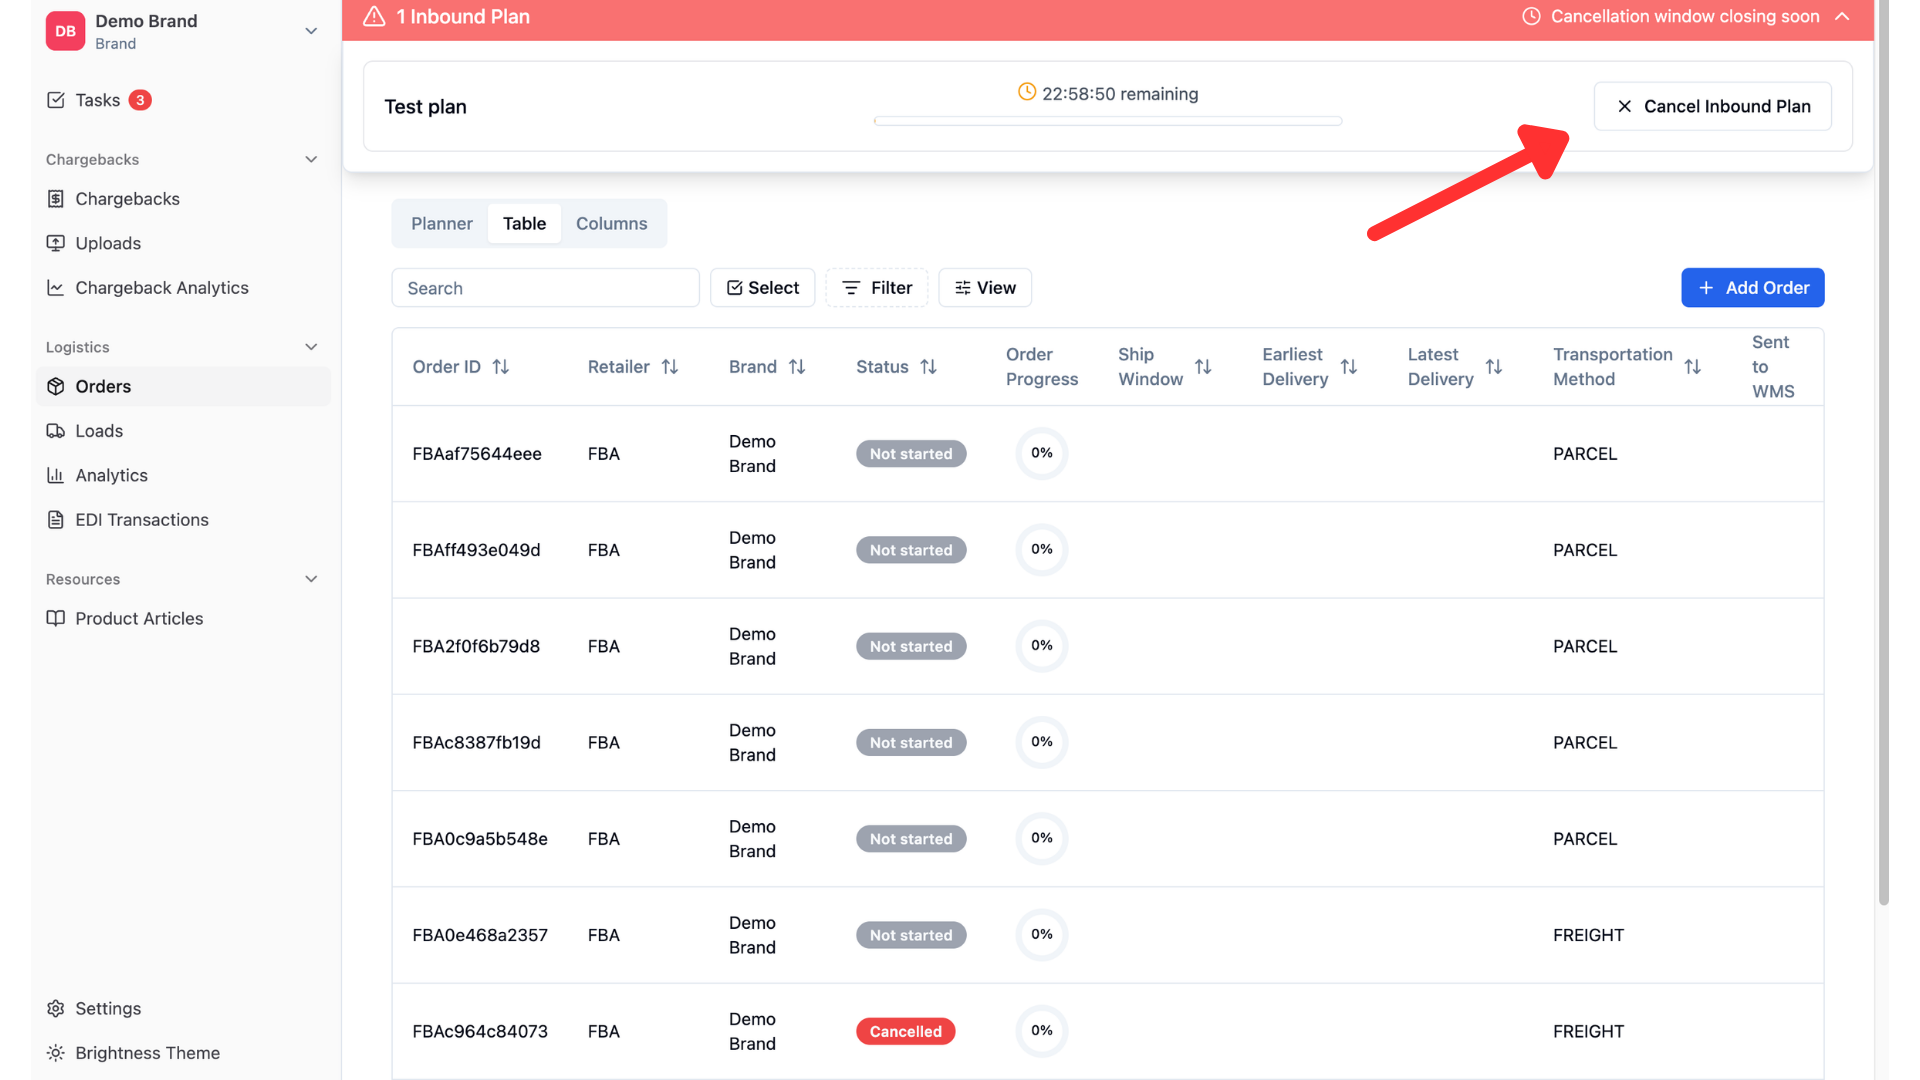
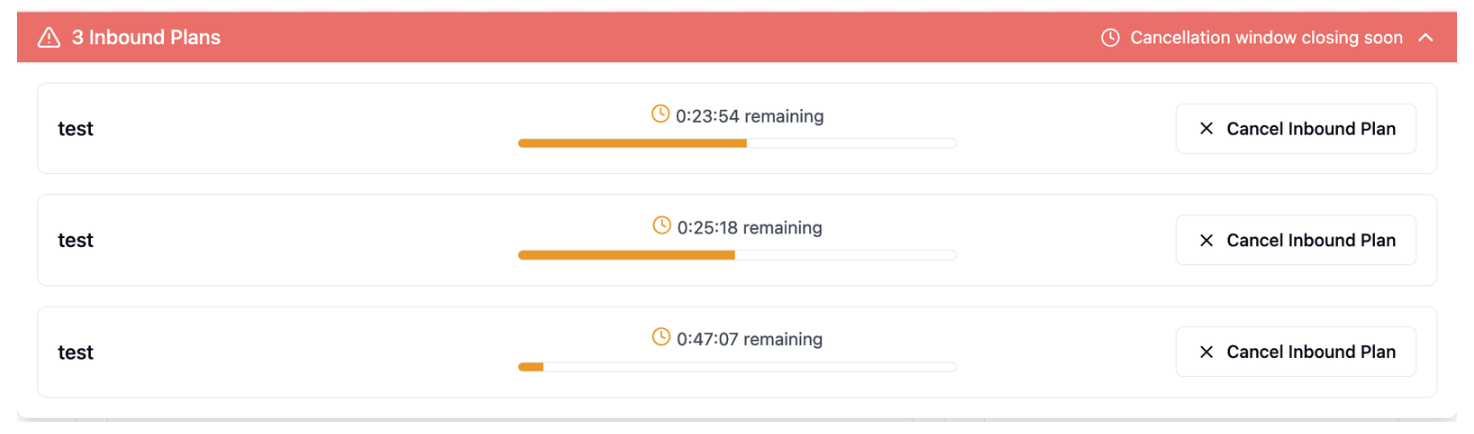
Once your order is placed, you will have a certain amount of time to cancel your inbound plan. This will be indicated by a banner across the top of your screen. For freight orders, you will have one hour, for parcel, 24 hours.
FAQs
How do I move cartons on a pallet for a freight FBA order?
Since Amazon provides specific shipment instructions, moving cartons on a pallet for a freight order is not allowed.
How do I cancel my FBA order outside the cancellation window?
Once the cancellation window has closed, you are unable to cancel your plan. You may try contacting Amazon to cancel the order but may incur charges.
How do I access Parcel Transportation Options?
Complete the required freight class and delivery window fields on the shipment configuration plan screen. It will highlight red if you don't have all of the information filled out.
Proceed to the next screen where transportation options are displayed (freight or parcel depending on order size).
Select your preferred parcel option from the filtered results.
What is the parcel vs freight threshold that Amazon determines?
TLDR: there isn't a single hard number. Amazon decides per shipment based on total weight, box count, and what's inside.
The general rule of thumb: individual boxes need to be under 50 lb and within standard parcel dimensions to qualify for Small Parcel Delivery (SPD). But even if every box is compliant, once your total shipment weight crosses Amazon's SPD ceiling (historically around 150 lb), they'll stop offering SPD and only return LTL freight options.
Why am I only seeing 'Use Your Own Carrier' options with no estimated costs?
We return all available options that Amazon is returning to us, so if there are no Amazon Partner Carrier Options listed, this is likely because the quantity, type or timing of the order do not fit Amazon's preferences for providing carrier options.
Why am I only seeing options for freight shipments rather than small parcel options?
All transportation options are provided by Amazon. If no small parcel options are available, it is likely because the quantity is too large to meet small parcel requirements.
I'm trying to add an FBA order, but don't see an option to?
FBA orders can only be added by brands - please make sure you are signed in as a brand, to be able to add a new order. To add an order, follow the steps for "Now it's time to create the FBA order!" above.
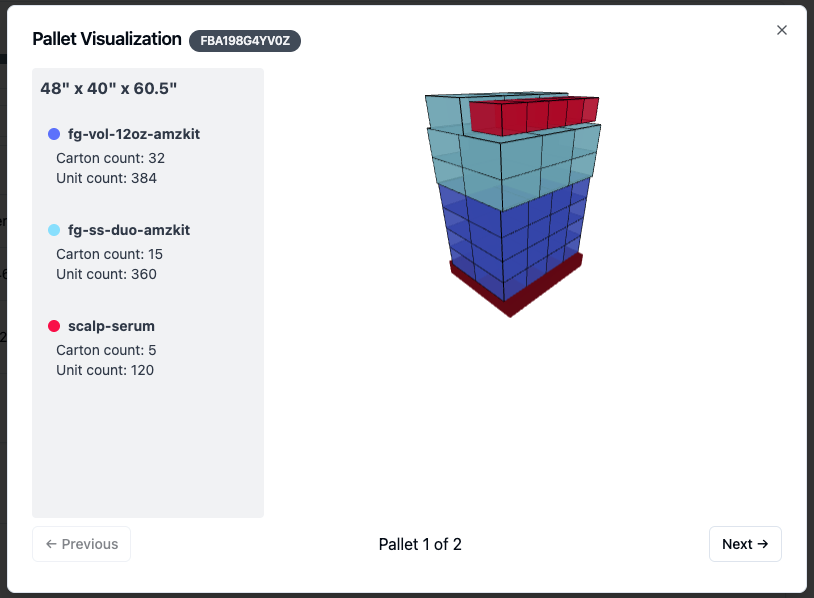
Why is my physically pallet higher than the direct workflow pallet visualization?
This occurs when the case dimensions entered in the system do not accurately reflect the actual carton dimensions, resulting in incorrect pallet configuration calculation in RR.
What to do if FBA order(s) are manually completed Amazon Seller?
The order will require a manual load entry in RetailReady to close it out, as it did not go through standard processing. Use tablet mode to complete this step, then add a comment to the order noting that it was manually loaded to close it out.
What’s the difference between Amazon Partnered Carrier and Choose Your Own Carrier?
Amazon Partnered Carrier:
The Partnered Carrier program (also called the Partnered Carrier Program, PCP) is Amazon’s own shipping-option offering for inbound shipments to FBA.Choose Your Own Carrier:
This means you (or your 3PL) arrange shipping with any carrier of your choice (outside of Amazon’s pre-negotiated network). You manage the pickup, the carrier account, and possibly the labels/tracking.
How is the pickup date set for Amazon FBA freight orders?
Amazon-Partnered Carrier:
When you create an FBA freight order in RetailReady and select an Amazon-partnered carrier, you’ll choose the delivery window during order creation.
Amazon immediately returns the pickup date and the Bill of Lading (BOL) through their API. RetailReady displays this information on your order.
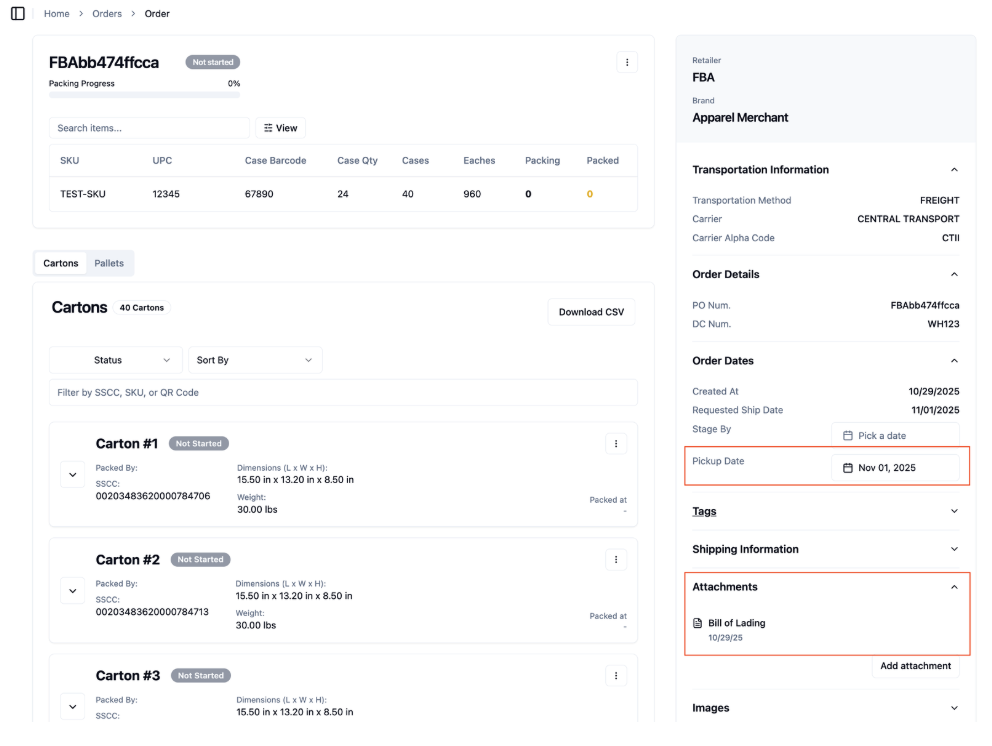
If the pickup date needs to change, you must open a case with Amazon directly. RetailReady cannot override or reschedule Amazon’s pickup date.
Choose Your Own Carrier:
During order creation in RetailReady, you’ll select a delivery window.
You are then responsible for coordinating directly with your carrier to confirm the pickup date.
That confirmed date can be entered and tracked in RetailReady so it’s tied to the order record.
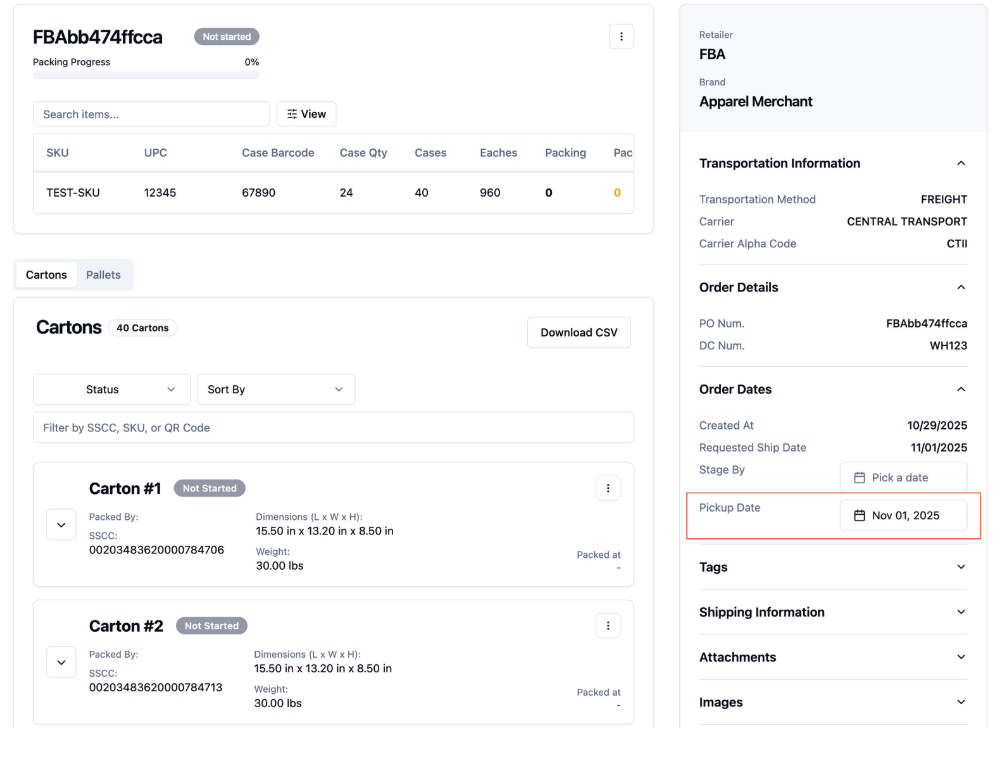
Any adjustments to the pickup must be handled between you and your carrier.
When is the Bill of Lading (BOL) available?
Amazon-Partnered Carrier:
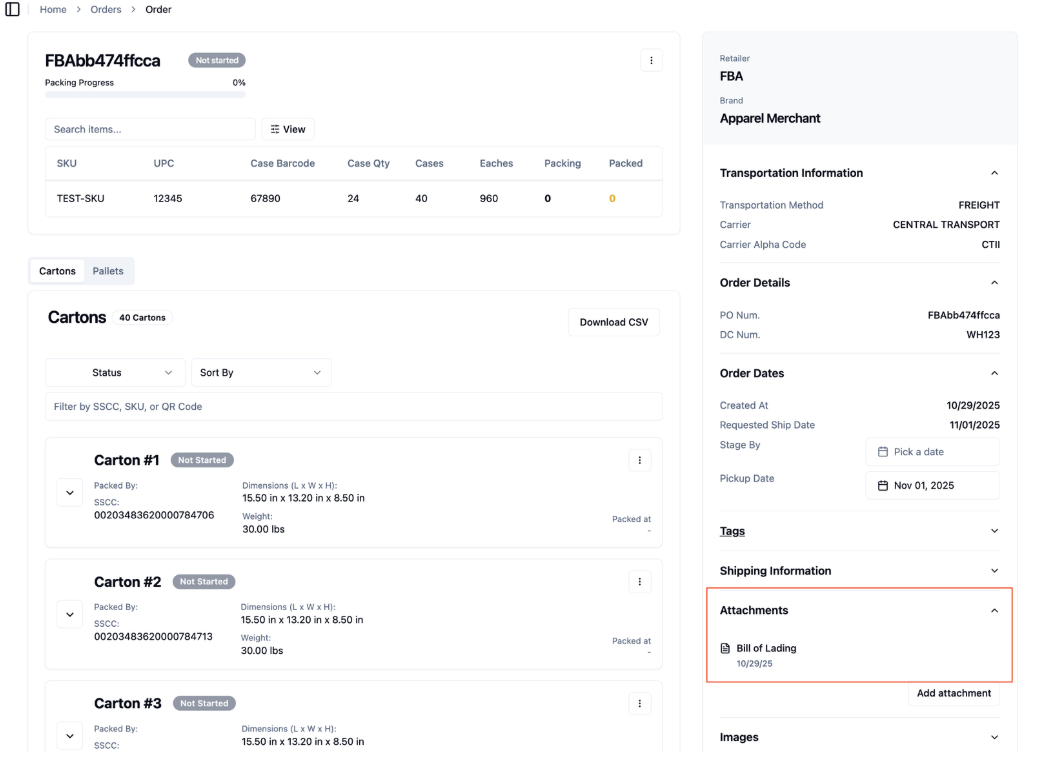
RetailReady surfaces the BOL file as soon as it is returned by Amazon’s API, which is usually immediately after the delivery window is confirmed.
You can find the BOL on the Orders page under Attachments in RetailReady
Choose Your Own Carrier:
Amazon does not generate the BOL for non-partnered carriers. Instead, the BOL must be created by you or your carrier.
The Amazon Reference ID for the order must be recorded on the BOL and used when scheduling an Amazon delivery appointment.
You can find the Amazon Reference ID on the Orders page in RetailReady
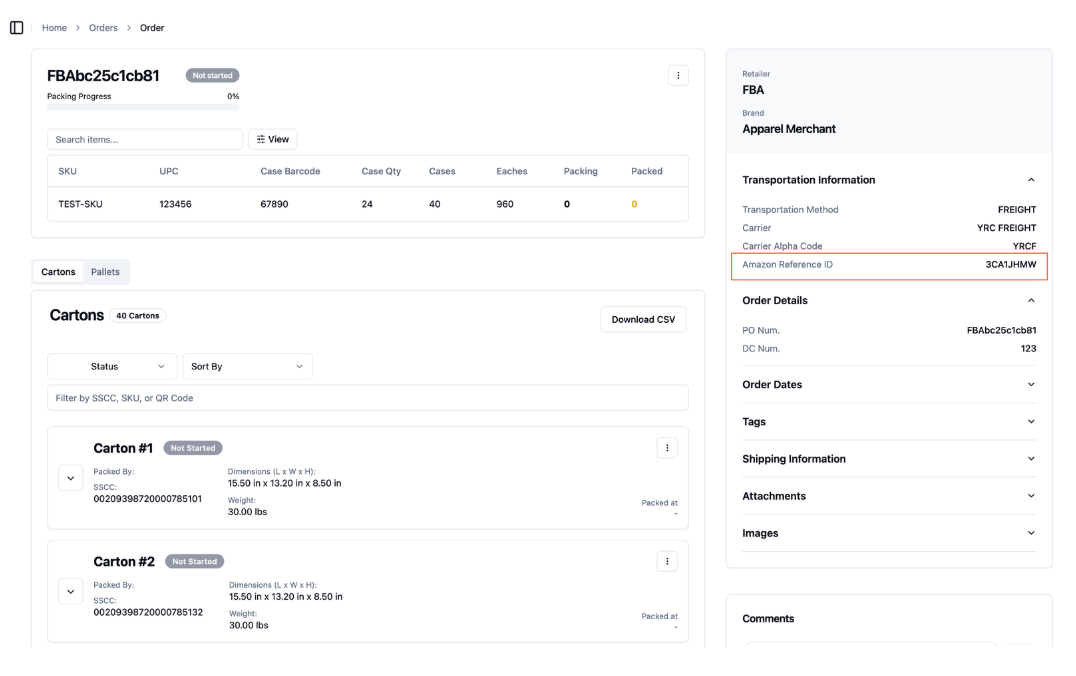
RetailReady allows you to upload and store this BOL against the FBA order so all shipment documents remain centralized.
What happens if the carrier or warehouse misses a pickup?
Amazon-Partnered Carrier:
If a scheduled pickup is missed, you’ll need to open a case with Amazon to request rescheduling. Only Amazon can adjust or reassign the pickup once it’s been booked. RetailReady continues to display the latest pickup date as returned by Amazon or entered by your team.Choose Your Own Carrier:
If you’re using your own carrier, you’ll need to coordinate directly with your carrier to reschedule the pickup. You only need to open a case with Amazon if the new delivery date falls outside the original delivery window Amazon approved for the shipment. After confirming the new pickup date with your carrier, update the pickup date in RetailReady so it stays in sync with your shipment records.
How is tracking sent back to Amazon for “Use Your Own Carrier”?
When you choose your own carrier, RetailReady automatically sends tracking and transportation details back to Amazon once transportation information has been entered for freight orders, or once parcel labels have been generated for parcel orders.
You can enter transportation details in RetailReady on the Orders page.
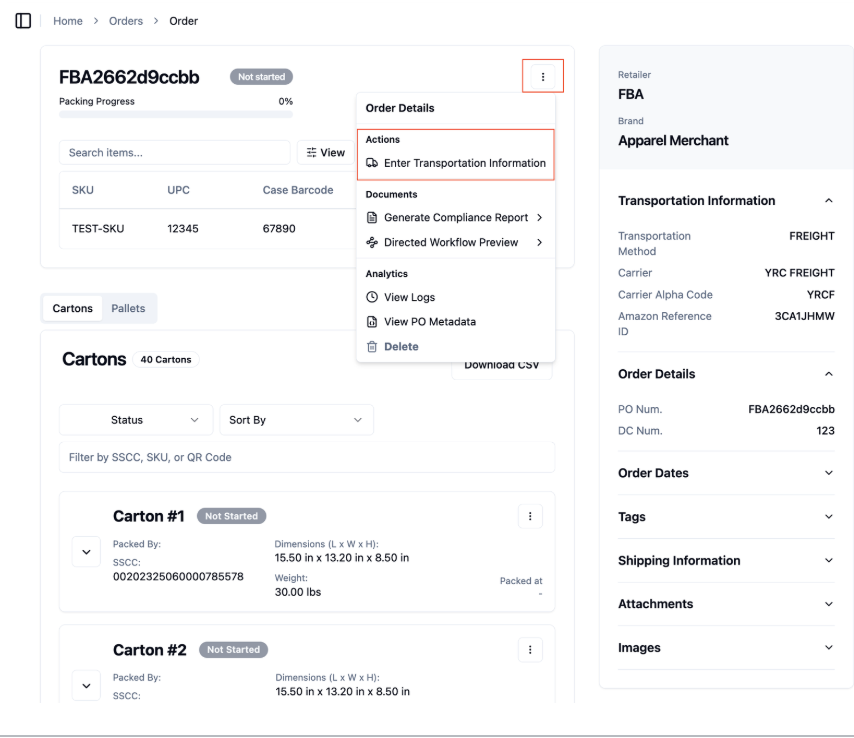
How long do I have to cancel an inbound plan?
Amazon provides a limited cancellation window for FBA inbound plans:
Freight shipments: 1-hour cancellation window
Parcel shipments: 24-hour cancellation window
After these time windows, the inbound plan becomes locked in Amazon’s system and cannot be canceled. If past cancellation window then you need to Open a case via Seller Central to request cancellation
In RetailReady, any FBA orders that are still within their cancellation window will appear in the red banner at the top of the page. Click the banner to view all eligible orders and use the Cancel button to cancel them.
Why are some SKUs not showing when creating an FBA order?
When creating an FBA inbound plan, RetailReady automatically filters out SKUs that aren’t fully configured for Amazon. You’ll see a red info icon (ℹ) explaining which SKUs were skipped and why.
SKUs are excluded if:
Missing required setup — SKU must have case pack quantity, dimensions, and weight in the Item Master.
Excluded from FBA — SKU’s case rule lists FBA as an excluded retailer.
Duplicate Amazon SKU (MSKU) — More than one internal SKU is mapped to the same MSKU.
Missing prep info in Seller Central — Amazon shows “Prep Category: Unknown,” meaning setup is incomplete.
Already selected — SKUs already added to the current plan are hidden to prevent duplicates.
How to fix:
Hover or click the red info icon to see details and links to each SKU.
Complete the missing fields in RetailReady or update the product setup in Amazon Seller Central.
Why can I not use some SKUs for Inbound Plans?
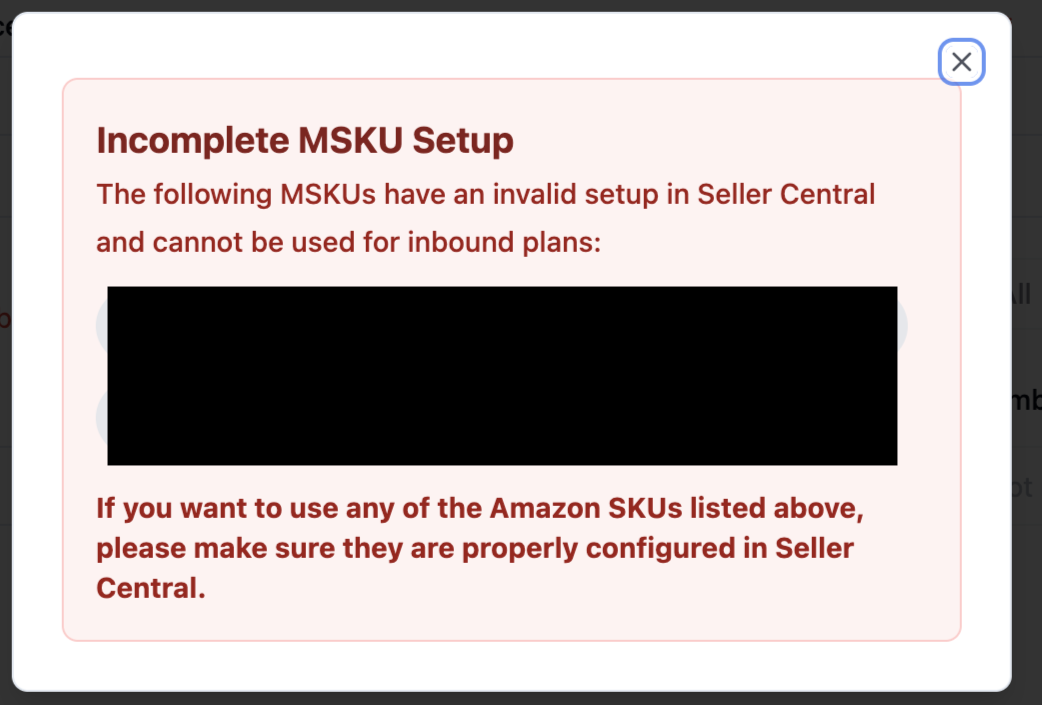
To enable a SKU to ship to FBA, Amazon requires that each SKUs prep details are configured in Seller Central.
RetailReady will not enable shipping of the incomplete SKU until the prep details have been configured in Seller Central
How do I add my prep details?
Prep details come directly from Amazon Seller Central. You don’t need to enter them manually in RetailReady.
Amazon automatically determines prep requirements based on the product type, but you can review or update them in Seller Central if they’re missing or incorrect.
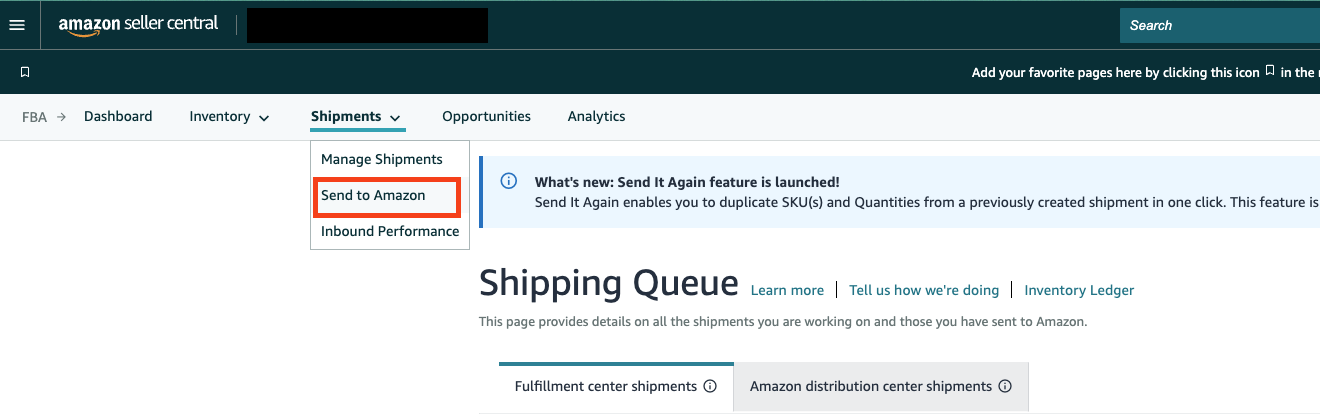
Navigate to Seller Central > Dashboard > Inventory > FBA > Shipments:
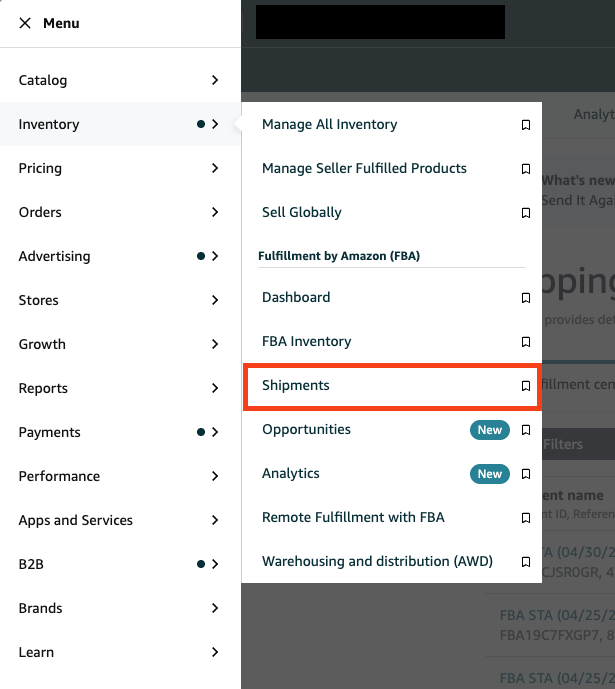
Click Shipments > Send to Amazon
Find the SKU with missing prep details and click the "Prep and labeling details needed"
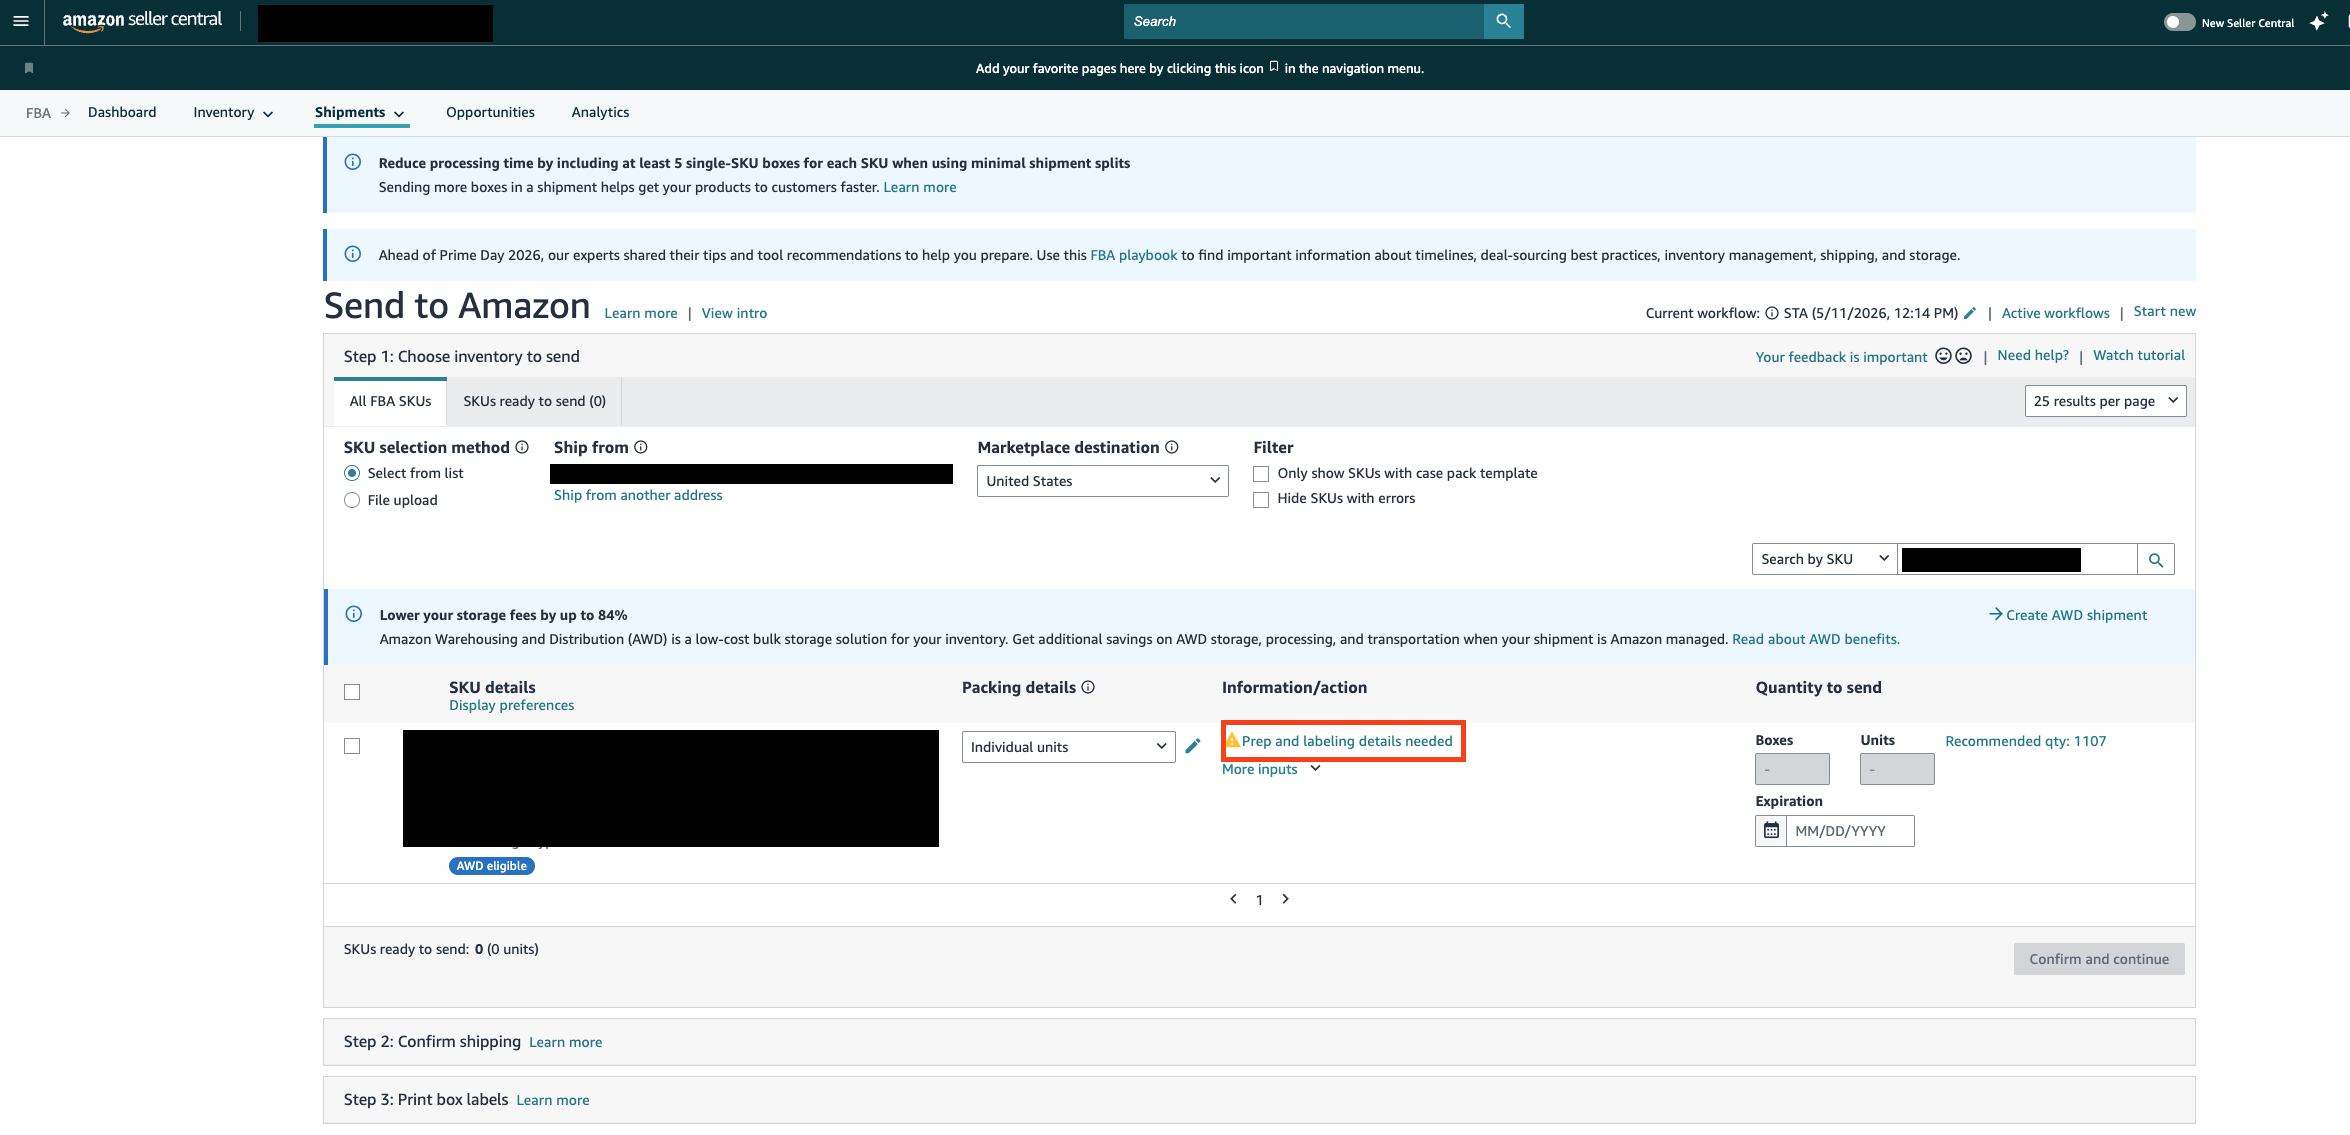
RetailReady automatically syncs your prep details from Amazon.
These details are saved and reused for future FBA shipments, so you only need to do this setup process once.