How To Use The Overboxing Feature
Last updated: April 3, 2026
What is Overboxing?
Overboxing is the practice of placing multiple cartons inside a larger box to consolidate parcel costs.
How Do I See if Overboxing is Enabled?
Navigate to the Connections Tab on the Left Hand Side of Retail Ready.
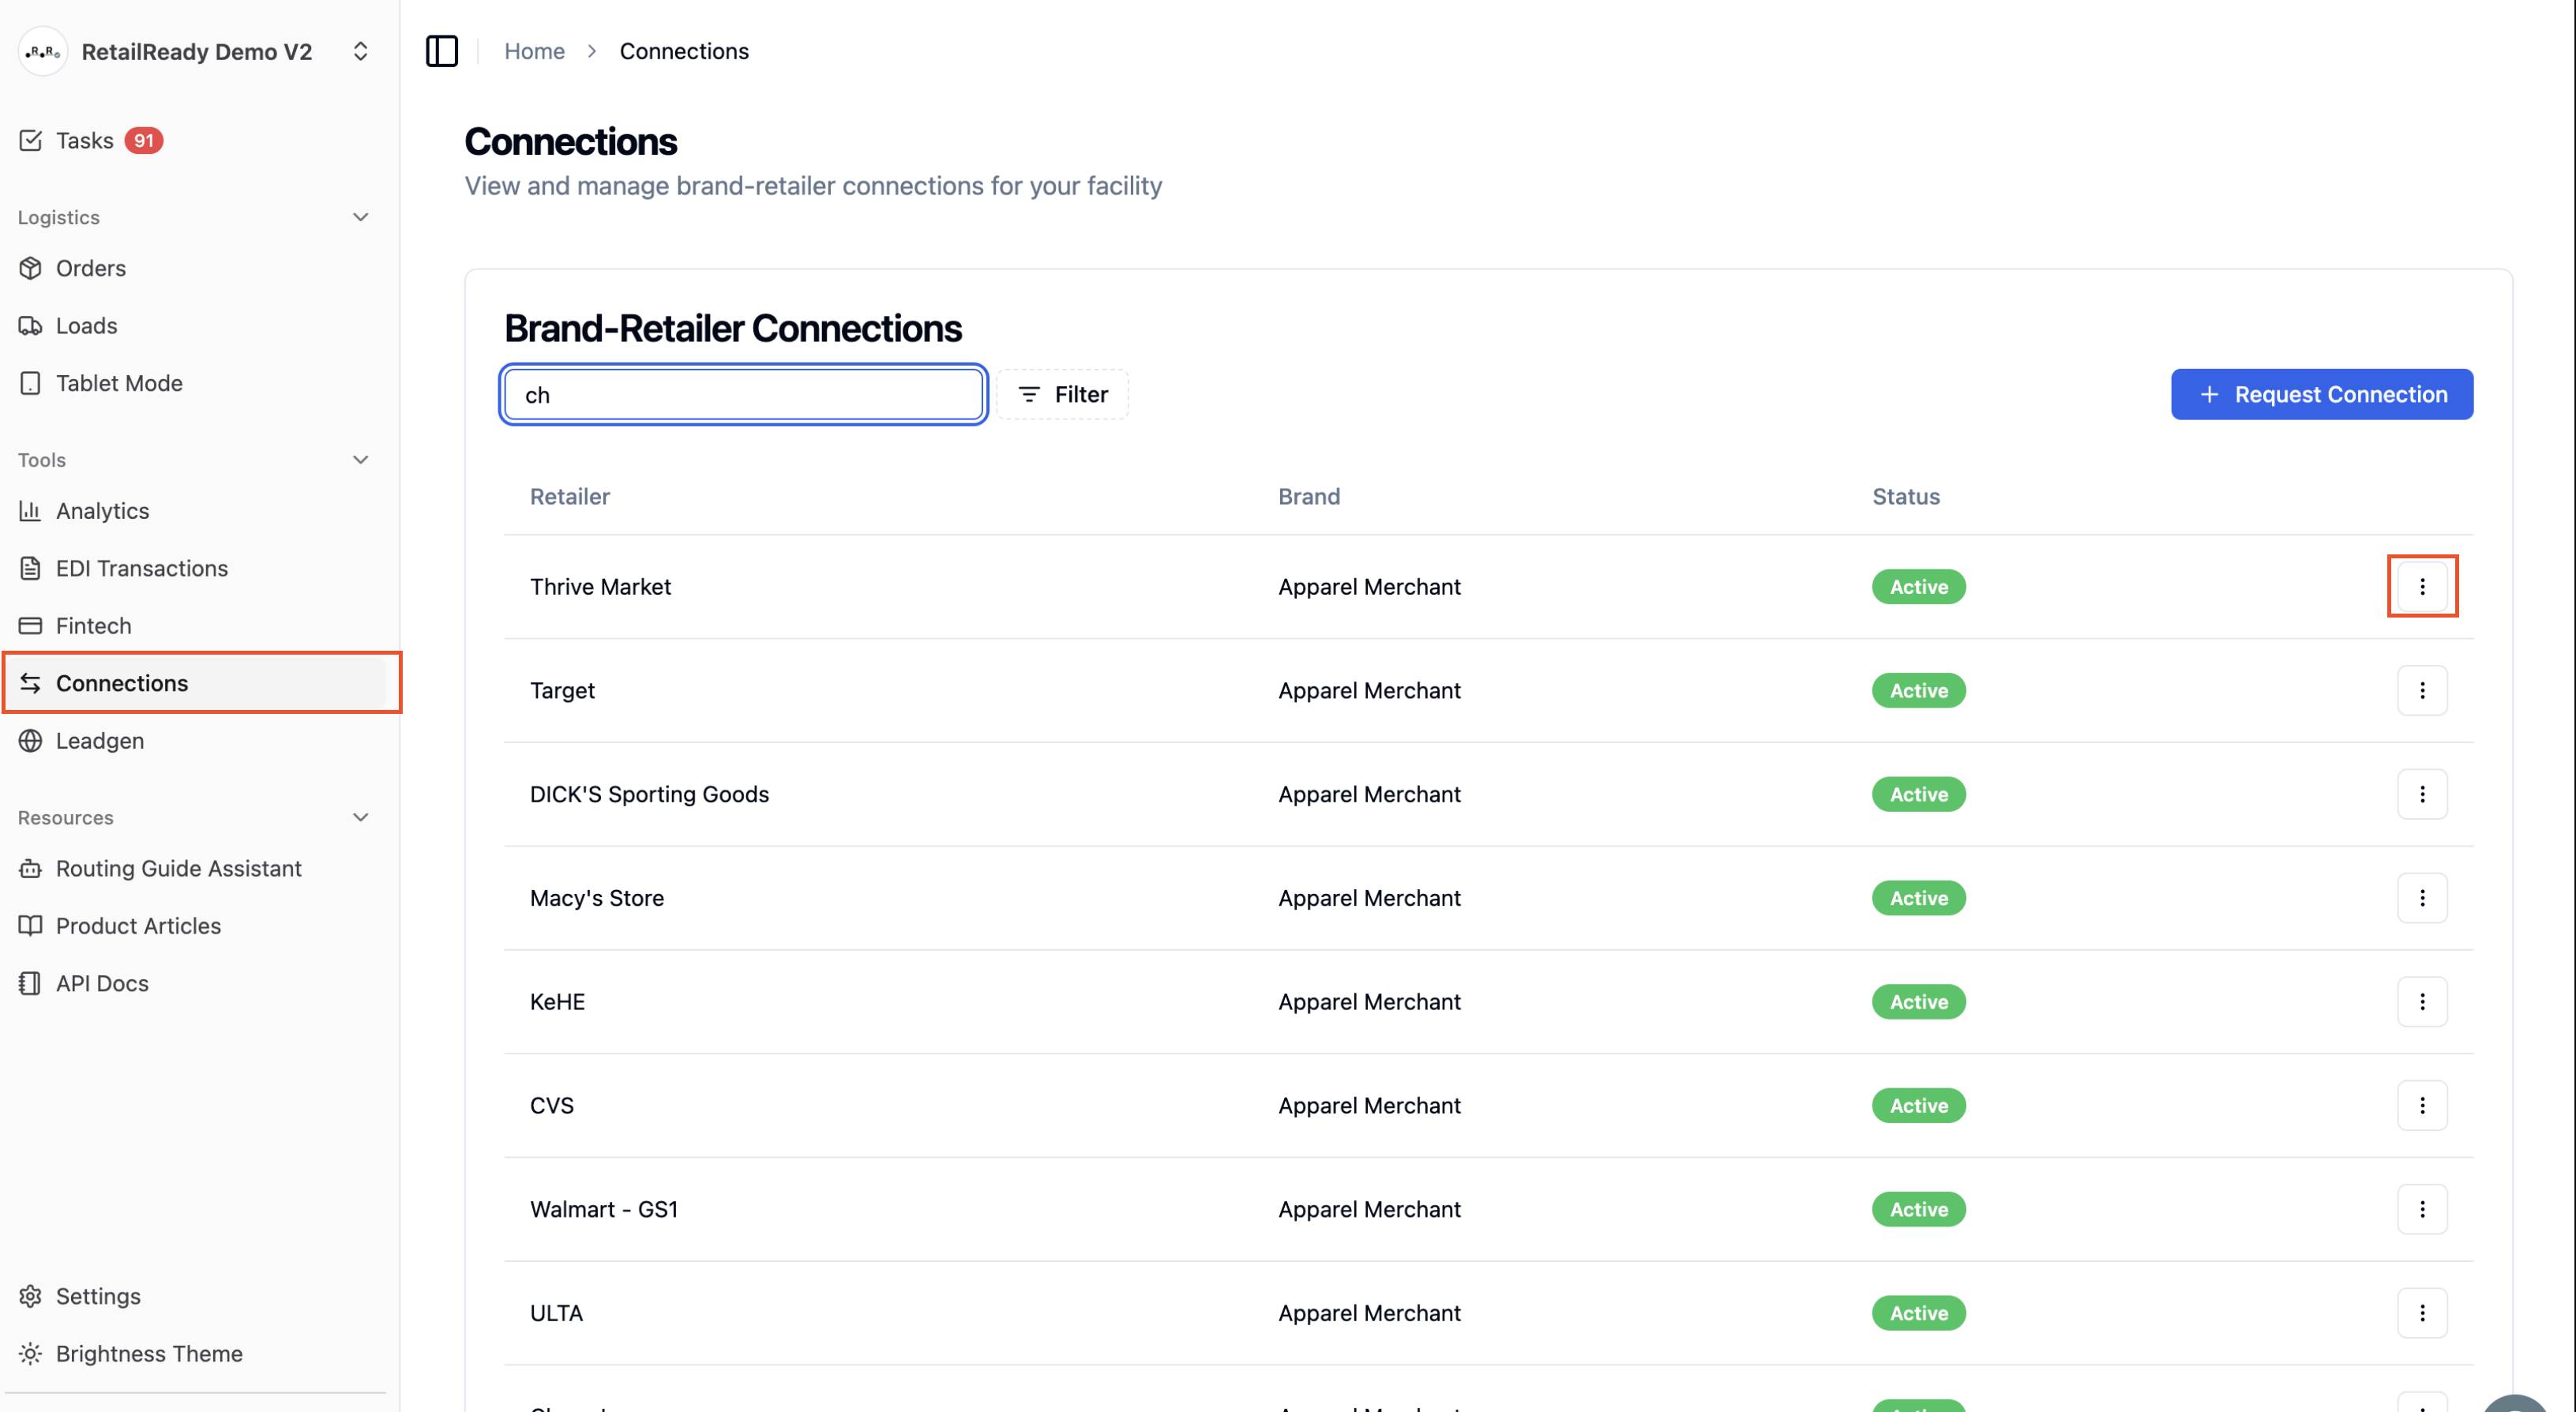
Find the Brand and select the three dots on the right side. Select View Connection Details.
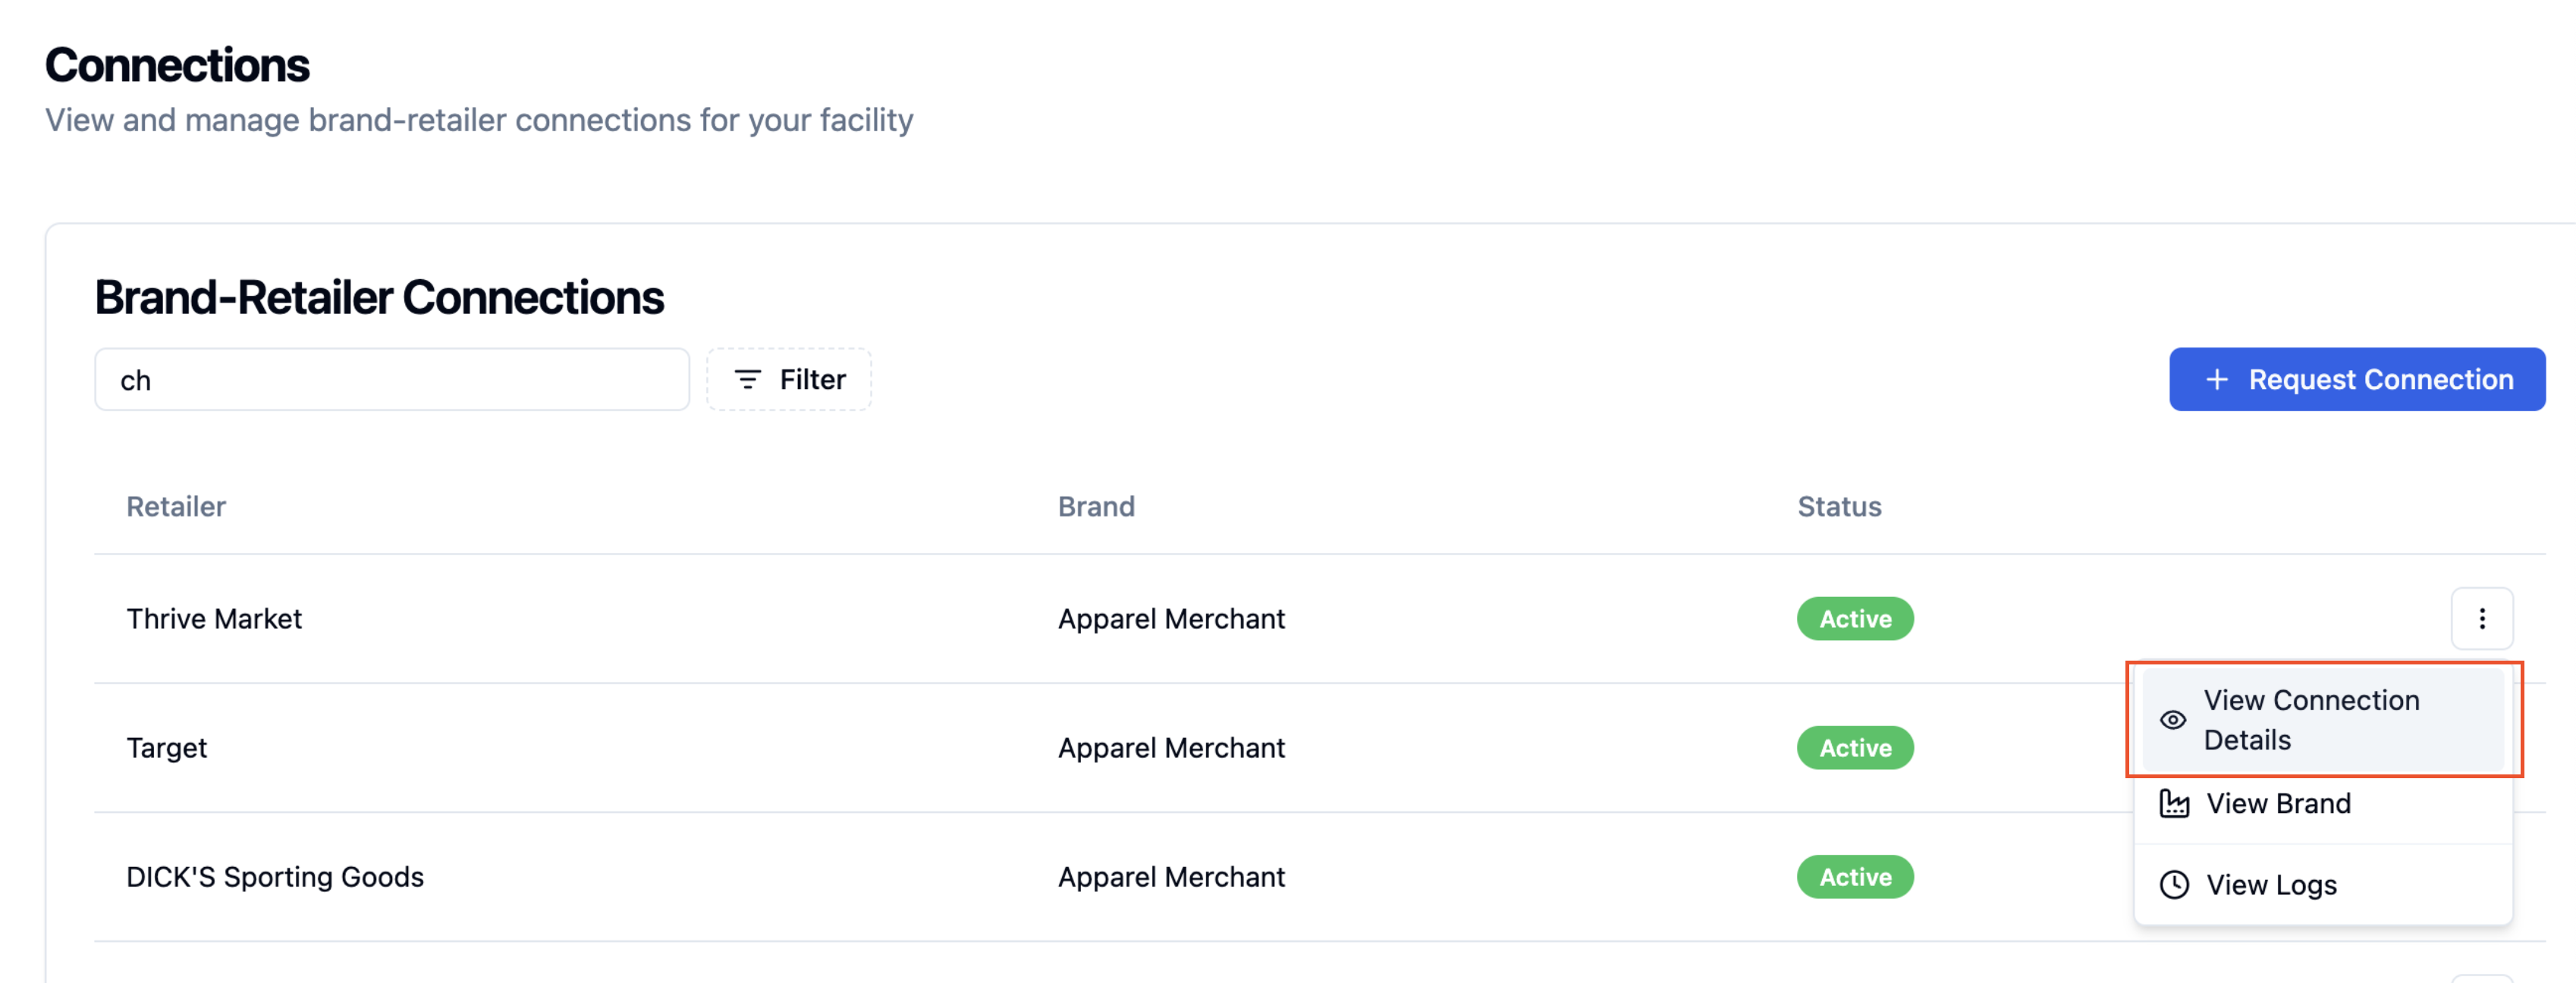
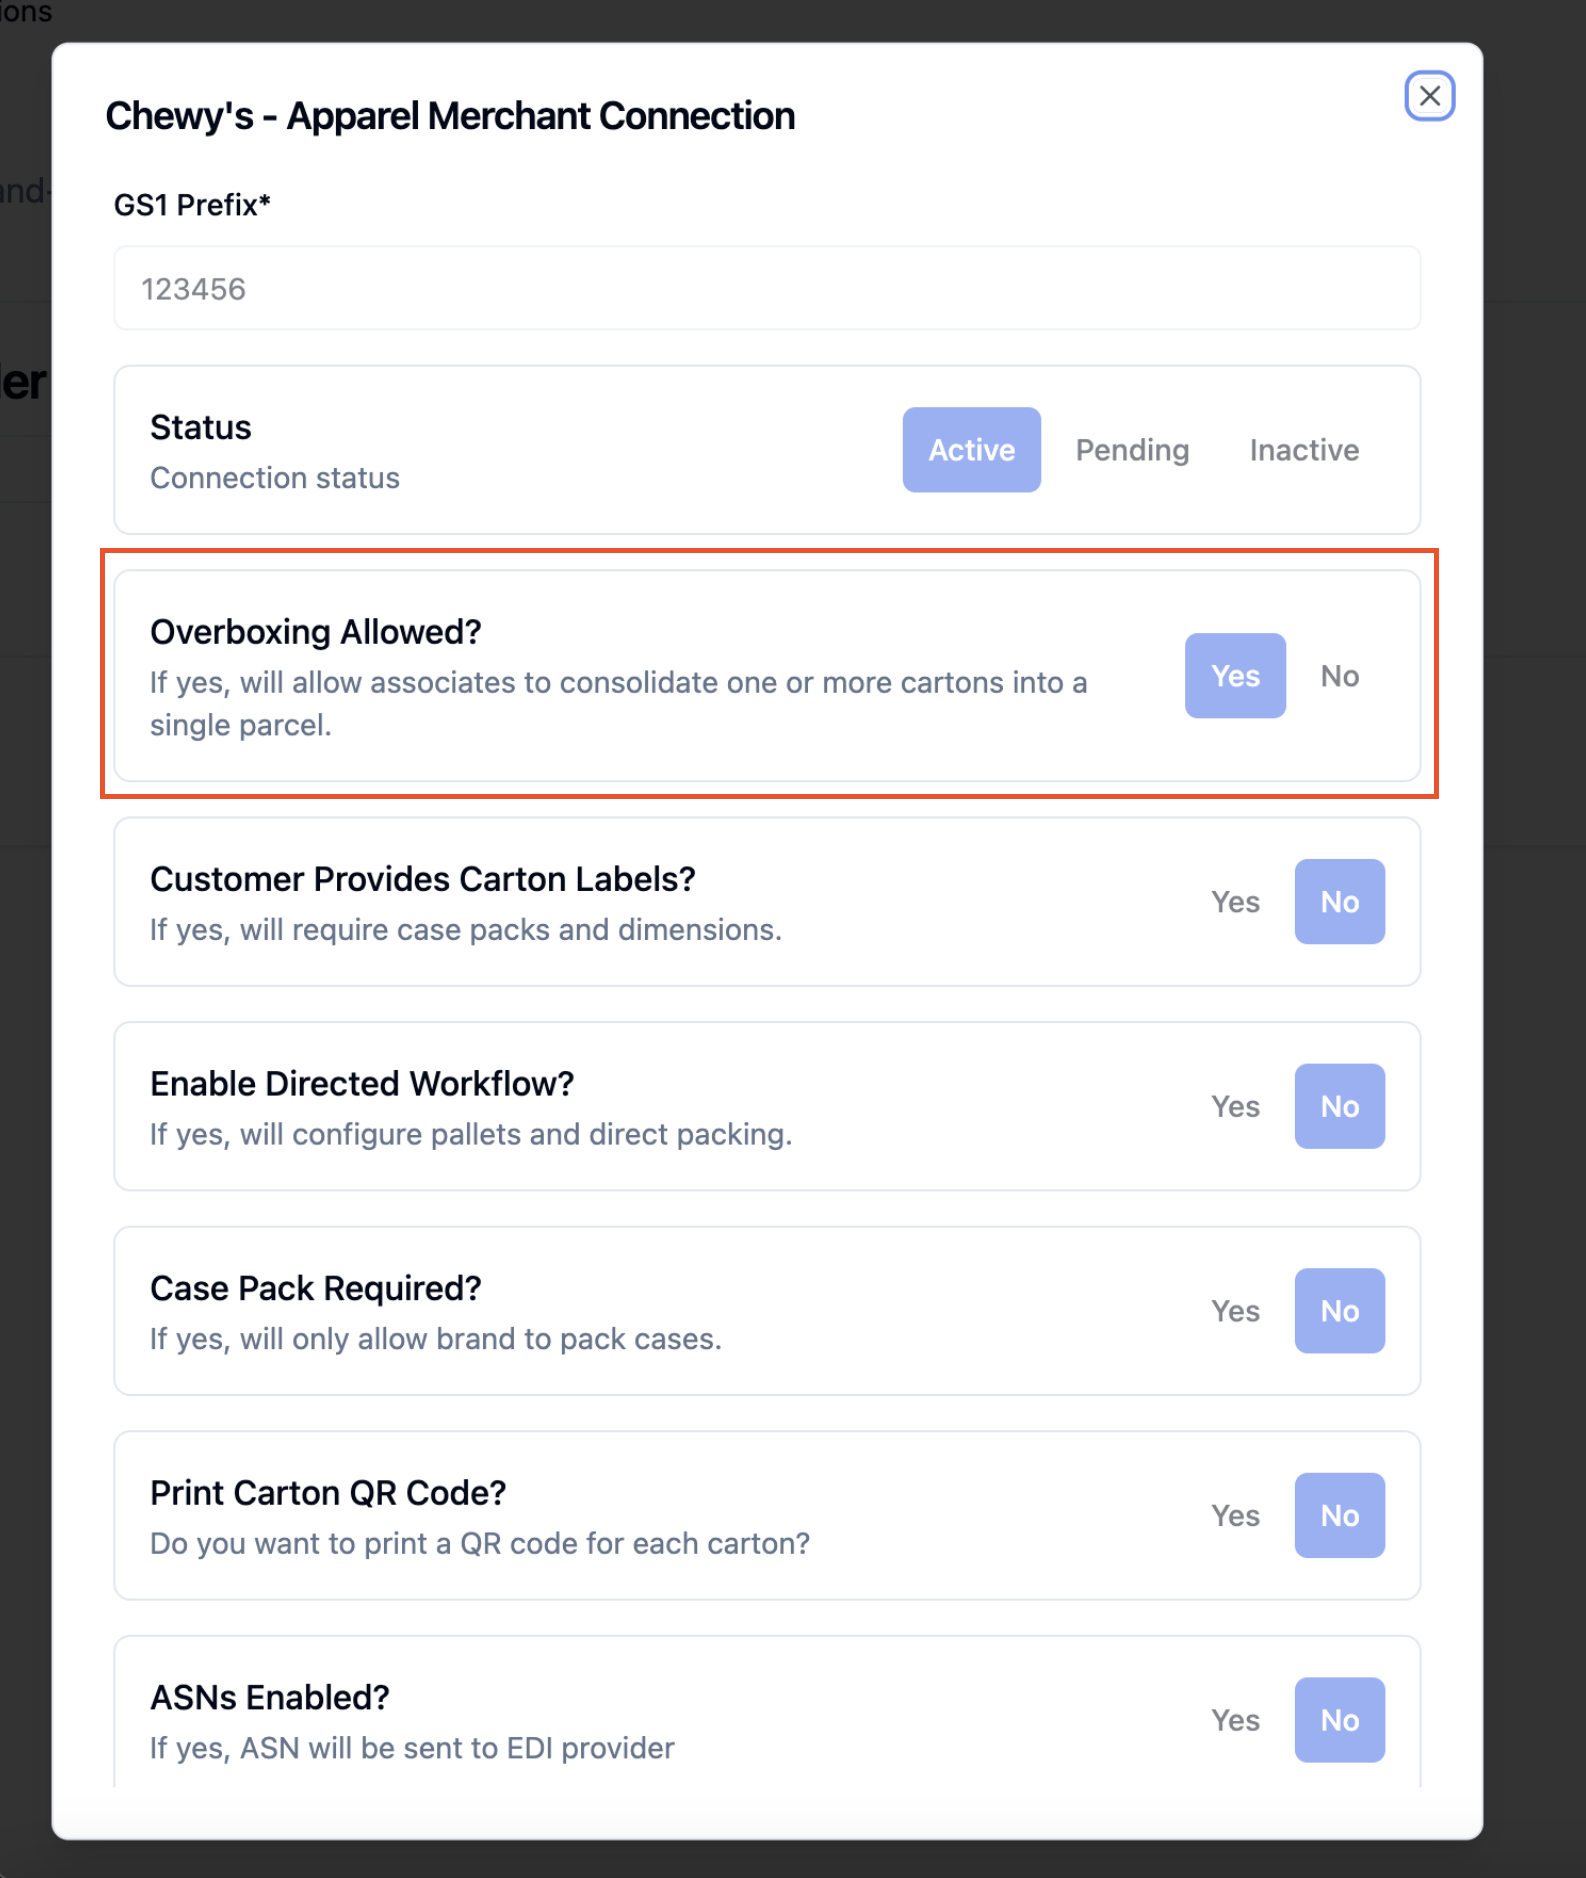
Check to see if Overboxing is Allowed for the brand. If not enabled, contact RetailReady support and we'll get it turned on.
How Overboxing Works In Your RetailReady Flow (Tablet & Phone)
First, you'll need to complete packing out a parcel order into cartons; freight orders are not eligible for overboxing (you can update 'Transportation Information' on the Order page to confirm it's shipping parcel). Once Carton packout is completed, open the Order and click 'Generate Parcel Labels'.
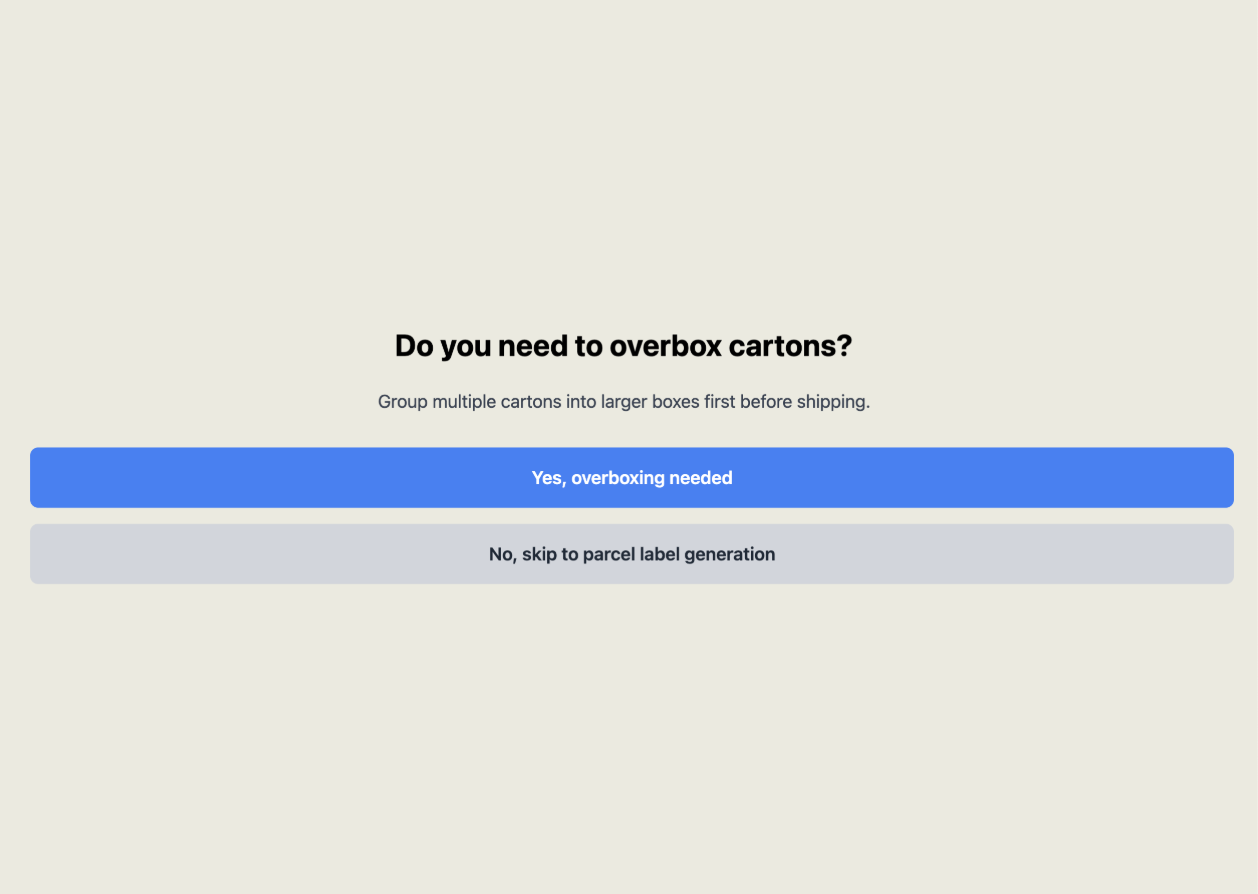
A screen will now appear to ask if Overboxing is needed. Select 'Yes' to configure Overboxes, or 'No' to generate parcel labels for each packed Carton as-is.
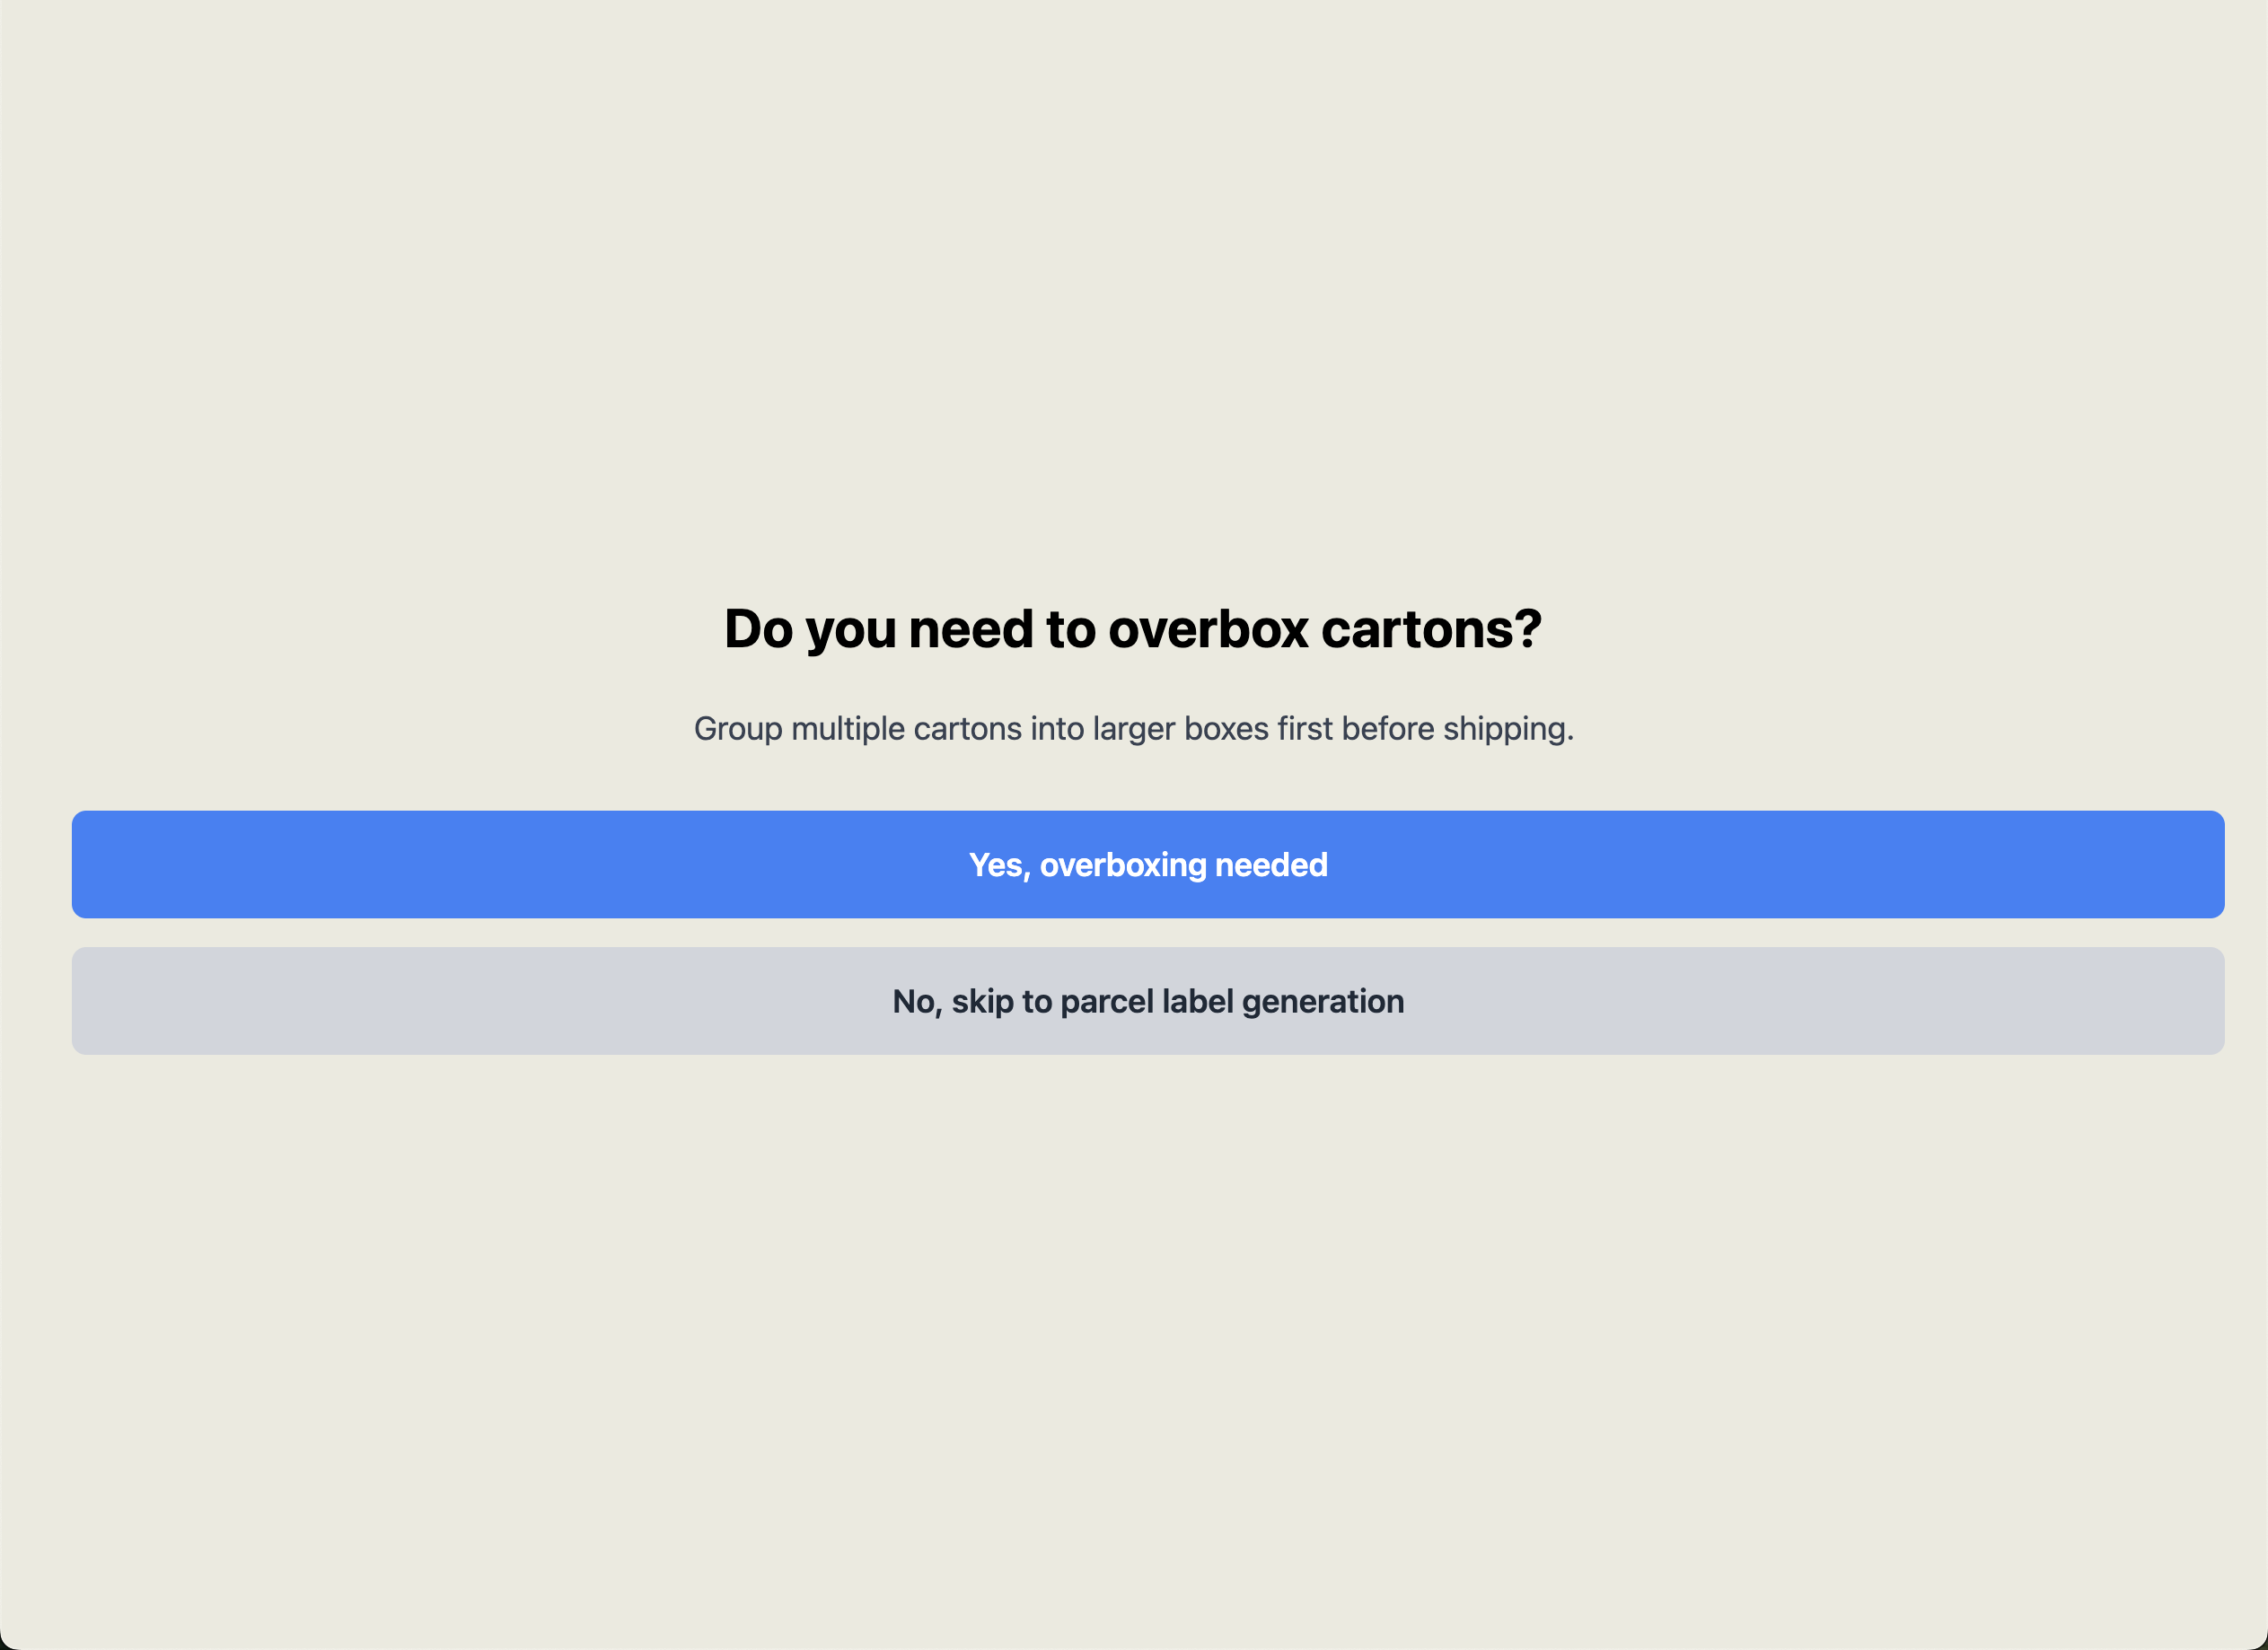
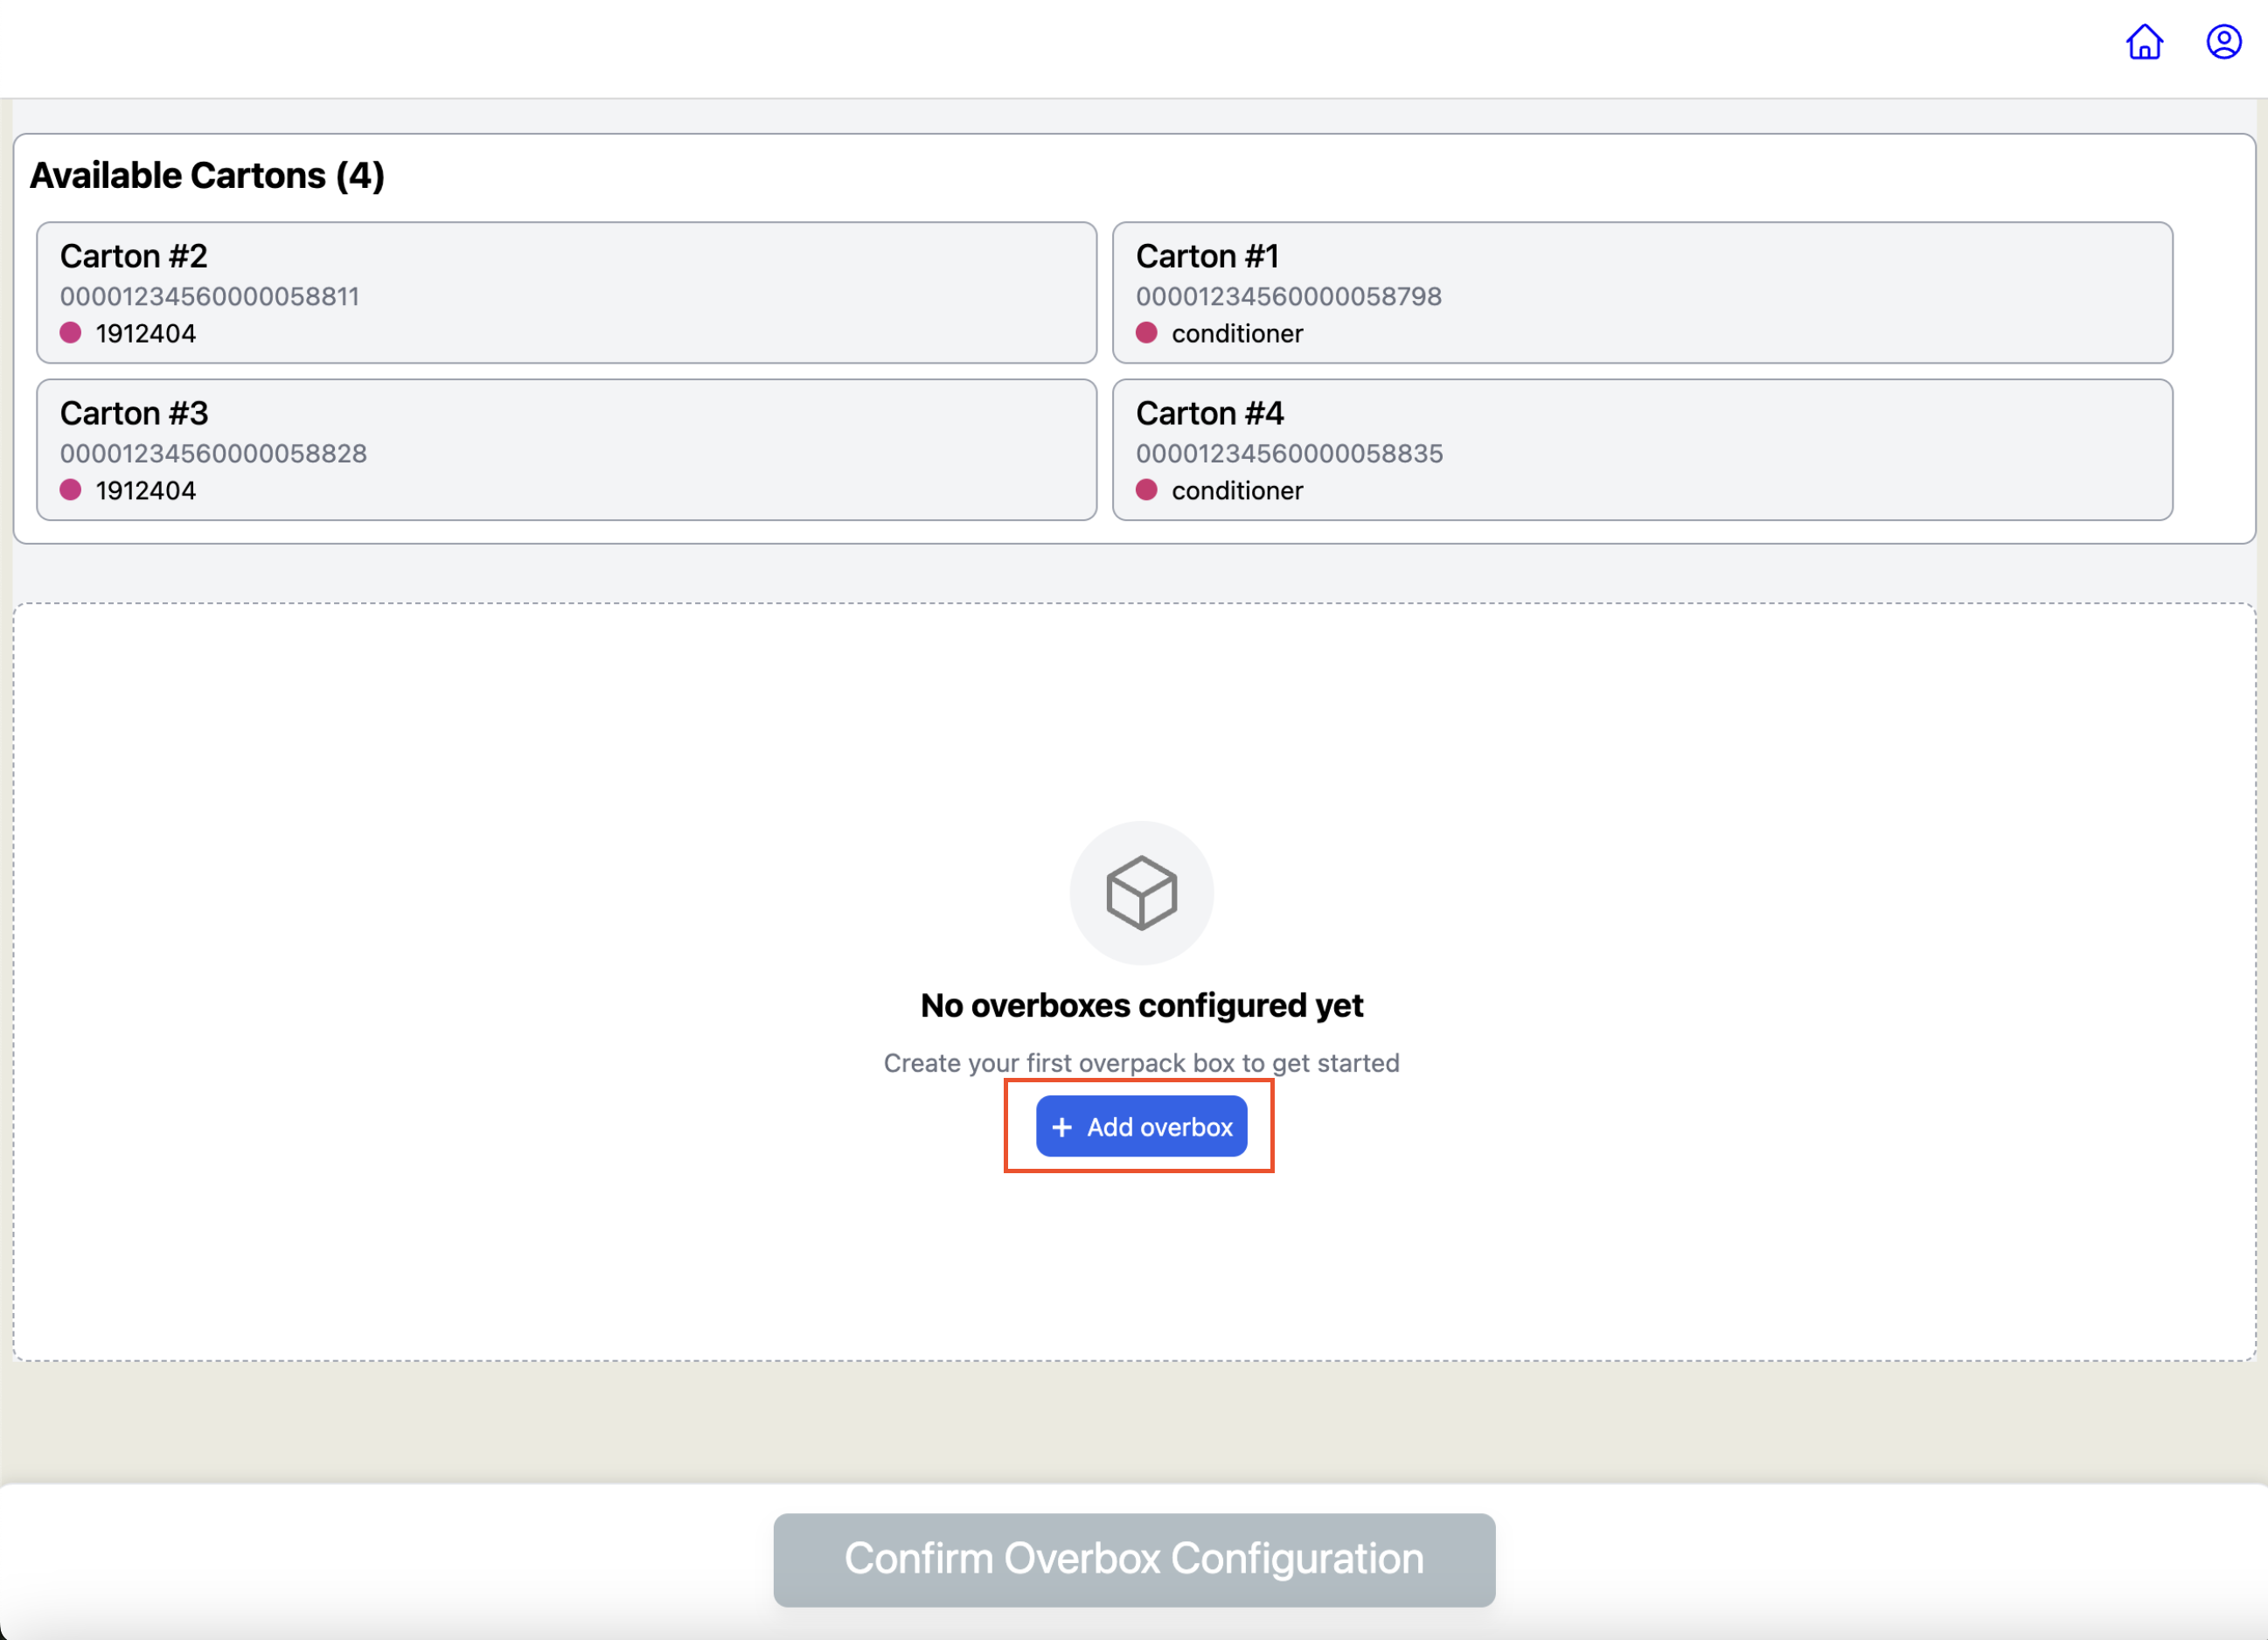
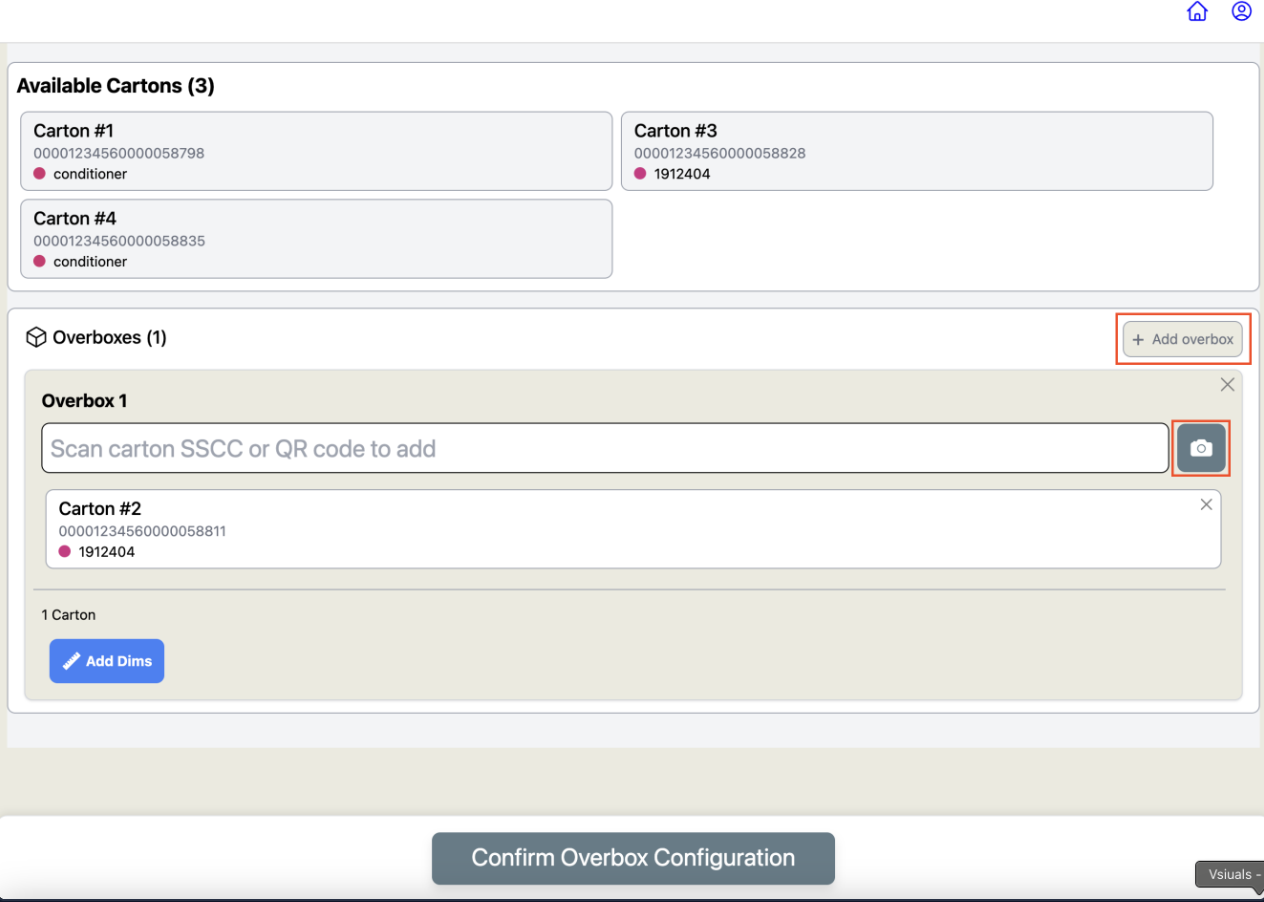
If 'Yes' is selected, you will now see your available Cartons to put into an Overbox. Click 'Add overbox' to start creating your Overbox.
Enter the Information for the Cartons you'd like to add to the Overbox by scanning the SSCC of the carton (or UPC of cartons if the retailer does not require case labels).
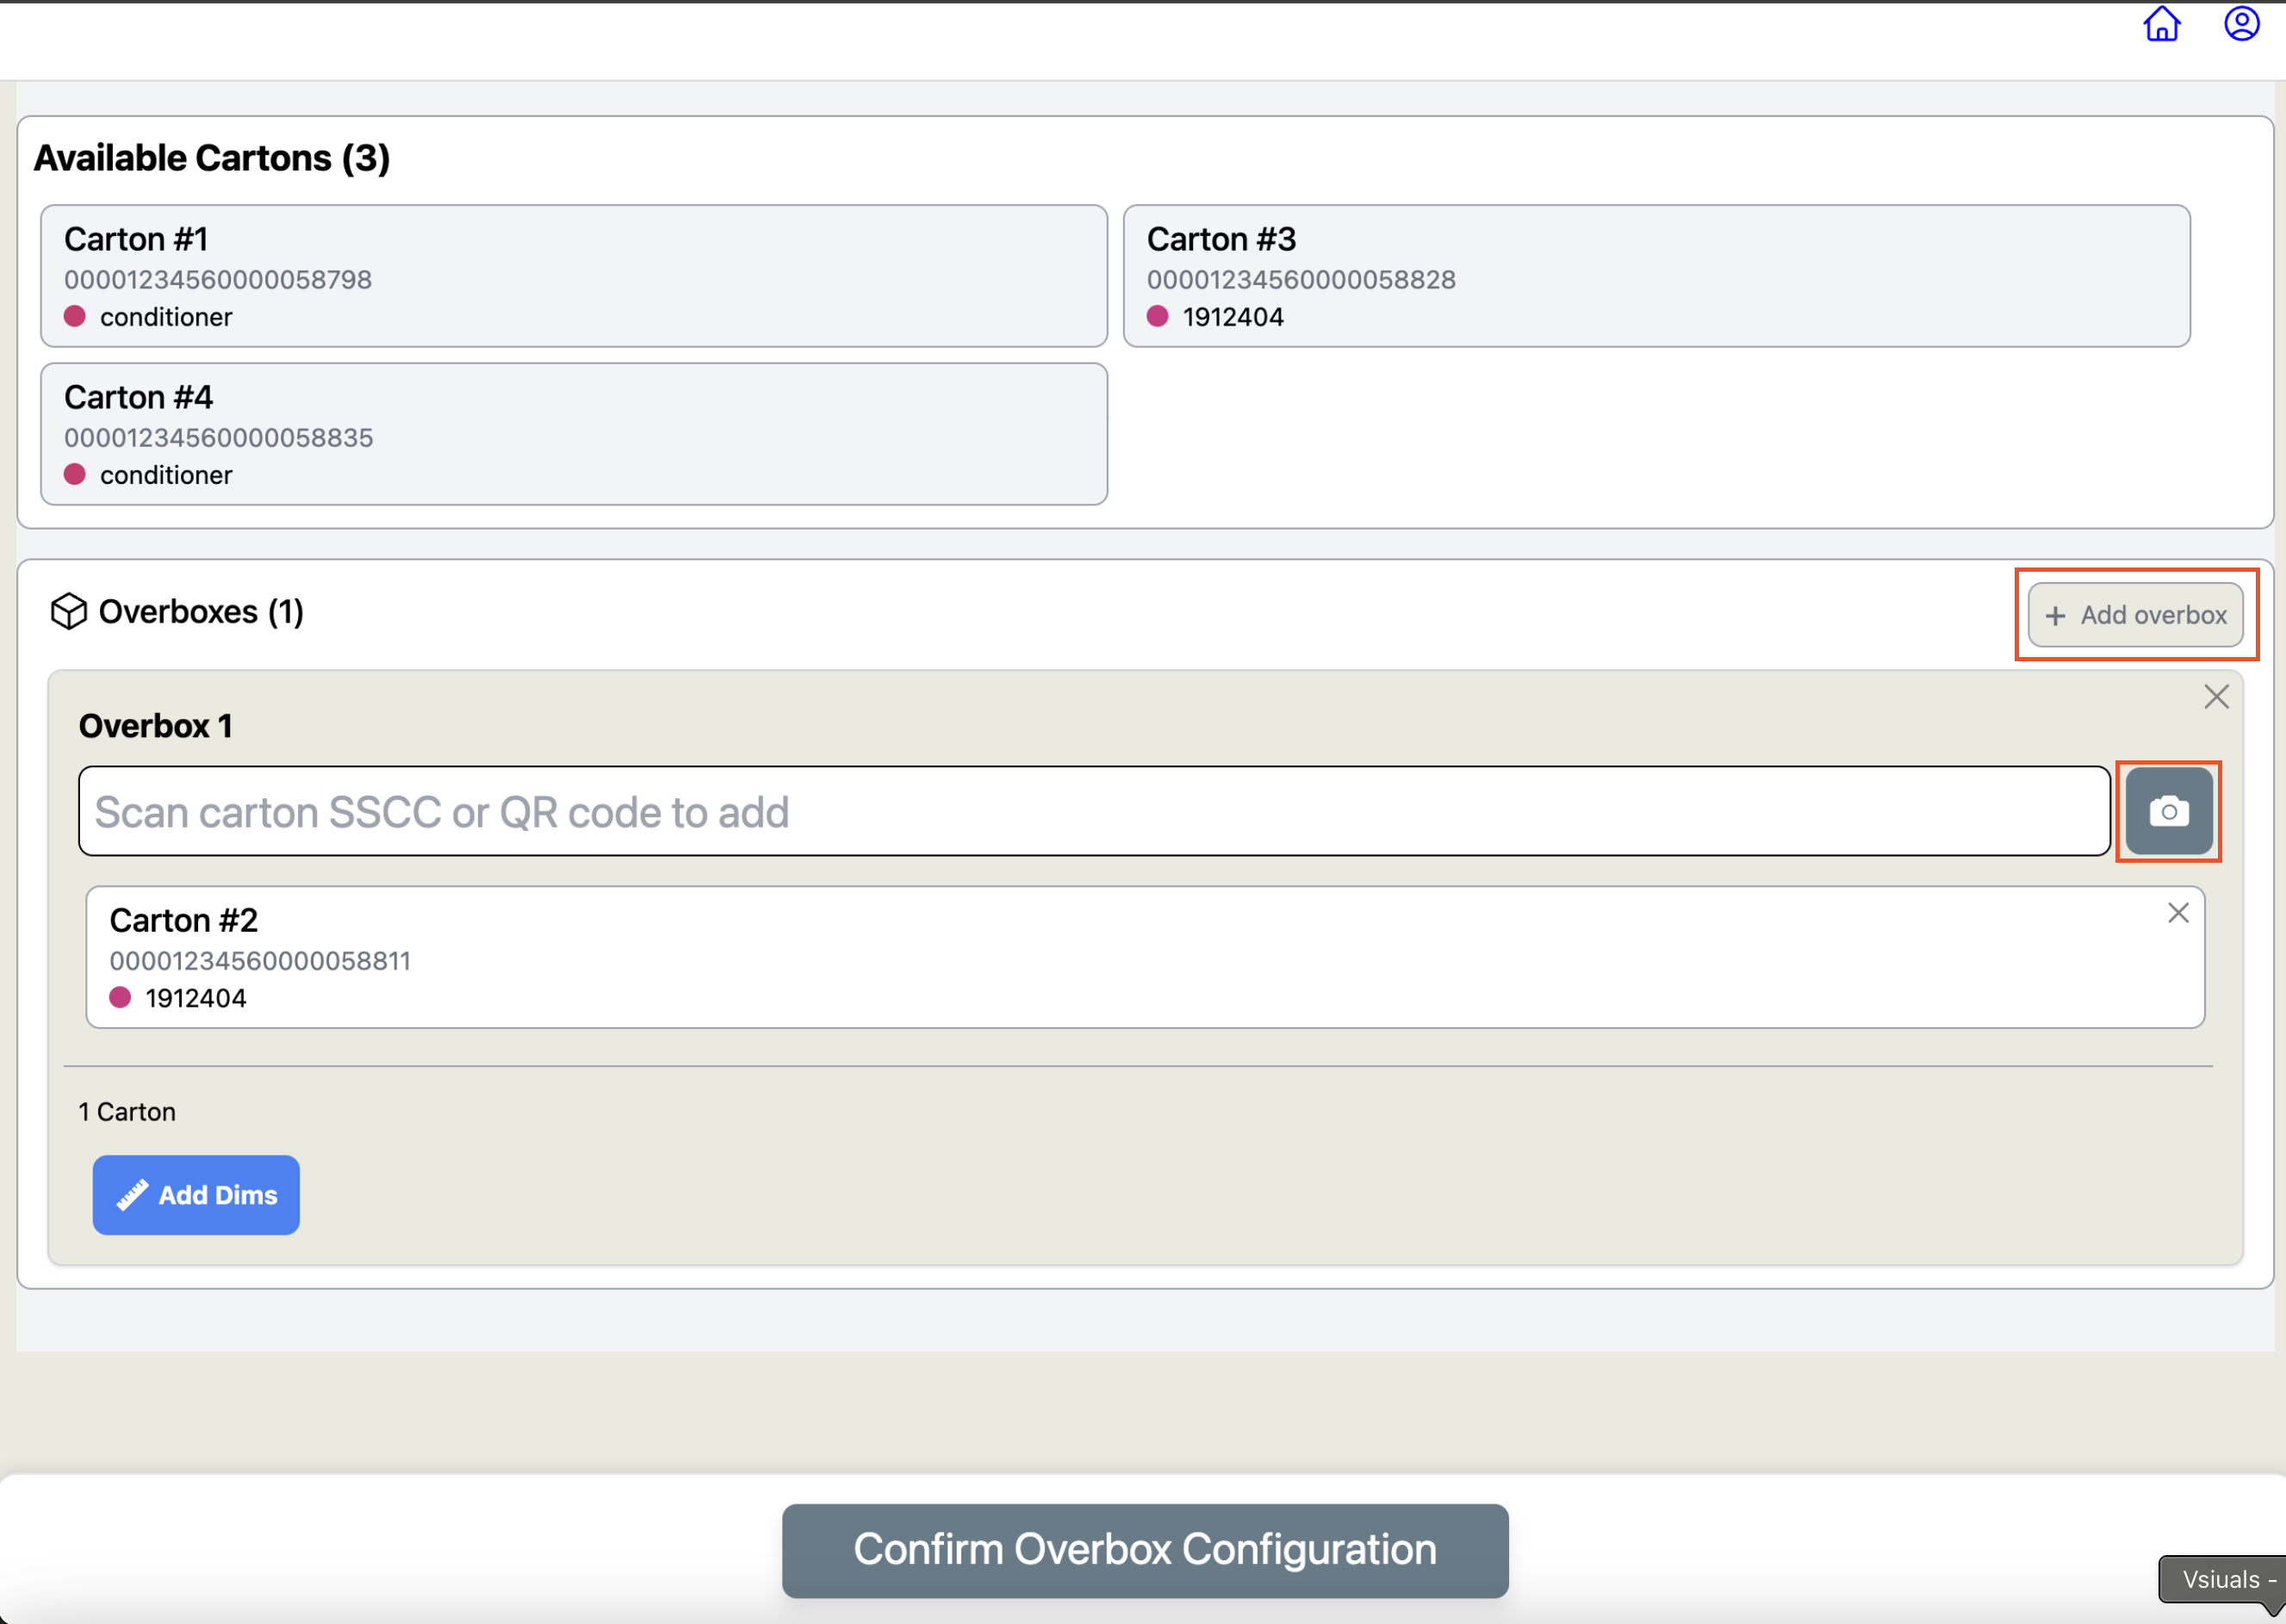
Before navigating to the next step, be sure to click 'Add Dims' to include packing dimensions for each Overbox.
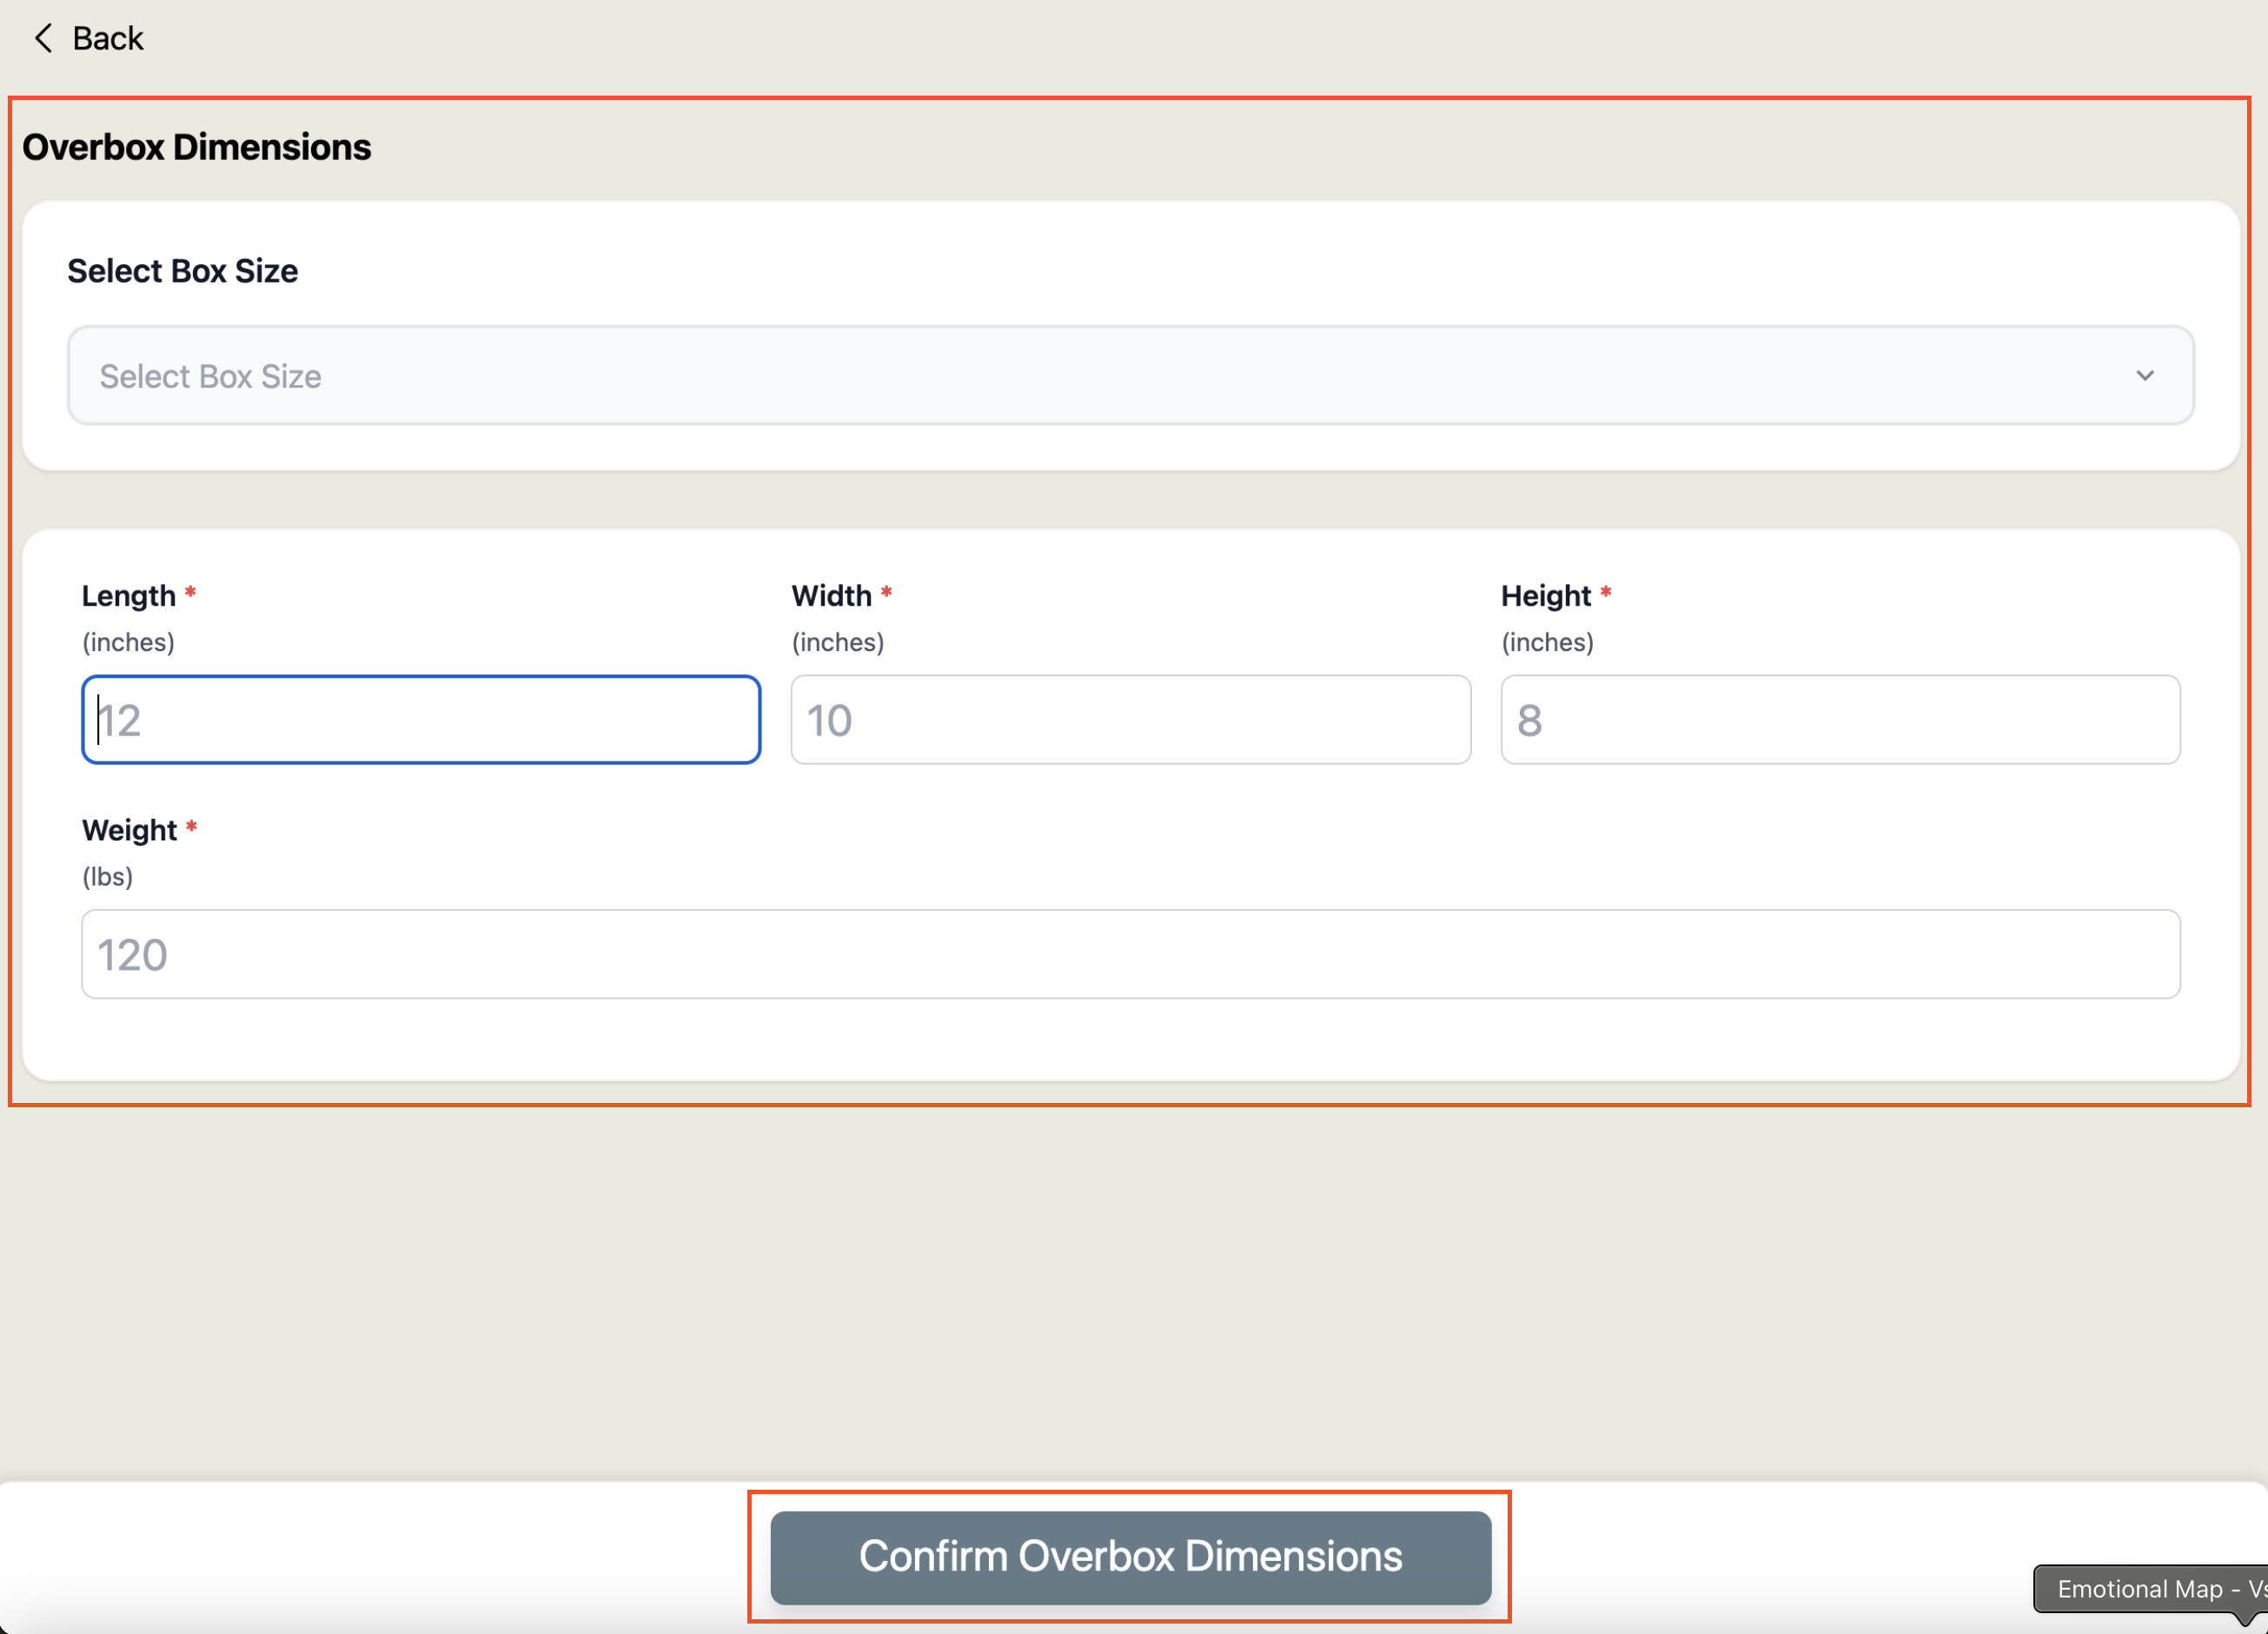
Enter dimensions and click 'Confirm Overbox Dimensions'.
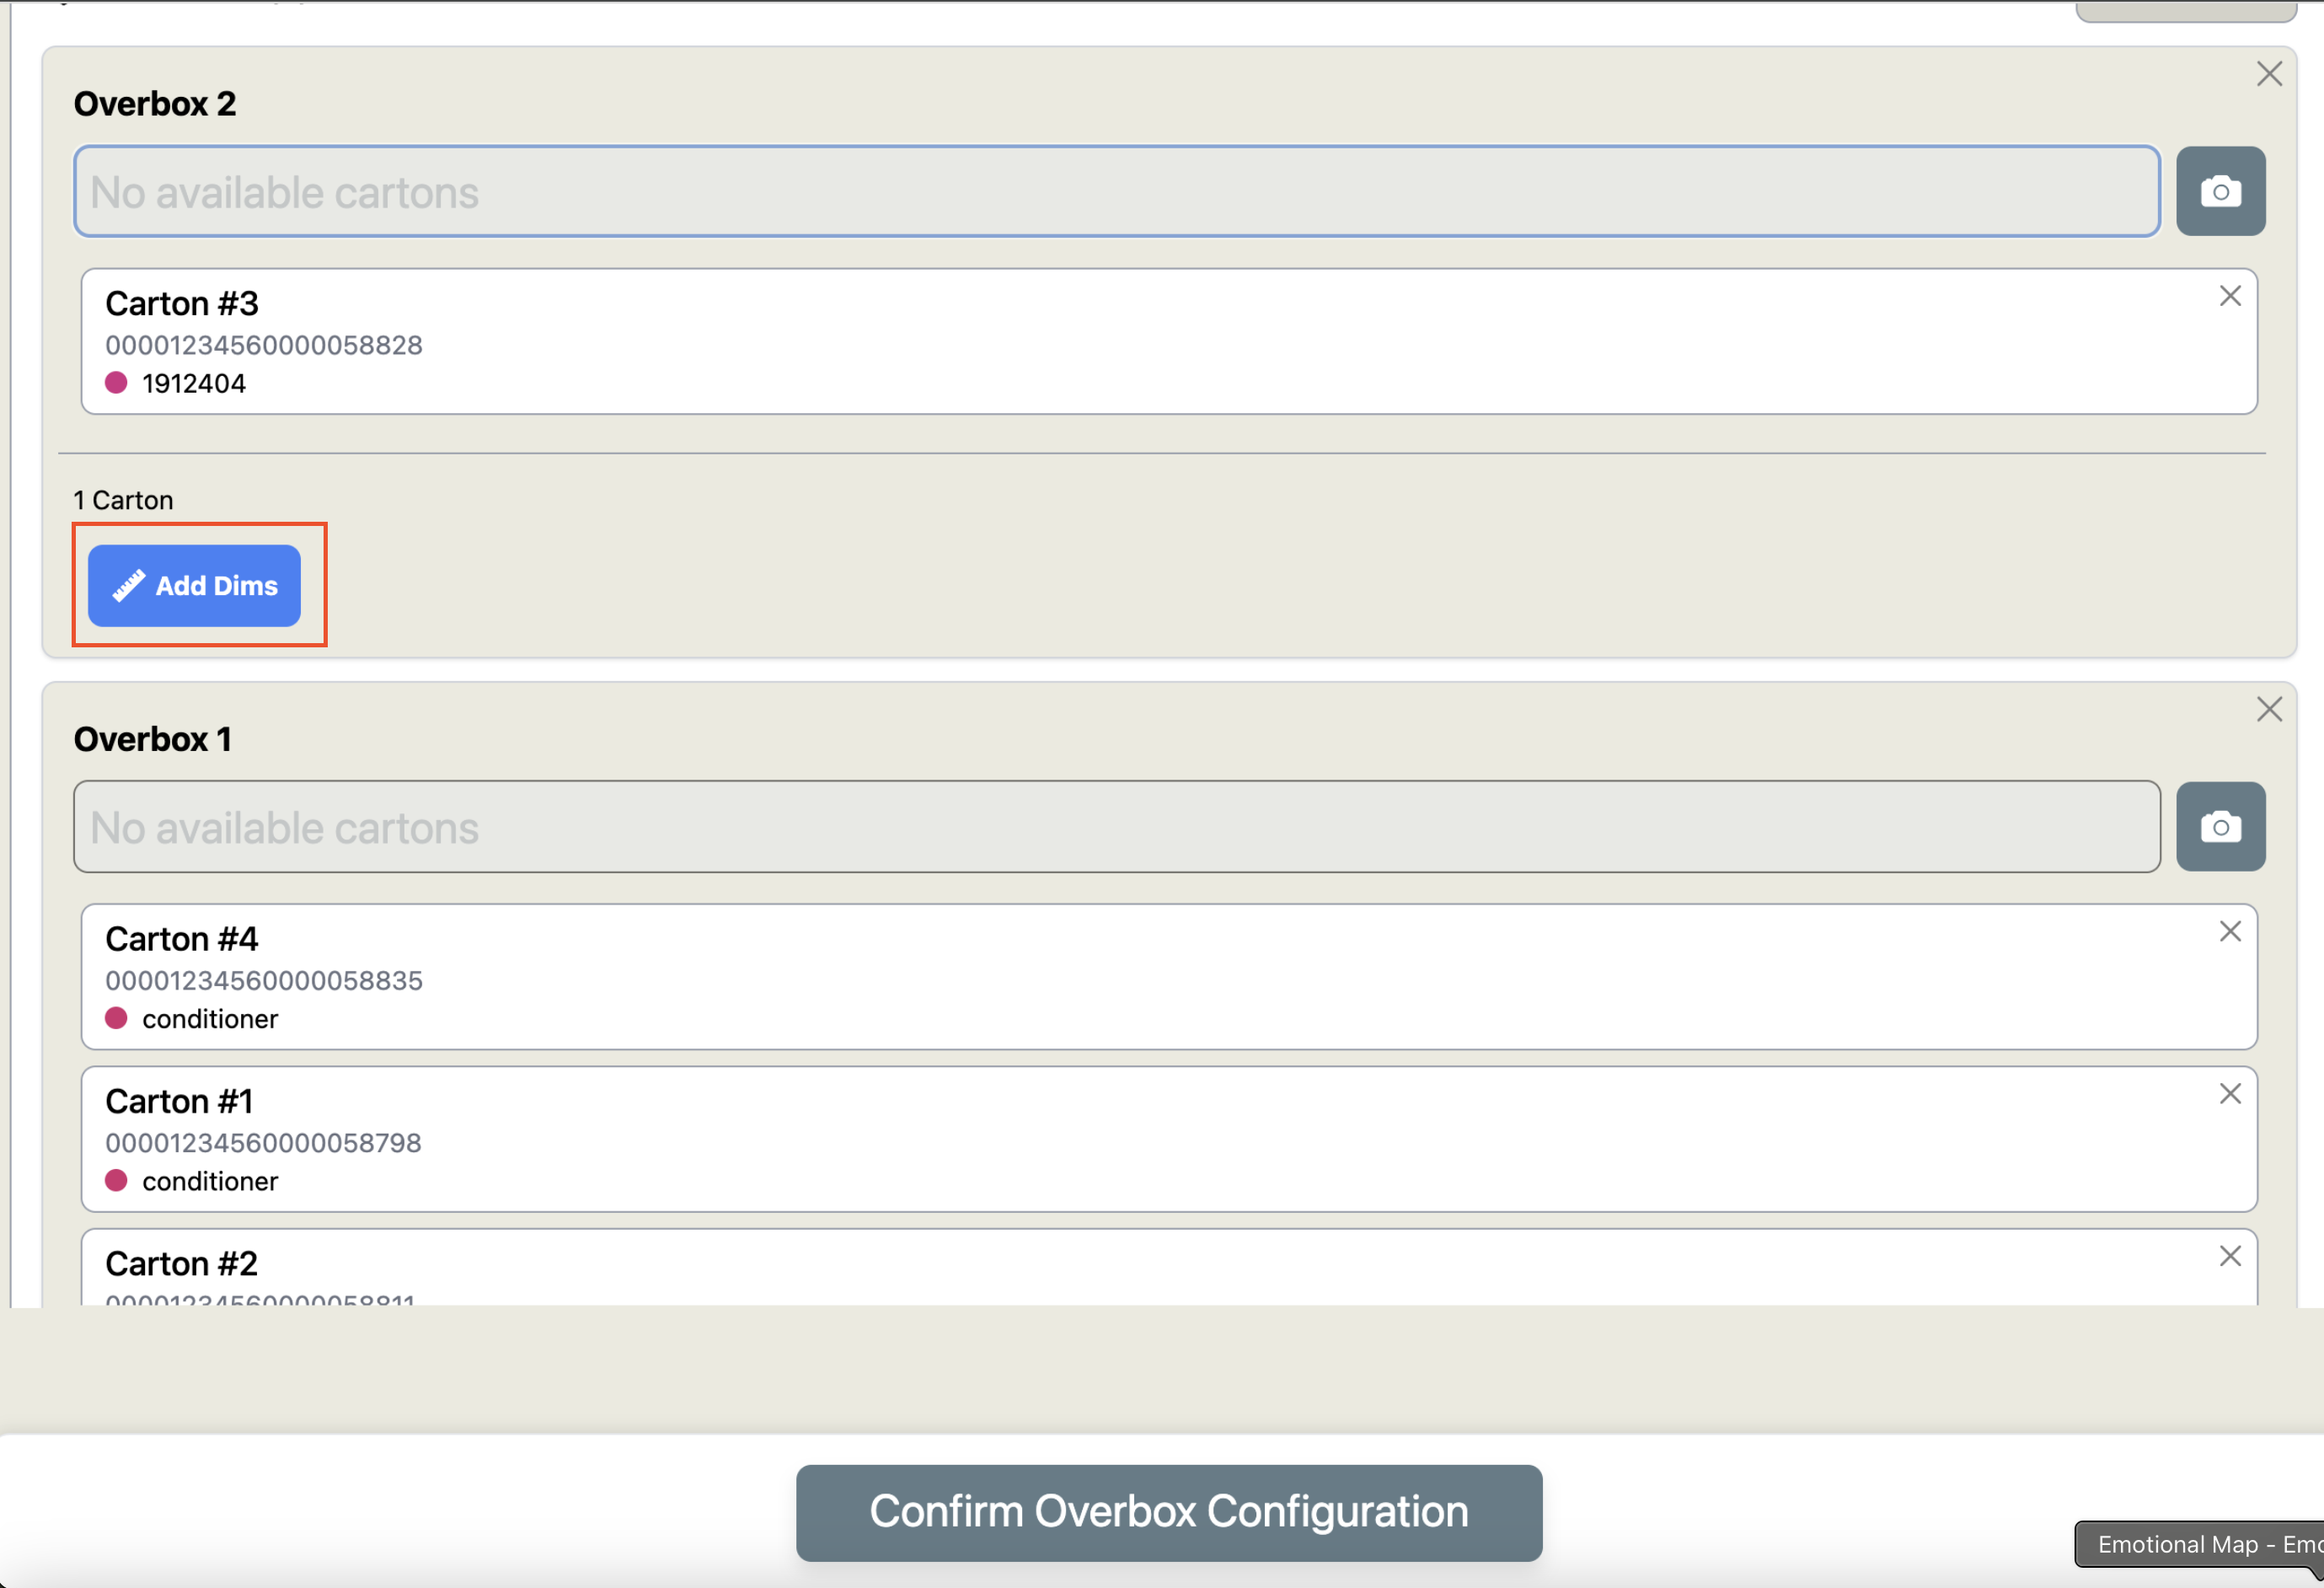
If you'd like to split the Cartons across multiple Overboxes, select 'Add overbox' in the right hand corner. You can add as many Overboxes as needed, following Steps 4-6.
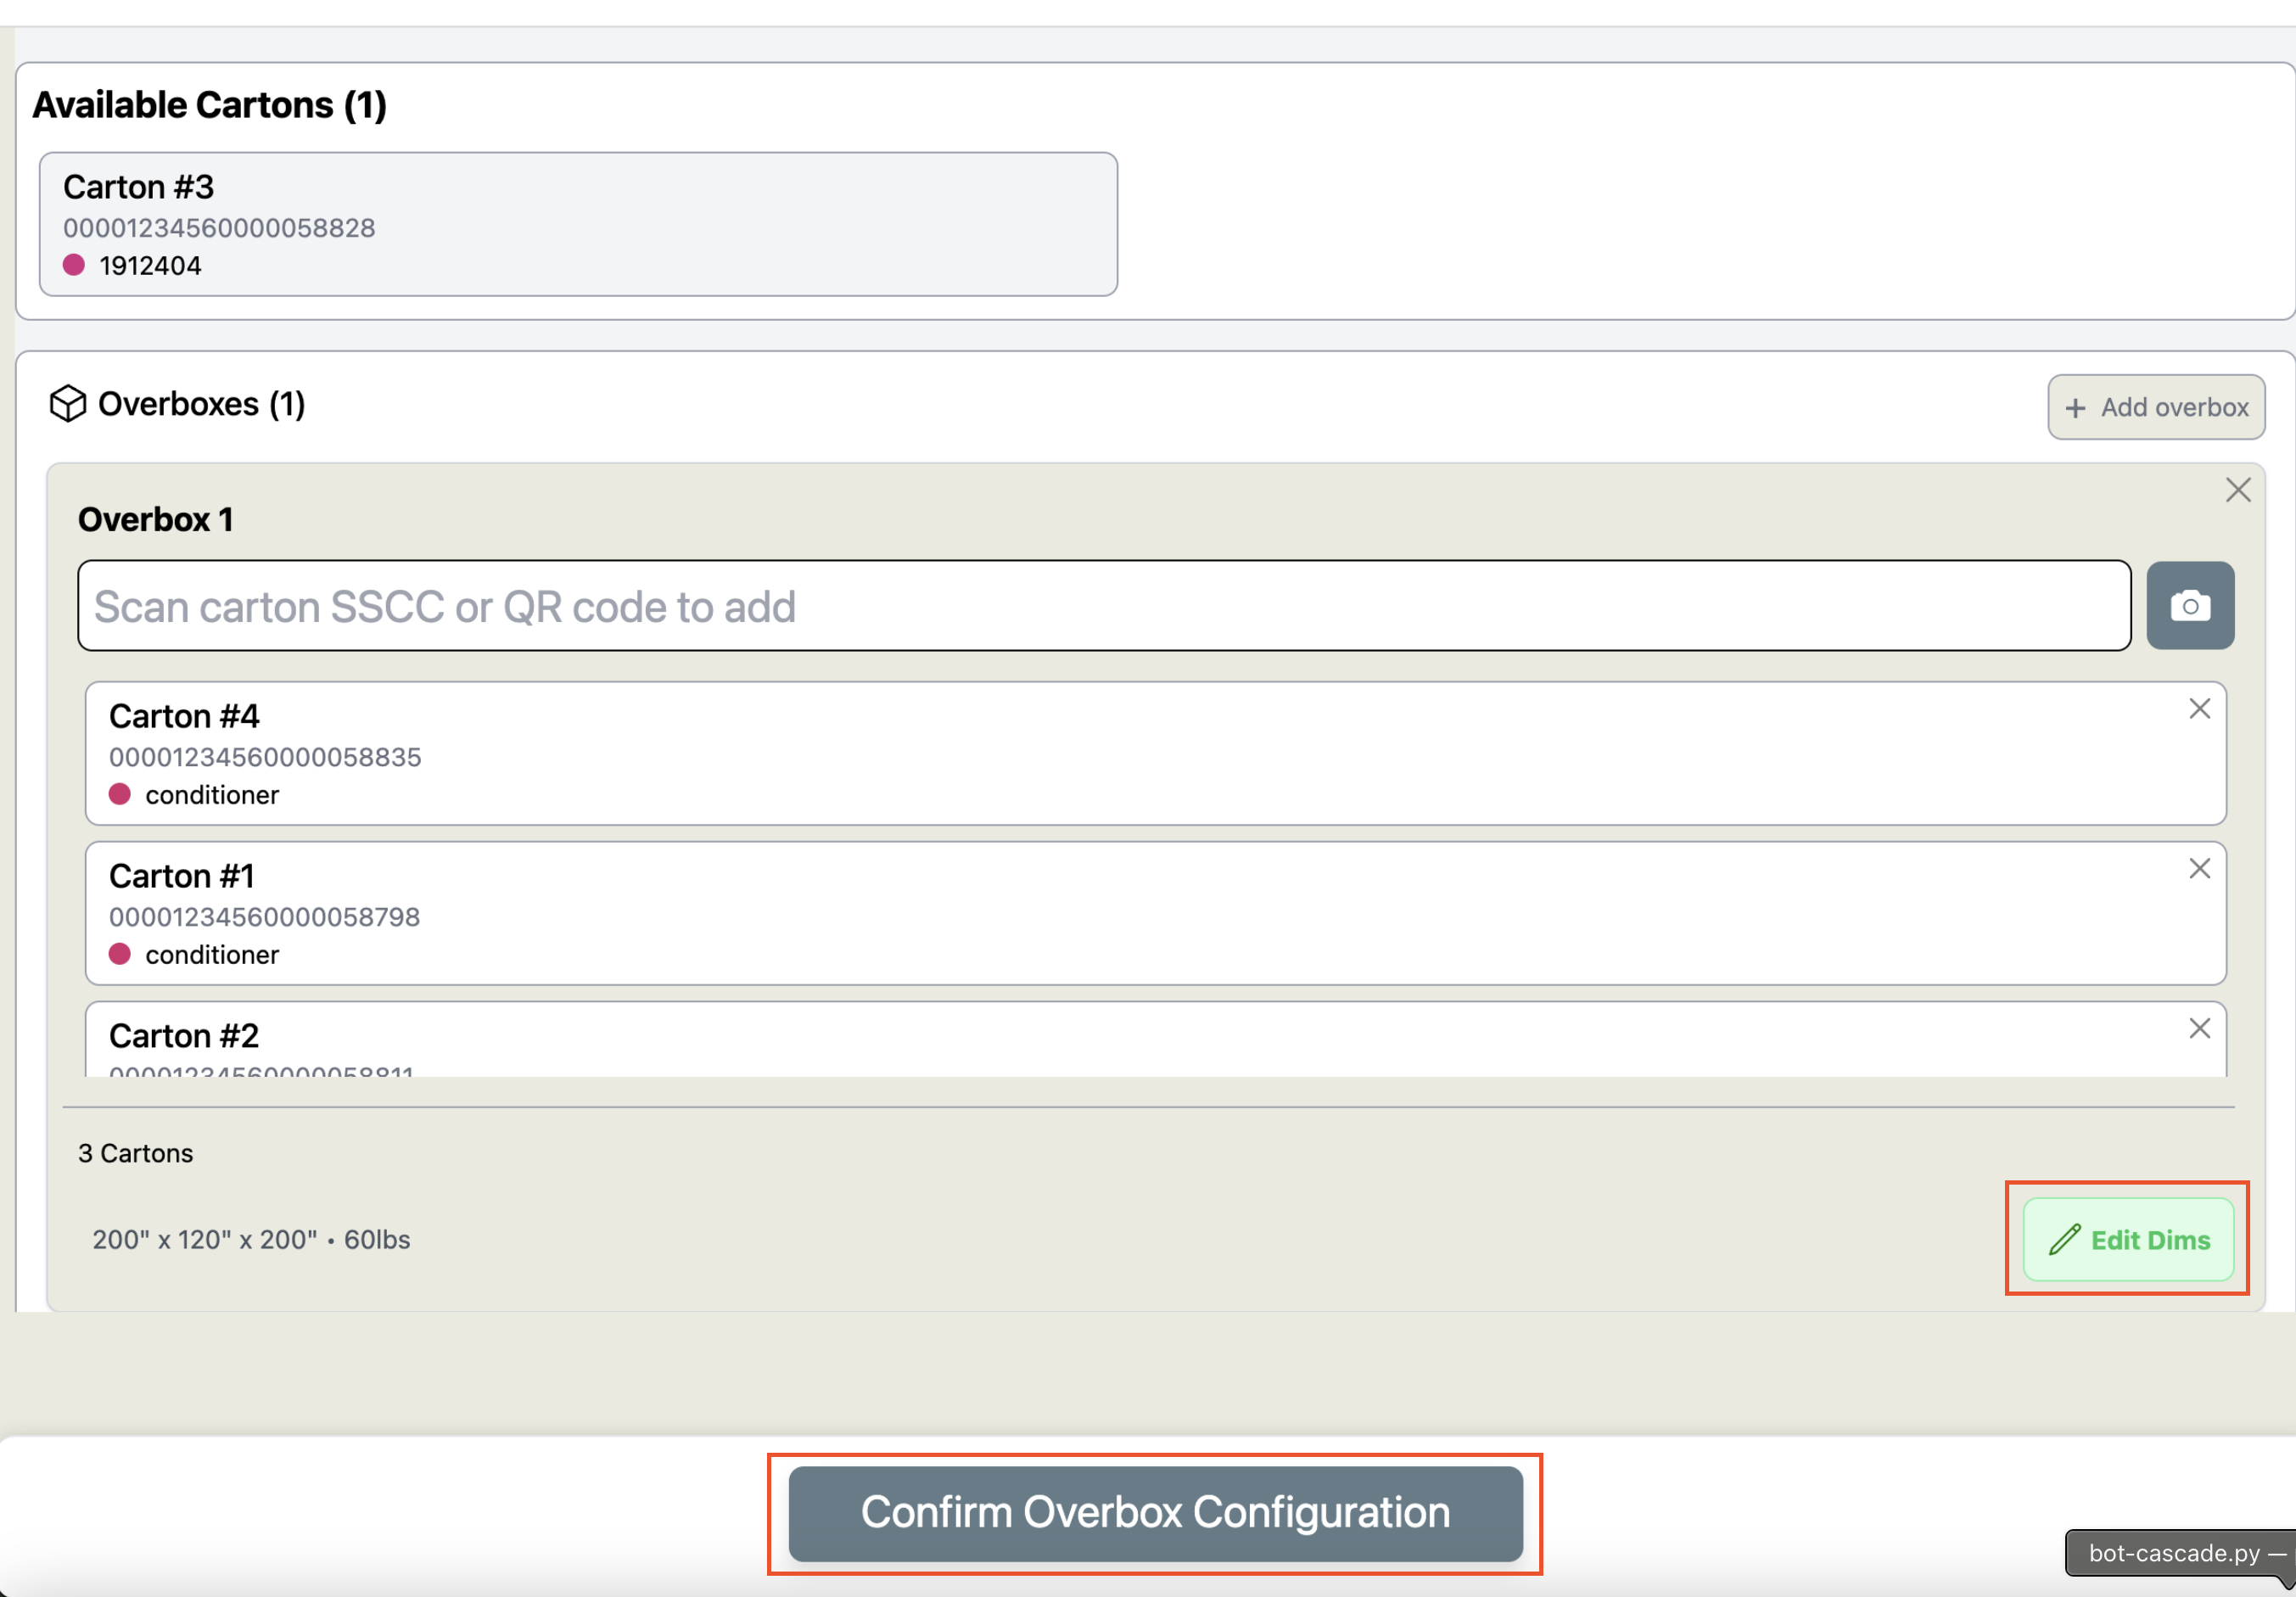
You can use the 'Edit Dims' button in the bottom right to adjust any Overbox dimensions. Select 'Confirm Overbox Configuration' once Carton and dimension configuration is complete.
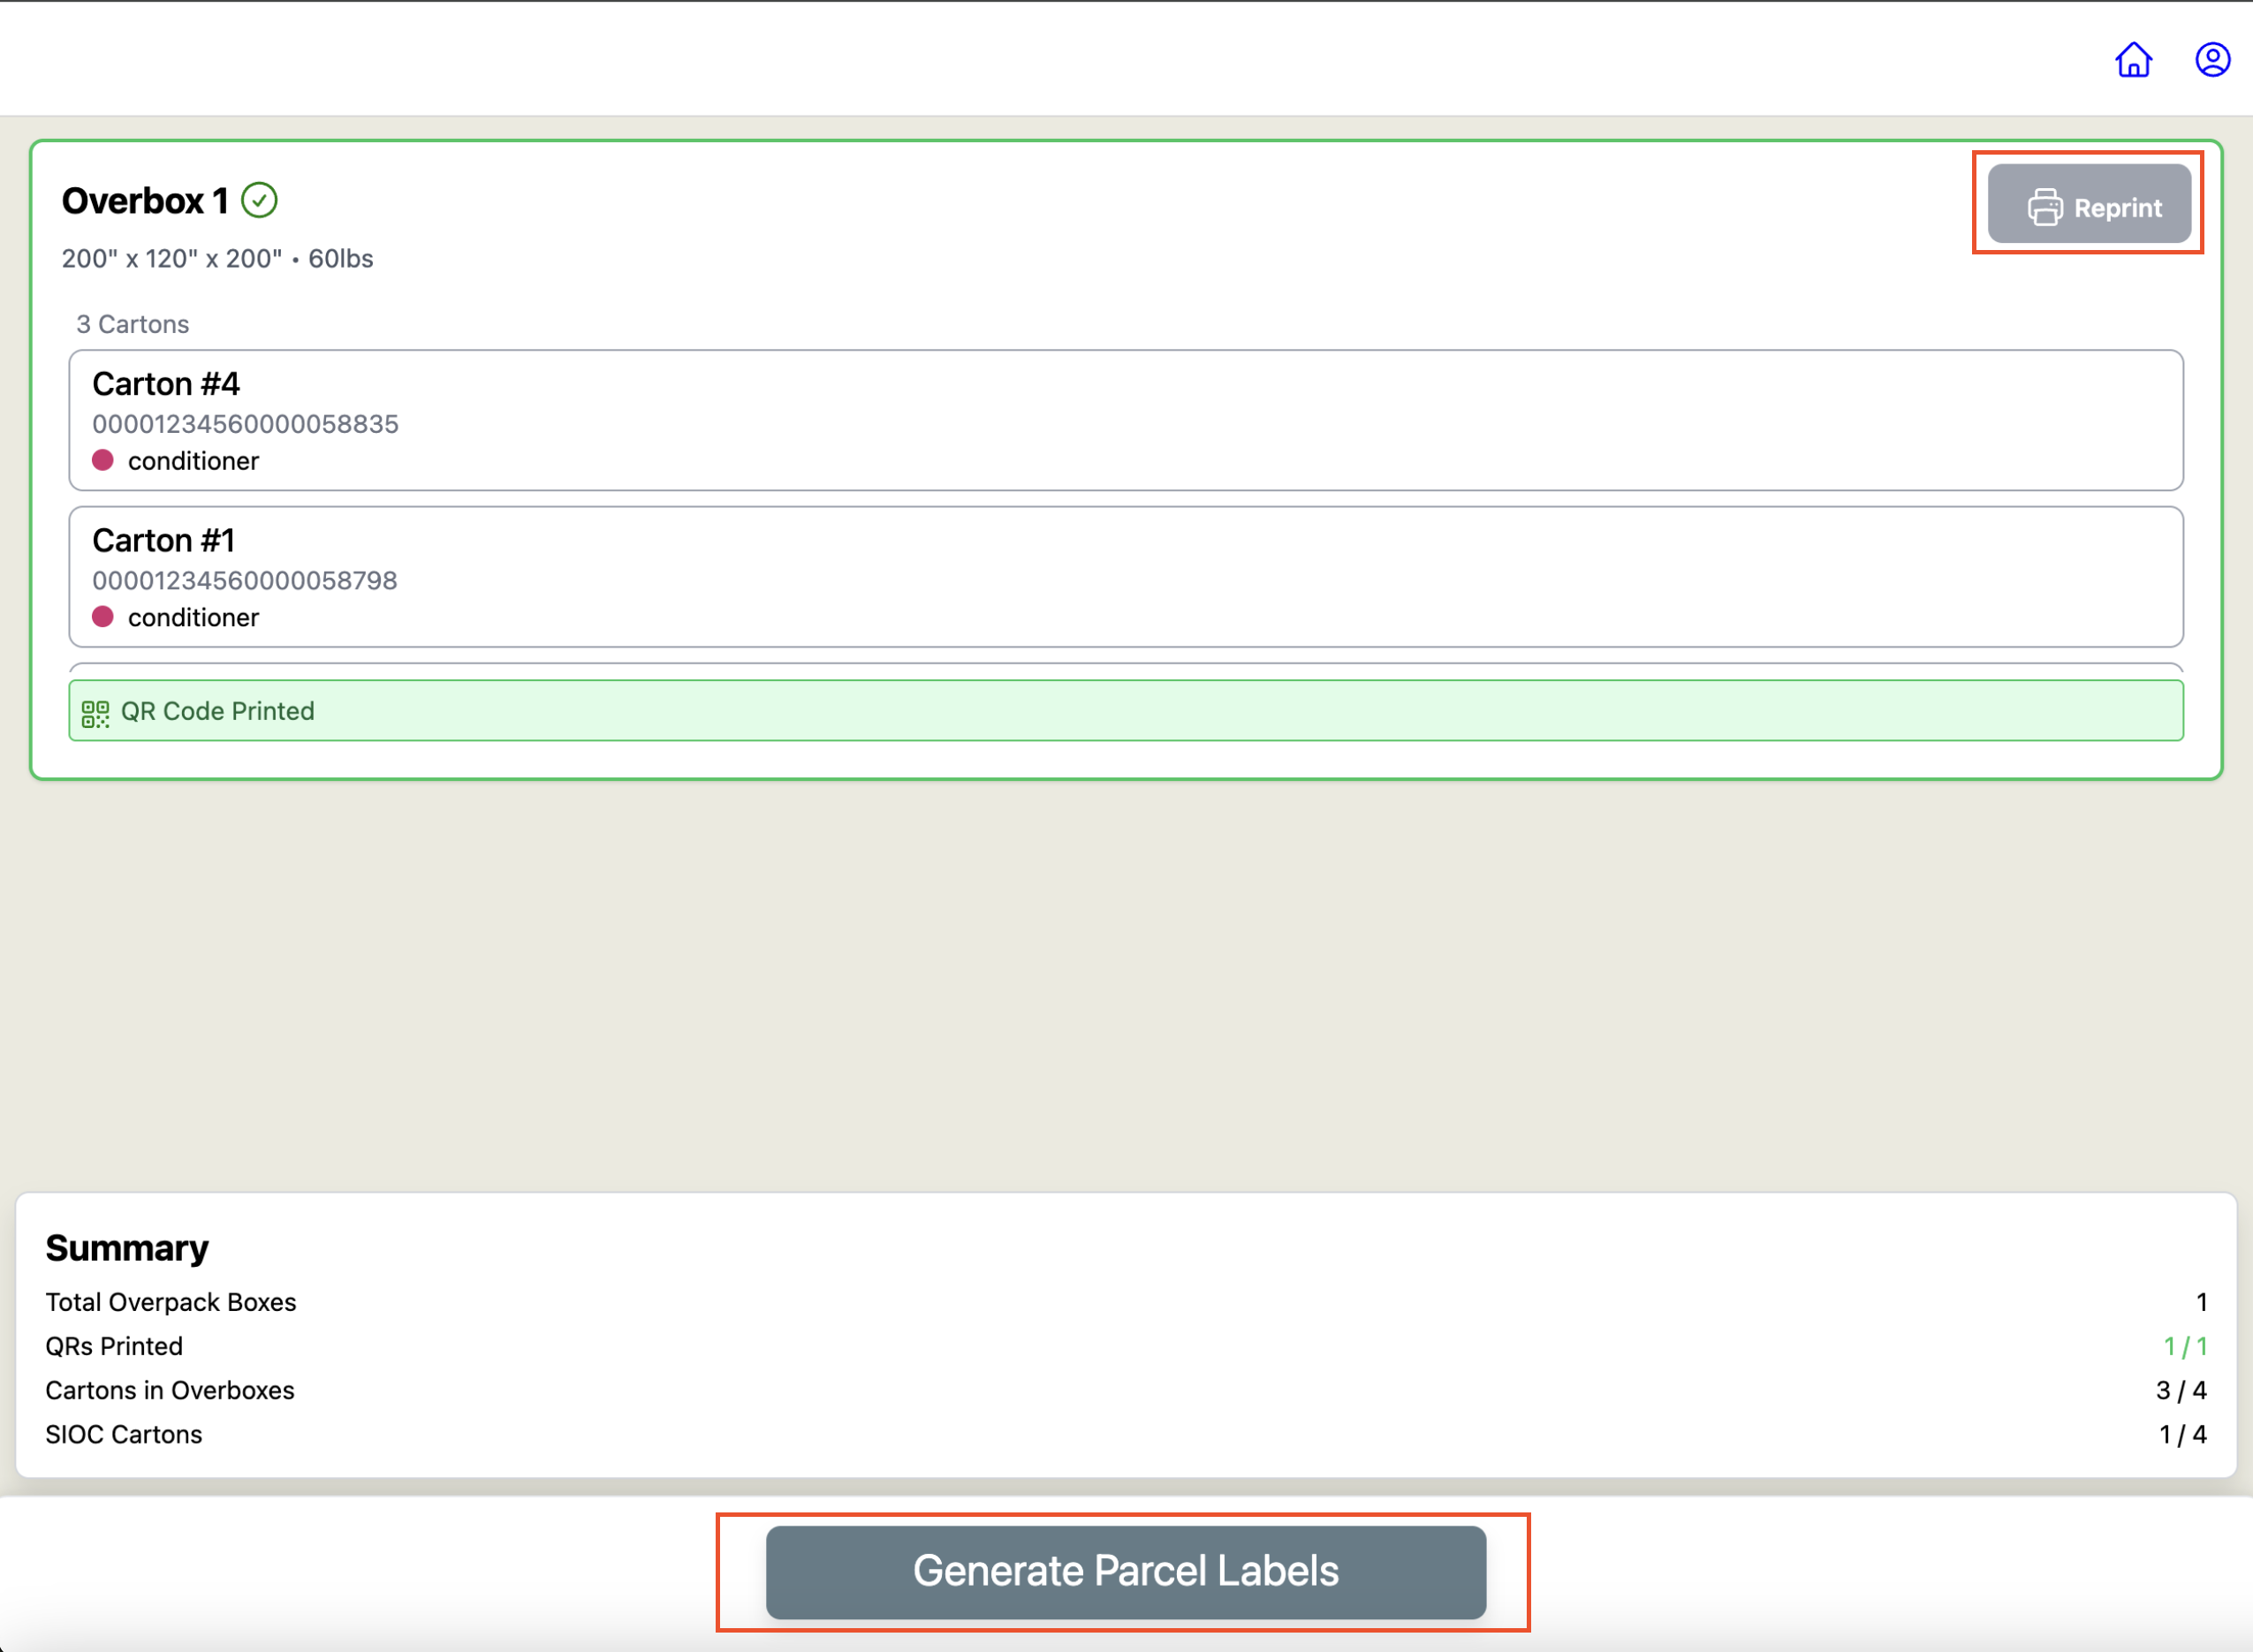
Select 'Print QR' from the right hand corner to get the Overbox QR code. Once printed, a green border will appear.

Once all Overbox QR codes are printed, proceed to generate parcel labels.
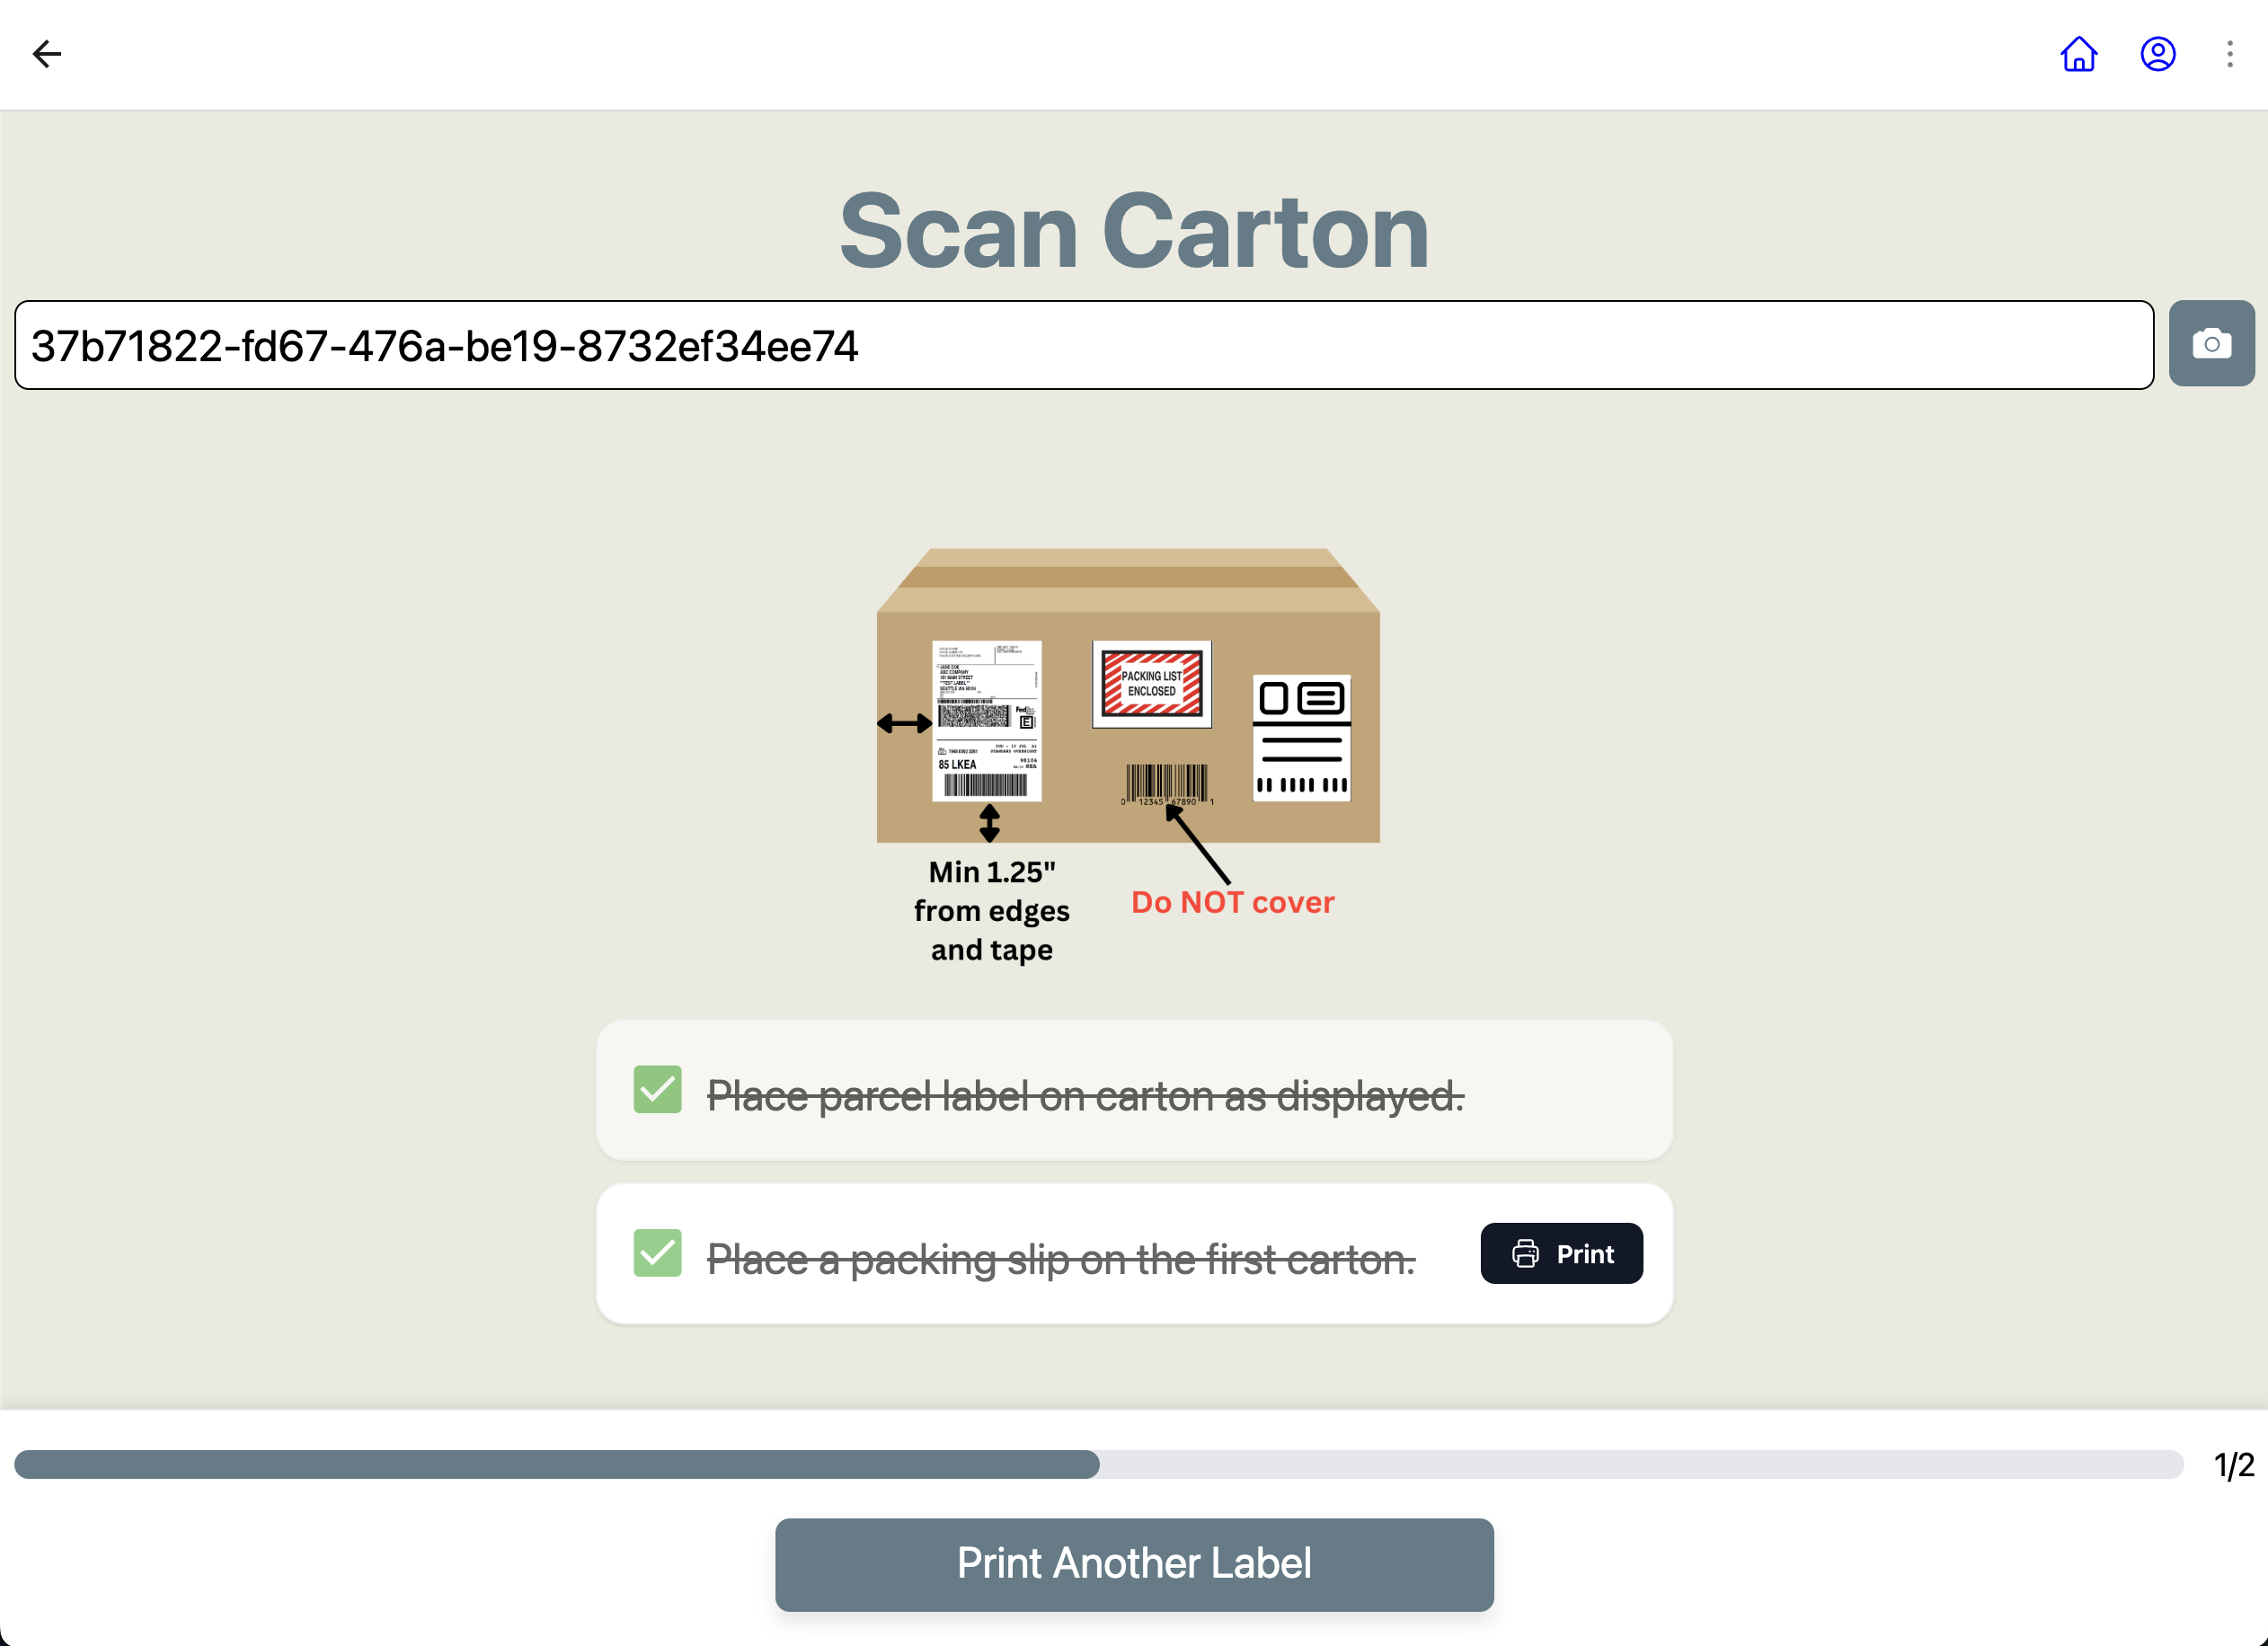
Place the parcel label as directed on the Overbox. If there were any Cartons leftover to ship in own container (SIOC) it will print out the parcel label for those as well.
FAQs:
How do I Change the Overbox Configuration after Carton Labels have Printed?
If you get into a situation where you need to rearrange the consolidation of cartons into the Overboxes, a SuperAdmin can delete the created Overboxes.
Visit your Orders dashboard, and navigate to the Cartons Tab. To get here, select Orders from the left sidebar on the home screen and click on the order that contains the Overbox in question.
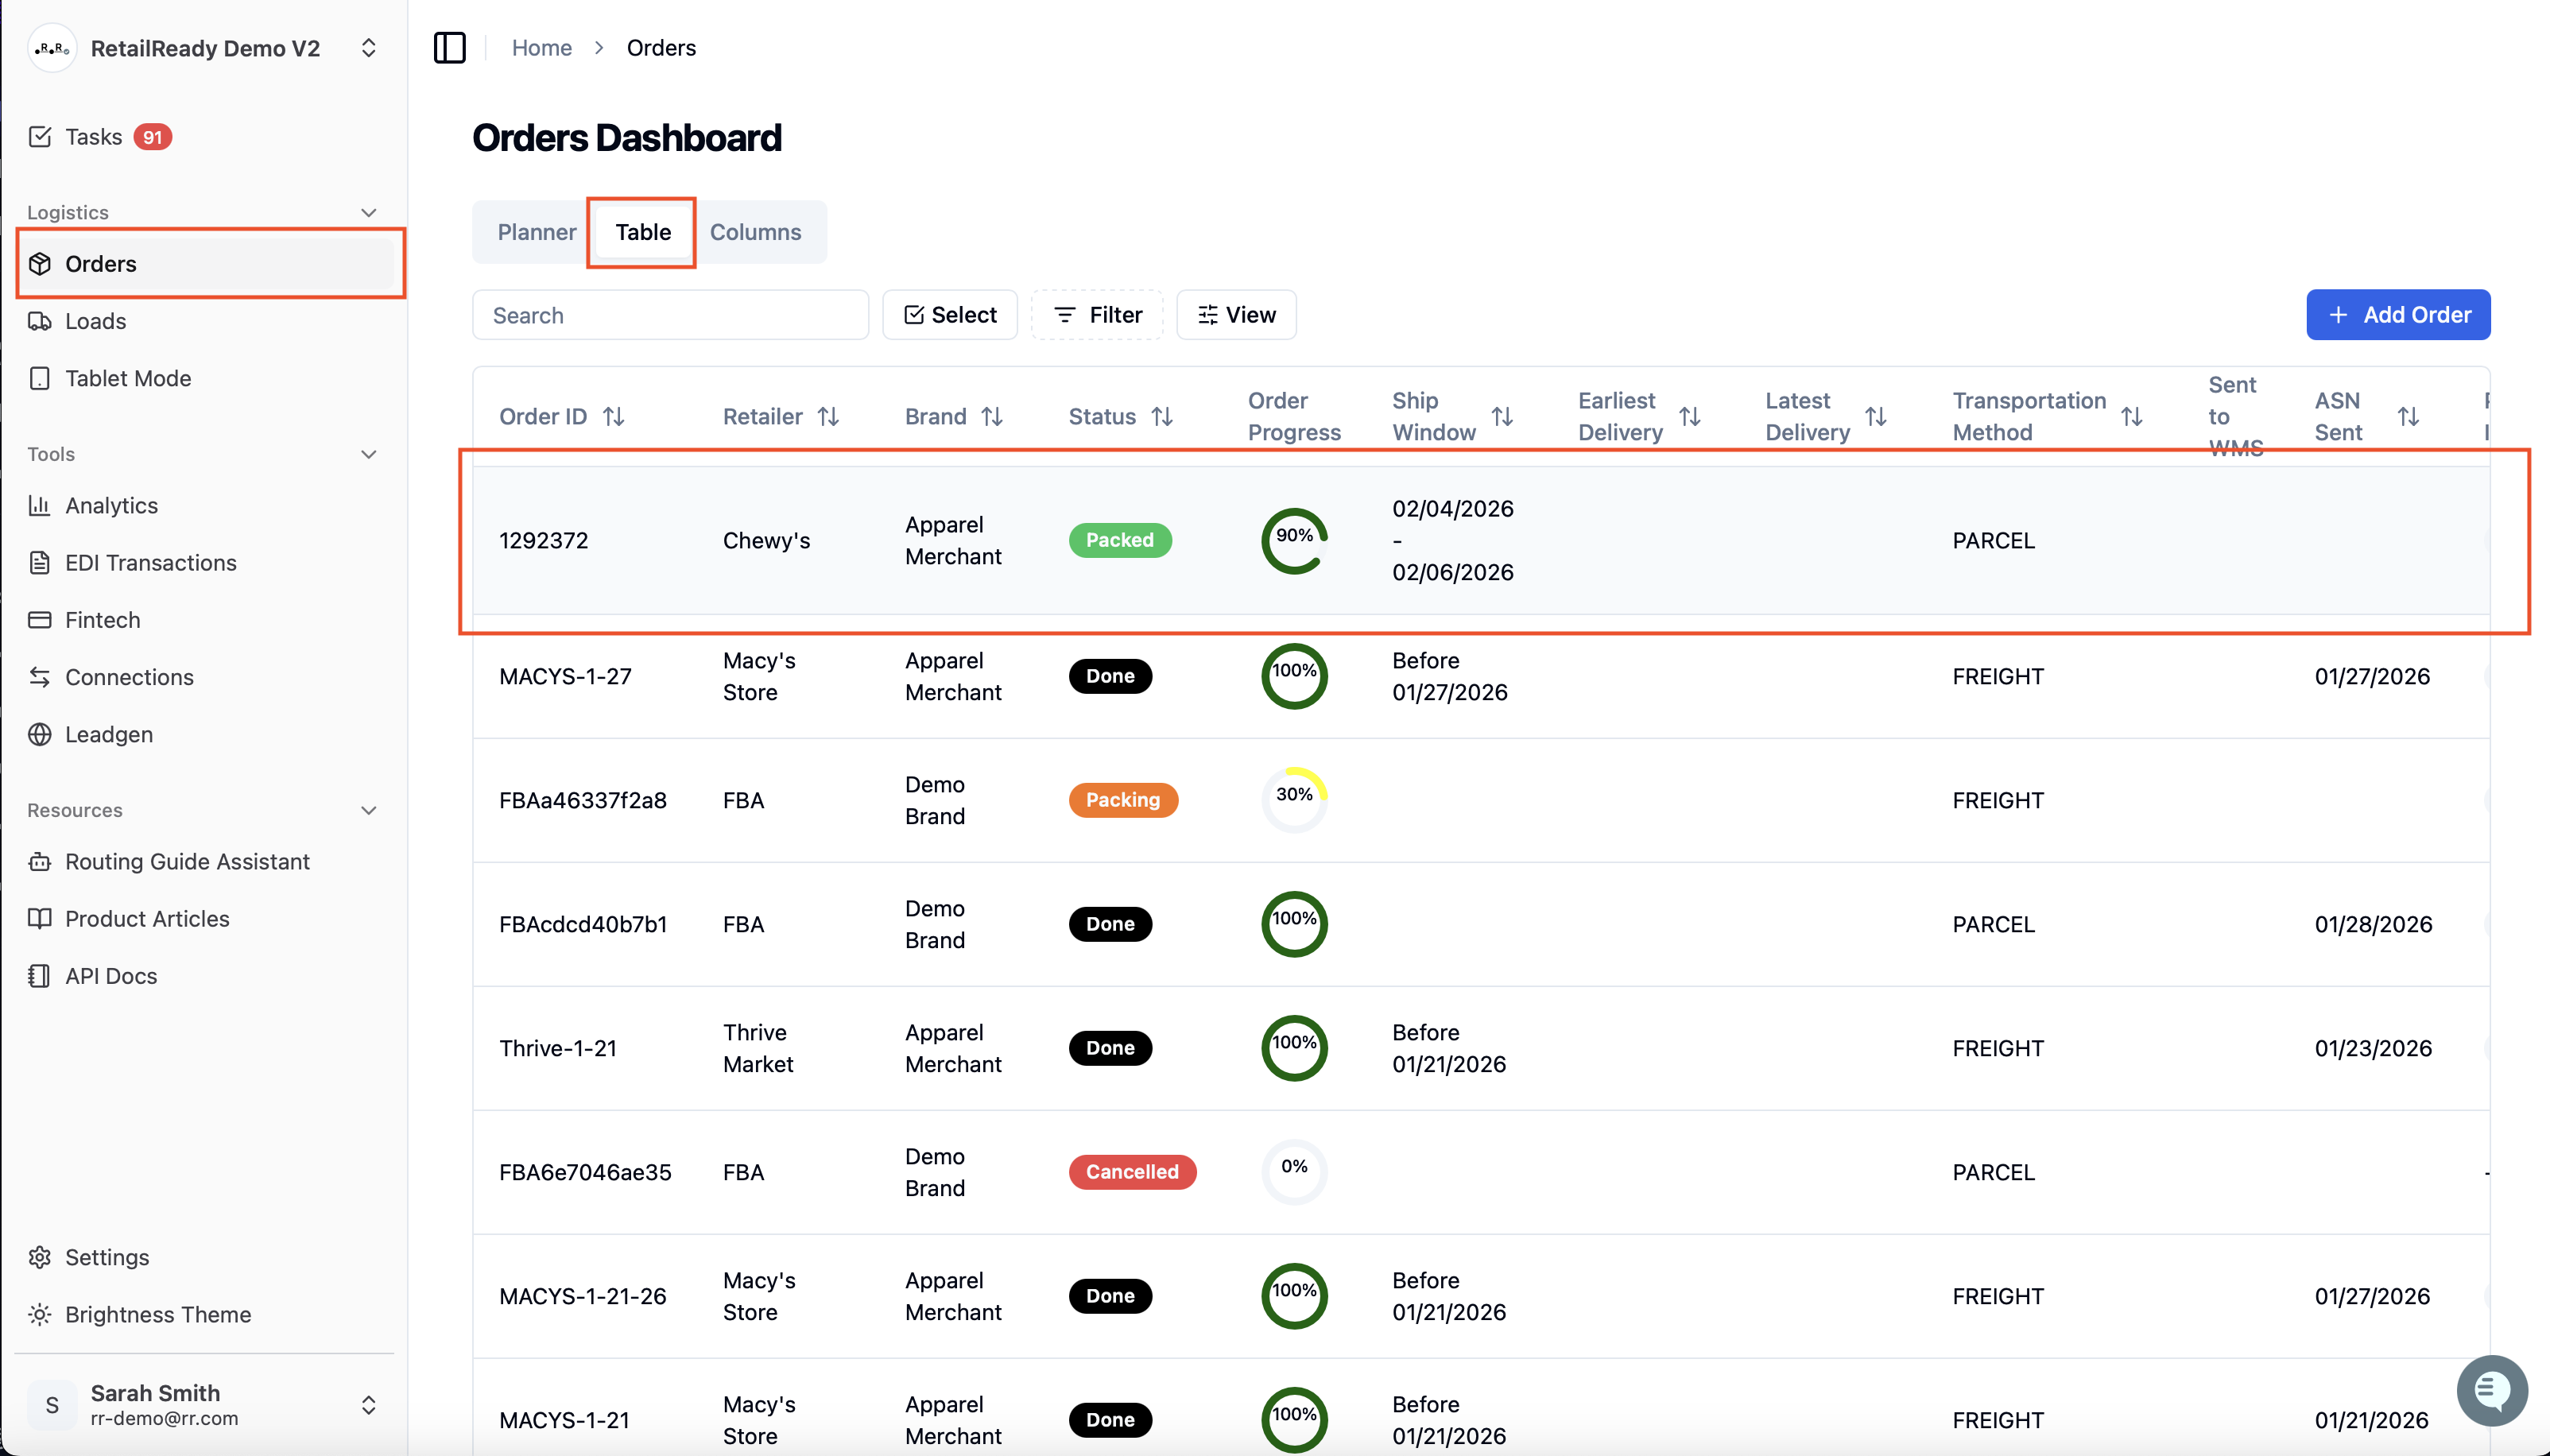
Once viewing the Cartons Tab on the Orders page, select the 3 dot menu in the right hand corner of the Overbox that you want to reconfigure.
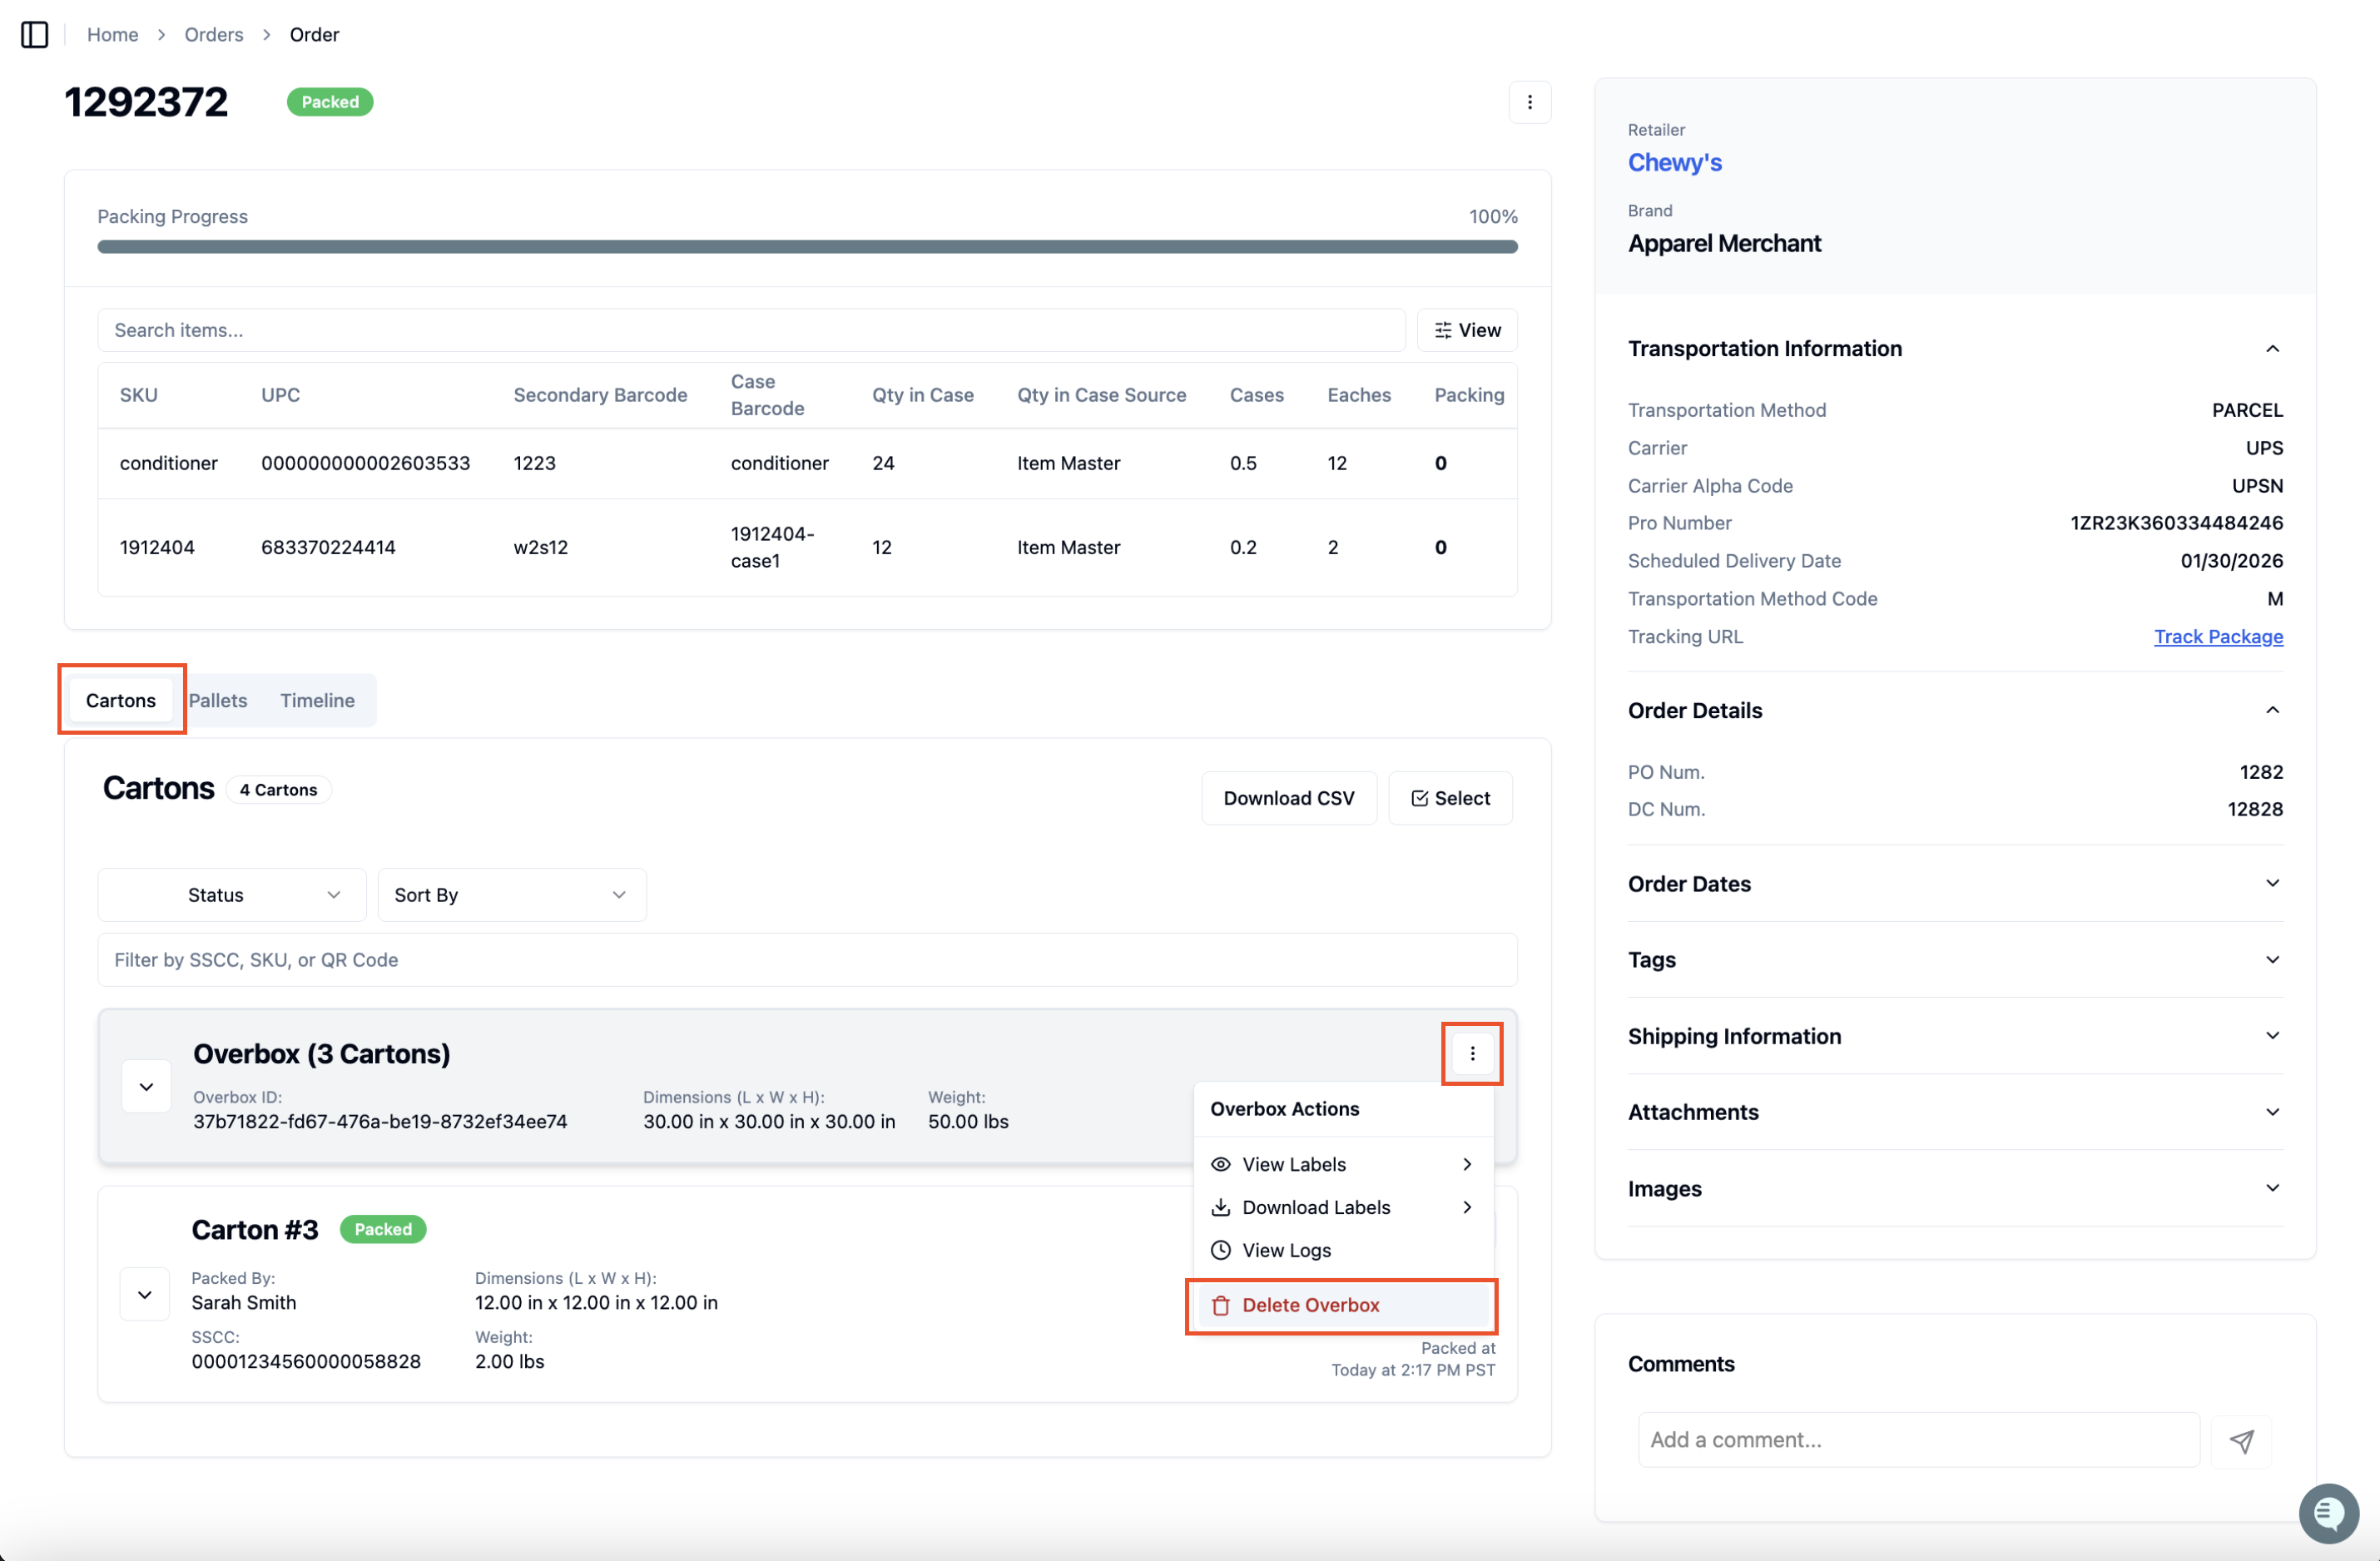
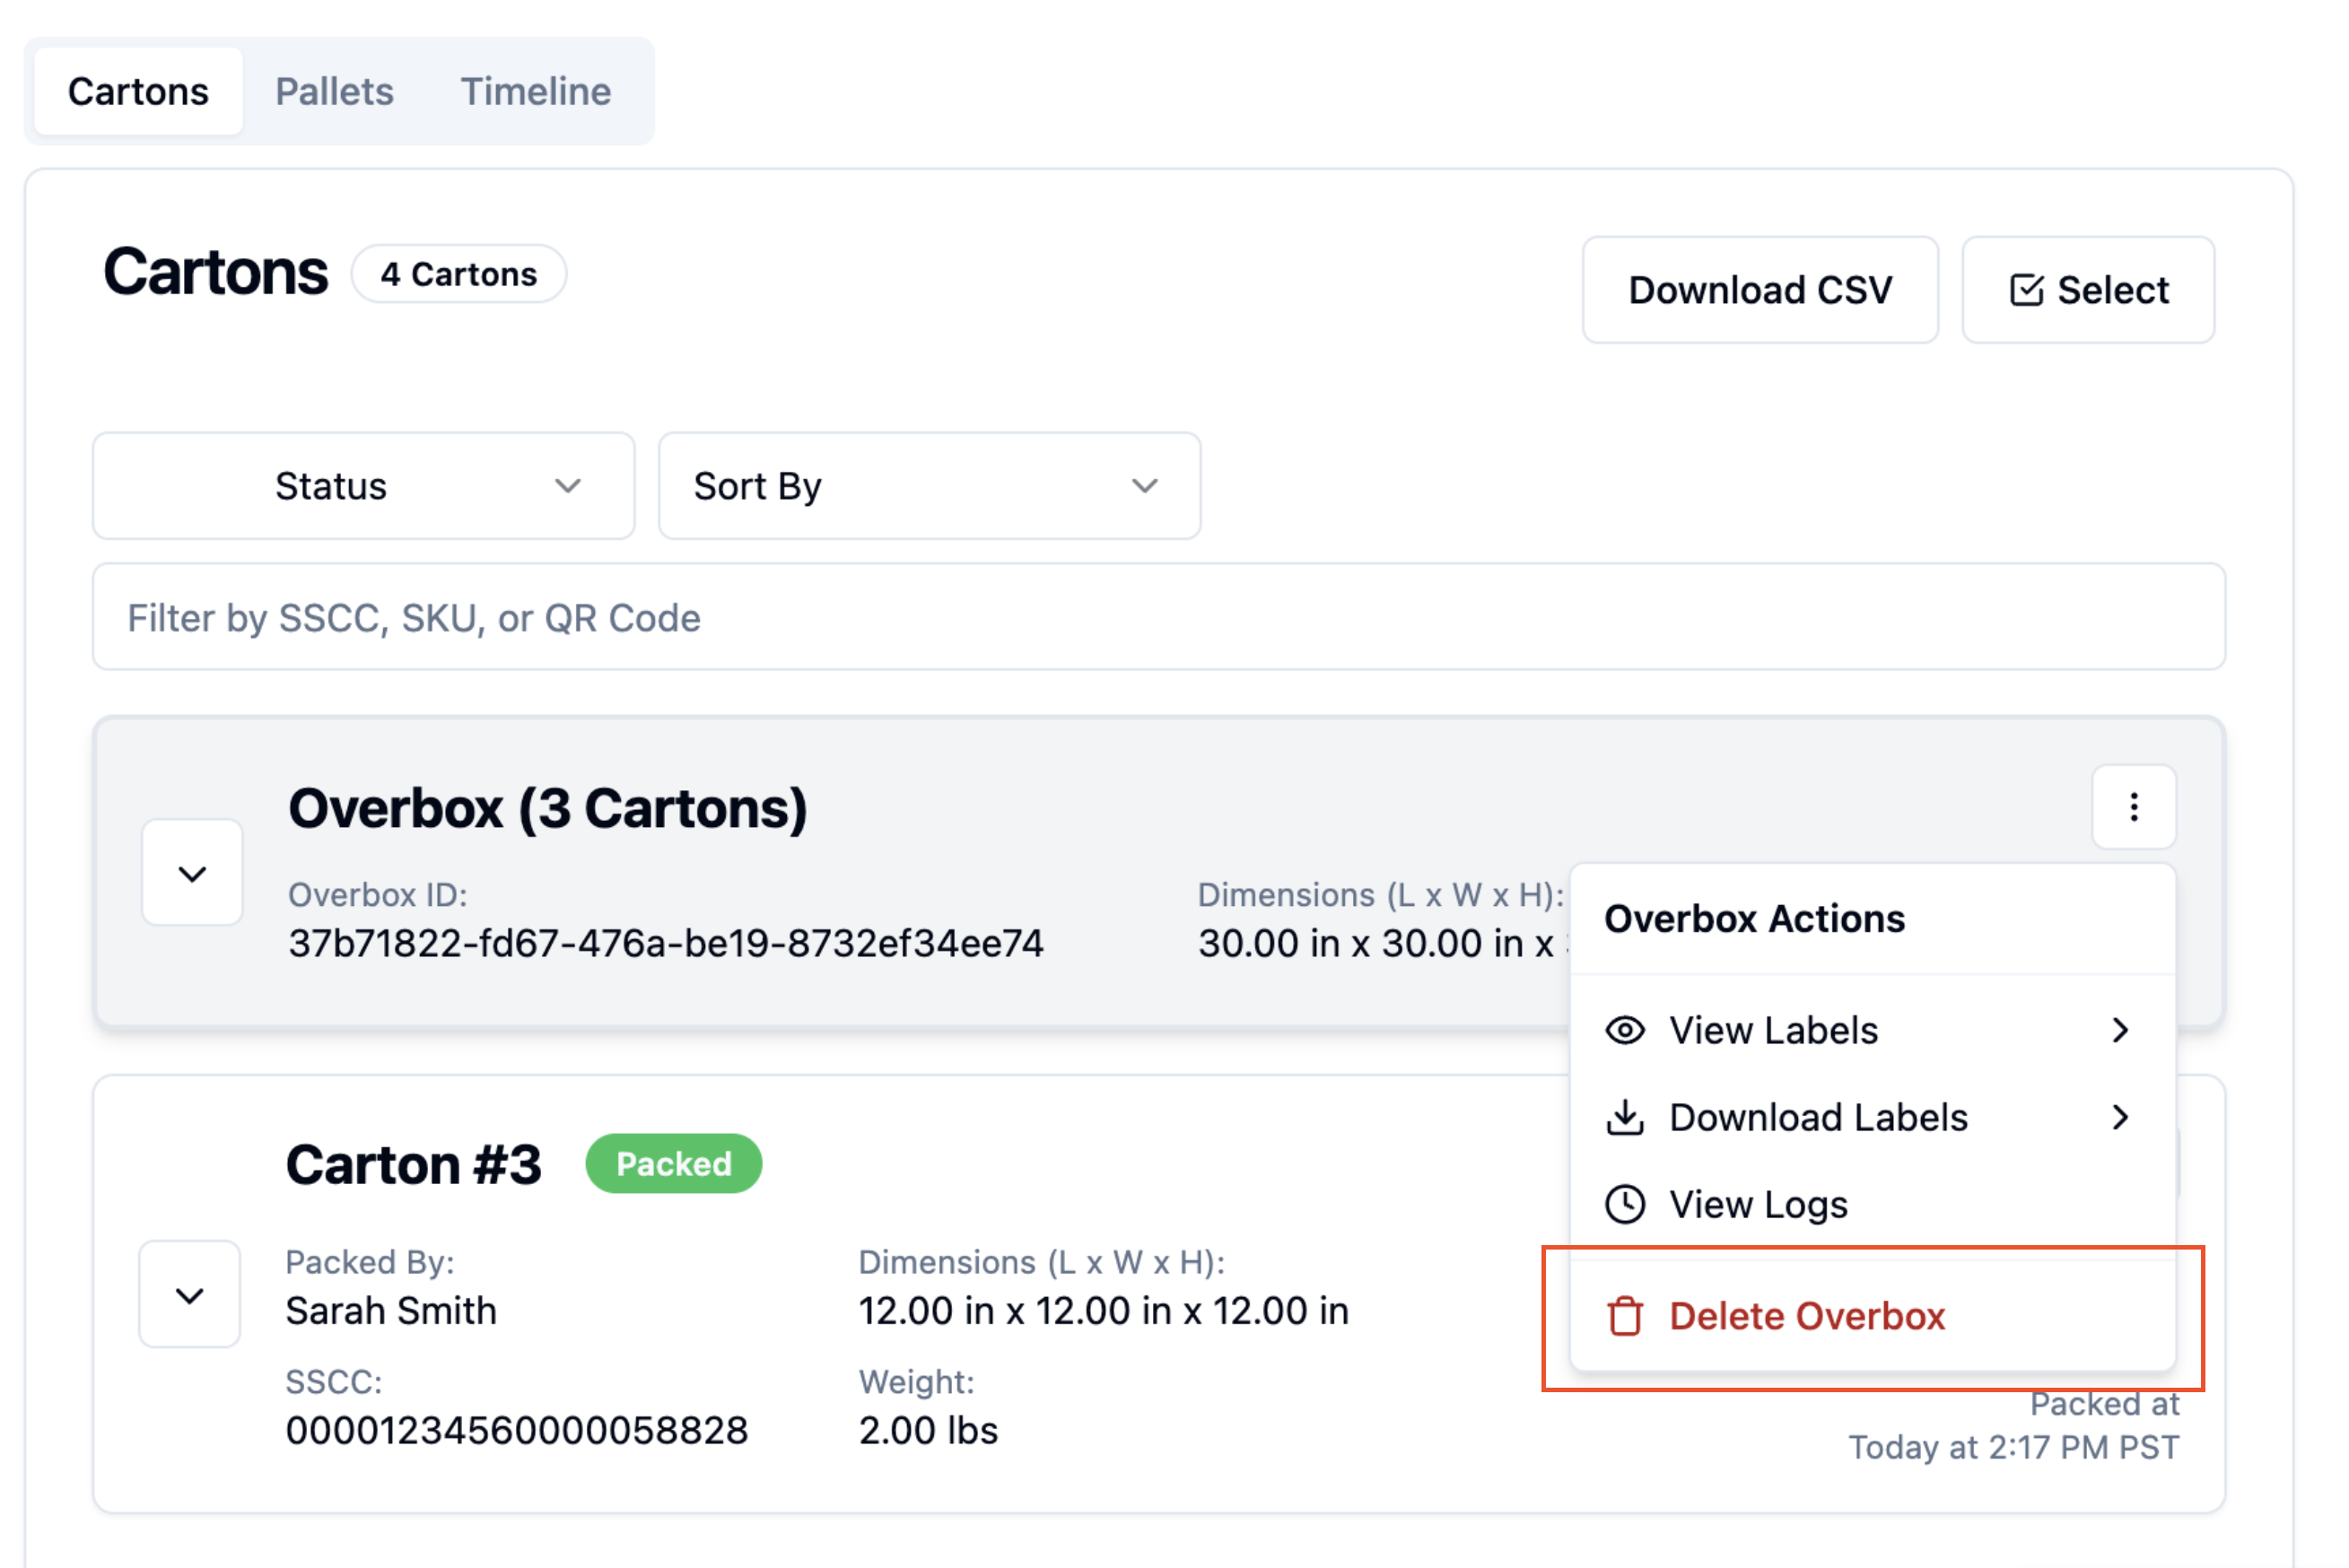
Select 'Delete Overbox' to remove the Overbox configuration.
The Cartons that were previously in the Overbox will now appear on your Carton dashboard.
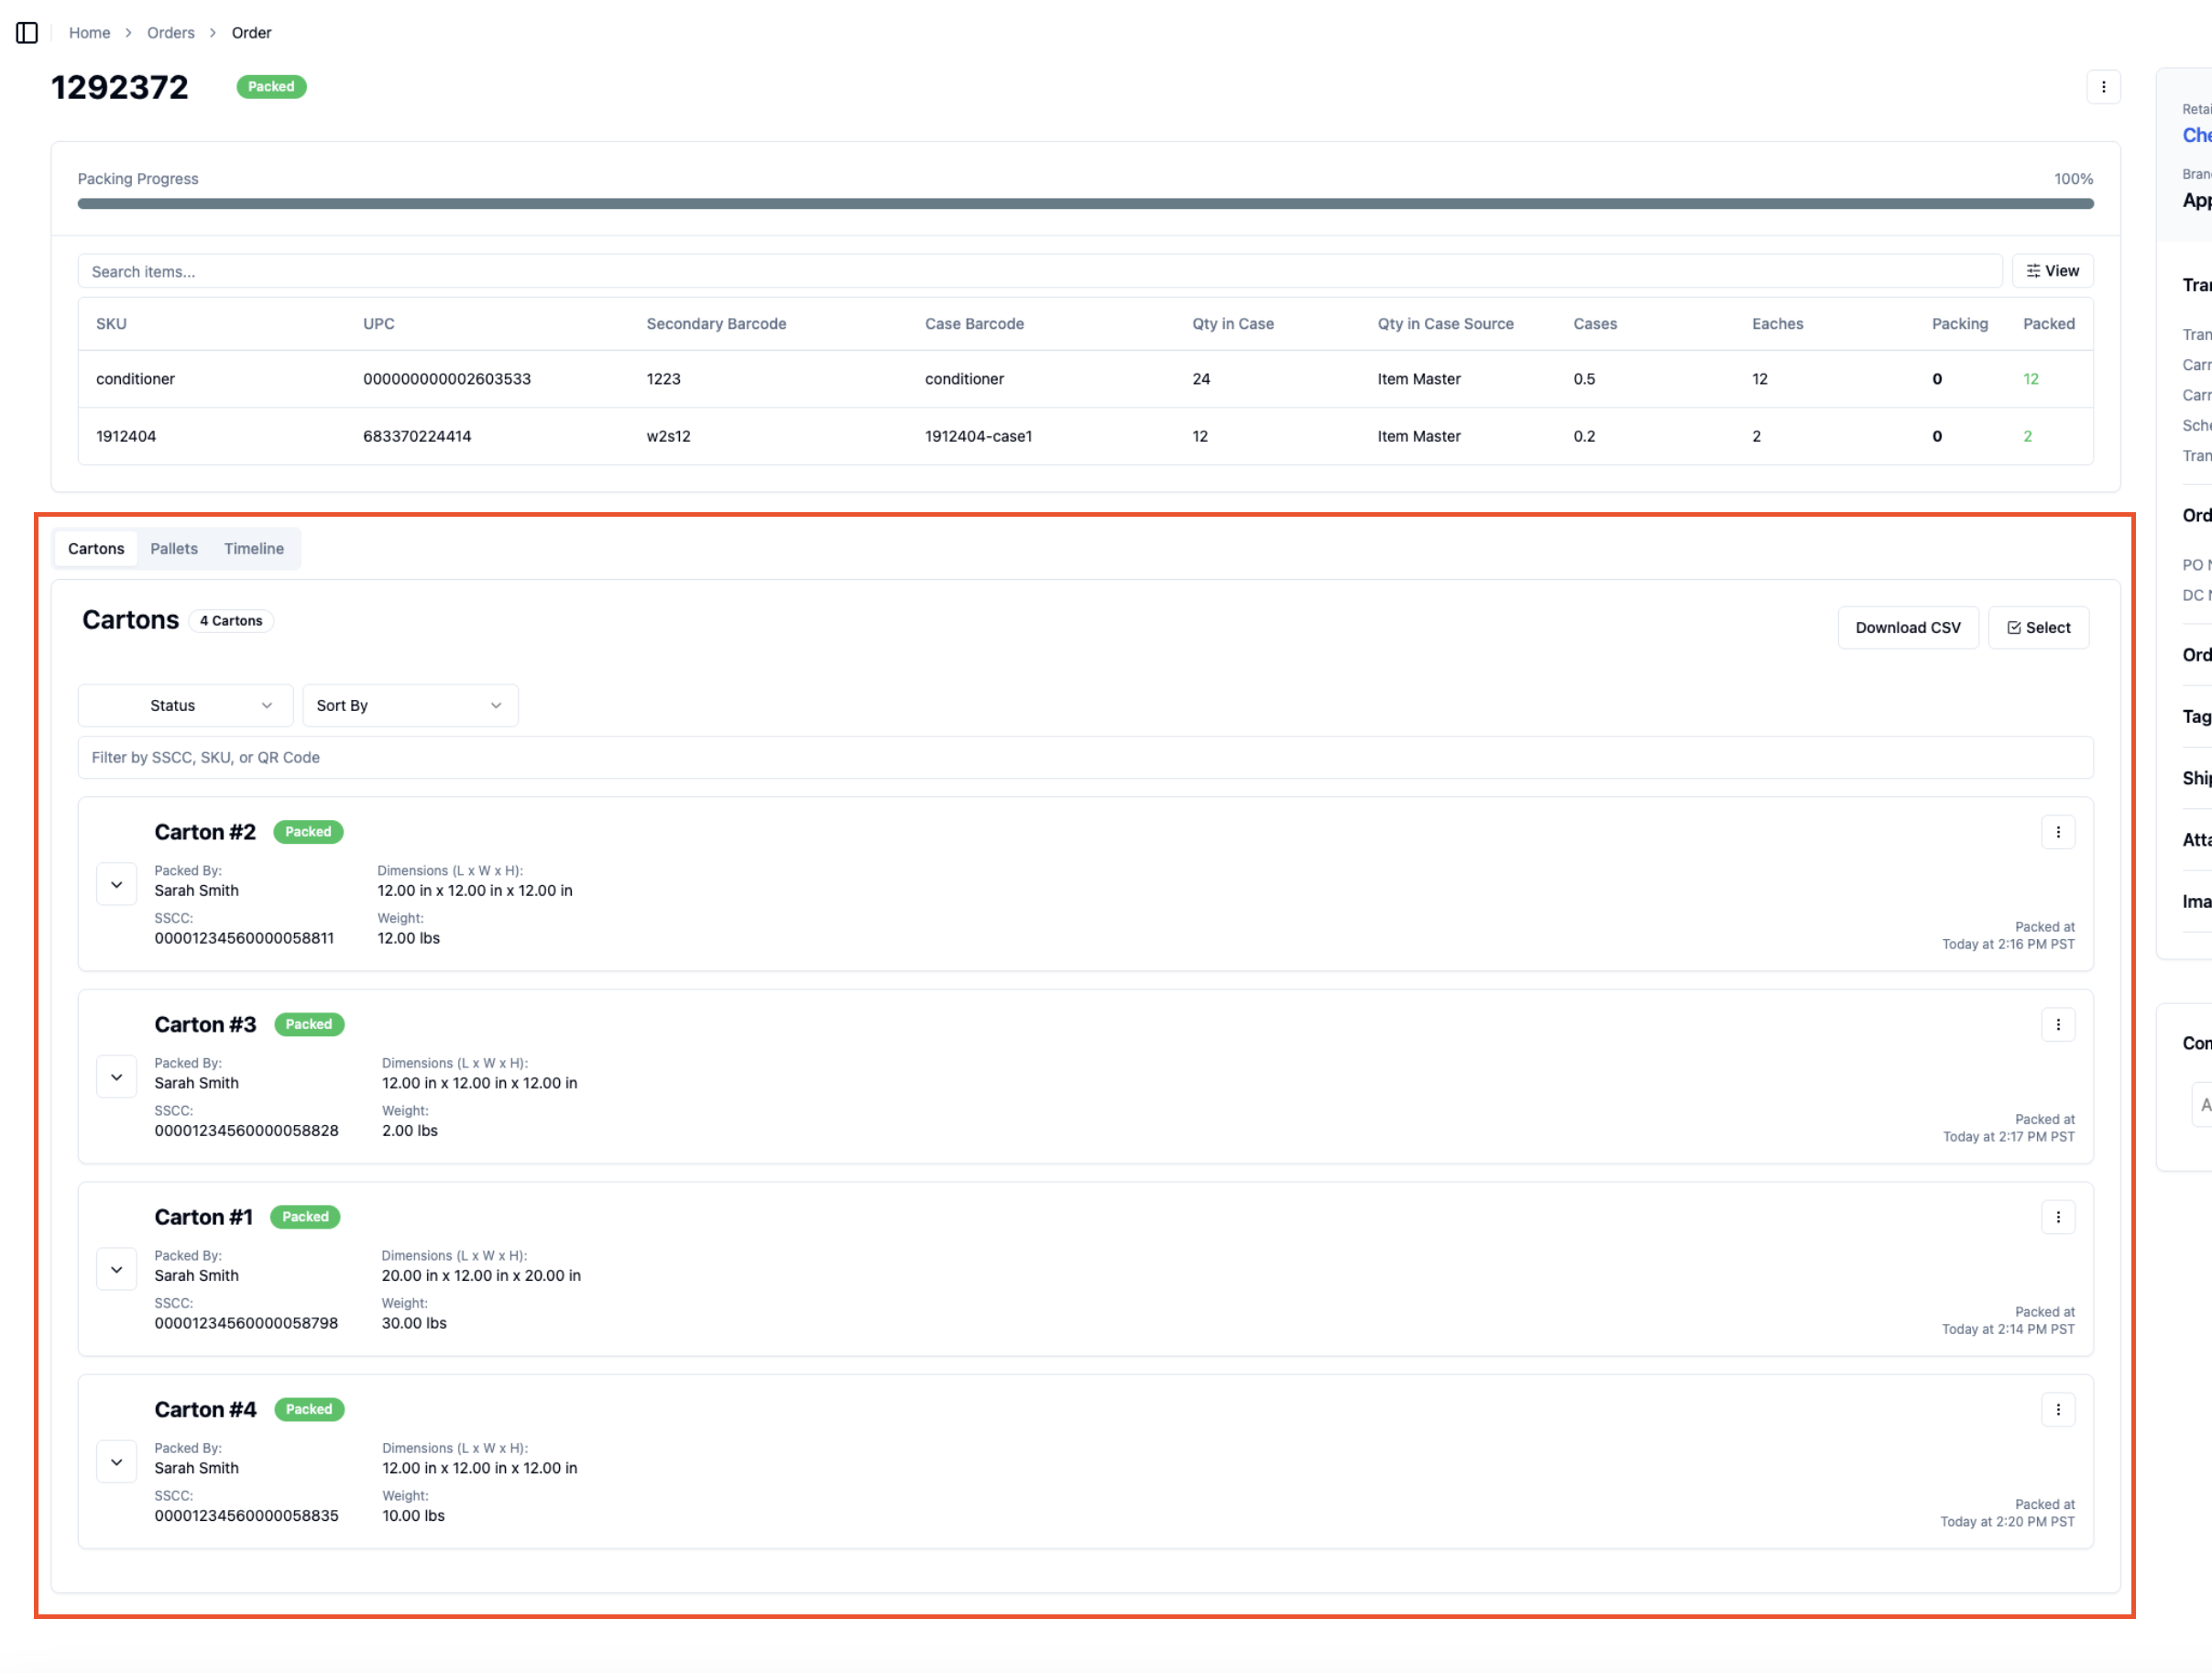
Now, workers can pull back up the Order in the RetailReady tablet & phone view to redo the Overboxes. After pulling up the Order and clicking 'Generate Parcel Labels', they can select 'Yes, overboxing needed' and proceed to repack the Cartons into Overboxes (follow the steps outlined above in the How Overboxing Works In Your RetailReady Flow section).
Can I change the Overboxing configuration once the ASN has been sent?
No. If all parcel labels are printed for an order, the order has been moved to Done and Overboxing cannot be reconfigured because the ASN has been sent. Be sure to change your Overbox configuration before printing all parcel labels!