RetailReady Fintech Module
Last updated: June 29, 2026
The Fintech module lets you configure pricing for your standard order shipping activities, retailer-required workflow actions, and brand-specific VAS instructions. Once configured, you can view and filter billing data across brands from the Fintech Dashboard, and download monthly invoices to support your customer invoicing and operational reporting.
How to Configure Fintech Setup
Step 1: Select a Retailer
In the bottom-left navigation, click 'Settings', then select 'Fintech Setup' under Brand Onboarding.
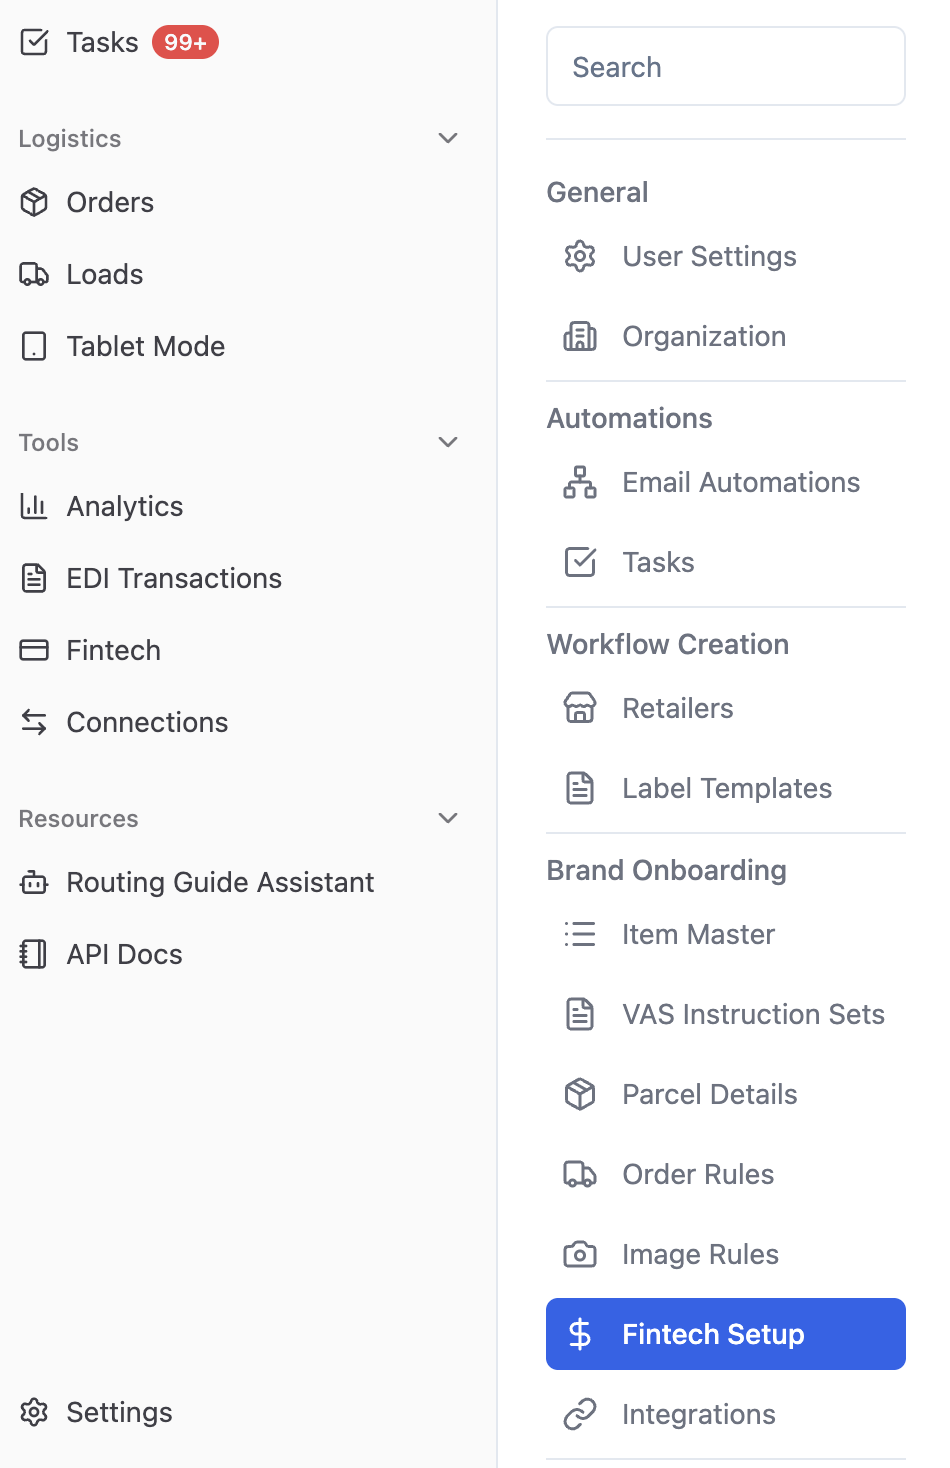
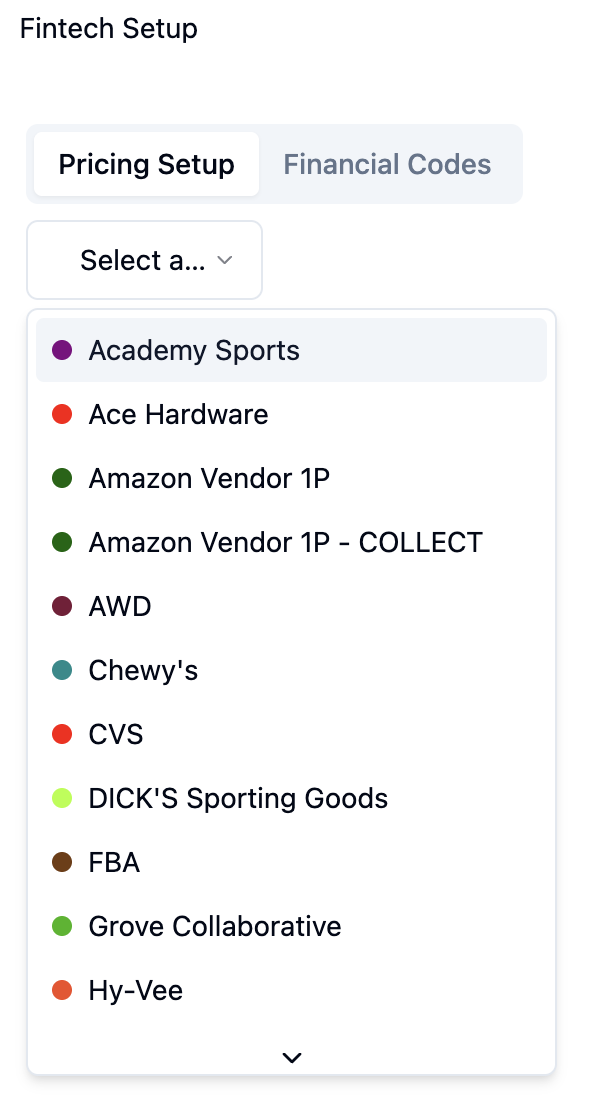
On the Pricing Setup tab, click the 'Select a retailer' dropdown and select the retailer you want to configure pricing for.
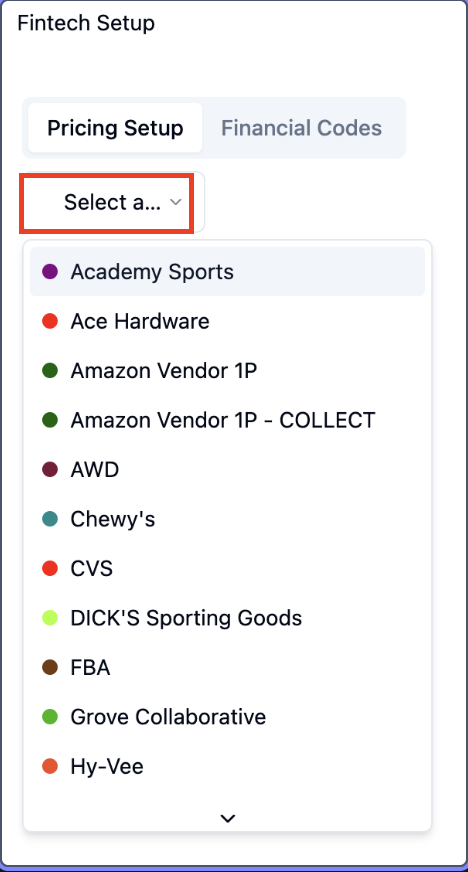
All pricing configuration is done per retailer. Repeat these steps for each retailer you work with.
Step 2: Set Up Core Pricing
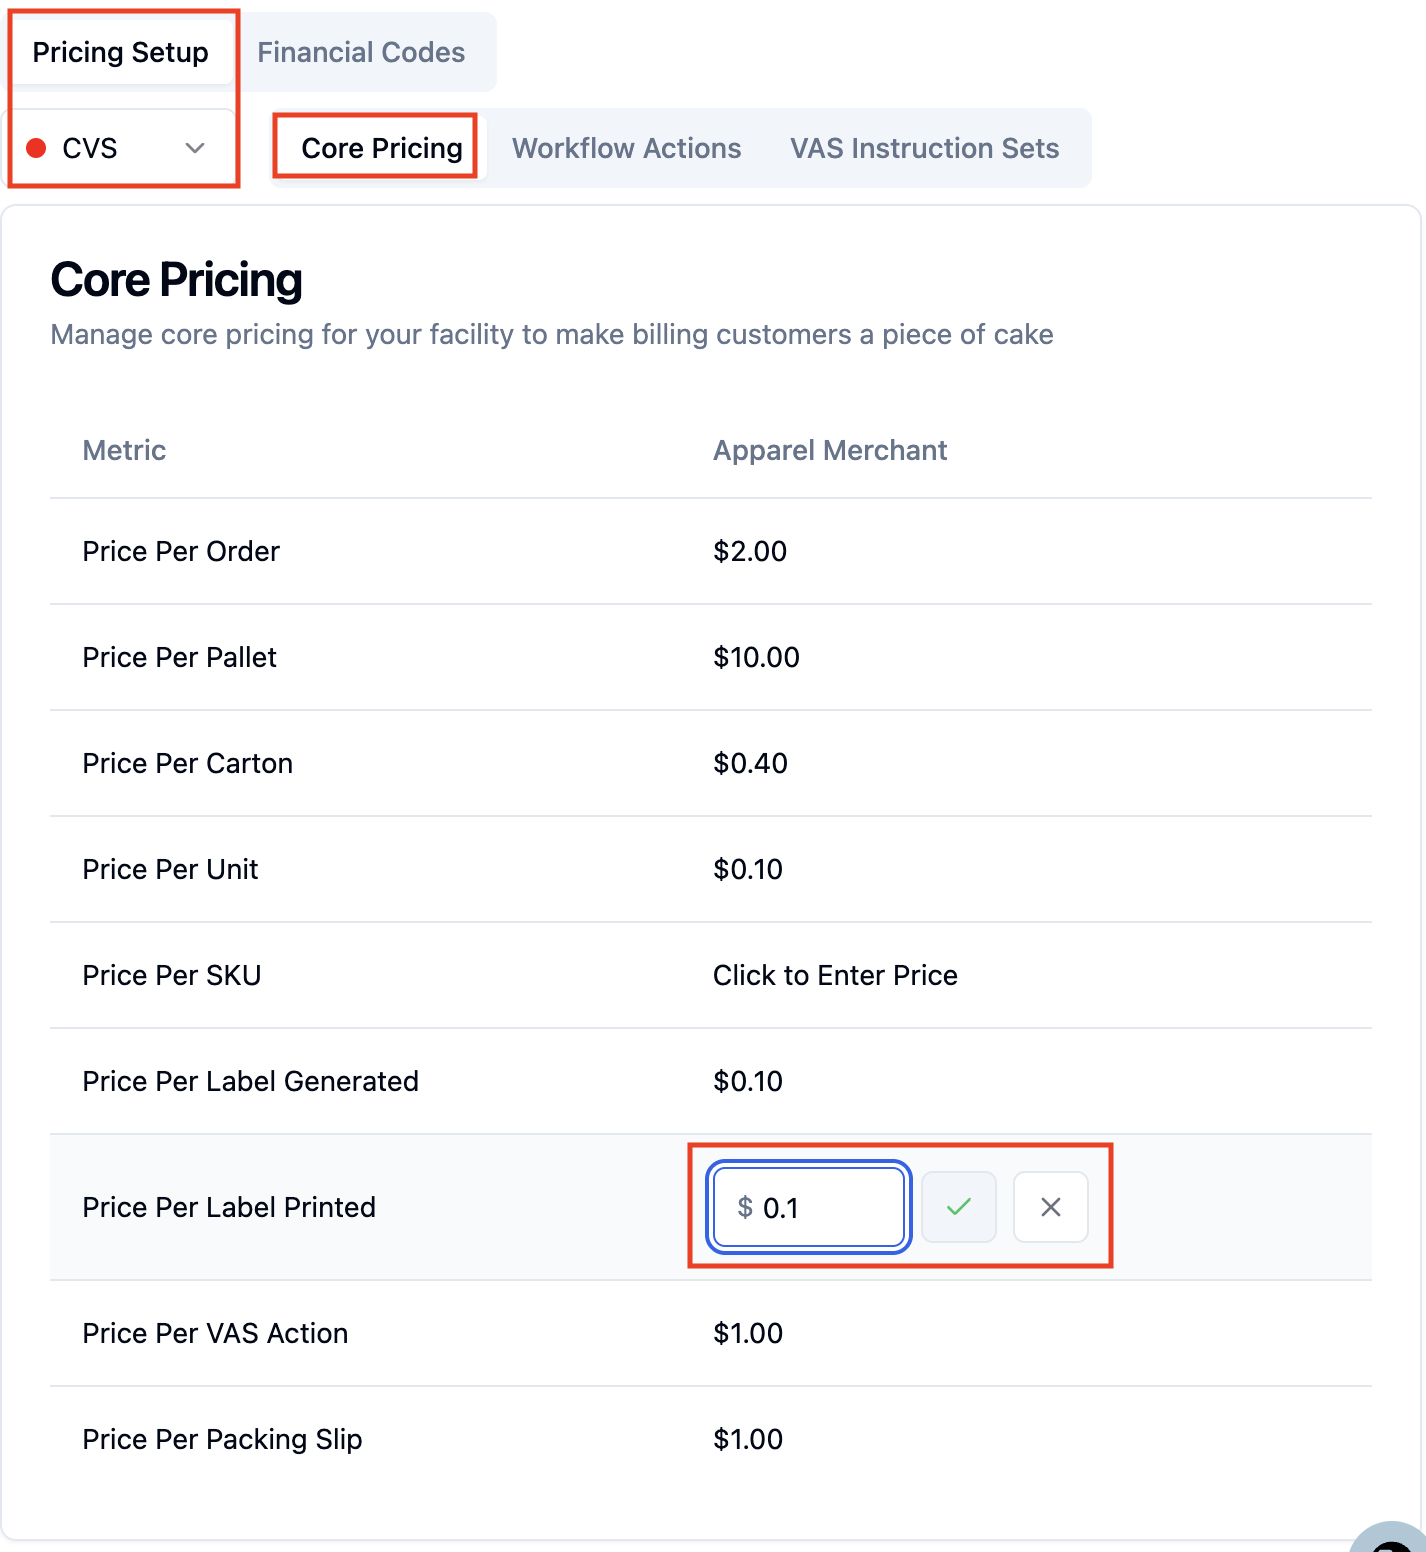
In the Core Pricing tab under Pricing Setup, select the retailer from the 'Select a retailer' dropdown that you want to setup pricing for.
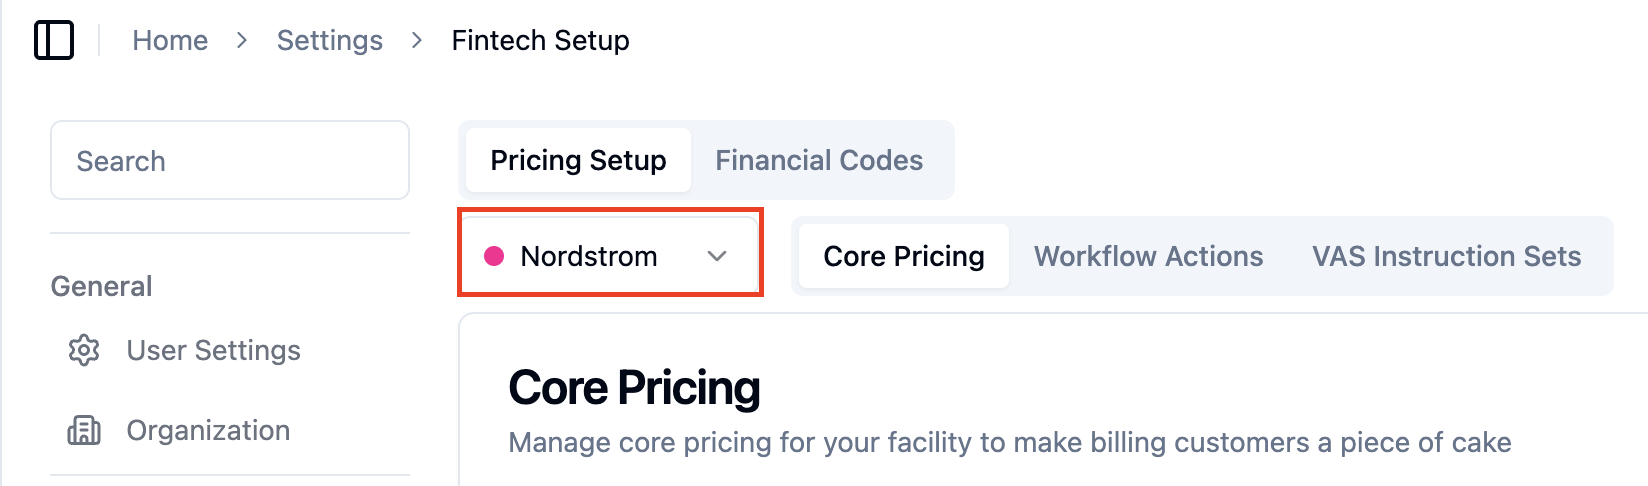
Click into any price field to the right of the Metric (Price Per Order, Price Per Pallet, Price Per Carton, Price Per Unit, Price Per SKU, Price Per Label Generated, Price Per Label Printed, Price Per VAS Action, Price Per Packing Slip) and enter the price.
Click the checkmark to save each line item.
Step 3: Create Financial Codes
Financial codes are reusable price tags you create and then assign to workflow actions and VAS instruction sets. You'll need to create at least one before completing Steps 4 and 5.
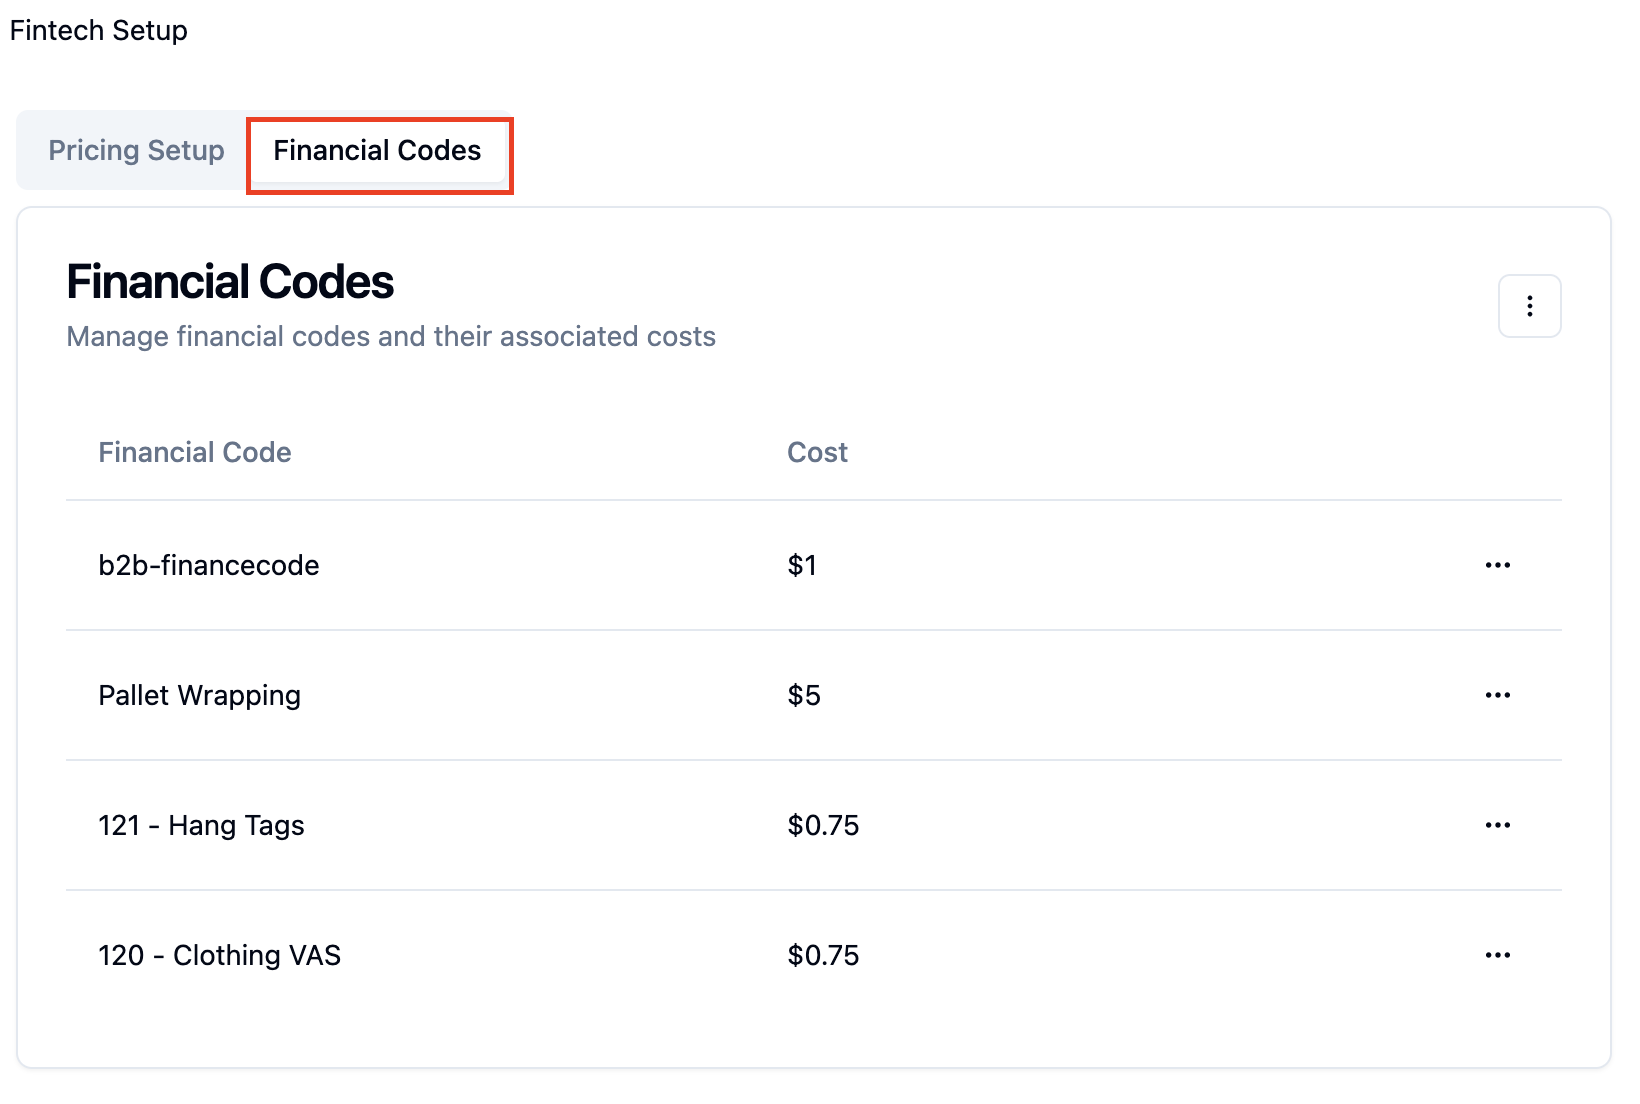
Click the Financial Codes tab at the top of the Fintech Setup page
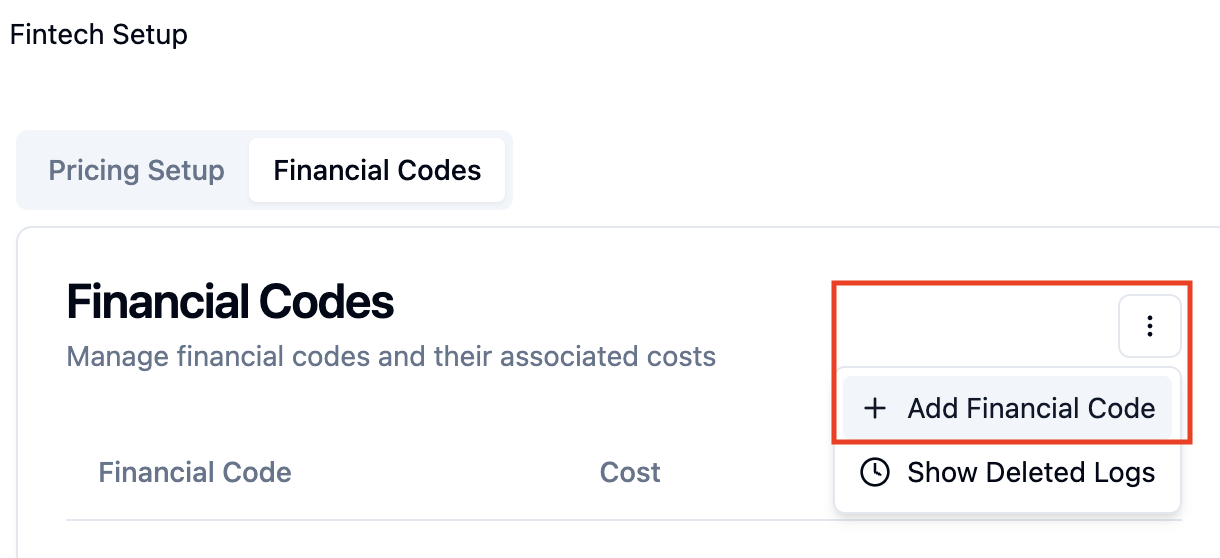
Click the '...' button in the top right of the Financial Codes panel and select '+ Add Financial Code'.
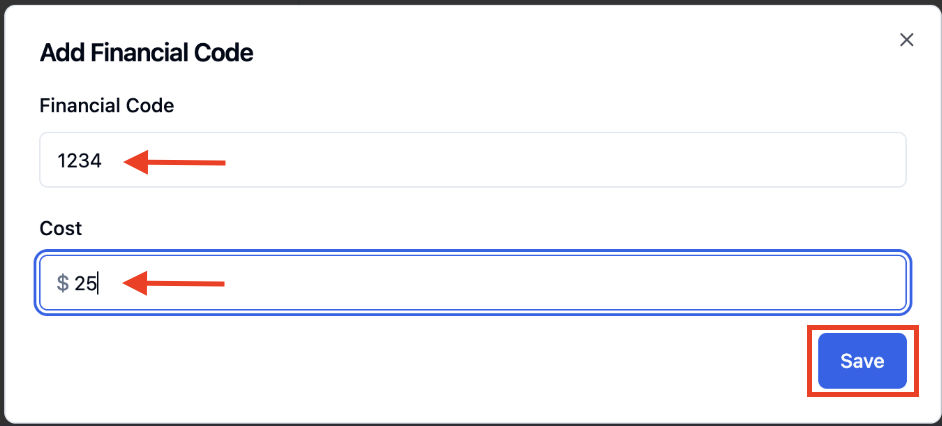
Enter a name for the financial code and a cost, then click 'Save'.
You can create as many financial codes as you need — for example, one for pallet wrapping, one for hang tagging, etc.
How to Modify or Delete a Financial Code
On the Financial Codes tab, locate the financial code you want to modify.
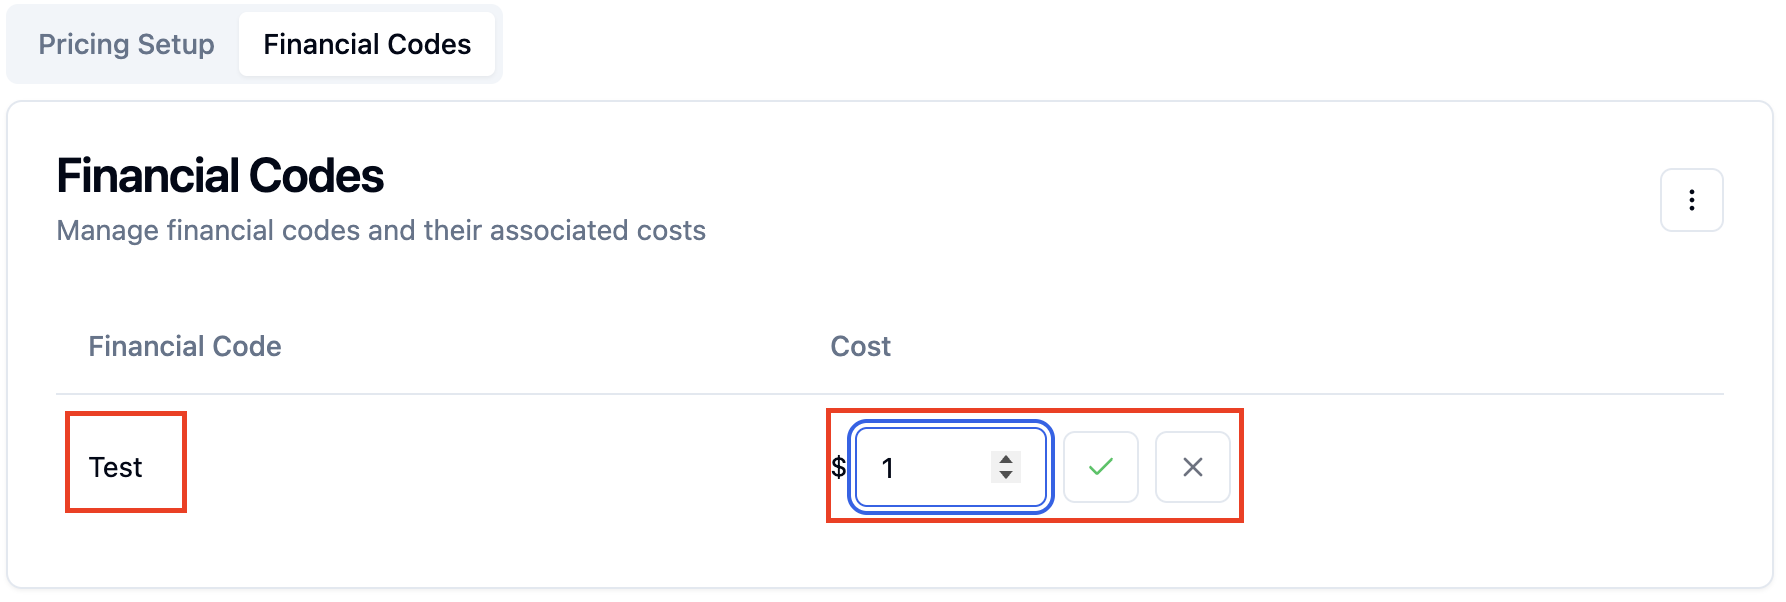
To modify the code, click either the code name or cost, edit the value, and click the checkmark to save.
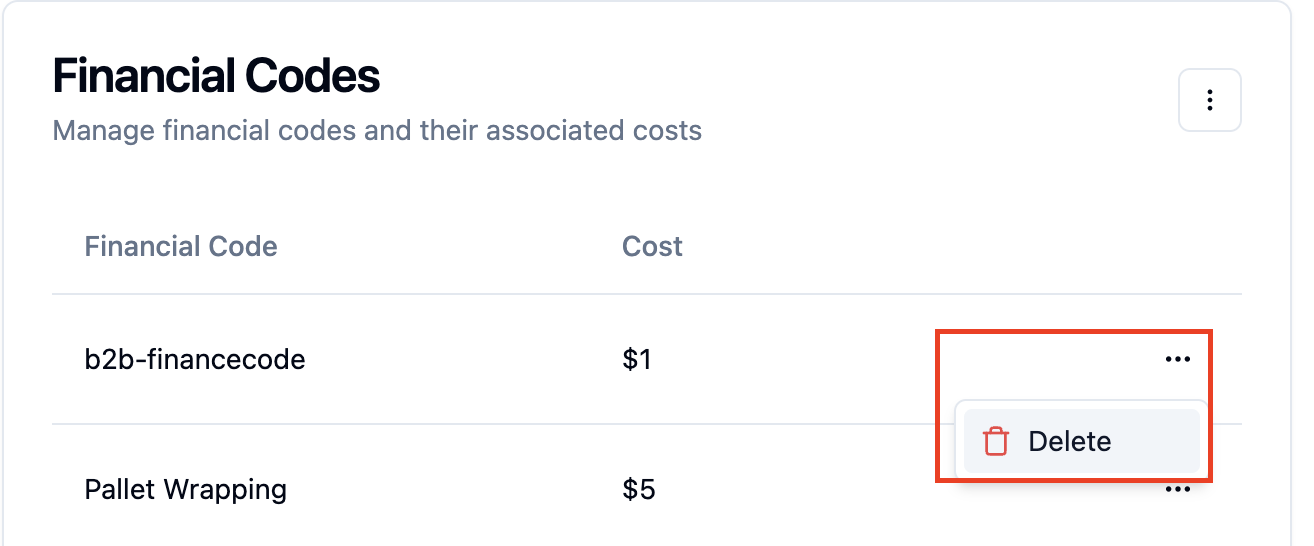
To delete the code, click the '...' to the right of the code, and click 'Delete'.
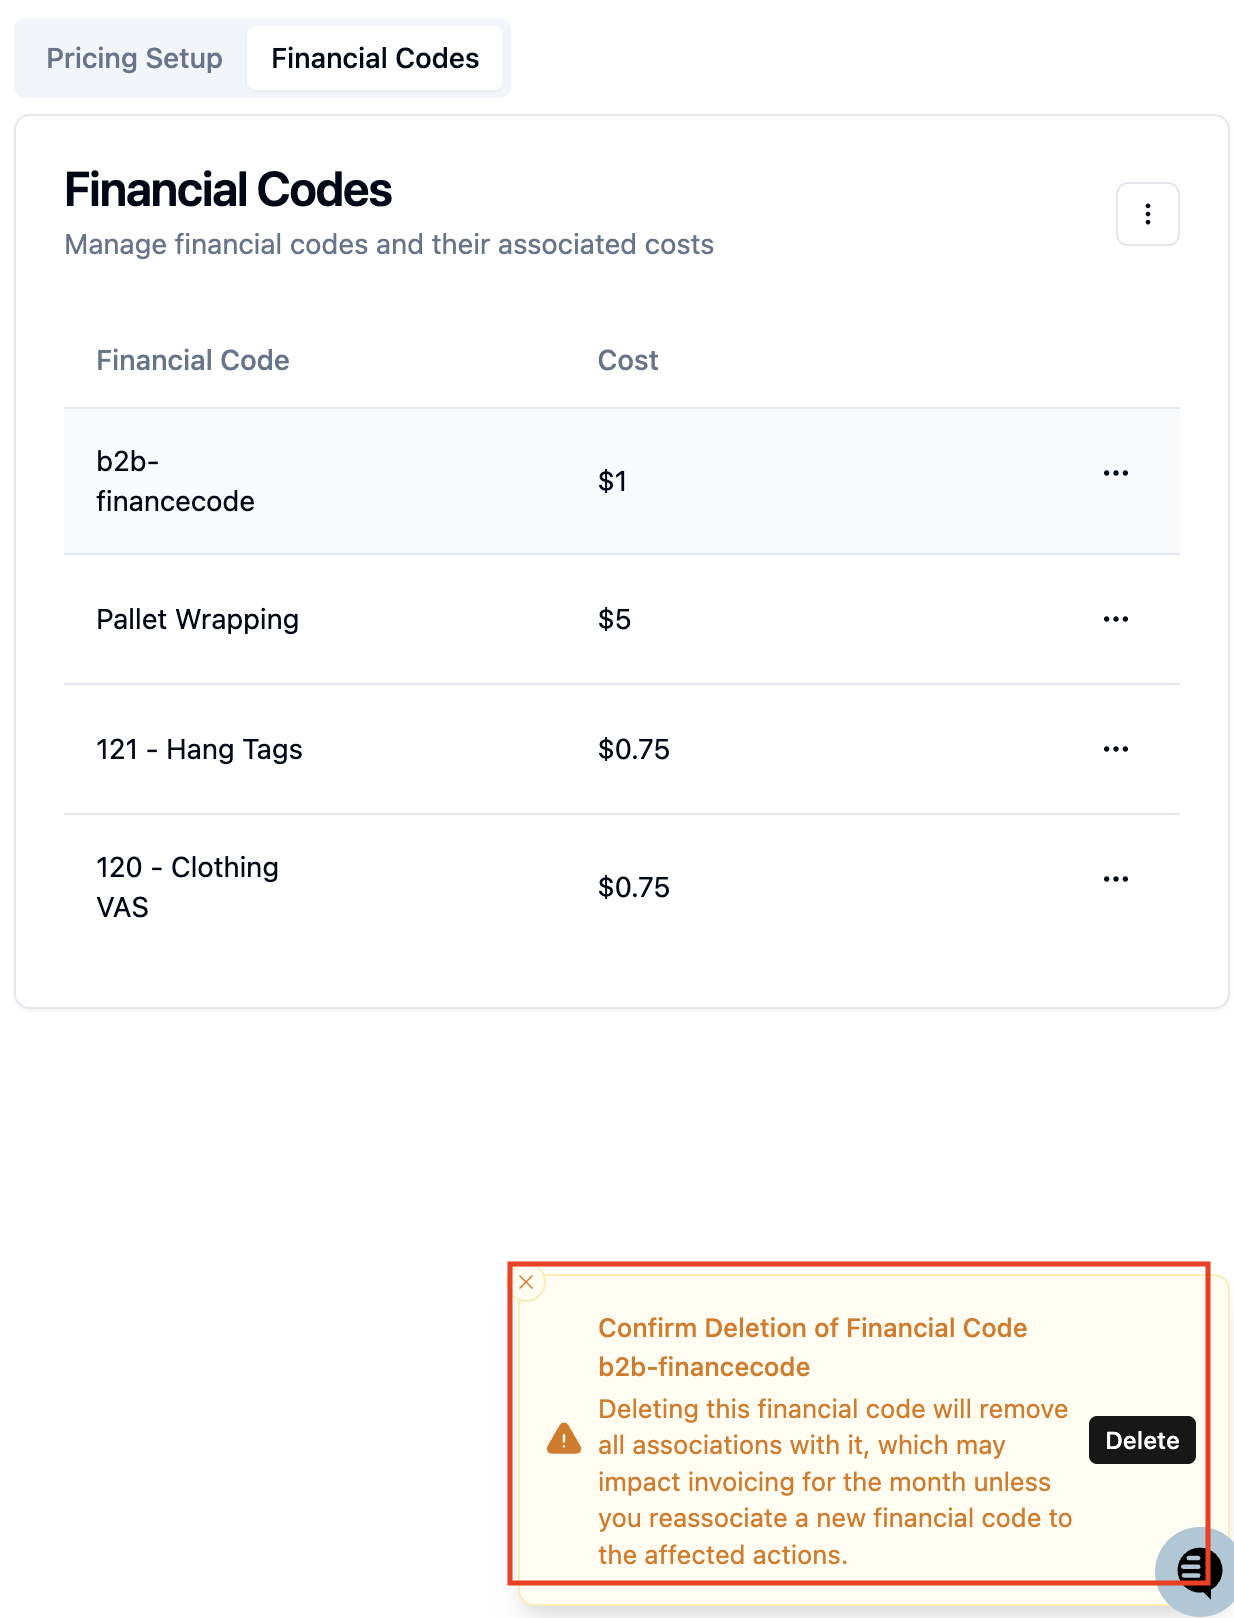
Confirm the code deletion at the bottom of the page by clicking 'Delete'.
Step 4: Associate Costs to Retailer Workflow Actions
Workflow actions are retailer-required steps as defined by the retailer in their routing guides. You can assign a financial code to each action to track and bill for them.
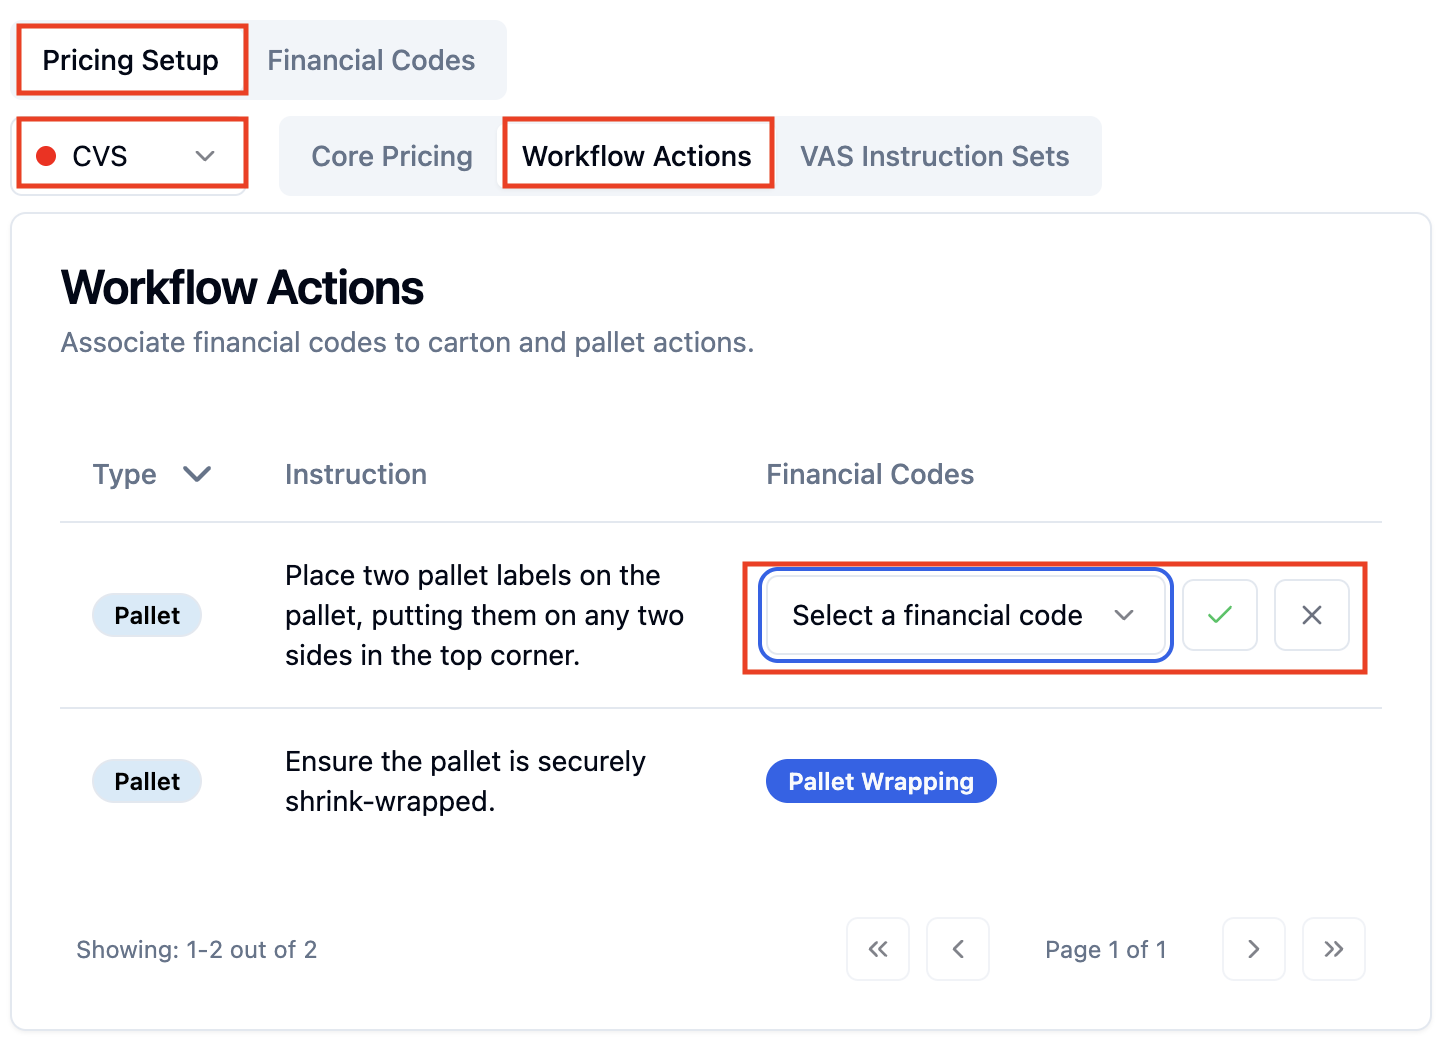
Click the Workflow Actions tab under Pricing Setup
Click the 'Select a retailer' dropdown and select the retailer you want to configure codes for.
You'll see the required workflow actions for that retailer listed by type (Pallet, Carton, etc.)
Click the 'Select a financial code' dropdown on the action you want to price, select the financial code you previously created, and click the checkmark to save the code association to the workflow action.
Step 5: Associate Costs to VAS Instruction Sets
VAS instruction sets are brand and retailer-specific actions configured during brand onboarding. You can associate a financial code to each instruction set to capture those costs.
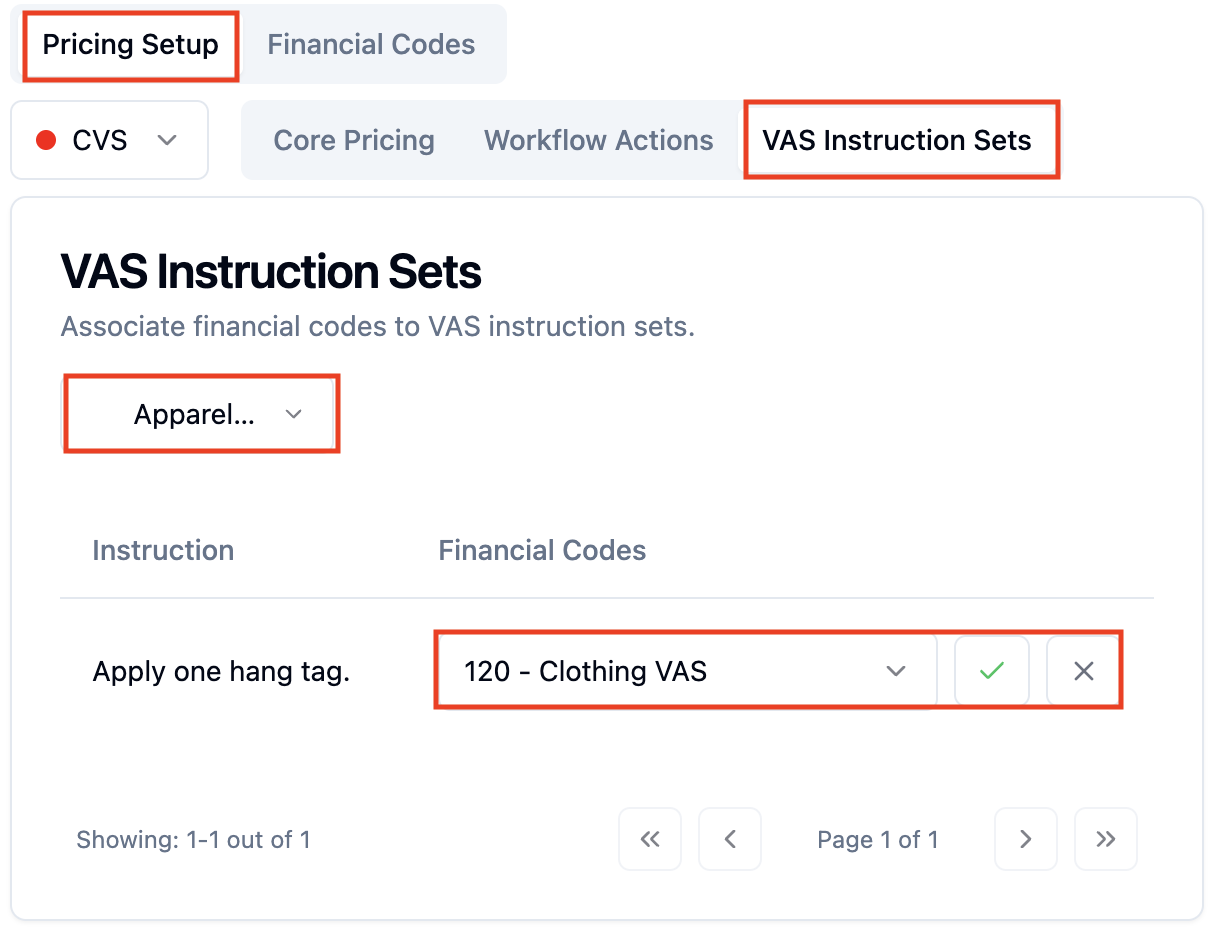
Under VAS Instruction Sets tab on the Pricing Setup tab, select the retailer from the 'Select a retailer' dropdown that you want to associate VAS Instructions Sets for.
Select a brand from the brand dropdown
Click the Financial Codes dropdown next to the instruction you want to price, select the applicable financial code, and click the checkmark to save
Note: VAS instruction sets must be added at the brand + retailer level in Settings before they will appear here. If you don't see any instructions listed, see how to 📄 Create VAS Instruction Sets .
How To View Billing Data and Download Invoices
Once your pricing is configured, the Fintech Dashboard gives you two ways to review billing activity.
How to View and Export the Bill Report
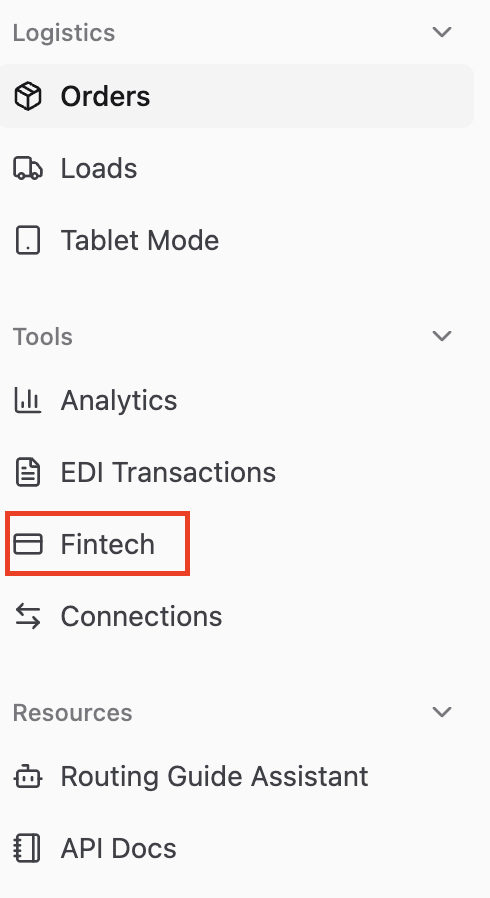
In the left navigation under Tools, click Fintech
On the Fintech Dashboard, click the Finance tab
Use the 'Filter' options to narrow results by date range, brand, retailer, or other parameters
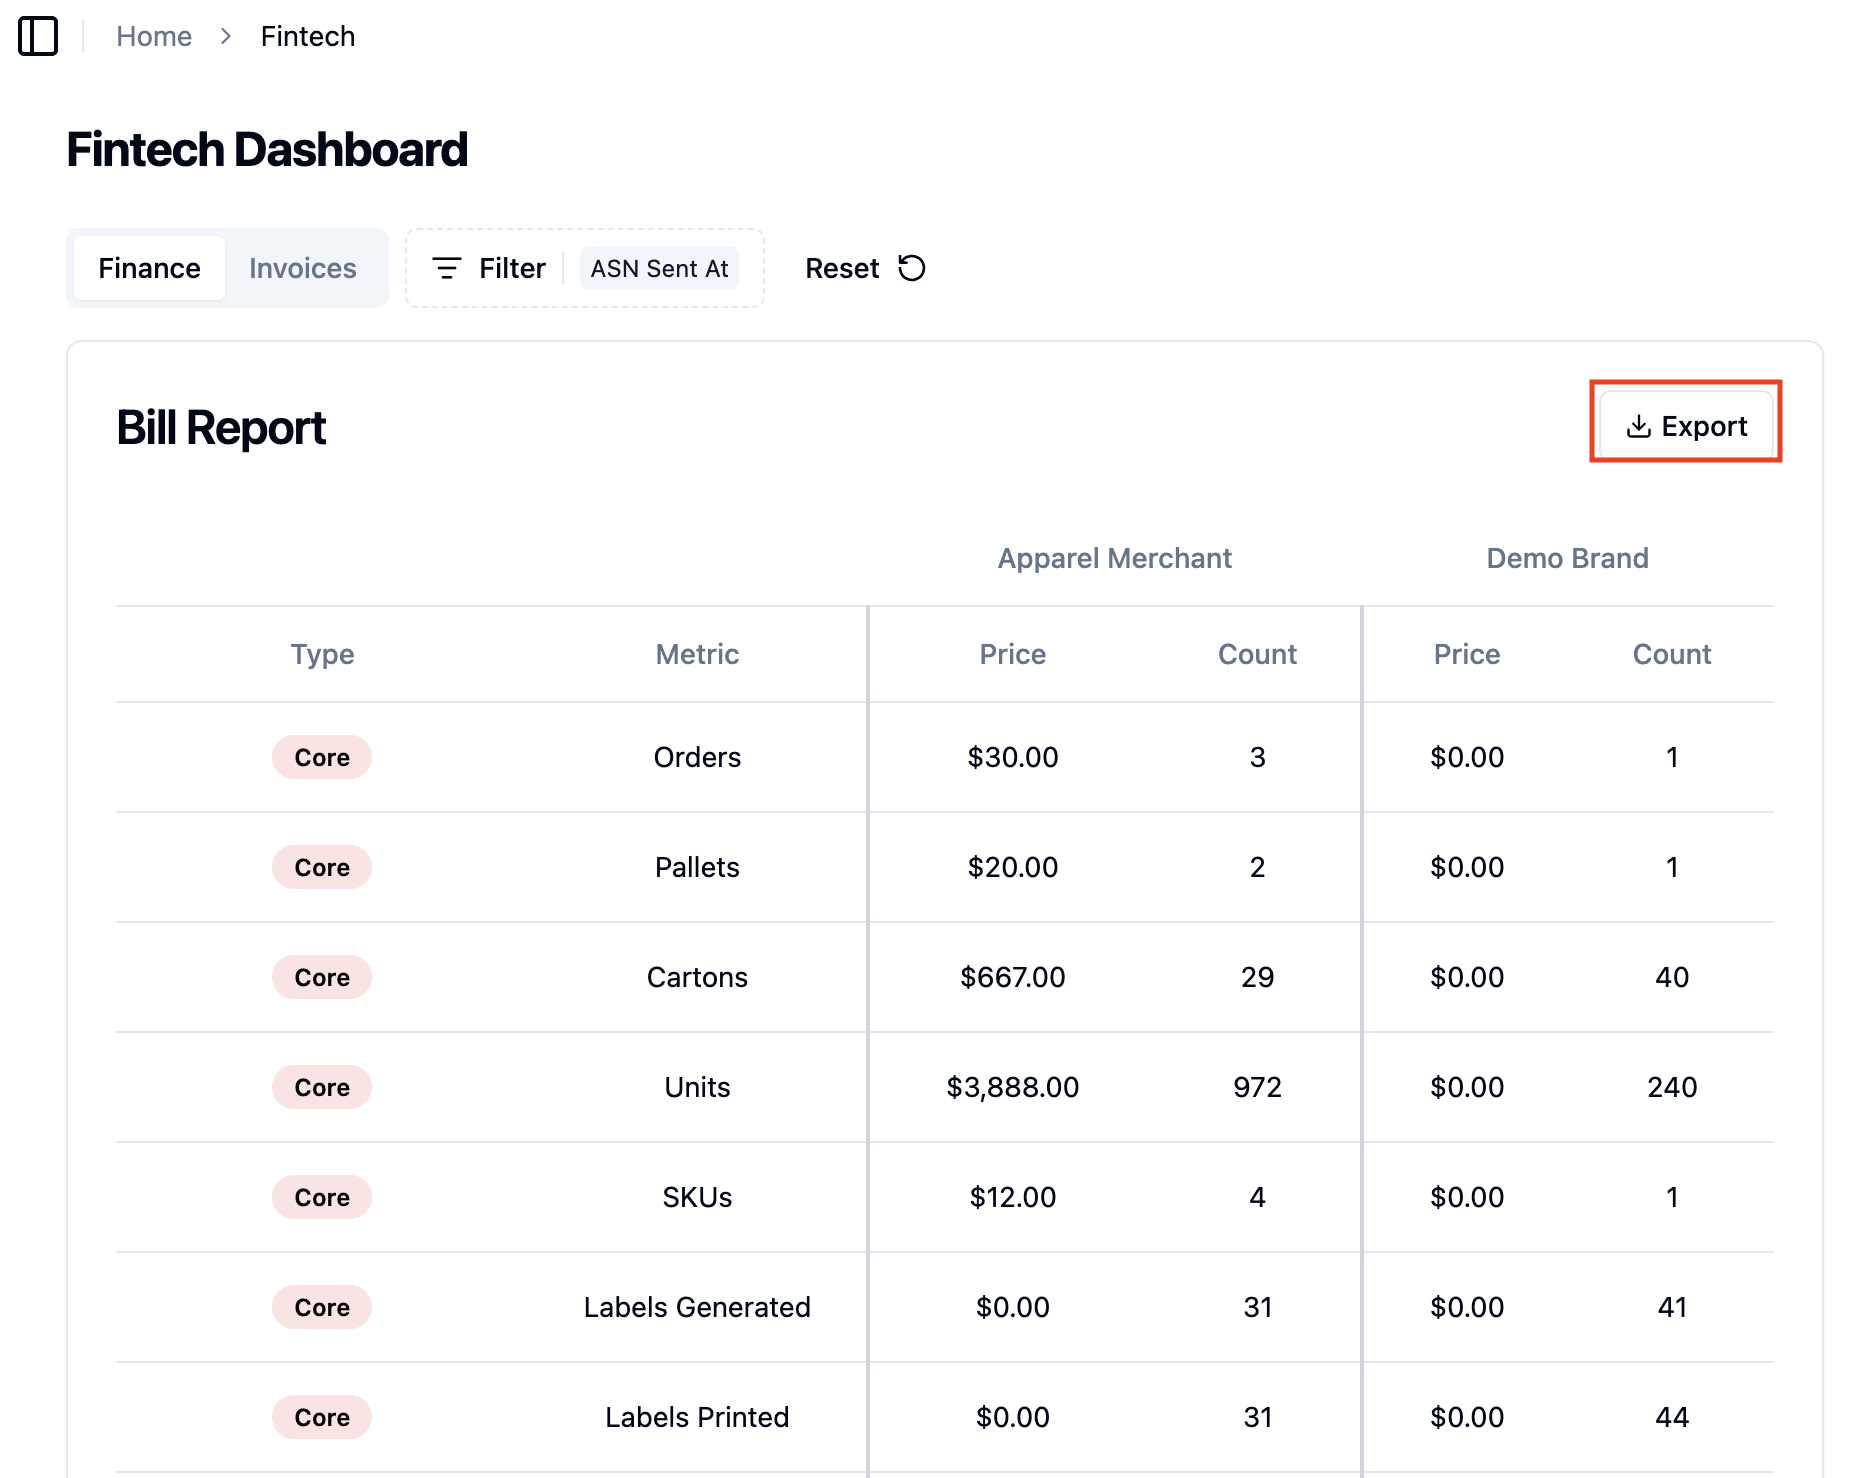
Click 'Export' to download the filtered data
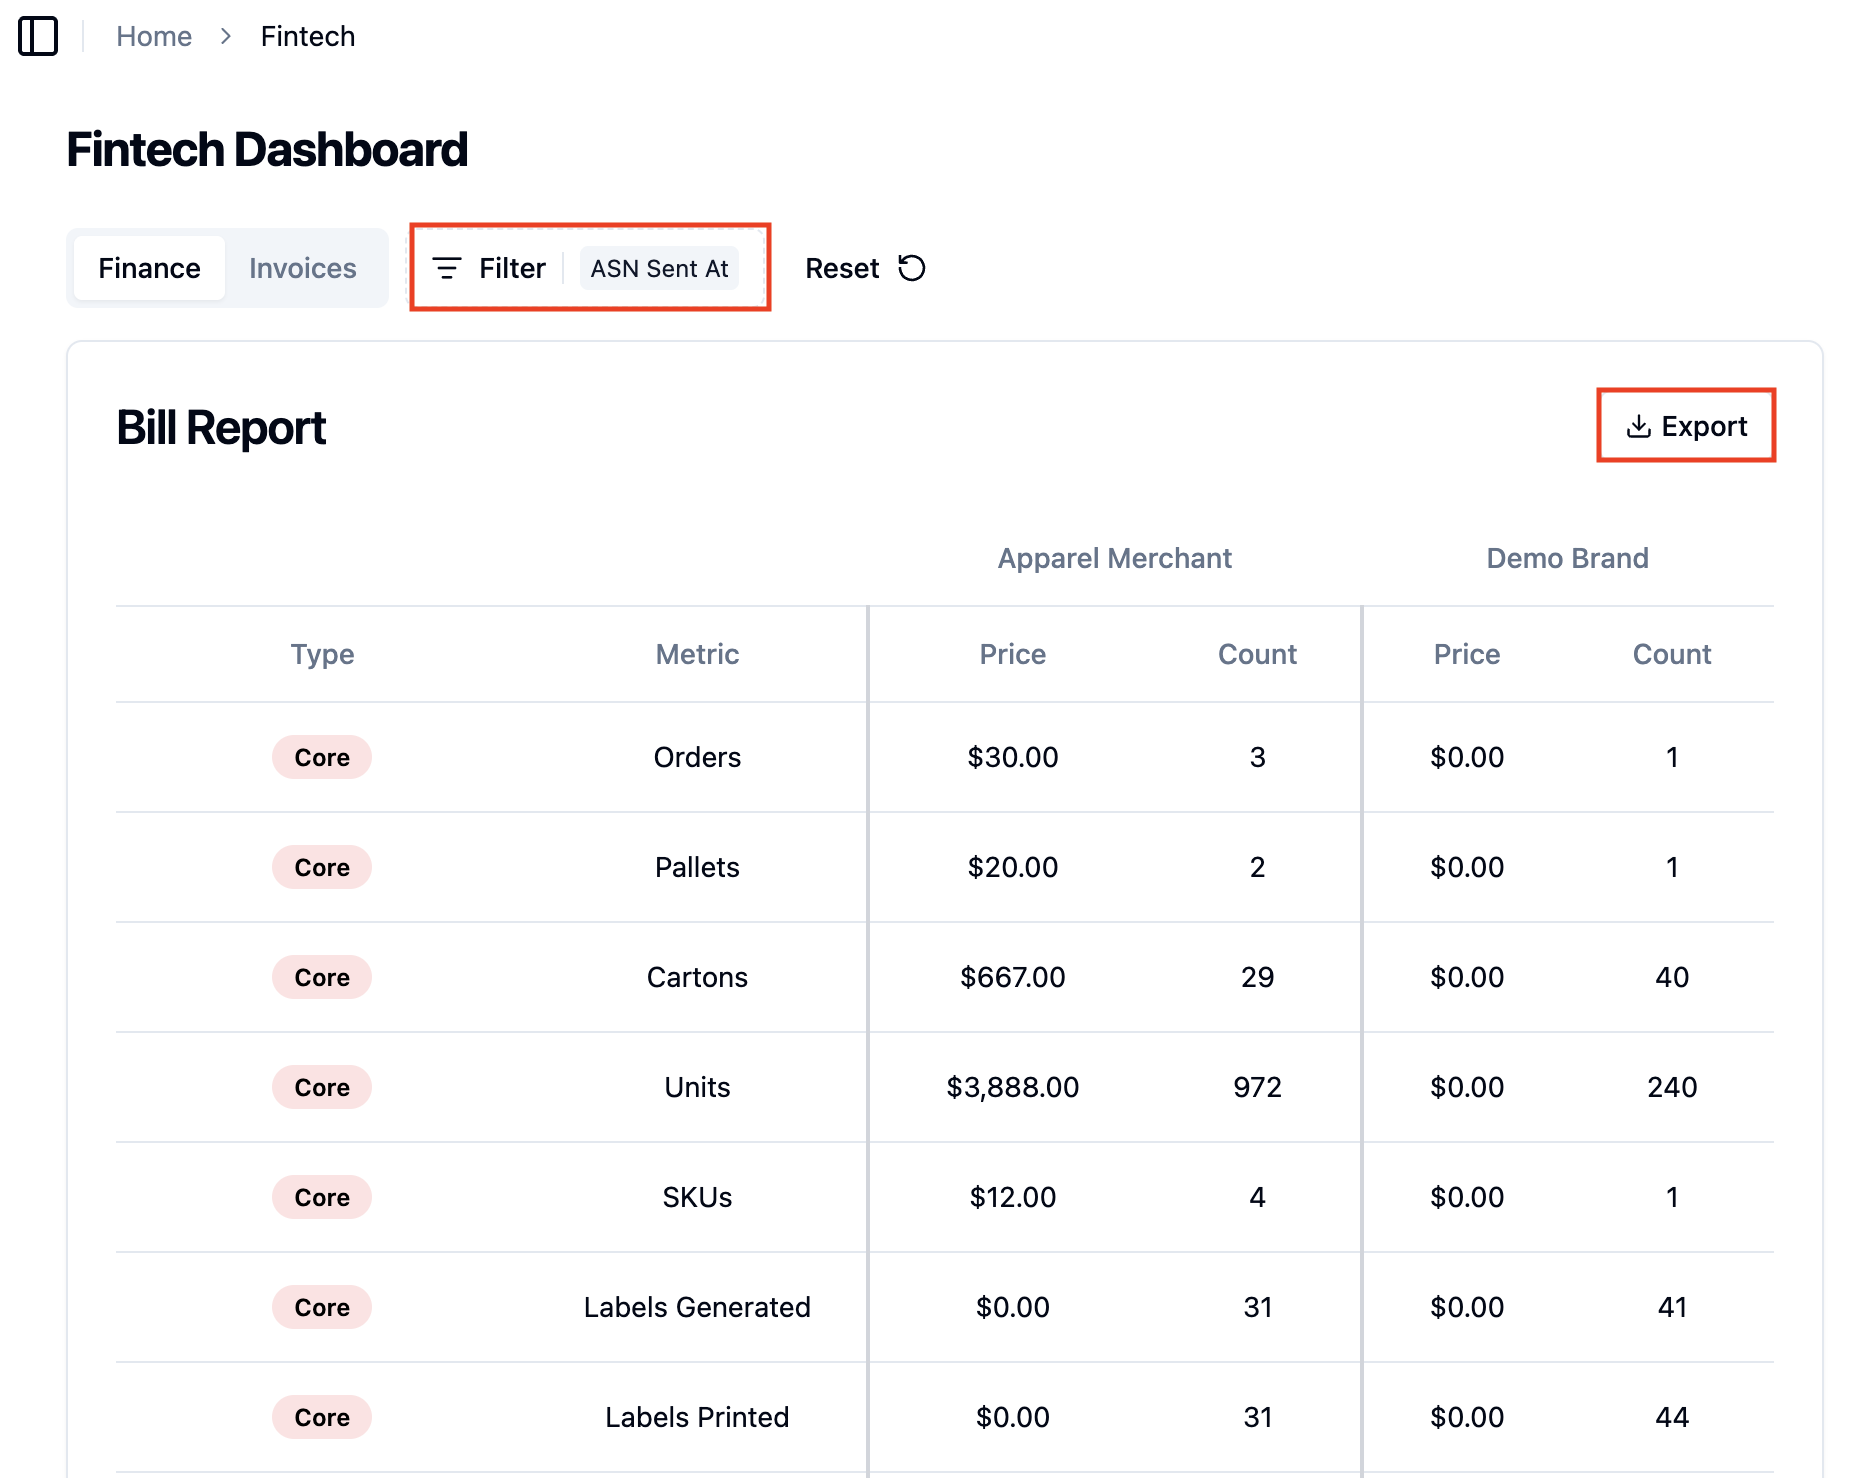
The Bill Report displays pricing by type (Core, Workflow, VAS) and metric across all configured brands, so you can review activity at a glance or export it for invoicing.
How to Download Monthly Invoices
In the left navigation under Tools, go to the Fintech section
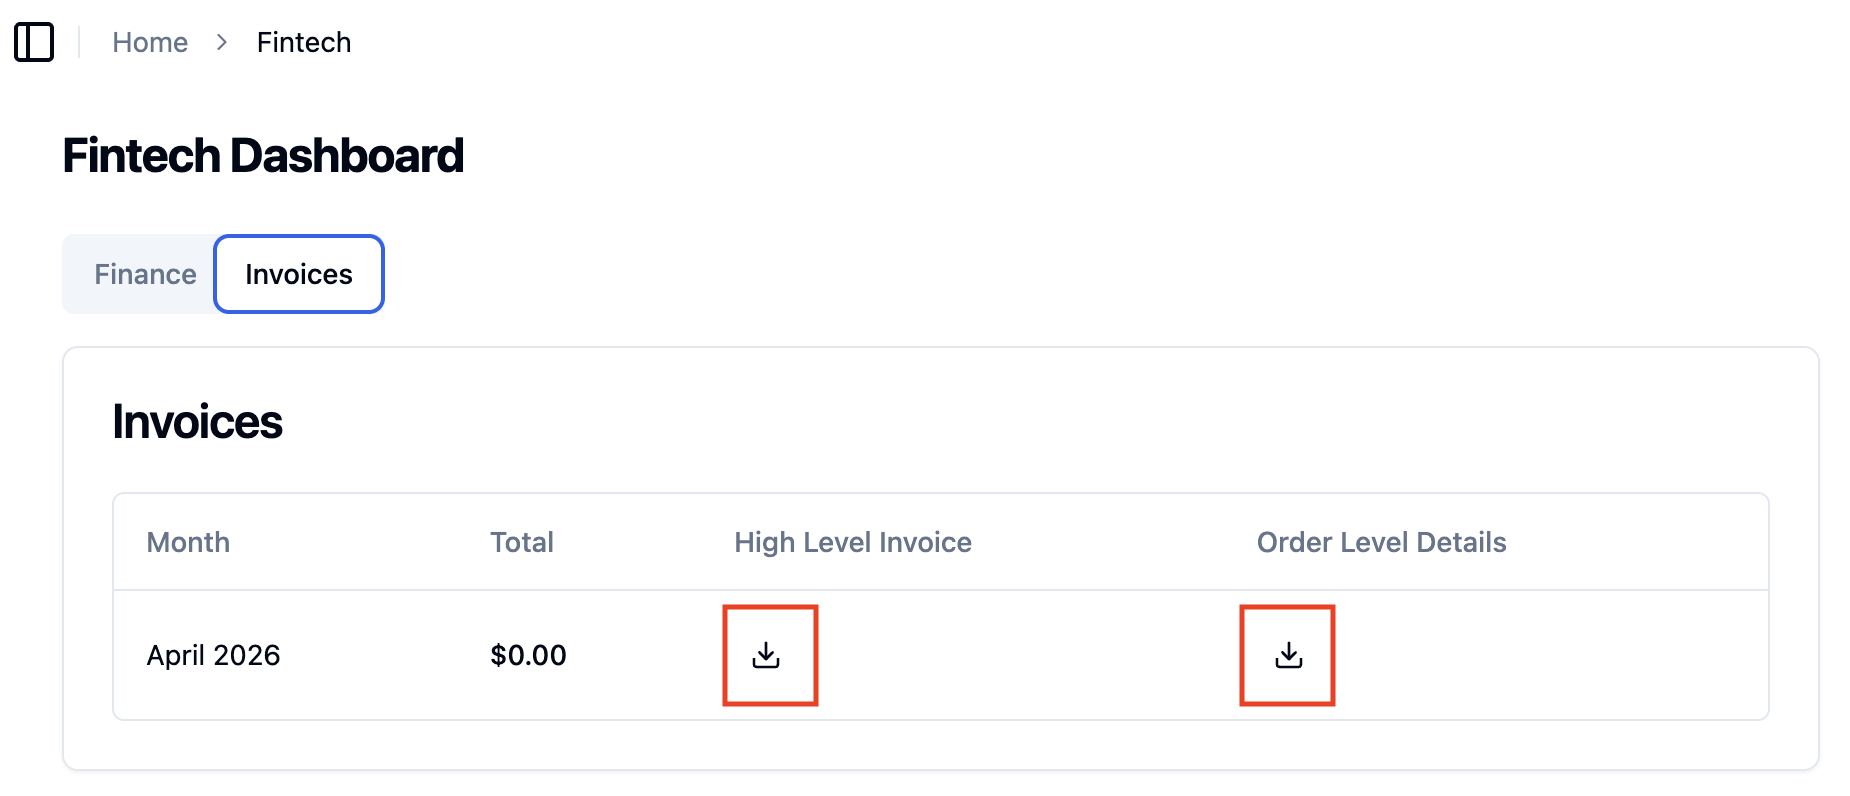
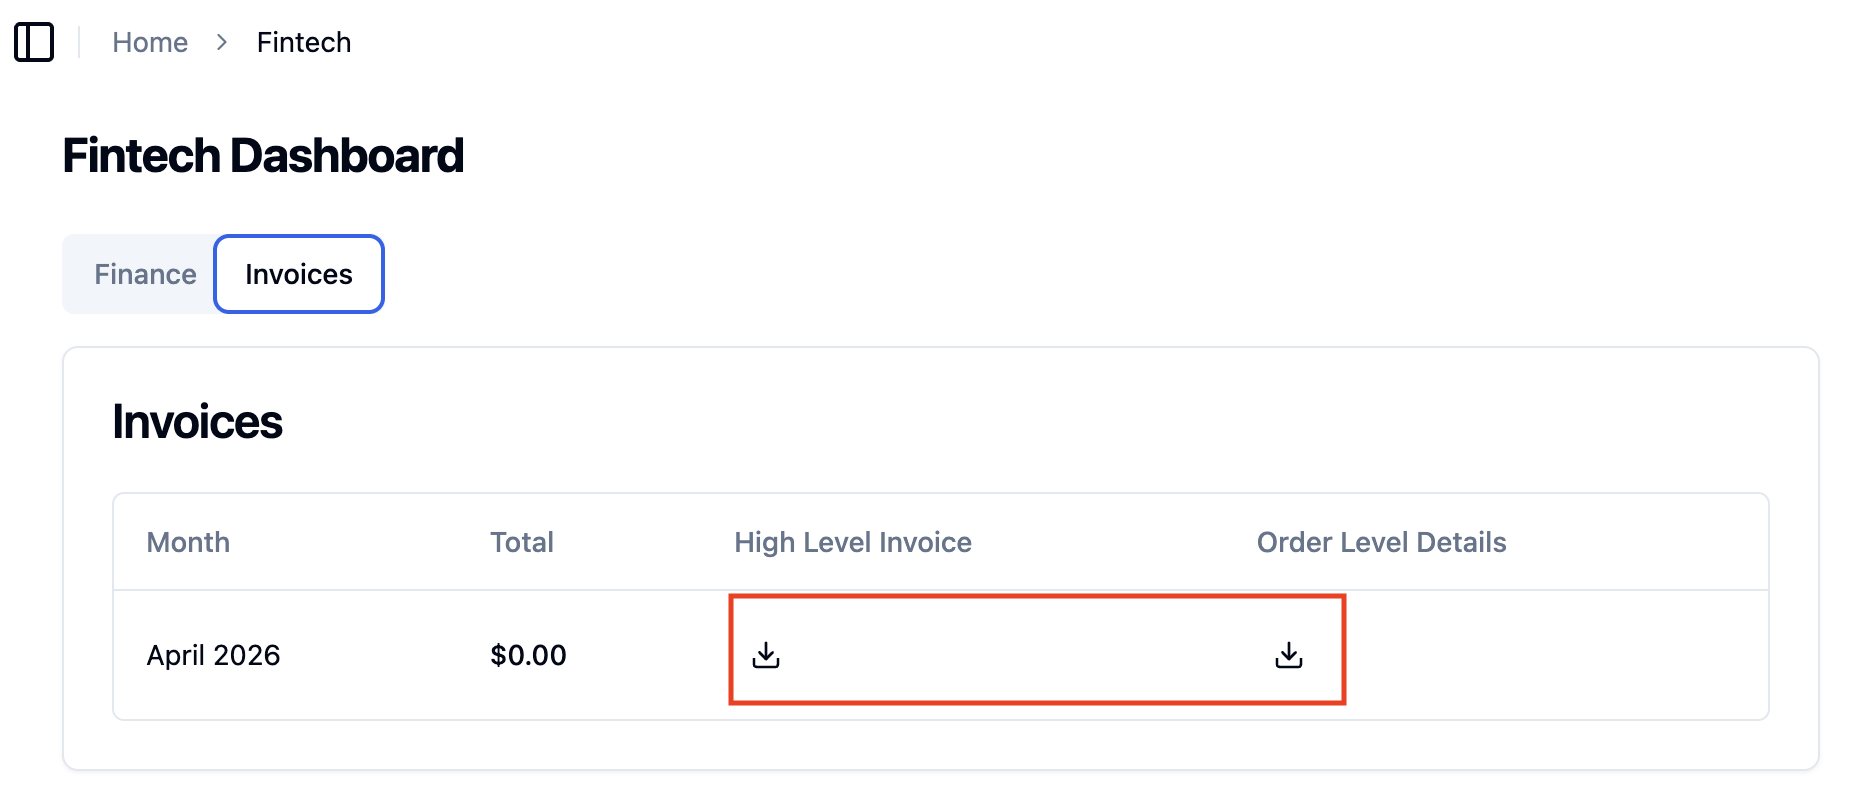
On the Fintech Dashboard, go to the Invoices tab
Locate the month you want, then click the download icon under High Level Invoice or Order Level Details
FAQs
What are Fintech Best Practices?
It is best practice to setup core pricing, workflow financial codes, VAS actions and associated VAS pricing during each new brand setup that you onboard to RetailReady, before the first orders are shipped.
What are Financial Codes used for?
Financial codes let you define a price once and reuse it across multiple workflow actions or VAS instruction sets. This is especially useful when you have many VAS instructions that all carry the same fee — instead of entering a dollar amount on each one individually, you create a single financial code and assign it wherever it applies. Additionally, this also lets you make changes to prices efficiently; when a price changes, you don't have to update every single action, just one financial code.
What if no VAS Instruction Sets appear on the VAS Instruction Sets tab?
VAS instruction sets need to be added at the brand + retailer level in Settings before they'll show up here. See📄 Create VAS Instruction Sets for more detail.
How do I export billing data?
You can export a filtered view of your Bill Report from the Finance tab on the Fintech Dashboard using the 'Export' button. For month-level summaries, you can also download a High Level Invoice or Order Level Details file directly from the Invoices tab.
Do I need to complete setup for each retailer separately?
Yes. Pricing configuration is done per retailer. You'll need to select each retailer from the dropdown on the Pricing Setup tab and configure core pricing, workflow actions, and VAS instruction sets individually for each one.
Why does my Core Pricing show a brand column, and how do I configure pricing for multiple brands?
Core pricing is set at the brand + retailer level, meaning each brand you work with under a given retailer can have its own price points. The brand column you see in Core Pricing reflects the brands that have been mapped to that retailer. To configure pricing for a different brand, select the same retailer from the dropdown — the Core Pricing table will show a column for each mapped brand, and you can click into any field to enter or update prices. If a brand is not appearing as a column, confirm that it has been onboarded and mapped to that retailer. You can request a new brand connection by following these steps: 📄 How to Request a New Connection