Delayed GS1 Label Orders
Last updated: May 25, 2026
This flow applies when a retailer requires a total carton count on the GS1 carton labels and the brand packs by eaches.
Because we don't know the final carton count until packing is complete, we print QR codes first and generate the GS1 labels at the end. Packouts are grouped based on the retailer's requirements:
By group: when the retailer needs carton count across multiple orders (e.g. Nordstrom requires carton count at the DC level for all orders sharing the same ship-by date)
By order: when the retailer needs carton count at the individual order level
How to Process a Delayed GS1 Label Order
This article walks through the end-to-end Delayed GS1 label order flow in RetailReady, from printing QR codes and packing by eaches, through generating GS1 labels once carton counts are finalized, to closing out the order for shipment. Follow these steps each time you process a Delayed GS1 label order.
Pack SKUs
Navigate to the RetailReady App
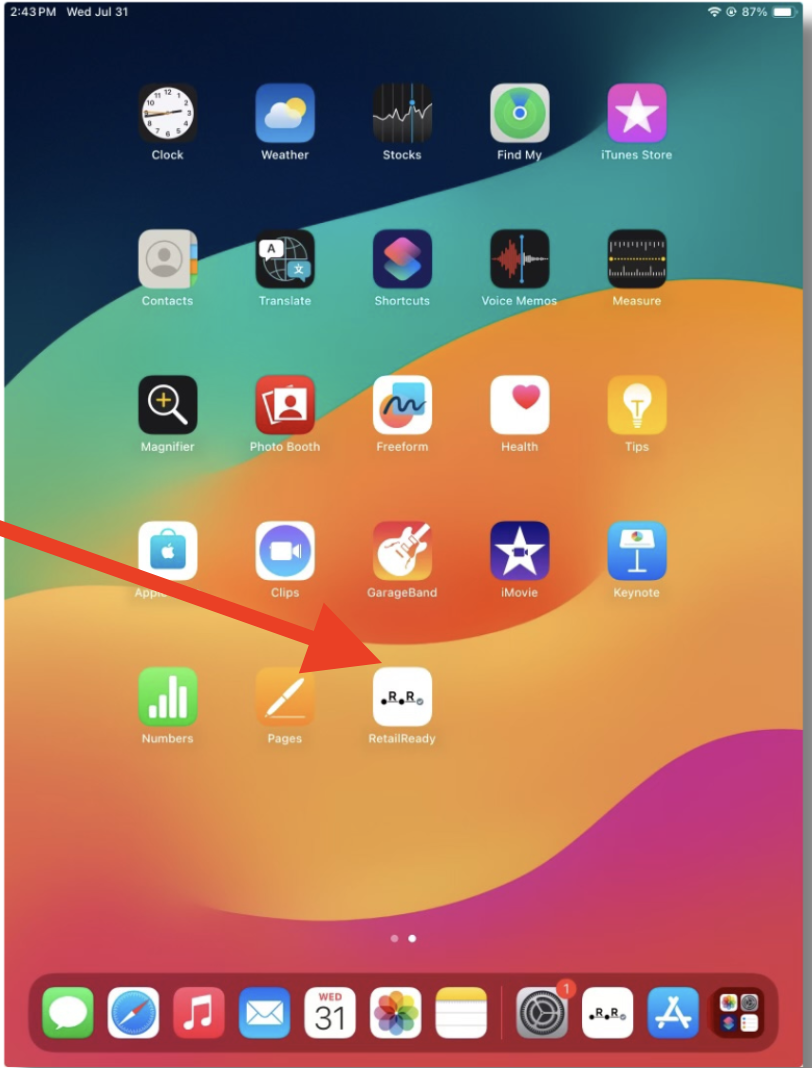
Locate the RetailReady icon on your iPad home screen and tap it to open the app or click 'tablet mode' located on the left-side navigation panel on the RetailReady dashboard.
Log in with your credentials.
Enter your Email and Password, then tap 'Log In'.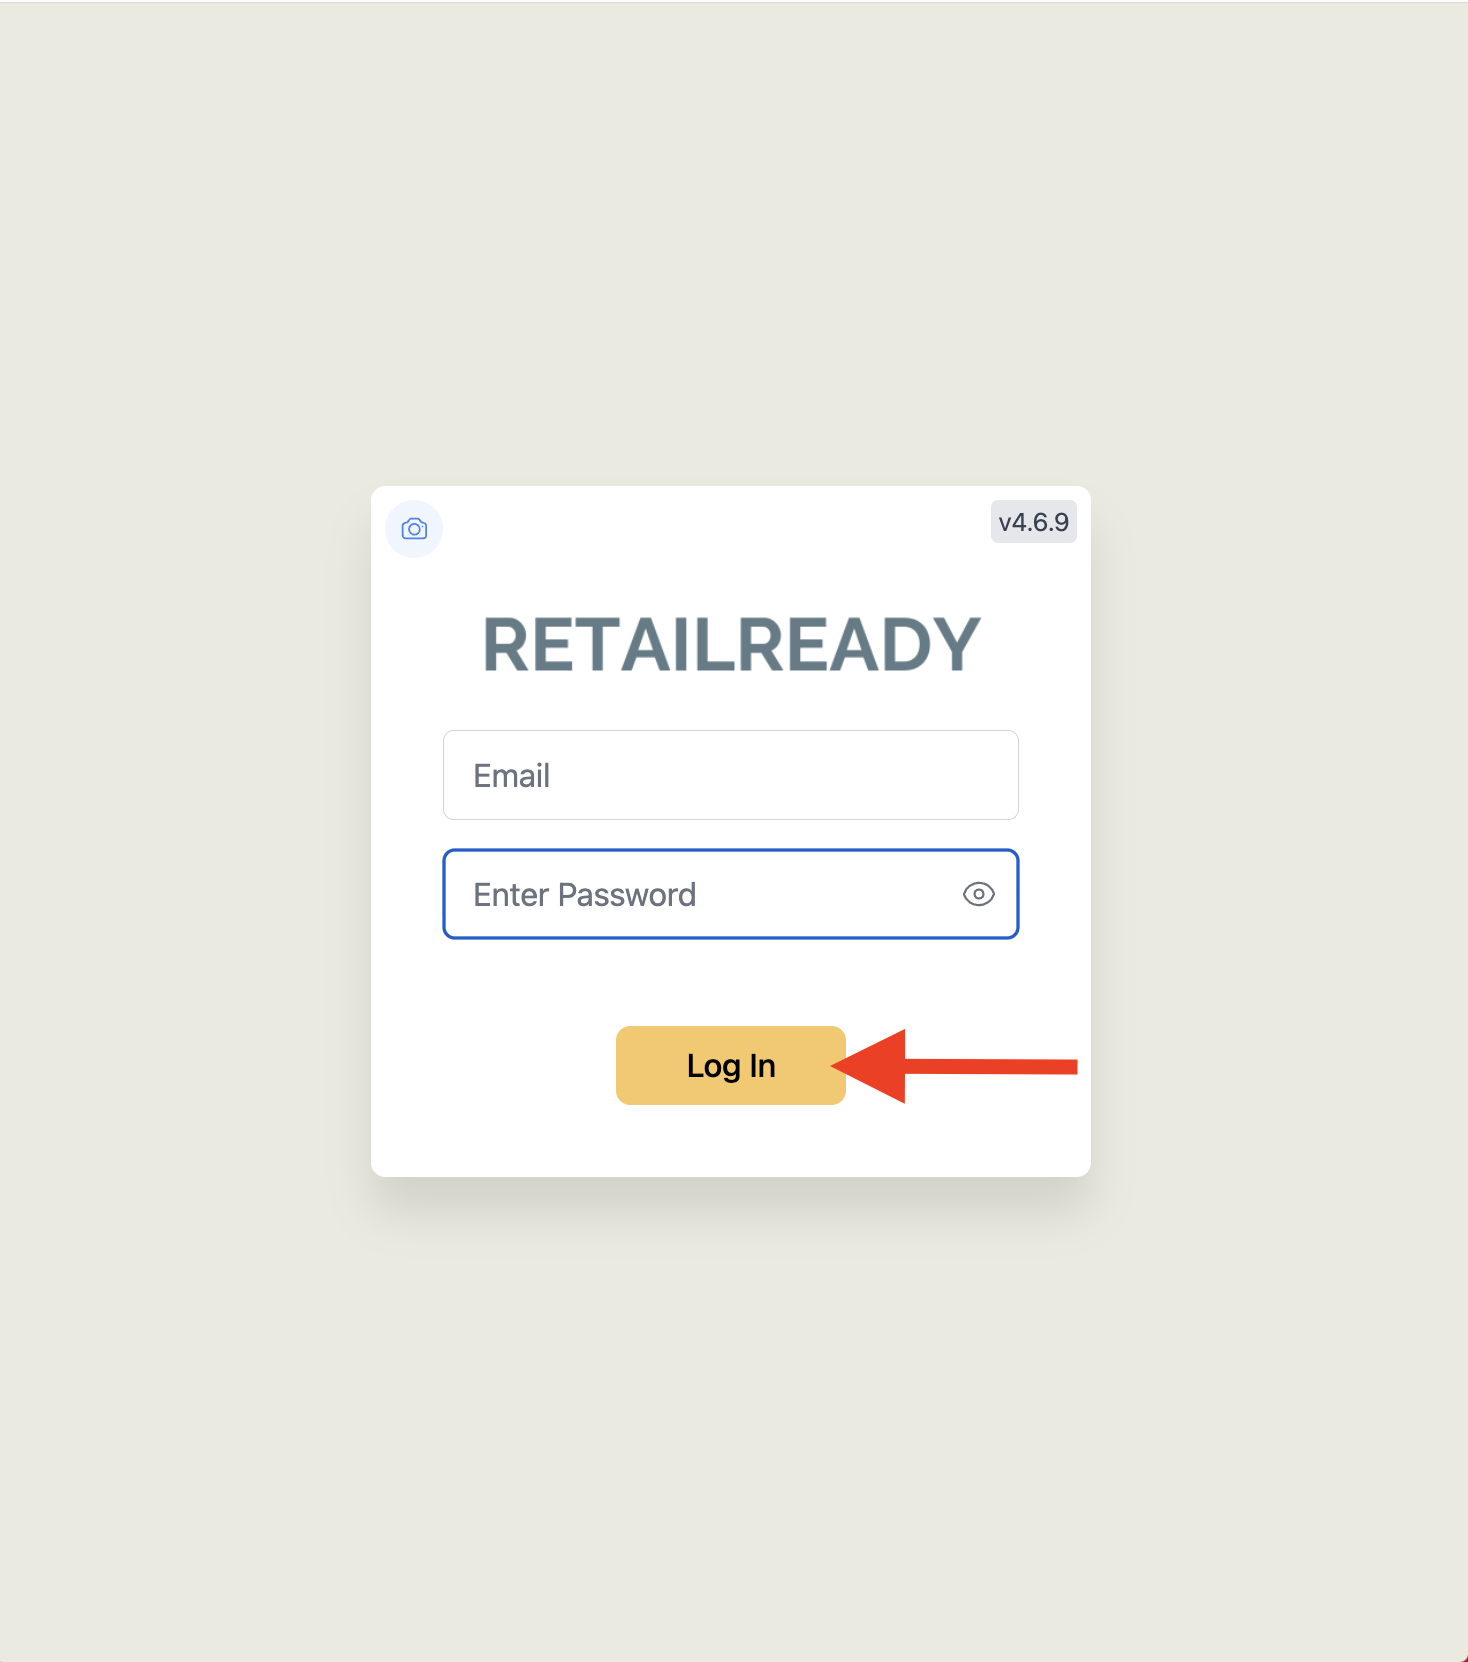
Select the printer you will be using.
After logging in, RetailReady will prompt you to select a printer. Tap the printer you'll be using for printing, then tap 'Continue'.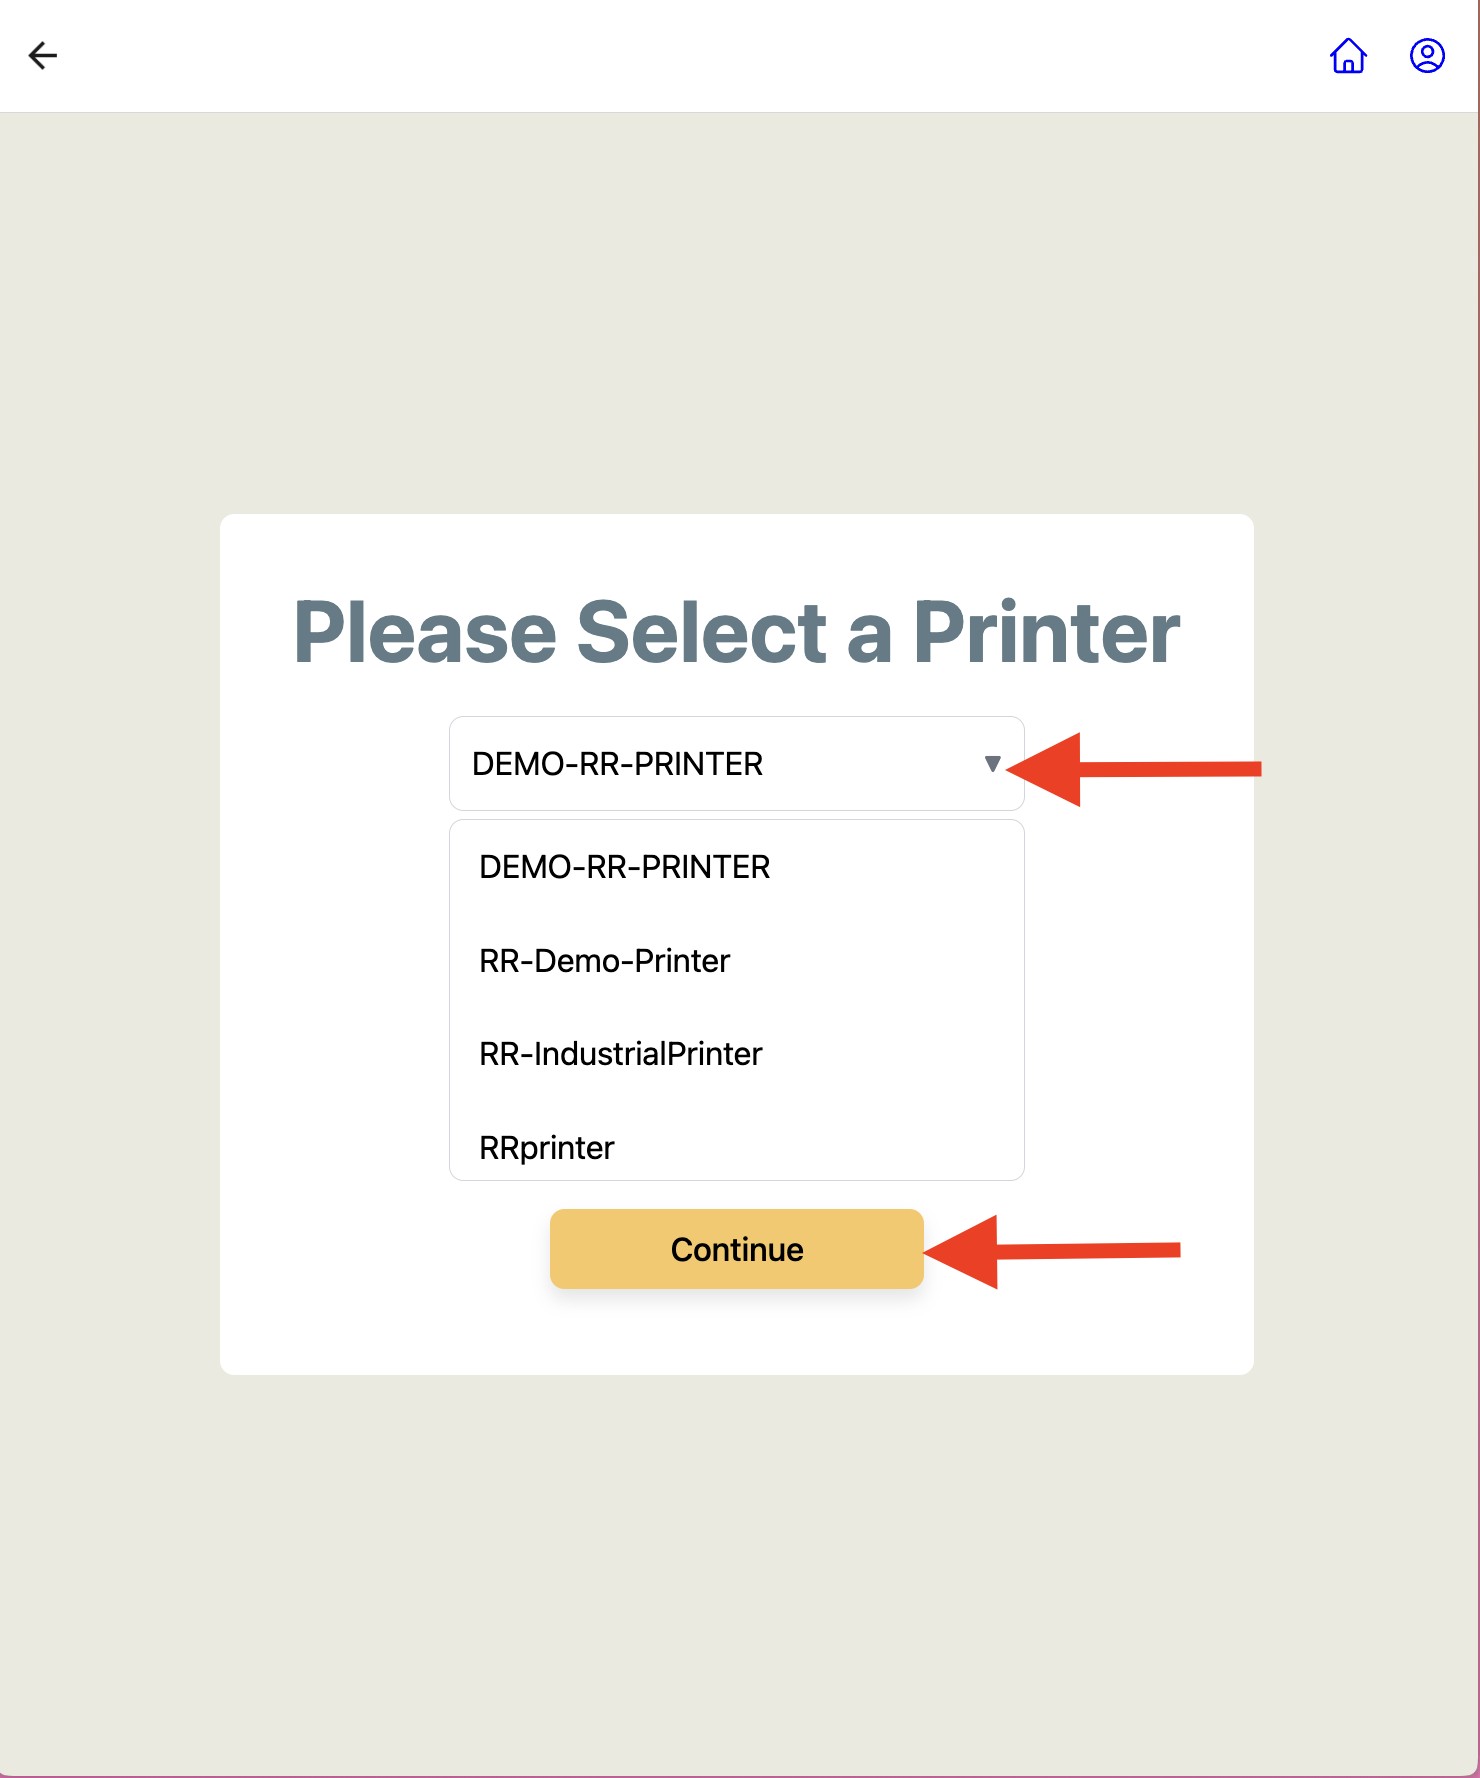
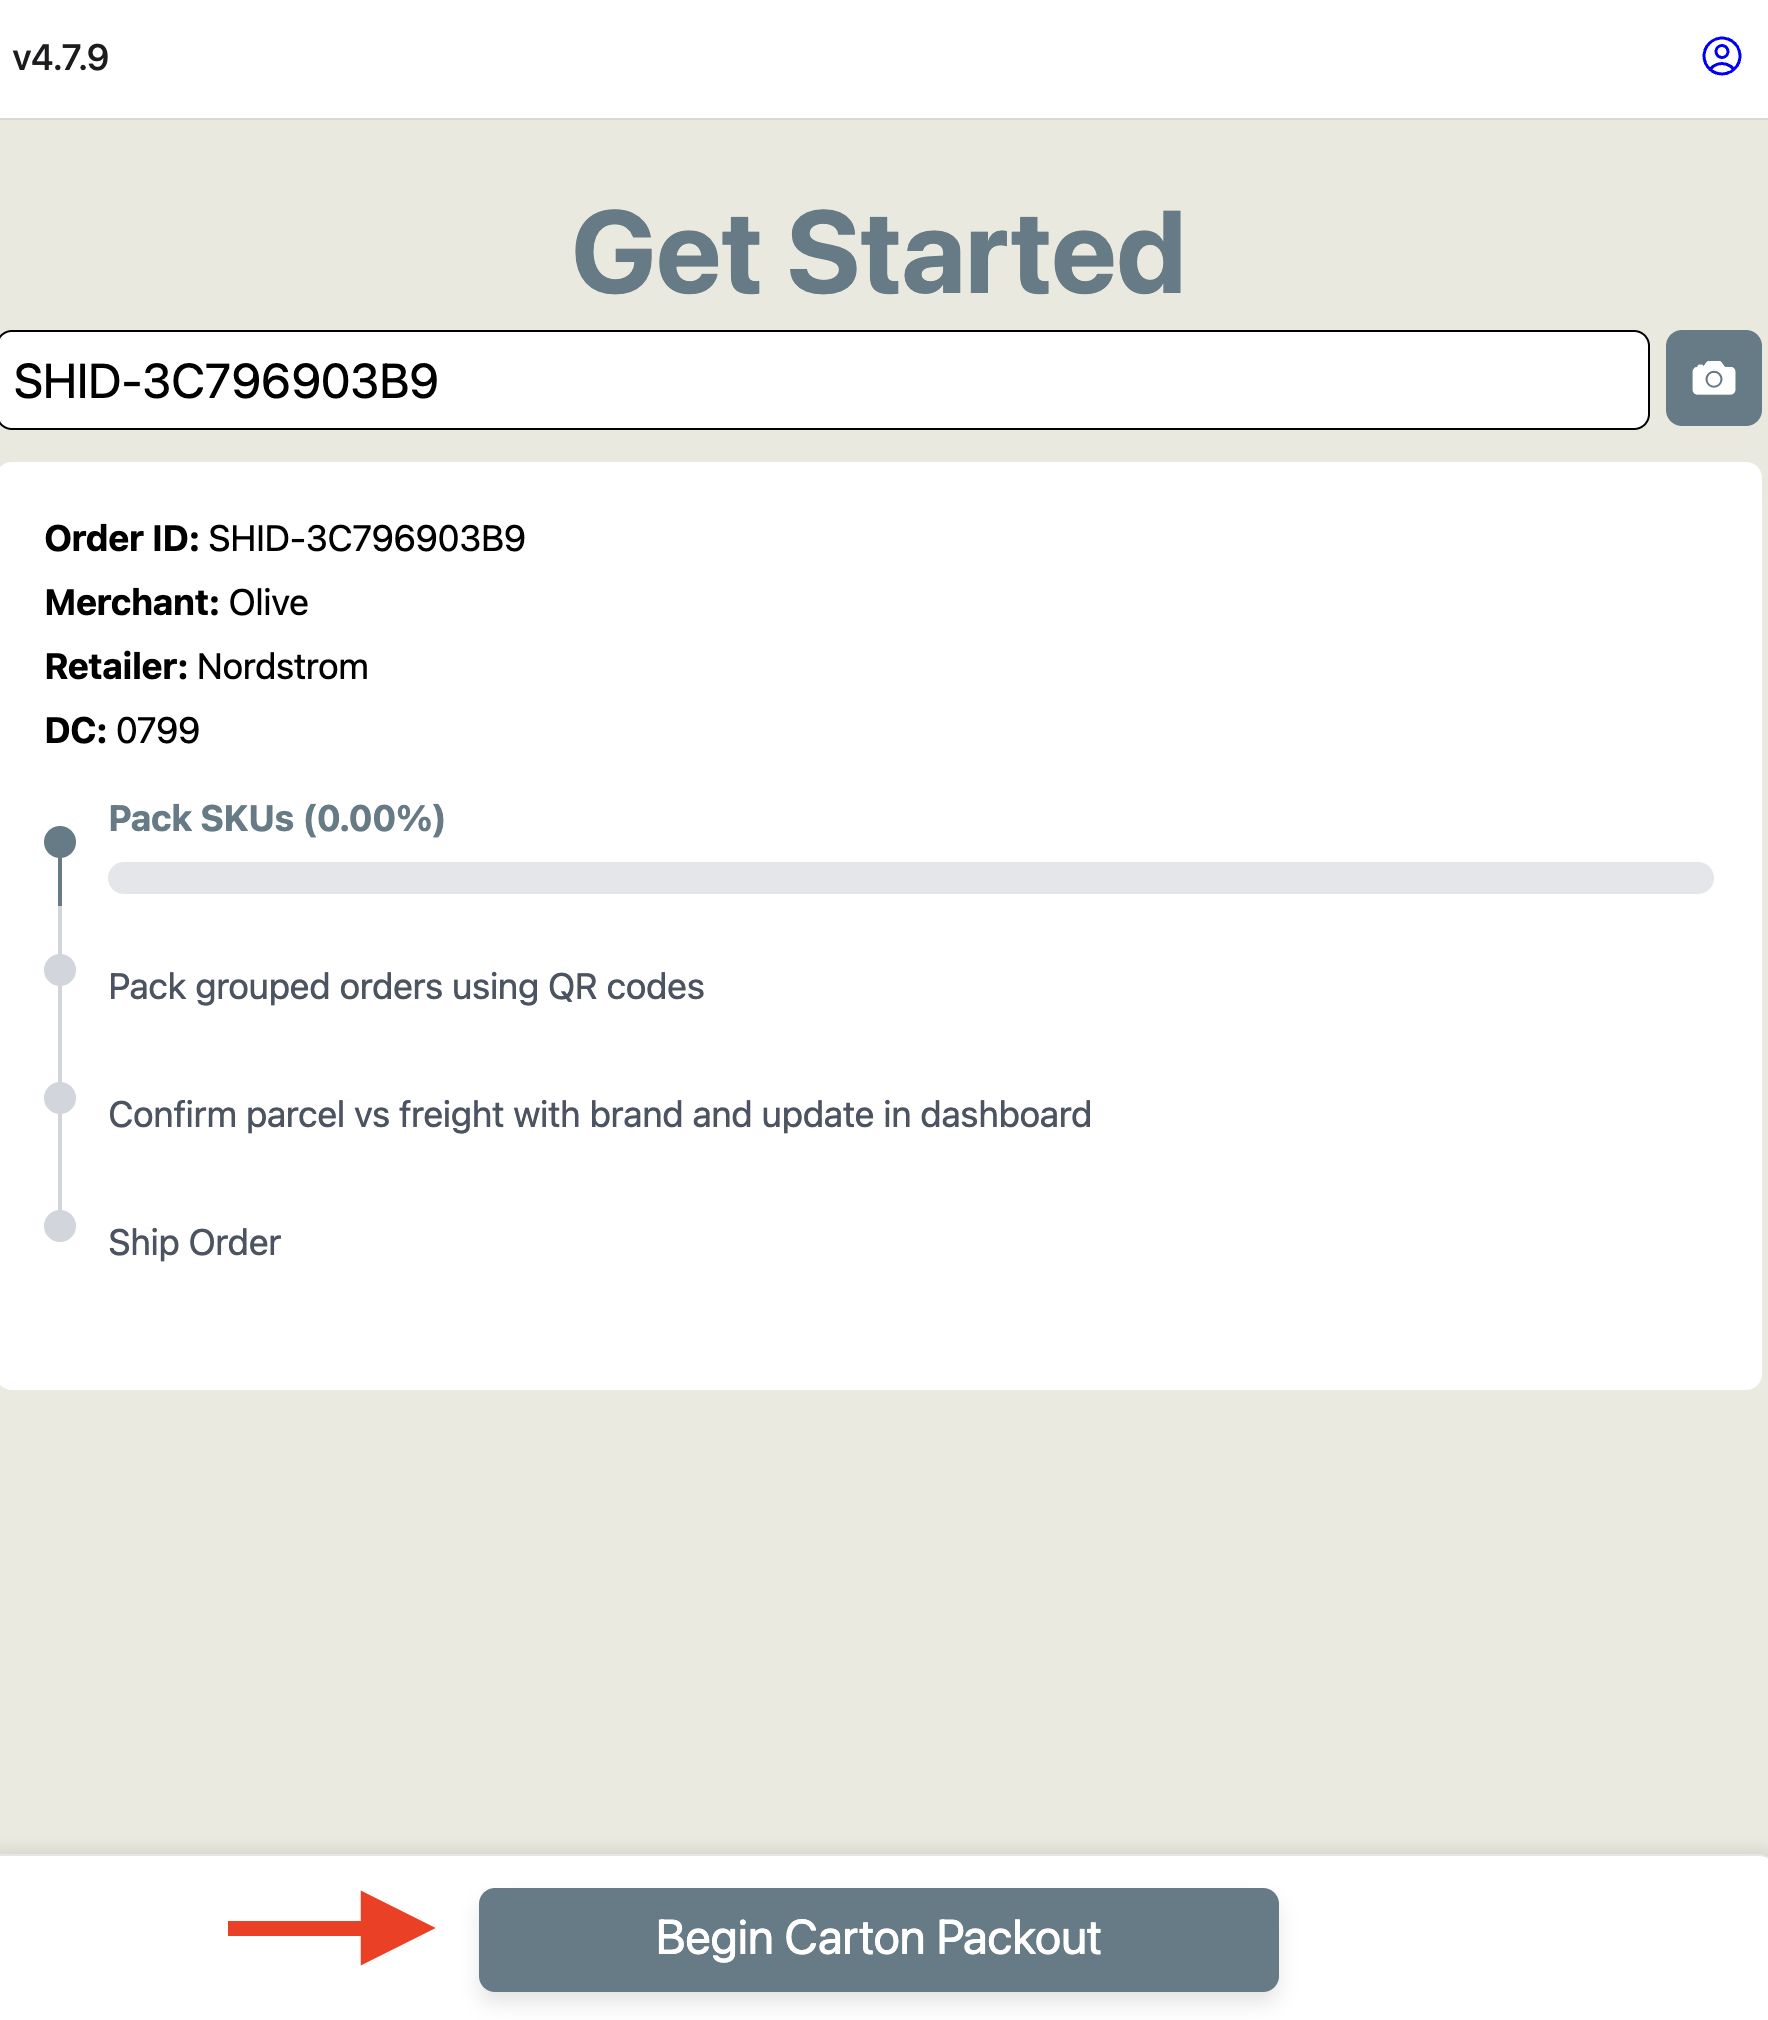
Scan or search for your order on the Get Started screen.
On the RetailReady home screen, tap the 'Scan Order, Carton, or Pallet' field and type the order number manually or click the camera icon to take a photo of the barcode of the order number.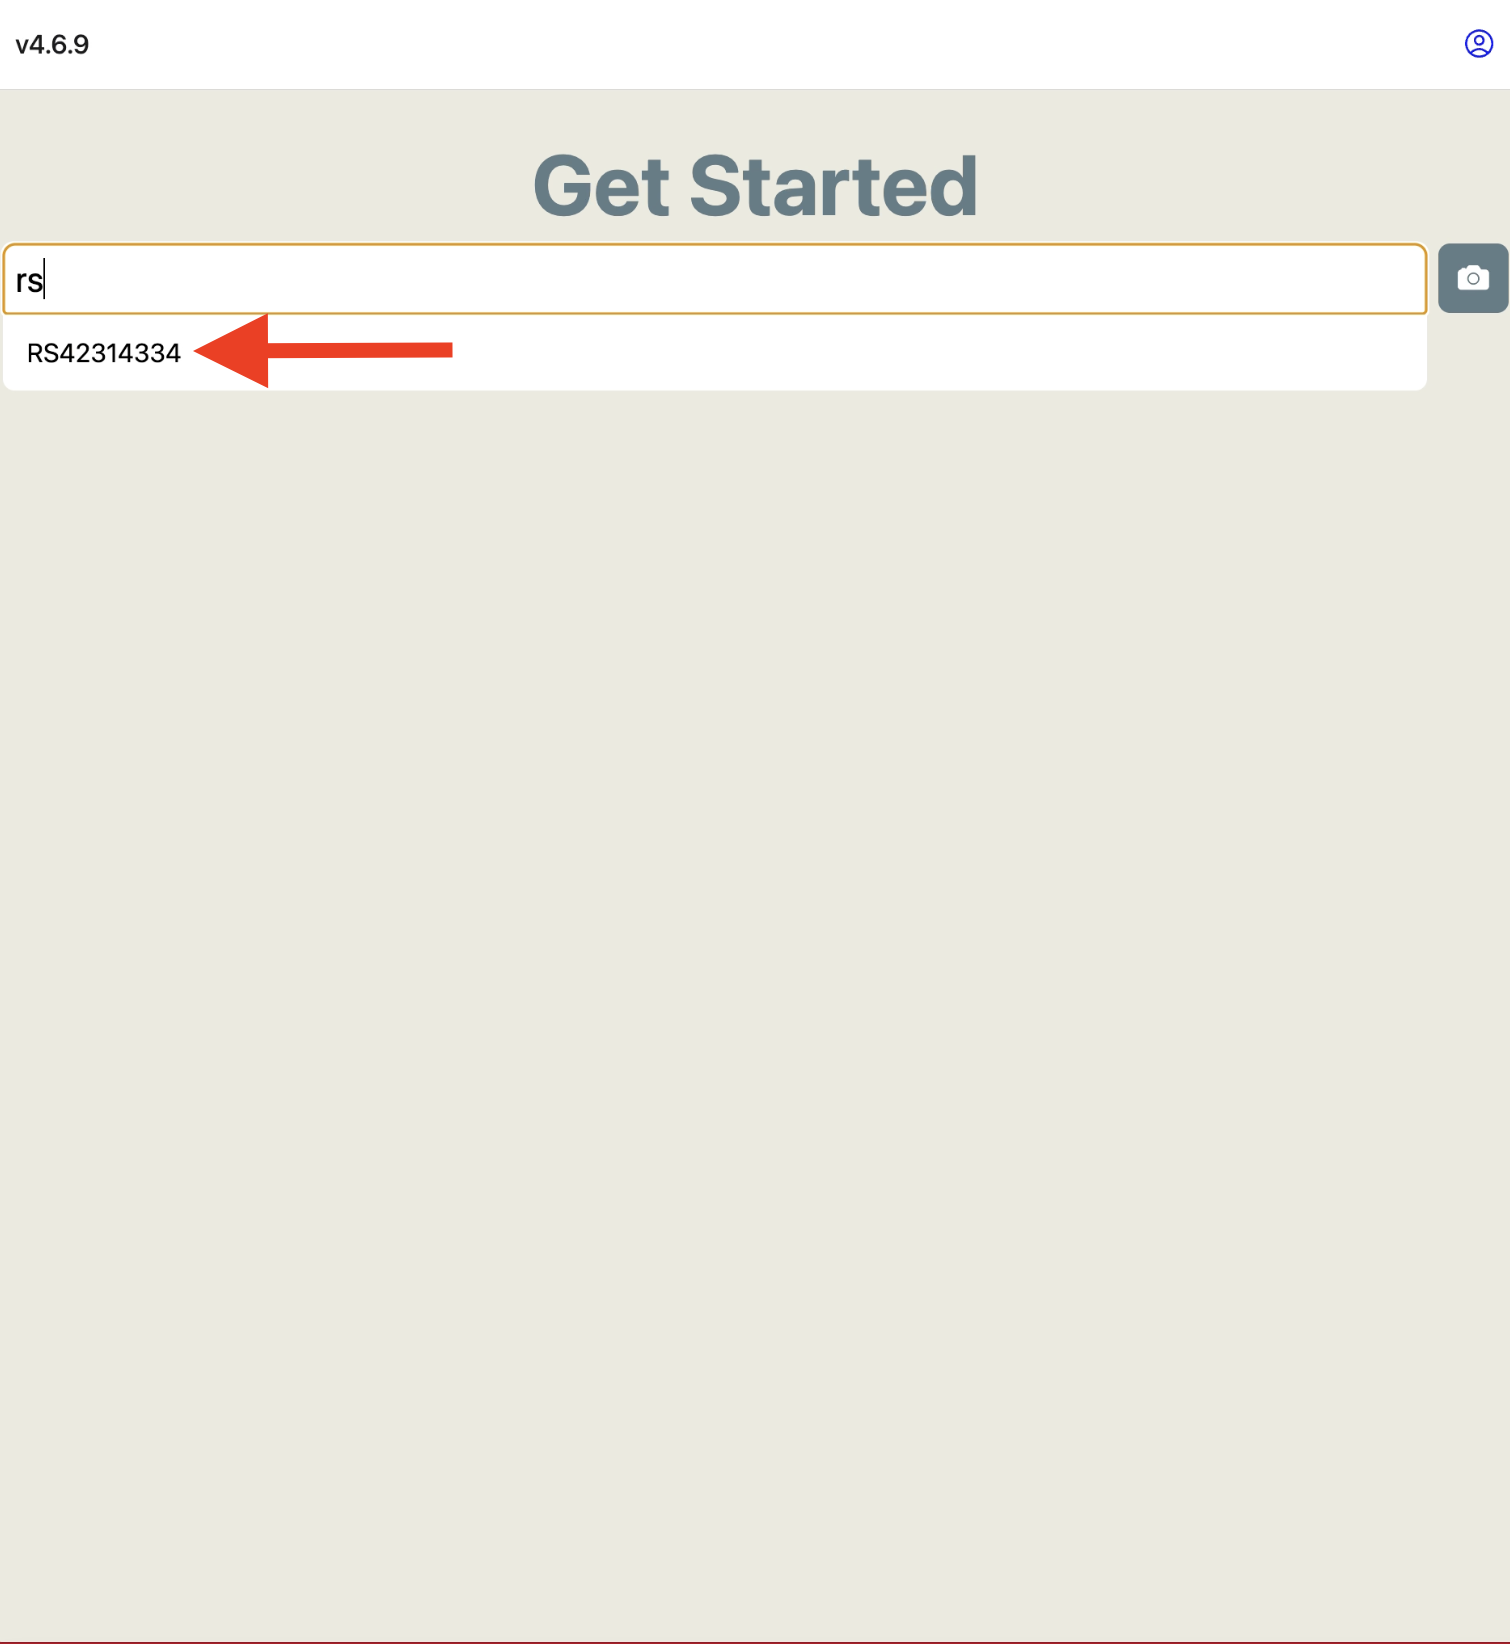
Review the order details and tap 'Begin Carton Packout'.
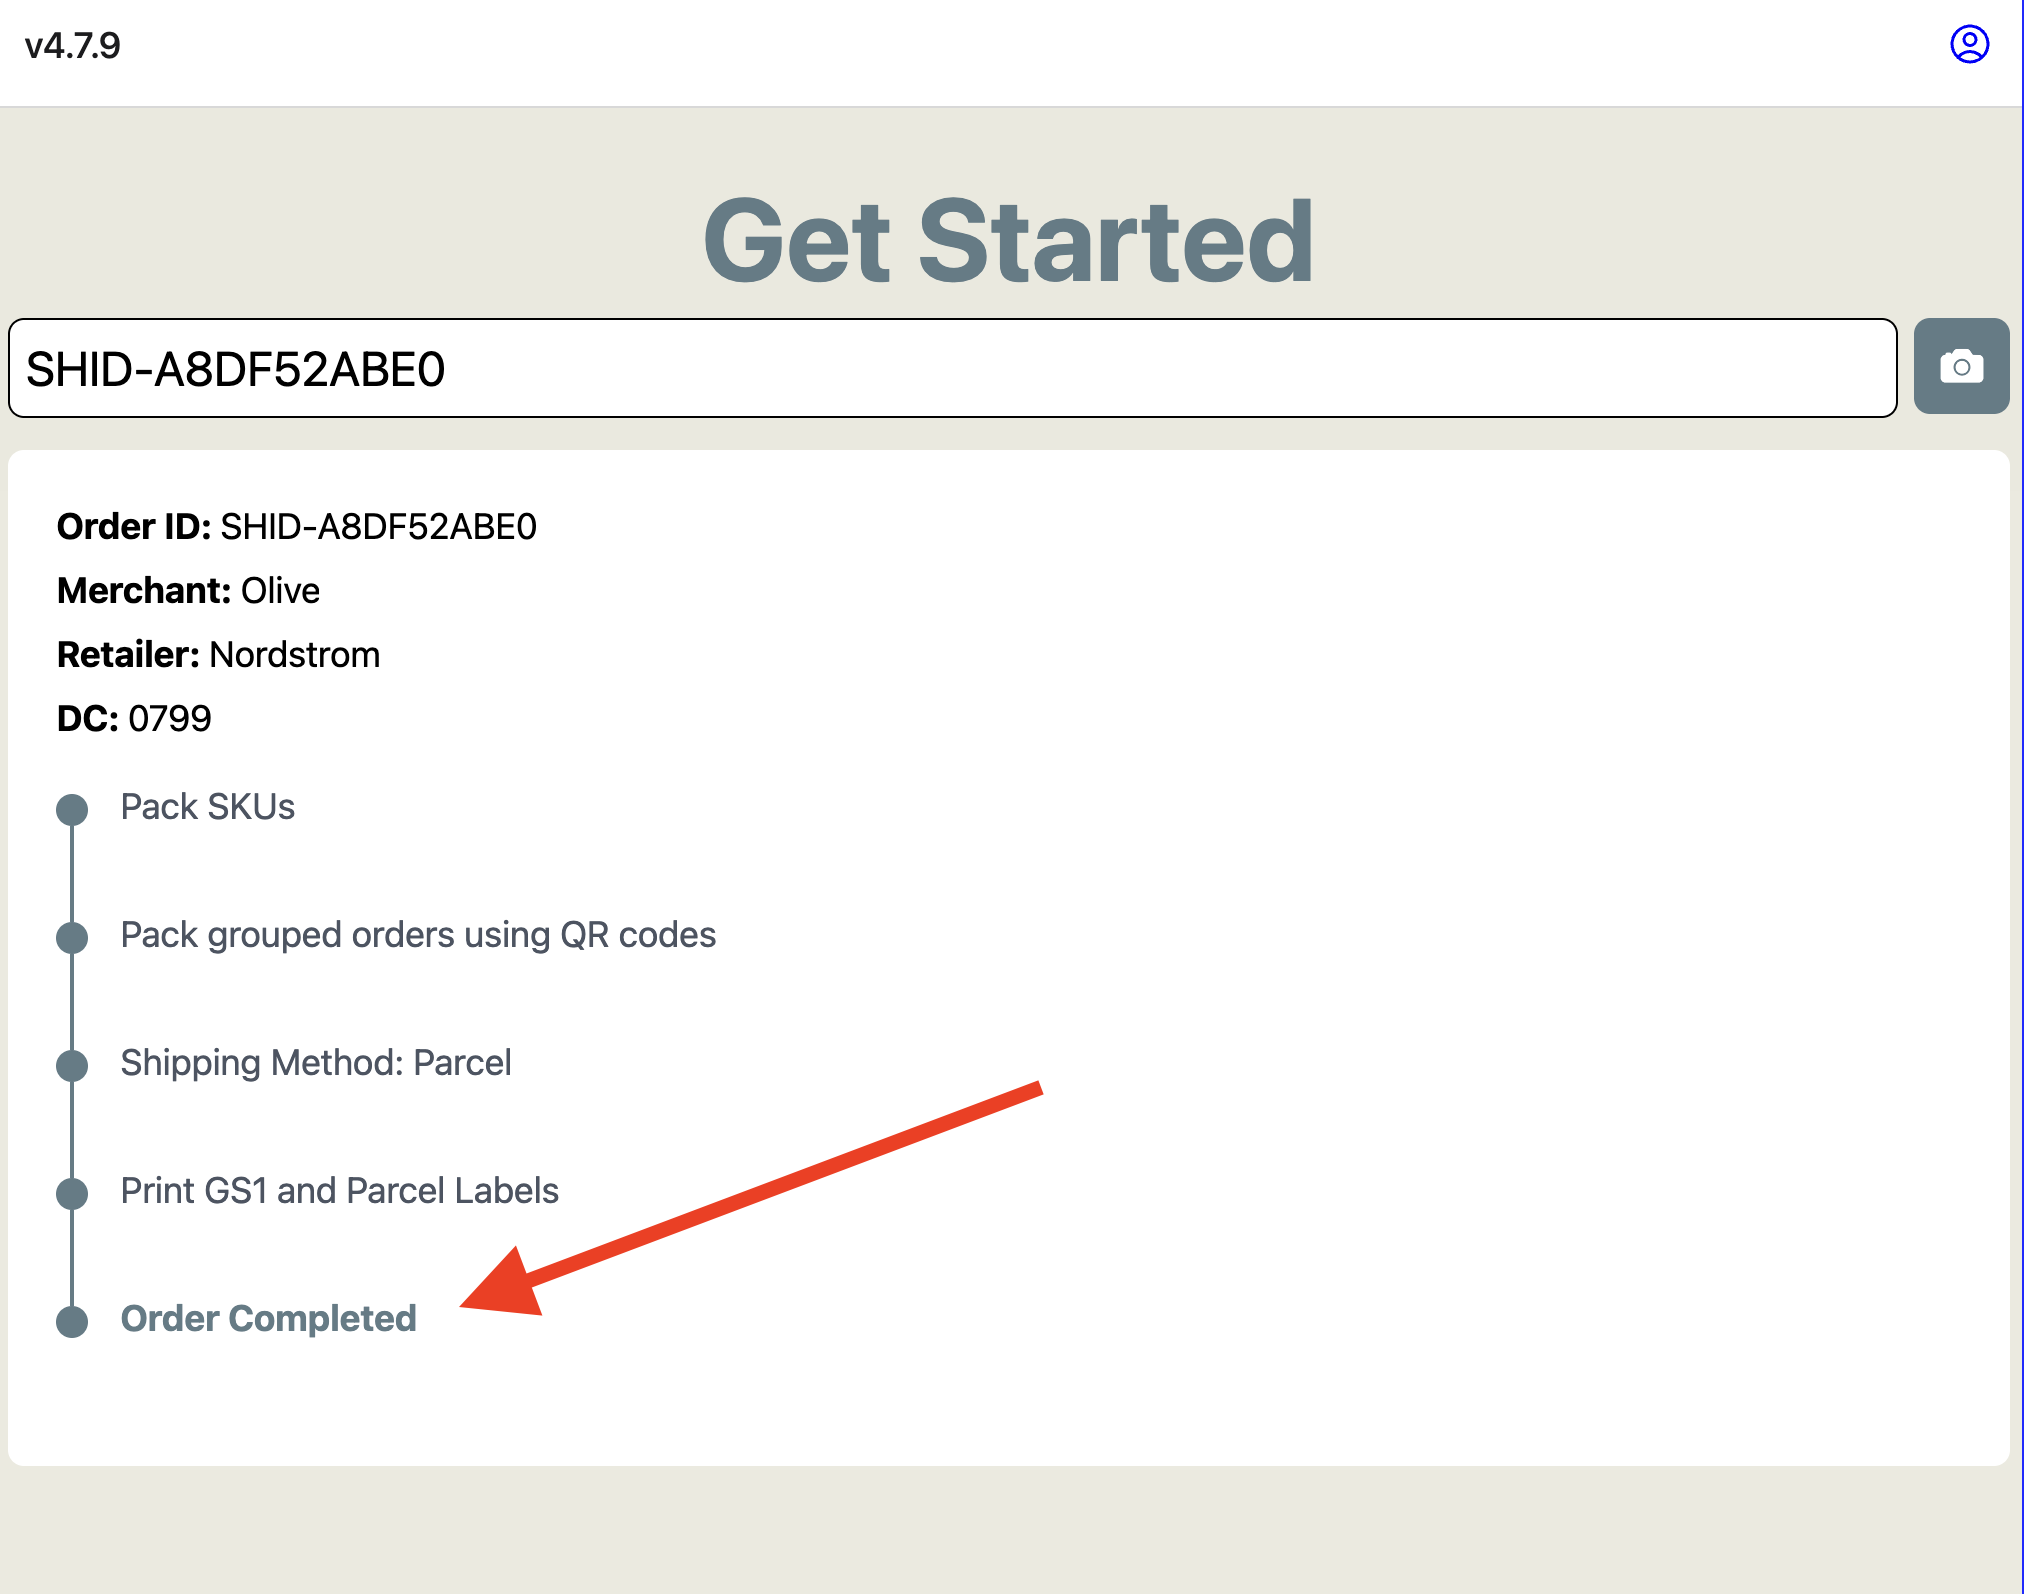
Confirm the Order ID, Merchant, and Retailer. The Freight order timeline shows six stages: Pack SKUs, Shipping Method: Freight, Stage Pallets, Create a load in RetailReady dashboard, Ship Order, and Order Completed. Tap 'Begin Carton Packout' to start.
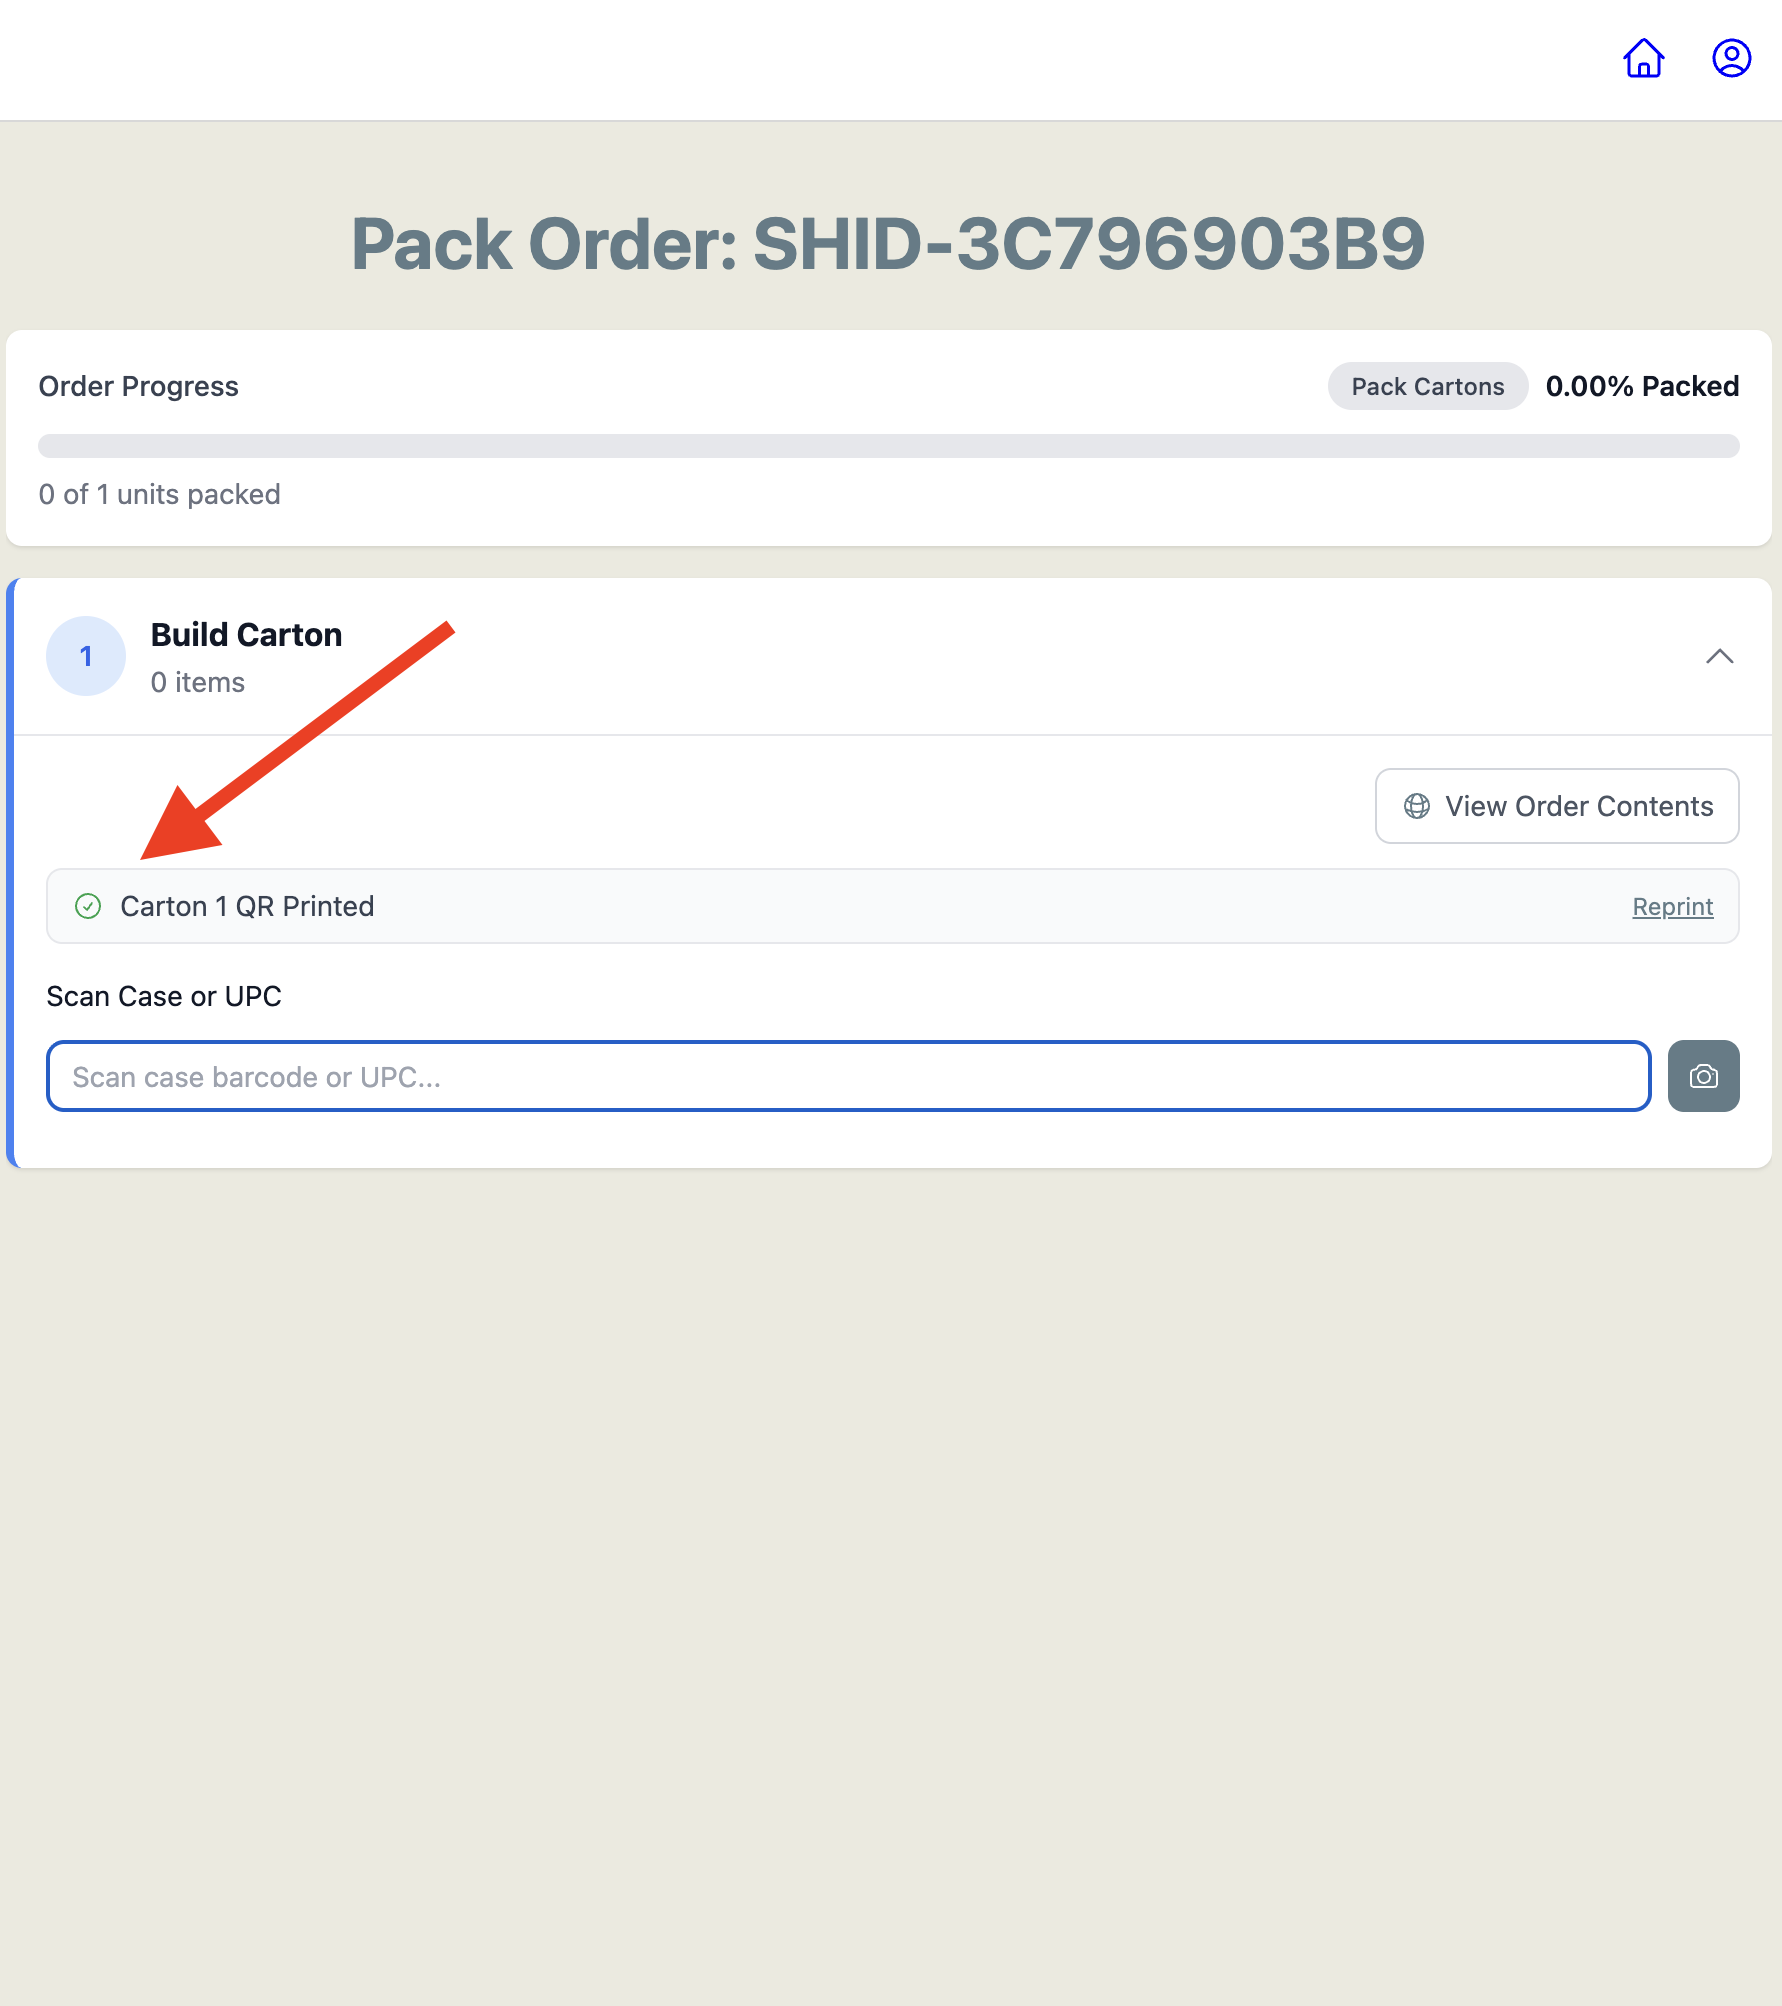
QR code Prints
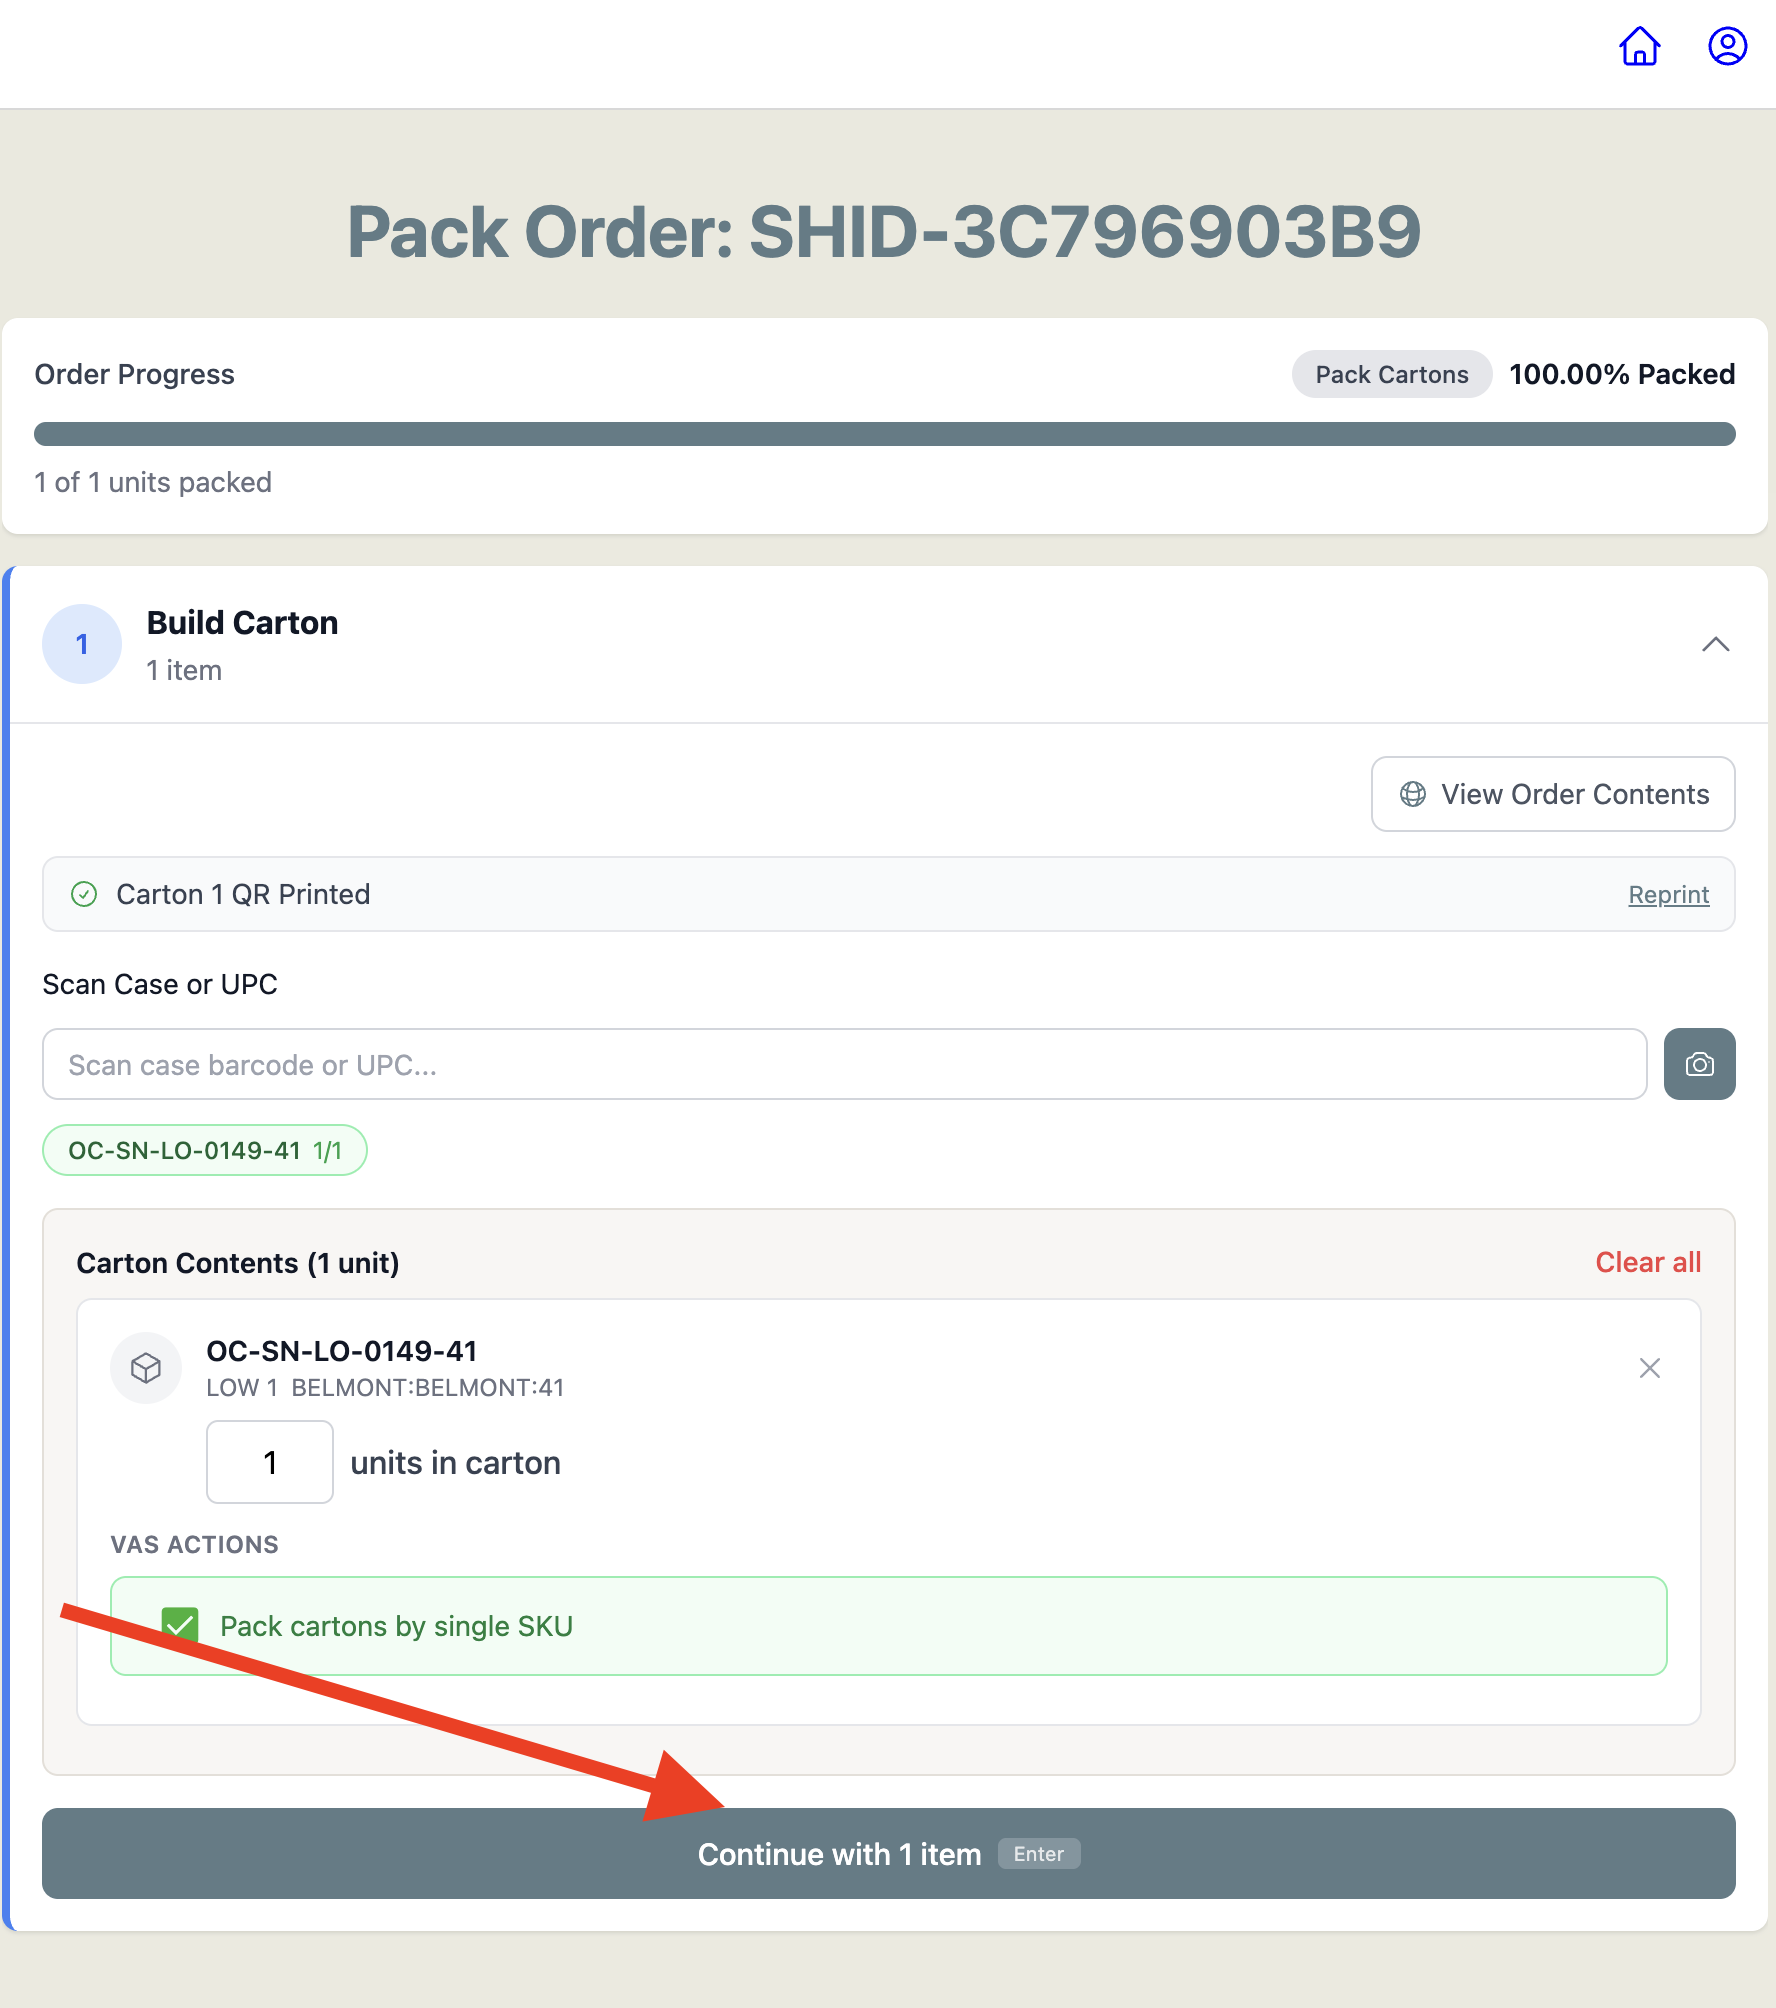
A QR code will automatically print (see "Carton 1 QR Printed"). This should be placed on the box so you can scan that box at a later time. We suggest "dog-earing" the label.
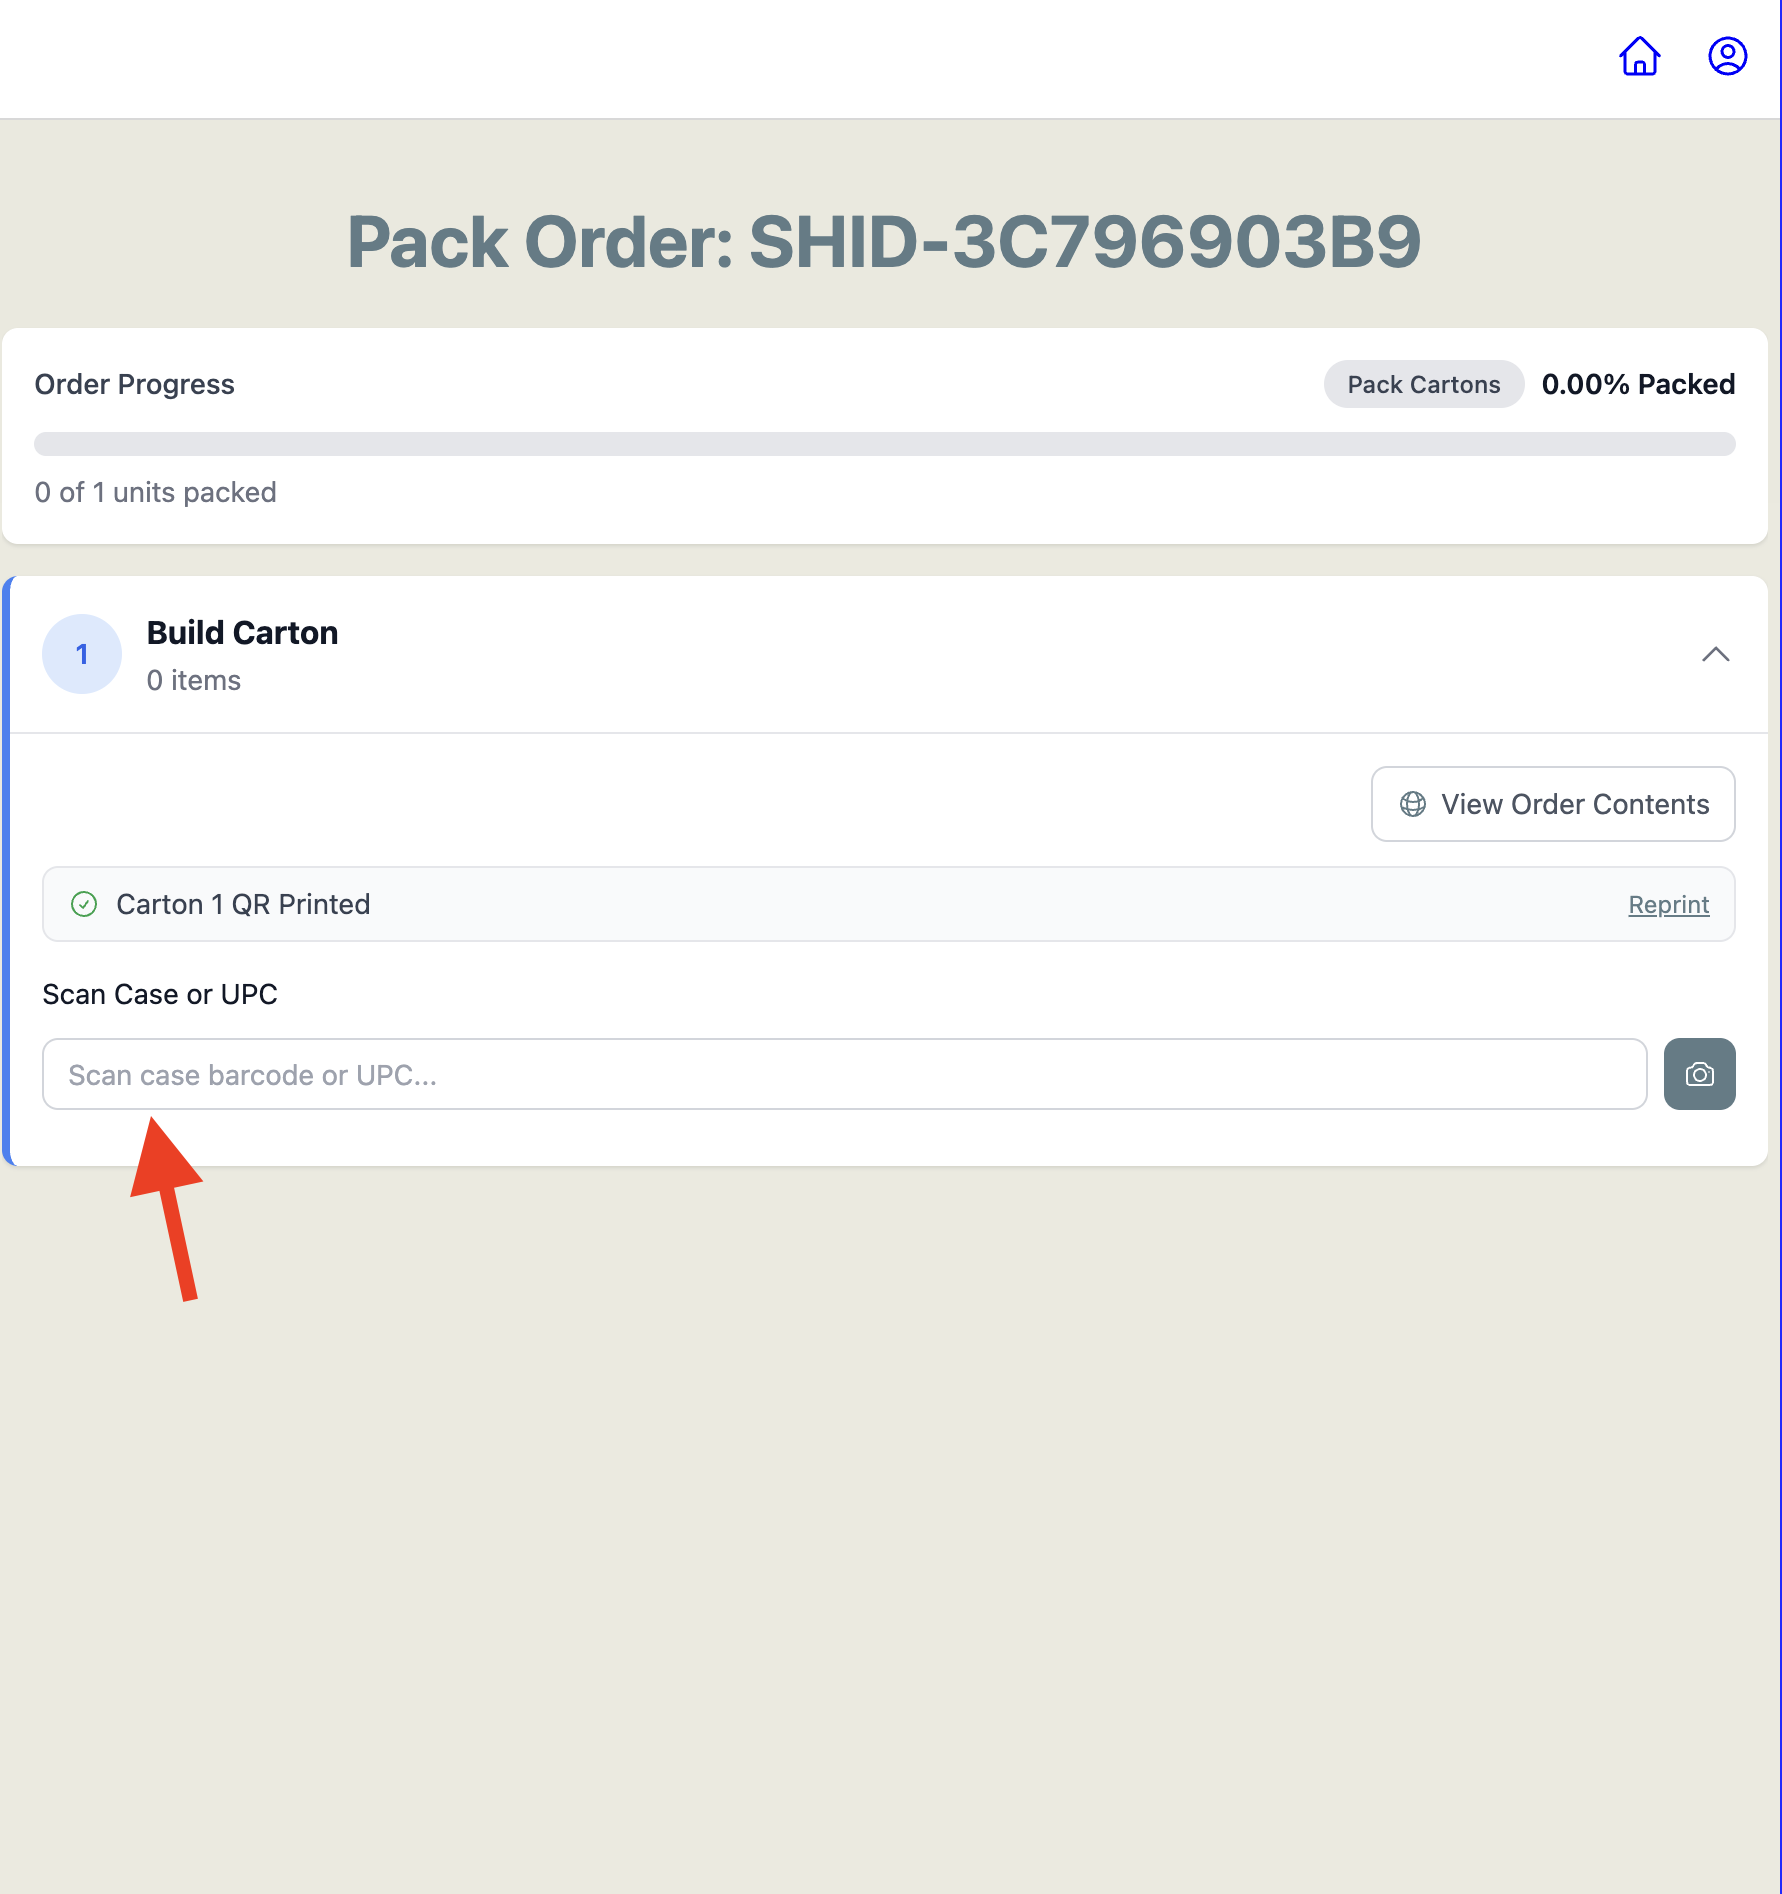
Scan UPC
Start scanning the UPC of the product into the carton. You can use a handheld scanner or the camera 📷 icon to the right of the input box to scan.
You can also click 'View Order Contents' as needed top copy the UPC/barcode.
Complete any VAS (value added services)
Once complete, check off the VAS action.
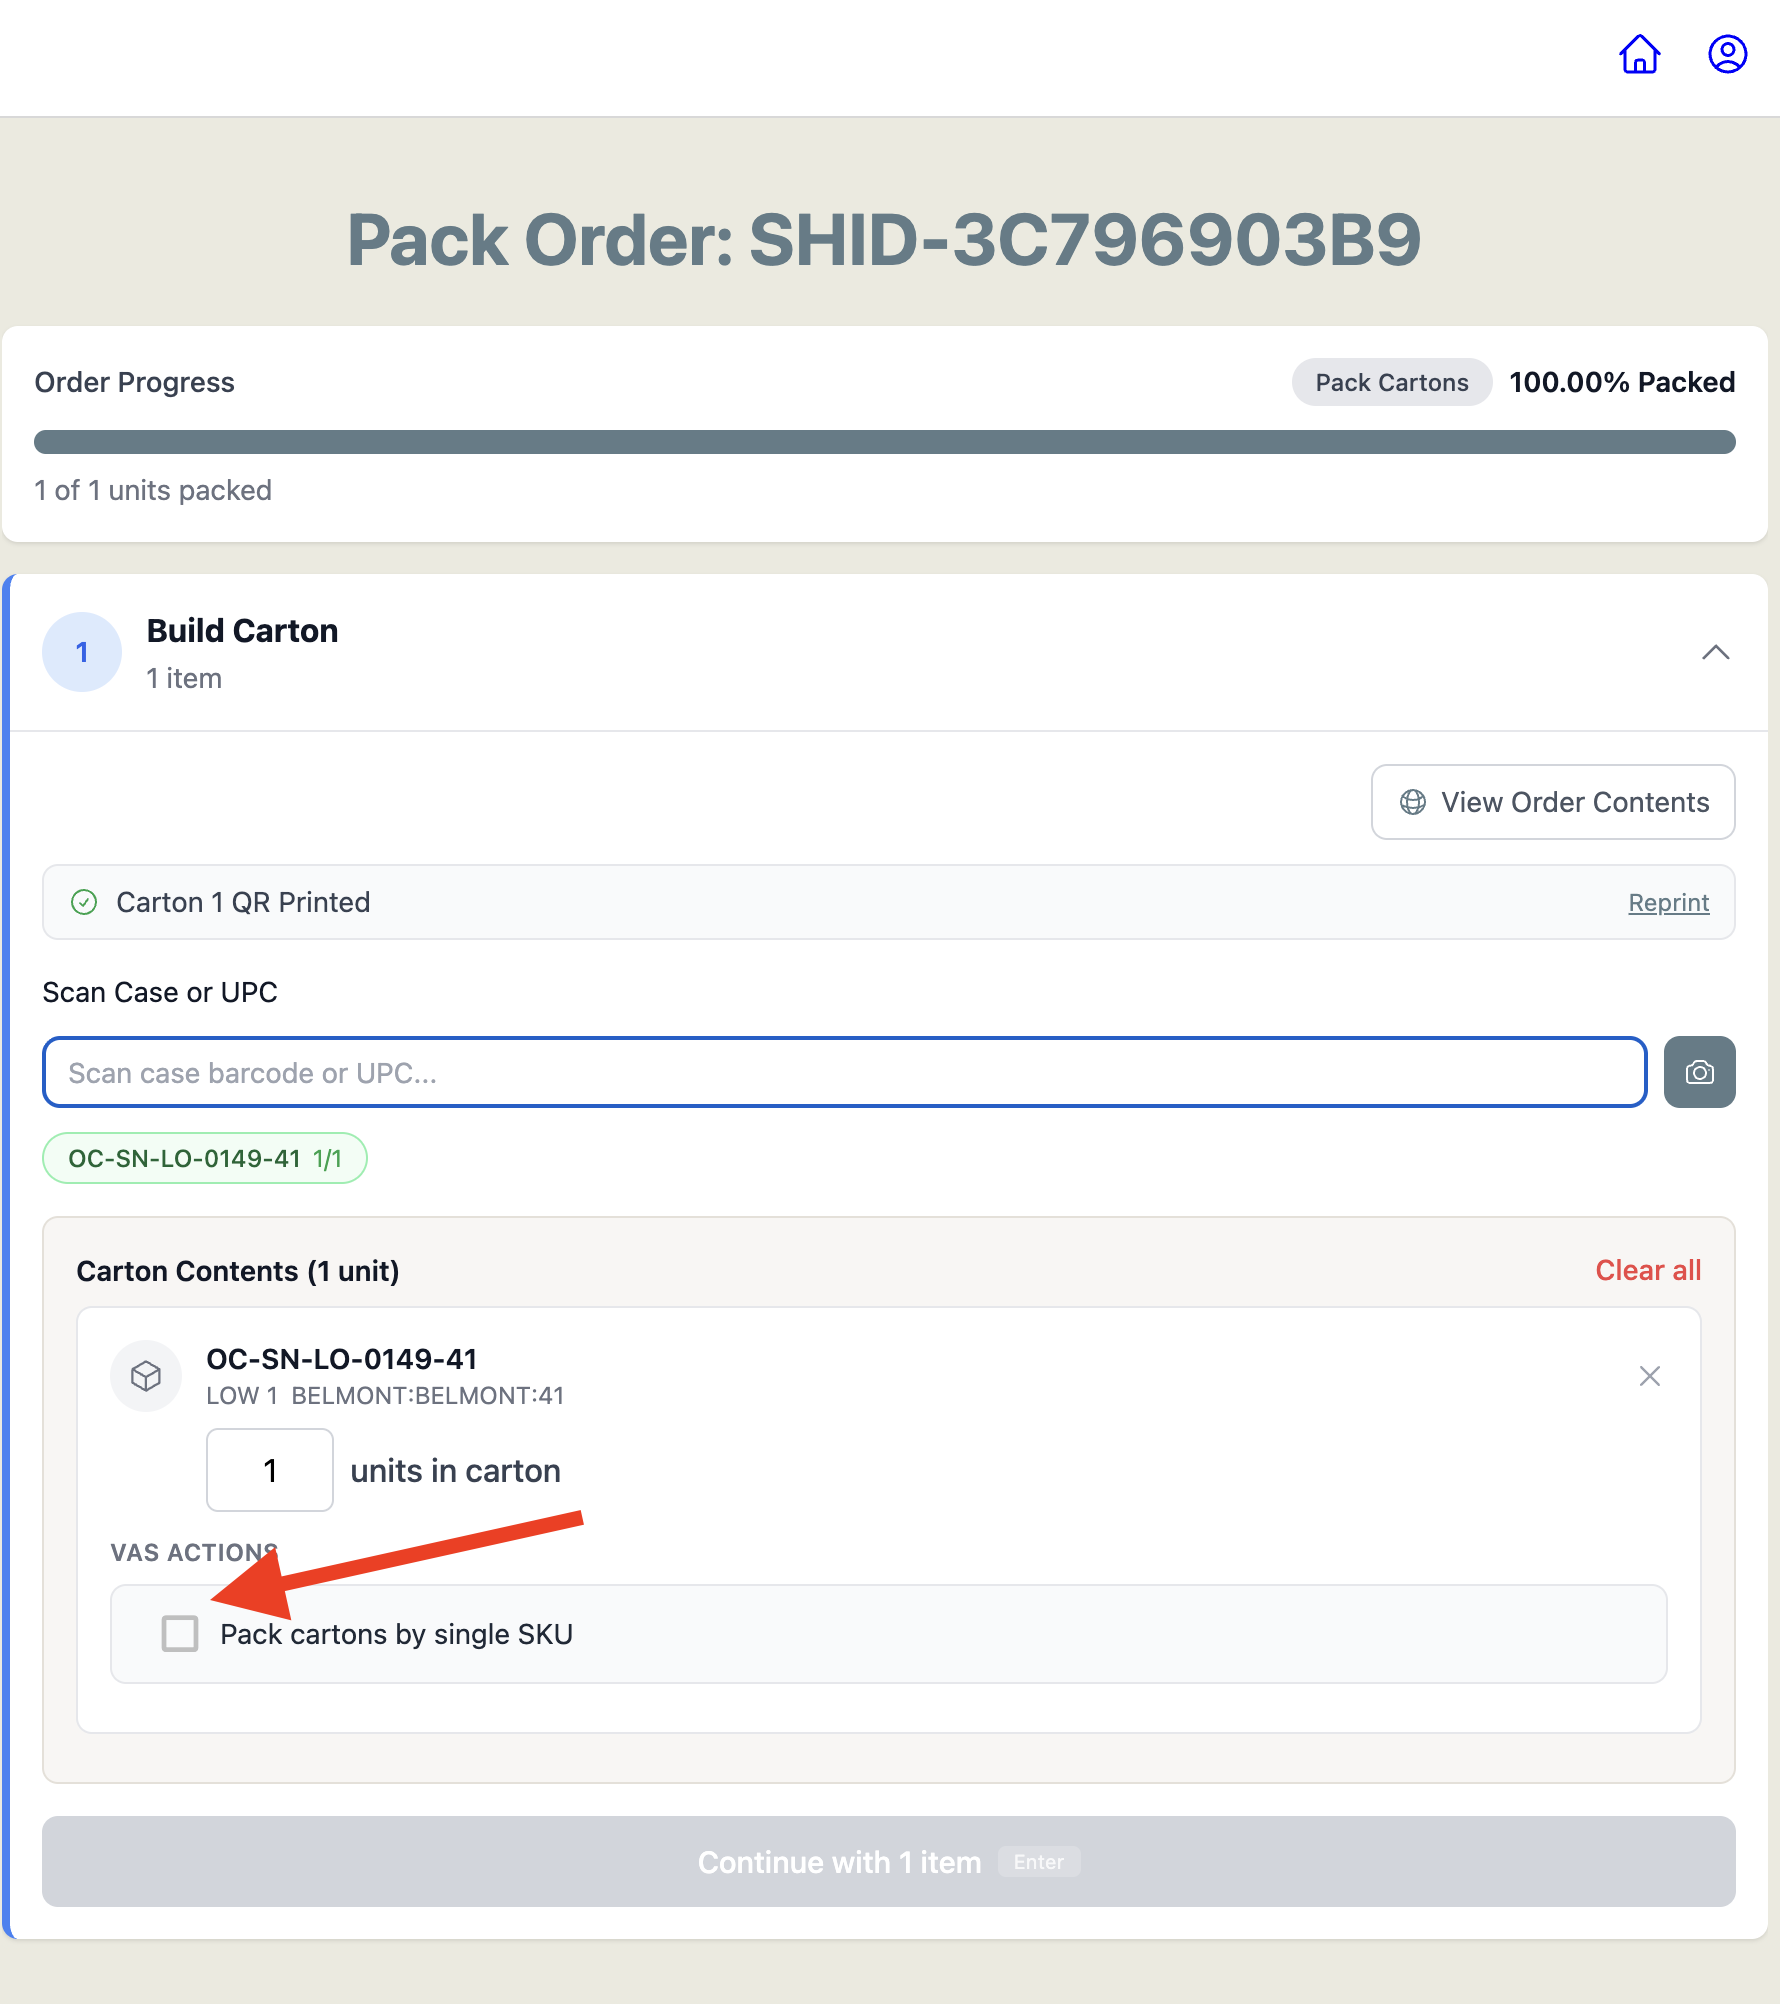
Click 'Continue with 1 item' or click 'Enter' on your keyboard for shortcut.
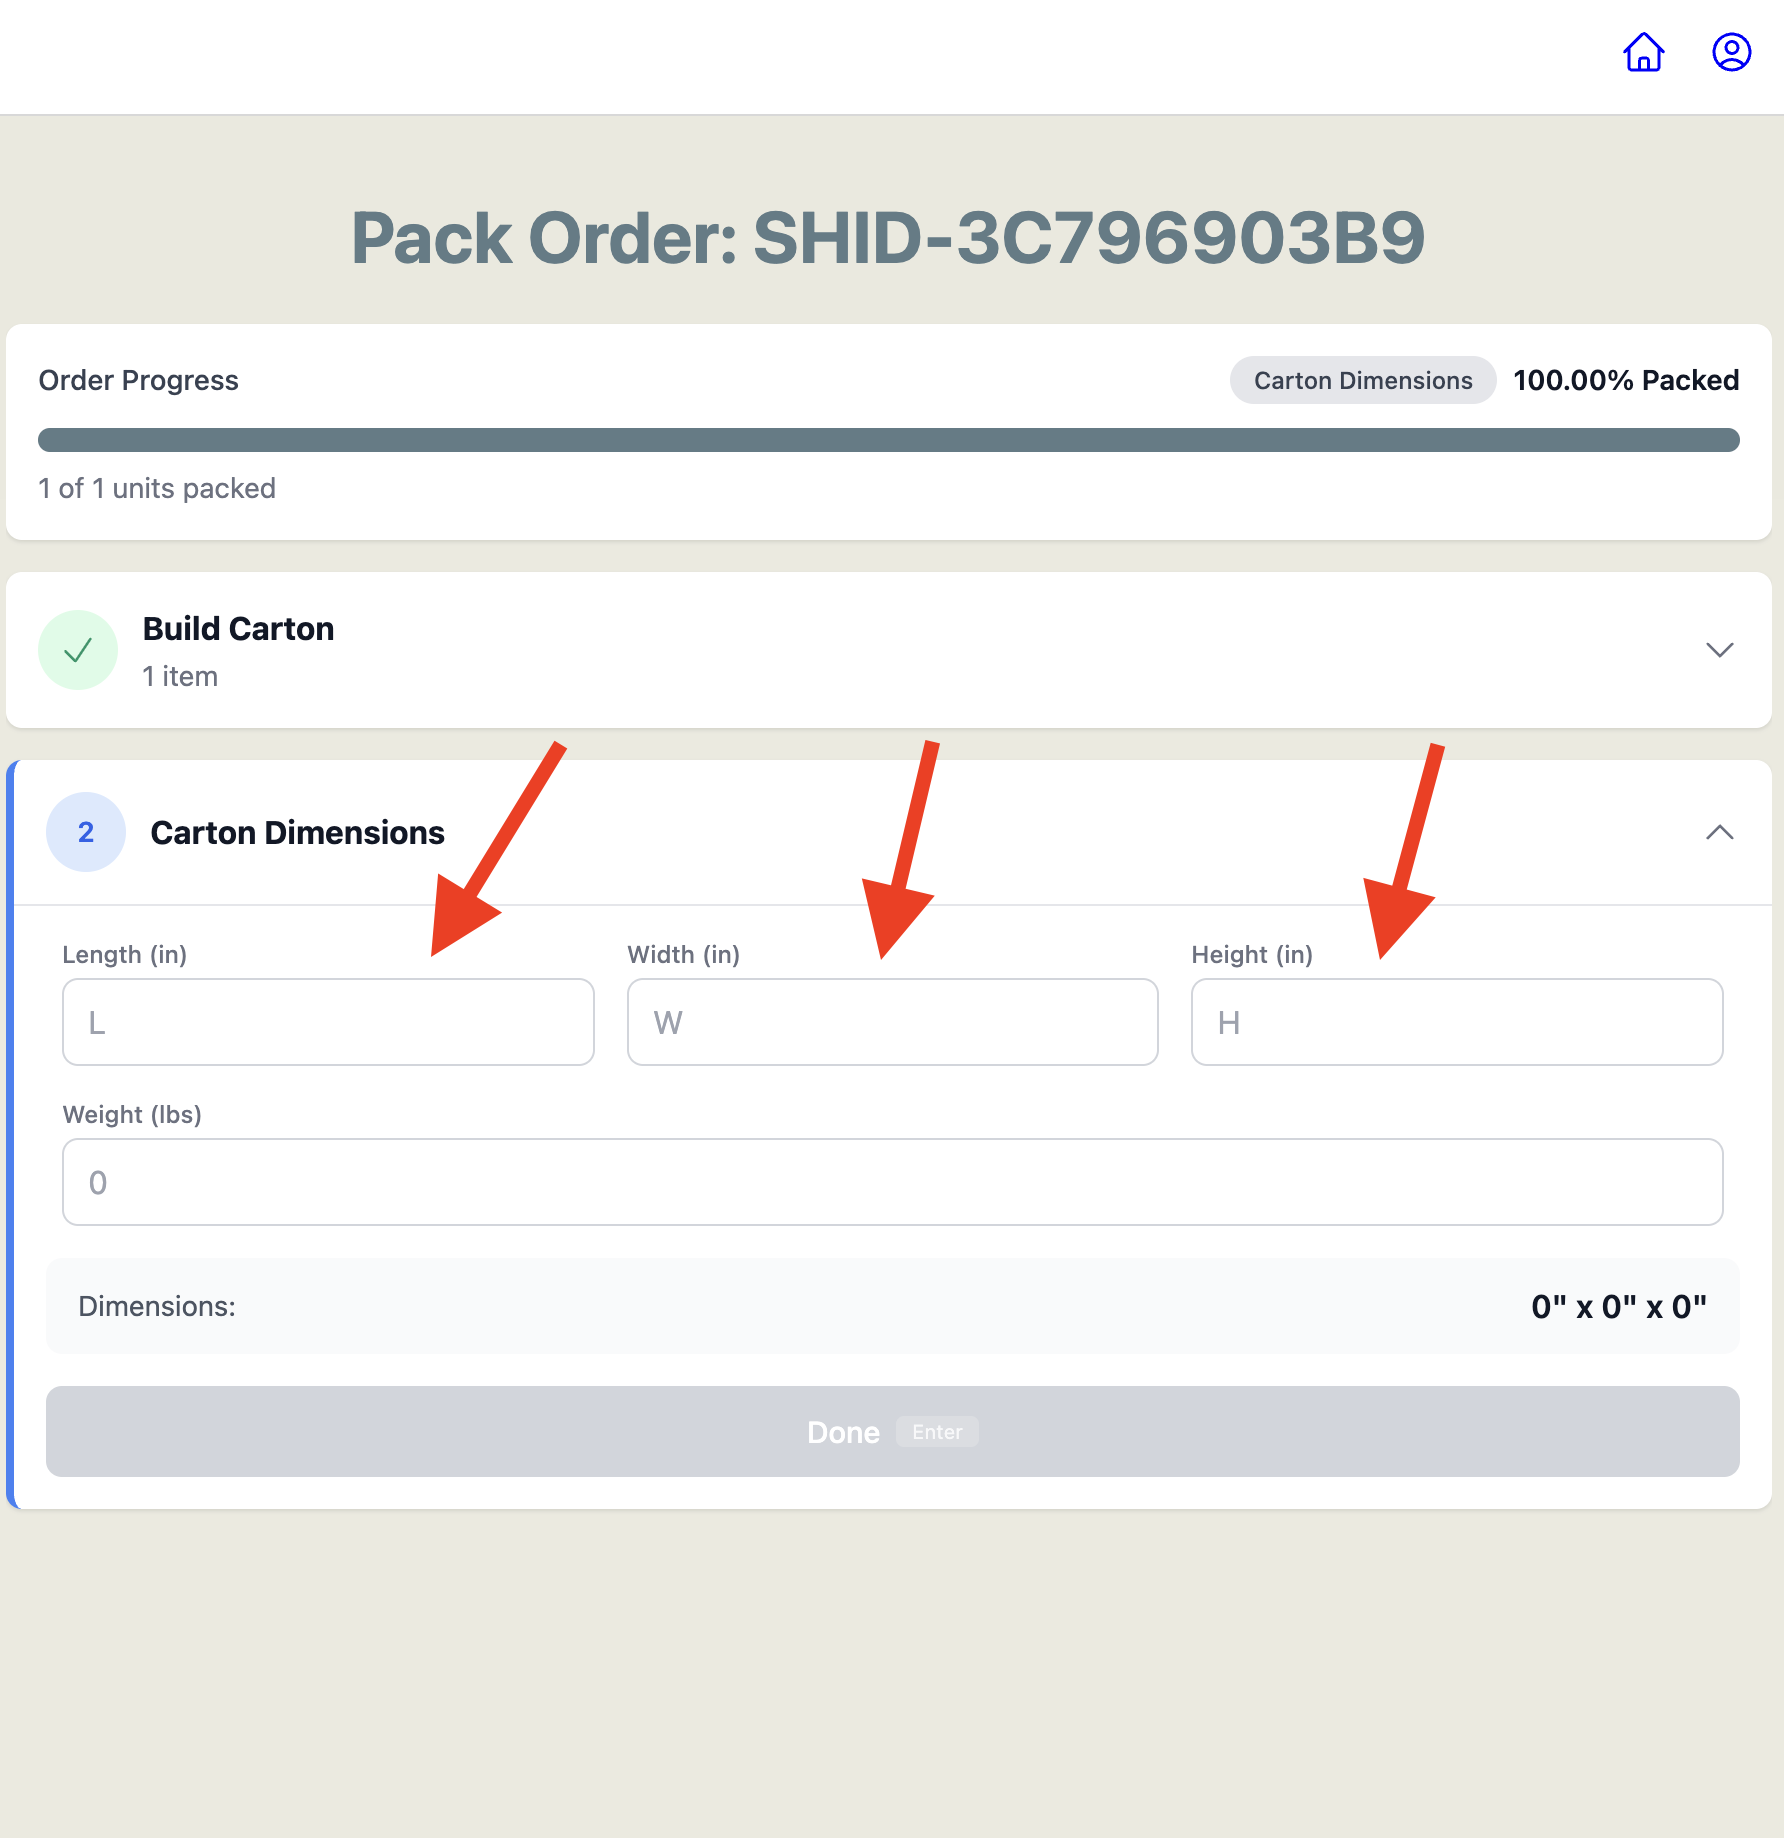
Enter carton dimensions and weight, then tap 'Done'.
Carton Dimensions, requires the box size and weight. There are three ways dimensions may be filled in:If your facility has Quick Select box sizes configured, select a preset from the 'Quick Select Box Size' dropdown. Not set up yet? Check out this help article to get started. 📄 Quick Select Box Sizes Setup
Manually type in the Length, Width, Height (in inches), and Weight (in lbs) fields.
The calculated dimensions display at the bottom of the screen.
Once filled out, tap 'Done'.
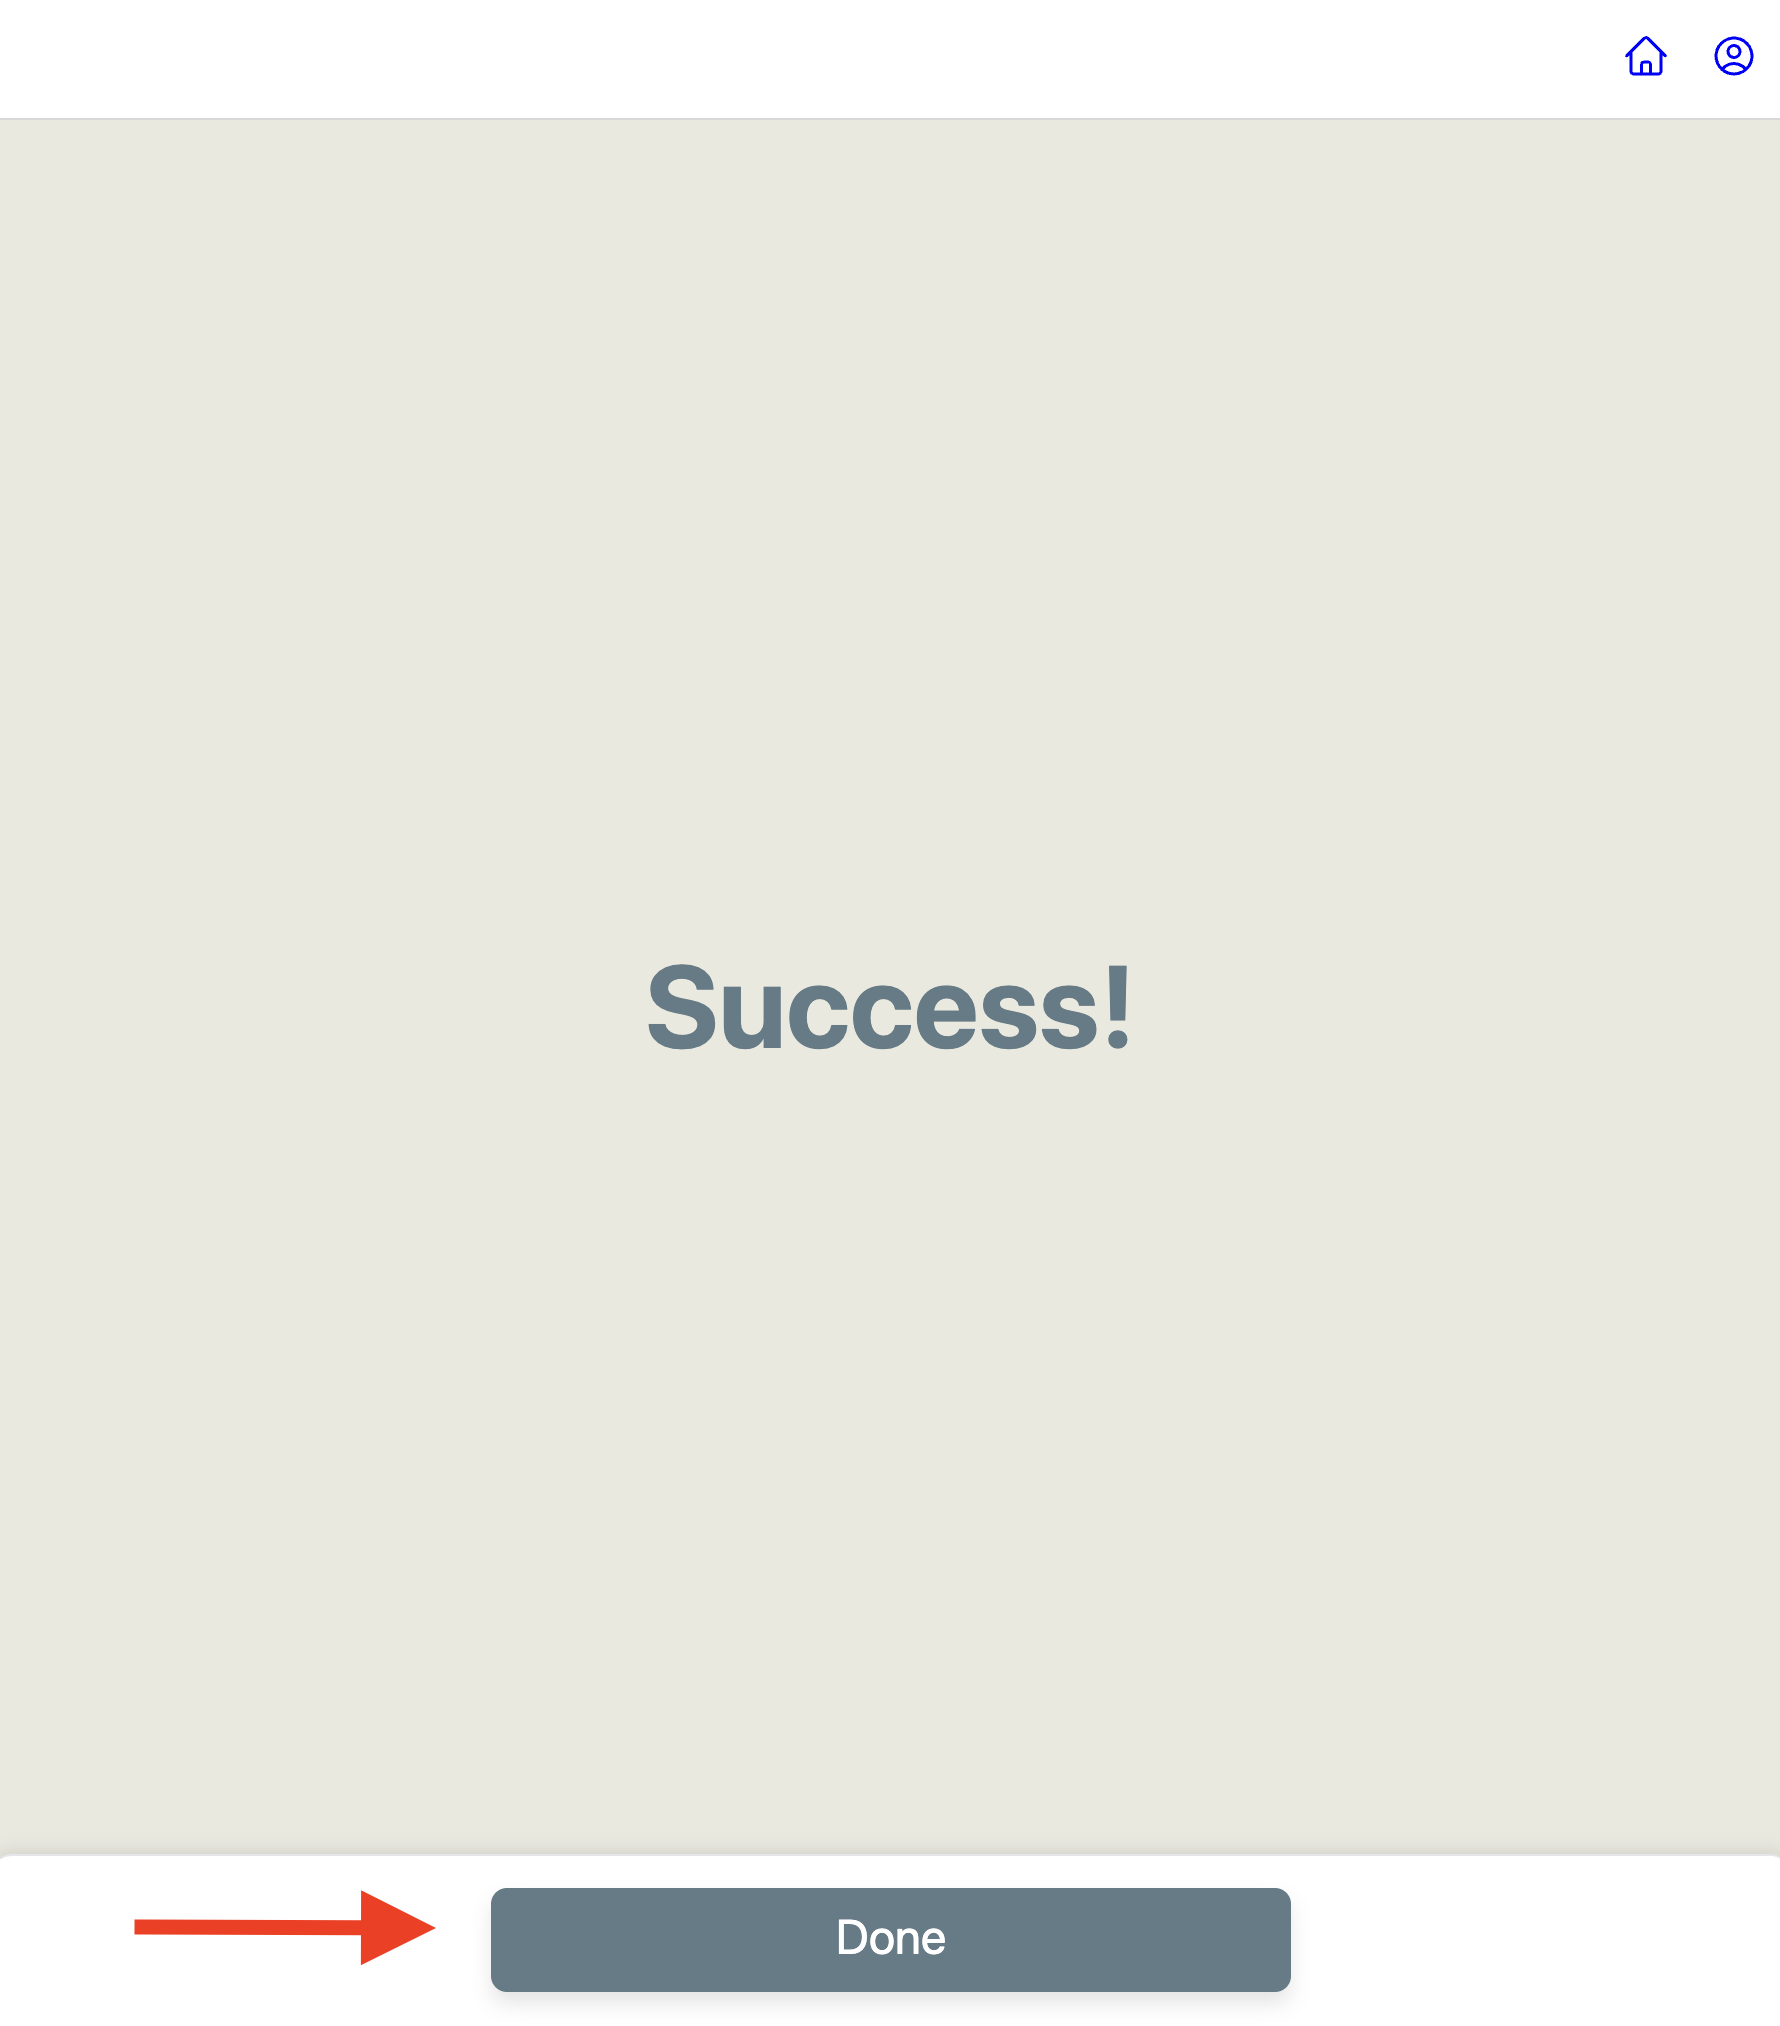
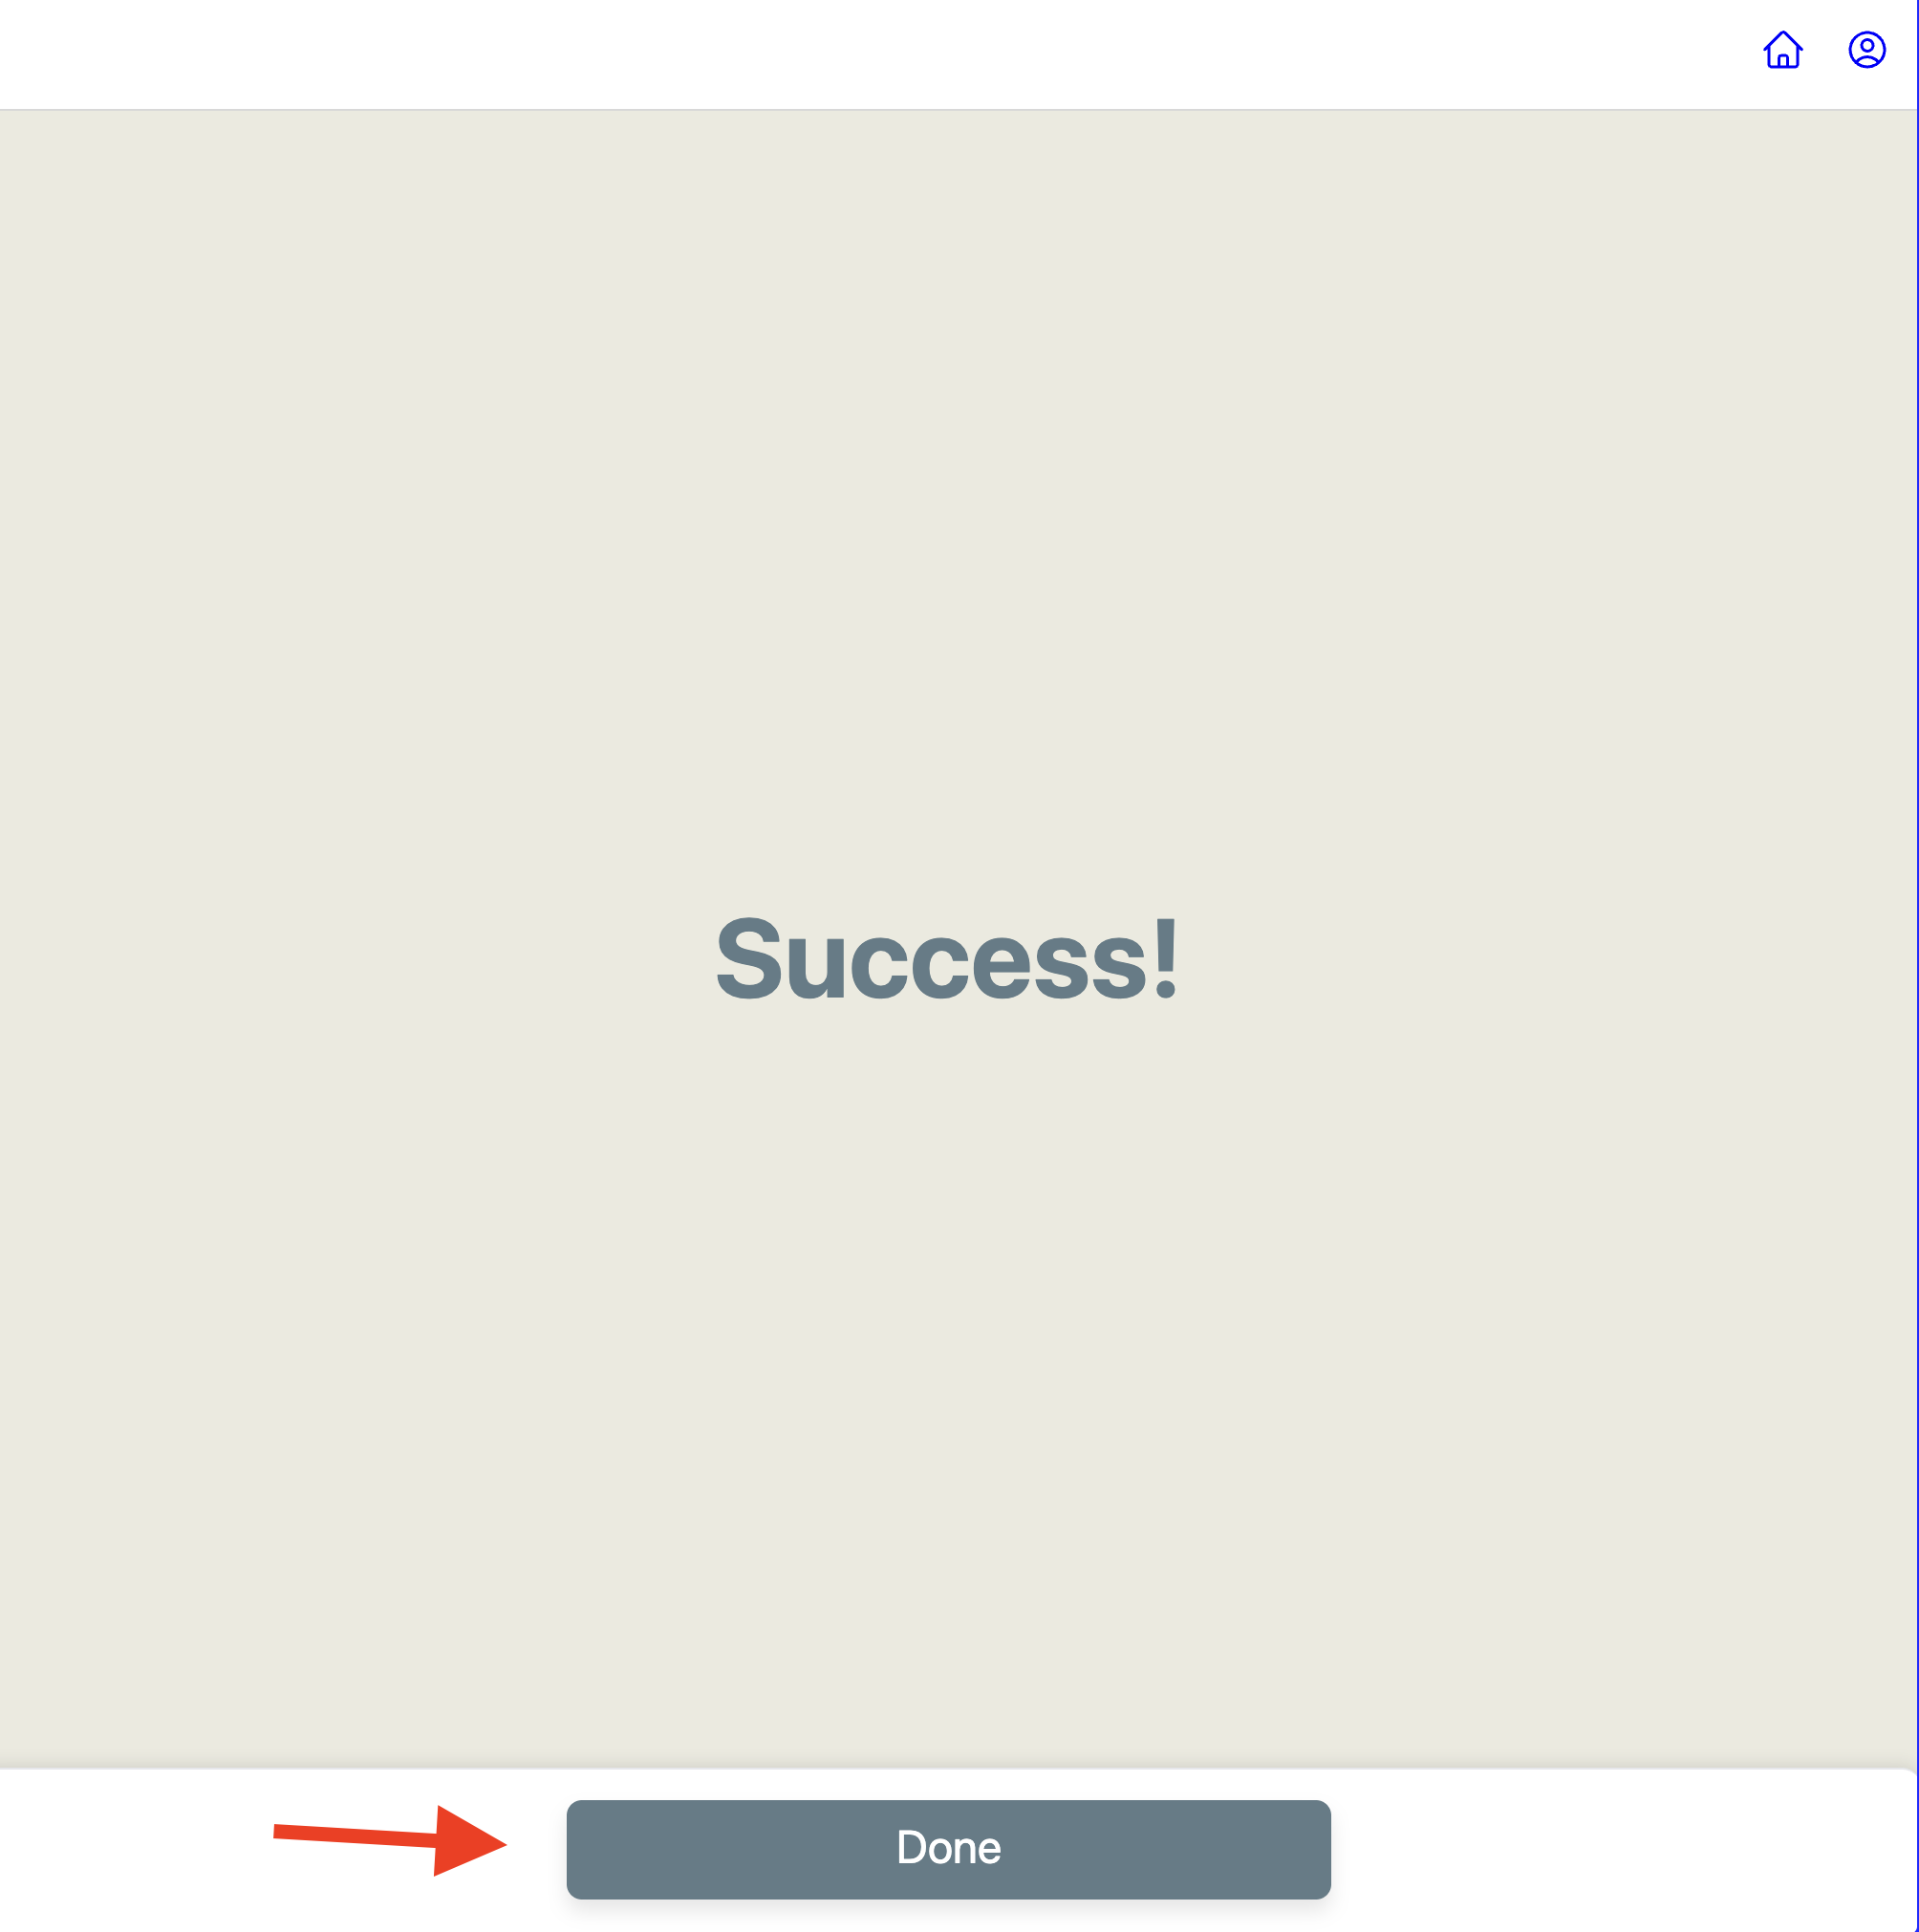
Success for the QR code label portion!
Click 'Done'.
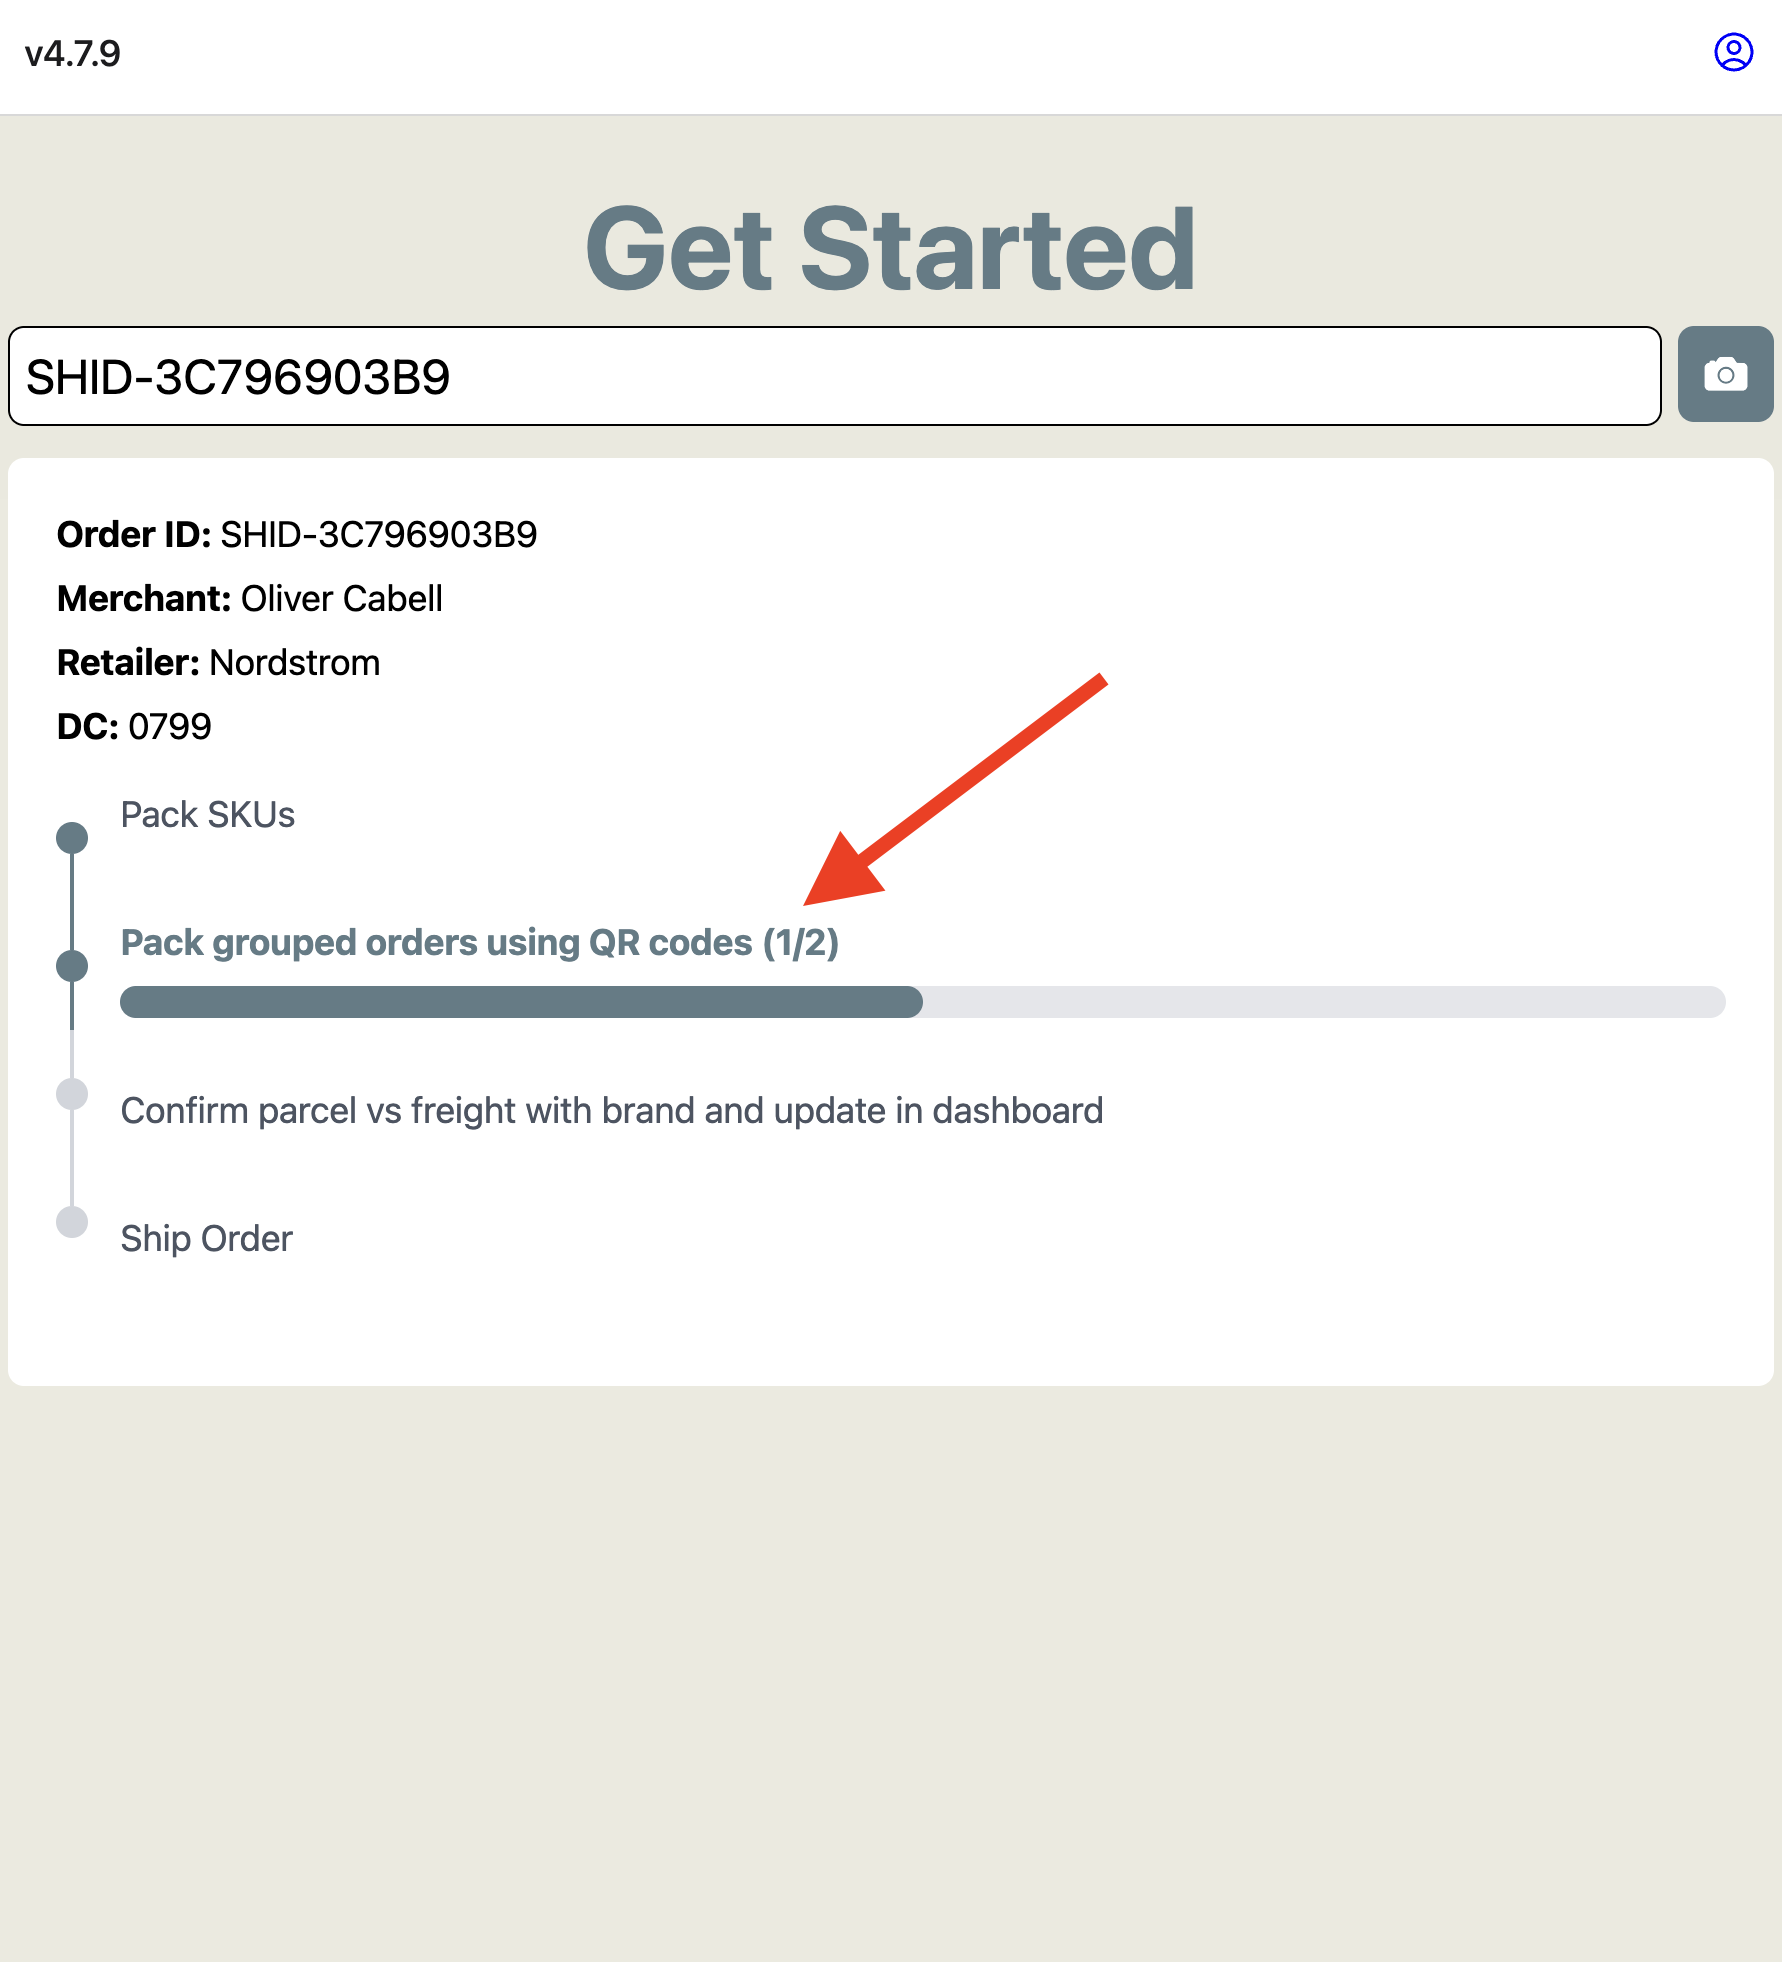
If there are more steps it will bring you to the home page to see the timeline view of what is next.
Finish packing orders in the group using QR codes
Now finish packing all other orders in that group in order to move on to the next stage in the timeline. You will have to scan the next order in that group to continue and repeat steps 6 - 11.
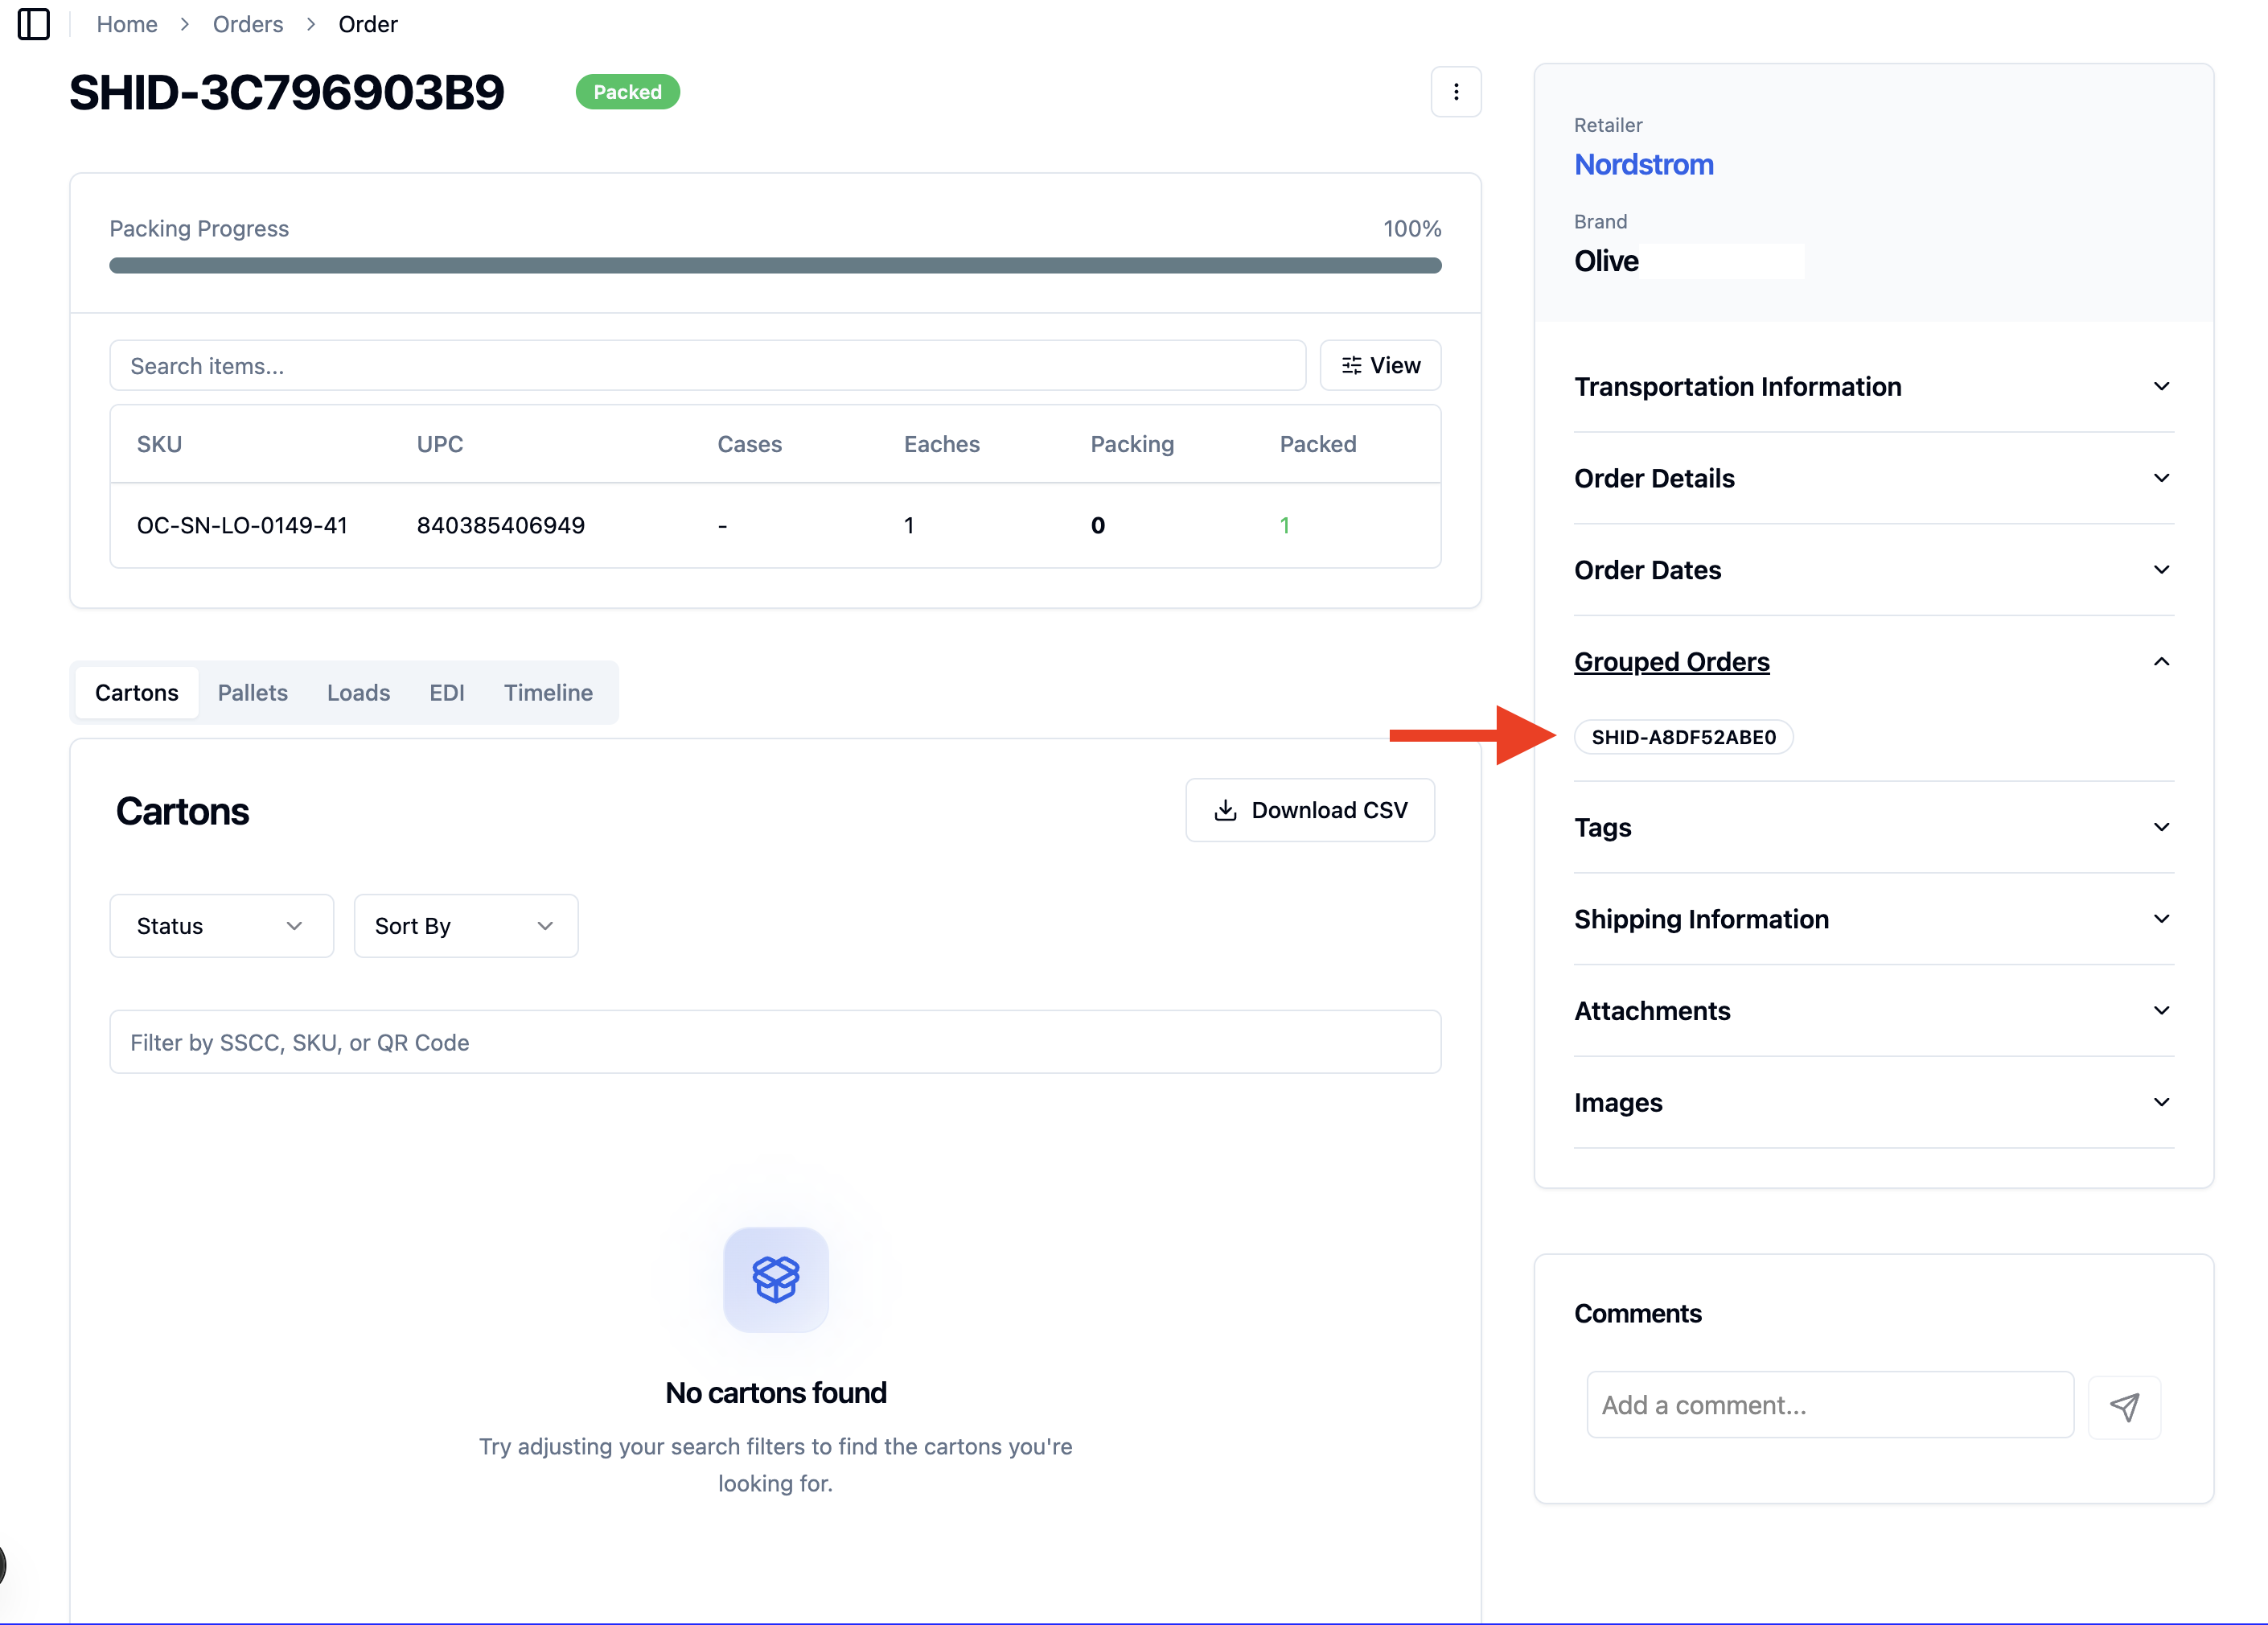
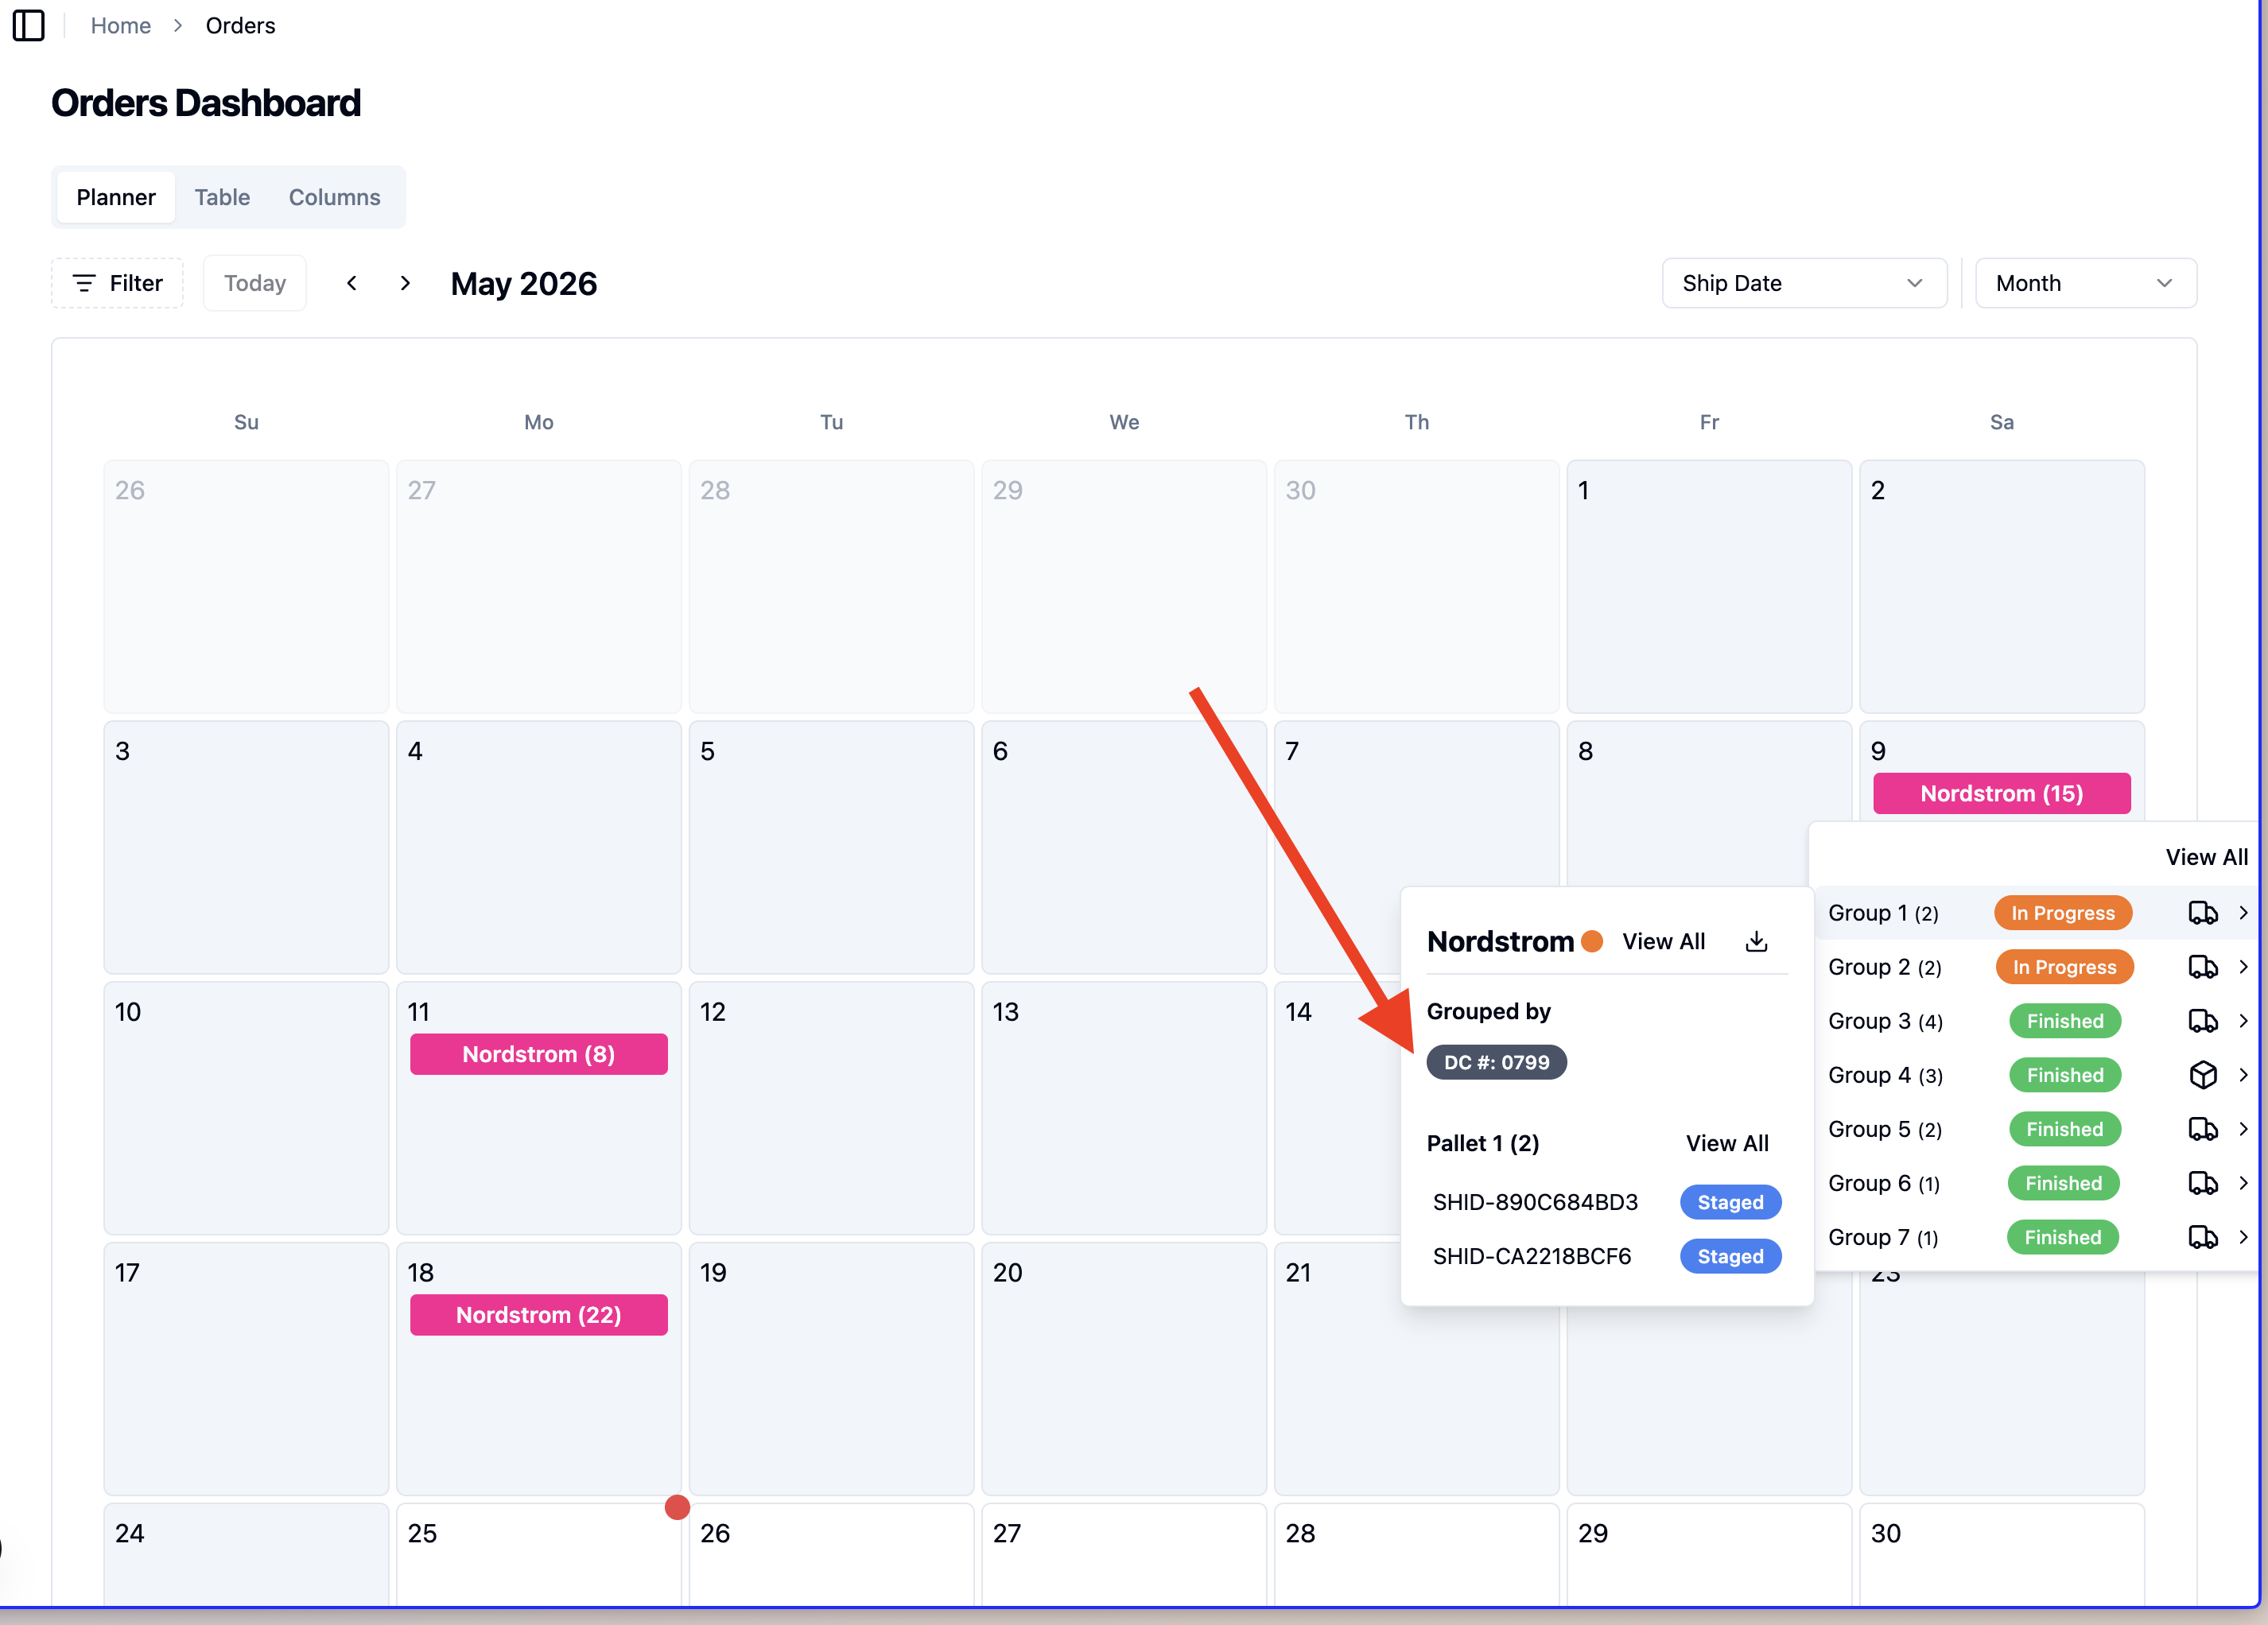
If you are unsure of which orders are in that group, you can look in the admin dashboard in these two places:
In the order:
In the Planner Dashboard:
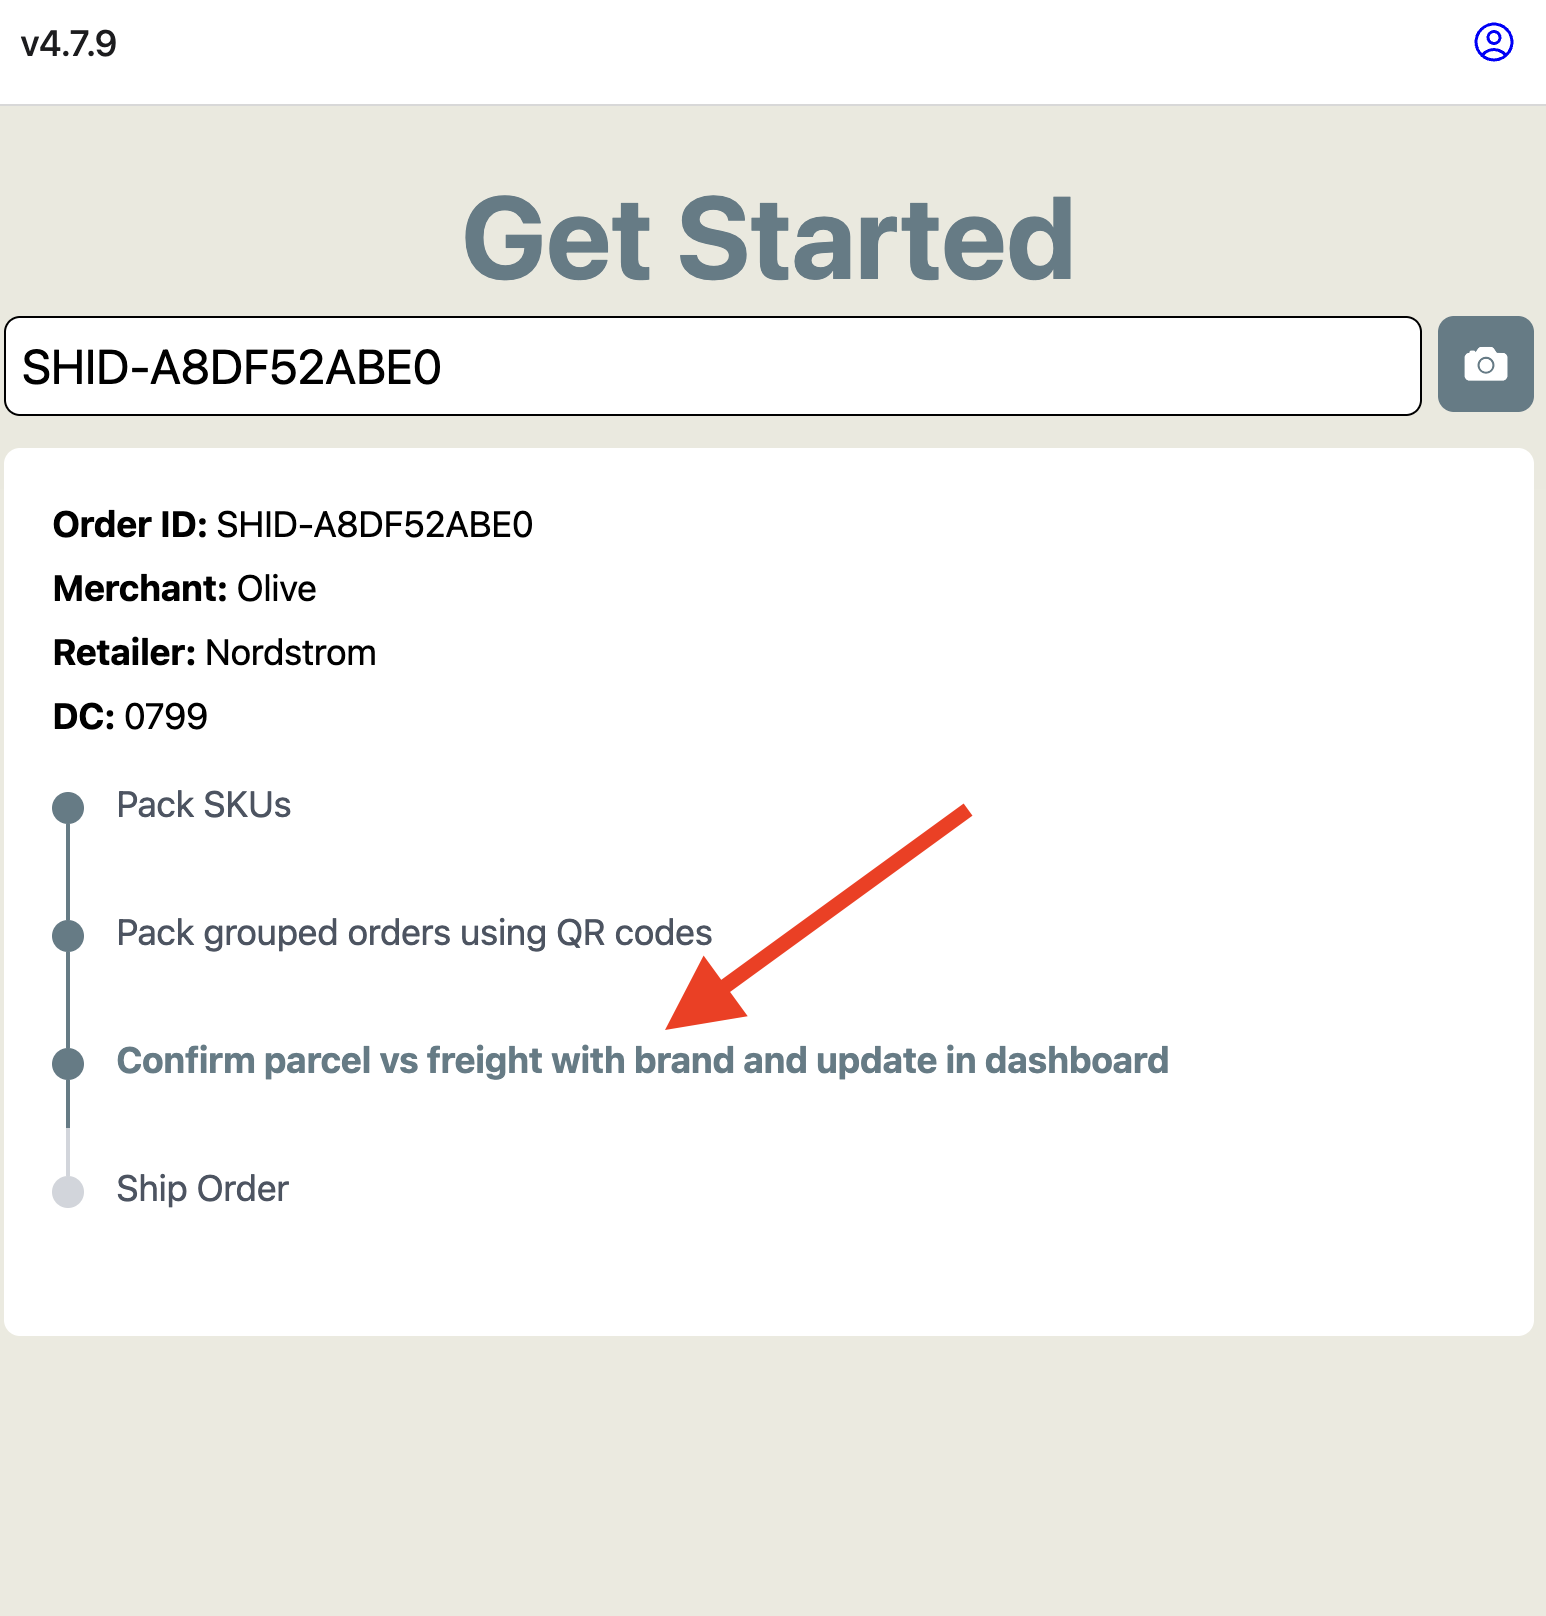
Confirm transportation method with the brand before proceeding
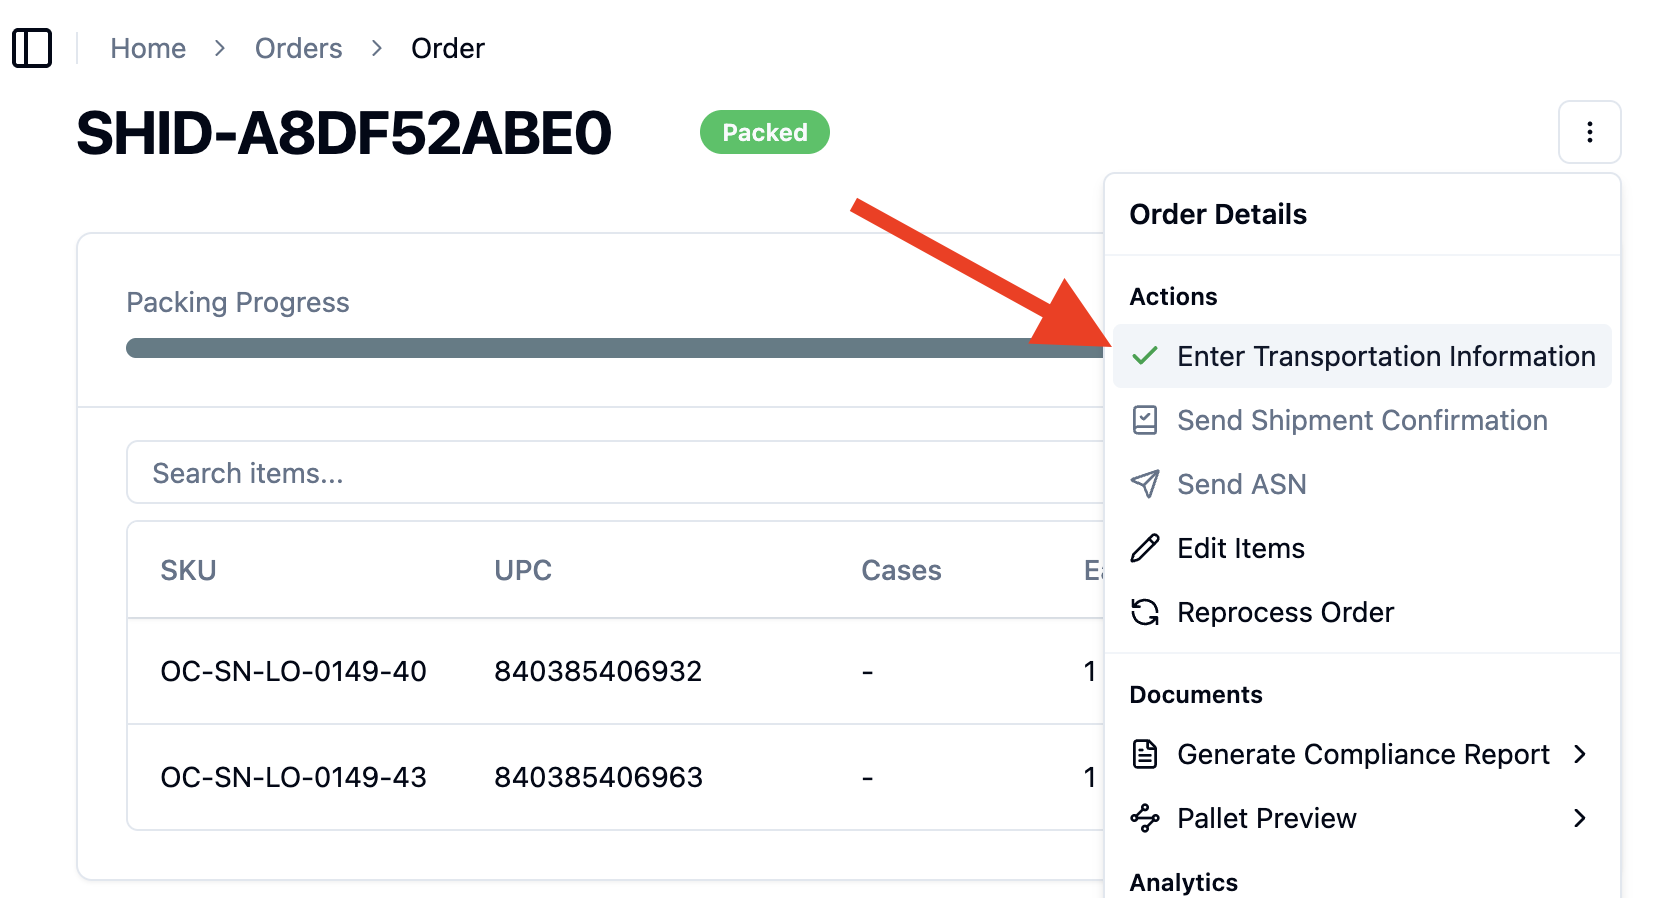
Once parcel or freight is determined, either the brand or 3PL can enter this in the dashboard.
Brand and 3PLs can enter transportation information here:
You can also do it in bulk on the orders dashboard by selecting orders you want to change in bulk. More info in this article 🚚.
Note: transportation method will auto-select if parcel vs freight rules are configured. For retailers like Nordstrom we do not set those rules, as we need the brand to route with Nordstrom for approval first.
Once transportation info is set, timeline will be updated
Timeline will now say 'Shipping Method: Parcel' and you will now see the next step unlocked to 'Print GS1 and Parcel Labels'.
Click 'Print Labels'
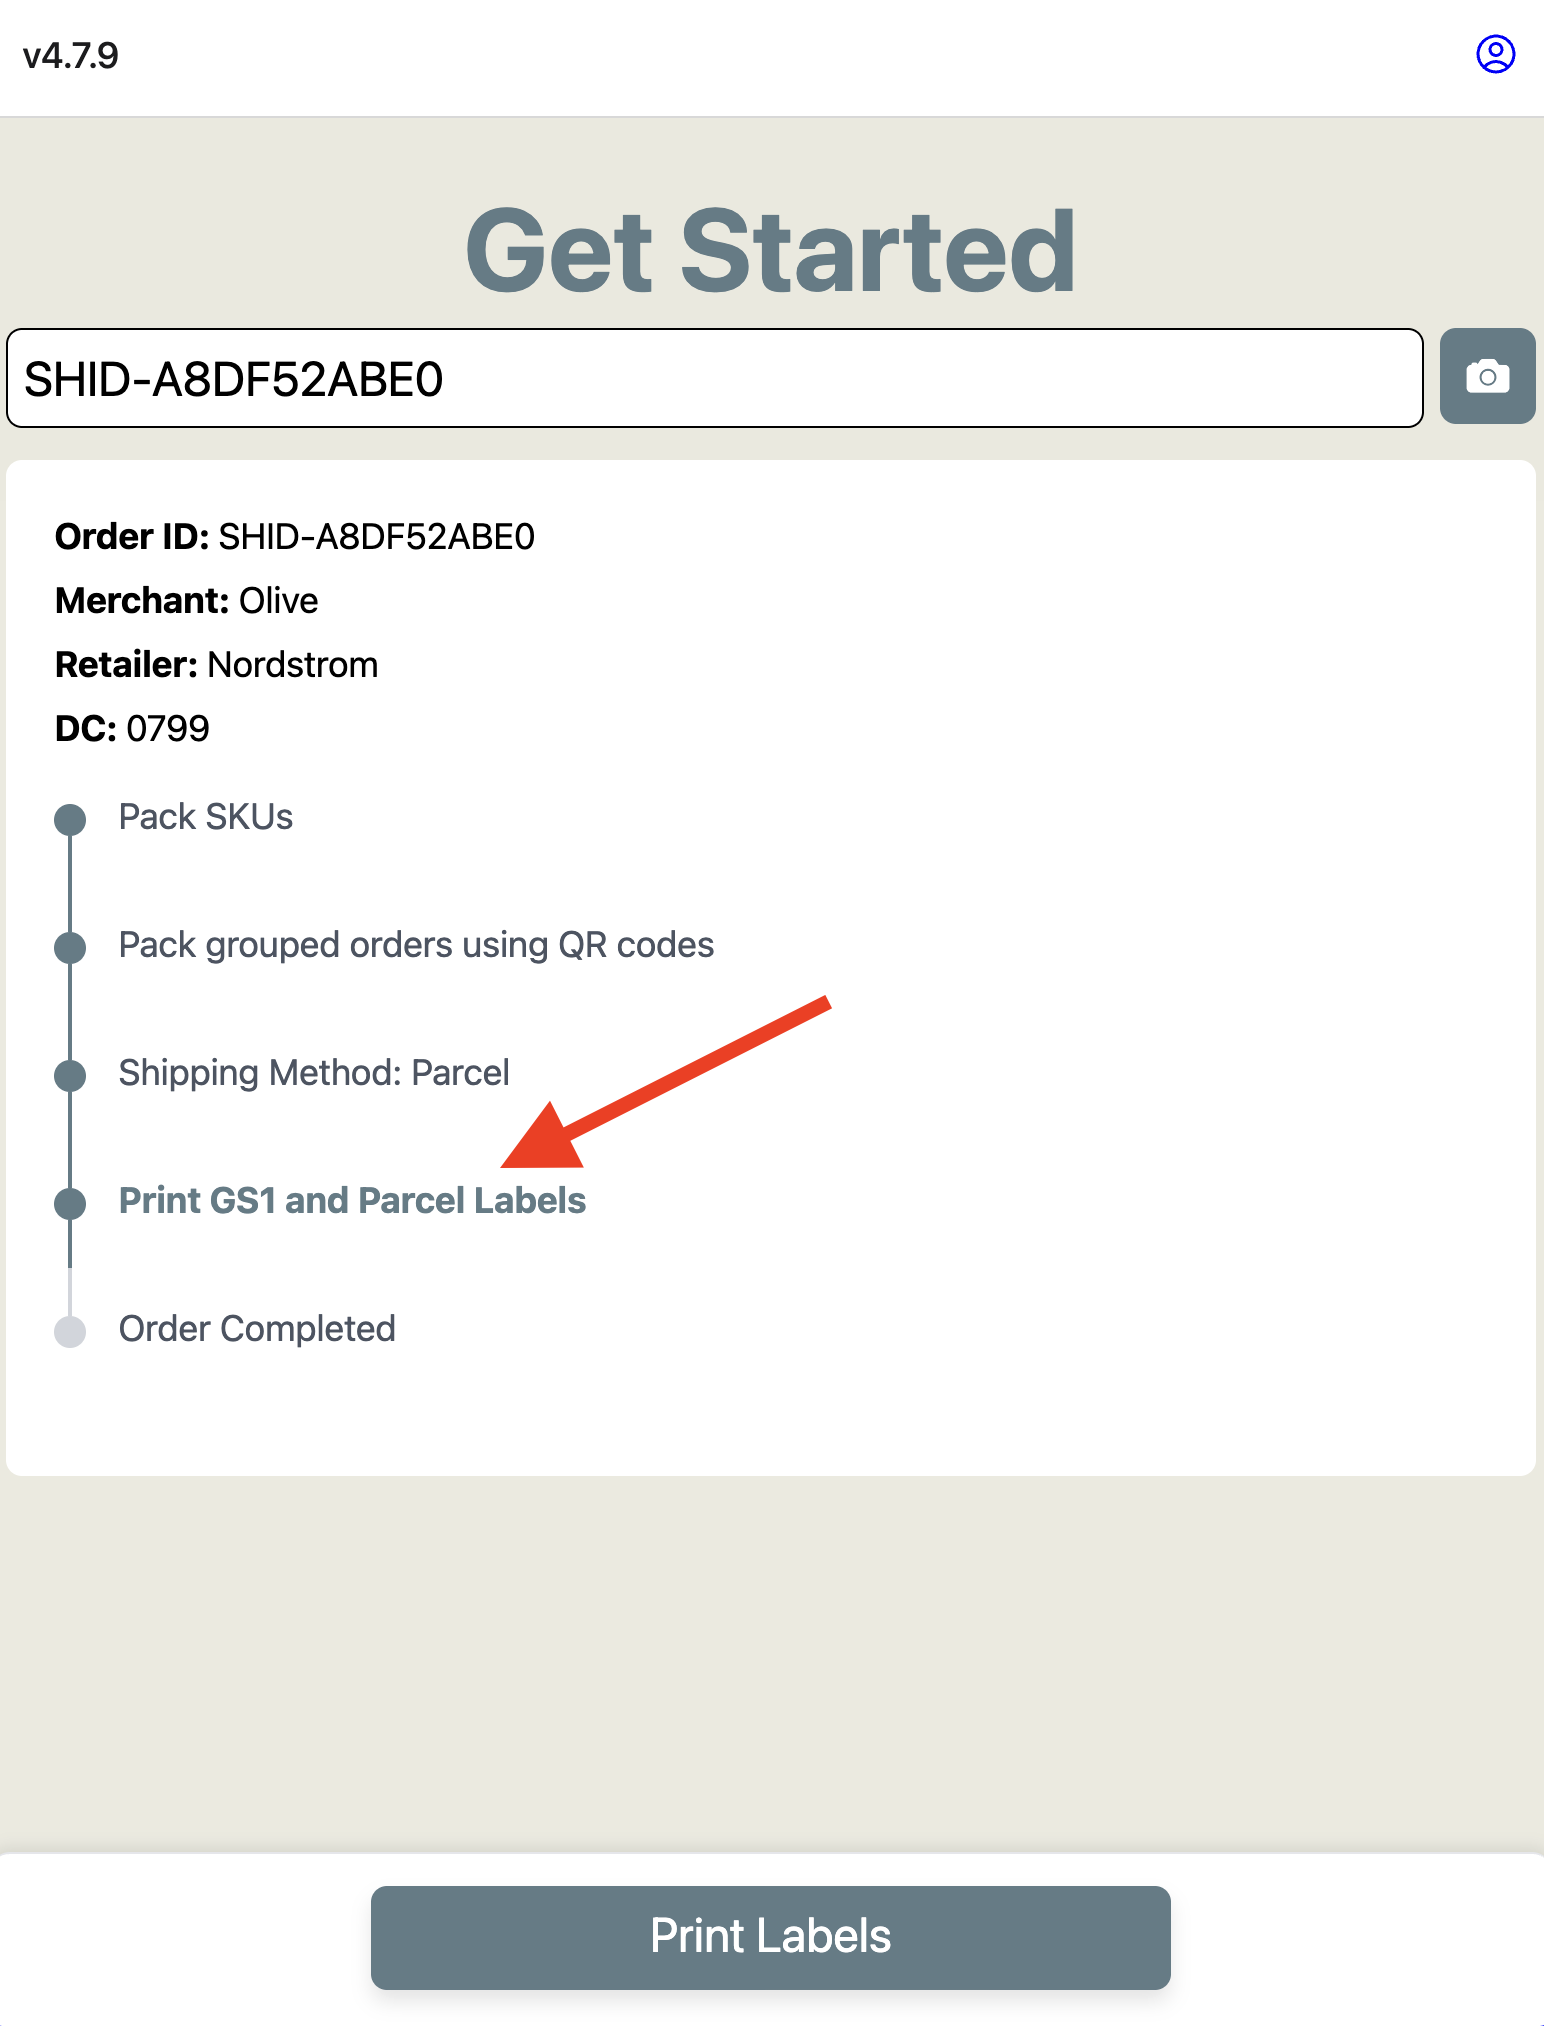
Print GS1 and Parcel Labels
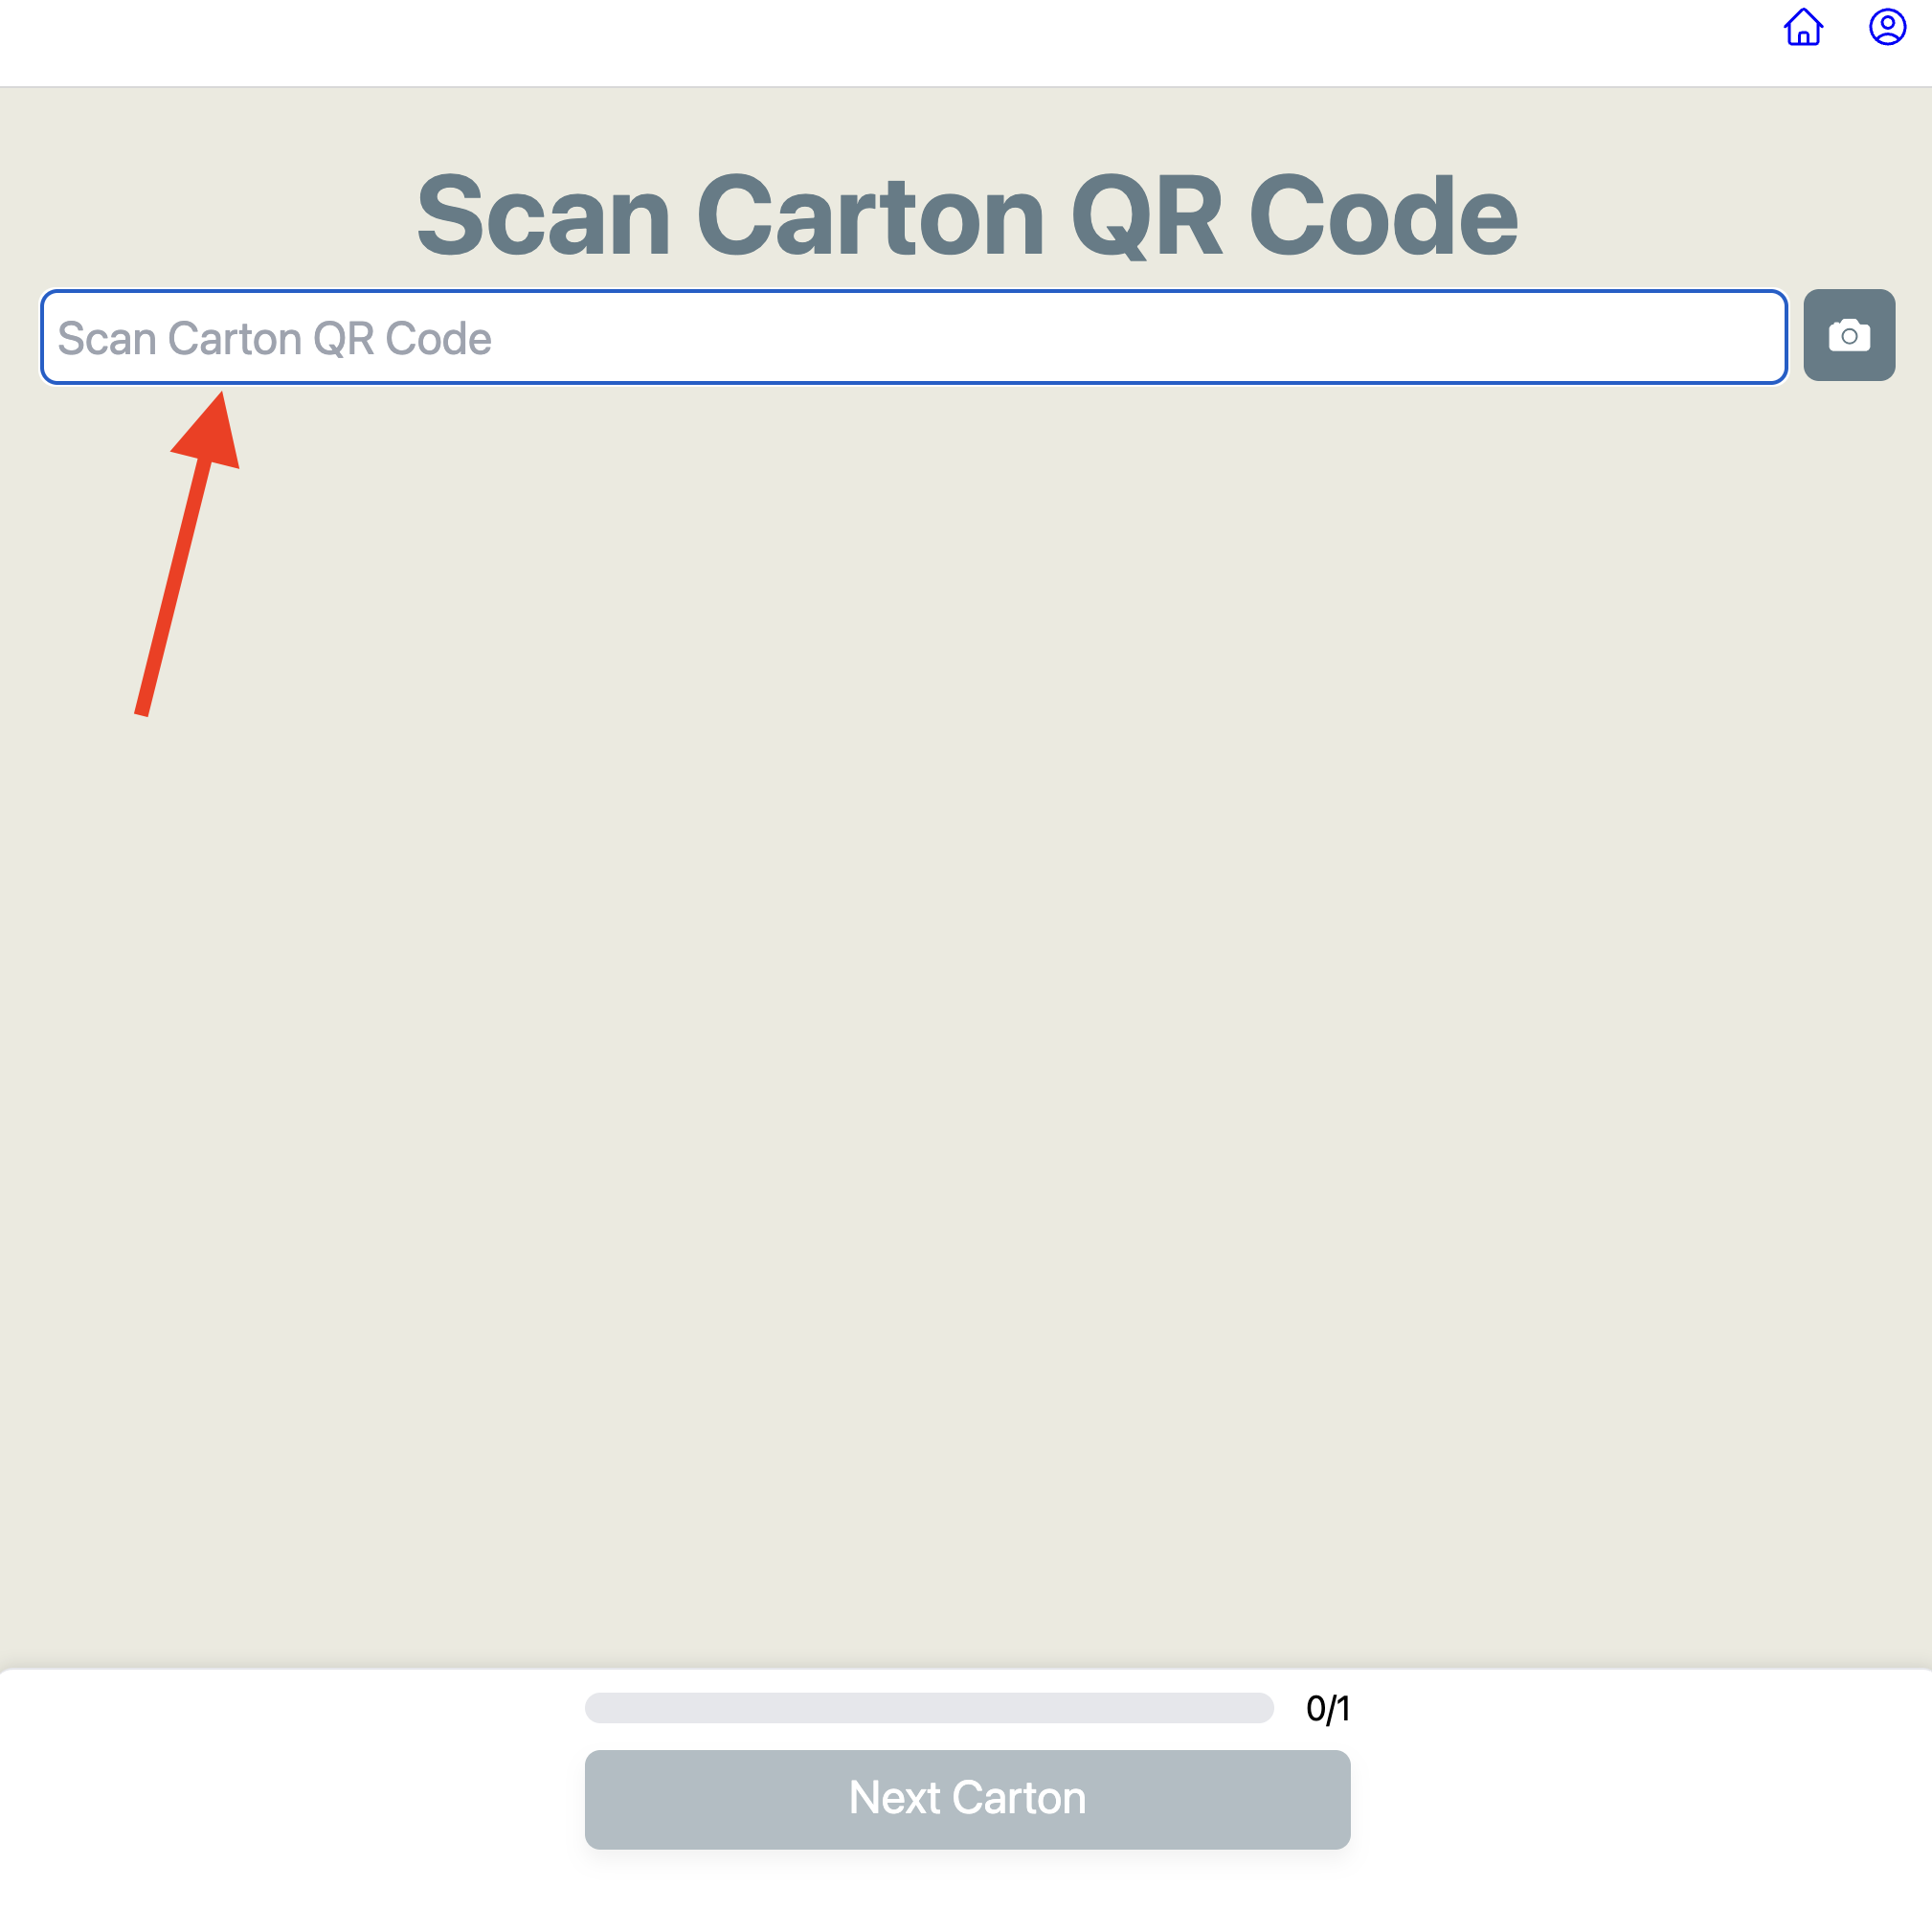
Scan the Carton QR code that was printed previously:
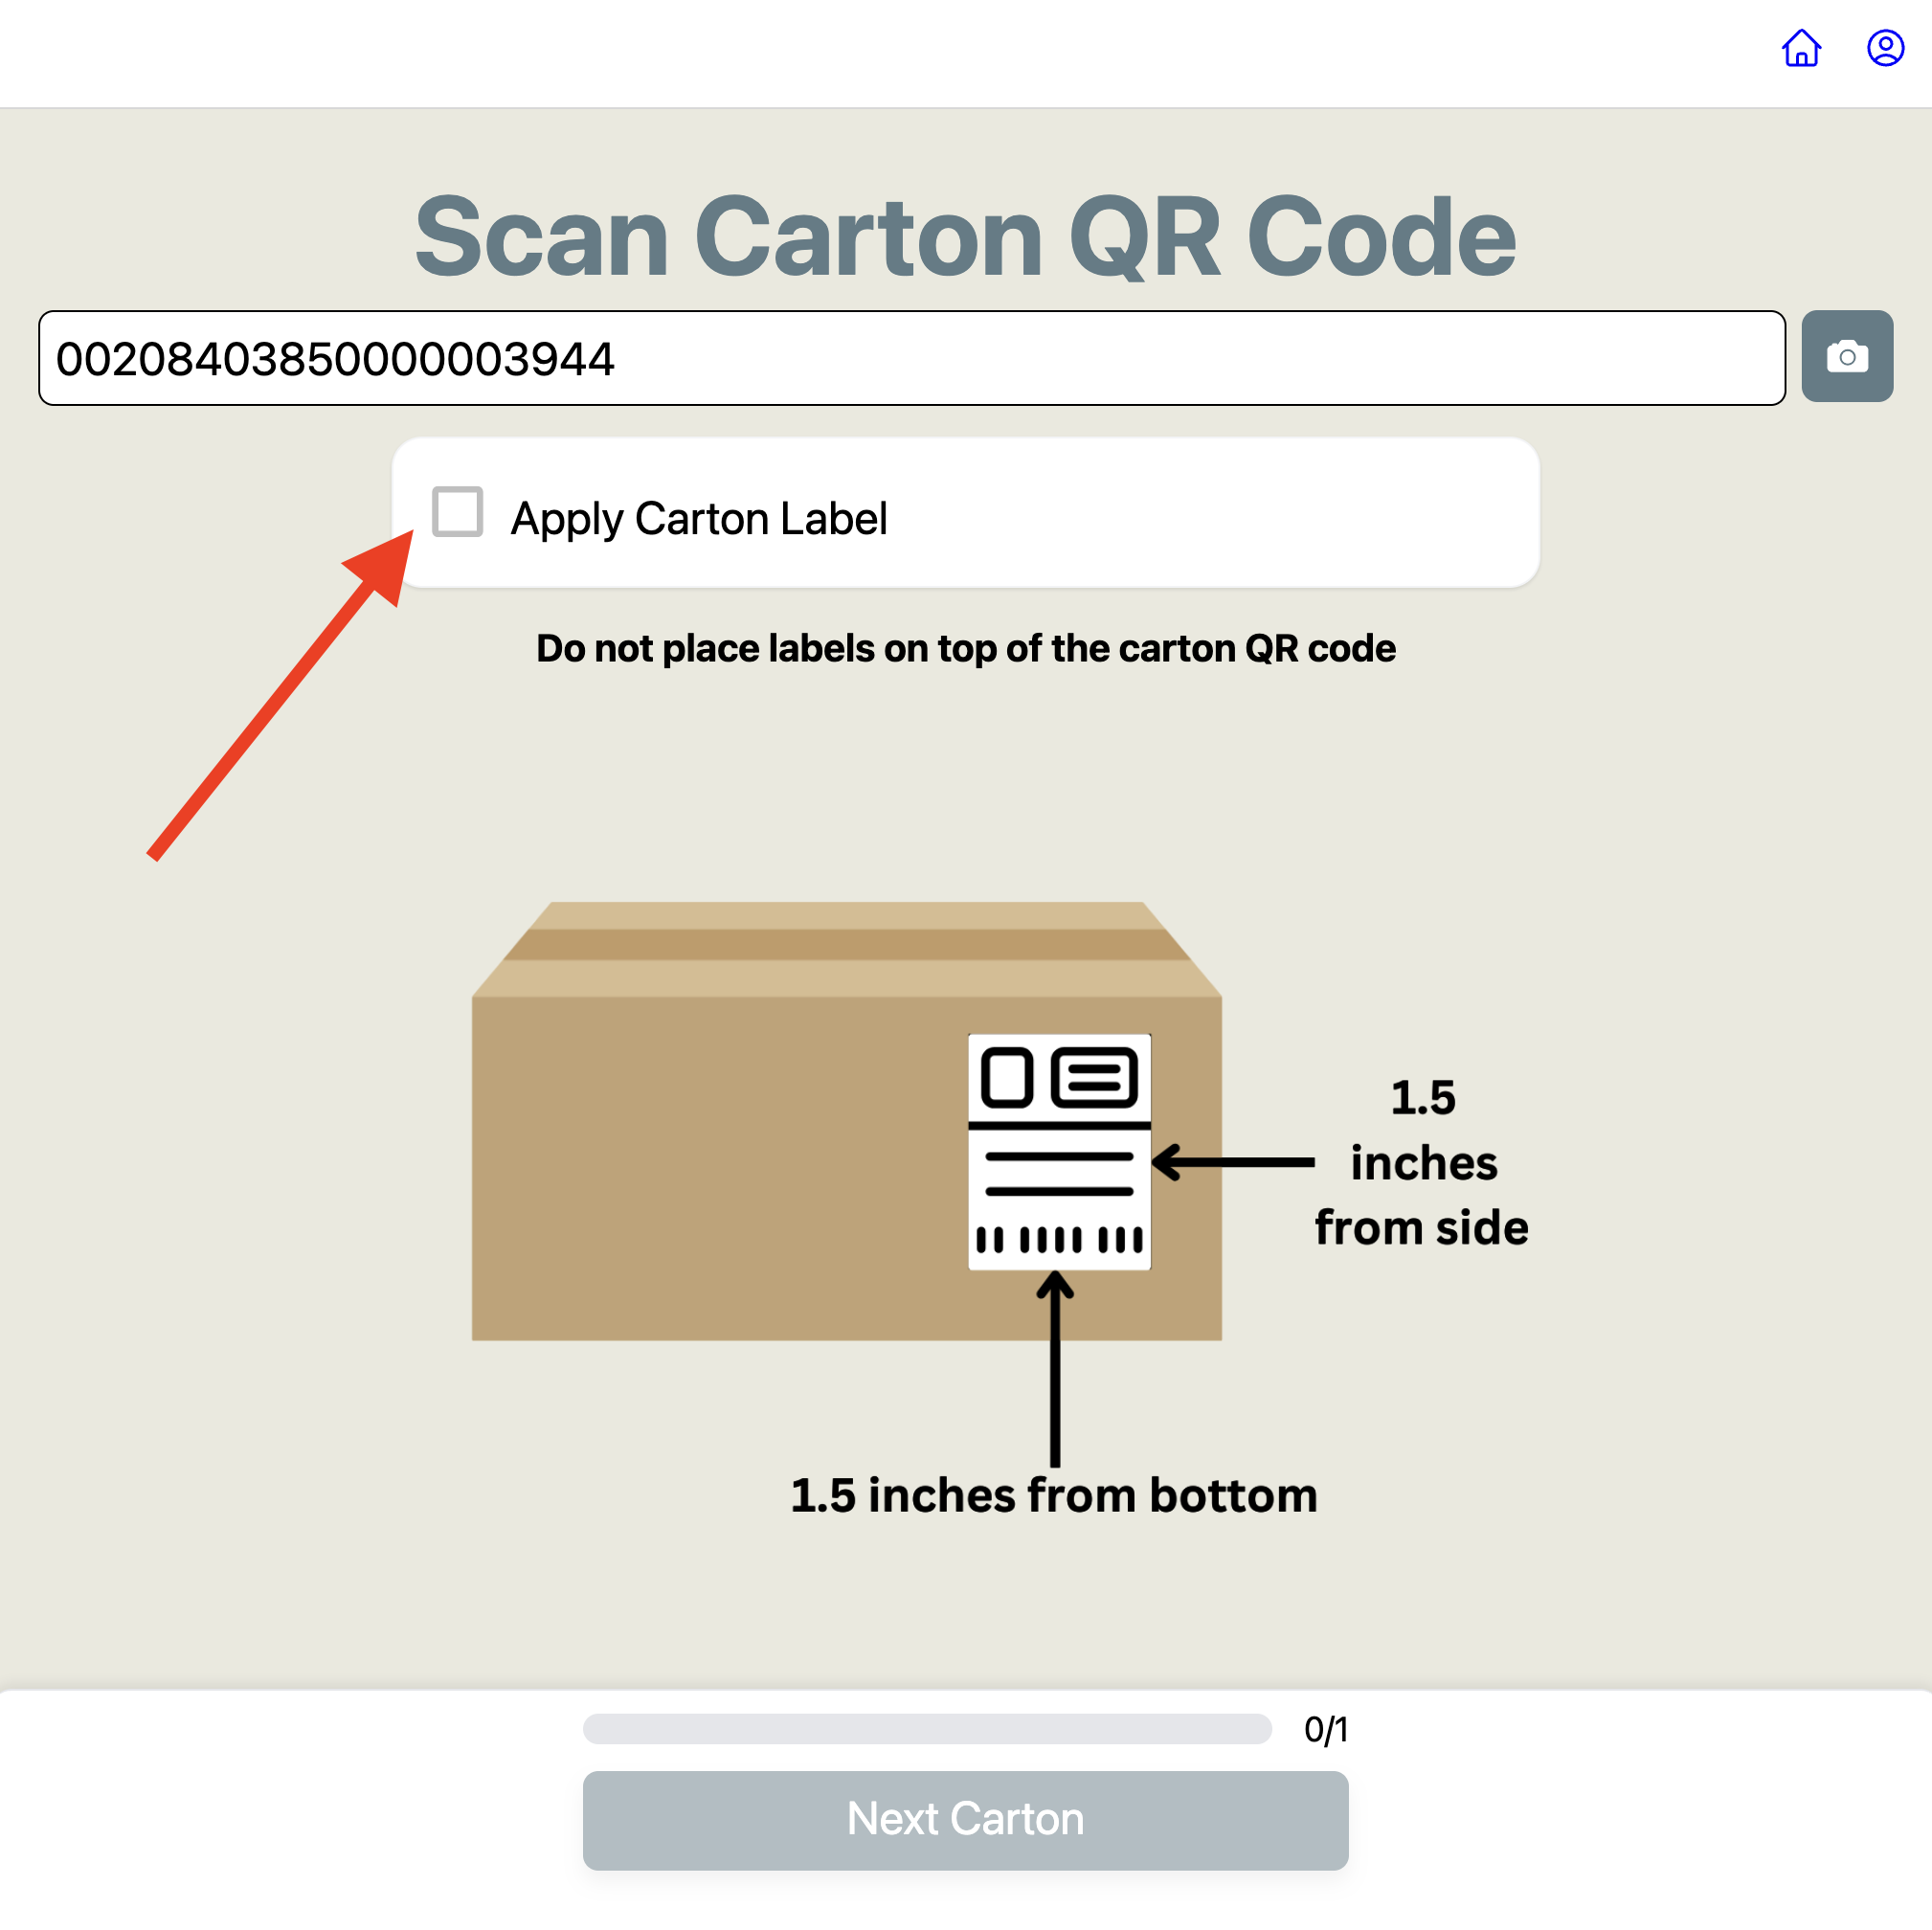
Check the instructions as you go
Note: you can leave the carton QR code on unless instructions say otherwise
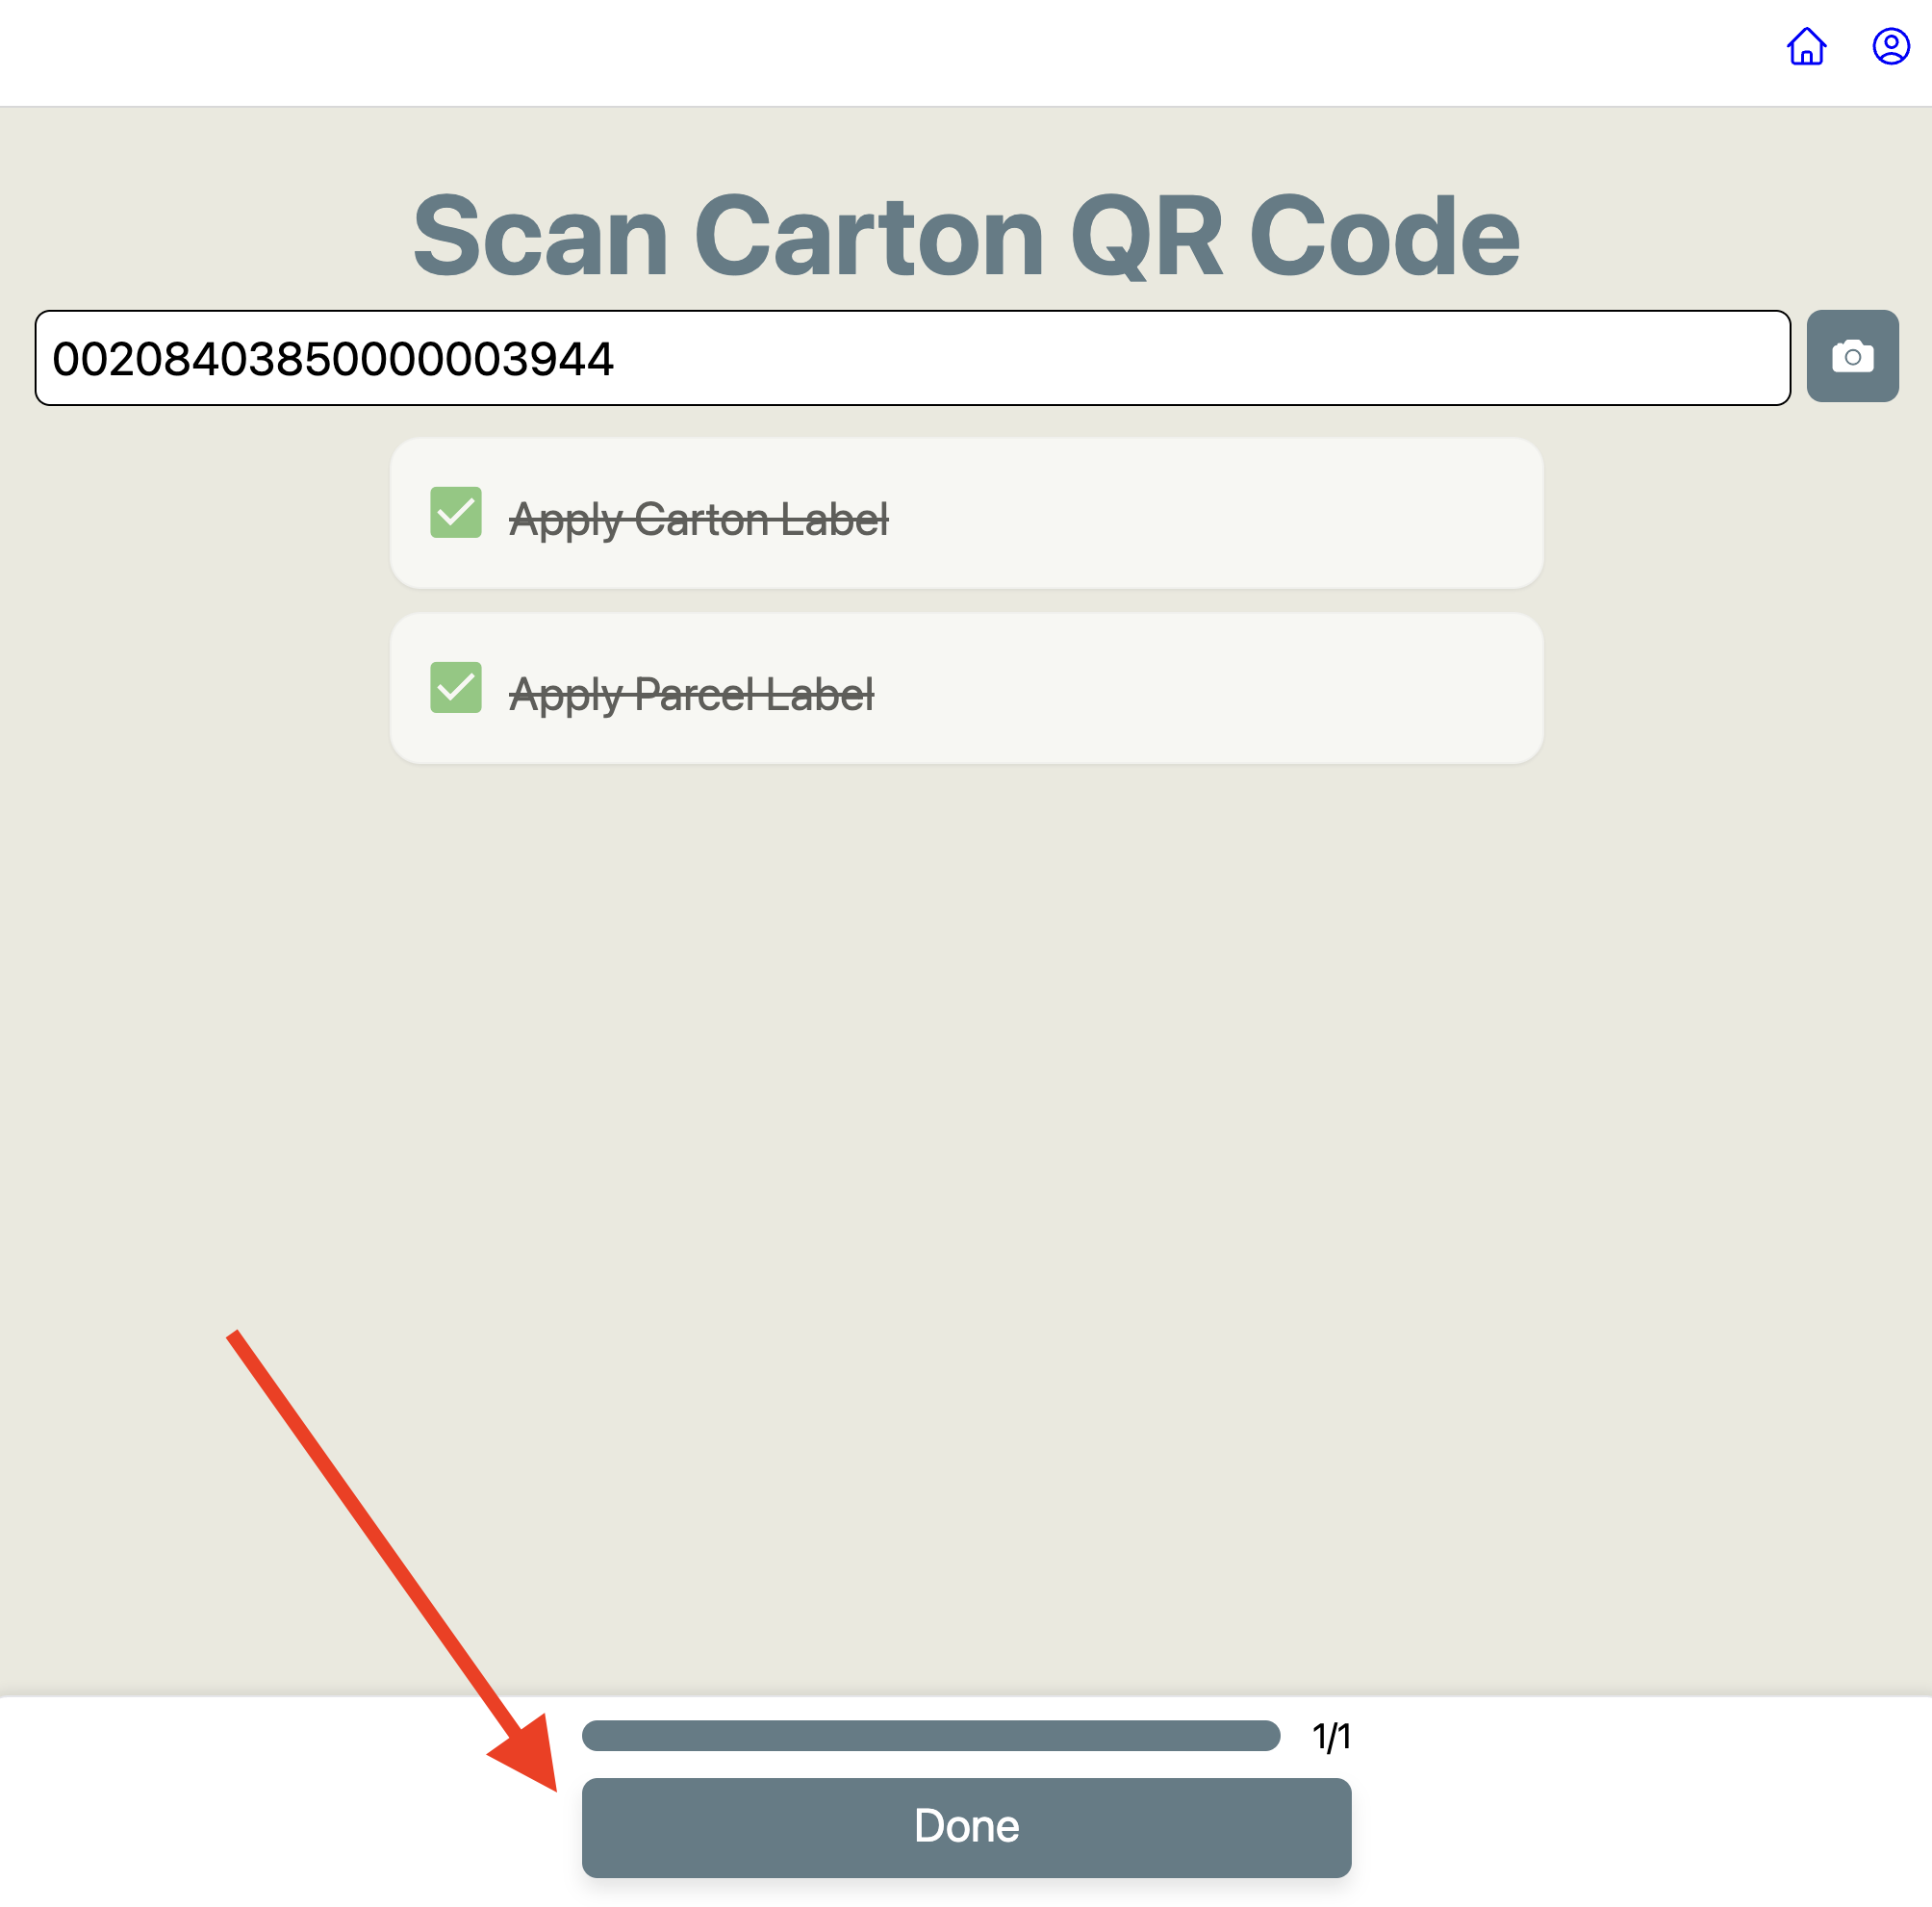
Success!
This order is now done!
You can always check in the timeline view to be sure!
For freight orders, it would be the same process, but you would just generate GS1 labels and then stage and load out the pallet after.
Feel free to reference this 🚚 freight help article for more info on that E2E process.
FAQ
When will this flow be used versus the normal freight or parcel flow?
The Delayed GS1 label flow will occur when both of these are true:
The retailer requires a total carton count on the GS1 carton labels (e.g. "Carton 1 of 12").
The brand packs by eaches, so the final carton count isn't known until packing is complete.
The standard freight or parcel flow will be used when the carton count is known up front, or when the retailer doesn't require carton count on the GS1 label. In those cases, GS1 labels can be printed at the start of the packout instead of the end.
A quick rule of thumb: if you need to wait until packing finishes to know how many cartons you're shipping, you're in the Delayed GS1 label flow.