Quick Select Box Sizes Setup
Last updated: April 22, 2026
What is Standard Box Sizes?
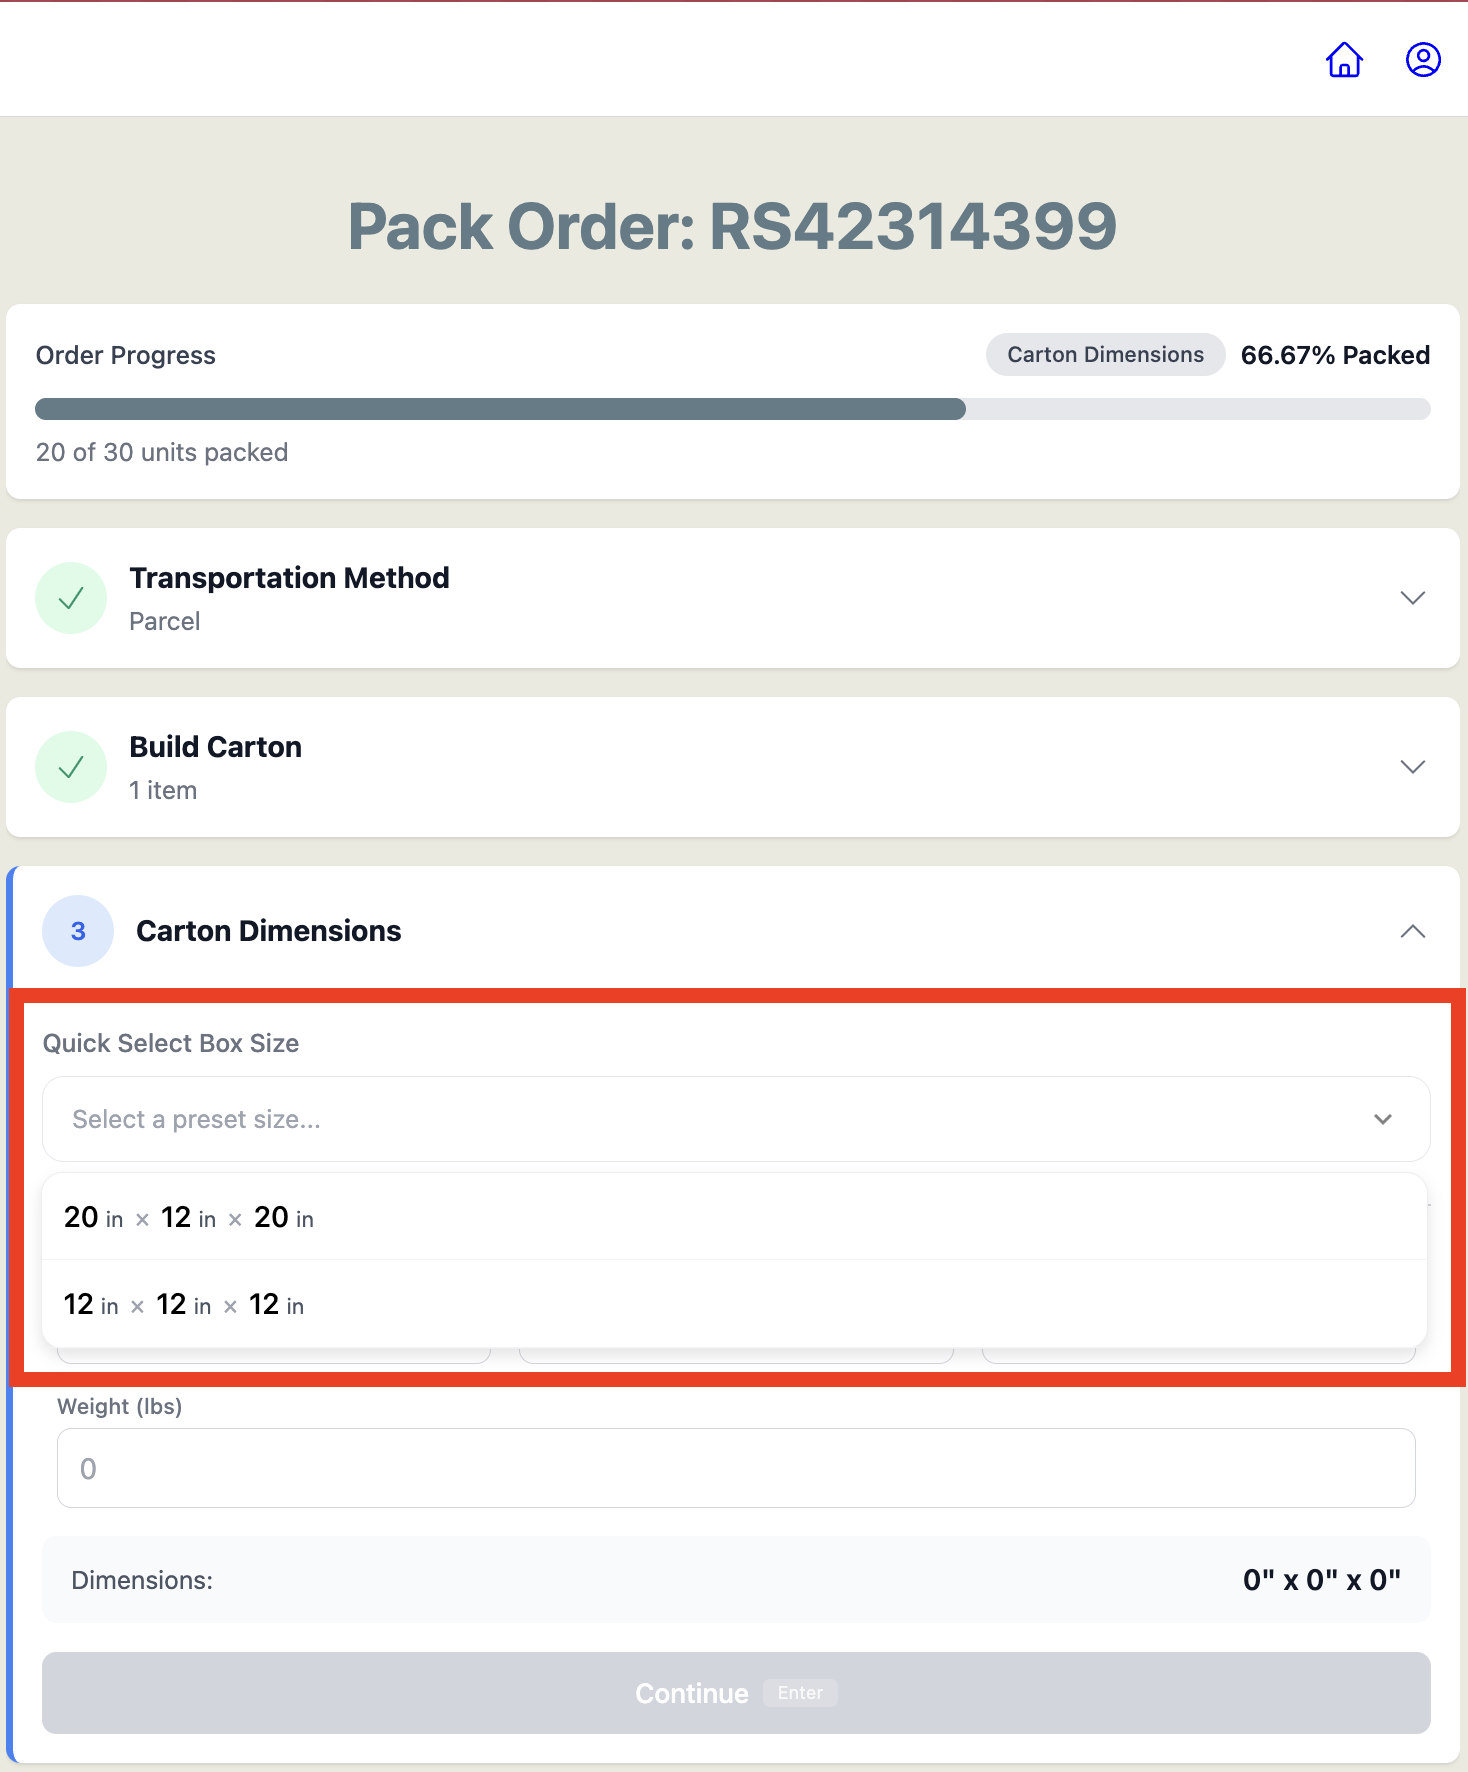
Standard Box Sizes lets you build a library of pre configured box dimensions for your facility. On configured, at packout, select a box from the Quick Select Box Size dropdown and the Length, Width, and Height fields will fill in instantly with a single click, no manual typing required.
How to Add Standard Box Sizes
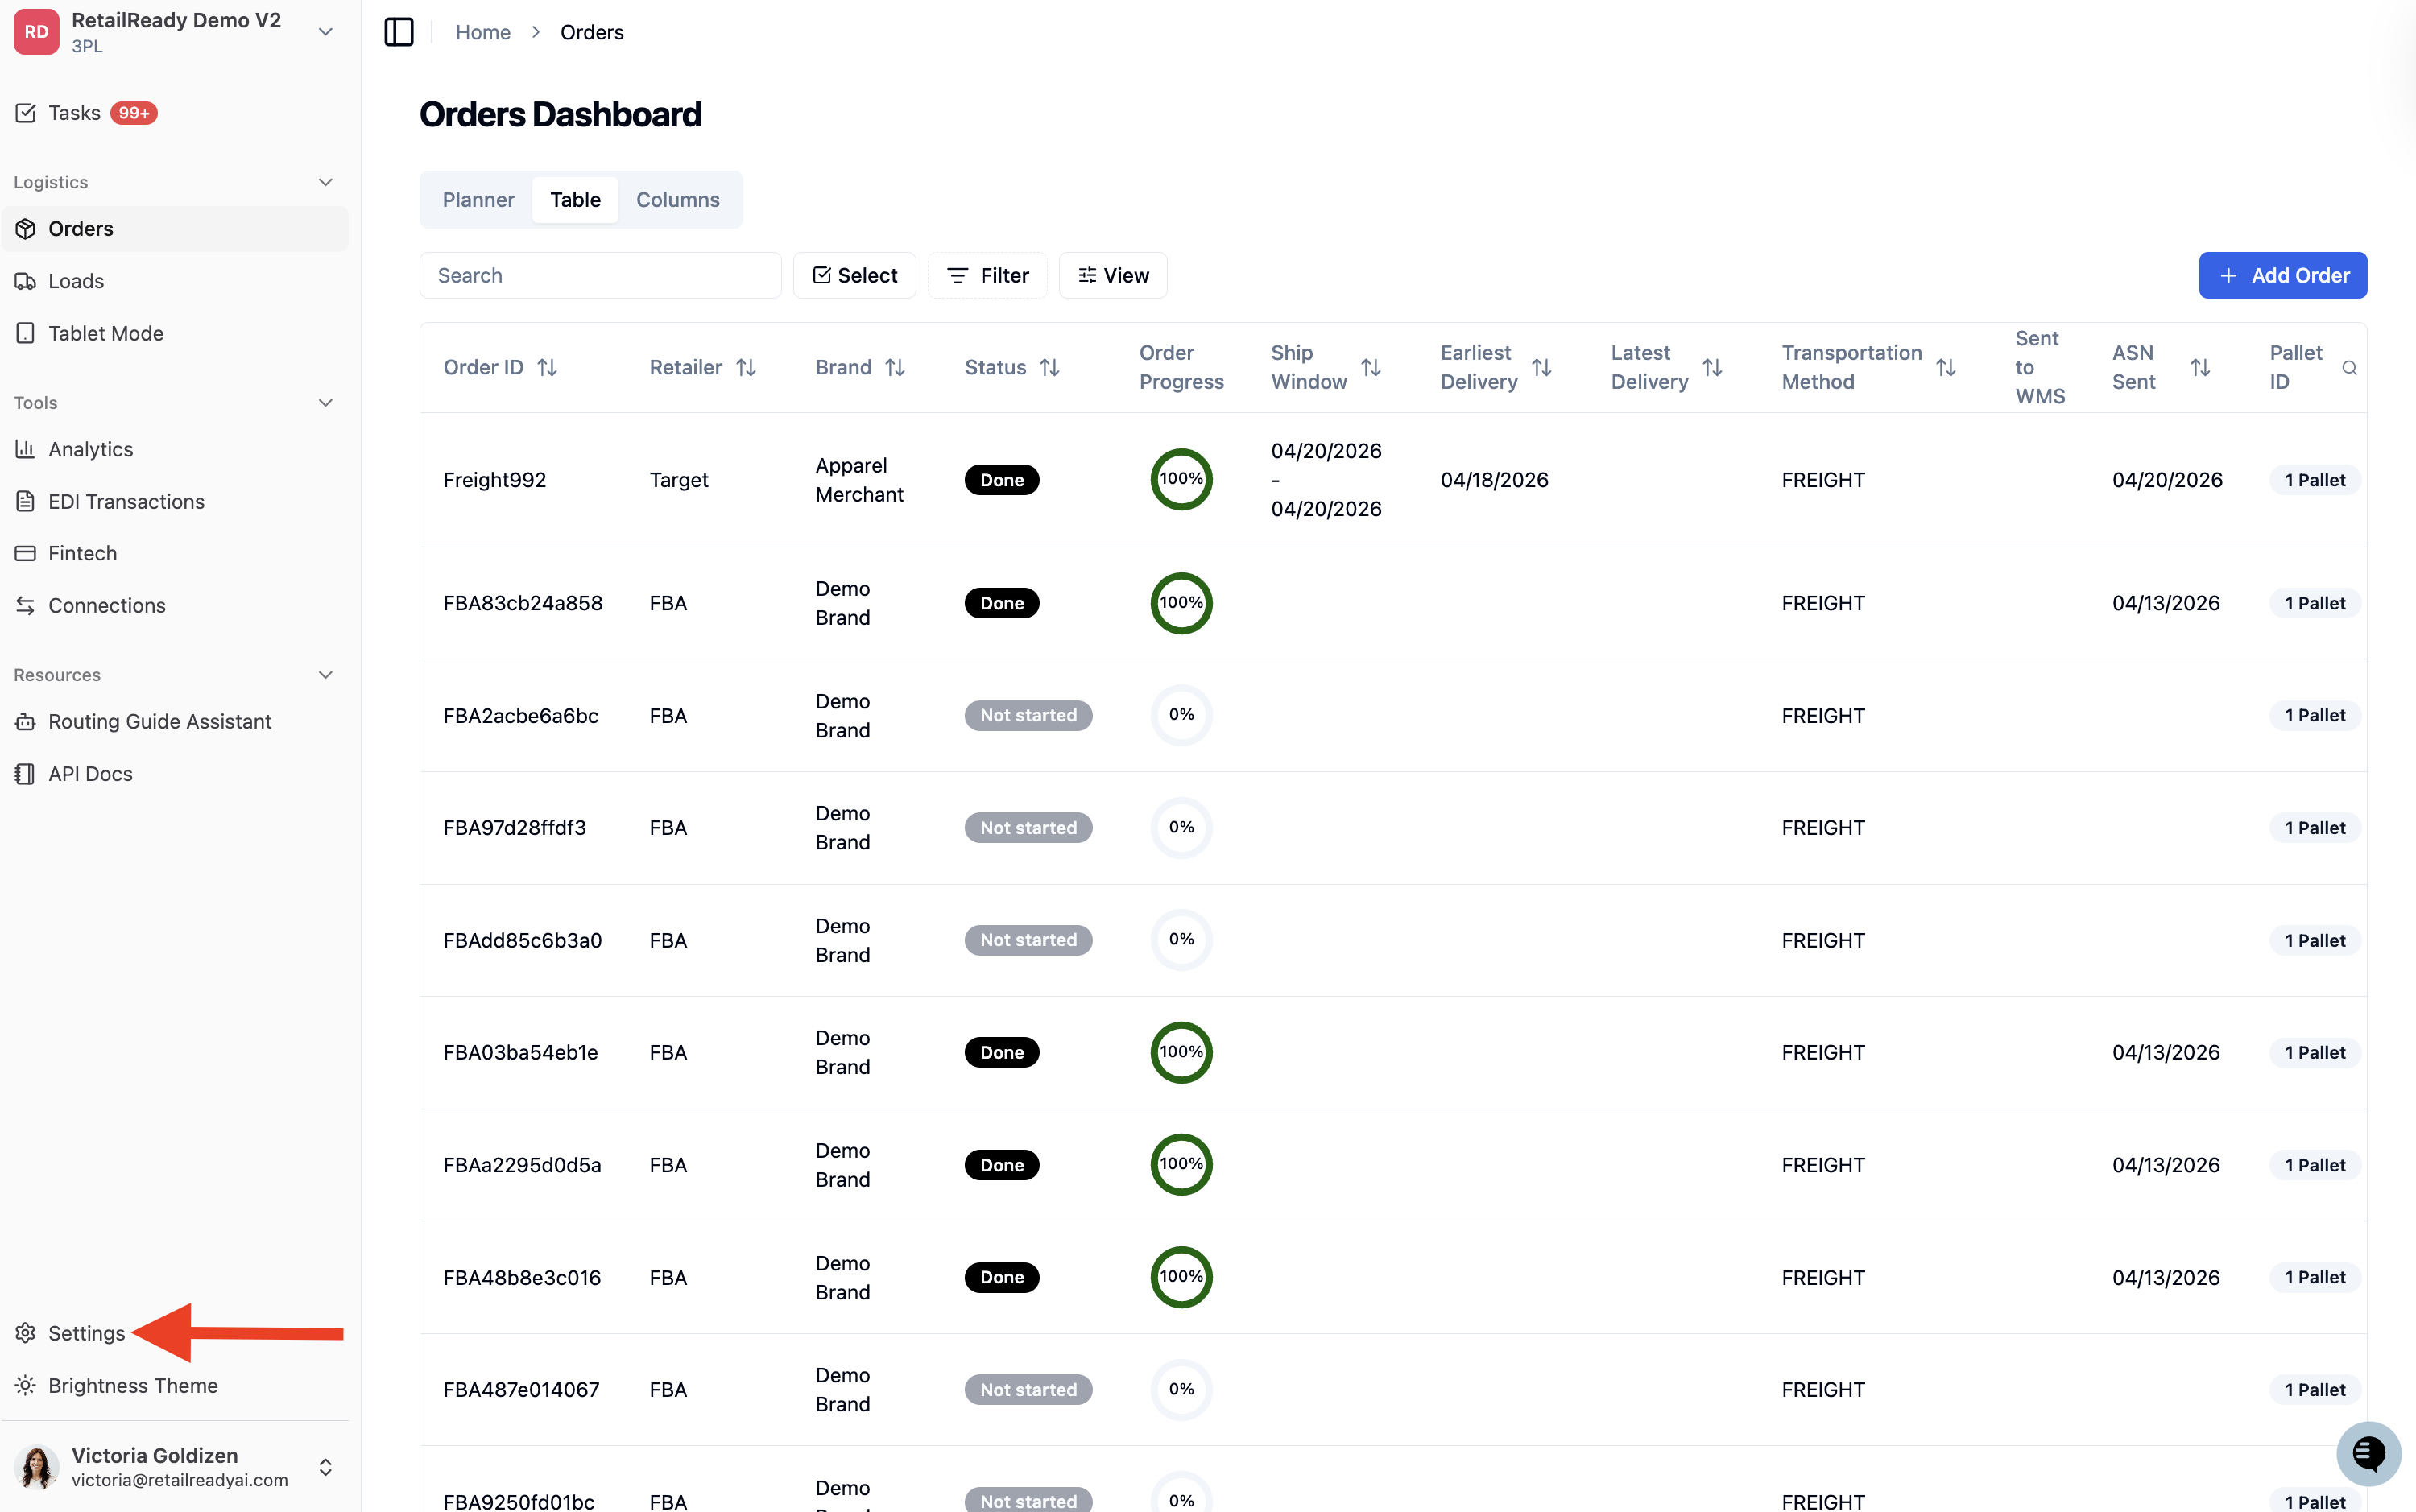
From the left-hand navigation, click 'Settings' at the bottom of the sidebar.
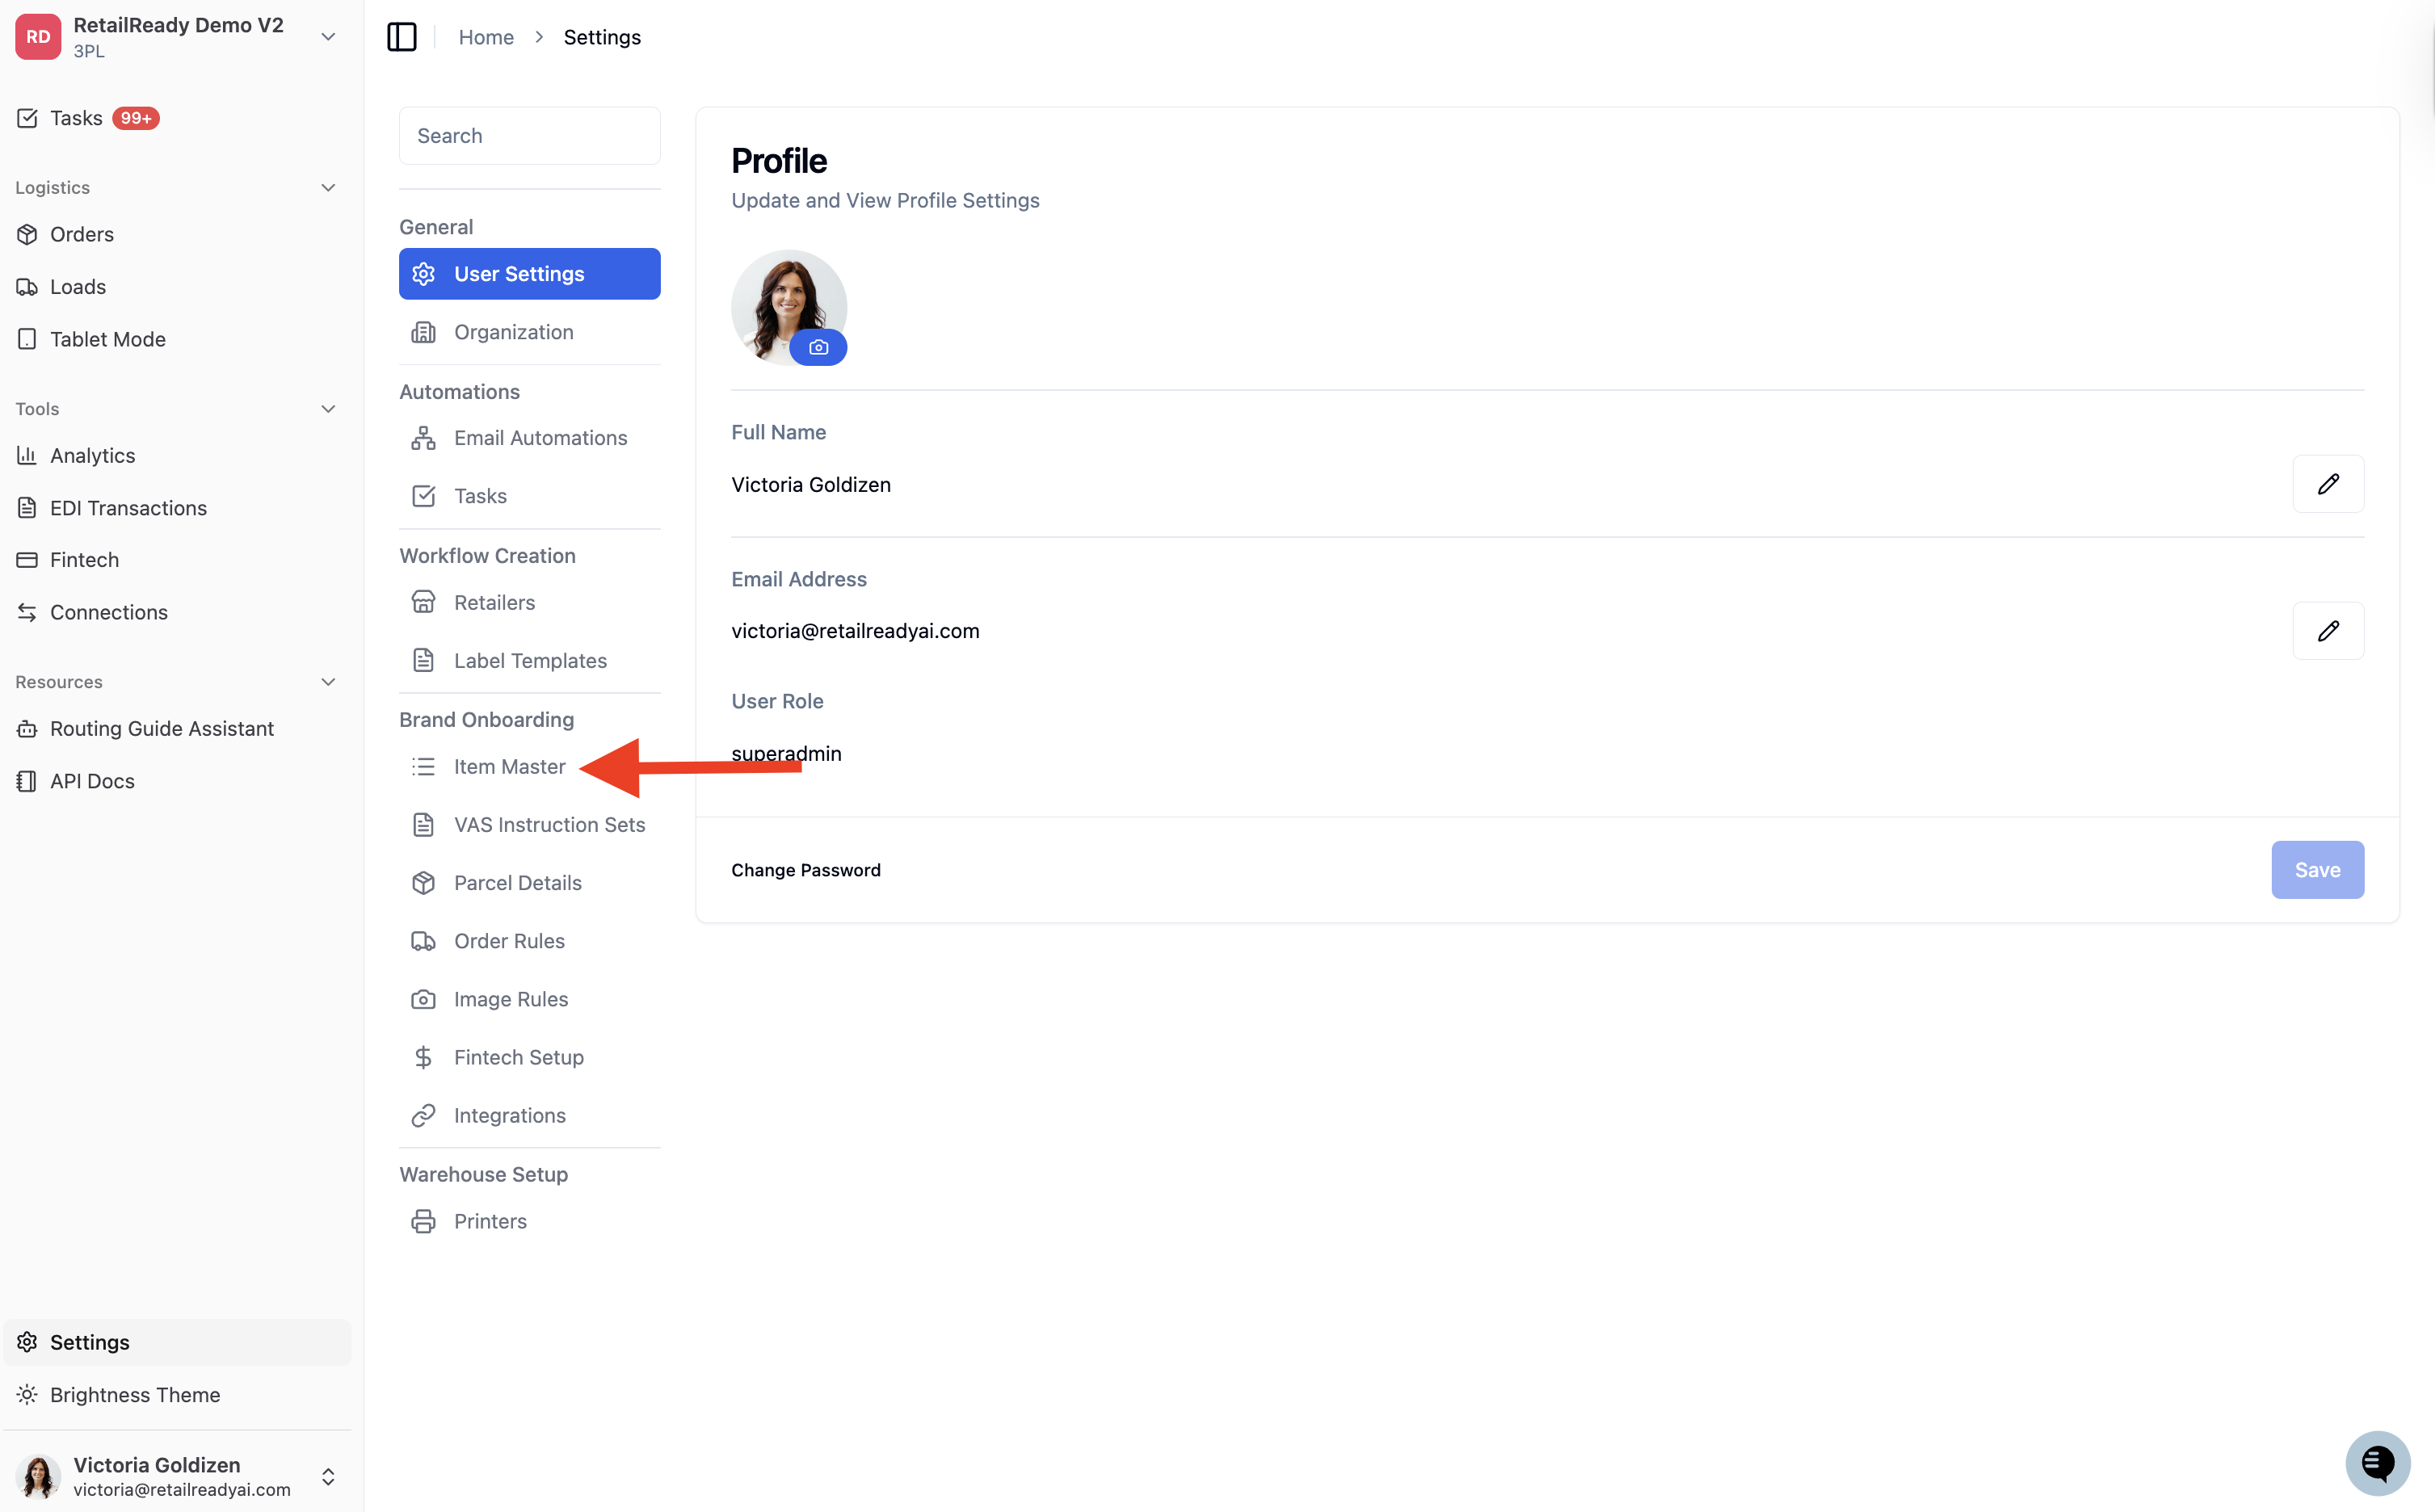
In the Settings menu, scroll down to the Brand Onboarding section and click 'Item Master'.
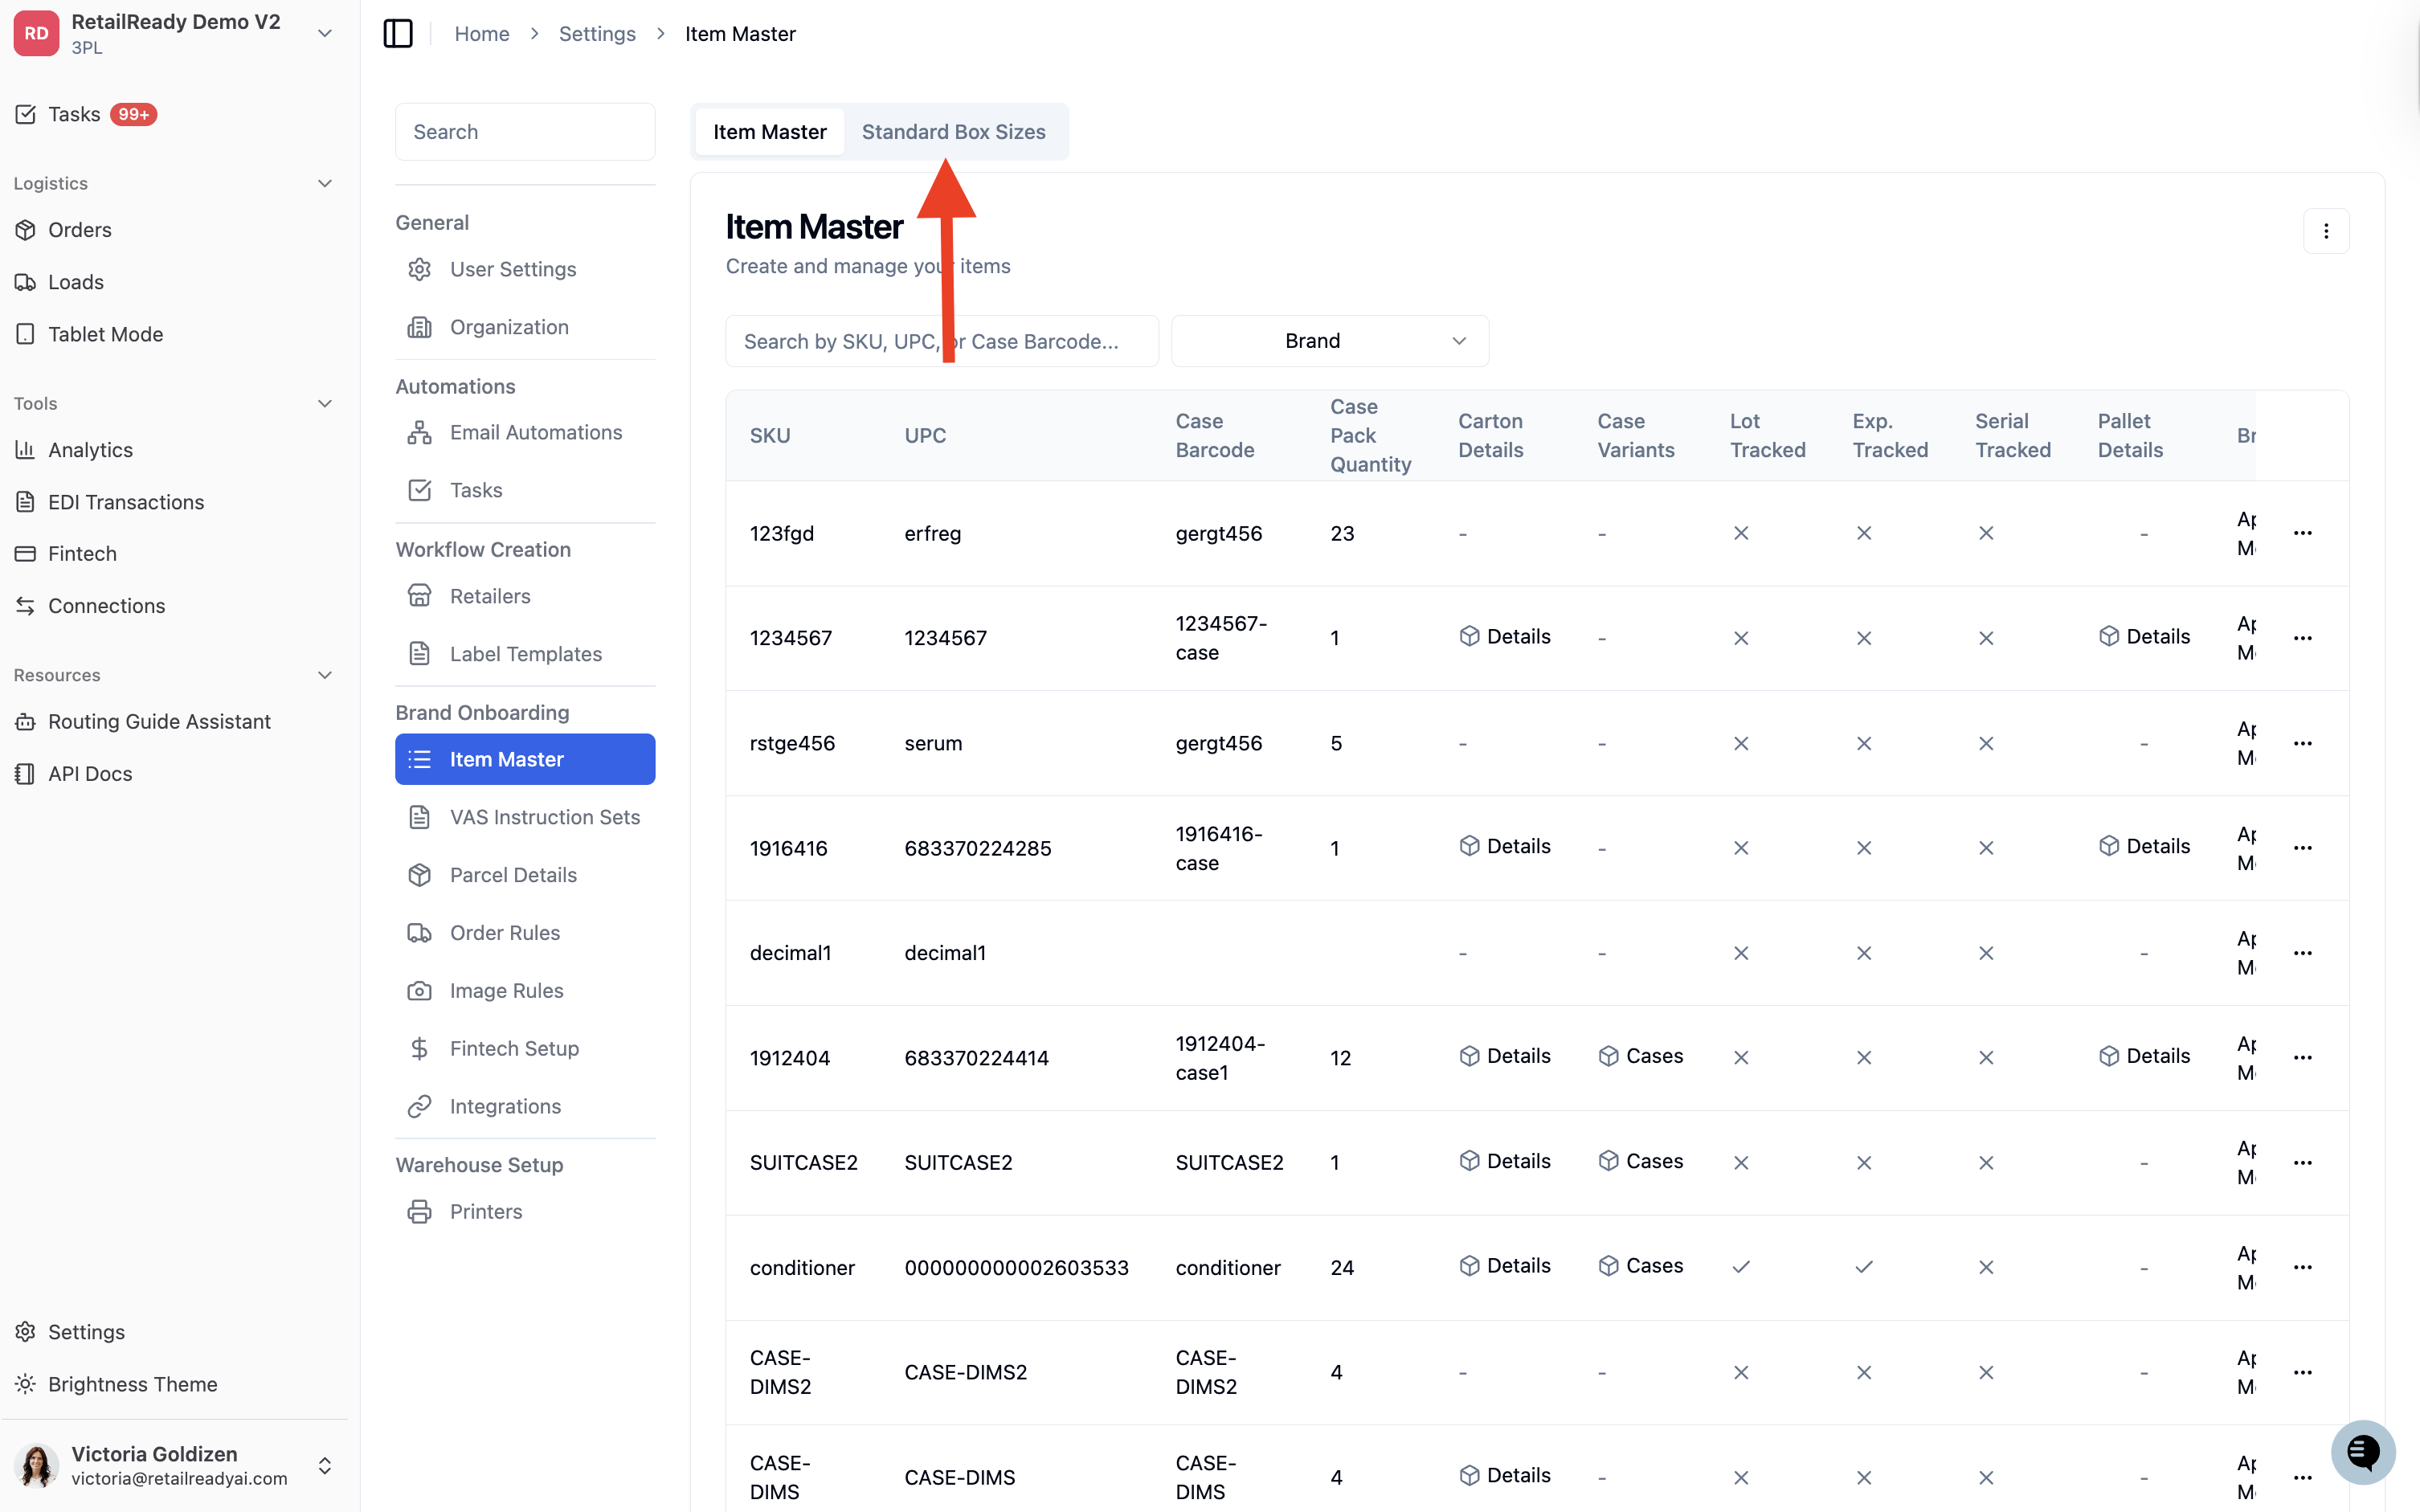
At the top of the Item Master page, click the 'Standard Box Sizes' tab.
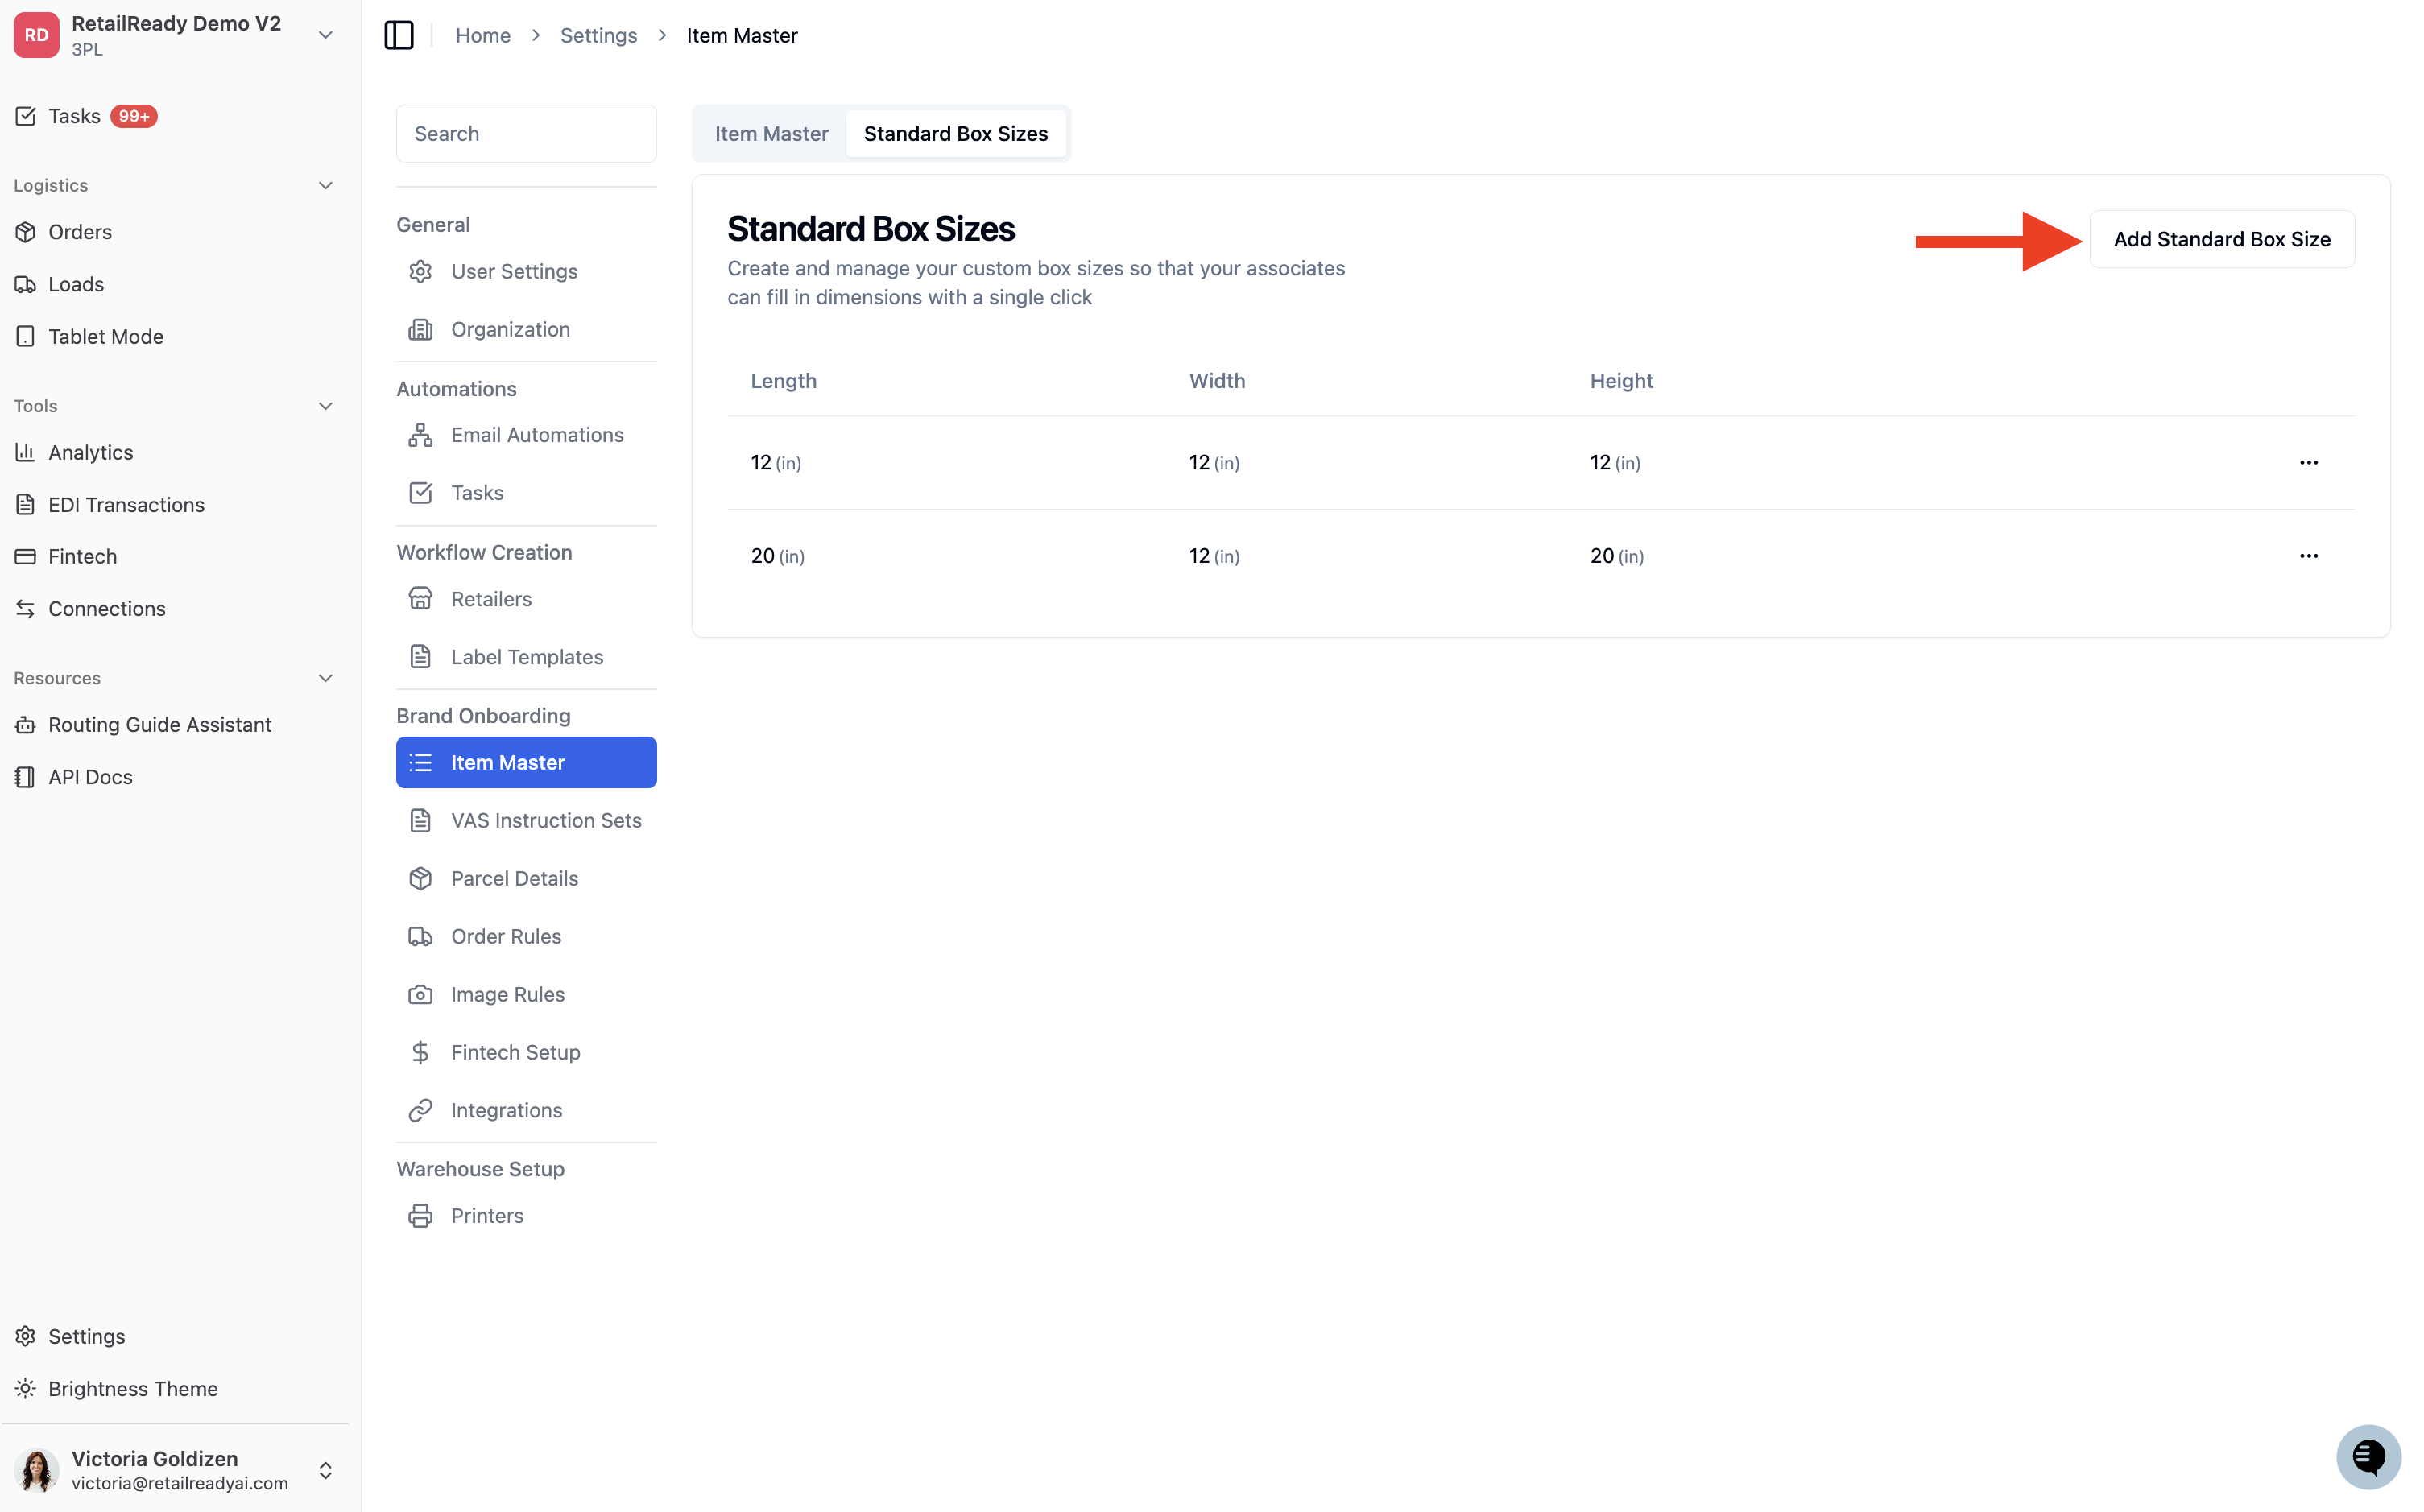
In the top right corner, click 'Add Standard Box Size'. The Create Standard Box Sizing modal will open.
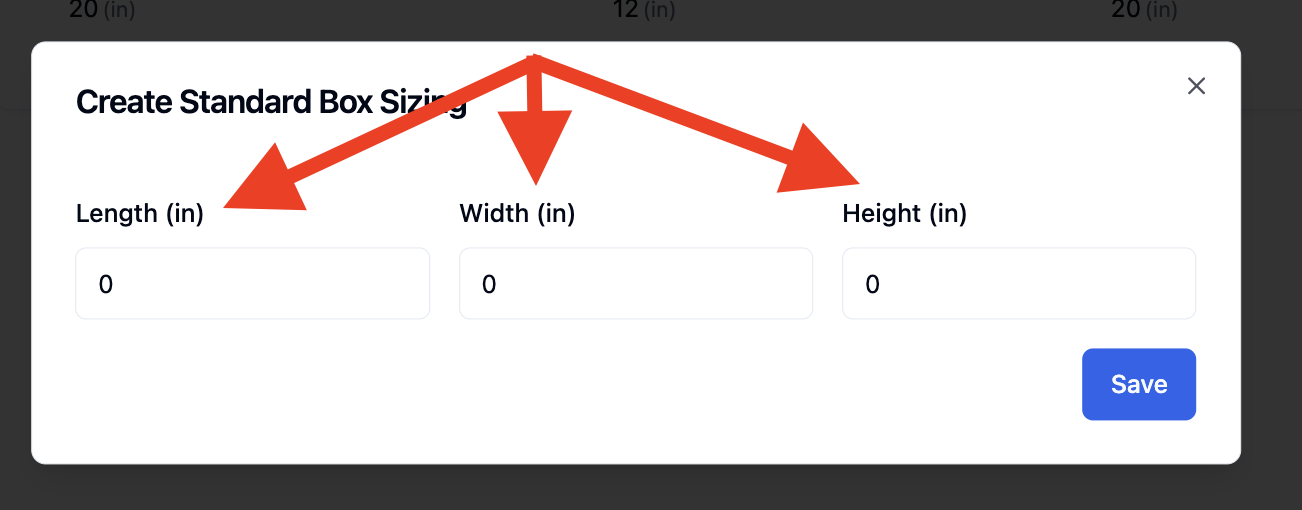
Enter your box dimensions in the Length (in), Width (in), and Height (in) fields. All three fields are required.
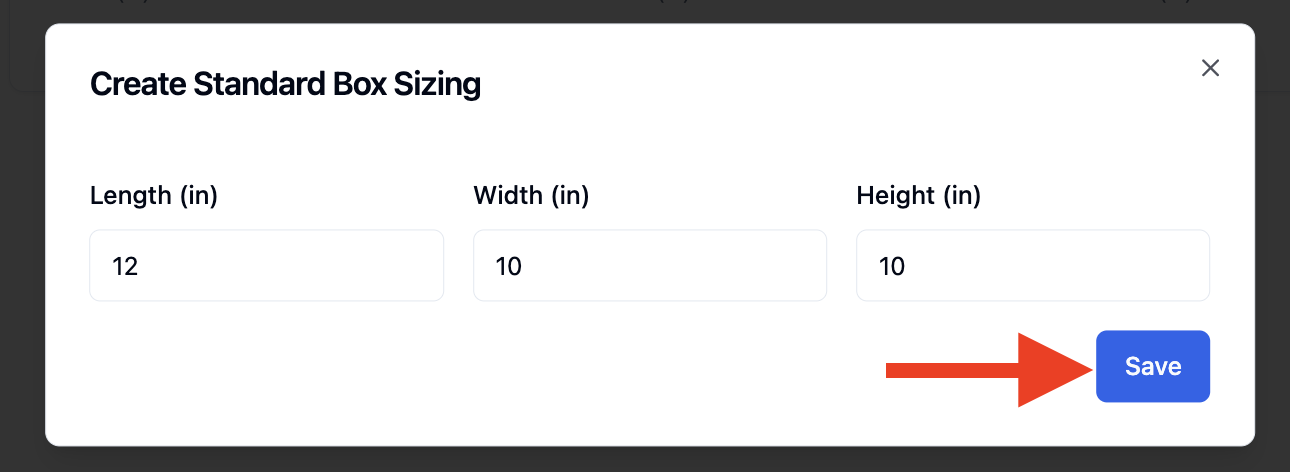
Click 'Save'. The box size will appear immediately in the Standard Box Sizes list.
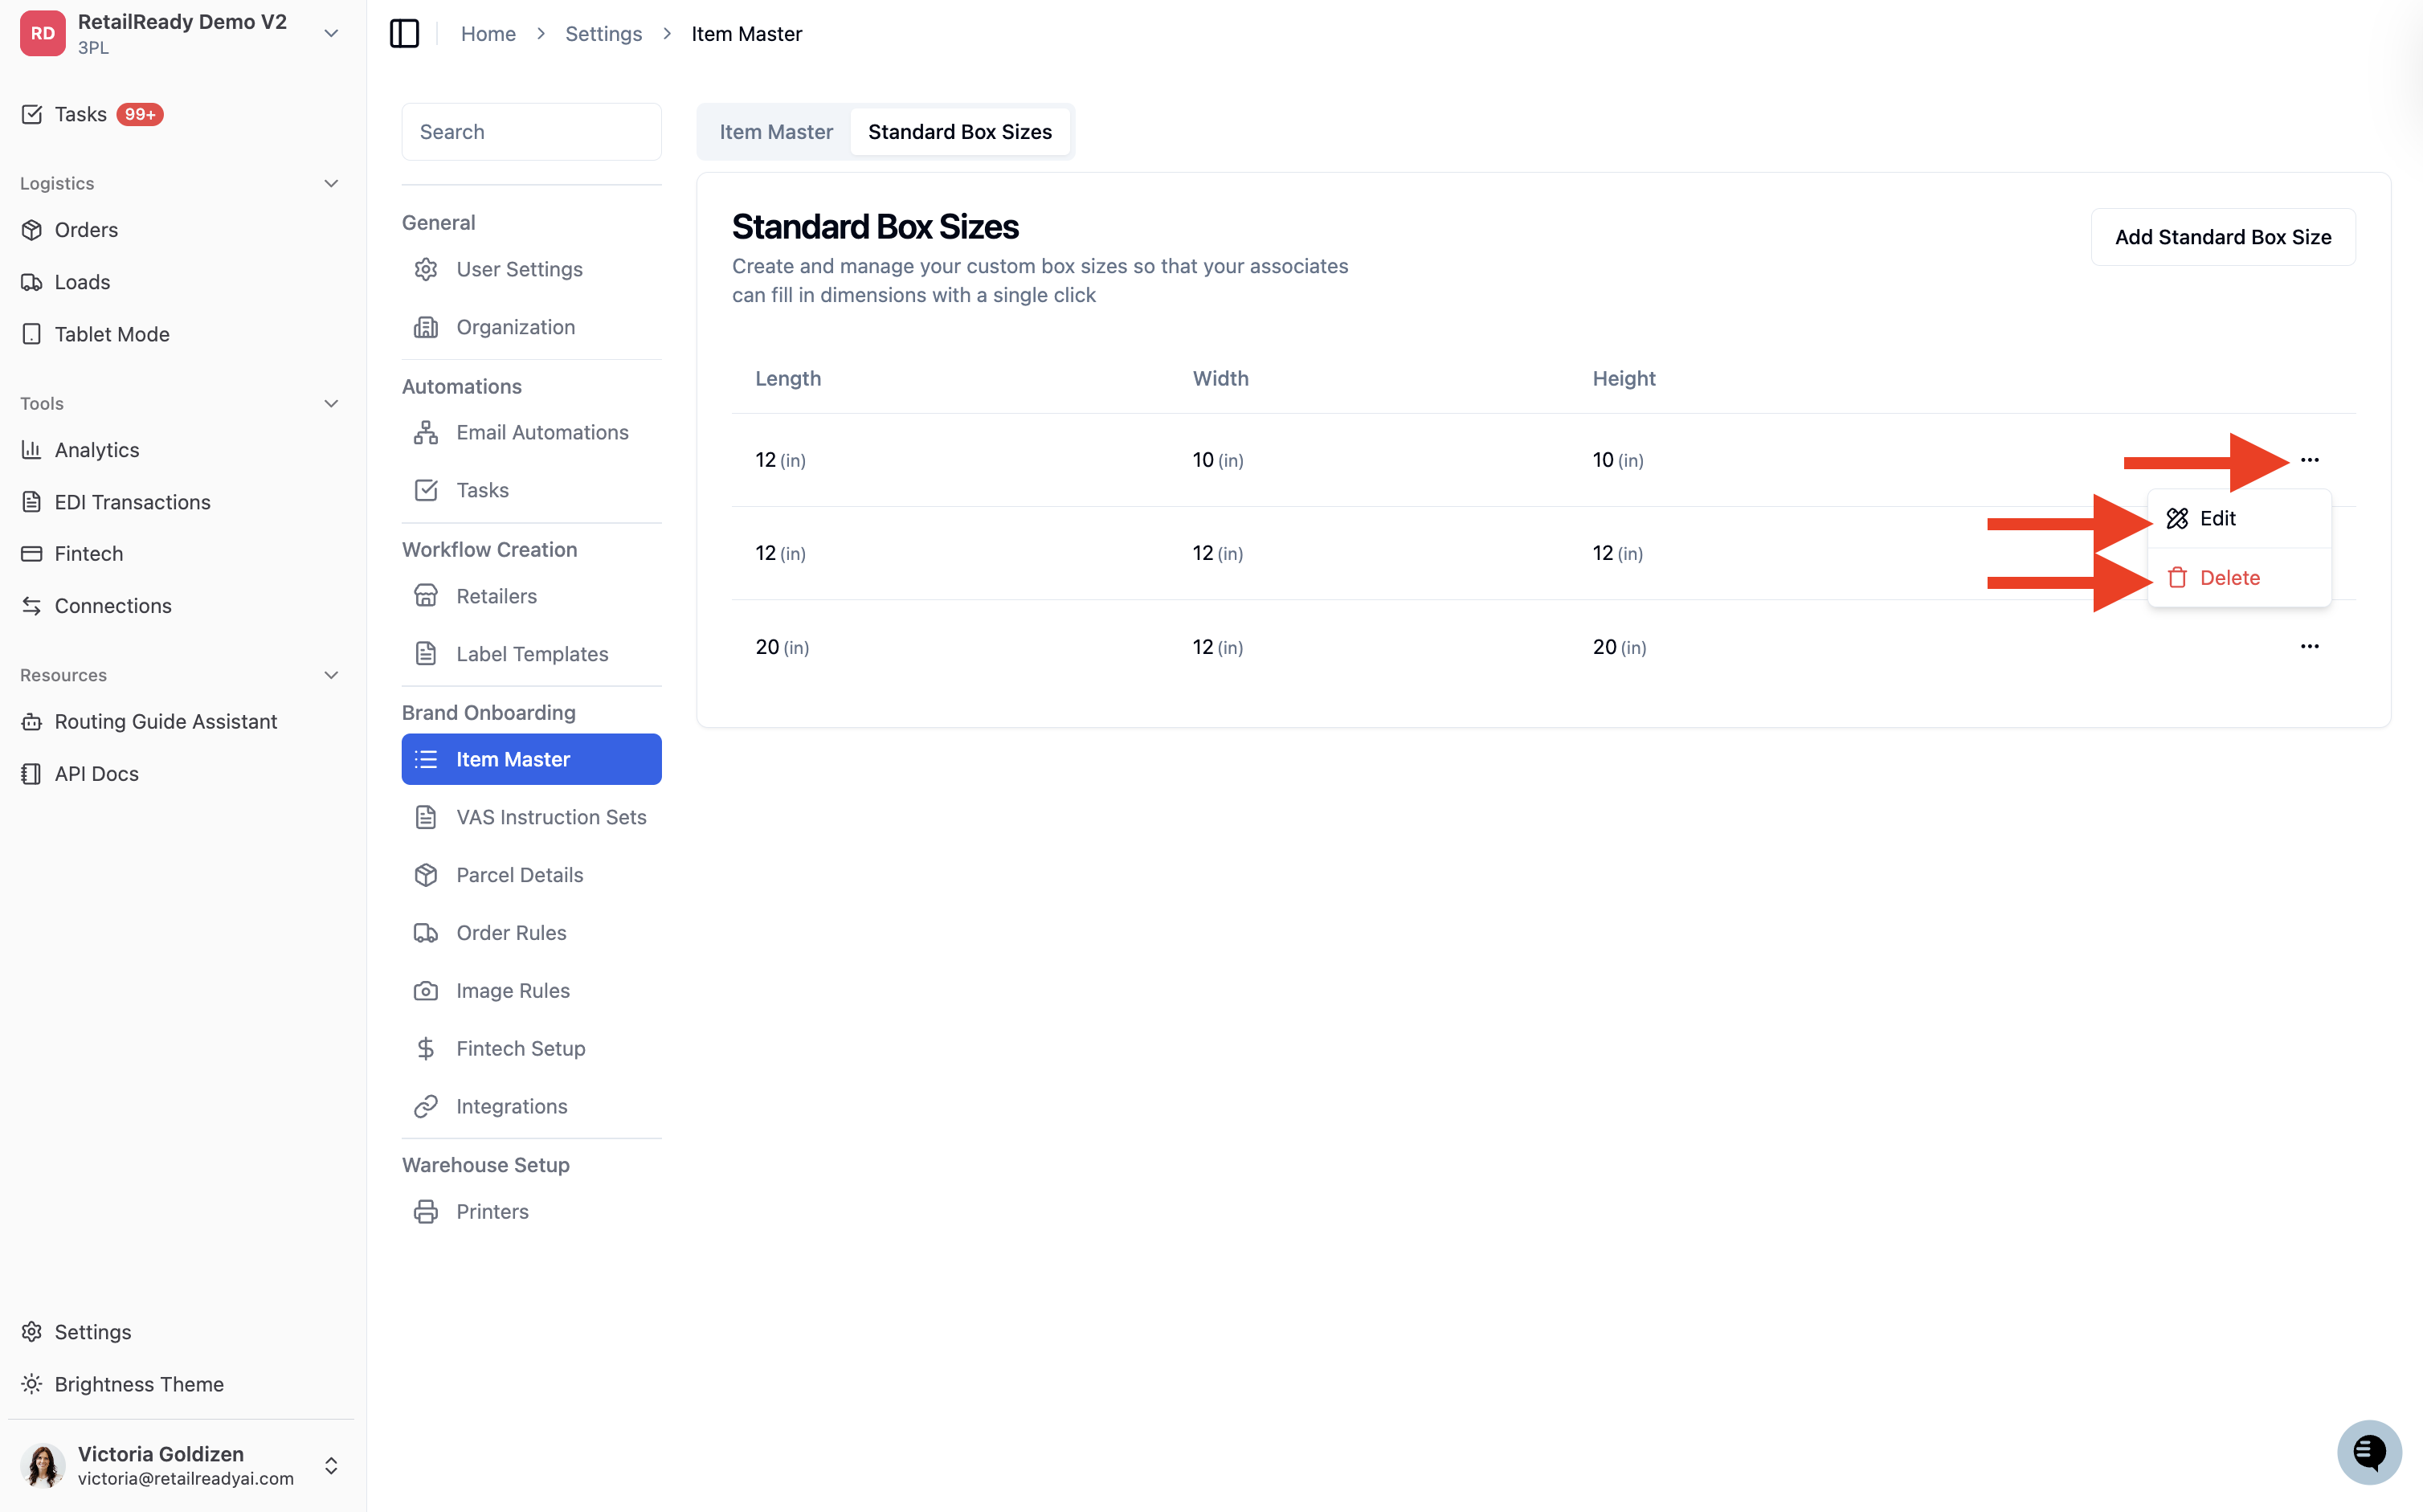
To edit or delete a box size: Click the 3 dot menu (⋮) on the right side of any row to access edit and delete options.
What You See During Packout
Once your box sizes are configured, the Quick Select Box Size dropdown will be available at the packout station. Select a box and the Length, Width, and Height fields fill in instantly. Manual entry is still available if needed.