Parcel Flow
Last updated: July 26, 2026
This article walks through the end-to-end Parcel order flow in RetailReady, from scanning an order on the Get Started screen through packing cartons, entering dimensions, applying GS1 labels, and generating and printing parcel shipping labels.
How to Process an E2E Parcel Order in RetailReady
Pack SKUs
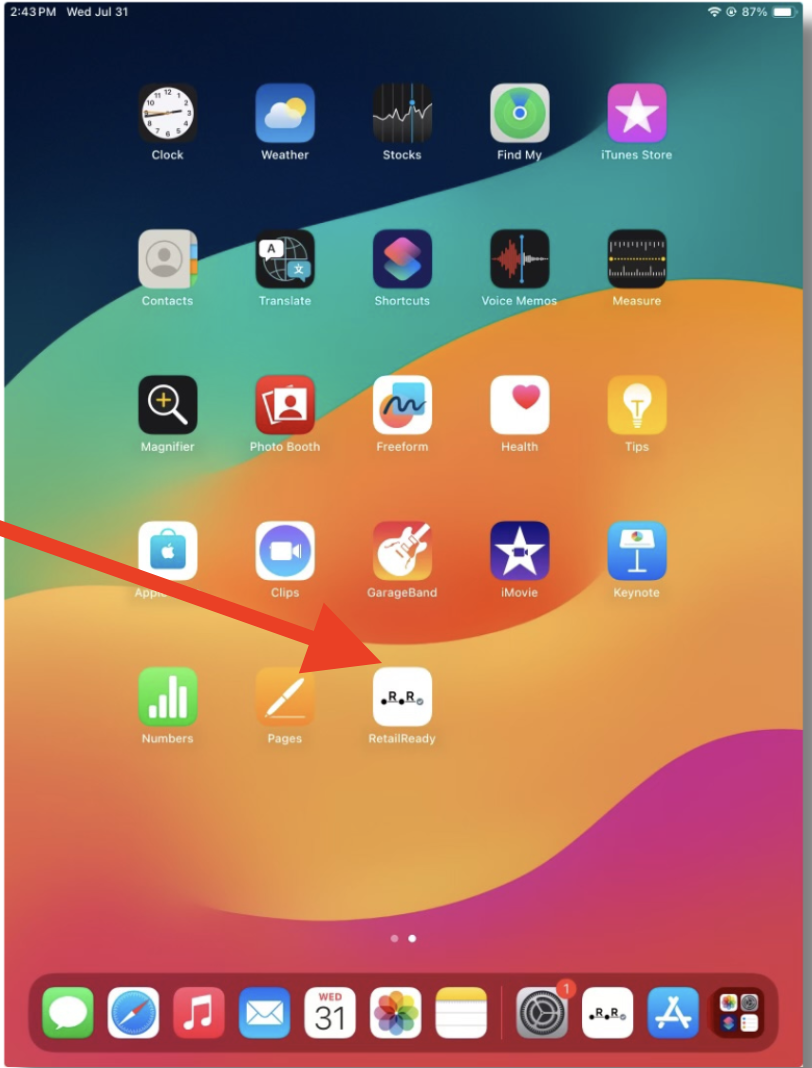
Navigate to the RetailReady App
Locate the RetailReady icon on your iPad home screen and tap it to open the app or click 'tablet mode' located on the left-side navigation panel on the RetailReady dashboard.
Log in with your credentials.
Enter your Email and Password, then tap 'Log In'.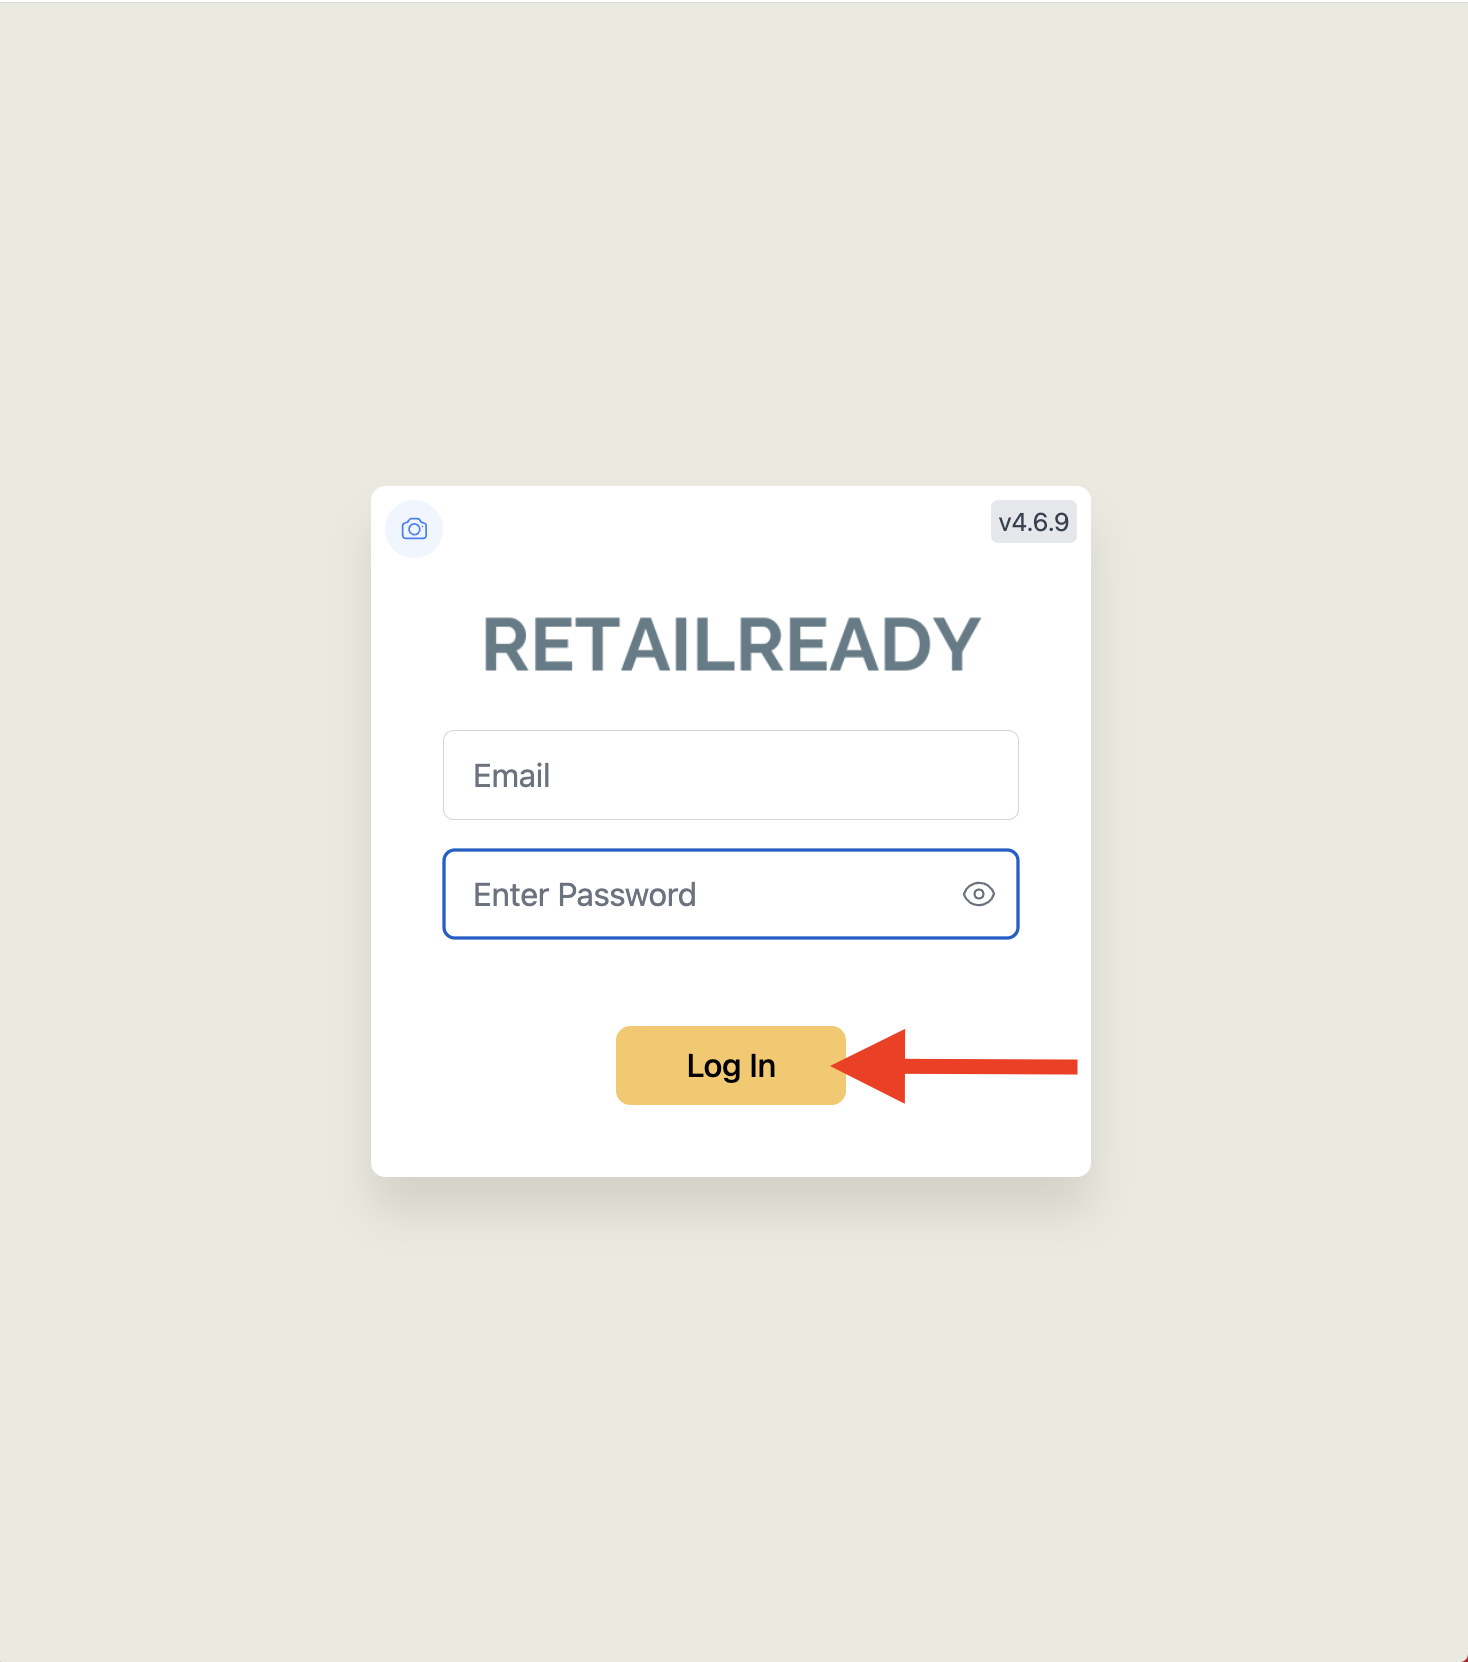
Select the printer you will be using.
After logging in, RetailReady will prompt you to select a printer. Tap the printer you'll be using for printing, then tap 'Continue'.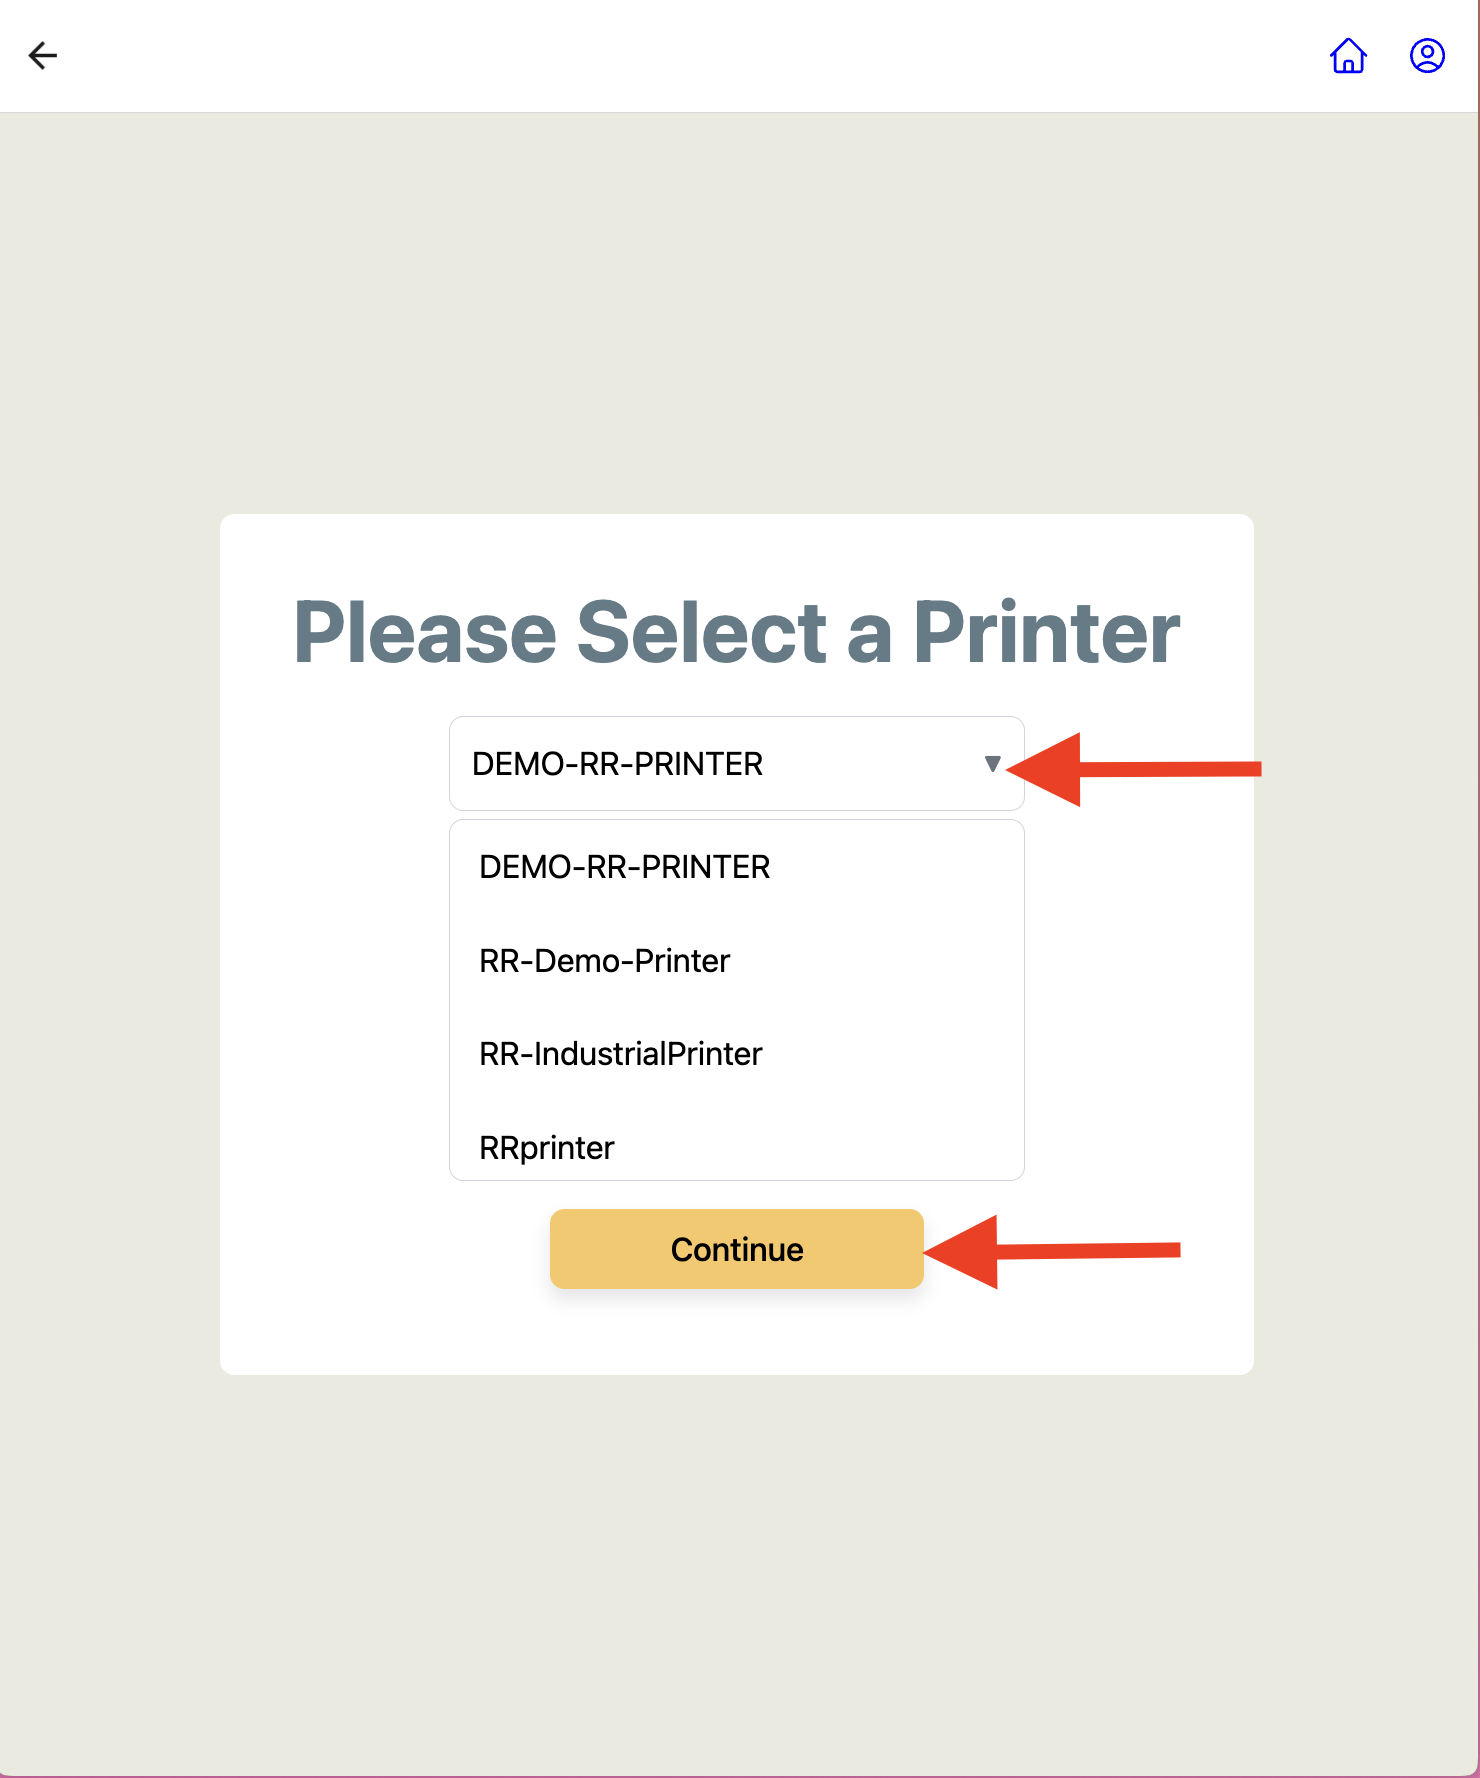
Scan or search for your order on the Get Started screen.
On the RetailReady home screen, tap the 'Scan Order, Carton, or Pallet' field and type the order number manually or click the camera icon to take a photo of the barcode of the order number.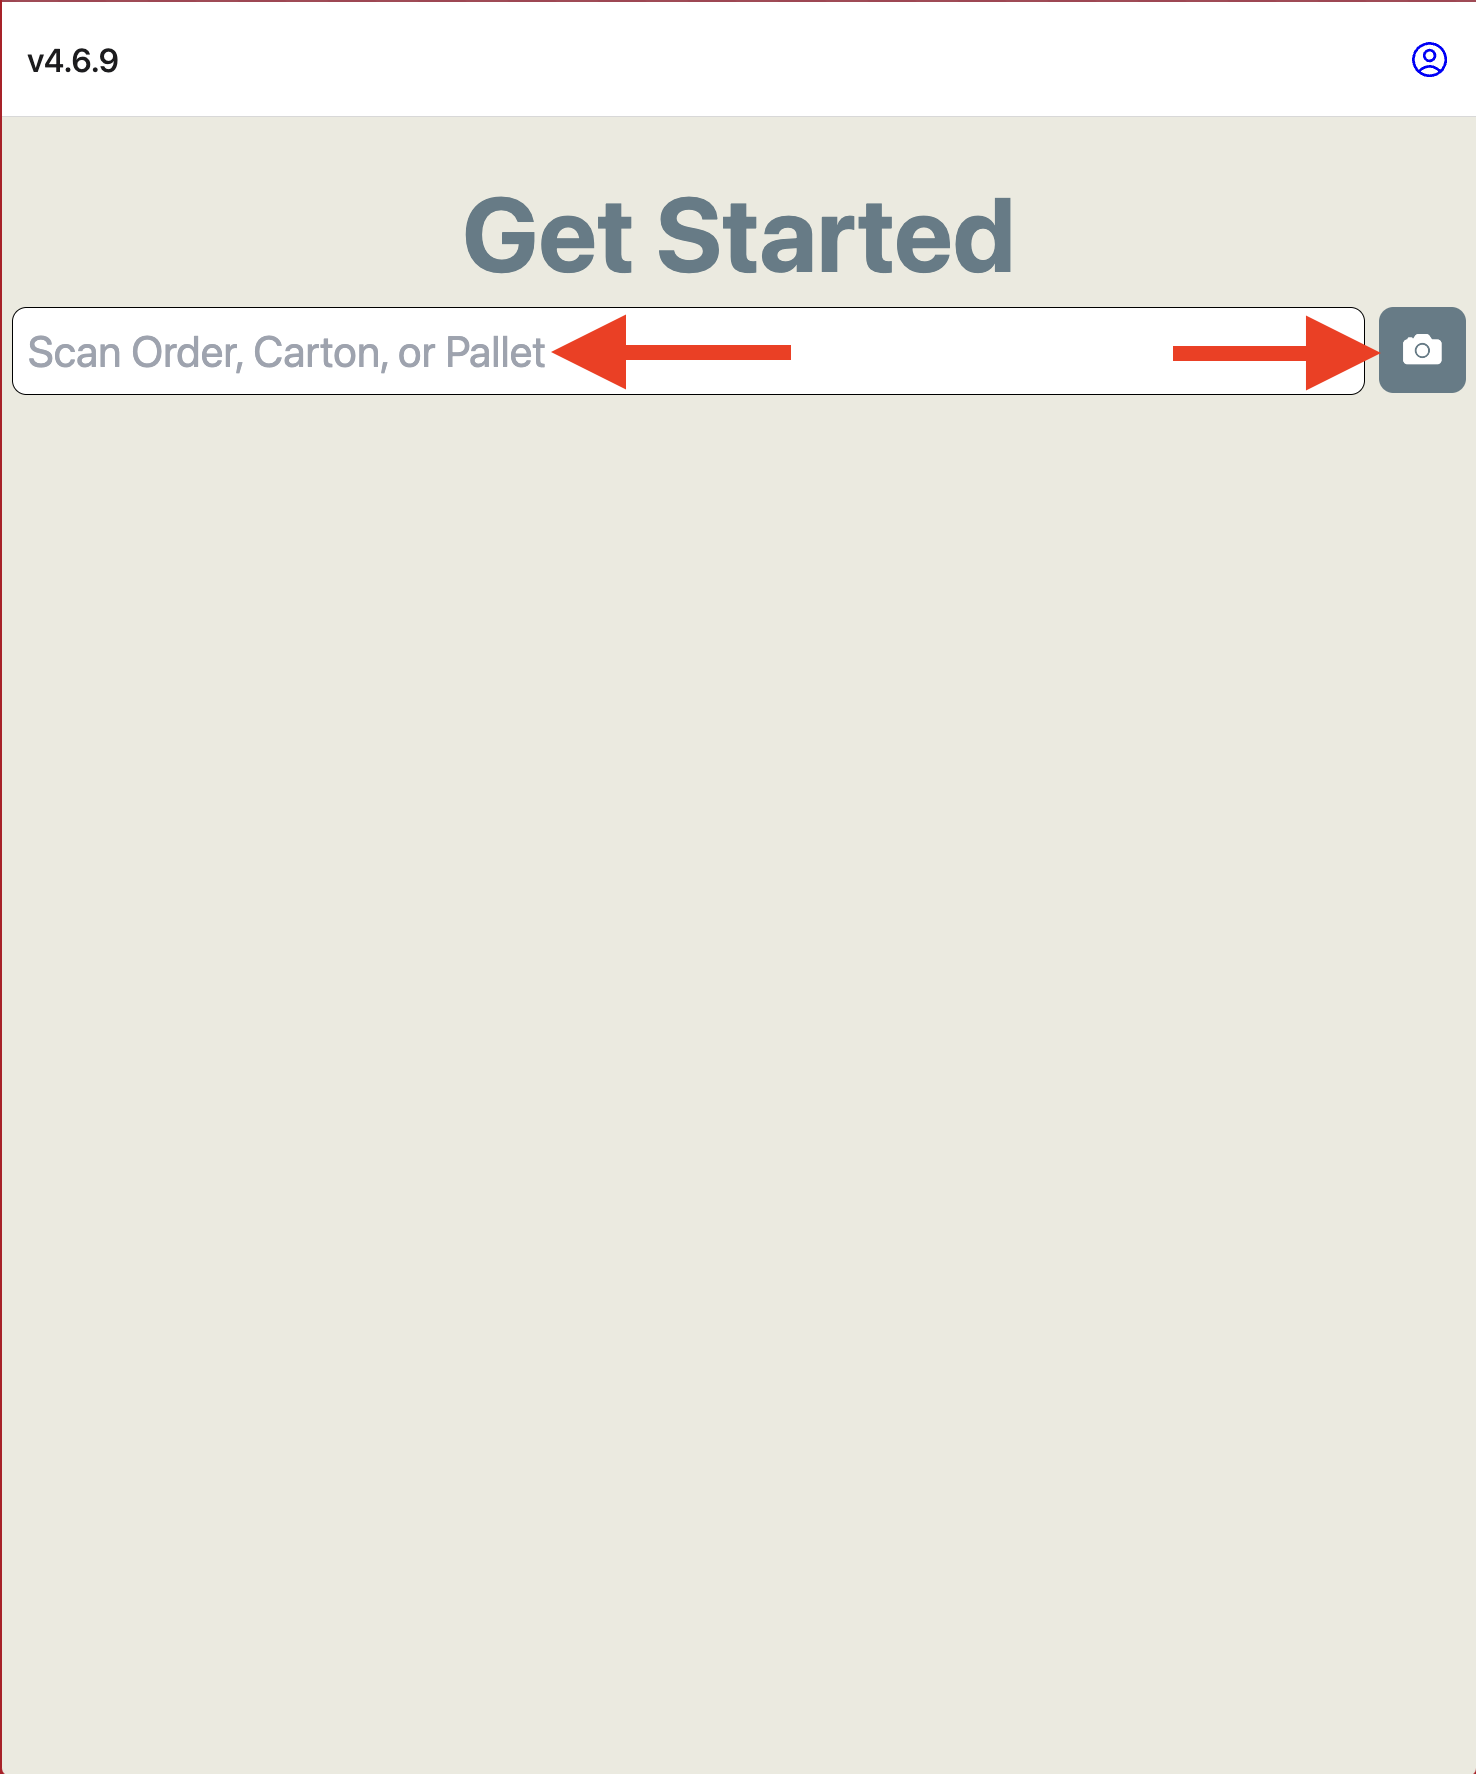
Select the order from the autocomplete results.
As you type or scan, matching orders appear below the field. Tap the correct order to pack.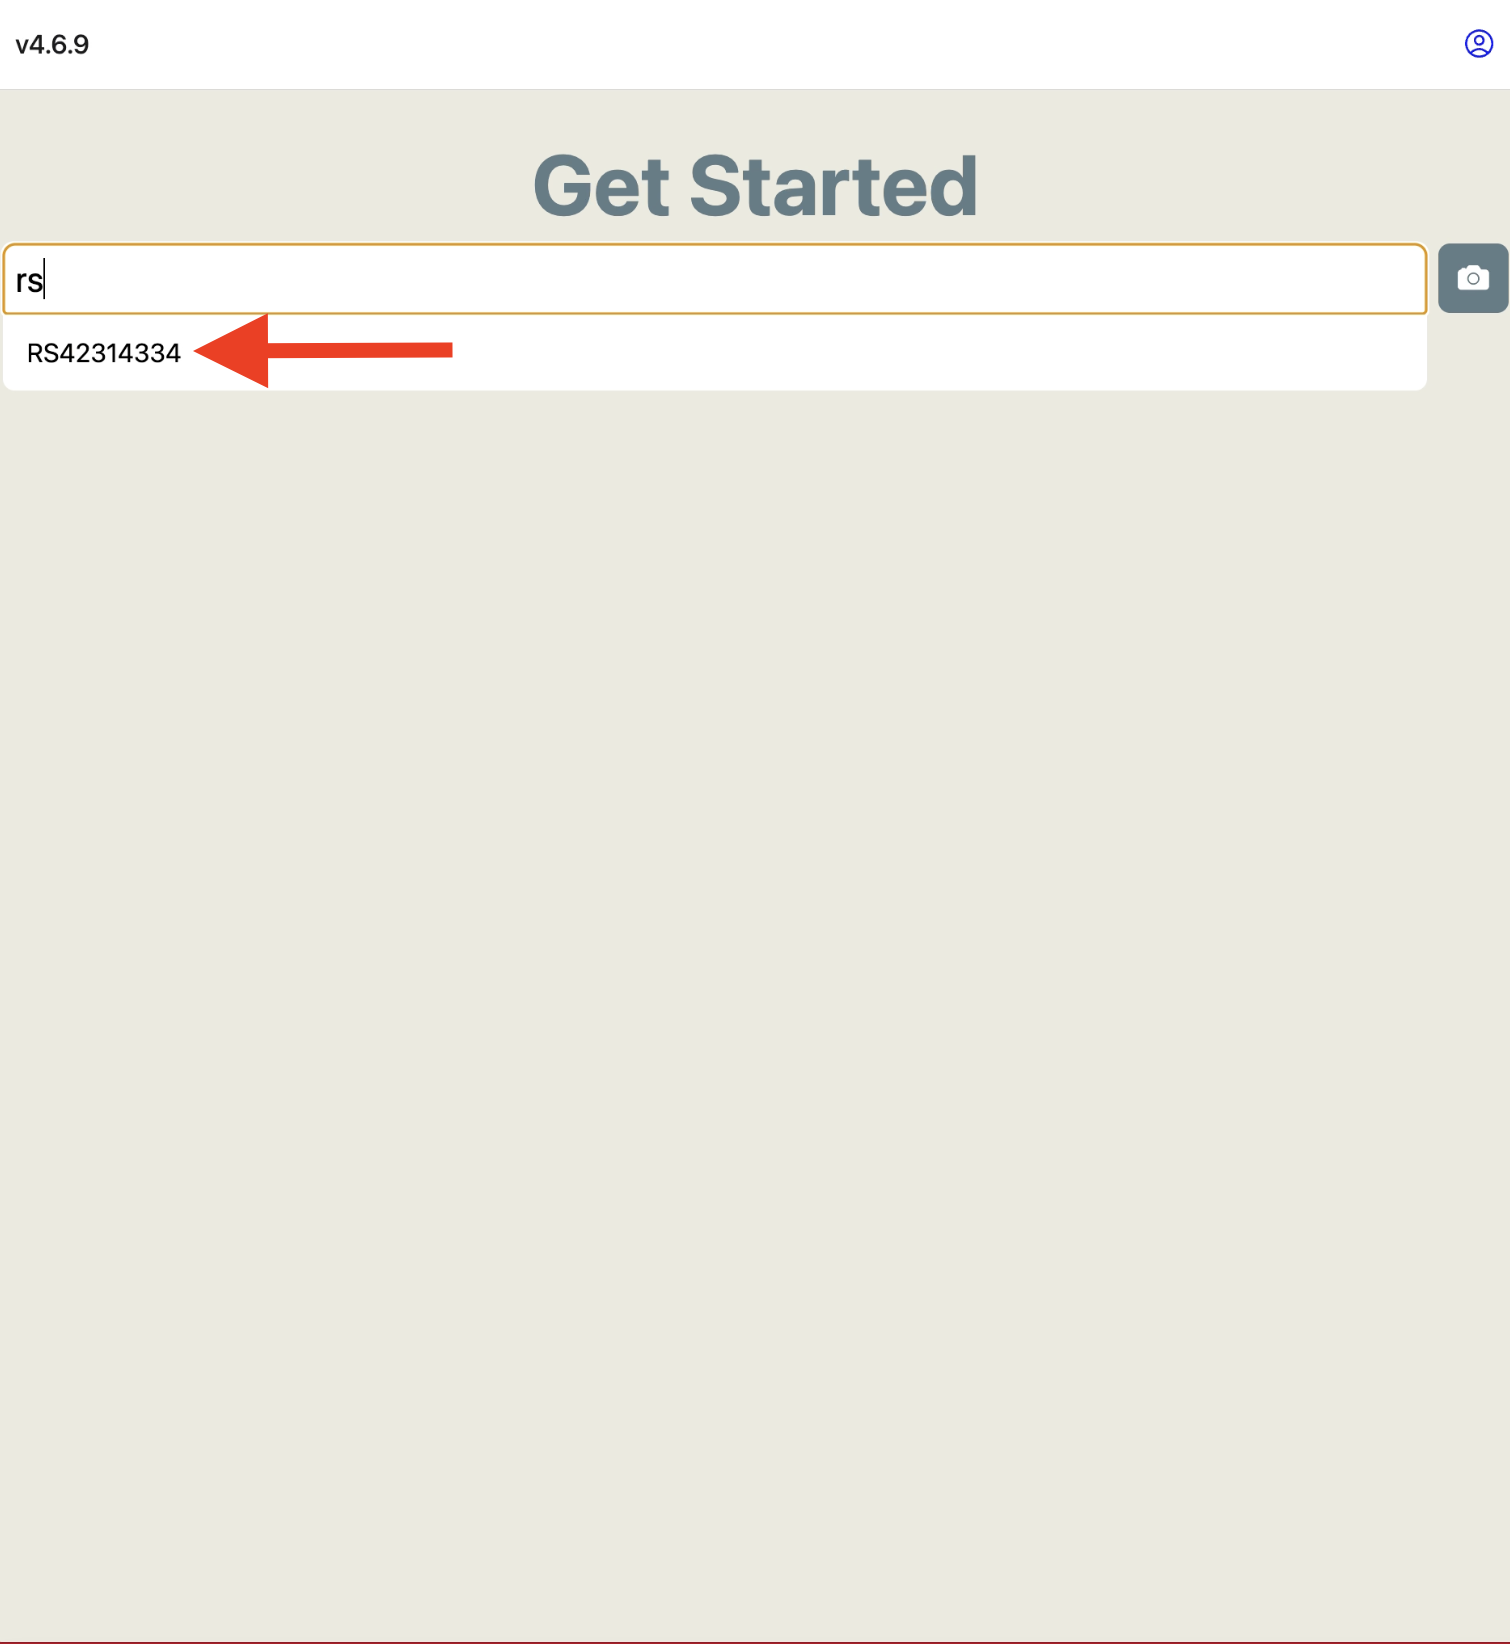
Review the order details and tap 'Begin Carton Packout'.
Confirm the Order ID, Merchant, and Retailer. The order progress timeline shows the four stages: Pack SKUs, Shipping Method, Apply Parcel Labels, and Order Completed. Tap 'Begin Carton Packout to start'.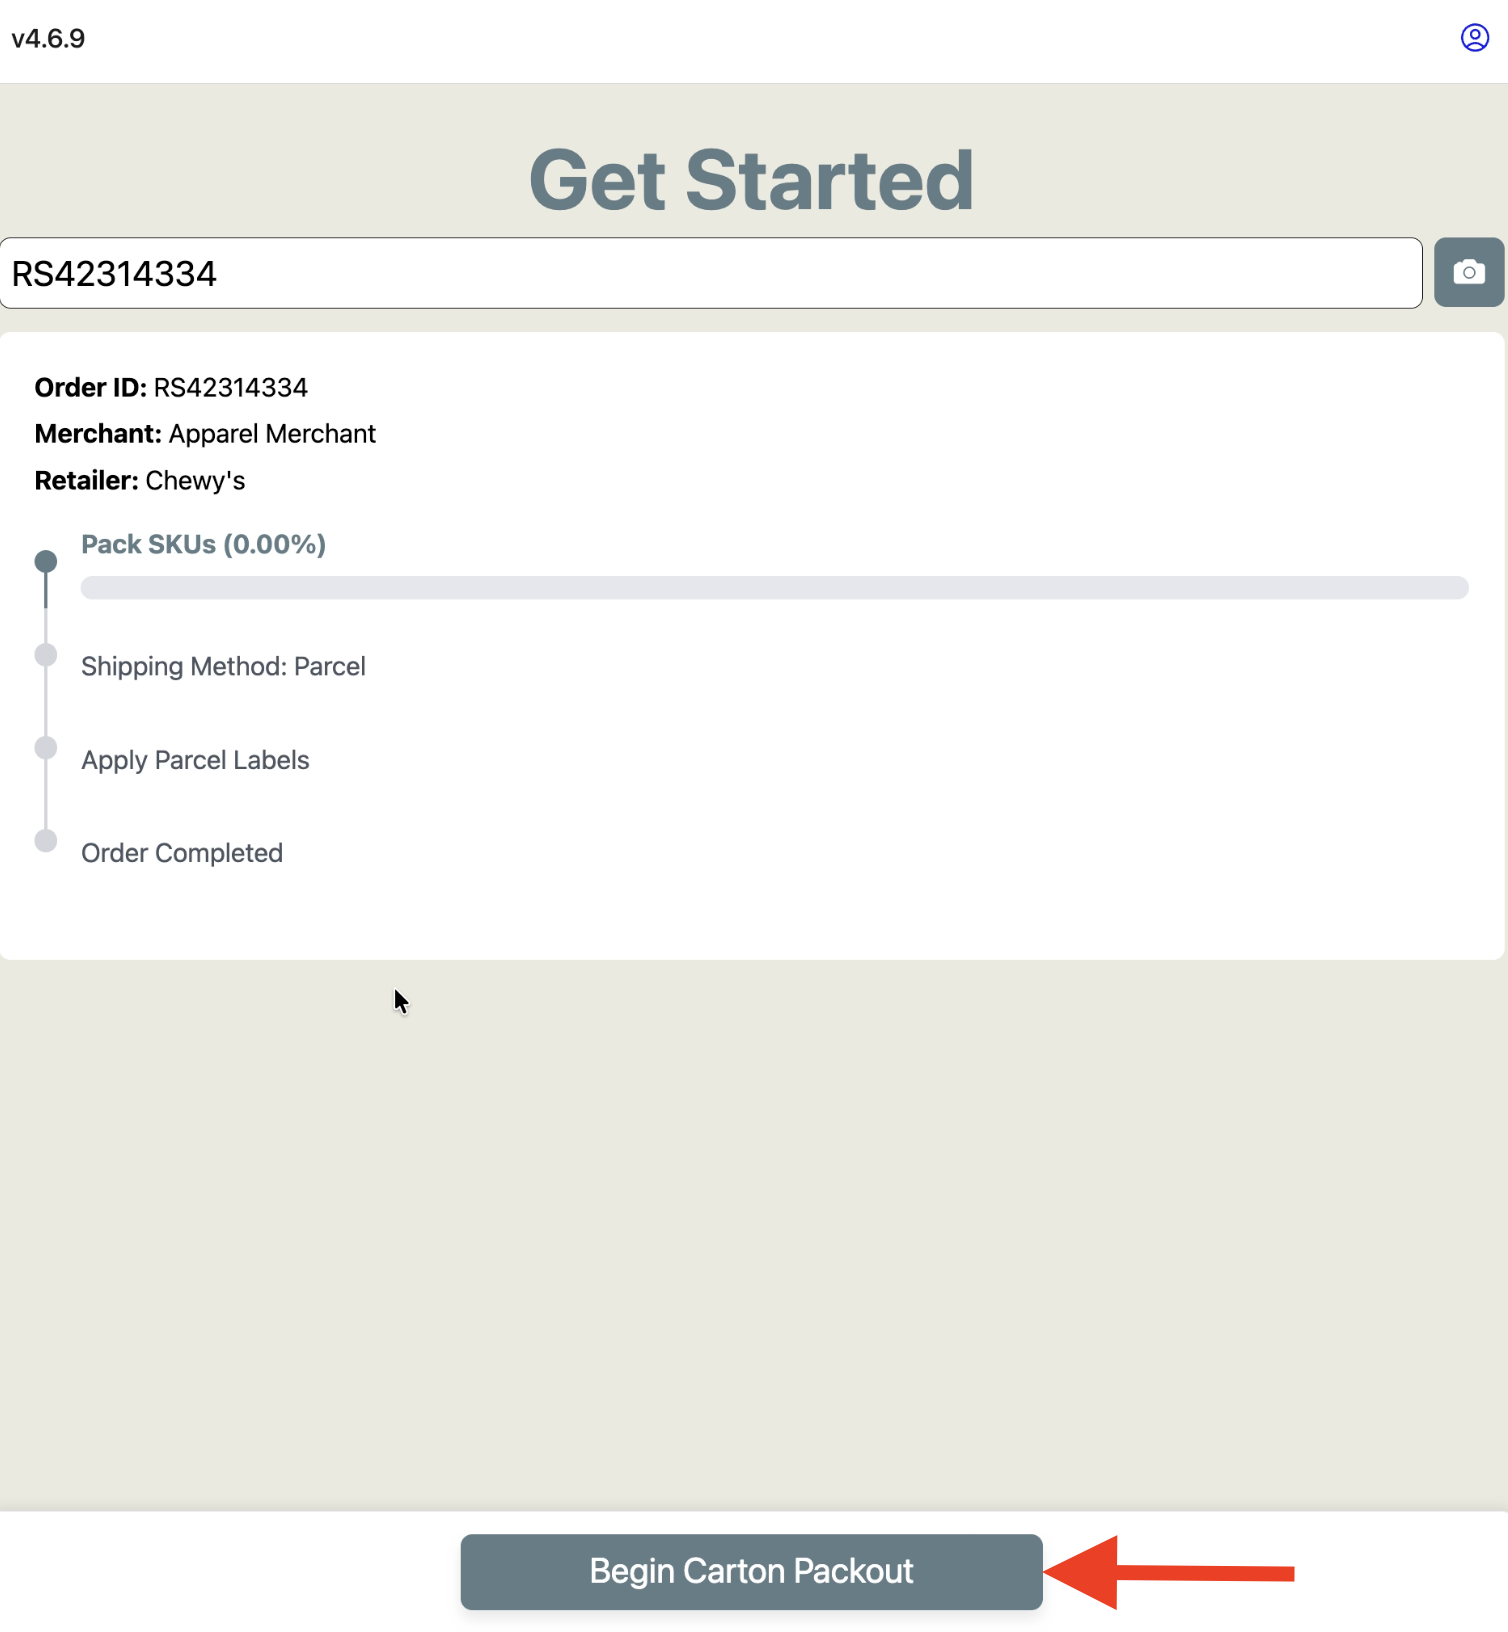
Select Your Transportation Method
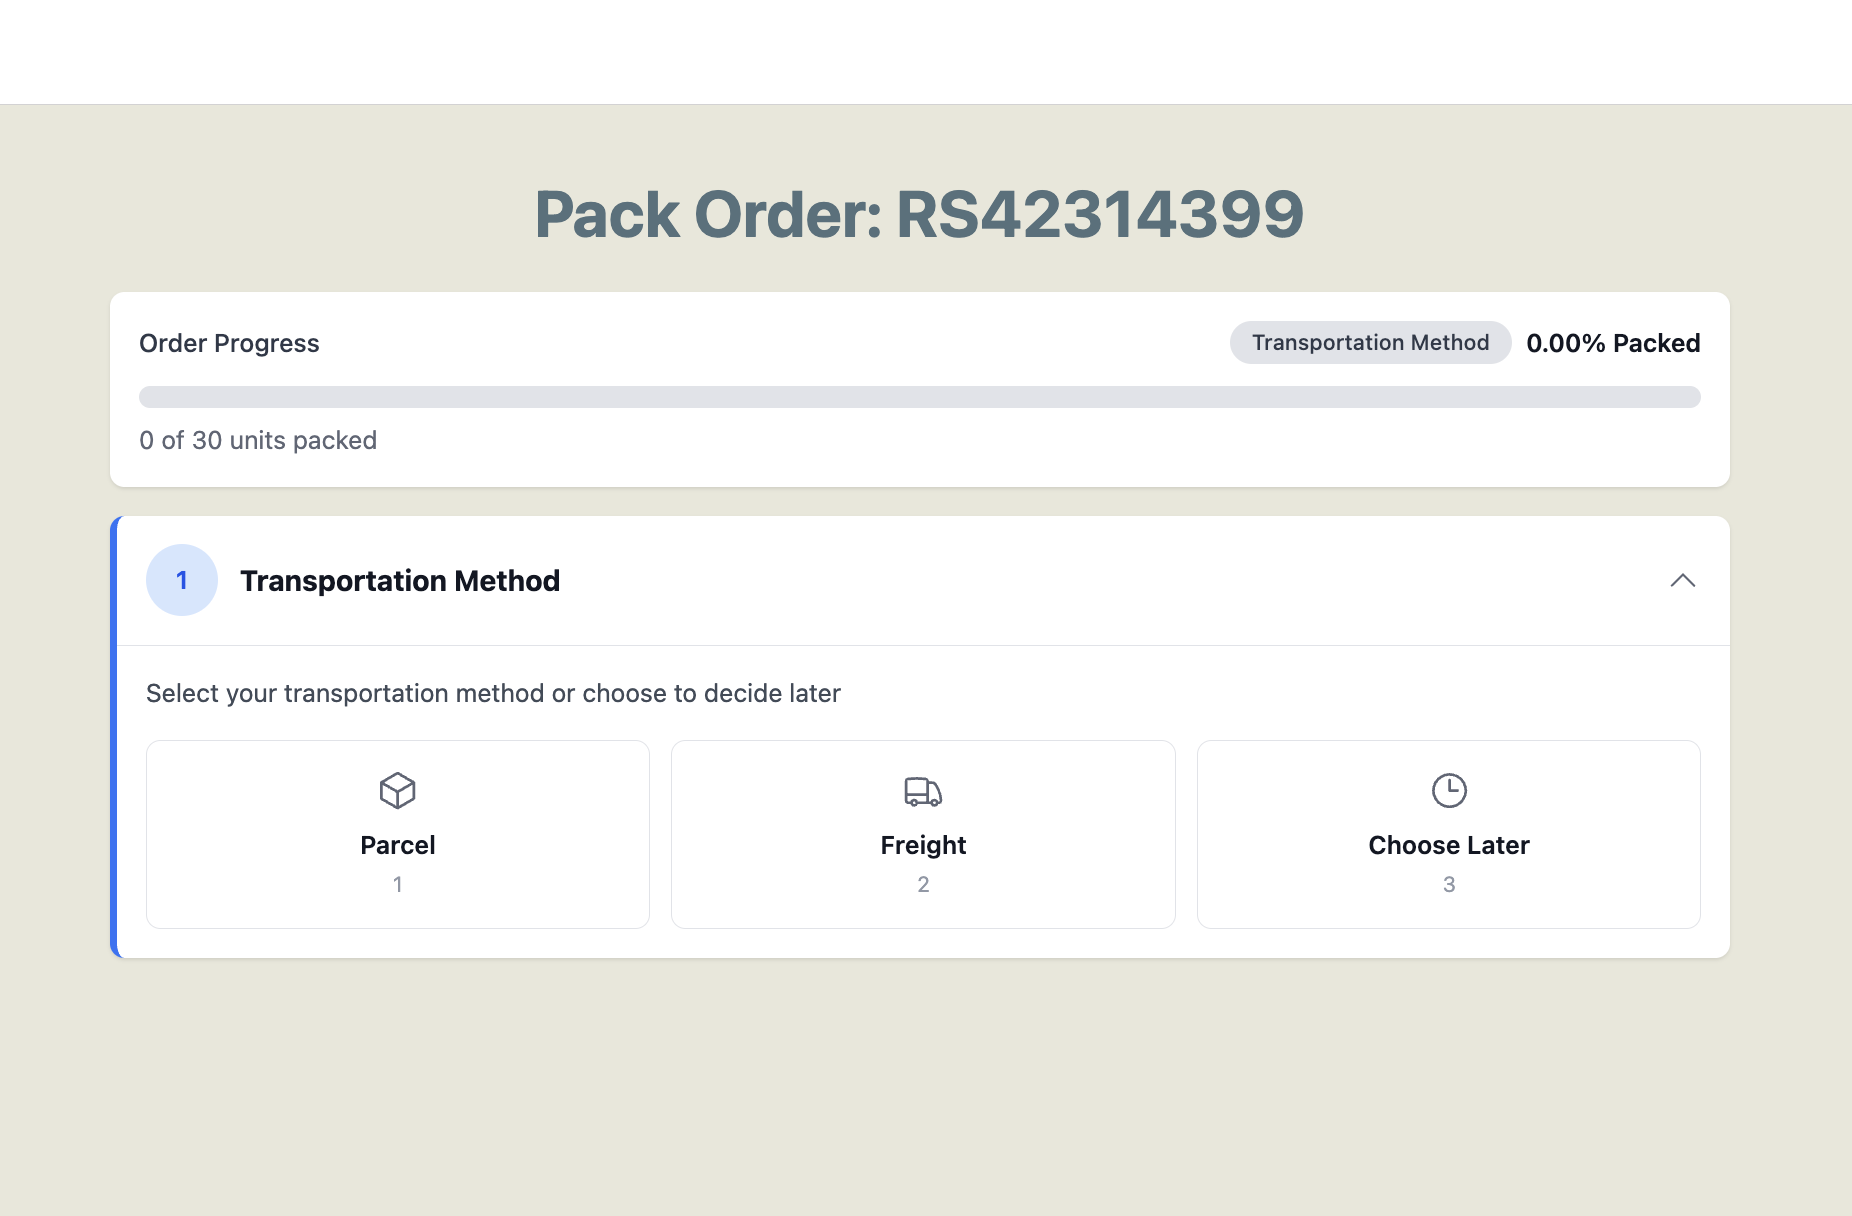
This step only appears when no transportation information has been entered for this order in the RetailReady dashboard. You must select an option to move forward.
Need to enter transportation information? Transportation information can be entered at any time, either before starting packout or while an order is being processed. Use this link to learn how:📄 Transportation Information for Parcel
Select "Parcel," "Freight," or "Choose Later" to proceed.
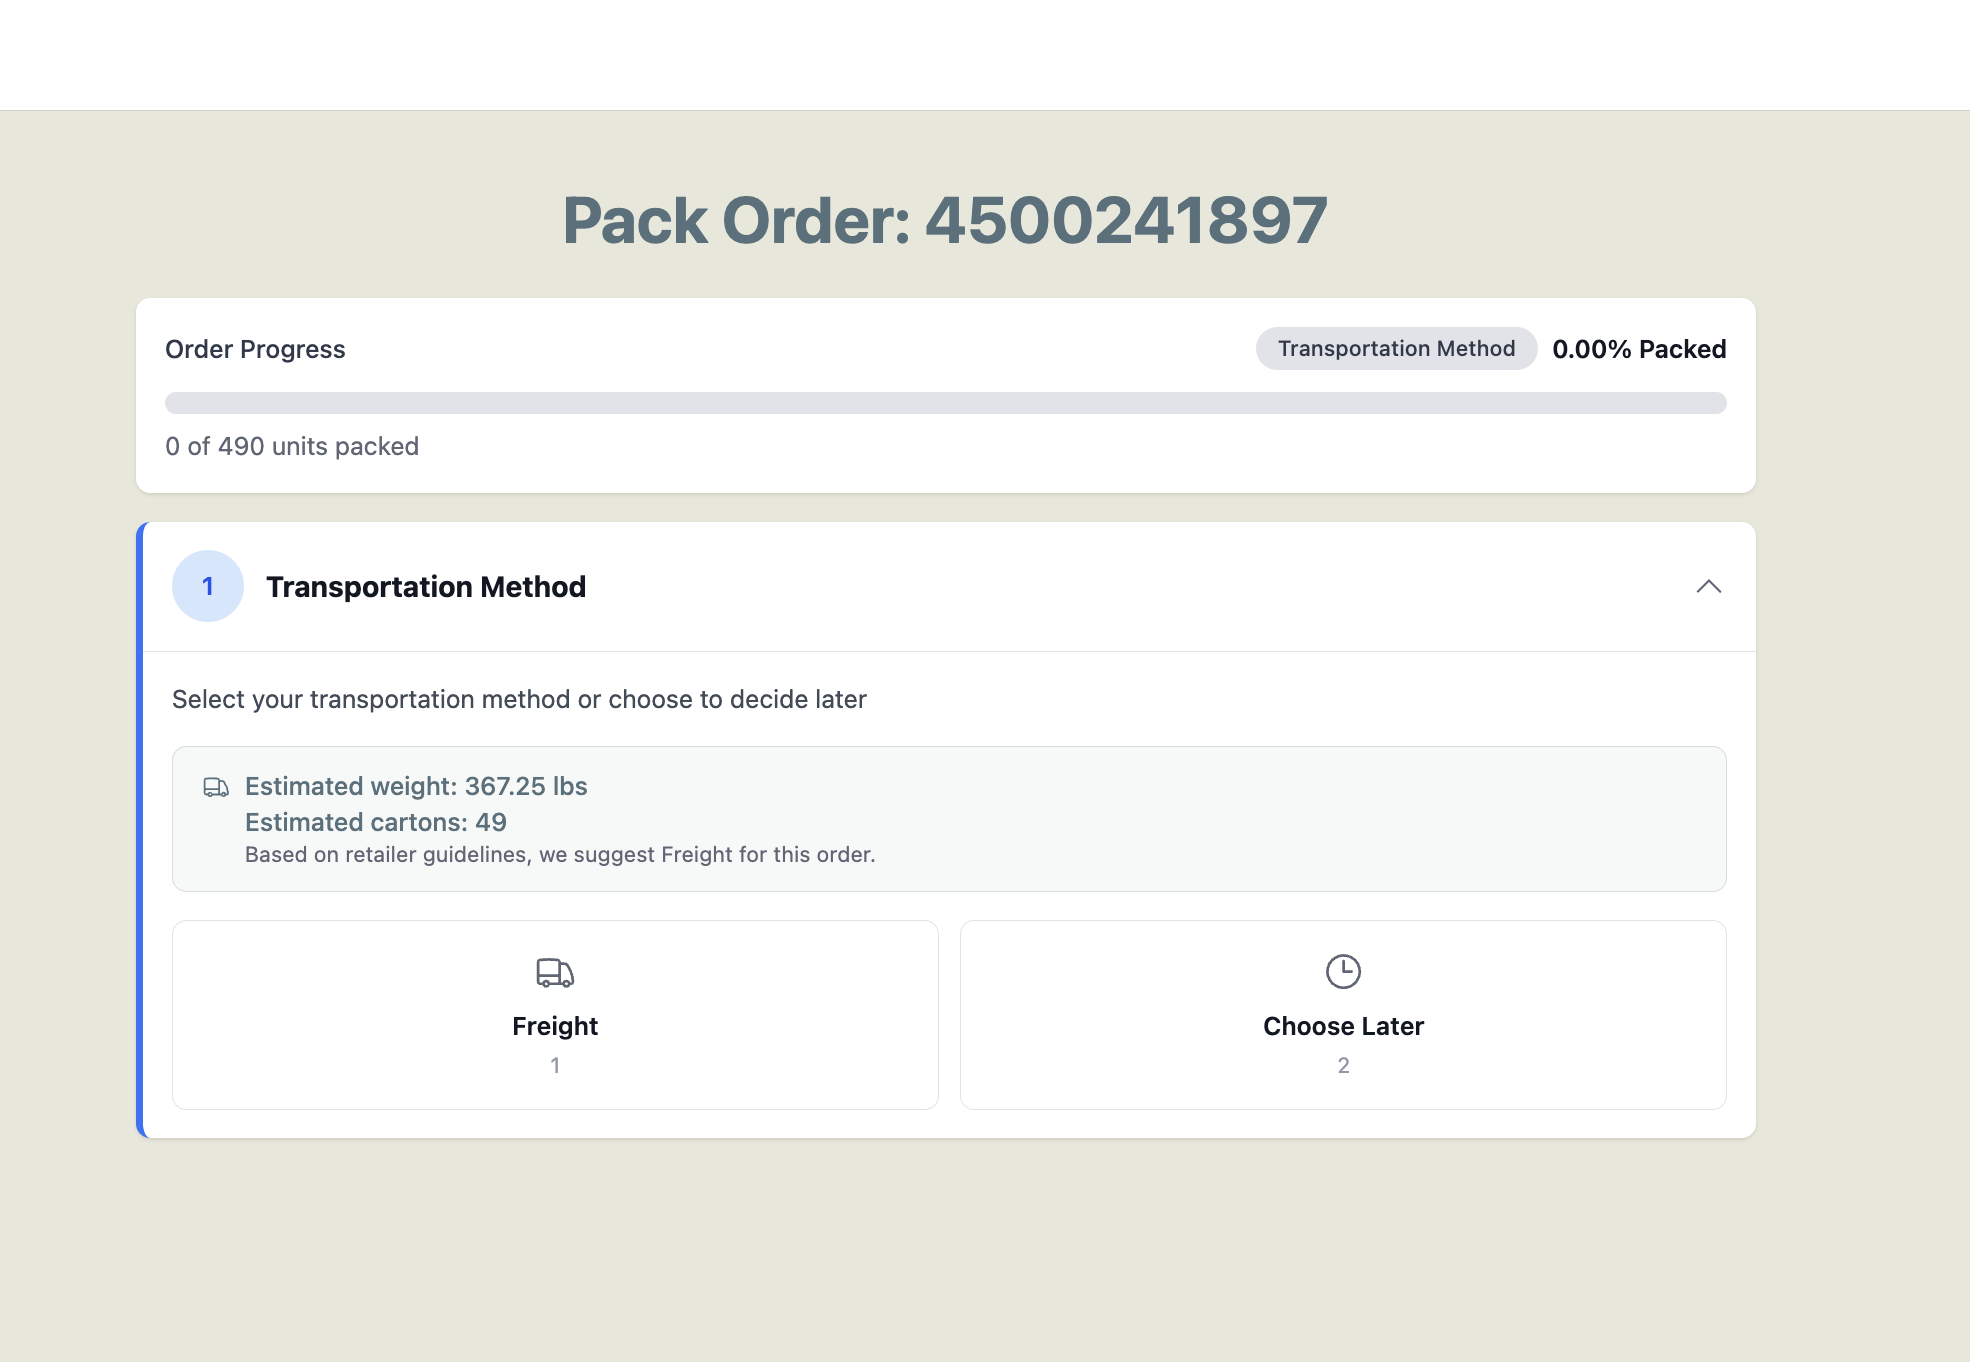
RetailReady can suggest a transportation method for you! If Parcel vs. Freight thresholds are entered in "Settings" > "Order Rules" > "Parcel vs Freight Rules" and case dimensions are entered in the Item Master, RetailReady will display an estimated weight, estimated carton count, and a recommended transportation method for the order.
Scan the case barcode or UPC.
On the "Build Carton" screen, scan the case barcode or UPC using the built-in camera scanner, a Bluetooth scanner, or type it in manually using the 'Scan case barcode or UPC...' field. You can also tap 'View Order Contents' to see the full item list.
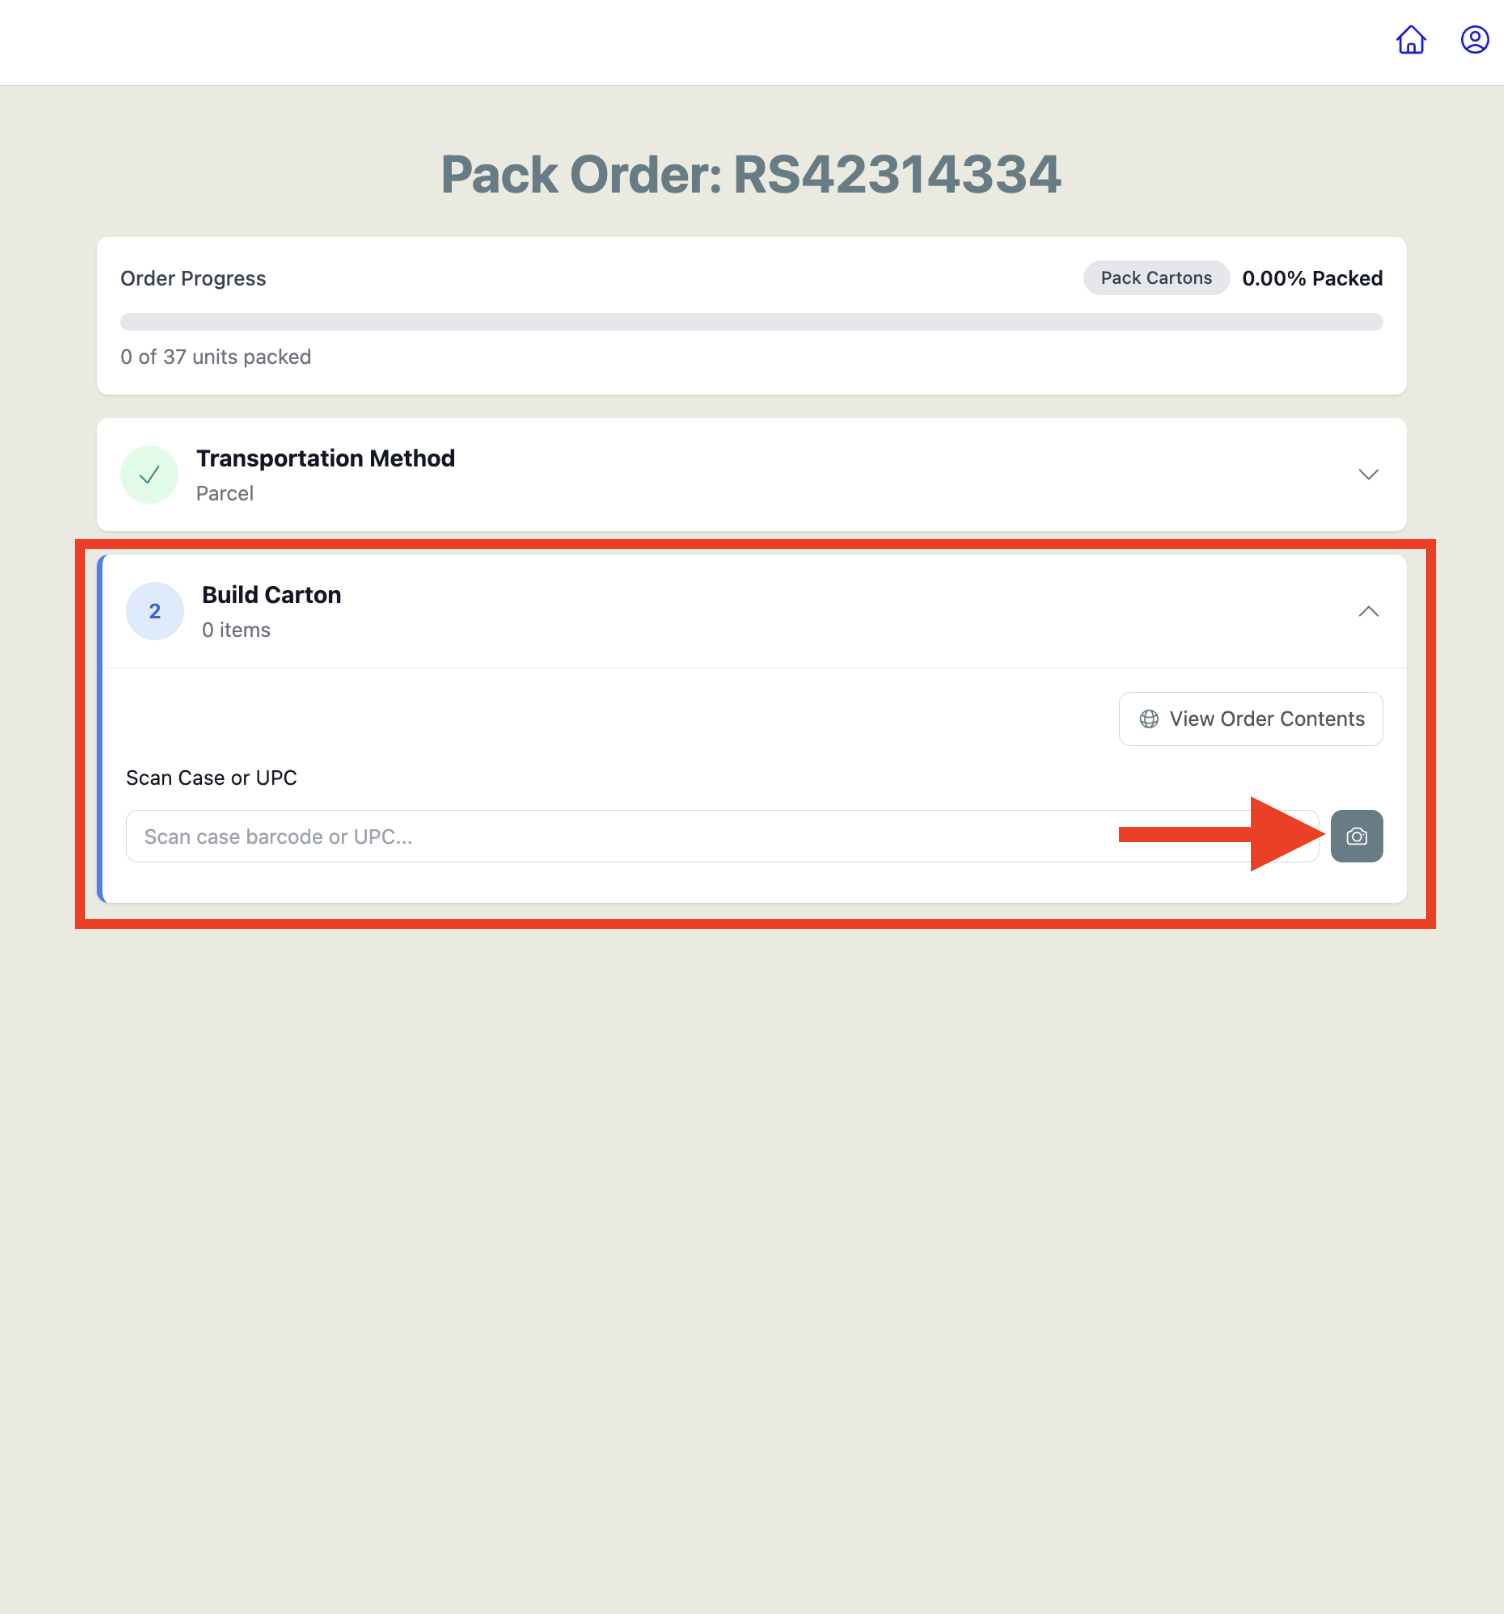
Enter SKU quantity and tap 'Continue with X item(s)'.
After scanning, the item appears under Carton Contents with a unit count. Adjust the quantity if needed, or scan additional items to add them to the same carton. When the carton is ready, tap 'Continue with X item' (or press Enter) to proceed.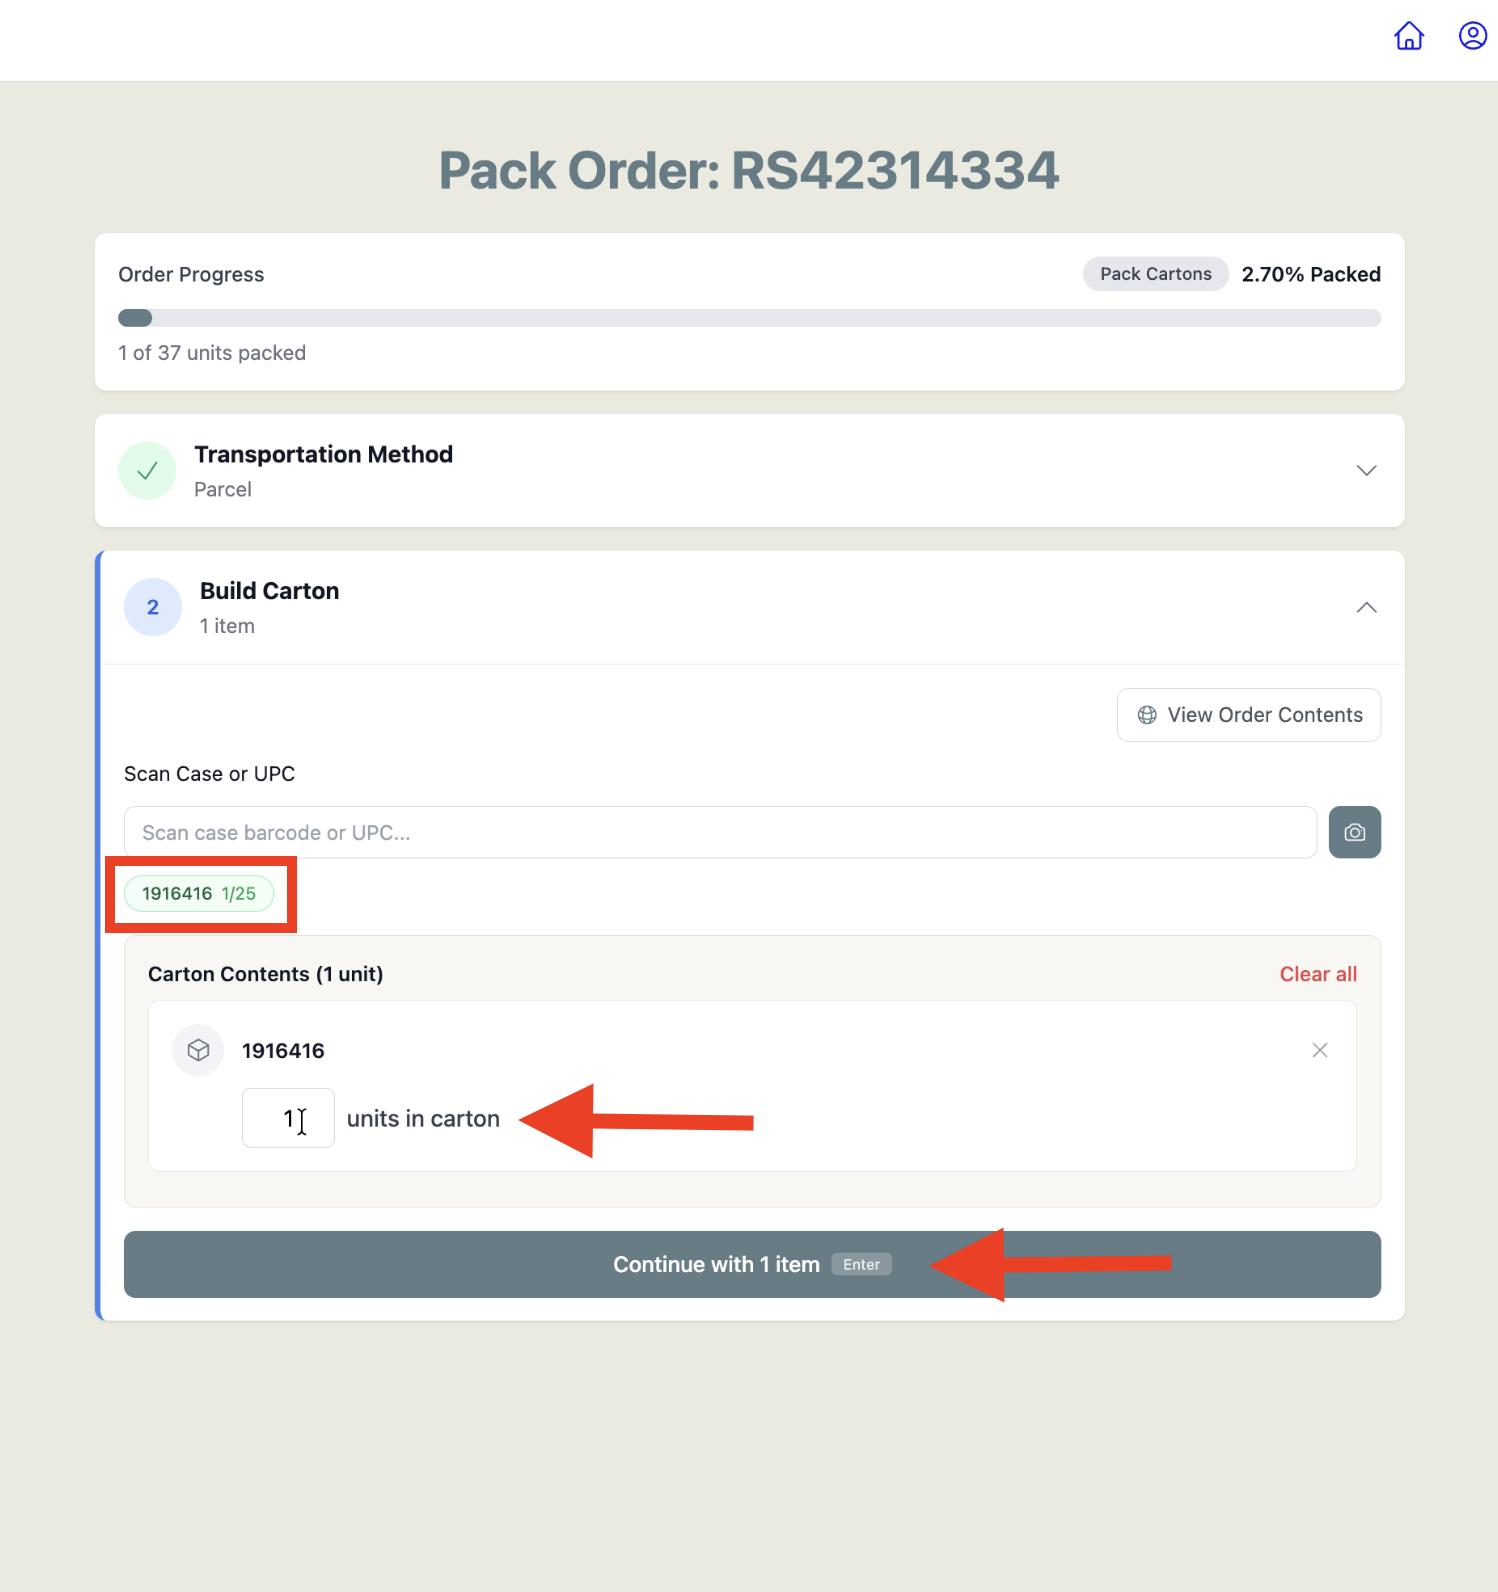
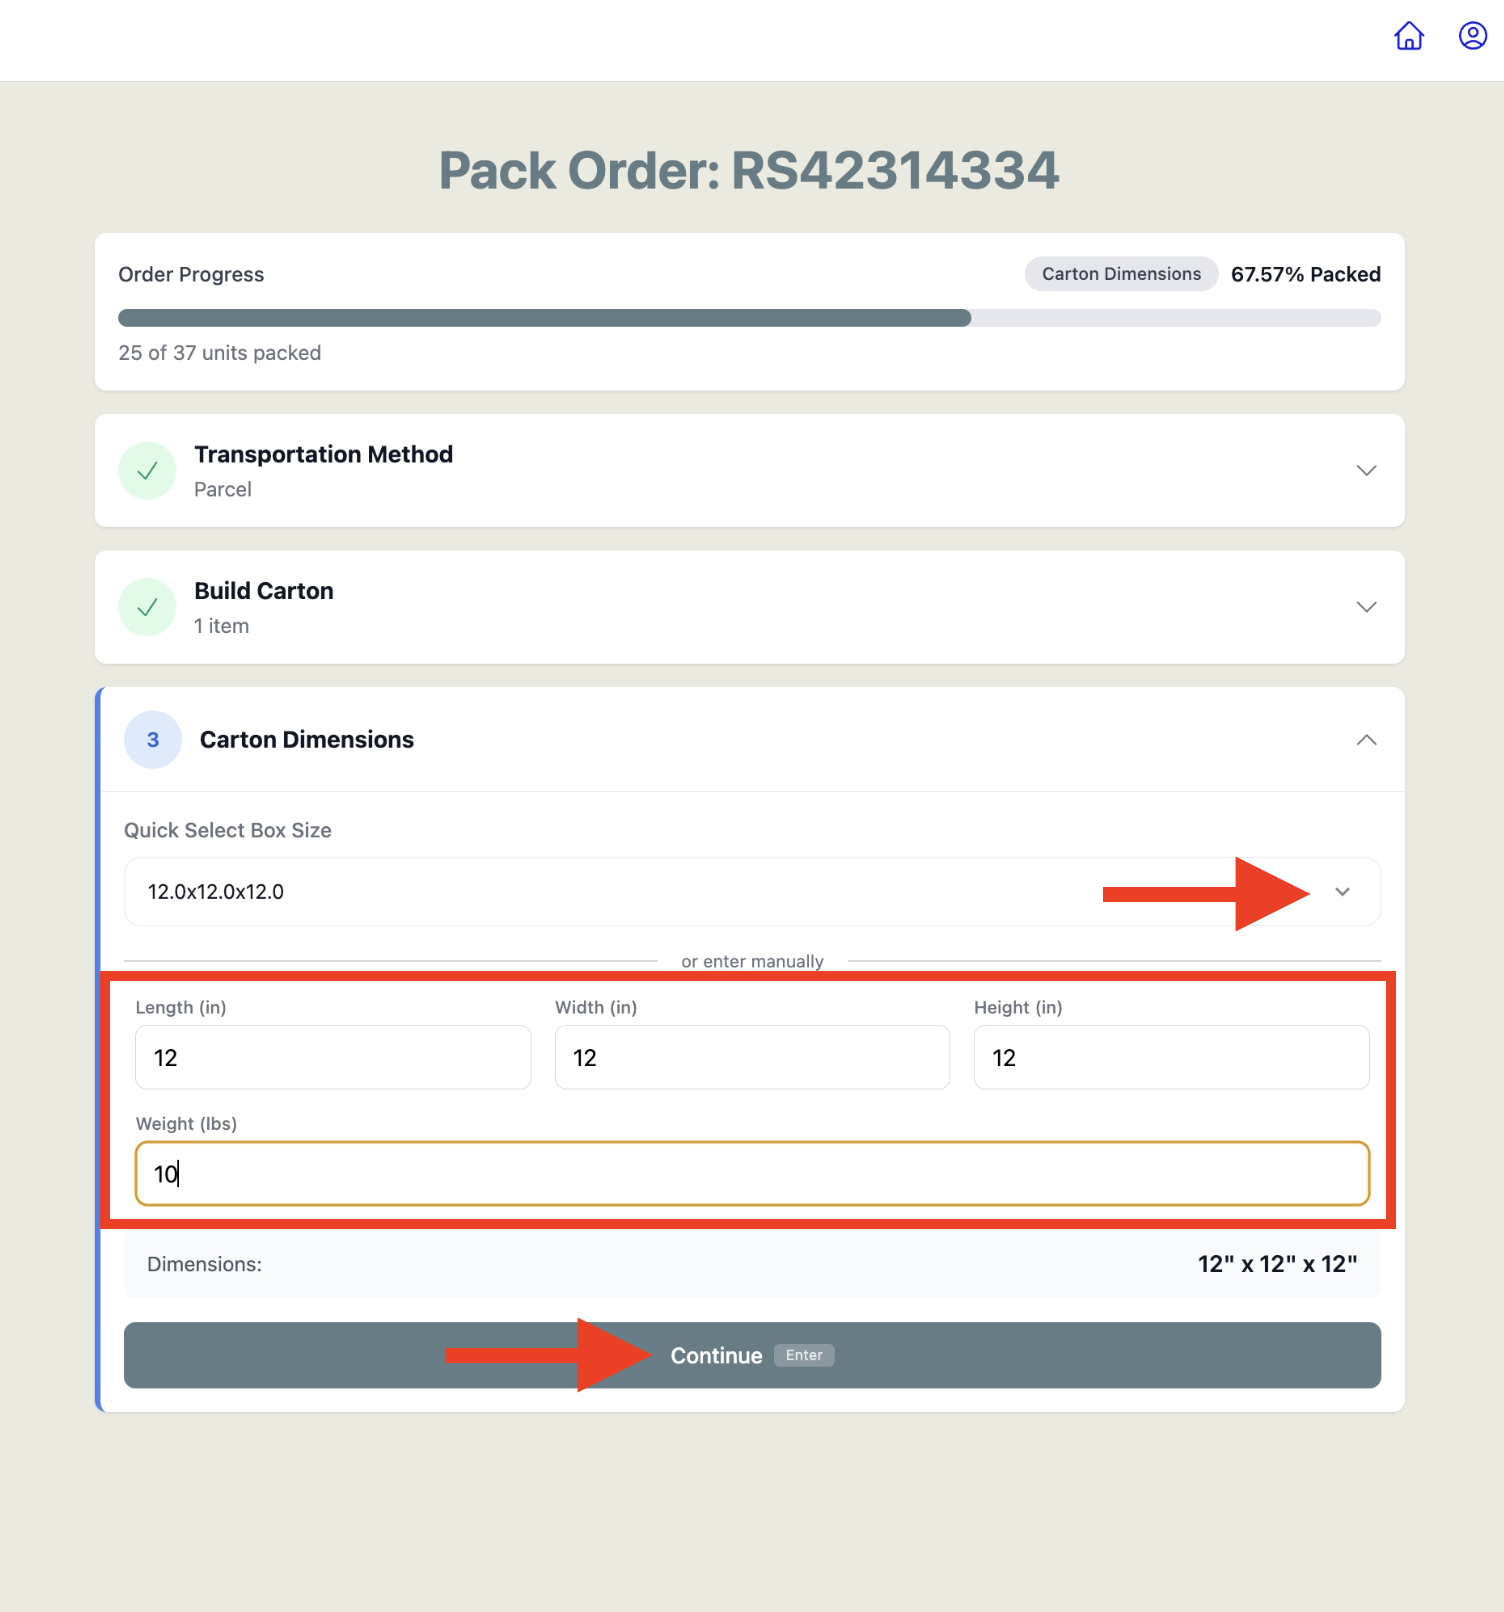
Enter carton dimensions and weight, then tap 'Continue'.
Carton Dimensions, requires the box size and weight. There are three ways dimensions may be filled in:If your facility has Quick Select box sizes configured, select a preset from the 'Quick Select Box Size' dropdown. Not set up yet? Check out this help article to get started.📄 Quick Select Box Sizes Setup
If case dimensions and weight are entered in the Item Master for this SKU, the Length, Width, Height, and Weight fields will pre-fill automatically.
If neither is set up, manually type in the Length, Width, Height (in inches), and Weight (in lbs) fields.
The calculated dimensions display at the bottom of the screen. Tap 'Continue' (or press Enter on your keyboard) when complete
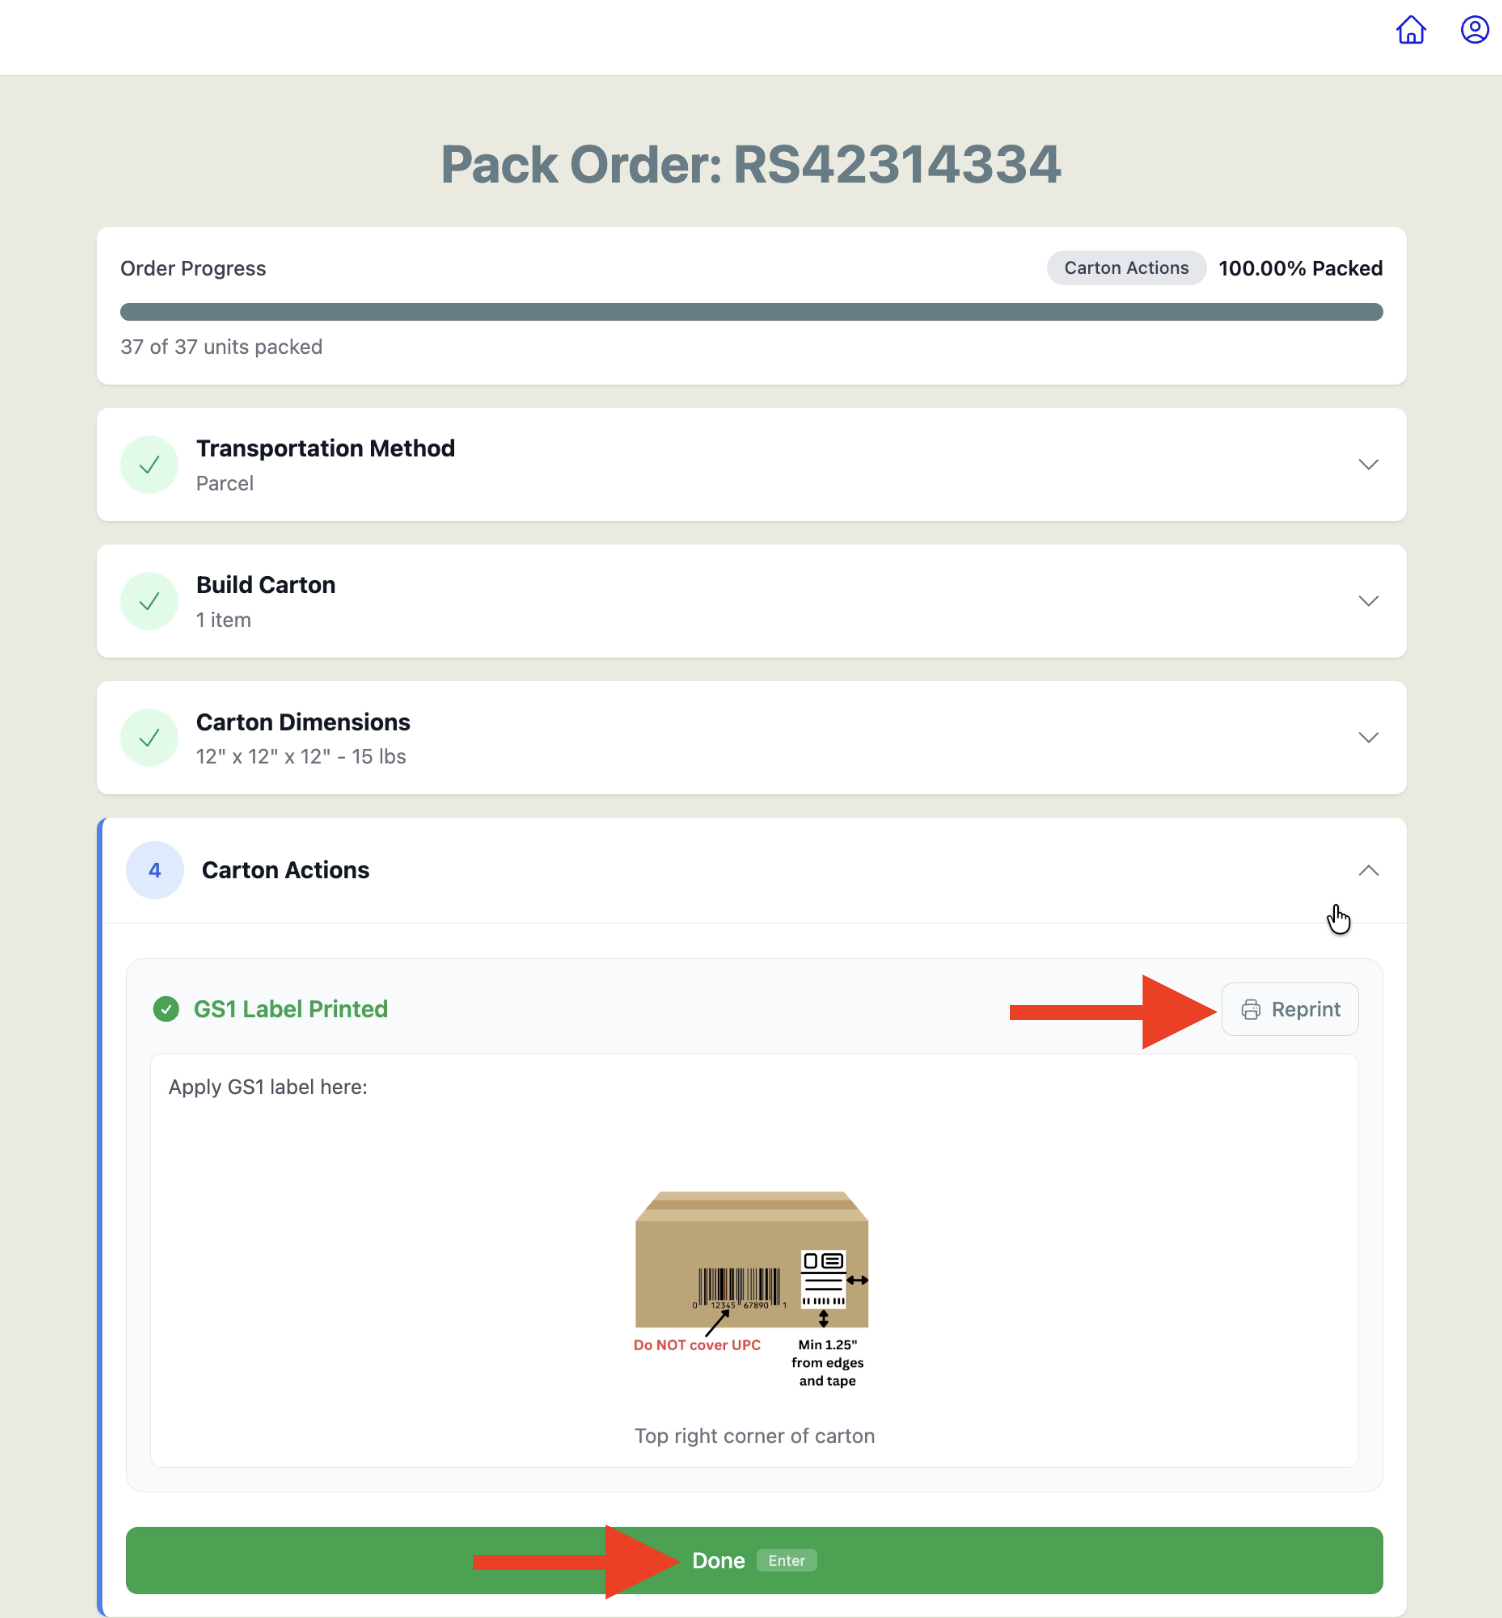
Apply the GS1 label and tap 'Done' or 'New Carton'.
Carton Actions, confirms the GS1 label has printed and shows exactly where to apply it on the carton. Apply the label as shown, then:Click 'Done' if this is the last carton for the order.
Click 'New Carton' to pack the next carton and repeat Steps 7-10.
SUCCESS — Order packed
Once all cartons are packed, you will receive a SUCCESS screen, click 'Done'.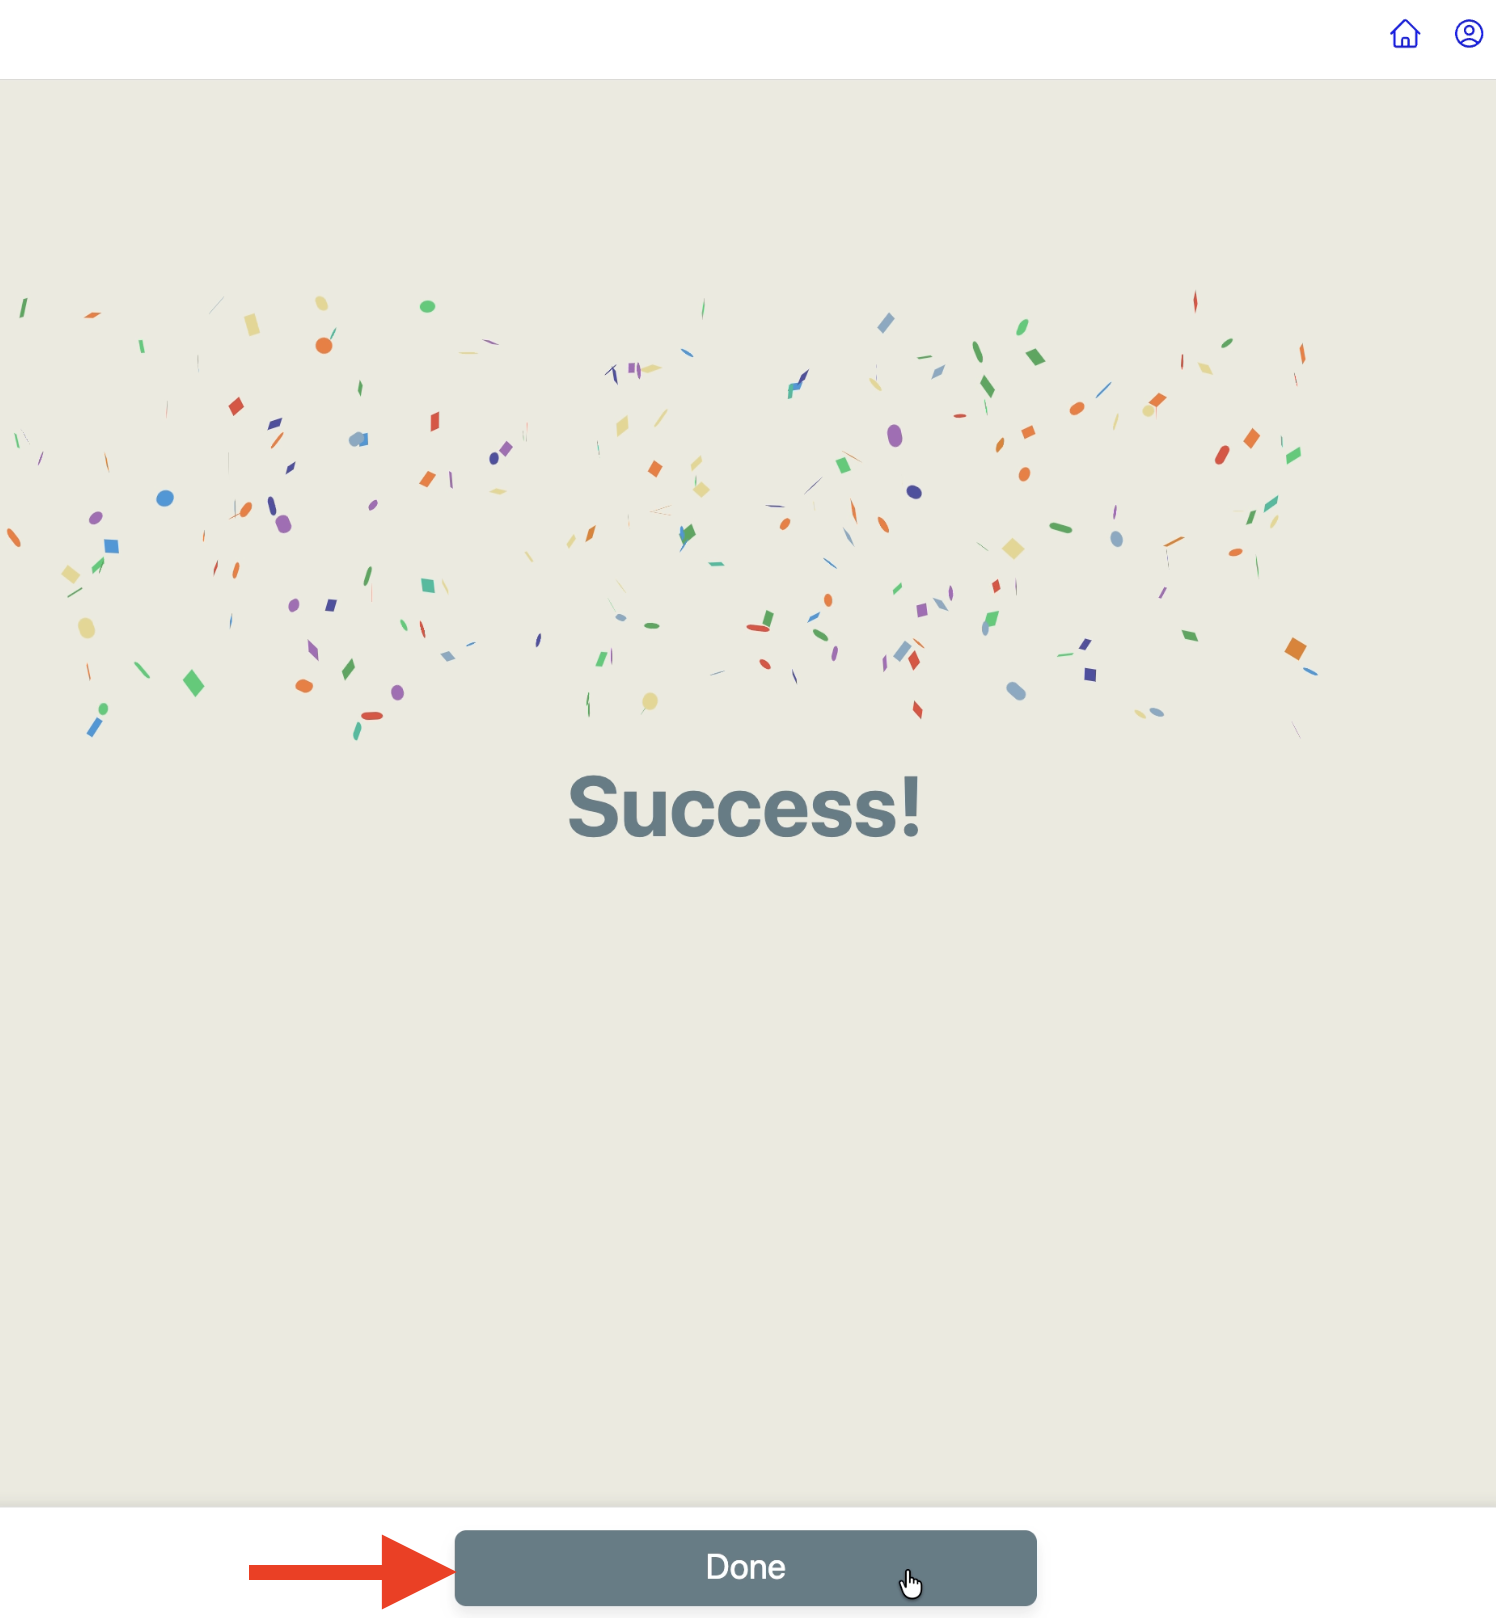
Apply Labels
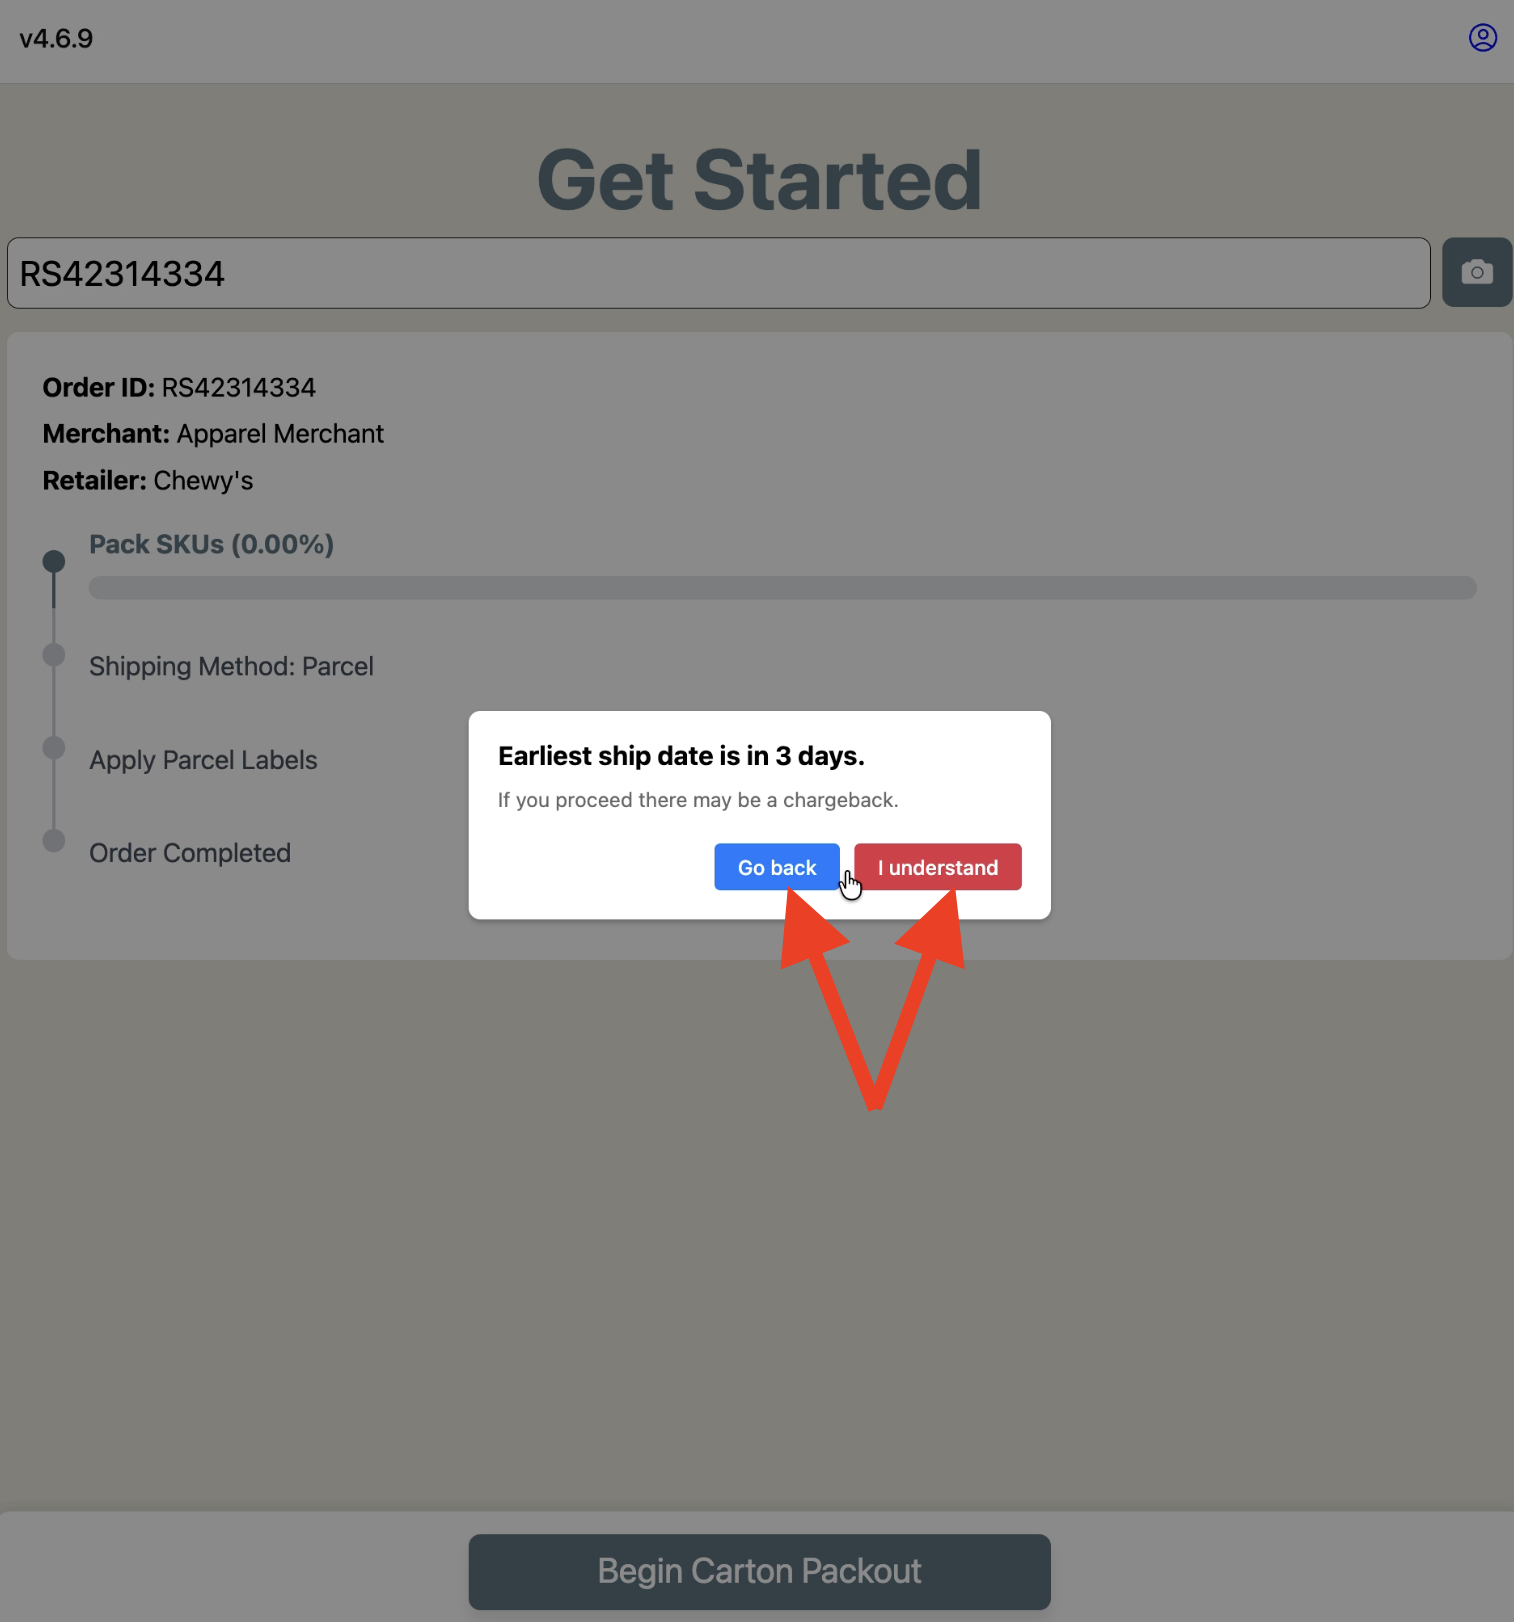
Note: If the order's earliest ship date has not yet been reached, RetailReady will show a warning: "Earliest ship date is in X days. If you proceed there may be a chargeback." Tap 'Go back' to wait, or tap 'I understand' to proceed anyway. Shipping before the earliest ship date can result in retailer chargebacks.
[If enabled] Configure overboxes and tap 'Confirm Overbox Configuration'.
After all cartons are packed, the Available Cartons summary displays each carton and its contents. An overboxes section appears with one overbox already created. For each overbox:Scan the carton SSCC or QR code to add it to the overbox.
Click 'Add Dims' to enter overbox dimensions.
Click '+ Add overbox' if additional overboxes are needed.
When all cartons are assigned, tap 'Confirm Overbox Configuration'.
Click 'Print QR'
Review the overbox summary and tap 'Generate Parcel Labels'.
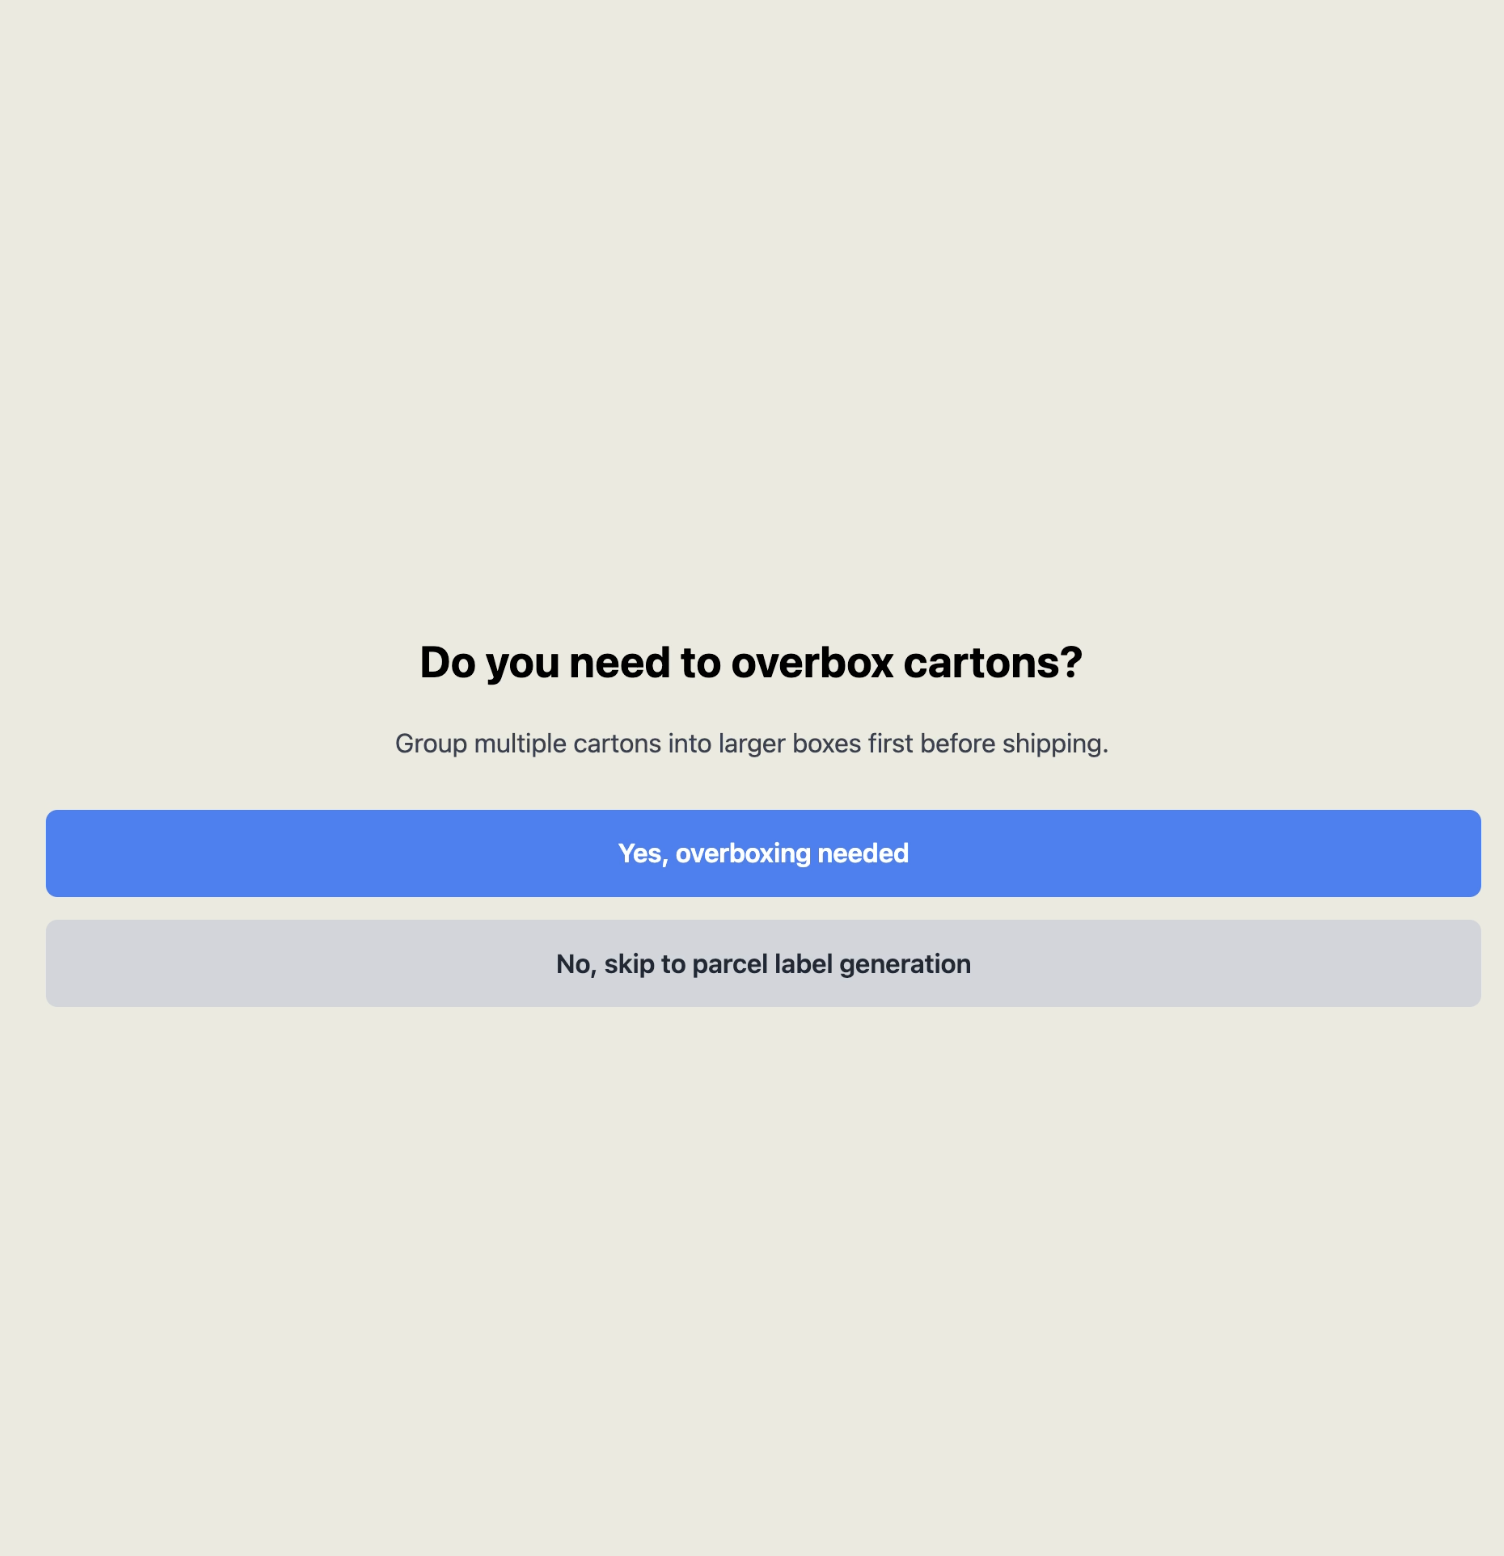
Overbox is an optional feature. This screen only appears if the Overbox configuration is turned on for that particilar retailer<>brand. You can see whether it is enabled the the connection details in the 'Connections' tab for that particular retailer<> brand. If you don't see this screen, skip to Step 2.
For a full guide on how overboxes work, refer to the 📄 How To Use The Overboxing Feature
Scan each carton SSCC or Overbox QR code to print its parcel shipping label.
Scan each carton or overbox QR code one at a time. RetailReady will send the parcel shipping label to the connected Zebra printer automatically.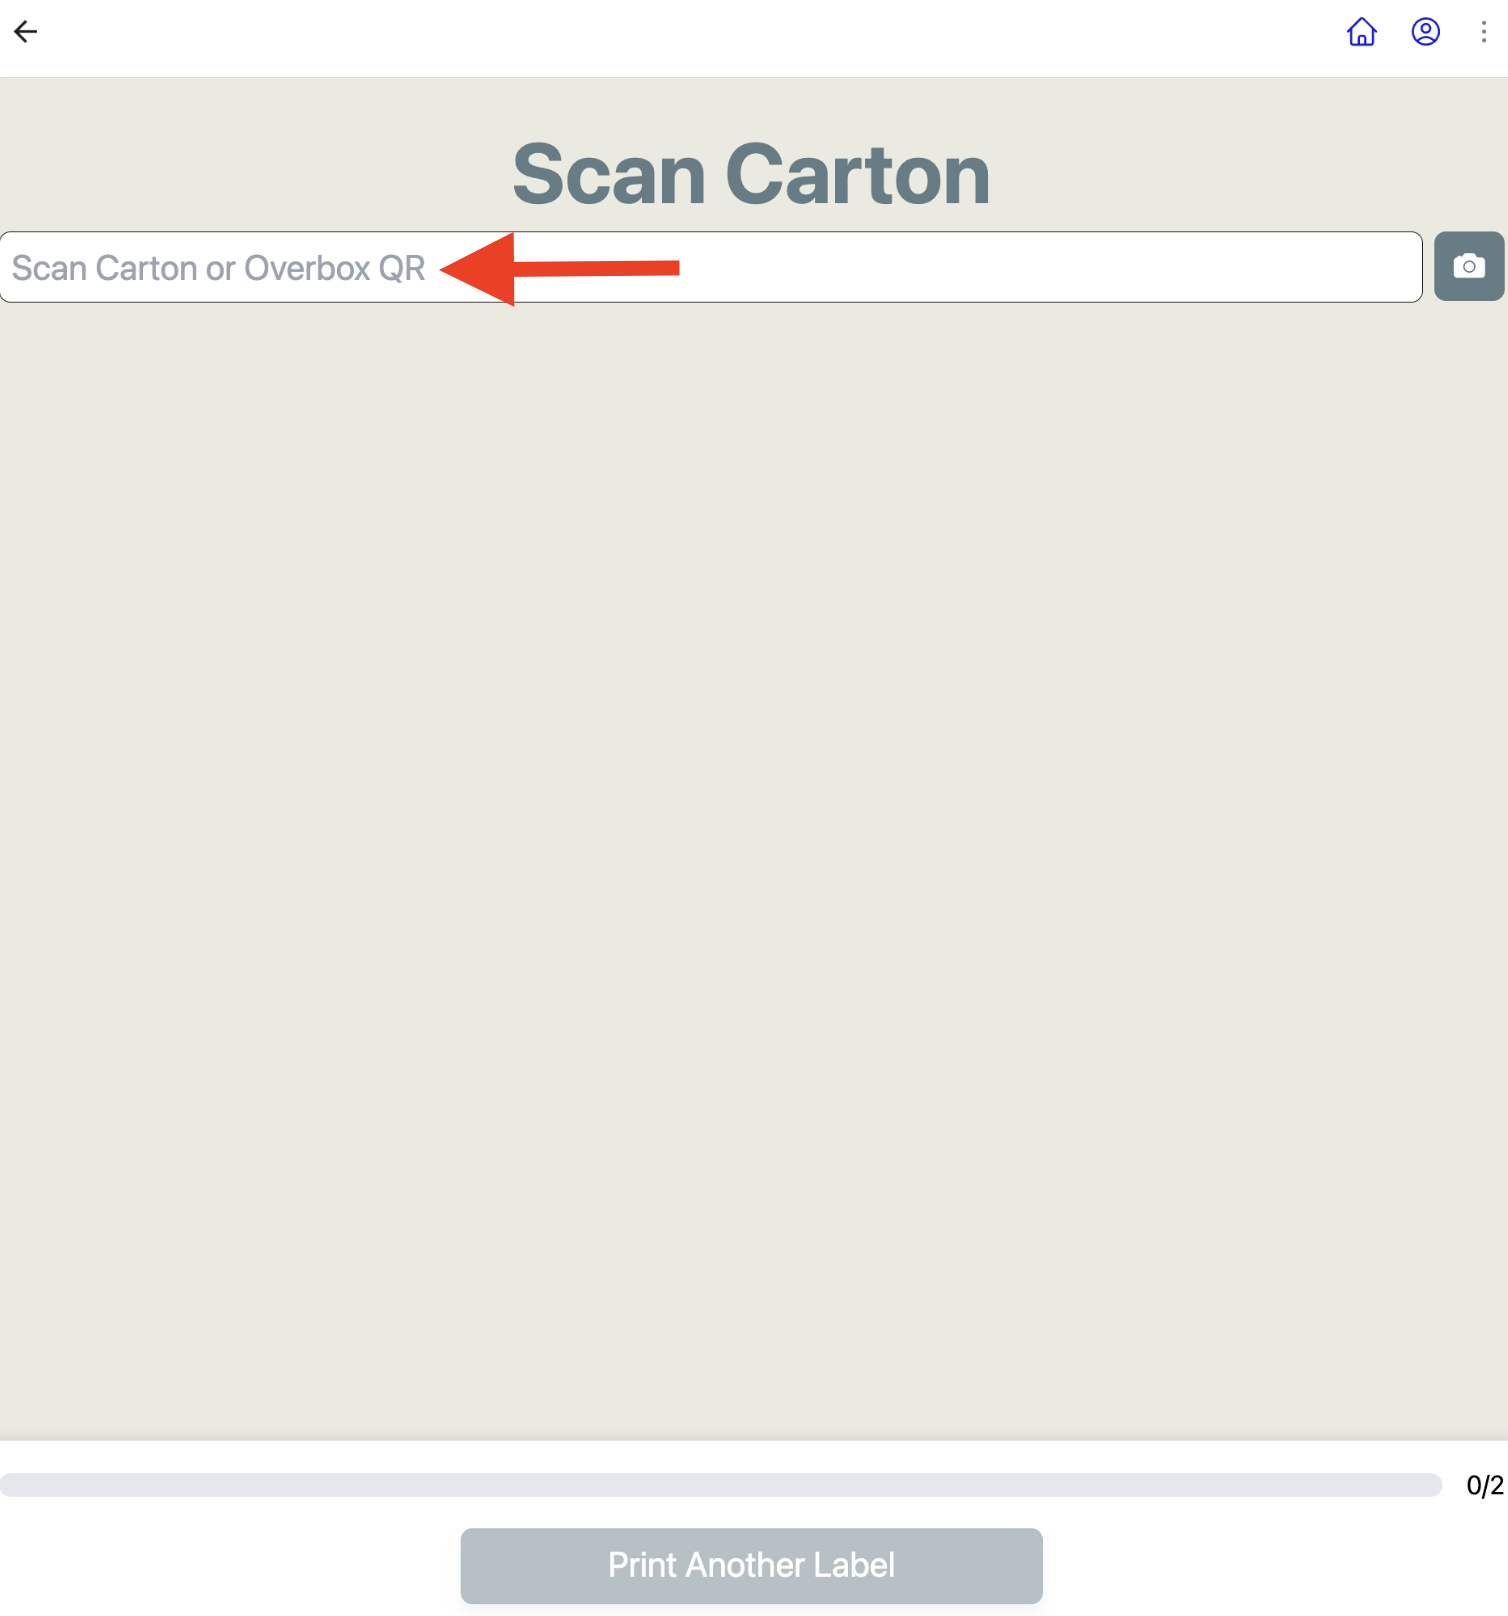
Confirm and apply the printed label complete the checklist.
A confirmation dialog appears: "Printing Parcel Shipping Label at Zebra Printer." Tap 'OK' to dismiss. Apply the parcel shipping label to the carton per the placement diagram shown.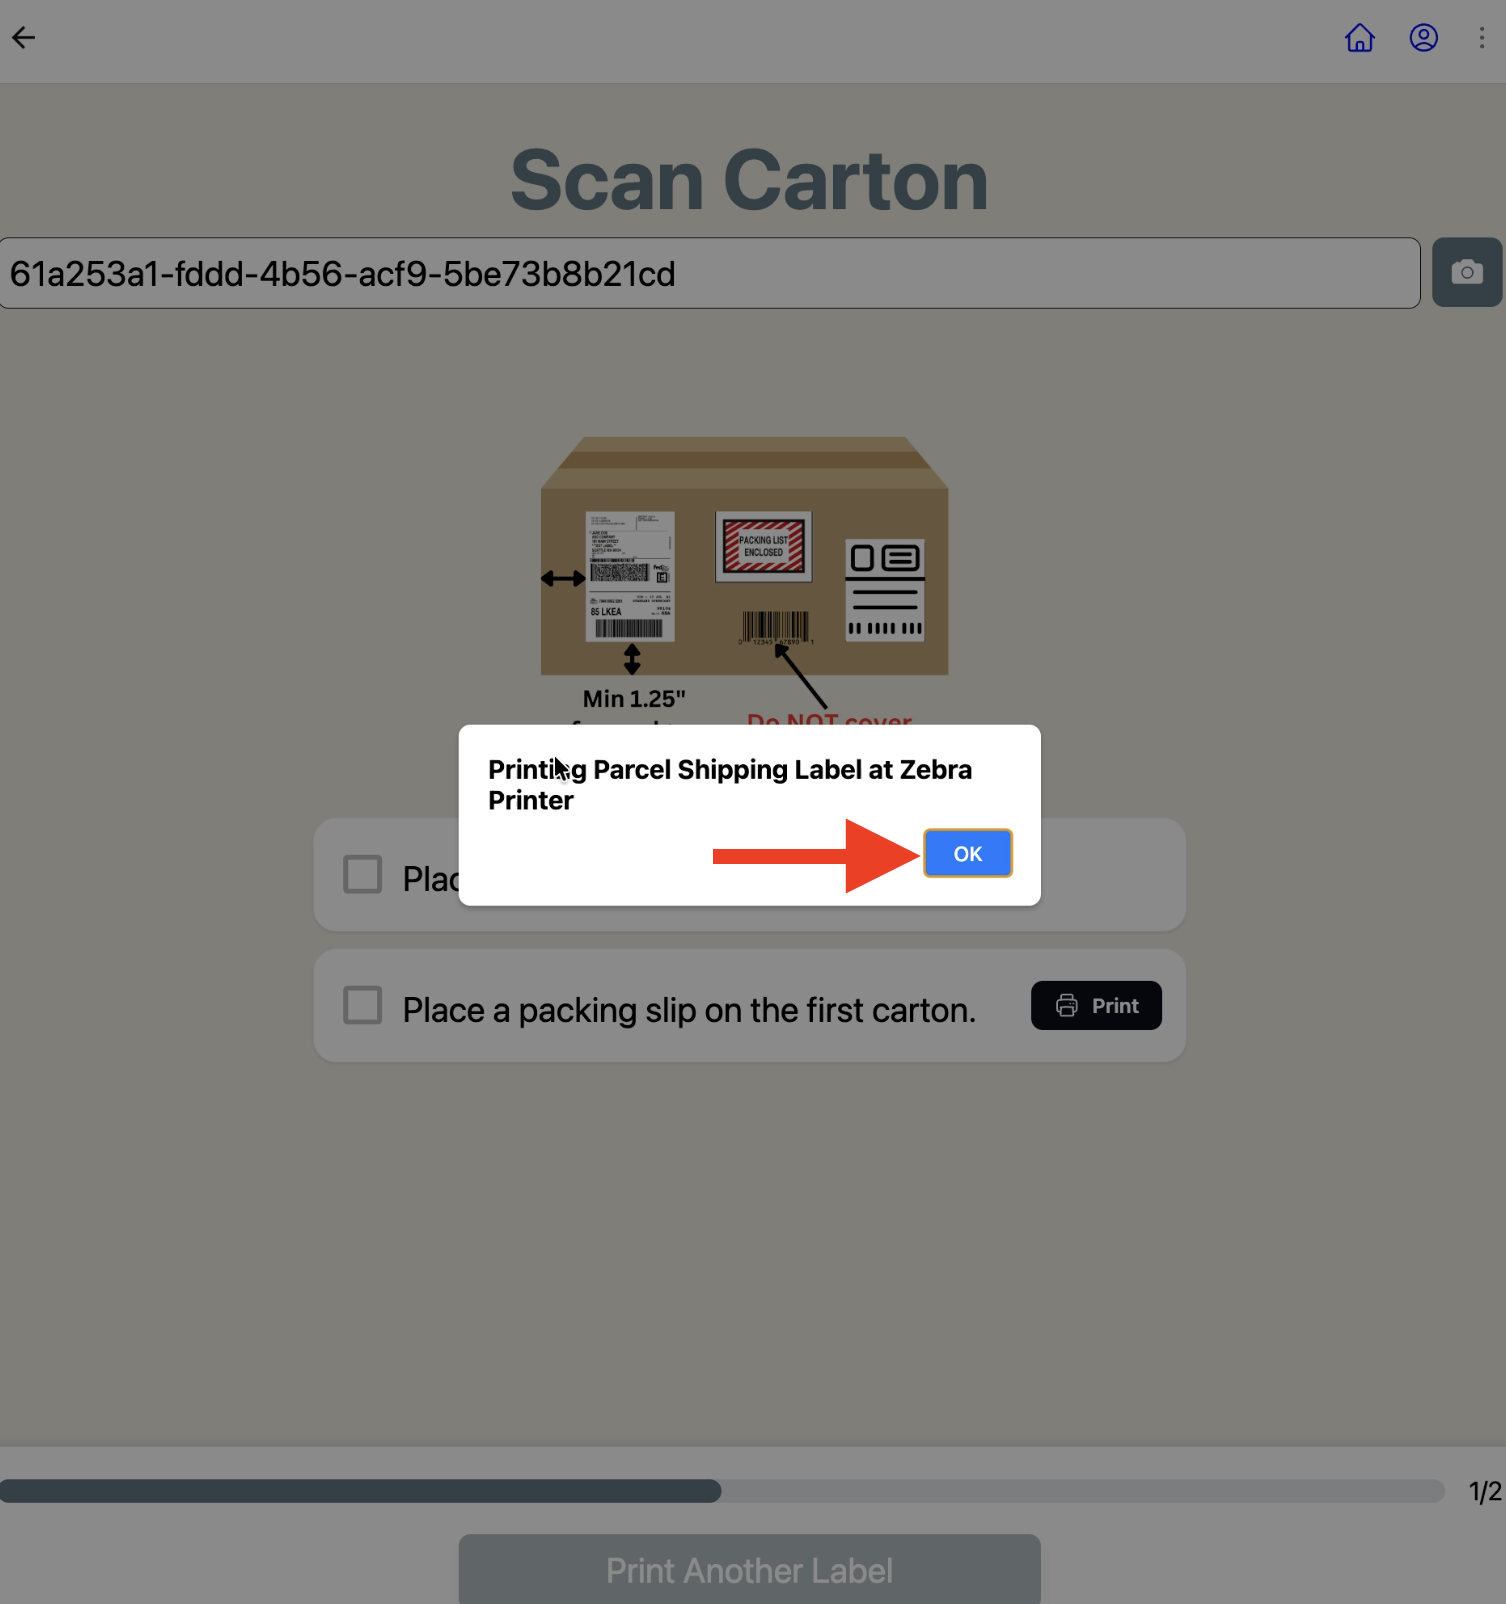
Complete the checklist.
Check off all required steps. Tap 'Print Another Label' to continue to the next carton and repeat steps 2-3 or 'Done' to complete the last carton.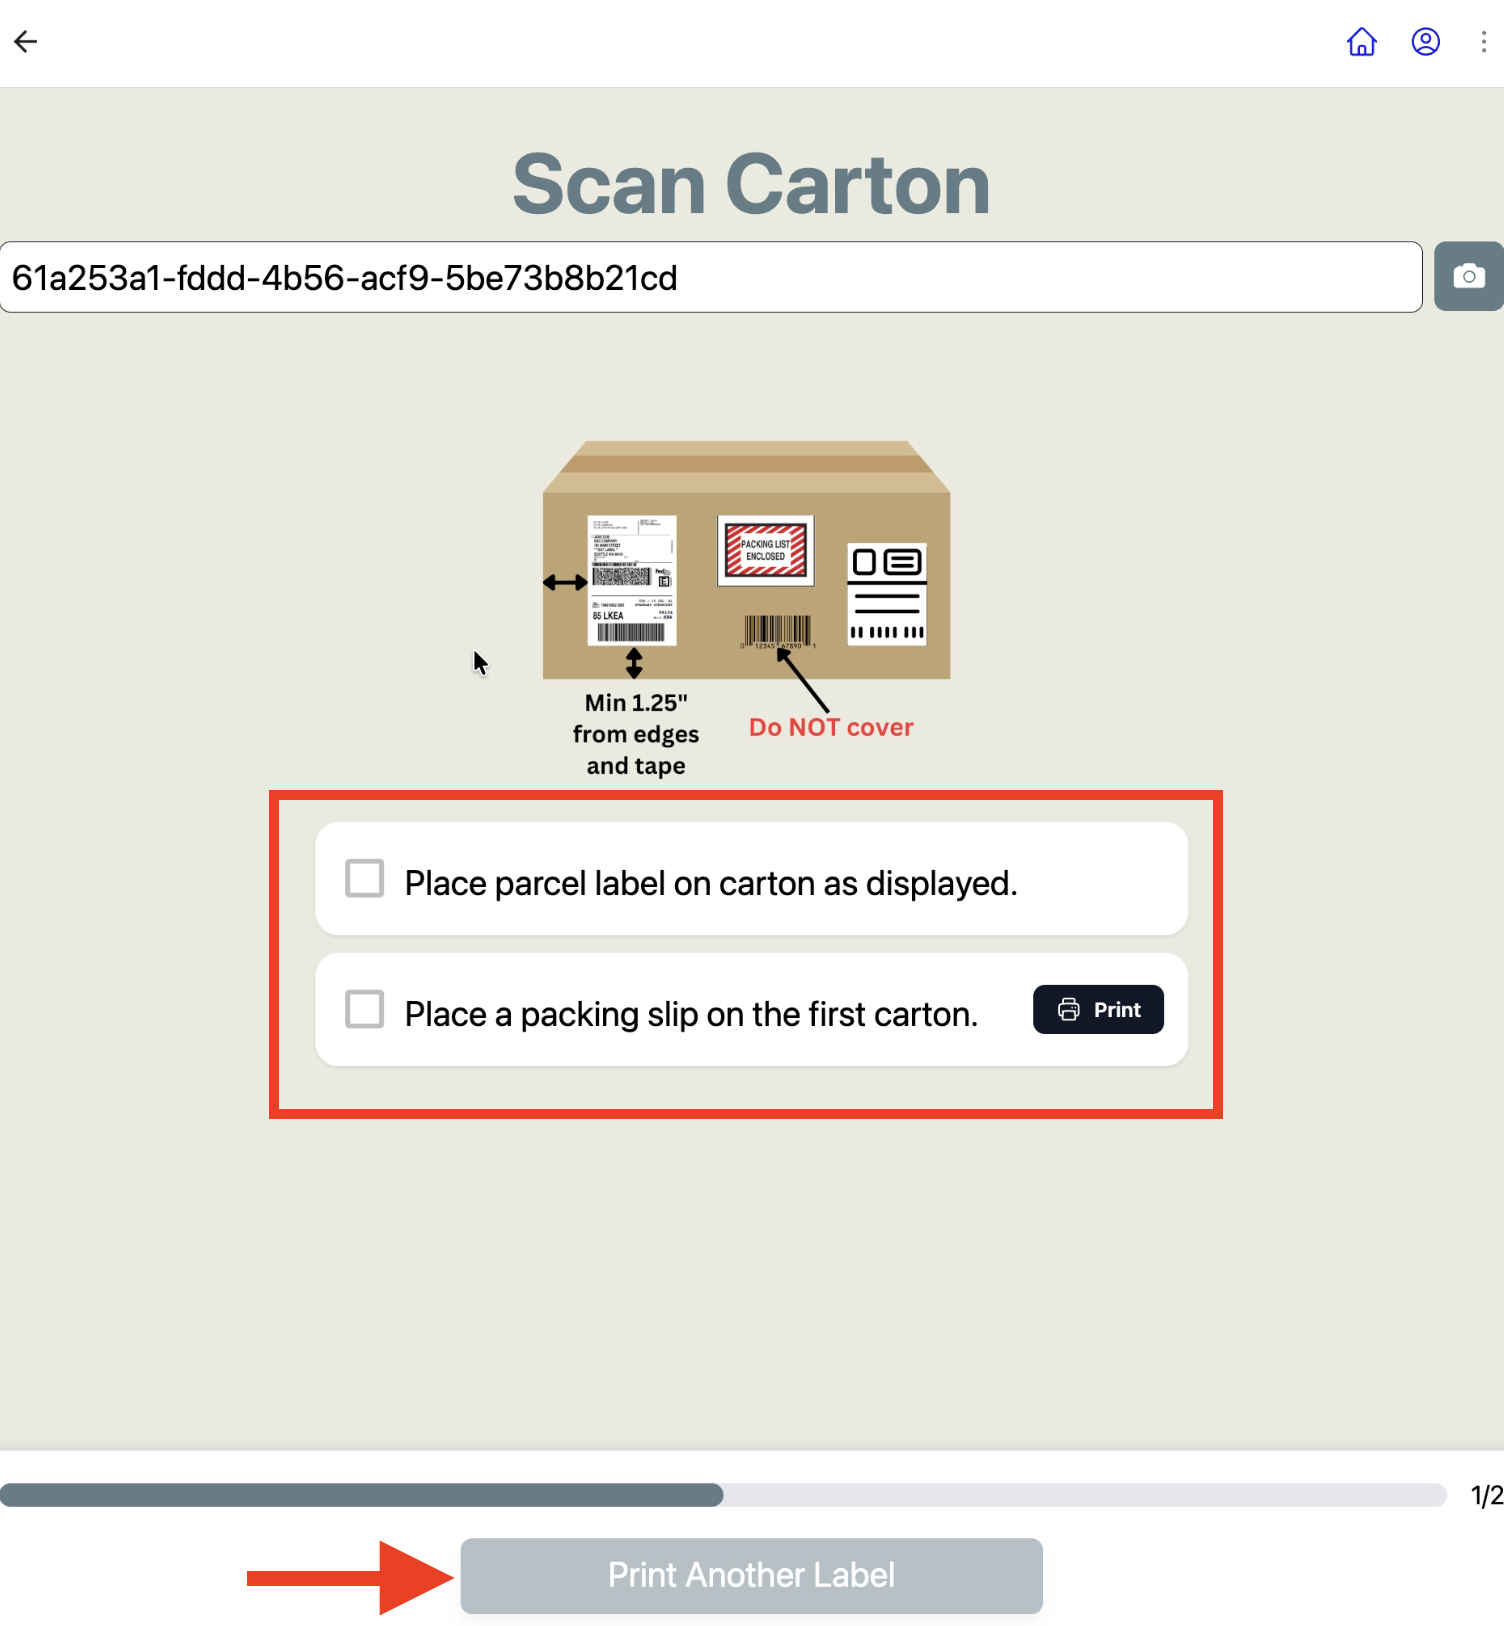
SUCCESS — Order complete
Once all parcel labels are printed, you will receive a SUCCESS screen, click 'Done'. The order is now complete and ready for carrier pickup.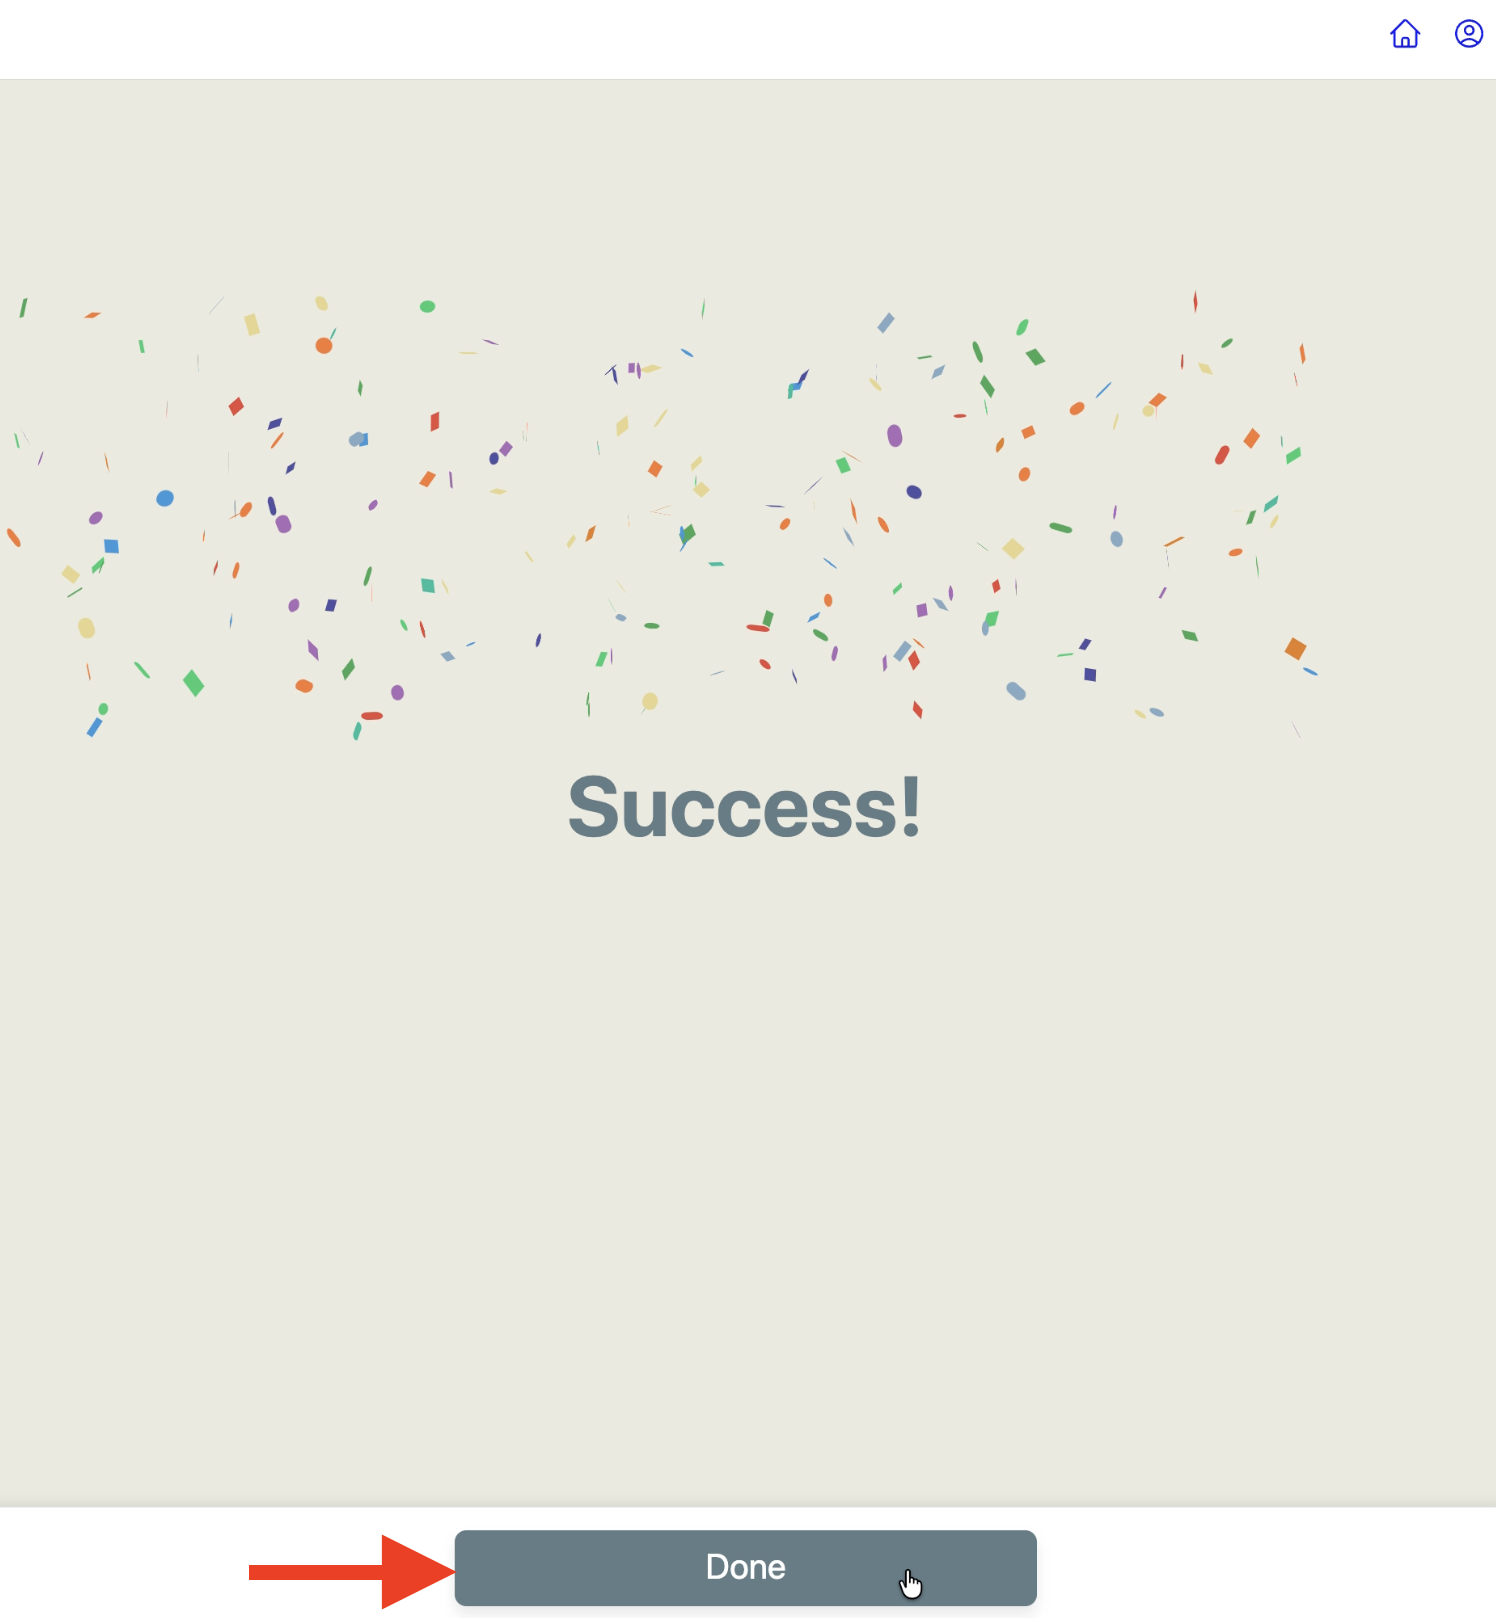
FAQ
What does the "Earliest ship date is in X days" warning mean?
The retailer has specified that this order cannot ship before a certain date. Processing early may result in a chargeback. Tap 'Go back' to hold the order, or confirm with your the retailer/brand before tapping 'I understand' to proceed.
How do I get a preset box size instead of entering dimensions manually?
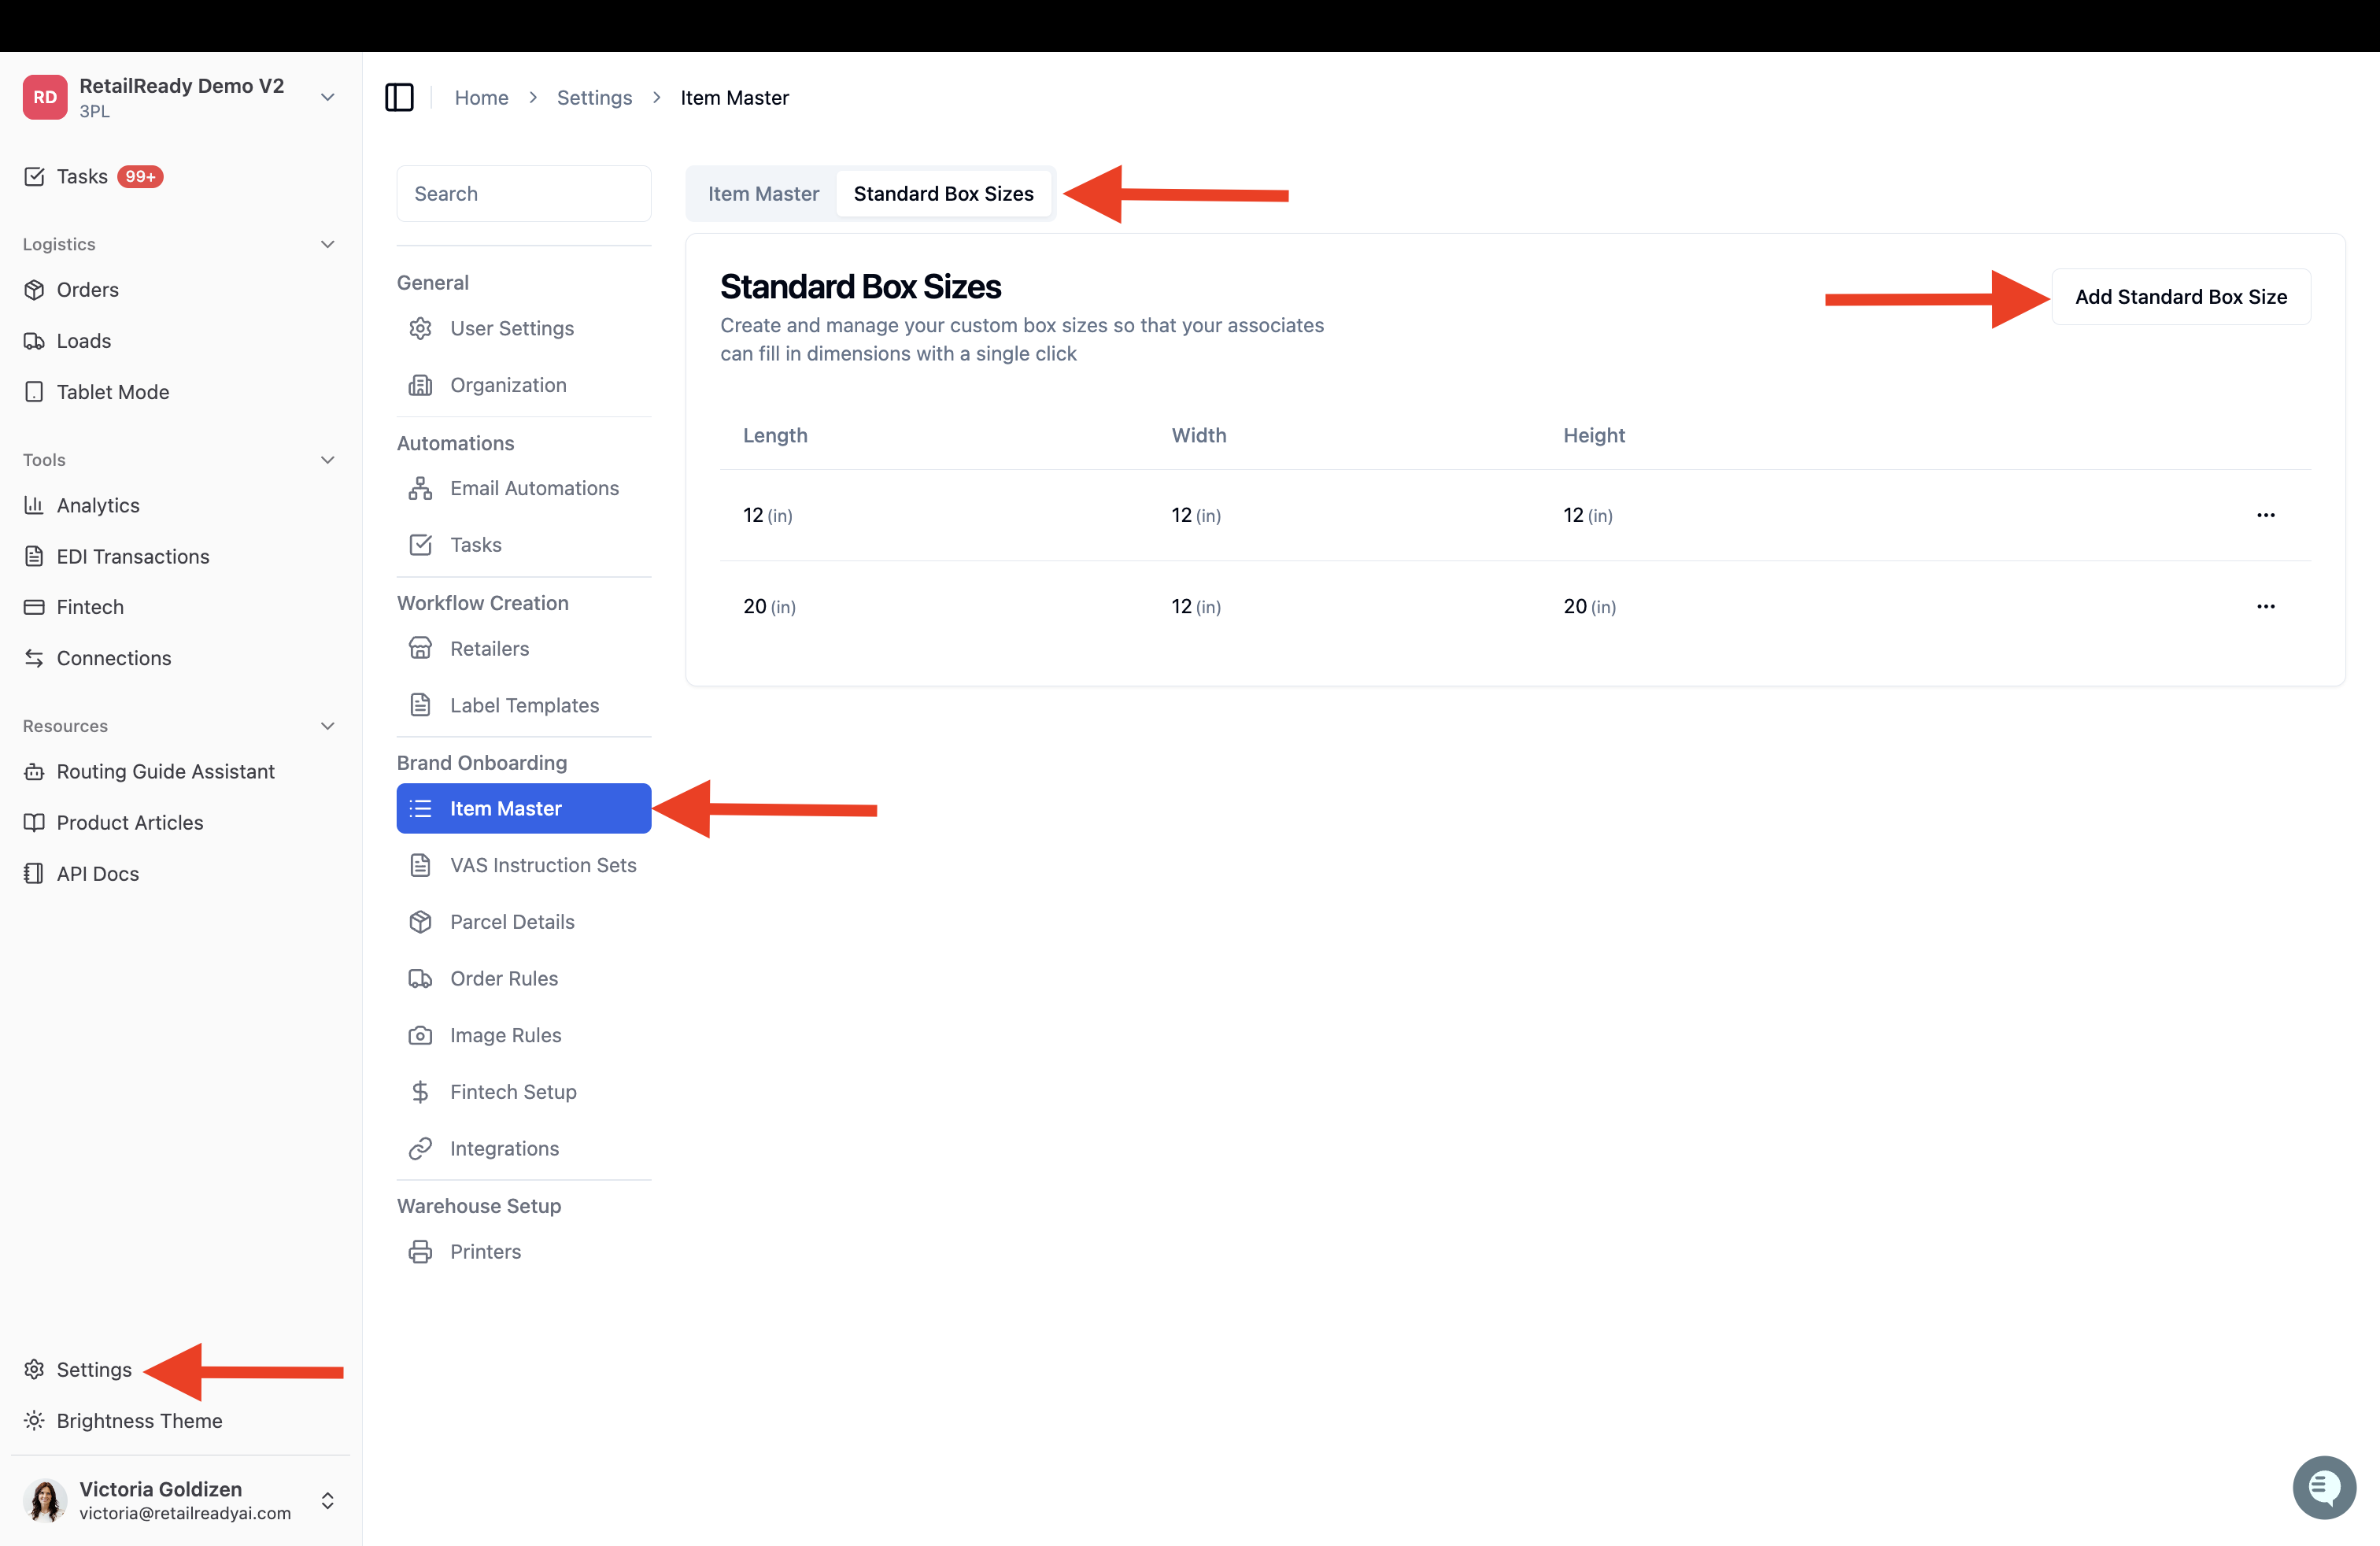
The Carton Dimensions step includes a 'Quick Select Box Size' dropdown with preset sizes configured for your account. To configure preset sizes, navigate to Settings > Item Master > Standard Box Sizes > Add Standard Box Size.
I don't see the Overboxes screen, is something wrong?
No, the Overbox feature is an optional configuration. If you don't see that screen, the feature is not enabled for your account. Contact your RetailReady account team if you believe it should be enabled.
My parcel label didn't print, what do I do?
Check that the Zebra printer is powered on, connected, and has label stock loaded. Use the 'Reprint' option on the Carton Actions screen to reprint without reprocessing the carton.
What do I do if I need to switch to freight after an order has already started?
Making this switch will be done from the order on the desktop!
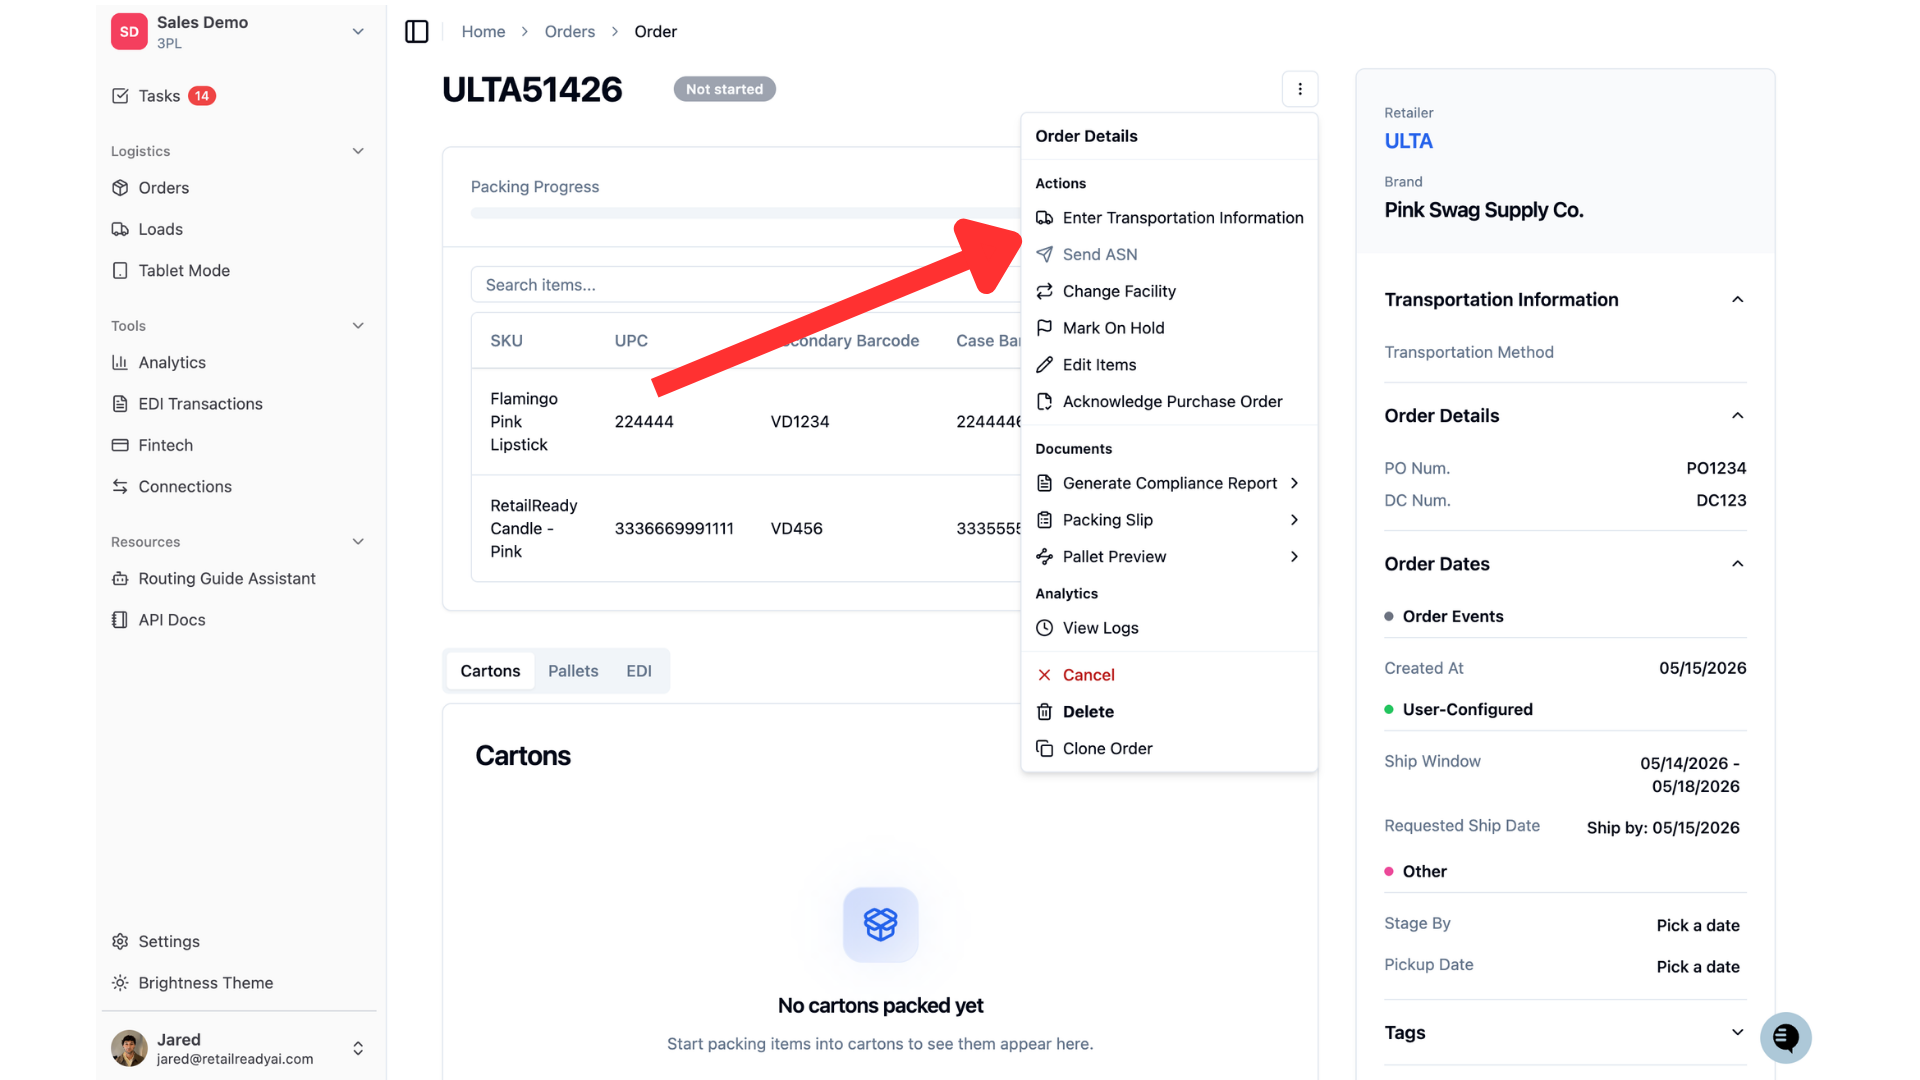
Pull up your order on the desktop. You can navigate to the transportation info by clicking the 3 dots and then 'Enter Transportation Information'.
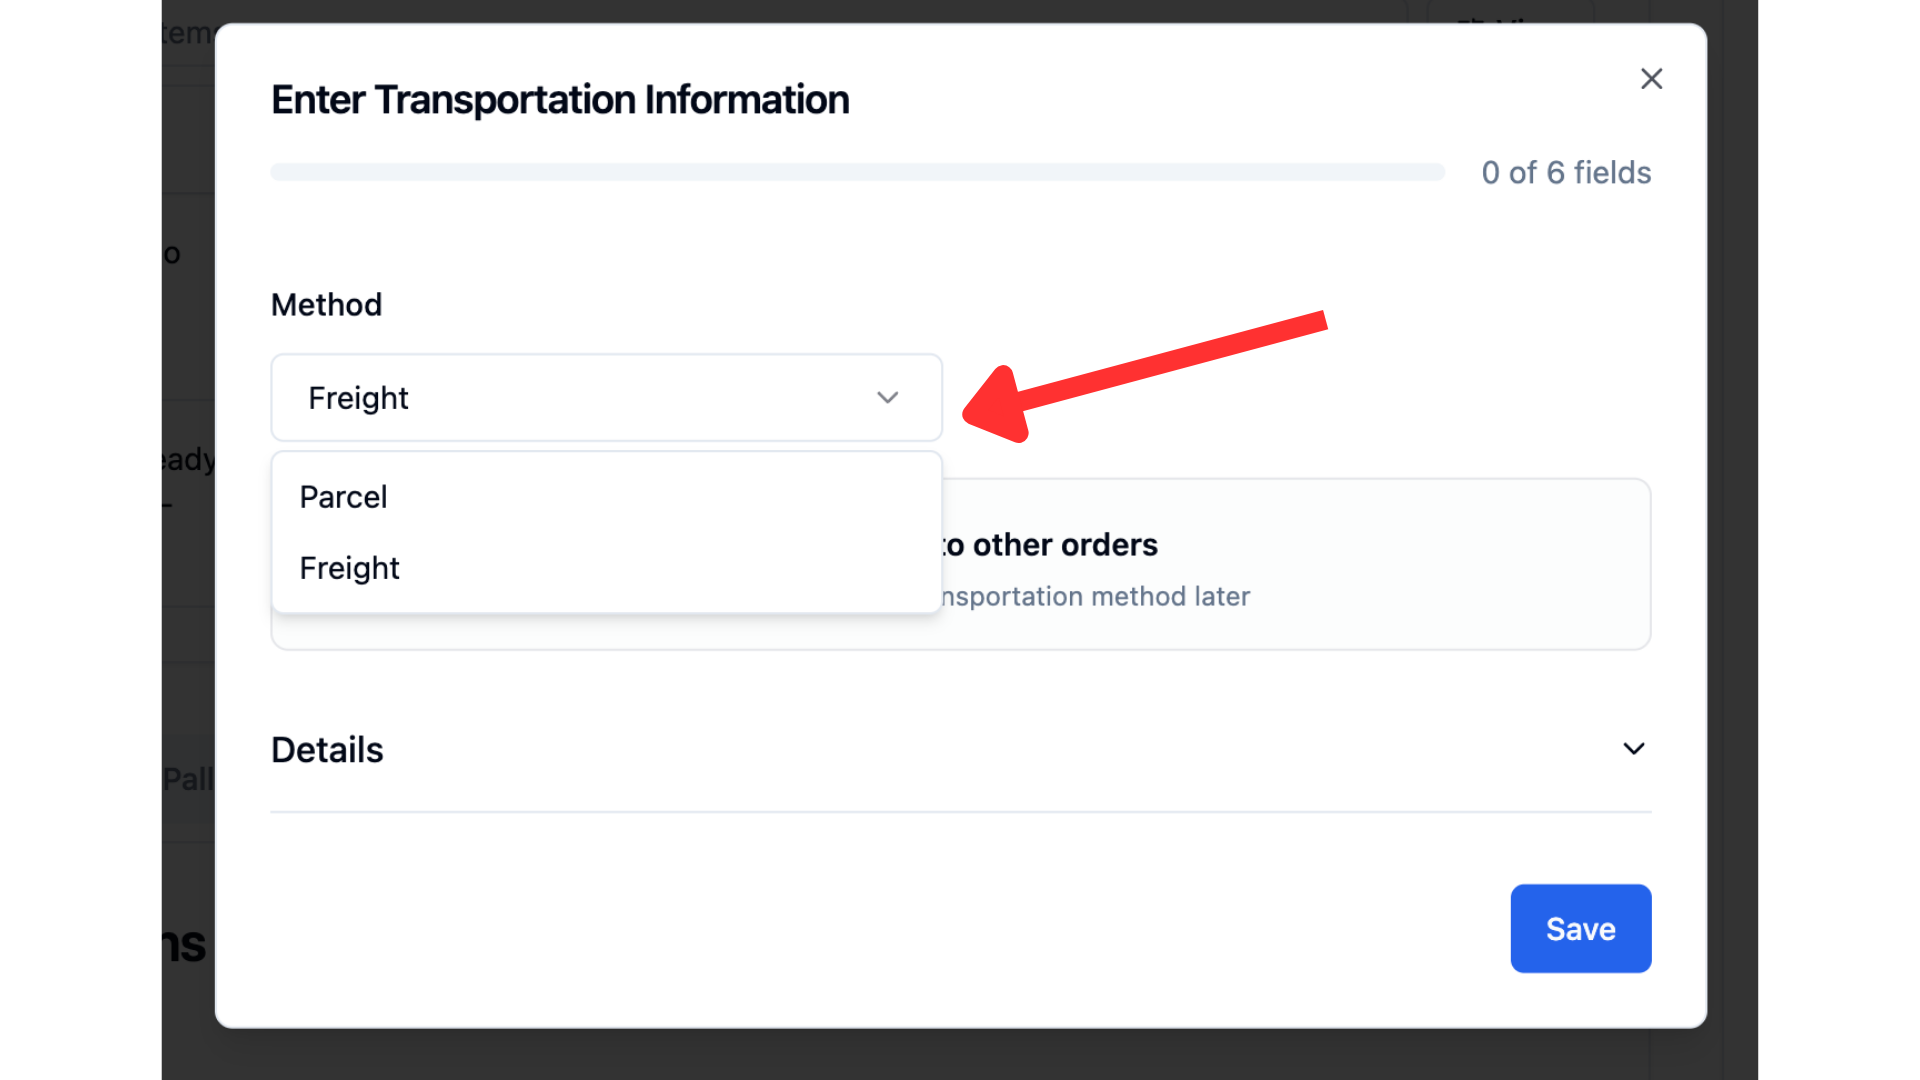
You can switch the choice of transportation method from the drop down and add the appropriate freight information!
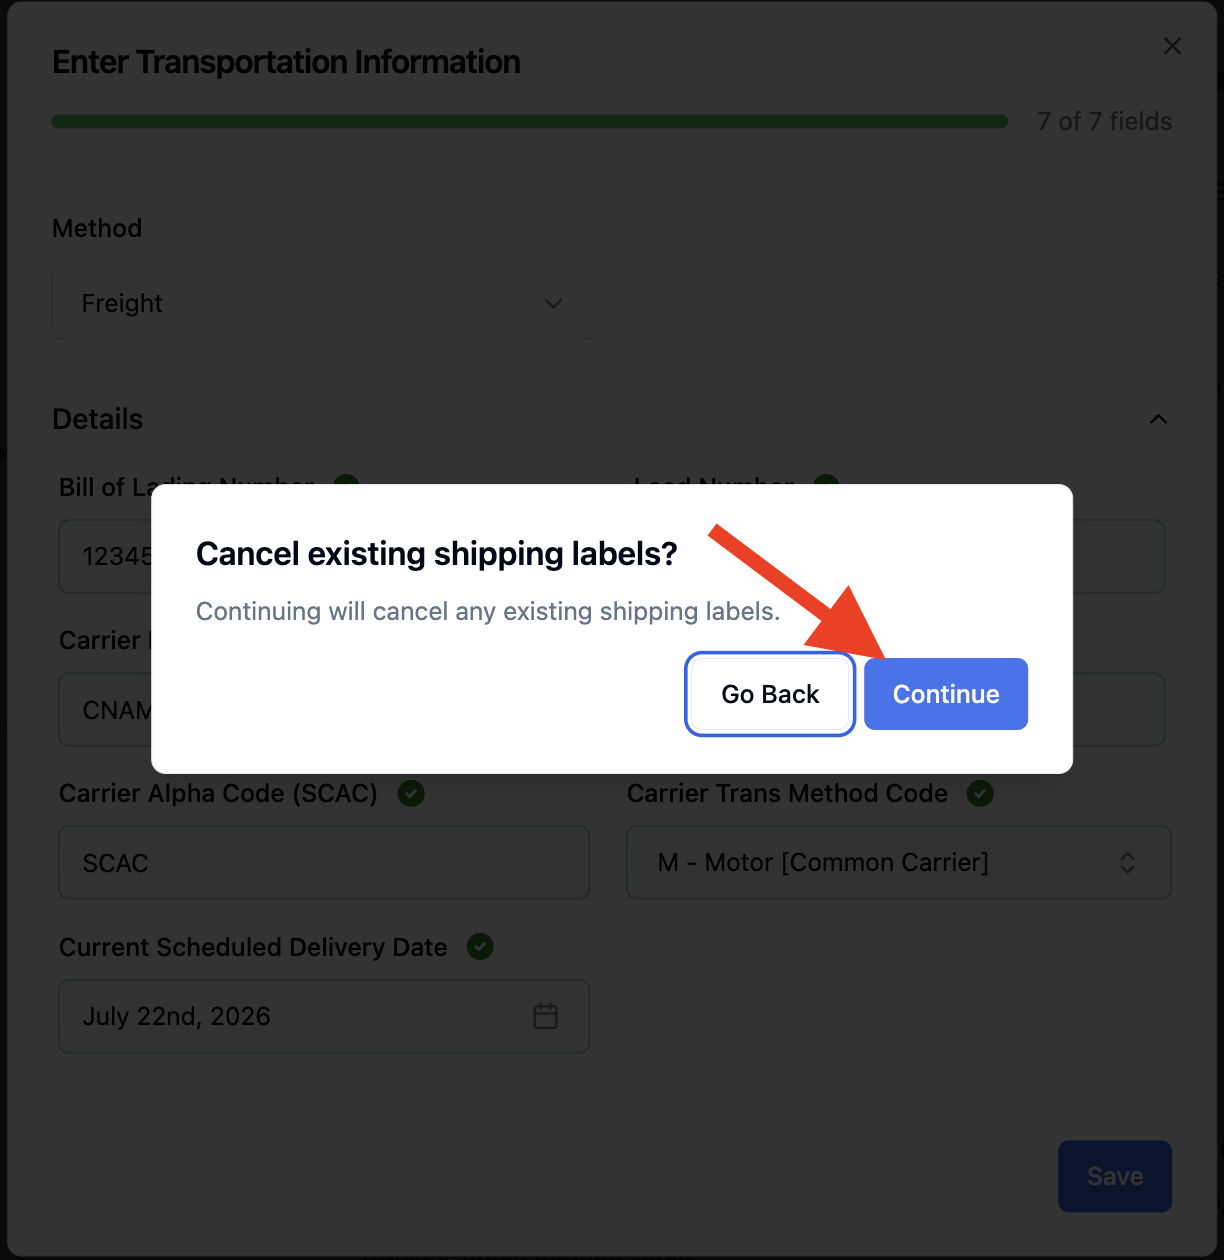
When switching from parcel to freight after parcel labels have already been generated, you will be asked if you would like to cancel your parcel labels. When clicking 'Continue', your printed parcel labels will be voided.
Once complete, you can continue your packing progress without having to restart. When you continue packing out this order, you will be on the "Stage Pallet" step!